Japan Trove

Category: Uncategorized

  • Nozawa Onsen: Nagano’s Traditional Ski Village and Its Free Soto-yu Hot Springs

    Nozawa Onsen: Nagano’s Traditional Ski Village and Its Free Soto-yu Hot Springs

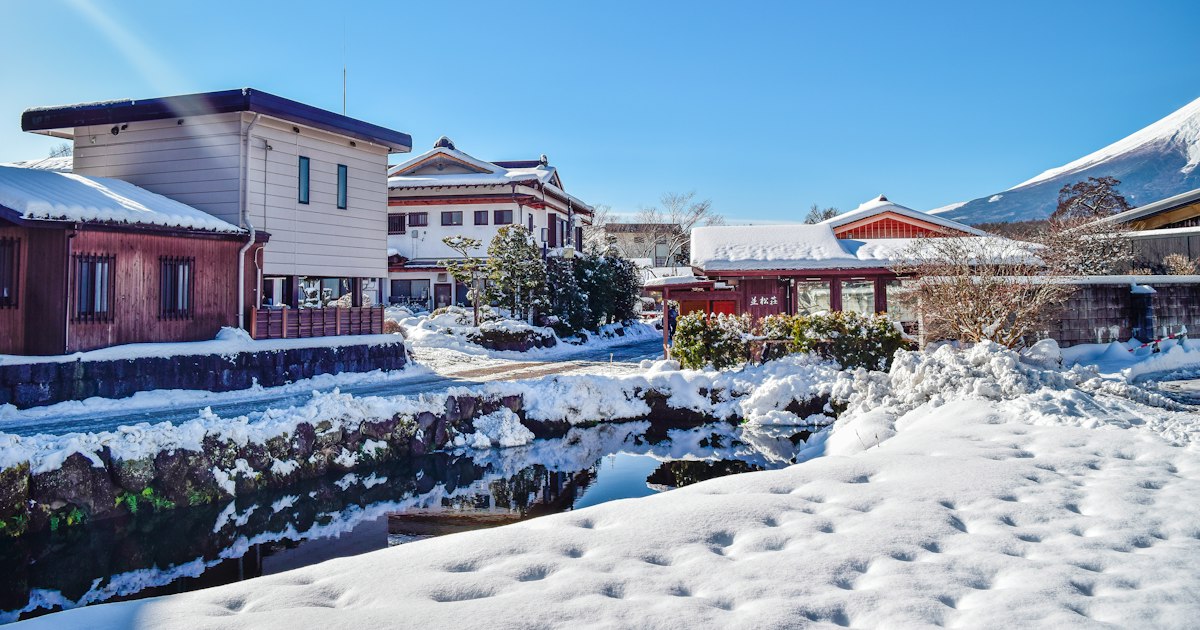
    Photo by Nopparuj Lamaikul on Unsplash

    Steam rising off wooden bathhouses, narrow lanes lined with ryokan, and skiers tramping home in slippers past a 13th free hot spring — Nozawa Onsen in northern Nagano is one of the few places in Japan where the ski resort and the onsen town are genuinely the same village, not a resort bolted onto a hot spring as an afterthought. It’s been a bathing destination for well over a thousand years and a ski town since the 1930s, and the two identities still run through each other on every street corner.

    Why Nozawa Onsen Is Worth the Trip

    Most visitors come for one of two reasons: the skiing, which is some of the most reliable powder snow in Nagano thanks to the village’s elevation and position facing the Sea of Japan, or the onsen culture, which is unusually public and communal. Unlike most hot spring towns where the best baths are locked inside hotels, Nozawa Onsen’s 13 historic soto-yu (external bathhouses) are scattered through the village and open to anyone — residents and visitors alike — for free or a small donation. That combination of serious skiing and genuinely free public bathing is rare even by Japanese standards.

    Getting There: Tokyo to Nozawa Onsen

    The standard route from Tokyo is the Hokuriku Shinkansen to Iiyama Station, which takes roughly 1 hour 40 minutes. From Iiyama Station, the Nozawa Onsen Liner bus runs directly to the village in about 25 minutes, with fares typically around ¥600–700 one way; in winter, buses are timed to meet shinkansen arrivals, but schedules thin out considerably outside peak ski season, so check the timetable before you plan a late arrival. If you’re booking the shinkansen leg yourself, it’s worth reading up on Smart EX, the EX App, and Ekinet beforehand, since reserved seats on the Hokuriku line sell out fast on weekends during ski season. And if your connection is tight, it helps to know that Japan’s shinkansen transfer rules are more forgiving than most tourists expect if you end up on a later train.

    The 13 Free Soto-yu: Etiquette and Must-Visit Baths

    The soto-yu are maintained entirely by the local community — residents pay for their upkeep, and visitors are essentially guests in a neighborhood facility, not a tourist attraction. Treat them accordingly: there’s no staff, no soap or shampoo provided (and often none allowed), and a small donation box (around ¥100 is the customary amount) at the entrance. Rinse off before entering the tub, don’t bring towels into the water, and keep noise down — these are working baths for local families as much as they are for travelers.

    Most soto-yu are open very long hours, typically from around 5:00 or 6:00 a.m. until 11:00 p.m., though individual baths occasionally close for cleaning on a rotating schedule, so if one is shut, there’s almost always another within a few minutes’ walk. The most famous is O-yu, a large wooden bathhouse right in the center of the village near the old clock tower — it’s the one you’ll see photographed most often, and a good first stop since it’s easy to find. From there, it’s worth wandering to two or three others rather than sticking to just one; each has a slightly different water temperature and feel, and the walk between them, past steaming drainage channels used by locals to cook eggs and vegetables, is part of the experience.

    Because the waters are genuinely hot (many soto-yu run noticeably hotter than a typical hotel onsen), ease in gradually, and don’t attempt a bath if you’ve been drinking — a combination that causes more fainting incidents than almost anything else in these villages.

    Skiing and Snow Season Timing

    Nozawa Onsen Ski Resort is one of Japan’s oldest and largest, with a base around 565m and a summit near 1660m, offering a genuine mix of long cruising runs, steep terrain, and good tree skiing for a resort this accessible from Tokyo. The season generally runs from early/mid-December through late March or early April depending on snowfall, with the most reliable powder in January and February. Late December and the New Year period are the busiest and most expensive weeks; late February into March often brings a good balance of snow quality and thinner crowds. Lift day passes are priced in the same general range as other major Nagano resorts, typically somewhere around ¥6,500–7,500 for an adult, though exact pricing shifts by season, so confirm current rates before you go.

    Where to Stay: Budget to Splurge

    Nozawa Onsen is almost entirely small ryokan and minshuku rather than big hotel chains, which keeps the village feel intact but means booking ahead matters in peak season.

    • Budget: Simple minshuku or guesthouse rooms, often shared bathrooms (though you’ll bathe in the soto-yu anyway), run roughly ¥8,000–12,000 per person per night, sometimes including breakfast.
    • Mid-range: Family-run ryokan with private or semi-private baths and a kaiseki-style dinner typically land around ¥15,000–25,000 per person.
    • Splurge: A handful of higher-end ryokan with private in-room onsen baths and multi-course dinners can run ¥30,000 and well beyond per person.

    Whichever tier you choose, most rooms are traditional tatami with futon bedding rather than Western beds — if you haven’t slept on one before, it’s worth knowing how a traditional futon sleep set is actually arranged and used so the first night doesn’t come as a surprise.

    The Dosojin Fire Festival and Local Food

    If your trip lines up with January 15, Nozawa Onsen hosts the Dosojin Fire Festival, one of Japan’s most dramatic fire festivals: villagers build a massive wooden shrine structure and defend it against torch-wielding young men in a ritual battle before the whole thing is set ablaze. It draws large crowds, so accommodation around that date books out especially early.

    Off the slopes, the village’s signature food is nozawana, a pickled mustard green grown locally and served at nearly every ryokan breakfast and as a snack from village shops — it’s a good, inexpensive souvenir if you want to bring a taste of the trip home.

    Common Mistakes to Avoid

    Don’t assume every soto-yu works like a tourist onsen — showing up without small coins for the donation box, or bringing shampoo into a bath that doesn’t allow it, is the fastest way to feel (and look) like an outsider. Don’t skip travel insurance for a ski trip either; injuries on the slopes or a bad fall on icy village lanes are common enough that it’s worth reading what kind of travel insurance actually covers a Japan ski trip before you go, and knowing where to find a pharmacy or clinic if something does go wrong. Finally, don’t try to do Nozawa Onsen as a single-day trip from Tokyo — between the shinkansen, the bus, and the time it takes to actually enjoy the baths and the village at a walking pace, it’s a destination that rewards at least one overnight stay.
  • Jinbei: Japan’s Traditional Summer Loungewear and Where to Buy It

    Jinbei: Japan’s Traditional Summer Loungewear and Where to Buy It

    Photo by note thanun on Unsplash

    Walk through a Japanese neighborhood on a sweltering August evening and you’ll see them everywhere: people lounging on their porches, kids chasing fireworks, grandparents fanning themselves on the engawa, all dressed in loose, short-sleeved cotton sets that look like a cross between pajamas and a kimono. That’s a jinbei (甚平), and it’s one of the most comfortable, affordable, and genuinely useful souvenirs you can bring home from a summer trip to Japan. This guide covers what a jinbei actually is, when to buy one, and exactly where to find good ones at every budget.

    What Is a Jinbei, Exactly?

    A jinbei is a two-piece summer outfit: a short, straight-sleeved top that closes with string ties (no obi belt required) and a pair of matching shorts, usually knee-length. It’s traditionally made of cotton, hemp, or a cotton-linen blend chosen specifically for breathability, since the whole point of the garment is staying cool in Japan’s brutal, humid summers.

    People often confuse jinbei with yukata, but they serve different purposes. A yukata is a full-length robe tied with an obi sash, worn as actual outerwear to festivals, fireworks shows, or around a ryokan in the evening. A jinbei is loungewear — the Japanese equivalent of a comfortable tracksuit or pajama set. Men and boys wear jinbei most commonly, but women’s and girls’ versions exist too, usually with softer prints or slightly tailored cuts. Many ryokan provide a jinbei (instead of or alongside a yukata) for guests to relax in after the bath, which is often how foreign visitors first encounter one.

    Best Time to Buy (and Wear) One

    Jinbei are a seasonal item. Shops start stocking them in late April or May and keep them on shelves through August, with selection thinning out by September. If you want the widest range of sizes, colors, and fabrics, shop in June before the peak summer rush. Late-July and August often bring markdown sales at department stores as they clear seasonal stock, so that’s a good window for bargain hunting if you don’t mind a smaller size run.

    As for wearing one: jinbei are considered casual homewear, so they’re appropriate at a ryokan, a casual izakaya in a yukata-friendly onsen town, a local summer festival, or just lounging at your accommodation. They’re not appropriate for a nice restaurant, a temple visit, or anywhere with a dress code — treat them the way you’d treat sweatpants back home.

    Where to Buy: Budget, Mid-Range, and Splurge

    Budget (¥1,000–¥3,000): Uniqlo carries simple cotton jinbei sets seasonally for roughly ¥1,990–¥2,990, which is the easiest option if you just want something comfortable to wear at your hotel. Don Quijote stocks cheaper novelty versions, often in polyester with anime or kanji prints, for around ¥1,000–¥2,000 — fun as a costume piece or gift, but less breathable for actually sleeping in. Most Don Quijote city locations stay open very late or 24 hours, so they’re a reliable last-minute stop.

    Mid-range (¥3,000–¥10,000): MUJI sells well-made cotton gauze jinbei for about ¥2,990–¥4,990 in muted, adult-friendly colors. For a more traditional option, the kimono floors of department stores like Takashimaya, Isetan, or Daimaru (typically open 10:00–20:00) stock proper cotton jinbei from roughly ¥5,000–¥15,000, often with better stitching and more authentic indigo or kasuri-pattern fabrics. Asakusa, Tokyo’s old-town kimono district, is also worth a visit — the backstreets around Nakamise-dori and Kappabashi have small specialty shops selling jinbei alongside yukata, with prices in a similar ¥4,000–¥12,000 range and staff who can help with sizing. Asakusa Station is served by the Tokyo Metro Ginza Line and Toei Asakusa Line, so it’s an easy add-on to a sightseeing day.

    Splurge (¥15,000 and up): For something closer to a craft piece, look for hand-dyed indigo (aizome) jinbei or Arimatsu shibori tie-dye versions from Aichi Prefecture, which run ¥15,000–¥30,000+ depending on the dyeing technique and fabric weight. These are built to last for years, not just a summer. If you want quality fabric for less, resale specialists like Komehyo occasionally carry gently used traditional loungewear and kimono-adjacent pieces at a discount — worth a browse if you’re also hunting for other secondhand textiles.

    If you’d rather have one made to your own measurements or in a specific fabric, Tokyo’s Nippori Fabric Town sells yukata-weight cotton by the meter and is a short walk from Nippori Station’s north exit on the JR Yamanote Line — a tailor or a handy traveler can turn a few meters of cotton into a custom jinbei.

    Buying for Kids and Babies

    Jinbei are an especially popular souvenir for children because they’re easy to size, easy to care for, and genuinely get worn after the trip. Akachan Honpo, Japan’s baby-and-kids superstore, stocks a wide range of children’s and toddler jinbei in summer, usually priced between ¥1,500 and ¥3,500, with sizes running from infant up through early elementary school. It’s a far better bet than a general department store if you need a specific small size, since the selection and size charts are built around Japanese children’s proportions.

    Sizing and Fabric: What to Check Before You Buy

    Japanese clothing sizing runs smaller than US or European sizing, and jinbei are usually labeled in measurements (S/M/L or specific cm ranges) rather than familiar international sizes. Check the height and chest measurements on the tag rather than assuming your usual size — many visitors end up sizing up one level from what they’d normally buy. For fabric, look at the label: 100% cotton or cotton-linen (綿麻) breathes far better in humid weather than polyester, which is common in the cheapest novelty versions and tends to feel sticky by midsummer.

    Common Mistakes to Avoid

    • Treating it like a yukata. Don’t wear a jinbei to a festival expecting it to read as formal wear — it’s loungewear, and locals will clock the difference immediately.
    • Buying polyester for comfort, not costume. Cheap synthetic jinbei look fine in photos but trap heat. If you actually plan to sleep or lounge in it during a humid Japanese summer, pay the extra ¥1,000–¥2,000 for cotton.
    • Guessing at size. Always check the cm measurements on the tag; “L” in one brand can be “M” in another.
    • Shopping too late in the season. By late August, the best colors and larger sizes are often sold out, especially at Uniqlo and MUJI.

    A jinbei is a small purchase that pays off well beyond the trip — it packs flat, costs less than a souvenir T-shirt at the mid-range end, and gives you a genuinely comfortable way to unwind after a long day of sightseeing, whether that’s at a ryokan, a city hotel, or back home when summer heat hits.

  • Yatsuhashi: Kyoto’s Cinnamon Mochi Sweet and Where to Buy It

    Yatsuhashi: Kyoto’s Cinnamon Mochi Sweet and Where to Buy It

    Photo by Viviana Nysaether on Unsplash

    Walk through Kyoto Station or the lane up to Kiyomizu-dera and you’ll smell it before you see it: a warm, cinnamon-dusted shop stacked with thin triangular pastries and soft folded mochi. That’s yatsuhashi, Kyoto’s signature souvenir sweet, and it’s been made in roughly the same form for over a century. Here’s what it actually is, which version to buy, and where to get the good stuff instead of an airport-shelf afterthought.

    What Is Yatsuhashi, Exactly?

    Yatsuhashi is a rice-flour sweet flavored with cinnamon (and sometimes sugar and sesame), traditionally shaped like a thin fan or a bridge plank — the name literally means “eight bridges.” There are two completely different textures sold under this one name, and knowing the difference matters when you’re deciding what to buy:

    • Baked yatsuhashi (yaki yatsuhashi): The original style — a hard, crisp, cinnamon-scented cracker, slightly curved like a roof tile. Closer to a cookie than a mochi. Shelf-stable for months.
    • Raw yatsuhashi (nama yatsuhashi): The modern, far more popular version — a soft, chewy, uncooked mochi-like square folded into a triangle around a filling, usually sweet red bean (tsubuan), though matcha, chocolate, and fruit fillings are everywhere now. This is the one most visitors mean when they picture “yatsuhashi.”

    If you only try one, go for nama yatsuhashi — it’s what locals actually eat as a daily sweet, and most shops offer free samples at the counter so you can taste before buying.

    Where to Buy It in Kyoto

    Yatsuhashi is sold everywhere in Kyoto, but quality and freshness vary a lot by location:

    • Kyoto Station: The easiest stop — the basement and ground-floor souvenir corridors near the Hachijo and central exits stock multiple competing yatsuhashi brands side by side, which makes comparing flavors and prices simple if you’re short on time. Good for last-minute buying right before you board the Shinkansen home, especially if you’ve just sorted out your Shinkansen ticket and have ten minutes to spare.
    • Kiyomizu-dera approach (Matsubara-dori / Gojozaka): Several long-established yatsuhashi makers have shops along the slopes leading up to the temple, often with in-house tea rooms where you can sit down and try warm, freshly made nama yatsuhashi rather than the packaged version.
    • Nishiki Market: A few stalls sell yatsuhashi alongside Kyoto’s other food specialties — convenient if you’re already doing a market walk, though selection is narrower than at a dedicated shop.
    • Department store basements (depachika): Daimaru Kyoto and Takashimaya Kyoto both carry multiple yatsuhashi brands in their food halls, useful if you want air-conditioned comfort and gift-wrapping service.

    Most of the historic yatsuhashi makers (several claim roots going back to the 1600s–1800s) run their own standalone shops around the city in addition to station counters — if you have time, visiting one directly usually gets you a wider flavor selection and fresher stock than the station kiosks.

    Flavors and Fillings Worth Trying

    Cinnamon is the classic and the one to try first — it’s a genuinely distinctive flavor you won’t find in most other Japanese sweets. Beyond that, common variations include:

    • Tsubuan (sweet red bean): The standard nama yatsuhashi filling, not overly sweet.
    • Matcha: Green tea-flavored dough, sometimes with white bean or matcha-cream filling.
    • Kinako (roasted soybean flour): A nuttier, less sweet option.
    • Chocolate, strawberry, and seasonal fruit fillings: Aimed more at tourists and younger buyers — fun to try but less representative of the traditional product.

    Shops frequently sell mixed boxes with 4–6 flavors so you don’t have to commit to just one.

    Prices and What to Expect

    • Budget: Small boxes of 10–12 nama yatsuhashi pieces typically run about ¥600–800. Individually wrapped loose pieces at some counters cost even less if you just want a taste.
    • Mid-range: Mixed-flavor gift boxes (20+ pieces, nicer packaging) run roughly ¥1,000–1,800 — the standard choice for bringing something back for coworkers or family.
    • Splurge: Large assortment boxes from the oldest, most established makers, often including both baked and raw styles plus limited seasonal flavors, can run ¥2,500–4,000+ and come in more elaborate gift packaging.

    Baked yatsuhashi is usually priced similarly to the raw version per box, but since it keeps far longer, it’s the better pick if you’re not flying home for another week or two.

    Shelf Life: The One Thing to Get Right

    This is where people make their biggest mistake. Nama yatsuhashi is unbaked and perishable — most packs are only good for about 10–14 days unopened, and shops will tell you the exact date on the box. If you buy it on day one of a two-week trip, it may spoil before you get home. Baked yatsuhashi, by contrast, is shelf-stable for months, closer to a cookie, and travels in a suitcase without any risk.

    The simple rule: buy nama yatsuhashi near the end of your trip (ideally your last day or two in Kansai), and buy baked yatsuhashi anytime if you want a souvenir that’ll survive a long flight or sit in your bag for a while. If you’re combining Kyoto with other stops and worried about timing a late purchase against train schedules, it’s worth knowing that Japan’s Shinkansen transfer rules are more forgiving than people expect, so a quick extra stop at a shop before departure usually isn’t a disaster even if it eats into your buffer time.

    Common Mistakes to Avoid

    • Buying nama yatsuhashi too early in the trip — see above. Check the “best by” date printed on the box before buying.
    • Assuming all yatsuhashi tastes the same — cinnamon intensity, dough thickness, and filling sweetness vary noticeably between makers. Sample before buying a big box if the shop offers tastings.
    • Not asking about refrigeration — nama yatsuhashi doesn’t need refrigeration during a short trip, but keep it out of direct heat (don’t leave it in a hot car or in direct sun in your bag).
    • Skipping the baked version entirely — travelers who only try the soft mochi style miss out on the older, crunchier original, which also happens to be the more practical souvenir to carry.

    Yatsuhashi pairs naturally with Kyoto’s other grab-and-go sweets — if you’re building out a snack-shopping itinerary, it’s worth comparing it against mitarashi dango, another classic you’ll find at stalls and shrine approaches around the city, or rounding out your pantry souvenirs with something more savory like a good furikake rice seasoning for the folks back home who’d rather have something to cook with than something sweet.

  • Mitarashi Dango: Japan’s Skewered Rice Dumplings and Where to Try Them

    Mitarashi Dango: Japan’s Skewered Rice Dumplings and Where to Try Them

    Photo by Leongsan on Unsplash

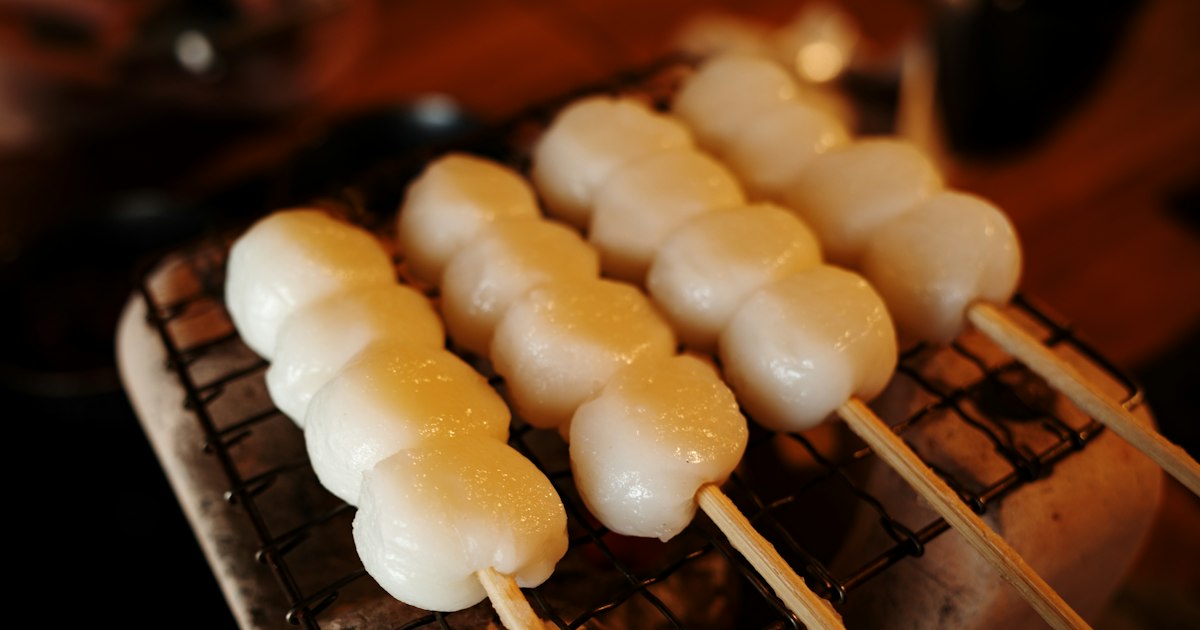
    If you’ve wandered past a shrine gate, a festival stall, or a convenience store checkout counter in Japan and caught the smell of something sweet and slightly scorched, there’s a good chance it was mitarashi dango. These small, chewy rice dumplings on a skewer, glazed in a glossy soy-sugar sauce, are one of Japan’s oldest and most unpretentious sweets — and one of the easiest to find once you know where to look.

    What Is Mitarashi Dango?

    Mitarashi dango is made from rice flour — usually a blend of glutinous (mochigome) and regular rice flour — rolled into small balls, boiled or steamed, then skewered three to five at a time. The skewer is grilled briefly over charcoal or a griddle to give the dumplings a light char, then brushed with mitarashi sauce: soy sauce, sugar, and a thickener (often potato starch) simmered into a sweet-salty glaze that’s slightly sticky and faintly smoky where it caramelizes.

    Texture-wise, expect something closer to mochi than Western dumplings — dense, chewy, and only mildly sweet, which is why it pairs so well with bitter green tea. A single skewer is a snack, not a dessert course; most people eat two or three in one sitting without feeling like they’ve overdone it.

    The Shrine Where It All Began

    The most commonly cited origin story traces mitarashi dango to Shimogamo Shrine in Kyoto, specifically the Mitarashi Pond within its grounds. According to local lore, bubbles rising from the pond’s spring water inspired the shape and spacing of the dumplings on the skewer — one ball set slightly apart from the other four, said to represent a head and body. A tea house near the shrine has sold dango under this name for generations, and it remains a reasonable first stop if you want to taste something close to the original.

    Shimogamo Shrine sits in the Tadasu no Mori forest in northern Kyoto, about a 15-minute walk from Demachiyanagi Station (Keihan Main Line or Eizan Electric Railway), or reachable by city bus from central Kyoto. Go on a weekday morning if you can — the approach is quiet and shaded, and nearby tea houses tend to sell out of the freshly grilled skewers by mid-afternoon on busy days.

    Where to Try It: Tokyo and Beyond

    In Tokyo, Asakusa is the easiest place to start. Nakamise-dori, the shopping street leading up to Senso-ji temple, has several stalls grilling dango to order — look for the ones with visible charcoal grills and a short line, since fresh-off-the-grill is noticeably better than pre-made skewers sitting under a heat lamp. Expect to pay roughly ¥130–250 per skewer depending on the shop. Asakusa Station is served by the Tokyo Metro Ginza Line, Toei Asakusa Line, and Tobu Skytree Line.

    Beyond temple towns, dango shows up at rest stops along hiking trails, where a hot cup of tea and a skewer are the classic reward for reaching a lookout point. If you’re hiking around Okutama in western Tokyo, several of the small shops near the trailheads and lake area sell grilled dango alongside other simple snacks — a good, low-key way to refuel before the return trip. Regional markets are another reliable source: at Omicho Market in Kanazawa, a few of the food stalls between the seafood vendors sell grilled dango as a palate-cleansing break from all the sashimi sampling.

    Best Time to Visit

    Mitarashi dango isn’t seasonal the way sakura mochi or kuri (chestnut) sweets are — it’s sold year-round. That said, it’s most visible and most fun to eat during festival season (matsuri), roughly June through September, when temporary stalls set up along shrine approaches and grill skewers over open flame for crowds. Cherry blossom season (late March to early April) and autumn foliage season (mid-November) also bring out more vendors near popular viewing spots, since dango is a traditional hanami and momiji-viewing snack. If you want it fresh and hot rather than packaged, aim for late morning to early afternoon — many small tea houses and stalls sell out or wind down production by 4 or 5pm.

    Budget, Mid-Range and Splurge

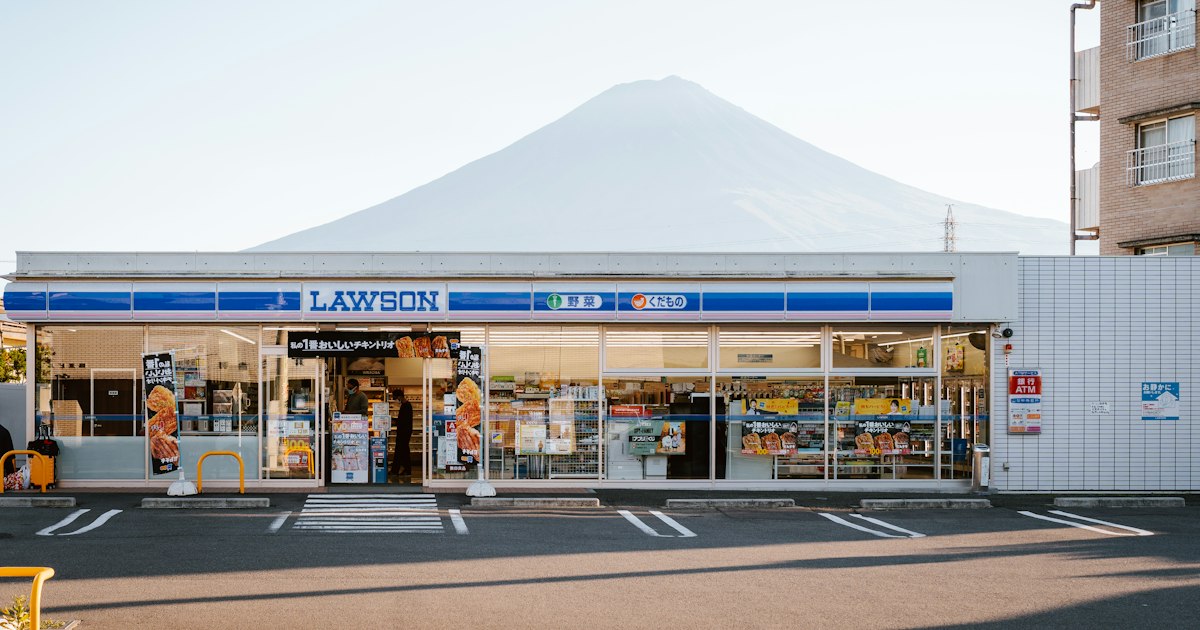
    • Budget (¥100–180 per skewer): Convenience stores — 7-Eleven, Lawson, and Family Mart all stock packaged mitarashi dango in their chilled dessert section, usually two or three skewers per pack for around ¥150–250 total. It’s a perfectly decent version, just less fresh and slightly firmer than grilled-to-order.
    • Mid-range (¥180–350 per skewer): Street stalls and casual wagashi (Japanese sweets) shops near temples, shrines, and shopping streets. This is where you get the charcoal aroma and a sauce made that day.
    • Splurge (¥400–800 per skewer or set): Established tea houses, particularly ones with a historical claim like the shops near Shimogamo Shrine, or dango served as part of a seasonal wagashi set with matcha at a traditional tea room. You’re paying for ingredients, technique, and often a seated experience with tea included.

    Common Mistakes

    The biggest mistake visitors make is confusing mitarashi dango with other dango varieties and being surprised by the flavor. Hanami dango (the pink-white-green trio) and an-dango (topped with sweet red bean paste) are both sweeter and have no soy sauce; mitarashi is savory-sweet, not candy-sweet, so go in expecting something closer to a savory rice cracker with a glaze than a dessert.

    Another frequent error is buying dango from a display case that’s been sitting for hours — the dumplings firm up and lose their chew within a few hours of being made, so if you have the option to buy from a stall actively grilling, take it. Finally, don’t eat it standing at the stall counter in a crowded tourist area without checking for a trash bin nearby; most vendors expect you to dispose of the skewer at or near the stall, since eating while walking is still frowned upon in many traditional shopping streets.

    Bringing the Flavor Home

    Packaged mitarashi dango doesn’t travel well as a souvenir — it’s a fresh food item, not shelf-stable, so eat it in Japan rather than trying to bring it home. If you want a rice-based Japanese flavor to take back with you instead, a bag of furikake rice seasoning captures a similar savory-umami profile and keeps for months in your pantry. And if you’re snack-hunting through a convenience store anyway, it’s worth a detour to the freezer aisle for a Garigari-kun ice bar — a completely different texture and temperature, but the same everyday-treat spirit that makes a skewer of mitarashi dango worth seeking out in the first place.

  • Garigari-kun & Japan’s Convenience Store Ice Cream Novelties: A Flavor Guide

    Garigari-kun & Japan’s Convenience Store Ice Cream Novelties: A Flavor Guide

    Photo by PJH on Unsplash

    Somewhere between the onigiri rack and the magazine stand, every Japanese convenience store hides a freezer case packed with some of the country’s best-loved snacks. If you only try one thing from it, make it Garigari-kun — the blue-wrapped, soda-flavored ice bar with the grinning cartoon boy on the front. But Garigari-kun is really just the gateway into a much bigger world of konbini ice cream novelties, and this guide will help you shop that freezer case like a local.

    What Makes Garigari-kun Japan’s Favorite Ice Bar

    Garigari-kun (“gari-gari” mimics the crunchy sound of biting into shaved ice) has been made by Akagi Nyugyo since 1981, and it’s still the best-selling ice bar in Japan. The classic version is soda-flavored shaved ice on a stick, coated in a slightly chewy outer layer, for around ¥70–83 depending on the store and region. It’s deliberately a little messy and crunchy rather than smooth — part of the appeal is the texture.

    What keeps it interesting for repeat visitors is Akagi’s habit of releasing bizarre limited flavors alongside the standard soda, cola, and grape versions. Corn potage soup flavor became a minor legend (it’s genuinely savory, not a joke), and the company has also done cola, ramune, “rich” custard pudding, and collaboration flavors tied to anime or other snack brands. These rotate every few weeks, so what’s in the freezer in April won’t be there in July. If you spot an odd flavor you’ve never heard of, that’s usually the point — buy it while it’s there, because it probably won’t be back.

    Where to Find It and When to Go

    You don’t need to hunt for Garigari-kun — it’s in the freezer case of almost every 7-Eleven, Lawson, and FamilyMart in the country, as well as supermarkets and drugstores. Convenience stores are open 24 hours (a shrinking number now close briefly overnight, but the vast majority still run around the clock), so there’s no real “opening hours” concern here. The freezer is usually near the checkout counter or along a side aisle, often with a sliding glass lid you lift to reach inside.

    Summer (June–September) is when the selection is widest, since ice cream sales spike and brands push their biggest flavor lineups and biggest novelty collaborations during that window. Winter freezers are smaller but still stocked — plenty of Japanese people eat ice cream year-round, heated rooms and kotatsu included, so you won’t find the shelves empty in January.

    Beyond Garigari-kun: Other Convenience Store Ice Cream Worth Trying

    Once you’ve tried Garigari-kun, branch out. A few staples worth knowing by name:

    • Pino (Morinaga) — bite-sized chocolate-coated vanilla ice cream balls, sold in a box of 6 for roughly ¥213. Great for sharing, and seasonal flavors (matcha, strawberry) show up often.
    • Choco Monaka Jumbo (Lotte) — vanilla ice cream in a crisp wafer shell shaped like a taiyaki, around ¥140–160. One of the most texturally satisfying things in the whole freezer.
    • Yukimi Daifuku (Lotte) — small mochi-wrapped vanilla ice cream pieces, a box of 6 for about ¥213. The closest thing to a traditional wagashi sweet in ice cream form.
    • Mow (Morinaga) — a premium cup ice cream, richer and creamier than standard konbini brands, around ¥160–180 per cup.
    • Häagen-Dazs Japan-exclusive minis — Japan gets flavors you won’t see elsewhere (hojicha, kinako mochi, black sesame), priced around ¥330–350 per small cup. This is the splurge end of the freezer.

    If you’re also curious about other distinctly Japanese pantry staples to bring home, our guides to furikake rice seasoning and regional miso pastes cover the savory side of a Japanese grocery haul, in case the ice cream aisle leaves you wanting something salty to balance it out.

    Budget, Mid-Range, and Splurge Picks

    For a budget stop, Garigari-kun at ¥70–83 or a plain Lotte ice monaka bar in the same price range will fill the “I want something cold” urge without denting your travel budget. For mid-range, a box of Pino or Yukimi Daifuku (¥210–230) gives you six pieces to share with a travel companion, which works out cheaper per bite than buying singles. For a splurge, Häagen-Dazs minis or seasonal premium collaborations (sometimes ¥350–450) are worth it once or twice on a trip, especially for a flavor genuinely not sold in your home country.

    Common Mistakes to Avoid

    A few things trip up first-timers:

    • Buying it and walking far before eating it. Japanese summers are humid, and a Garigari-kun will start dripping within a few minutes outside the freezer. Eat it near the store, or ask for a small bag if you need to carry it somewhere else.
    • Expecting to eat inside the store. Most convenience stores don’t have seating, though some larger branches have a small standing counter near the window. Check for a trash bin near the entrance before you unwrap anything — not every store has one visible, and you shouldn’t carry wrappers out onto the street to discard elsewhere.
    • Missing the small-change coin tray. Konbini purchases are fast and cashless-friendly (IC cards like Suica/Pasmo work at the register for nearly all of these), but if you’re paying cash, use the coin tray at the counter rather than handing coins directly to staff — it’s the local norm and speeds up the line behind you.
    • Assuming a weird flavor will still be there next week. Limited flavors really are limited, often for a single month or even a single regional release. If a flavor looks unusual and you’re curious, don’t wait — it may be gone on your next convenience store stop.
    • Skipping the freezer entirely because it looks like an afterthought. It’s tucked away, but for the price of a vending machine drink you get a genuine taste of Japanese snack culture that’s just as worth trying as a famous dessert shop.

    None of this requires planning ahead — unlike booking a seasonal event or a reserved seat on the Shinkansen, the convenience store freezer is always just around the corner, open whenever curiosity strikes.

  • Hakama: Japan’s Graduation Ceremony Dress and Where to Rent One

    Hakama: Japan’s Graduation Ceremony Dress and Where to Rent One

    Photo by enkuu smile on Unsplash

    If you’re in Japan in March and spot young women crossing a university campus in brightly colored kimono with long pleated “skirts” underneath, you’ve stumbled onto one of the most photogenic traditions in Japanese academic life: the hakama graduation outfit. Originally a men’s garment for samurai and scholars, the hakama has become the near-universal uniform for female university graduates on their sotsugyoshiki (graduation ceremony) day — and a growing number of exchange students, researchers, and even tourists now rent one for the experience. Here’s what it actually is, what it costs, and how to book a rental without getting overwhelmed by Japanese-only websites.

    What exactly is a hakama outfit?

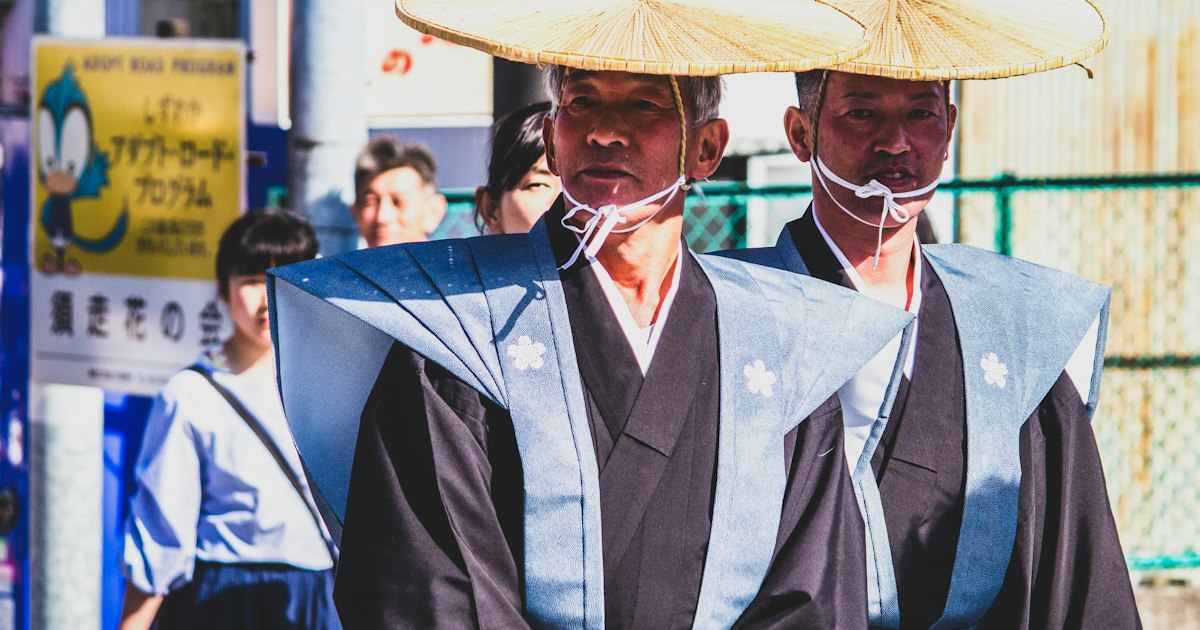
    The graduation hakama look is actually two garments worn together: a furisode or regular kimono on top, and the hakama — a wide-legged, pleated garment that sits at the waist like a long skirt — layered over it. It’s finished with a decorative obi (sash), a pair of fur-trimmed or lace-up boots (a Meiji-era fashion statement that has stuck), and often a hair accessory with silk flowers. Men occasionally wear hakama too, usually in a more subdued haori-and-hakama combination in navy or black, but it’s overwhelmingly a women’s graduation tradition today.

    The style dates back to female students at girls’ schools in the late 1800s who adapted men’s hakama for modern education — practical for sitting and moving, but still formal. It’s worn almost exclusively once: on the day you graduate from a Japanese university or graduate school.

    When you’ll actually see (or need) one

    Japan’s academic year ends in March, and the vast majority of university graduation ceremonies happen in the last week of March, with a smaller secondary round for graduate schools in late September. If you’re an exchange student finishing a program, this is the window you need to book in. If you’re simply a visitor who wants the experience — many rental studios now offer “graduation hakama” as a standalone photo-shoot package, no actual graduation required — you can do it any time of year, though demand (and sometimes price) spikes in March as real graduates book out the best inventory.

    How much it costs

    Rental pricing is fairly standardized across studios, bundled into a single package that includes the kimono, hakama, obi, boots, hair styling, and sometimes light makeup:

    • Budget (¥8,000–¥12,000): A basic set with a simpler kimono pattern, self-dressing or quick studio dressing, and no professional hairstyling — common at campus-adjacent rental counters that cater to students on a budget.
    • Mid-range (¥13,000–¥20,000): The most common choice — includes professional dressing (which takes 20–40 minutes), a styled updo with ornaments, boots, and often a short photo session included in the price.
    • Splurge (¥25,000–¥40,000+): Premium or antique-fabric kimono, a dedicated hair and makeup artist, a full outdoor photo shoot with a photographer, and sometimes a second outfit change.

    Most packages are same-day return — you wear it to the ceremony or shoot and bring it back that evening or the next morning. Studios near universities in Tokyo (Waseda, Keio, Tokyo University areas), Kyoto, and Osaka are the easiest to find, since they’re built around the March graduation rush.

    Where to actually book one

    Finding a rental shop isn’t hard once you know the names to search for. Chains like Kyoto Kimono Rental Wargo, Rental Kimono Okamoto, and Vasara operate multiple branches in Kyoto, Tokyo (Asakusa especially), and Osaka, and all offer graduation hakama sets alongside their standard kimono rentals for tourists. Search by shop name plus “hakama” on Google Maps, since most have English-language booking pages and same-day walk-in slots, though reserving 1–2 weeks ahead is safer during late March.

    If you’re a current student at a Japanese university, check your school’s co-op (gakusei seikatsu kyodo kumiai) first — many universities run discounted hakama rental drives for their own graduates in the weeks before the ceremony, often 20–30% cheaper than public rental shops because they batch-order inventory. Ask at the student affairs office in January or February; slots fill quickly.

    For fabric and sewing enthusiasts who want to understand the textiles involved — or hunt for your own kimono fabric as a souvenir rather than renting — Nippori Fabric Town in Tokyo is worth a detour; several shops there sell kimono-weight fabric and notions.

    Buying instead of renting

    Renting is almost always the right call for a one-day event, but if you fall in love with the look and want to own a set — whether a genuine vintage hakama or a good furisode to pair with one — Japan’s resale market is excellent for this. Komehyo and Japan’s luxury resale shops regularly stock secondhand kimono and formal wear at a fraction of new prices, and staff can advise on sizing and fabric quality even if you’re not fluent in Japanese.

    Common mistakes to avoid

    • Booking too late in March: The week before graduation is the single busiest rental period of the year nationwide. Popular patterns and your size range (especially larger Western sizes) sell out of inventory first — book 2–4 weeks ahead if your ceremony date is fixed.
    • Underestimating dressing time: Professional hakama dressing takes 30–45 minutes and most studios want you there well before your ceremony’s photo call. Build in buffer time, and don’t schedule a tight train connection right after — Japan’s transfer rules are lenient if you do miss a train, but it’s one less thing to worry about if you simply leave earlier.
    • Forgetting the boots are genuinely restrictive: The lace-up boots look great in photos but are not built for long walks or stairs. If your campus is hilly, ask the rental shop about swapping to zori sandals for comfort, especially if you’ll be standing for a long ceremony.
    • Skipping hair prep: Updos hold better on hair that isn’t freshly washed the morning of. If you want your hair camera-ready, it’s worth looking into Japanese hair care products a few days beforehand rather than the morning-of.
    • Not confirming return time and condition policy: Ask explicitly whether same-day return is required and what happens if it rains — some shops provide a plastic kimono cover free of charge, others charge a cleaning fee for a soiled hem.

    Whether you’re closing out a degree in Japan or just want the photos to prove you once wore full hakama regalia under cherry blossoms, it’s one of the more accessible “traditional costume” experiences in the country — book early, budget around ¥15,000 for a solid mid-range set, and give yourself more dressing time than you think you need.

  • Okutama: Tokyo’s Mountain Lake Escape and Hiking Trails

    Most visitors picture Tokyo as neon and crowds, but the city’s westernmost edge is almost entirely mountains, and Okutama sits right at the far tip of it. It’s still technically part of Tokyo Metropolis, yet the scenery — a turquoise reservoir lake, cedar-covered ridgelines, and a near-total absence of tour buses — feels closer to the Japan Alps. It makes an excellent escape if you’ve already covered central Tokyo and want a day of hiking, lake views, and mountain air without booking a hotel or committing to a multi-day trip.

    Where Okutama Is and Why It’s Different from Takao or Mitake

    Okutama Town is the last stop on the JR Ome Line, roughly 2 to 2.5 hours from central Tokyo by train. It’s often confused with Mount Takao or Mount Mitake, which are far more popular and much closer (under 90 minutes from Shinjuku). The trade-off is worth understanding before you go: Takao and Mitake get crowded on weekends and have paved approach paths and cable cars built for casual visitors. Okutama is quieter, more rugged, and centered on Lake Okutama (Okutama-ko), an artificial reservoir with genuinely striking blue-green water fed by the Tama River. If you want a short, easy outing, Mitake or Takao is the better pick. If you want real trail hiking, fewer people, and lake scenery, Okutama is worth the extra hour.

    How to Get There

    From Shinjuku or Tachikawa, take the JR Chuo Line to Ome Station, then transfer to the JR Ome Line bound for Okutama Station (the line name changes partway but it’s a through service on most trains). The full one-way trip from Shinjuku takes about 2 hours and costs roughly 1,310 yen on a standard IC fare; a round trip runs close to 2,600 yen. There’s no direct Shinkansen or reserved-seat option here, so you don’t need the booking tools you’d use for a trip like the one covered in Booking Shinkansen Tickets Online — a regular IC card (Suica or Pasmo) tapped at the gates is all you need, and trains run on ordinary commuter rail schedules rather than reserved departures.

    From Okutama Station, local buses run to Lake Okutama and the main trailheads, with fares in the 300–600 yen range depending on the stop. Buses are infrequent — often just one or two per hour — so check the timetable posted at the station before you commit to a loop route, since missing the last bus back can mean a long wait or an expensive taxi.

    Lake Okutama and the Floating Bridge

    The lake itself is the easiest win if you have limited time or energy. Okutama-ko is a reservoir created by Ogouchi Dam, and its color shifts from deep jade to pale turquoise depending on season and light. The most photographed spot is the Drum Bridge (Ogouchi floating bridge), a low pontoon bridge that bobs slightly as you cross it — it’s free to walk, open roughly dawn to dusk, and takes only a few minutes round trip. Combine it with a walk along the lakeside road for mountain reflections in the water. This part of the day requires no hiking gear and works fine in regular sneakers.

    Hiking Trails for Different Fitness Levels

    Okutama’s real draw for active travelers is its network of mountain trails, which range from gentle lakeside walks to serious full-day ridge hikes:

    • Easy: The lakeside promenade and Drum Bridge loop, under 2 km, suitable for anyone, no elevation gain to speak of.
    • Moderate: Mt. Mito (Mitosan), about 1,531 m, typically a 4–5 hour round trip from the Okutama-ko bus stop with a steady but manageable climb through cedar forest, rewarding you with views over the lake and surrounding peaks.
    • Challenging: Mt. Odake or the ridge routes toward Mt. Kumotori (Tokyo’s highest peak at 2,017 m) are full-day or overnight undertakings, with rocky sections, chain-assisted scrambles in places, and real elevation change — these are for hikers with proper boots, layers, and trail experience, not casual walkers.

    Trail signage is reasonably good but mostly in Japanese with romanized place names; downloading an offline hiking map (Yamap or similar apps work well here) before you lose signal is a smart precaution, since cell coverage drops out in the valleys.

    Best Season and Timing

    Late April to early June and October to mid-November are the sweet spots: spring brings fresh green foliage and mild temperatures, while autumn (especially early-to-mid November) brings red and gold leaves along the ridgelines and around the lake. Summer is hikeable but humid and buggy in the forest sections; winter trails can have icy patches at higher elevations and some bus services run reduced schedules, so check ahead if you’re visiting December through February. Whatever the season, start early — aim to catch a train by 8am so you arrive at the lake by 10–10:30am, giving yourself enough daylight to hike and still catch a bus back before the last afternoon departures, which can be as early as 4–5pm on some routes.

    Common Mistakes to Avoid

    • Underestimating bus frequency. Okutama’s buses are not Tokyo-subway frequent. Missing one can cost you an hour or more, so always note the next two or three departure times when you get off.
    • Treating it like a Takao-style stroll. Several of the better hikes involve real elevation and exposed rock; wear proper hiking shoes, not city sneakers, and bring more water than you think you need since there are few vending machines once you’re on the trail.
    • Assuming convenience stores are everywhere. Okutama Town has a handful of small shops near the station, but nothing like the density of central Tokyo. Buy snacks, onigiri, or a trail lunch before boarding the bus up to the lake.
    • Ignoring cash needs. Some of the smaller soba shops and rest huts near the trailheads are cash-only; carry a few thousand yen in coins and small bills.

    Where to Eat and What to Bring Back

    Okutama is known regionally for wasabi (grown in cold mountain streams nearby) and for hearty mountain-vegetable soba. A simple bowl of soba at a trailside restaurant runs roughly 900–1,300 yen; it’s a far gentler portion than the famous Wanko Soba challenge up in Iwate, but just as satisfying after a few hours on the trail. If you want to bring a taste of the trip home, look for local wasabi products or mountain-vegetable pickles at the small shops near the station — they pack well and make a more distinctive souvenir than mass-market options. For budget travelers, a packed lunch from a Tokyo convenience store before you leave plus a 300 yen bus fare covers the whole day’s transit; mid-range visitors might add a soba lunch and a soak at one of the small onsen facilities near the station (day-use baths typically run 800–1,000 yen); splurge options are limited here since it’s a day-trip destination rather than a resort area, so the “luxury” move is really just hiring a local guide for the Kumotori ridge route if you want the full-day summit experience done safely.

    Practical Planning Notes

    There’s no need for a special rail pass for this trip — a regular IC card covers the whole route, unlike multi-day regional passes you might weigh for trips elsewhere, such as the comparison in Tokyo Subway Ticket vs Tono Furii Kippu. Toilets are available at Okutama Station and at the main bus stops around the lake, but become sparse once you’re on the trail, so plan accordingly. Mobile reception is patchy in the forested valleys, so tell someone your planned route and expected return time, especially if you’re attempting one of the longer ridge hikes. Overall, Okutama rewards a bit of extra planning with a day that feels genuinely remote despite never leaving the Tokyo Metropolis boundary.

  • Hitachi Seaside Park: Ibaraki’s Blue Nemophila and Kochia Fields

    Hitachi Seaside Park: Ibaraki’s Blue Nemophila and Kochia Fields

    Photo by Zion C on Unsplash

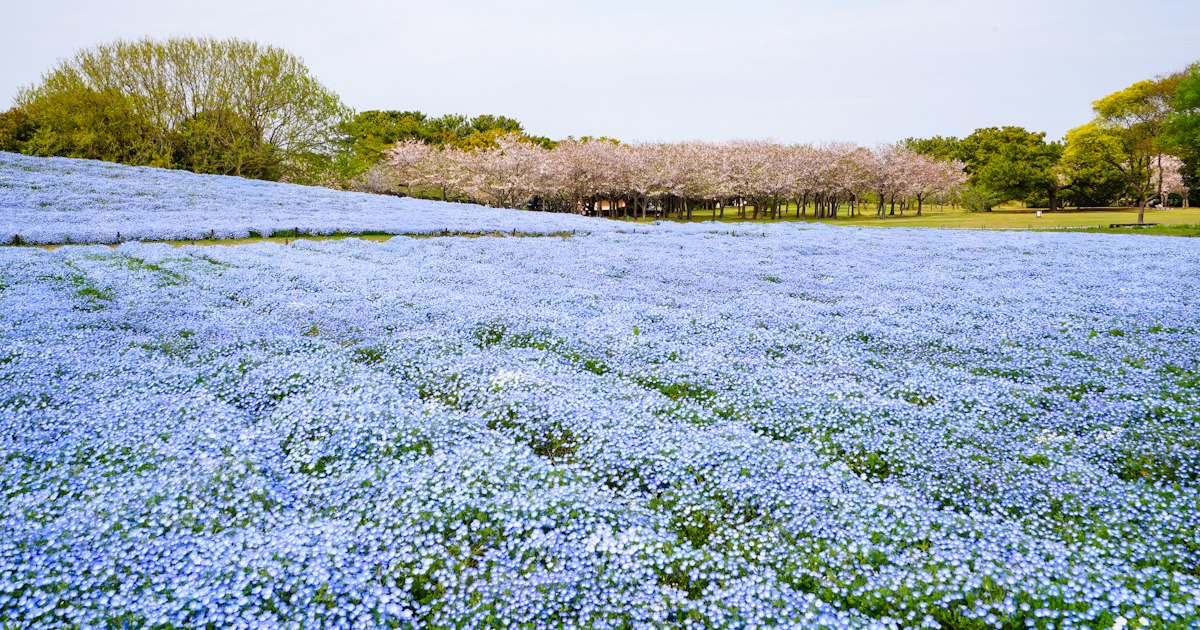
    Twice a year, a hillside in Ibaraki Prefecture turns into one of the most photographed landscapes in Japan. In spring, Miharashi Hill at Hitachi Seaside Park disappears under 3.5 million nemophila (“baby blue eyes”) flowers, turning the slope and sky into one continuous shade of blue. In autumn, the same hill is covered in kochia bushes that blaze from green to a deep, fiery red. Neither bloom lasts long, and neither is well known outside Japan, which makes the park a rewarding detour for visitors willing to go an hour and a half past Tokyo’s usual day-trip radius.

    Why Hitachi Seaside Park Is Worth the Trip

    Hitachi Seaside Park (ひたち海浜公園) sits in Hitachinaka City on Ibaraki’s Pacific coast, about 140 km northeast of Tokyo. It’s a large national government park — roughly 350 hectares — with a Ferris wheel, cycling paths, a beach, and seasonal flower fields that rotate through the year: tulips and nemophila in spring, kochia and cosmos in autumn. The nemophila and kochia seasons are the two that draw international attention, largely because of photos of Miharashi Hill’s gradient of blue or red sweeping down toward the ocean. Unlike more famous flower spots such as Chichibu’s shibazakura hill (covered in our Chichibu day-trip guide), Hitachi Seaside Park still feels relatively uncrowded on weekdays, even at peak bloom.

    When to Go: Nemophila vs. Kochia Season

    Nemophila typically blooms from mid-April to early May, peaking around Golden Week (late April to May 5). This is the single busiest stretch of the park’s year, since it overlaps with Japan’s biggest domestic holiday period — book trains and nearby accommodation well in advance if you’re traveling then.

    Kochia season runs roughly from mid-September through early October. The bushes start green and gradually redden, with the deepest crimson color usually appearing in the first one to two weeks of October — often alongside a wide field of cosmos flowers blooming at the same time nearby. Bloom timing shifts by a week or two depending on the year’s weather, so check the park’s official site or its social media accounts for real-time bloom reports within a month of your visit rather than relying on fixed calendar dates.

    Getting There from Tokyo

    The standard route is by train and bus. From Tokyo or Ueno Station, take the JR Joban Line “Hitachi” or “Tokiwa” limited express to Katsuta Station (about 80–90 minutes). Reserved seats on these limited expresses can be booked through JR East’s Ekinet system, the same type of online reservation covered in our guide to booking Shinkansen and limited express tickets online — it’s worth reserving ahead during nemophila and kochia weekends, since unreserved cars fill up fast. From Katsuta Station’s east exit, an Ibaraki Kotsu bus bound for “Kaihin Koen” (海浜公園) takes about 20 minutes and drops you near the park’s West Entrance; one-way fare is around ¥400–500.

    During peak nemophila and kochia weekends, direct highway buses also run from Tokyo Station (Yaesu side) straight to the park, taking roughly 2 hours 20 minutes for about ¥2,000–2,600 one way — slower than the train but no transfers. If you’re flying rather than taking the train, Ibaraki Airport (IBR) near Omitama is only about 40 minutes from the park by car or bus and is served by budget domestic carrier Skymark; our comparison of LCCs versus JAL and ANA for domestic flights is useful if you’re connecting from Fukuoka, Kobe, or Naha rather than coming from Tokyo.

    Admission, Hours, and Park Layout

    Standard admission is ¥410 for adults (ages 15–64), ¥210 for seniors 65 and over, and free for anyone 14 and under. During the nemophila season in spring, the park switches to special “flower season” pricing, raising adult admission to roughly ¥900, since it’s the single most popular stretch of the entire year; kochia season sometimes carries a smaller surcharge as well, so confirm current pricing on the official site before you go. The park is generally open 9:30 am to 5:00 pm (last entry around 4:00 pm), with extended hours in midsummer. It’s typically closed on Tuesdays outside peak flower seasons, but stays open daily during the nemophila and kochia weeks — still worth double-checking, since maintenance closures occasionally fall on other weekdays.

    Miharashi Hill, where the nemophila and kochia are planted, is a 10–15 minute walk from the West Entrance, or reachable by a paid shuttle train (the “Kaiyu-go”) that loops through the park for around ¥320 per ride — useful if you don’t want to tackle the hill’s slope on foot, especially with kids or in the heat.

    Tips for Photos and Avoiding Crowds

    Arrive right at opening. The classic wide shot — flowers in the foreground, Ferris wheel and ocean in the distance — gets crowded with other photographers by mid-morning on weekends, and the hill offers limited shade once the sun is high. Weekday mornings, especially Tuesday through Thursday, are dramatically quieter than weekends during both bloom seasons. For nemophila, the most photogenic days are typically clear and not too windy, since overcast light flattens the blue, and strong wind makes the thin flower stems blur in photos. For kochia, go slightly later in the season than you might expect — many visitors show up while the bushes are still green and miss the deeper red that develops closer to early October.

    Budget, Mid-Range, and Splurge Options

    On a tight budget, a day trip is entirely doable: round-trip train plus bus runs roughly ¥6,000–7,000 from central Tokyo, admission is ¥410–900, and the park has reasonably priced food stalls selling items like grilled squid or soft-serve ice cream for ¥400–600. Mid-range travelers often rent bicycles inside the park (around ¥540 for an adult bike per use) to cover the large grounds faster and combine the visit with a seafood lunch at nearby Oarai, a fishing port about 20 minutes away by car or bus. For a splurge, consider staying overnight in Oarai or Mito rather than rushing back to Tokyo same-day — it lets you catch the park at opening for uncrowded photos and still have time afterward for Mito’s Kairakuen, one of Japan’s three great gardens, which is a reasonable add-on if you’re already this far north.

    Common Mistakes to Avoid

    The most common mistake is timing: because nemophila and kochia peak for only a week or two, travelers who lock in dates months ahead based on “average” bloom calendars sometimes arrive to find the hill still mostly green or already past its best color. Check recent bloom-status updates close to your travel date rather than trusting a fixed date from a prior year. The second mistake is underestimating the walk — Miharashi Hill is larger and more exposed than photos suggest, so bring sun protection and water, especially during the warmer end of nemophila season or early autumn kochia visits. Finally, don’t plan a rushed half-day trip squeezed between other Tokyo activities; between the train, the bus connection, and the time needed to actually enjoy the hill without rushing, this works best as a dedicated full day out from Tokyo.

  • Komehyo and Japan’s Luxury Resale Shops: A Buyer’s Guide

    Komehyo and Japan’s Luxury Resale Shops: A Buyer’s Guide

    Photo by Yanhao Fang on Unsplash

    Japan has one of the world’s best secondhand luxury markets, and it isn’t close. Decades of meticulous ownership, humidity-controlled storage, and a resale culture built on trust mean a used Chanel bag or Rolex bought in Tokyo or Nagoya is often in better condition than one sold as “pre-owned” anywhere else. Komehyo is the name most visitors run into first, but it’s one of several chains worth knowing before you shop. Here’s how to buy well, avoid the rookie mistakes, and get the best price.

    Why Japan’s resale market is different

    Japanese secondhand shops grade items with a rigor that’s unusual outside the country. Most chains use a letter system — typically S (unused/showroom condition) down through A, B, and C (visible wear) — and staff will point out every flaw before you buy, not after. Authentication is taken seriously too, with in-house specialists trained specifically on hardware, stitching, and serial numbers for houses like Hermès, Chanel, and Louis Vuitton. That’s why prices for the same bag model can vary by 30–40% between two shops: you’re paying for the grade, not just the label.

    Komehyo: Japan’s biggest name

    Founded in Nagoya in 1947, Komehyo (コメ兵) is Japan’s largest publicly listed secondhand luxury retailer, with flagship stores in Ginza, Shinjuku, and Shibuya in Tokyo, a multi-floor headquarters building in Nagoya, and branches in Osaka’s Shinsaibashi and other major cities. Beyond bags and watches, Komehyo is also a serious destination for used kimono and furisode — a category worth a look if the full-price kimono world (see our guide to Seijin no Hi and the furisode tradition) left you curious but priced out.

    Most Komehyo locations open around 11:00 and close around 20:00, with no fixed weekly closing day at the flagship stores (always check the specific branch page before visiting, since hours shift around New Year). The Ginza and Shinjuku stores are multi-floor affairs — bags and watches upstairs, jewelry and small accessories on lower floors — and staff at the larger locations usually speak workable English given the tourist volume.

    Crucially for visitors: Komehyo’s major stores are registered tax-free shops. Spend over ¥5,000 (before tax) on a single visit and, with your passport in hand, you get the 10% consumption tax waived on the spot — a meaningful discount on a ¥300,000 watch.

    Other resale chains worth knowing

    • Daikokuya — Komehyo’s closest rival in scale, strong on watches and jewelry, with a flagship in Ueno and branches nationwide.
    • RAGTAG — leans younger and more fashion-forward (Comme des Garçons, Celine, streetwear-adjacent designer pieces) rather than classic handbags; good if you want pieces, not just investment bags.
    • Brand Off — smaller, curated stores often tucked into shopping streets in Ginza and Shibuya; worth a look for watches and smaller leather goods.
    • 2nd Street — the budget end of the spectrum. Mostly contemporary secondhand clothing with occasional designer finds, and prices that start in the low thousands of yen rather than tens of thousands.

    If you’re building a day around shopping, it’s worth knowing that several of these chains cluster their flagships within a few train stops of each other in central Tokyo — Ginza and Shinjuku both have a Komehyo and a Daikokuya within walking distance of the station, so a single afternoon with a day pass for the subway can cover three or four shops without wasting time on individual fares.

    Budget, mid-range, and splurge picks

    At the budget end, small leather goods — cardholders, keychains, coin purses from mid-tier houses like Coach or Kate Spade Japan — run ¥3,000–¥15,000 at most chains, and 2nd Street can go lower still. Mid-range is where the market is deepest: a grade-A Louis Vuitton Speedy or Chanel wallet typically lands in the ¥80,000–¥250,000 range, and this is the sweet spot for first-time resale buyers because the grading gap between A and B is usually visible and easy to judge in person. For a splurge, Hermès Birkins and Kellys at Komehyo or Daikokuya generally start around ¥1.5 million for common leathers and sizes and climb sharply for exotic skins or discontinued colors — expect waitlists and a request slip rather than a walk-up purchase for the rarest pieces.

    Watches follow a similar curve: a well-worn Seiko or Citizen might be ¥10,000–¥30,000, a clean Omega Seamaster often ¥150,000–¥400,000, and a Rolex Submariner or Daytona frequently ¥1.5–3 million depending on reference and box/papers status.

    Best timing and common mistakes

    Late December into early January brings fukubukuro-style clearance and post-holiday restocking as people sell gifts and unused items, which is genuinely one of the better windows for finding fresh inventory at a discount. The weeks around Japan’s fiscal year-end in March also see a wave of corporate gift and relocation sell-offs. Avoid assuming Golden Week (late April–early May) is a bargain period — it’s actually the busiest tourist shopping window and prices don’t move.

    The most common visitor mistake is skipping the grading explanation and just comparing sticker prices across shops — a “cheaper” bag at grade B might need a cleaning or corner repair that a slightly pricier grade A doesn’t. Ask staff to show you the flaws directly; most are happy to walk through it with a loupe. The second mistake is forgetting the tax-free minimum and passport requirement, then realizing at checkout that cash-only applies to some smaller boutiques (the big chains all take major cards, but a few of the small Ginza specialty shops are card-limited or cash-preferred for negotiated prices). Third: don’t expect to haggle at Komehyo or Daikokuya — prices are fixed and marked, unlike flea markets or some standalone watch dealers.

    Getting there, especially Nagoya

    If you want to see the resale market at its most serious, Komehyo’s Nagoya headquarters building is worth the detour — it’s the largest single secondhand luxury retail space in the country, with floors dedicated to watches, jewelry, art, and kimono that the branch stores simply don’t have room for. Nagoya is an easy stop if you’re already routing through central Japan via Chubu Centrair Airport, or a straightforward Shinkansen hop from Tokyo or Osaka — book that leg through Smart EX or the EX app rather than at the station window to save time during peak travel periods.

    However you plan the trip, treat a resale shop visit the way you’d treat buying anything from a specialty market — go in with a price range in mind, ask questions, and let the grading system do the work for you rather than relying on photos or guesswork.

  • Furikake: A Buyer’s Guide to Japan’s Rice Seasoning

    Furikake: A Buyer’s Guide to Japan’s Rice Seasoning

    Photo by Adrian Infernus on Unsplash

    If you’ve ever seen a bowl of Japanese rice flecked with green, pink, and black specks, you’ve met furikake. It’s the easiest, cheapest, most pack-friendly souvenir in the country — and also one of the most confusing aisles in a Japanese supermarket if you don’t know what you’re looking at. This guide breaks down what furikake actually is, which flavors are worth your suitcase space, and where to buy it at every budget.

    What Is Furikake, Exactly?

    Furikake (ふりかけ) is a dry seasoning sprinkled over steamed rice, typically a mix of toasted sesame seeds, nori (dried seaweed), salt, sugar, and some form of dried fish or seaweed powder for umami. It dates back to the early 20th century, when it was developed as an inexpensive way to add calcium and nutrients to plain rice using ground fish bone and seaweed. Today it’s sold in everything from 2.5-gram single-serve sachets to large refill bags, and it’s a staple in school lunchboxes (bento) across the country.

    It’s easy to confuse with ochazuke seasoning, which is meant to be dissolved in hot water or tea poured over rice, not just sprinkled dry. Nagatanien, the brand most associated with furikake, actually built its business on “Ochazuke Nori,” launched in 1961 — so you’ll see both products side by side, often in similar foil packets. Read the package: if it says “ochazuke no moto,” it’s for the soup version, not the dry sprinkle.

    The Core Flavors You’ll See on Shelves

    • Nori Tama — nori, sesame, and dried egg flakes; the mildest, kid-friendly default.
    • Okaka — built on katsuobushi (dried bonito flakes), smoky and savory. If you’ve read our guide to dashi and katsuobushi, this is the same bonito flavor in sprinkle form.
    • Yukari — made from salted, dried red shiso leaves. Tart, purple, and sold in an iconic can by Mishima Foods since 1959. Fully plant-based, which matters if you’re shopping for a vegetarian.
    • Sake (salmon) — salty, slightly sweet dried salmon flakes.
    • Mentaiko / tarako — spicy or plain cod roe flavor, a dry homage to the roe dish made famous in Fukuoka (see our mentaiko guide if you want the real thing while you’re there).
    • Wasabi — a sharper, nose-tingling option, usually green-tinted.

    Most brands sell “assortment boxes” with six small foil packets in different flavors — a smart way to try several before committing to a full-size bag.

    Where to Buy Furikake in Japan

    You don’t need to hunt this down; the harder part is narrowing your choices.

    • Supermarkets (Life, Seiyu, AEON, Ito-Yokado) have the widest selection and the lowest prices, usually open 9:00–22:00 or later. This is where locals actually shop, and it’s where you’ll find the full Nagatanien and Marumiya lineups.
    • 100-yen shops like Daiso and Seria stock single-brand furikake sachets for ¥108–220 — fine for a taste test, not for serious gifting.
    • Don Quijote stores, open late (often 24 hours in big cities), carry tourist-friendly multi-flavor boxes near the snack aisles, usually with tax-free checkout for purchases over ¥5,000.
    • Depachika (department store basement food halls) in Tokyo, Osaka, and Kyoto carry the premium, gift-boxed versions — think lacquered tins rather than foil bags.
    • Regional markets are worth a browse if you’re already there for seafood. Omicho Market in Kanazawa has kitchen-goods stalls selling local furikake blends alongside the fish stands — a good stop if you’re building a full Japanese-pantry souvenir haul alongside miso and dashi.
    • Airport shops at Narita, Haneda, and Kansai sell boxed furikake sets near the gates — convenient if you’re buying last-minute, though prices run 20–30% higher than supermarkets.

    Budget, Mid-Range, and Splurge Picks

    Budget (¥108–¥300): Single foil sachets from Daiso or convenience stores (7-Eleven, Lawson, FamilyMart), or a basic Nagatanien nori-tama packet. Good for sampling, not for gifting.

    Mid-range (¥300–¥700): Standard supermarket bottles or bags from Nagatanien, Marumiya, or Maruha Nichiro, and the popular six-flavor assortment boxes. This is the sweet spot for most visitors — enough variety to bring home for friends without weighing down your bag.

    Splurge (¥1,000–¥3,000): Gift tins from depachika food halls, often featuring premium katsuobushi, dried uni (sea urchin), or truffle-infused blends. These come in presentation boxes and are the right call if you’re bringing furikake as an actual gift rather than a pantry refill.

    How to Use It (and Common Mistakes)

    The obvious use is sprinkled over a bowl of plain steamed rice, but it’s just as good on onigiri, scrambled eggs, avocado toast, popcorn, or pasta — it’s become a minor trend outside Japan for exactly that reason.

    Common mistakes to avoid:

    • Assuming it’s all vegetarian. Most furikake contains dried fish (katsuobushi or other seafood). If you’re shopping for a vegetarian traveler or friend, yukari (shiso) or a sesame-nori blend without “katsuobushi” or “sakana” listed in the ingredients are safer bets.
    • Buying only single-serve sachets thinking they’re a full-size product — a 2.5g packet covers one bowl of rice, not a week of breakfasts.
    • Leaving fish-based furikake unrefrigerated in summer once opened. Unopened, most varieties are shelf-stable for 6–12 months at room temperature; once opened, especially fish or egg-based ones, keep them sealed and use within a few weeks, refrigerating in hot, humid months.
    • Confusing furikake with ochazuke mix, as mentioned above — check the package instructions before buying a box of what you think is a sprinkle seasoning.

    Packing It Home: Shelf Life and Customs

    Furikake travels well: it’s dry, lightweight, sealed, and doesn’t need refrigeration while unopened, making it one of the few Japanese food souvenirs that survives a long flight with zero fuss. Most countries, including the US, UK, EU, Australia, and Canada, permit commercially sealed dried fish products for personal use, but rules shift — if you’re traveling with a large quantity of fish-based furikake, check your destination country’s current food import restrictions before you fly, since enforcement varies by product and country.

    There’s no real “best season” to buy furikake — it’s sold year-round — though keep an eye out for limited seasonal flavors like sakura-shrimp blends in spring or matsutake-mushroom versions in autumn, which make for a more memorable gift than the everyday nori-tama. Pair a bag of furikake with a small container of dashi powder or a pack of miso, and you’ve got the start of a genuinely useful Japanese pantry kit rather than just a snack.