Japan Trove

Author: JapanTrove Editorial

  • Ryukyu Glass: Okinawa’s Colorful Handblown Glassware

    Ryukyu Glass: Okinawa’s Colorful Handblown Glassware

    Photo by Shutter Speed on Unsplash

    Thick-walled, bubble-flecked, and tinted in shades of Okinawan sea and sky, Ryukyu glass (琉球ガラス) is one of the few souvenirs from Japan that actually looks like where it’s from. Unlike the razor-precision of Edo Kiriko cut glass up in Tokyo, Ryukyu glass is deliberately imperfect — thick, weighty, full of tiny air bubbles, and hand-shaped in bold colors that owe more to postwar recycling than to refined tradition. Here’s what it is, where to see it made, and how to buy it without overpaying or breaking it on the way home.

    A Craft Born From Necessity, Not Tradition

    Ryukyu glass isn’t an ancient art like lacquerware or textiles — it’s barely 70 years old. After World War II, Okinawan glassmakers had no access to fine raw glass, so they melted down discarded Coca-Cola bottles, beer bottles, and glass left behind by the US military. The recycled glass was full of impurities and air bubbles, which glassmakers turned into a signature look rather than a flaw to hide. Cobalt blue bottles became the deep blue tones still common today; brown beer bottles became the amber and green pieces you’ll see everywhere. Modern Ryukyu glass is made with cleaner raw materials now, but the style — thick walls, bubbles, saturated color, slightly irregular shapes — is intentionally preserved.

    Where to Watch It Being Made

    The best reason to buy Ryukyu glass in Okinawa rather than at a Tokyo department store is that you can watch — or try — the glassblowing yourself.

    • Ryukyu Glass Village (琉球ガラス村), in Itoman City near Cape Kyan in the south of the main island, is the largest facility and the easiest for visitors without a car to reach via tour bus or rental car (about 30–40 minutes from Naha by car). Open daily, typically 9:00–17:30. Free to walk through the workshop and gallery; glassblowing experiences run roughly ¥3,300–¥5,500 depending on the item you make (cup, bowl, or paperweight), with finished pieces shipped to your home or hotel a few days later since they need time to cool and anneal properly.
    • Okinawa Glass Studio 6 and several smaller independent studios around Naha and Yomitan Village also offer hands-on sessions, often for similar prices, with more one-on-one time with the glassmaker since group sizes are smaller.
    • Kokusai Dori (International Street) in Naha has numerous retail shops selling finished Ryukyu glass without the workshop visit — convenient if you’re short on time but you’ll pay retail markup and won’t see how it’s made.

    If you only have time for one stop, Ryukyu Glass Village is the safe choice: it combines a large retail gallery, a working studio you can observe for free, and an easy booking process for the hands-on experience.

    What to Buy and What It Costs

    Budget (¥1,000–¥3,000): Small sake cups (guinomi), shot glasses, and chopstick rests are the most common starter pieces. A single small tumbler often runs ¥1,500–¥2,500 at village shops; sets of two matching cups in a gift box are a popular size for checked luggage.

    Mid-range (¥3,000–¥8,000): Highball or rock glasses, small bowls, and vases in signature Okinawan blue (“Ryukyu blue,” meant to evoke the surrounding sea) fall in this range. This is where the craftsmanship differences between mass-produced and artisan-signed pieces become noticeable — look for a maker’s mark etched or engraved on the base.

    Splurge (¥10,000 and up): Larger serving bowls, layered multi-color vases, and pieces by named glass artists (some studios sell signed one-off works) can run ¥15,000–¥50,000+. These are usually sold at the glassmaker’s own studio rather than souvenir shops, so ask staff at Ryukyu Glass Village if any resident artists have work on display.

    A quick way to gauge quality: hold the piece up to light. Bubbles should look intentional and evenly distributed, not clustered at a seam, which can indicate a weaker fusing point.

    Best Time to Go and How to Get There

    Okinawa is warm nearly year-round, but the most comfortable months for exploring outdoor glass villages and beach areas nearby are November through April, avoiding the intense heat and humidity of July–August and the typhoon risk of June and September–October. If you’re combining a glassblowing session with a beach day, aim for spring (March–May) when the ocean is calm and it’s not yet peak heat.

    Naha Airport is the arrival point for almost all visitors; from there, Ryukyu Glass Village and most studios in the south are a 30–45 minute drive or a combination of monorail plus bus/taxi. Rental car is by far the easiest way to visit multiple studios in one day, since public bus schedules to Itoman are infrequent. If you’re not driving, several day-tour operators in Naha bundle a glassblowing experience with other southern Okinawa stops like Okinawa World or the Peace Memorial Park.

    Common Mistakes to Avoid

    • Skipping the workshop for retail-only shopping. Kokusai Dori shops are convenient but the same cup can cost 20–30% more than at the source, with less certainty about who actually made it.
    • Not asking about shipping for hands-on pieces. Anything you personally blow needs to cool and anneal slowly — it cannot be handed to you the same day. Studios ship internationally, but confirm the cost and timeline (often 1–2 weeks) before you commit, especially if you’re traveling onward within Japan or flying home soon after.
    • Packing finished glass in checked luggage without protection. Ryukyu glass is thick and fairly forgiving compared to thin crystal, but it’s still glass. Ask the shop to wrap pieces in bubble wrap and box them — most will do this for free — and pack the box in the center of your suitcase surrounded by clothes.
    • Assuming all “Ryukyu glass” sold in Naha is handmade locally. Some souvenir-shop stock is machine-pressed and imported. Genuine handblown pieces have slight asymmetry, visible bubbles, and often a stamped or etched maker/studio name on the underside — mass-produced lookalikes tend to be too uniform and lighter in weight than they should be.

    Packing It Home

    If you’re checking a bag, wrapped glass inside a hard-sided suitcase, cushioned by clothing on all sides, generally survives fine — Ryukyu glass’s thickness actually works in its favor here compared to thinner crystal or porcelain. If you’re carrying on, note that Japan’s airport security allows wrapped glassware in carry-ons, but if you’re connecting onward by Shinkansen with a large suitcase, check the reservation and size rules at Shinkansen Oversized Luggage Rules: Reservations & What Counts before you buy anything oversized like a large vase or serving bowl.

    For travelers comparing Japan’s regional glass and craft souvenirs, it’s worth noting how differently each region approaches the material: Tokyo’s Edo Kiriko cut glass is precision-faceted and formal, while Ryukyu glass is deliberately loose and colorful — both make excellent, very different gifts from the same trip. If you’re building out a full Okinawa-to-Tokyo souvenir list, pairing a Ryukyu glass cup with something like a rice cooker or kitchen item from the mainland gives a nice contrast of island craft versus everyday Japanese design.

    Final Tip

    Buy the piece you’ll actually use. Ryukyu glass looks striking on a shelf, but its real appeal is functional — a cold glass of chu-hi or beer looks noticeably better in a thick, bubble-flecked Okinawan tumbler than in a plain one. If you’re curious about what to fill it with once you’re home, Japan’s canned cocktail culture (covered in Chu-Hi and Japan’s Canned Cocktail Culture: What to Try) pairs surprisingly well with a Ryukyu glass tumbler brought back from Itoman.
  • Edo Kiriko: Tokyo’s Cut-Glass Craft and Where to Buy

    Edo Kiriko: Tokyo’s Cut-Glass Craft and Where to Buy

    Photo by Beth Macdonald on Unsplash

    Look closely at the drinkware in a good Tokyo department store or a sake bar in Ginza and you’ll often spot glass with faceted, jewel-like patterns catching the light — deep red or blue on the outside, clear glass showing through in intricate cuts. That’s Edo Kiriko, Tokyo’s traditional cut-glass craft, and it makes one of the more distinctive, pack-worthy souvenirs you can bring home from Japan. Here’s what it actually is, how to tell the real thing from a machine-made imitation, and where to buy it without overpaying.

    What Is Edo Kiriko?

    Edo Kiriko dates back to 1834, when a glass merchant named Kagiya Kyubei began cutting patterns into glass surfaces in what was then the city of Edo (now Tokyo). The craft evolved over the following century, absorbing European cut-crystal techniques introduced in the Meiji era, and today it’s officially recognized as a traditional craft of Japan. Production is still concentrated in Tokyo’s old shitamachi (downtown) neighborhoods — Sumida, Koto, and Edogawa wards — where small family workshops cut each piece by hand against a spinning wheel.

    The signature look is “iro-kise” glass: a layer of colored glass (ruby red, cobalt blue, purple, amber, or green) fused over clear glass, then cut through so the pattern appears as clear lines against the color. Classic motifs include kiku (chrysanthemum), asanoha (hemp leaf), kagome (basket weave), and nanako (fish roe) — geometric, precise, and rooted in symbolism from nature and folk design.

    How to Spot the Real Thing (and Avoid Common Mistakes)

    The single most common mistake shoppers make is confusing Edo Kiriko with Satsuma Kiriko, a related but distinct cut-glass tradition from Kagoshima that uses thicker color layers and softer gradients. Both are beautiful, but if you’re specifically after Tokyo’s craft, check the label — reputable sellers will state “Edo Kiriko” and often name the workshop or artisan.

    The second mistake is buying a machine-pressed “kiriko-style” glass thinking it’s hand-cut. Genuine Edo Kiriko is cut by hand on a rotating wheel, which means every piece has tiny variations and the cuts feel sharp and slightly irregular to the touch — pressed glass patterns look uniform and slightly rounded. Price is a reliable signal: a real hand-cut guinomi (small sake cup) rarely sells for under about ¥5,000, and pieces with fine, dense cutting from a named artisan run considerably higher. If you see a “kiriko” rocks glass for ¥1,500 in a souvenir shop, it’s almost certainly machine-made.

    Also budget for weight and fragility when planning your trip home — these are solid, heavy pieces, and shops will wrap them well, but you’ll want to carry fragile glass in your carry-on rather than checked luggage. If you’re taking the shinkansen onward with a larger suitcase, it’s worth checking the Shinkansen oversized luggage rules ahead of time so your bags and your new glassware travel smoothly together.

    Where to Buy: Budget to Splurge

    Budget (¥3,000–¥8,000): Small guinomi sake cups or shot glasses are the most affordable entry point into genuine Edo Kiriko. Department store craft floors — Takashimaya Nihombashi, Isetan Shinjuku, and Mitsukoshi Ginza all carry curated selections — stock smaller pieces at this range, and staff can explain which workshop made each one.

    Mid-range (¥10,000–¥30,000): Rocks glasses, wine glasses, and small bowls with denser cutting patterns fall in this bracket. Hirota Glass (Hirota Garasu), founded in 1899 and one of Tokyo’s oldest glassmakers, has a shop and gallery in Sumida where you can see a wide range of both traditional and contemporary designs. Kagami Crystal, known for exceptionally fine cutting, is another respected name to look for at this level.

    Splurge (¥40,000 and up): Large vases, decanters, or pieces by well-known individual artisans (some hold the title of Traditional Craftsman) can run into the hundreds of thousands of yen. These are collector pieces — worth seeking out if you want something truly one-of-a-kind, but not necessary for a first taste of the craft.

    Where to See It Made: Sumida Edo Kiriko Museum

    For a deeper look, visit the Sumida Edo Kiriko Museum (Sumida Edo Kiriko-kan), run by a cooperative of local workshops. It functions as both a small museum showing historical and contemporary pieces and a shop selling work from multiple artisans under one roof, so you can compare styles and price points before buying. Hours and closed days vary by season and sometimes by workshop schedule, so check the current opening times before you go rather than assuming a fixed schedule.

    The museum sits in Sumida ward, an easy add-on if you’re already visiting the neighborhood for sumo. It’s a short walk or taxi ride from Ryogoku Station, so it pairs naturally with a morning at the sumo stadium and a chanko nabe lunch — see our guide to Ryogoku’s sumo district and where to eat chanko nabe for a full half-day itinerary that combines both.

    Best Season and Timing to Shop

    Edo Kiriko is sold year-round, but a few timing notes help. Department stores run gift fairs featuring traditional crafts around Ochugen (mid-summer, late June to mid-July) and Oseibo (year-end, early to mid-December), when selections are broadest and staff are used to explaining pieces to gift-buyers — useful even if you’re buying for yourself. Small workshops in Sumida and Koto sometimes hold open-studio weekends in autumn; these aren’t heavily advertised in English, so ask at the Sumida Edo Kiriko Museum or a local tourist information counter what’s on during your visit. Weekday mornings are the best time to shop unhurried at the smaller workshops, since weekends can draw domestic collectors specifically hunting for limited pieces.

    Caring for and Packing Your Glass

    Hand-cut edges are sharp by design, so hand-wash rather than using a dishwasher, which can dull the fine cutting over time and risks chipping against other items. Most reputable shops will pack pieces in a rigid box with cushioning suitable for air travel; if you’re buying several pieces, ask the shop to consolidate them into one well-padded box rather than several thin ones, which is both safer and easier to fit in a suitcase.

    Edo Kiriko sits alongside a handful of other Japanese crafts that reward the same kind of careful shopping — hand-forged, regionally rooted, and worth understanding before you buy. If cut glass has you interested in traditional Japanese tools more broadly, our guides to Nambu Tekki cast iron kettles from Iwate and Japanese whetstones (toishi) cover two more crafts worth seeking out on the same trip.

  • Nambu Tekki Cast Iron Kettles: Iwate’s Traditional Craft and Where to Buy

    Nambu Tekki Cast Iron Kettles: Iwate’s Traditional Craft and Where to Buy

    Photo by EJ Li on Unsplash

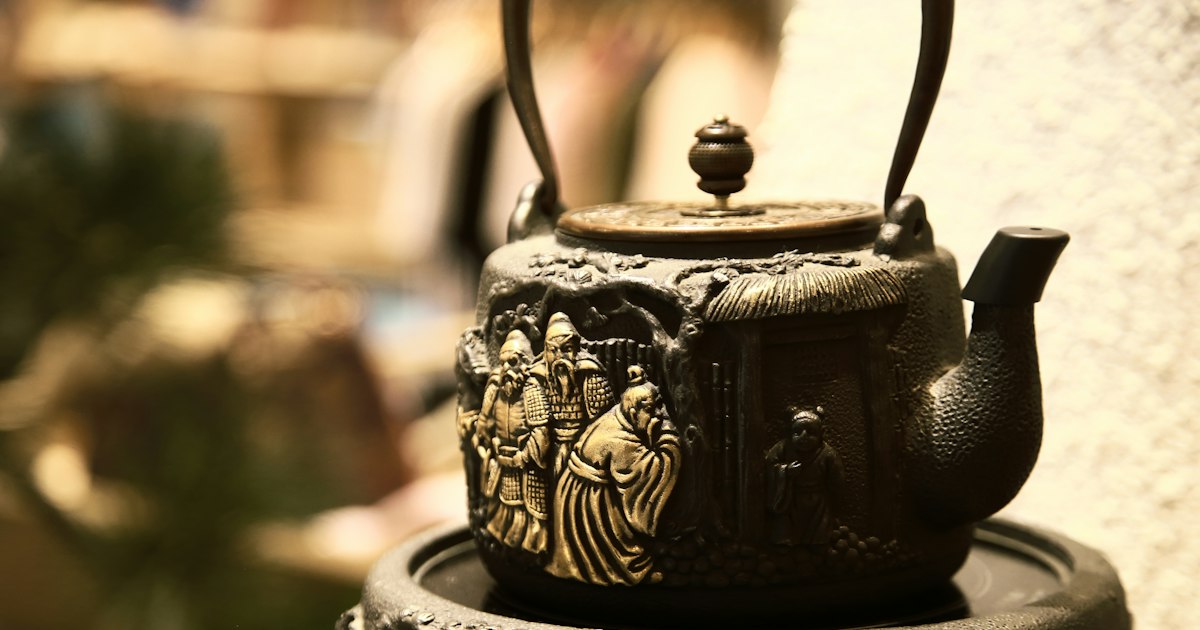
    If you’ve ever seen a heavy, dimpled black kettle in a Kyoto tea shop or a Tokyo department store’s kitchenware floor, chances are it was Nambu Tekki (南部鉄器) — the cast iron ware that has come out of Iwate Prefecture for around 400 years. These kettles are functional heirlooms: they distribute heat evenly, soften tap water by releasing trace iron, and, with basic care, last for generations. This guide covers what actually makes Nambu Tekki different from generic cast iron, what to expect to pay, and where to buy it — both in its Iwate homeland and back in Tokyo if your itinerary doesn’t stretch that far north.

    What Makes Nambu Tekki Special

    Nambu Tekki traces back to the 17th century, when the Nanbu clan that ruled the Morioka domain invited tea-ceremony kettle casters from Kyoto to produce chagama (tea kettles) for the local elite. A second, separate tradition of everyday cast-iron cookware developed around the same era in Mizusawa, in what’s now Oshu City, further south in Iwate. The two lineages eventually merged under the single “Nambu Tekki” name, and in 1975 the craft was designated a traditional craft (dentō kōgei) by Japan’s Ministry of Economy, Trade and Industry.

    What sets it apart from mass-produced cast iron is the casting process: molds are hand-carved with fine dot or arare (hail-drop) patterns, molten iron is poured at controlled temperatures, and pieces are often finished with a lacquer-like oxidized coating (called “shibu-nuri” or similar treatments) rather than paint, which is part of why the surface ages gracefully instead of just rusting. Look for two major workshop names as you shop: Iwachu (岩鋳), founded in 1902 in Morioka and now the most internationally recognizable name, and OIGEN (及源鋳造), founded in 1852 in Oshu, known for a slightly more rustic, artisanal look. Suzuki Morihisa Workshop, with roots going back over 400 years, is the oldest still-operating studio and focuses on traditional tea-ceremony pieces.

    Tetsubin vs. Cast-Iron Cookware: Know the Difference Before You Buy

    This trips up a lot of first-time buyers. A tetsubin (鉄瓶) is a kettle for boiling water — most modern ones sold to tourists have an enamel coating on the inside, which means you never need to season them and they won’t rust from water contact. A traditional chagama or unlined tetsubin has bare cast iron inside; it needs to be dried immediately after each use and occasionally “seasoned” with a light film of oxidation, or it will rust. Meanwhile, Nambu Tekki also makes cast-iron skillets, grill pans, and rice pots (kamado-style), which behave like any raw cast-iron cookware — season with oil, never soak, dry thoroughly.

    If you just want a nice-looking, low-maintenance souvenir for boiling water, buy an enamel-lined tetsubin and say so explicitly to the shop staff, who are used to the question. If you’re a tea enthusiast wanting the “real” unlined experience, expect more upkeep and ask about seasoning instructions in English — most shops that cater to foreign buyers keep a printed sheet.

    Where to Buy in Iwate: Morioka and Oshu

    Buying at the source gets you the widest selection and the chance to watch casting in progress. In Morioka, Morioka Handi-Works Square (もりおか手づくり村), a short bus ride from Morioka Station, houses dozens of craft workshops under one roof, including a Nambu Tekki foundry with a viewing area and a shop selling pieces directly from the studios — it’s typically open daily from around 9:00 to 17:00. Iwachu also runs its own showroom and factory shop on the outskirts of Morioka city, worth calling ahead about hours since it can vary with production schedules.

    In Oshu (formerly Mizusawa), reachable via the Tohoku Shinkansen to Mizusawa-Esashi Station (about 2 hours 40 minutes from Tokyo), OIGEN operates a factory shop near its foundry where you’ll find their full catalog plus factory-second pieces at a discount. This area is quieter and far less touristed than Morioka, so it’s worth combining with a stop at Morioka rather than a dedicated day trip. Both cities are compact enough to cover on foot or by short taxi from the station.

    Where to Buy Nambu Tekki in Tokyo

    If Iwate isn’t on your route, you don’t have to skip Nambu Tekki entirely. Kappabashi, Tokyo’s kitchenware wholesale district near Asakusa, has several shops stocking tetsubin and cast-iron cookware from Iwate makers, often at prices comparable to Iwate itself. The Japan Traditional Crafts Aoyama Square, near Aoyama-Itchome Station, curates traditional crafts from across the country, including Nambu Tekki, and is a good one-stop option if you’re also craft-shopping for other regional goods — it pairs well with a stop by Shigaraki Ware or other pottery pieces if you’re building out a Japanese kitchen and tableware collection. Major department stores like Isetan Shinjuku and Takashimaya Nihonbashi also carry curated Iwachu lines in their kitchenware sections, particularly the colorful enamel-exterior tetsubin designed for the export market.

    What to Expect to Pay: Budget, Mid-Range, and Splurge

    Prices scale with size, pattern complexity, and whether a named artisan signed the piece. As a rough guide:

    • Budget (¥3,000–¥8,000): Small trivets, chopstick rests, mini teapots, and furin wind chimes — good lightweight souvenirs.
    • Mid-range (¥8,000–¥25,000): Standard 0.5–1.4 liter enamel-lined tetsubin from Iwachu or OIGEN, including the popular colorful export-market designs. Most everyday cast-iron skillets and small pots also fall in this band.
    • Splurge (¥30,000–¥100,000+): Larger unlined tea-ceremony chagama, intricately patterned tetsubin, or pieces signed by a recognized craftsperson at a workshop like Suzuki Morihisa. Museum-quality historical pieces can run well beyond this.

    A common mistake is buying an unlined kettle without realizing it needs regular care, then being surprised when it develops rust spots within weeks — always ask “enamel-lined or not?” (hōrō-biki, in shop terms) before purchasing.

    Timing, Getting There, and Getting It Home

    Iwate is pleasant most of the year, but late April to early May (cherry blossoms) and mid-October to early November (autumn foliage, easily combined with a side trip to nearby gorges) are the most scenic times to visit Morioka. Morioka’s Sansa Odori festival in early August is also a lively time to be in town, though accommodation books up. Morioka is reached via the Tohoku Shinkansen in about 2 hours 10 minutes from Tokyo, making it a very doable day trip or overnight add-on to a Tohoku itinerary.

    One practical note before you buy: cast iron is heavy — even a modest 1-liter tetsubin can weigh 1.5–2 kg — and most shops will wrap it securely but won’t ship internationally as standard. If you’re bringing one home in checked luggage, wrap it in clothing to prevent rattling, and if you’re traveling onward by bullet train with a suitcase that’s grown a size larger, check the current Shinkansen oversized luggage rules before you book your seat. And if cast iron has you thinking about upgrading your kitchen game more broadly, it’s worth a look at Japan’s other iconic kitchen exports — from traditional whetstones for sharpening knives to the rice cookers that pair naturally with a Nambu Tekki kettle on the same countertop.

  • Jins & Zoff: Japan’s Budget Eyewear Brands and Where to Buy

    Jins & Zoff: Japan’s Budget Eyewear Brands and Where to Buy

    Photo by Na sen on Unsplash

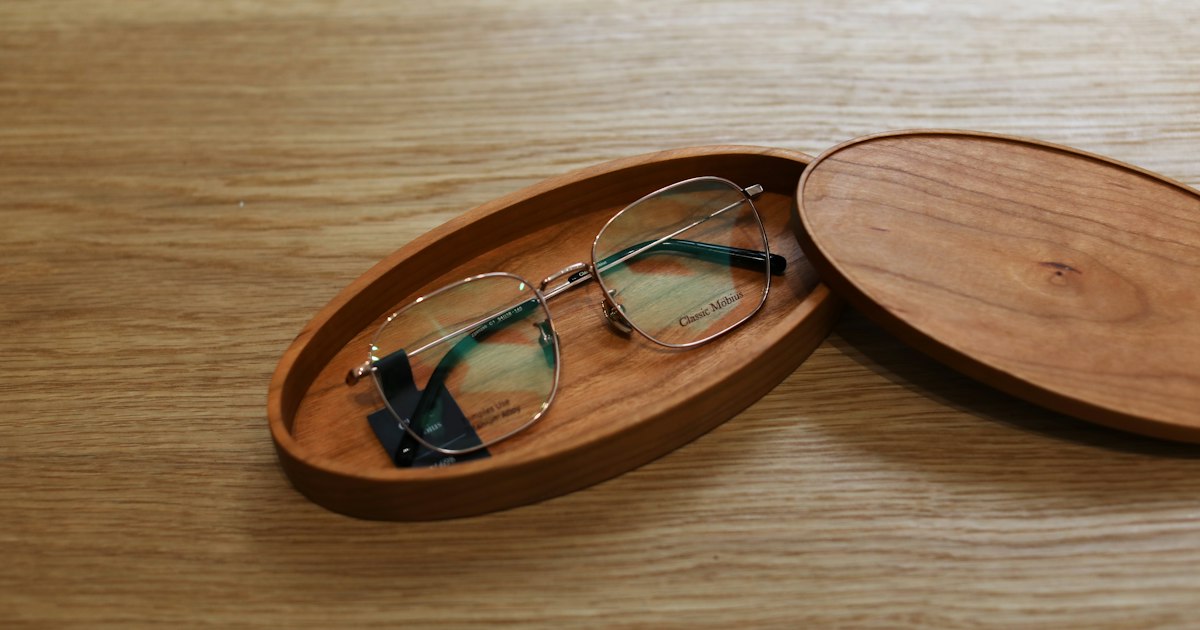
    If you’ve ever paid $300 for a pair of prescription glasses back home, Japan’s budget eyewear chains will feel like a glitch in the system. Jins and Zoff are the two biggest names in Japanese “fast fashion” eyewear — full prescription glasses, frame and lenses included, often ready the same day for less than the cost of a hotel dinner. They’re a favorite stop for travelers who broke their glasses mid-trip, forgot their spare pair, or just want a cheap, well-made pair of Japanese frames as a souvenir. Here’s how the two brands differ, what things cost, and how to buy a pair without wasting a day of your trip.

    Jins vs. Zoff: what’s the difference?

    Both brands were founded in Japan in the early 2000s and built their business on the same idea: cut out the middleman between manufacturing and retail, so a full pair of glasses — frame, lenses, fitting — costs a fraction of what an optician charges. In practice, they feel very similar in-store, but there are a few differences worth knowing:

    • Jins leans slightly more tech-forward. It popularized “Jins Screen” blue-light-cutting lenses and has an in-app vision test in some stores. Frame styling tends toward clean, minimal, unisex shapes, and Jins has a larger presence outside Japan (including the US and China), so you may already know the brand.
    • Zoff (run by a company called Intermestic) tends to skew a bit more fashion-forward, with frequent designer collaborations (Ne-Net, Kenzo, and various anime/character tie-ins have appeared over the years) and a slightly younger, trend-driven catalog under lines like “Zoff Smart.”
    • Pricing and turnaround time are nearly identical between the two, so in practice most people just buy from whichever store is closer.

    How much do glasses actually cost?

    This is the main draw. Entry-level frames with single-vision prescription lenses typically run from about ¥5,000 to ¥9,000 (roughly $35–$60) at both chains, tax included, lenses included — no extra “lens upgrade” fee for standard thin lenses the way you’d often see at Western opticians. Mid-range and designer-collaboration frames run ¥10,000–¥18,000. Add-ons like blue-light coating, photochromic (sunglasses-that-darken) lenses, or high-index thin lenses for strong prescriptions add roughly ¥3,000–¥8,000 on top. Sunglasses with prescription lenses and premium acetate frames — the “splurge” end for both brands — can reach ¥20,000–¥25,000, which is still well below what you’d pay for a comparable pair from a Western designer brand. Non-prescription reading glasses and sunglasses start even lower, often under ¥5,000.

    Getting a prescription made on the spot

    You don’t need to bring a prescription from home. Both chains have a free in-store eye exam using an autorefractor (the machine you look into while it clicks through focus) plus a quick manual check with a staff member. The whole exam takes about 10–15 minutes and requires no appointment at most locations — just take a numbered ticket at the counter. If you already wear glasses or contacts, bringing your current prescription or old glasses speeds things up but isn’t required.

    Turnaround is the other big selling point: standard single-vision lenses are usually ground and fitted in-store within 30–60 minutes, and many people finish the whole process — exam, frame selection, and pickup — in under an hour. Stronger or more complex prescriptions (high astigmatism, bifocals, very high index lenses) may need to be sent to a lab, which can take a few days to a week; ask at the counter before you commit if you’re on a tight itinerary.

    Where to buy: best store types for travelers

    Jins and Zoff stores are everywhere in Japan — easily 400+ locations each — which makes them genuinely convenient rather than a special pilgrimage. A few store types are especially useful for visitors:

    • Train station branches: Both chains have shops inside or right next to major JR and subway stations (Shinjuku, Tokyo, Shibuya, Ikebukuro, Umeda, Nagoya Station), which is ideal if you need a quick fix between train connections. Staff are used to fast, no-frills transactions here.
    • Department store and mall locations: Roomier stores with a bigger frame selection and slightly more patient staff — good if you want to actually browse. You’ll find these in most major malls and department store fashion floors.
    • Shopping arcades and discount streets: If you’re already exploring Japan’s bargain shopping districts, it’s worth checking whether a Jins or Zoff branch is nearby — areas like Ameyoko Market in Ueno, Osu Shopping Arcade in Nagoya, or Sugamo in Tokyo often have a branch on or near the main street, so you can knock out eyewear shopping alongside other errands.

    Most stores keep standard Japanese retail hours, roughly 10:00 or 11:00 AM to 8:00 or 9:00 PM, seven days a week, with no lunch closure — but hours vary by location (mall stores follow the mall’s hours), so check the specific branch on the Jins or Zoff website before heading out, especially on public holidays.

    Tax-free shopping and practical tips

    Both chains participate in Japan’s tax-free program for foreign tourists: spend over ¥5,500 (before tax) in a single transaction at a store with a “Tax-Free” sign, show your passport at checkout, and the 10% consumption tax is deducted on the spot — no separate refund counter needed, unlike the old system. Since most complete pairs of glasses clear that threshold easily, bring your passport.

    A few common mistakes to avoid:

    • Assuming every branch does same-day lenses. Smaller shops in train stations sometimes have limited on-site grinding equipment for complex prescriptions. If timing matters, ask before you pay, or call ahead if your Japanese/English allows.
    • Skipping the fitting adjustment. Staff will heat and bend the frame to fit your face for free — it only takes a minute and makes a real difference in comfort, especially with plastic frames.
    • Not checking your prescription’s expiry. If you’re bringing a prescription from home, some staff will ask when it was issued; very old prescriptions (2+ years) may prompt them to recommend the free in-store exam instead.
    • Buying non-prescription “fashion” frames by mistake. Display models are sometimes just frames — confirm with staff that lenses are being fitted, particularly if you’re communicating across a language gap.

    Best time to go

    Weekday mornings right after opening are the quietest time at both chains, especially in city-center branches that get crowded with local shoppers after work and on weekends. If you’re traveling in peak tourist seasons (spring cherry blossom weeks or the New Year and Golden Week holidays), expect longer waits, both for the fitting queue and for staff availability to help in English — some larger flagship stores in Tokyo and Osaka have English-speaking staff or translation tools, but it’s not guaranteed everywhere.

    For most travelers, Jins and Zoff aren’t a dedicated shopping destination so much as a genuinely handy safety net — and a nice souvenir if you spot a frame you like. Between the low prices, no-appointment eye exams, and same-day pickup, replacing a broken pair of glasses in Japan can end up being easier than it would be at home.

  • Japan’s Winter Illuminations: Best Light Festivals and Where to See Them

    Japan’s Winter Illuminations: Best Light Festivals and Where to See Them

    Photo by Dominic Kurniawan Suryaputra on Unsplash

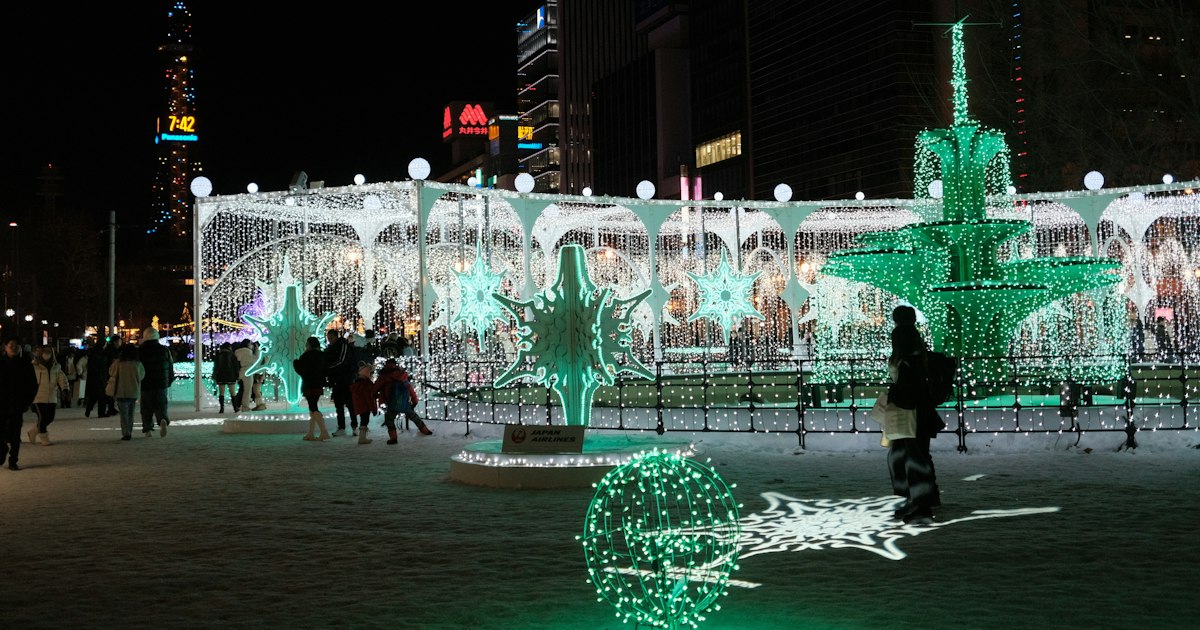
    From early November through February, Japan turns its parks, train stations, and mountain resorts into glowing LED wonderlands. Winter illuminations (irumineshon) are one of the country’s most photogenic seasonal traditions, and unlike cherry blossoms or autumn leaves, they’re predictable — no weather gamble, no guessing when peak timing will hit. Here’s where to see the best of them, what they actually cost, and how to avoid the crowds that catch most first-time visitors off guard.

    Kobe Luminarie: the original and still one of the best

    Kobe Luminarie started in 1995 as a memorial to victims of the Great Hanshin Earthquake, and it remains one of Japan’s most striking displays — thousands of ornate metal-framed arches strung with LED bulbs along a corridor near Higashi Yuenchi Park and the Old Foreign Settlement. It typically runs for about ten days in early December (check the current year’s dates, since they shift slightly), lit nightly from around 6pm to 9:30pm. Entry is free. The nearest stations are JR Motomachi or Kobe Sanomiya, both a 5-10 minute walk. Go on a weeknight if you can — weekend crowds funnel through the narrow arch corridor in one direction only, and it can take 30-45 minutes just to shuffle through.

    Nabana no Sato: Japan’s biggest illumination by scale

    In Kuwana, Mie Prefecture (accessible from Nagoya), Nabana no Sato is a flower park that transforms into an enormous illumination garden from mid-October through early May — one of the longest seasonal runs in the country. The signature feature is a tunnel of LED “wisteria” light trees and a massive light-up lake reflection that’s become one of the most Instagrammed scenes in the country. Admission runs around 2,300 yen for adults during illumination season (it’s seasonal, so check current pricing), and hours are typically 9am to around 9pm with lights on from sunset. From Nagoya, take the Kintetsu line to Kuwana Station, then a shuttle bus (about 20 minutes) to the park entrance — the shuttle runs frequently but queues form fast on weekends, so arrive by mid-afternoon if you want a seat and daylight time to walk the flower gardens before dark.

    Tokyo’s illumination circuit: Marunouchi, Roppongi, and Shiodome

    Tokyo doesn’t have one single mega-illumination — instead it has a scattered circuit you can hit in one evening. Marunouchi Naka-dori (near Tokyo Station) strings its keyaki trees with warm white lights from mid-November through Valentine’s Day, free and unticketed, lit from around 5pm to midnight. Roppongi Hills does a blue-toned “Roppongi Hills Christmas” with a giant tree display, also free. Shiodome’s Caretta illumination is smaller but has a good soundtracked show every 15-20 minutes. None of these require tickets or reservations, and they’re all within a 20-minute train ride of each other on the Yamanote/Oedo lines — a practical option if you’re short on time and don’t want to leave the city. If your Tokyo trip also has you exploring old shopping streets, pair an evening illumination walk with a daytime visit to Sugamo’s old-fashioned shopping street or the bargain stalls at Ameyoko Market.

    Sapporo White Illumination and the Snow Festival lead-in

    In Hokkaido, Sapporo’s White Illumination runs Odori Park from late November through around Christmas, free to walk through, lit from around 4pm (it gets dark early up north) to 10pm. It’s a good warm-up if you’re timing a trip toward the Sapporo Snow Festival in February — the two don’t overlap, so pick one based on your travel window. Dress far warmer than you think you need to; Sapporo winter evenings regularly sit below freezing, and standing still for photos gets cold fast. If Hokkaido’s onsen towns are also on your list, this region pairs naturally with a detour to see the snow monkeys at Jigokudani Monkey Park, though note that’s in Nagano, not Hokkaido — worth factoring into your route if you’re combining both.

    Regional standouts worth a detour

    • Ashikaga Flower Park (Tochigi) — roughly 90 minutes from Tokyo by train, this park’s illumination centers on light-wrapped wisteria trellises and is widely ranked among Japan’s top three illuminations. Tickets are around 1,800-1,900 yen for adults during peak illumination dates (late October through early February), with reduced pricing on off-peak weeknights. Hours run to around 8:30pm.
    • Huis Ten Bosch (Nagasaki) — a Dutch-themed park that stages one of the country’s largest illuminations, with over 13 million bulbs across the grounds. Full-day passes run roughly 6,900-7,500 yen for adults, which sounds steep until you realize it includes daytime access to the park’s attractions too. If you’re already in Nagasaki, it’s an easy add-on to a day spent trying castella sponge cake around the city.
    • Karuizawa’s winter illumination — if you’re doing a mountain-resort getaway from Tokyo, Karuizawa runs a more low-key, atmospheric illumination through its outlet mall and shopping streets, a nice contrast to the mega-parks. See our guide to Karuizawa as a mountain resort getaway for the full trip-planning picture.

    Common mistakes and how to budget your evening

    The single biggest mistake visitors make is arriving right at lighting time — that’s when everyone else arrives too. Get to major illuminations 30-45 minutes before lights-on if you want clear photos and a comfortable walking pace; the crowds thin out noticeably about an hour after sunset once the initial rush passes through. Second mistake: underestimating how cold standing still for photos gets, even in relatively mild regions like Kobe or Nagoya — bring more layers than you’d wear for daytime sightseeing. Third: not checking whether an illumination requires a separate ticket from general park admission (Nabana no Sato and Huis Ten Bosch both fold it into one price, but some venues charge extra for evening entry after a daytime closure).

    For budget planning: free options (Kobe Luminarie, Tokyo’s Marunouchi and Roppongi Hills, Sapporo White Illumination) let you build a multi-stop evening for the cost of train fare alone. Mid-range options like Ashikaga Flower Park run under 2,000 yen and are easy day trips from Tokyo. For a splurge that turns into a full day out, Huis Ten Bosch or Nabana no Sato justify their higher ticket prices with daytime attractions plus the light show. If you’re traveling between illumination cities by Shinkansen with winter coats and gear in tow, it’s worth knowing the oversized luggage rules and reservation requirements before you book seats, since bulky winter luggage can trigger the oversized-baggage reservation fee.

    When to go

    Peak illumination season runs from late November through late December, driven by Christmas timing even though Christmas isn’t a major Japanese holiday — it’s treated more as a romantic/seasonal event than a family one. Many illuminations extend into January and February, which is actually the better window for avoiding crowds, since the pre-Christmas rush dies down but the lights stay up. If your trip lands in early November, Nabana no Sato is one of the few major illuminations already running, since its season starts earliest.

  • Japanese Whetstones (Toishi): How to Sharpen Knives the Traditional Way

    Japanese Whetstones (Toishi): How to Sharpen Knives the Traditional Way

    Photo by Emma Ou on Unsplash

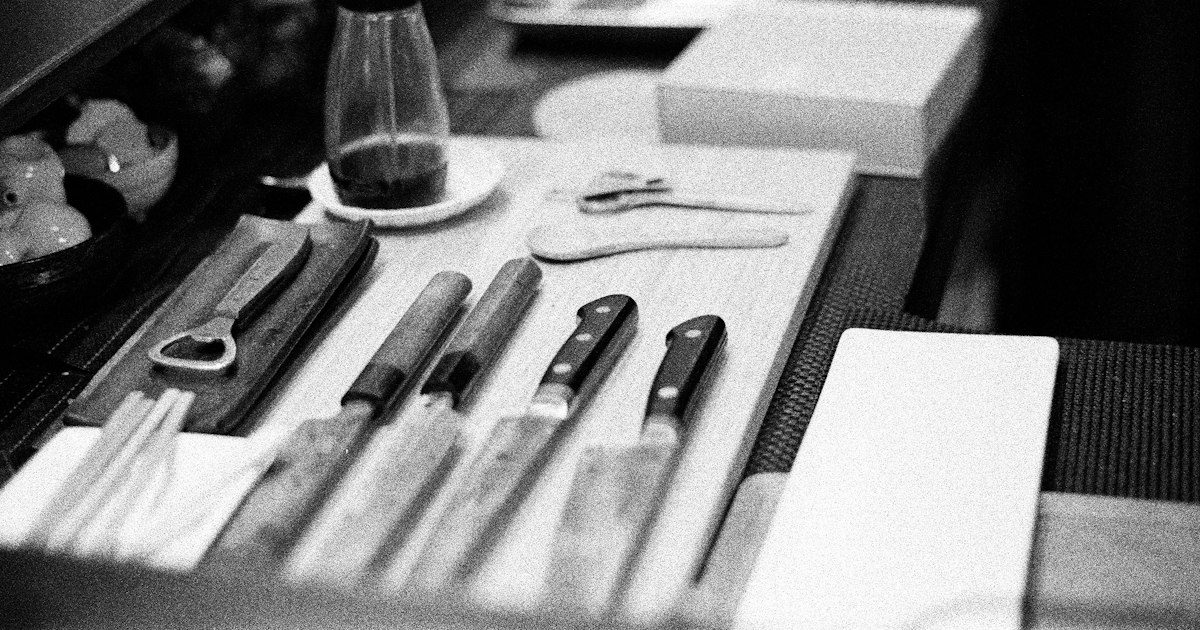
    A good Japanese kitchen knife deserves a good edge, and nothing puts one on it like a traditional whetstone, or toishi. Unlike a pull-through sharpener, a whetstone doesn’t strip away metal indiscriminately — it lets you control angle, pressure, and finish, which is exactly why Japanese chefs have sharpened this way for centuries. If you’re bringing home a nice knife from a shop like Aritsugu in Kyoto or one of the specialty stores in Tokyo, learning to use a whetstone is what actually keeps that purchase worthwhile for years instead of months.

    What Is a Toishi, and Why It’s Different

    A toishi is a flat sharpening stone used with water rather than oil. Traditional Japanese stones come in two broad categories: natural stones (tennen toishi), quarried mostly from a handful of mountains near Kyoto and prized for centuries by carpenters and chefs alike, and synthetic stones made from bonded abrasive particles, which is what most home cooks actually use today. Natural stones are graded loosely by quarry name (Narutaki, Ozuku, Nakayama) and can be extraordinarily expensive; synthetic stones are graded by grit number, which is the more useful system for anyone starting out.

    Japanese stones are typically water stones — you soak or splash them before use — as opposed to the oil stones common in Western sharpening traditions. Water stones cut faster and are far less messy, but they wear down (dish) more quickly, which is something to plan for.

    Understanding Grit Numbers

    Grit is the single most important number on the box. As a rough guide:

    • #220–#600 (coarse): for repairing chips or reshaping a badly worn edge. Most home cooks never need this.
    • #1000–#2000 (medium): the everyday sharpening stone. If you only buy one, buy a #1000.
    • #3000–#6000 (fine): refines the edge after the medium stone, adds noticeable sharpness.
    • #8000 and up (finishing/polishing): a mirror polish that also improves food release, popular for sashimi knives but not essential for general use.

    Many beginners buy a combination stone with two grits fused back-to-back (commonly #1000/#6000) — a sensible, space-saving way to cover both medium sharpening and a finishing pass.

    Where to Buy Whetstones in Japan

    Tokyo’s Kappabashi district in Asakusa (nearest station: Tawaramachi on the Ginza Line) is the country’s best-known kitchenware street, lined with knife and stone specialists; note that a number of shops close on Sundays or keep irregular holiday hours, so a weekday visit is safer. In Kyoto, Nishiki Market is home to Aritsugu, a knife shop with roots going back to the 16th century that also stocks whetstones and offers in-store sharpening. Nihonbashi-based Kiya, founded in 1792, is another long-established option with a Ginza branch as well. Department stores in Tokyo and Osaka (Isetan, Takashimaya) also carry mid-range stones from major brands in their kitchenware floors, which is convenient if you’d rather not hunt down a specialty shop. If you enjoy browsing traditional craft and market goods generally, it’s worth pairing a whetstone hunt with a stop at somewhere like the Toji Temple flea market in Kyoto, where old tools — including vintage natural stones — occasionally turn up among the antiques.

    Budget, Mid-Range, and Splurge Options

    Budget (¥2,000–¥4,500): A King brand combination stone (#1000/#6000) is the standard beginner recommendation — widely available, forgiving, and genuinely good enough for most home kitchens.

    Mid-range (¥5,000–¥15,000): Naniwa and Suehiro stones offer better consistency and faster cutting. Shapton’s glass-backed stones are popular with serious home cooks because they’re “splash-and-go” — a quick rinse instead of a long soak — and hold their flatness well.

    Splurge (¥20,000–well into six figures): Natural Kyoto finishing stones, sold by quarry and grade, are collected the way some people collect watches. A quality natural finishing stone easily runs ¥30,000–¥100,000, and rare pieces go much higher. These are polishing stones used after a synthetic set, not a practical starting point, but seeing them at a specialty shop is worth it even if you don’t buy one.

    Also worth adding to any purchase: a small nagura rubbing stone (¥1,000–¥2,000) to raise slurry on very fine stones, and a flattening stone (¥2,000–¥3,000) to keep your main stone’s surface true.

    How to Sharpen a Knife: Step by Step

    1. Soak the stone. Submerge ceramic-bonded stones in water until bubbles stop rising (roughly 5–15 minutes). Glass-backed stones like Shapton just need a splash of water — check the packaging.
    2. Set your angle. Most Western-style double-bevel knives (santoku, gyuto) sharpen well at about 15–20 degrees per side. Traditional single-bevel Japanese knives (yanagiba, deba) are sharpened almost flat, closer to 10 degrees, on the bevel side only, with just a light touch on the back to remove the burr.
    3. Sharpen the coarser/medium stone first. Using light, even pressure, push the blade across the stone in smooth strokes, working the full length of the edge, heel to tip. Keep the angle consistent — this matters more than pressure.
    4. Check for a burr. Run a fingertip (carefully) along the opposite edge; a slight roughness means you’ve sharpened enough on that side. Flip and repeat.
    5. Move to the fine/finishing stone and repeat with lighter pressure to refine and polish the edge.
    6. Strop lightly on the stone with near-zero pressure to remove any remaining burr, then rinse and dry both the knife and the stone.

    Common Mistakes to Avoid

    • Skipping grits. Jumping from #1000 straight to #8000 wastes time — the medium stone does the real work of setting the edge.
    • Inconsistent angle. Wobbling the angle mid-stroke is the single biggest reason home sharpening disappoints; many beginners use an inexpensive angle guide clip until muscle memory kicks in.
    • Ignoring the stone’s flatness. Stones dish in the center with use. An unflattened stone will round your edge instead of sharpening it evenly — flatten every few sessions.
    • Using a Western angle on a single-bevel knife (or vice versa). Sharpening a deba or yanagiba like a Western knife ruins its geometry; ask the shop which type you have if you’re unsure.
    • Not drying stone and blade afterward. Left wet, carbon-steel knives rust quickly and stones can develop mildew or crack in freezing weather.

    Bringing Your Whetstone Home

    A whetstone itself isn’t a restricted item and travels fine in carry-on luggage — it’s just a dense rock. If you’re also buying a knife, that has to go in checked baggage, and both items together can add noticeable weight, so factor that into your packing. If you’re traveling onward by bullet train with a full haul of kitchenware, it’s worth checking the Shinkansen oversized luggage rules before you buy more than you can comfortably carry. And if whetstones get you interested in Japanese kitchen gear more broadly, our Japanese rice cooker buying guide covers the other major kitchen souvenir worth researching before you shop.

    There’s no substitute for trying a stone by hand — the feel of a slurry building under a blade is part of why this method has survived so long. Budget an hour at a Kappabashi or Nishiki Market shop, ask questions, and you’ll leave with both a stone and enough technique to actually use it once you’re home.

  • Gokayama: Toyama’s Quieter Gassho-Zukuri Village Near Shirakawa-go

    Gokayama: Toyama’s Quieter Gassho-Zukuri Village Near Shirakawa-go

    Photo by あま あわれ on Unsplash

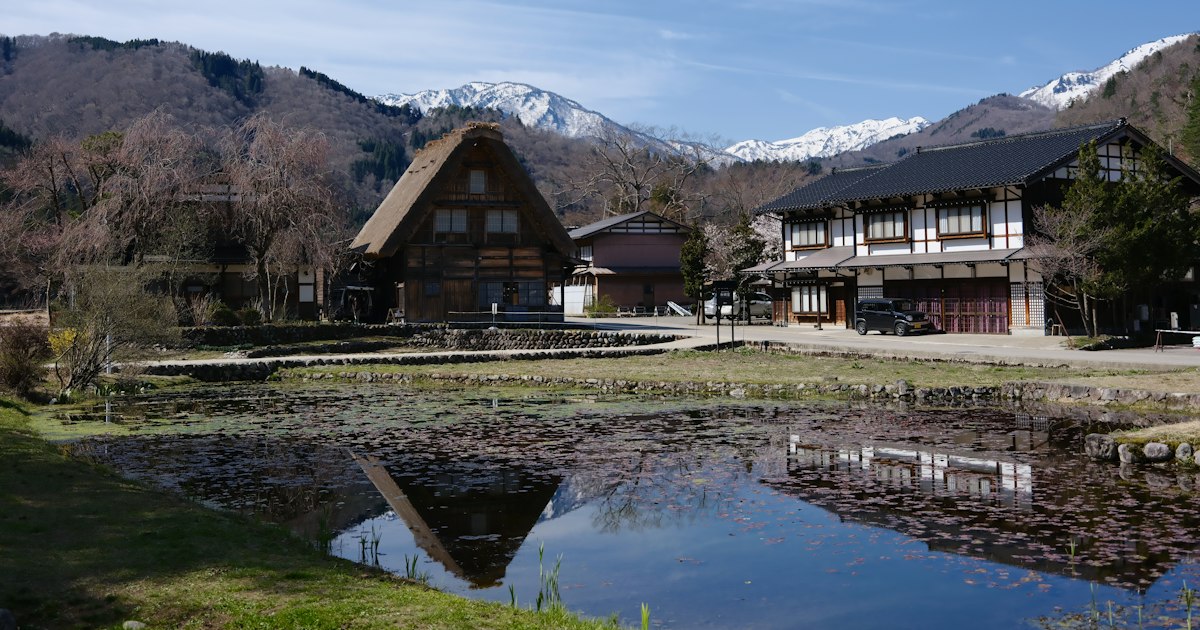
    Everyone who plans a trip to the Japan Alps ends up looking at photos of Shirakawa-go’s steep, thatched-roof farmhouses. Fewer people realize that the same UNESCO World Heritage listing covers two more villages just up the road in Toyama Prefecture — Ainokura and Suganuma, together known as Gokayama. They have the same gassho-zukuri architecture, the same folk history, and a fraction of the tour buses. If you want the postcard scene without shuffling through crowds for a parking spot, this is where to go.

    Why Gokayama Instead of (or in Addition to) Shirakawa-go

    Shirakawa-go’s main village, Ogimachi, has around 114 gassho-zukuri houses and gets well over a million visitors a year. Gokayama’s two villages together have roughly 30 houses — about 20 in Ainokura and 9 in Suganuma — and see a small fraction of that traffic. The architecture and history are the same: steep 60-degree thatched roofs designed to shed heavy snow, built without nails, in a region so isolated that its feudal-era economy ran on silk farming and gunpowder production made from silkworm droppings fermented under the floorboards. What Gokayama lacks in scale it makes up for in quiet — you can walk the lanes at dusk without dodging selfie sticks, and several houses still function as private homes, not museum exhibits.

    Ainokura vs. Suganuma: Which to Visit

    If you only have time for one, choose based on what you want:

    • Ainokura is the larger of the two, set on a hillside with a viewpoint above the village — the classic wide shot. It has more houses open to visitors, a folklore museum (around ¥300 entry), a few craft shops, and a couple of minshuku (guesthouses) for overnight stays.
    • Suganuma is smaller and sits right on the Sho River, framed by mountains on both sides. It’s the more photogenic, compact option for a quick stop — you can see the whole village in 30-45 minutes. It also has the Gokayama Folklore Museum and the Gassho-zukuri Gunpowder Museum (Enshou-no-Yakata), each around ¥300, or a combined ticket for both for around ¥500.

    If you have a car and time for both, they’re only about 9 km apart along Route 156, roughly a 15-minute drive.

    How to Get There

    Gokayama is genuinely rural, and this is the part first-time visitors underestimate. Without a car, your main option is the Kaetsunou “World Heritage Bus,” which runs between Takaoka Station (reachable via the Hokuriku Shinkansen from Kanazawa or Toyama) and Shirakawa-go, stopping at both Suganuma and Ainokura-guchi along the way. There are only around five to six buses a day in each direction, so check the timetable before you build your itinerary — missing the last bus back means an expensive taxi or an unplanned overnight stay. From Shirakawa-go, the ride to Ainokura takes about 25-30 minutes and costs roughly ¥800 one way; from Takaoka Station, budget closer to 75-90 minutes.

    Driving is far more flexible and lets you combine both villages in one day. Parking at Ainokura’s observation-deck lot and at Suganuma’s roadside station both run around ¥500 per car for the day, since cars aren’t allowed to park inside the villages themselves. If you’re routing through on the Shinkansen with luggage, it’s worth checking our guide to Shinkansen oversized luggage rules before you book seats, since you’ll want your bags accessible for the bus transfer at Takaoka or Shin-Takaoka.

    What to Do Once You’re There

    Walking the villages themselves is free, and that’s most of the experience — narrow lanes between farmhouses, rice paddies, and mountains close on every side. A few things worth building in extra time for:

    • Enter a house. Several gassho-zukuri buildings in both villages are open as small museums (around ¥300 each) showing the multi-story attic space once used for silkworm cultivation, plus the irori hearth that keeps the wooden beams smoke-cured and pest-resistant.
    • Try washi paper-making. Gokayama Washi no Sato, near the villages in Kamitaira, is a working paper mill where you can make your own sheet of traditional washi — a postcard-sized piece runs around ¥800-1,000 and takes about 20-30 minutes. It’s a nice hands-on craft stop, similar in spirit to visiting a pottery town like Shigaraki for ceramics — a living craft rather than a shop shelf.
    • Eat Gokayama tofu. The region’s tofu is famously dense and firm — locally there’s a saying that you can tie it with rope and carry it home. It shows up grilled, in hot pot, and as a souvenir at roadside shops.

    Best Time to Visit

    Late April into May brings fresh green against the thatched roofs and is comfortable for walking. Late October to early November has strong autumn color in the surrounding mountains. Winter (December-February) is when Gokayama looks most like the postcards, with snow piled on the steep roofs — and unlike Shirakawa-go’s tightly ticketed winter illumination nights, Gokayama runs its own light-up events on select Saturdays in January, usually with far less advance-booking pressure. Parking is still limited on those nights, so arrive early and dress for genuinely cold, snowy conditions; regional roads can be icy, so budget extra time if you’re driving.

    Where to Eat and Stay

    Neither village has much beyond a handful of small restaurants and shops, so don’t plan on convenience-store backup — bring cash, since card acceptance is inconsistent in both villages. For lunch, look for simple soba or tofu-based set meals at the small eateries near the parking areas. For a genuinely memorable night, a handful of the gassho-zukuri houses in Ainokura operate as minshuku, where you sleep in the loft-style rooms and eat dinner around the irori hearth — river fish, mountain vegetables, and local tofu. Expect to pay roughly ¥10,000-15,000 per person with two meals, and book well ahead, since there are only a few rooms in the whole village.

    Common Mistakes to Avoid

    • Assuming Gokayama is a quick add-on to Shirakawa-go. The bus schedule is thin enough that a rushed same-day visit to all three villages (Ogimachi, Ainokura, Suganuma) is tight without a car — check timetables before committing.
    • Skipping Suganuma because it’s “smaller.” Its riverside setting is arguably more photogenic than Ainokura, and it takes under an hour to see properly.
    • Walking into private homes. Many gassho-zukuri buildings are still lived in. Only enter ones clearly marked as open to visitors.
    • Not carrying cash. Card and IC-card acceptance is unreliable at rural shops and eateries here.

    Gokayama rewards the extra travel time with exactly what Shirakawa-go’s fame has made harder to find: a working mountain village you can actually stand still in. If you’re already chasing quiet, slow-paced corners of Japan the way you might at a mountain retreat like Karuizawa, or seeking out rural wildlife scenes like Jigokudani’s snow monkeys, Gokayama fits the same itinerary logic — a deliberate detour that pays off.

  • Onsen Tamago: Japan’s Hot-Spring-Cooked Eggs and Where to Try Them

    Onsen Tamago: Japan’s Hot-Spring-Cooked Eggs and Where to Try Them

    Photo by Ophemia on Unsplash

    If you’ve wandered through a hot spring town in Japan and smelled sulfur mixed with the scent of boiling water, you’ve probably also seen little stalls selling eggs with an oddly silky texture — white barely set, yolk warm and custardy. That’s onsen tamago, literally “hot spring egg,” and it’s one of the most satisfying 100-yen snacks in the country. Here’s what it actually is, the science behind the texture, and where to eat the best versions from Hakone to Kyushu.

    What Is Onsen Tamago, Exactly?

    Onsen tamago is not the same as the soft-boiled egg (hanjuku tamago) you get marinated in soy sauce atop a bowl of ramen. It’s cooked whole, in the shell, at a low and steady temperature — traditionally in natural hot spring water, now often replicated with sous-vide-style equipment. Egg whites and yolks set at different temperatures: yolk protein firms up around 65–70°C, while white needs closer to 80°C to fully solidify. Onsen tamago is held at roughly 65–68°C for 30–40 minutes, so the yolk turns gently custardy while the white stays translucent and barely-set, almost like a thin pudding. You eat it straight from the shell with a splash of soy sauce or a dashi-based sauce, or crack it over rice.

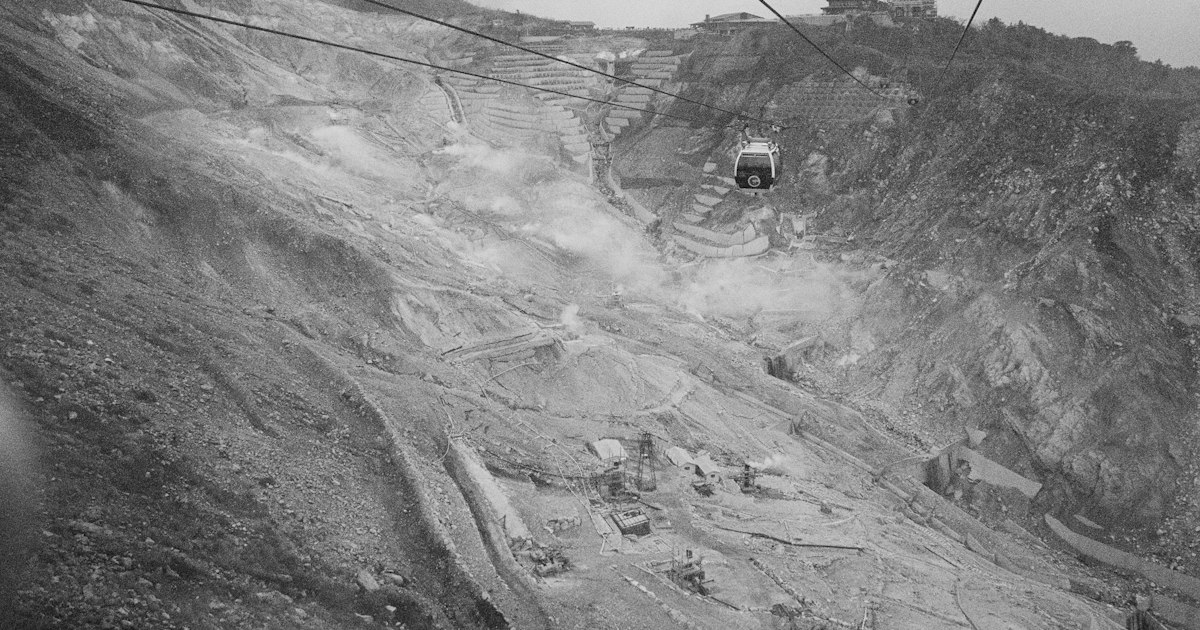
    Hakone’s Black Eggs at Owakudani

    The most famous onsen egg in Japan isn’t even beige — it’s black. At Owakudani, the volcanic valley above Hakone, eggs are boiled in the naturally sulfuric hot spring water and steam vents, which coats the shells with iron sulfide and turns them jet black. Local legend says eating one adds seven years to your life. You’ll find them sold in bags of five for about ¥500 at the Kuro-tamago-kan shop right by the ropeway station, open daily roughly 9:00–16:00 (hours shift seasonally and Owakudani occasionally closes for volcanic gas monitoring, so check current status before you go).

    To get there, take the Hakone Tozan Cable Car from Gora to Sounzan, then the Hakone Ropeway to Owakudani Station. The views over Mt. Fuji on a clear day are as much the draw as the eggs. Best timing is a morning visit before the ropeway gets crowded with tour groups, and autumn (October–November) or clear winter mornings give the best Fuji visibility. If you’re doing Hakone as a day trip from Tokyo with luggage in tow, it’s worth reading up on coin lockers in Japan so you can stash bags at Odawara or Hakone-Yumoto Station rather than hauling them up the ropeway.

    Kusatsu and Nozawa Onsen: Cook Your Own

    Several classic onsen towns let you boil your own eggs in designated cooking pools — never in the actual bathing water, which is both rude and unsanitary. In Kusatsu Onsen (Gunma Prefecture), shops around the iconic Yubatake hot spring field sell raw eggs in mesh bags for about ¥100–150; you lower them into a public tamago-yu (egg-boiling pool) for around 12–13 minutes and they come out perfectly done. In Nozawa Onsen (Nagano), the historic Ogama boiling spring near the village center serves the same purpose — it’s one of the town’s 13 free public bathhouses, and locals have used the adjacent boiling pool for cooking vegetables and eggs for generations. Both towns are best visited in winter, when steam rising off the springs against snowbanks is genuinely beautiful, though they’re pleasant year-round.

    Beppu’s Hell-Cooked Eggs

    Beppu, in Oita Prefecture on Kyushu, produces more hot spring water than anywhere else in Japan and channels the theatrics into its “Jigoku Meguri” (Hell Tour) — eight dramatically colored, boiling hot spring sites you visit sightseeing-style rather than bathing in. At Umi Jigoku (“Sea Hell”), a cobalt-blue pond that reaches around 98°C, eggs are steamed in cages over the vents and sold on-site for roughly ¥200–300 for a set of two or three. The Hell Tour circuit costs about ¥2,000 for a combined ticket covering all seven paid hells and takes half a day; individual hells run ¥400–500 each. Beppu Station connects to central Kyushu by JR, and local buses loop between the hells.

    Onsen Tamago Near Nagano’s Snow Monkeys

    If you’re heading to the Yudanaka-Shibu Onsen area to see the famous bathing macaques, budget time for the eggs too — this stretch of Nagano is dense with old-school onsen towns and several sell tamago cooked in spring water right along the main streets, typically ¥100–200 each from small vending stalls or ryokan gift shops. The monkeys themselves are the headline act here; see our guide to Jigokudani Monkey Park for access and timing, since the park is a 30-minute walk from the nearest bus stop and gets busiest between 11:00 and 14:00. Nearby Karuizawa, a longtime mountain retreat covered in our Karuizawa guide, also has onsen facilities if you want to combine a soak with the shopping and hiking the town is known for. And if you enjoy hands-on food experiences like cooking your own onsen egg, Nagano’s neighboring regions also offer nagashi somen, another interactive dish worth seeking out in summer.

    Budget, Mid-Range, and Splurge Options

    • Budget: Convenience store onsen tamago (Lawson and 7-Eleven both stock them in the refrigerated section) costs about ¥98–128 and is genuinely decent — a fine way to try the texture before committing to a trip.
    • Mid-range: Eating them fresh at an onsen town — Hakone’s black eggs, Kusatsu’s self-boiled eggs, Beppu’s hell-steamed eggs — runs ¥100–500 depending on location and quantity, plus whatever sightseeing fees apply (ropeway, hell tour tickets).
    • Splurge: Many ryokan serve onsen tamago as part of a kaiseki breakfast, sometimes dressed up with uni, wagyu, or truffle soy sauce. A ryokan stay with two meals included typically runs ¥25,000–60,000+ per person per night, but the tamago course itself is usually just one small, memorable bite within it.

    Common Mistakes to Avoid

    • Cooking eggs in bathing water: Only use designated tamago-yu (egg-boiling) pools, never the pools people are soaking in — staff will stop you, and it’s a real etiquette breach.
    • Confusing it with ramen eggs: Hanjuku tamago (the soy-marinated ramen topping) is fully separate — it’s cooked hotter and longer, then marinated, giving a firmer white and a jammier, browner yolk.
    • Assuming every “black egg” is onsen tamago: Hakone’s kuro-tamago is cooked the same low-temperature way, but the black shell comes from sulfur and iron in the water, not from the cooking method itself — regular onsen tamago elsewhere still has a plain, pale shell.
    • Skipping the timing check at Owakudani: The valley periodically closes ropeway access during elevated volcanic gas readings; check current operating status before building a Hakone day around it.

    Onsen tamago is a small thing, but it’s a good lens for understanding Japan’s hot spring culture more broadly — practical, communal, and built around genuinely using the geothermal water rather than just looking at it. Whether you grab one from a convenience store fridge or boil your own at a mountain onsen, it’s worth the five minutes.

  • Dorayaki: Japan’s Red-Bean Pancake Sandwich and Where to Try It

    Dorayaki: Japan’s Red-Bean Pancake Sandwich and Where to Try It

    Photo by Seiya Maeda on Unsplash

    If you’ve ever watched Doraemon devour a small golden disc with obvious joy, you’ve already met dorayaki. This is Japan’s answer to the pancake sandwich: two soft, castella-like cakes pressed around a filling of sweet red bean paste. It’s sold everywhere from convenience stores to century-old specialty shops, and it’s one of the easiest, most satisfying snacks a first-time visitor can try without needing any Japanese. Here’s what it actually is, where to get the good stuff, and how to avoid the rookie mistakes.

    What Is Dorayaki, Exactly?

    Dorayaki consists of two small pancakes — slightly sweet, eggy, and spongy, closer in texture to castella sponge cake than to a Western pancake — sandwiched around a layer of anko (sweet azuki bean paste). The best versions use a smooth koshian or a chunkier tsubuan, and some shops add whipped cream, chestnut, or matcha cream to the filling. The name comes from “dora,” meaning gong, because the round shape and golden color resemble a bronze gong — legend says the dish was invented when a samurai accidentally left his gong behind after being treated to food by a farmer, and pancakes were later cooked on it.

    Texture matters here: a good dorayaki should be moist and slightly chewy, not dry, and the bean paste should be soft enough to bite through cleanly. A mediocre one tastes like a dry muffin with jam. That difference is exactly why it’s worth seeking out a specialty shop rather than only grabbing one from a convenience store shelf.

    A Quick History (and Why Doraemon Loves It)

    Dorayaki as we know it today — two cakes sandwiching anko, rather than a single folded pancake — dates to the early 20th century, popularized by Tokyo confectioners. Usagiya in Ueno, founded in 1913, is widely credited with establishing the modern two-cake style that spread nationwide. The dish’s fame exploded internationally thanks to the robot cat Doraemon, whose favorite food is dorayaki; that connection is still why some shops near Tokyo’s anime and character-goods districts sell Doraemon-branded boxes as souvenirs.

    Where to Try the Best Dorayaki in Tokyo

    Two shops consistently top locals’ lists:

    • Usagiya (うさぎや), Ueno — The shop often credited with perfecting the modern dorayaki. A short walk from Ueno Station (JR Yamanote Line, or Tokyo Metro Ginza/Hibiya lines), it’s tucked just north of the Ameyoko Market shopping street, so it’s easy to combine with a bargain-hunting stop. Typical hours are around 9:00–18:00, closed Wednesdays; a single dorayaki runs roughly ¥250–300. Go early — the handmade batches sell out.
    • Kameju (亀十), Asakusa — A few minutes from Kaminarimon Gate and Nakamise shopping street, this shop draws long lines for its thick, generously filled dorayaki (around ¥300–350 each). It regularly sells out by mid-afternoon, so treat it as a mid-morning stop rather than an after-Senso-ji-temple dessert plan.

    Beyond these two, most traditional wagashi (Japanese sweets) shops in old shopping streets carry their own version. Neighborhoods known for old-school confectionery — like Sugamo’s Jizo-dori shopping street, nicknamed “Grandma’s Harajuku” — are good places to stumble onto a small family-run shop selling fresh dorayaki alongside senbei and mochi, often for less than the famous Ueno and Asakusa names charge.

    Budget, Mid-Range, and Splurge Options

    • Budget (¥120–160): Packaged dorayaki from convenience stores like 7-Eleven, Lawson, and FamilyMart, or from supermarkets. Perfectly decent for a quick snack, softer and sweeter than handmade versions, and available 24 hours.
    • Mid-range (¥250–400): Fresh, handmade dorayaki from specialty shops like Usagiya or Kameju, or from a neighborhood wagashi shop. This is the tier where the texture difference really shows.
    • Splurge (¥500–4,000): Depachika (department store basement food halls) in places like Isetan Shinjuku or Mitsukoshi Nihonbashi sell gift-boxed assortments with premium fillings — Uji matcha cream, candied chestnut, or seasonal fruit — individually wrapped for freshness. A box of six to eight runs roughly ¥1,500–4,000 and makes a genuinely good omiyage (souvenir gift) since the packaging is built for travel.

    Best Time to Go and Common Mistakes

    Dorayaki is a year-round treat, but two seasonal windows are worth knowing: autumn (September–November), when chestnut-filled versions (kuri dorayaki) appear, and spring, when some shops introduce lighter cream or sakura-flavored fillings. Neither is essential to plan a trip around, but it’s a nice bonus if your timing lines up.

    The most common mistake is buying a large batch expecting it to keep — dorayaki has no preservatives and the moist cake dries out and the filling can spoil within a day or two at room temperature, faster in Japan’s humid summer. Buy what you’ll eat that day, and treat anything from a gift box as a same-week item, not a take-home-to-another-country souvenir unless it’s specifically packaged for shelf stability (check the label). The second mistake is showing up to a famous shop like Kameju in the late afternoon expecting stock — popular flavors sell out, and there’s no guarantee of a restock that day.

    Bringing Dorayaki Home as a Souvenir

    If you want to carry dorayaki further afield in Japan — say, from Tokyo to a mountain retreat like Karuizawa — buy same-day and keep it in your bag rather than checked luggage; it doesn’t need refrigeration for short trips but does need to stay out of direct sun and heat. If you’re sightseeing for hours before returning to your hotel, a coin locker is a reasonable way to keep a fragile box from getting crushed in a crowded train, though ideally you’d eat it the same day regardless. For international travel, stick to the shelf-stable, individually wrapped gift boxes sold at depachika counters — ask staff (usually available in English at major department stores) which boxes are made for longer storage, since not all are.

    Whether you grab one from a convenience store shelf on your way to a train or queue up at Usagiya for the real thing, dorayaki is one of the simplest, cheapest ways to taste a piece of Japanese food culture that’s been essentially unchanged for over a century — and, unlike a lot of “famous” tourist food, it’s genuinely good.

  • Castella: Nagasaki’s Portuguese-Influenced Sponge Cake and Where to Buy

    Castella: Nagasaki’s Portuguese-Influenced Sponge Cake and Where to Buy

    Photo by Robin Stickel on Unsplash

    Long before Japan had convenience-store egg sandwiches or 7-Eleven coffee, it had castella — a dense, honey-colored sponge cake that traces back to Portuguese traders in the 1500s. Today it’s one of Nagasaki’s signature souvenirs, sold in tins and wooden boxes at train stations and department stores nationwide, but the best versions are still baked in the city where it all started. Here’s what makes real castella worth seeking out, and where to buy it whether you’re standing in Nagasaki or just passing through Tokyo station.

    A Sponge Cake with a 16th-Century Portuguese Passport

    Castella’s name comes from “pão de Castela,” or “bread of Castile,” a term Portuguese missionaries and merchants used for a simple egg-and-sugar cake they brought with them when Nagasaki opened as a trading port in the late 1500s. For roughly a century, Nagasaki was Japan’s only window to European trade, and Portuguese, and later Dutch, merchants based on the artificial island of Dejima introduced sugar, bread, and baking techniques that barely existed elsewhere in the country at the time.

    Japanese confectioners adapted the original recipe over generations, swapping in local techniques and ingredients until it became something distinct from its European ancestor. The Portuguese version has mostly disappeared even in Portugal, which makes Nagasaki’s castella one of the more interesting cases of a foreign food surviving, and evolving, far from home.

    What Makes Real Castella Different

    Castella is deceptively simple on paper: eggs, sugar, flour, and mizuame (a thick starch syrup). That last ingredient is the Japanese addition that changes everything — mizuame gives the cake its signature moist, slightly chewy crumb, distinguishing it from a Western-style dry sponge cake. Good castella should feel dense and springy, almost like a firm custard cake, not light and airy like a Victoria sponge.

    One detail confuses first-time buyers: the bottom layer of every traditional castella has a thin band of coarse sugar crystals called zarame. This isn’t a flaw or leftover packaging residue — it’s a mark of a traditionally made cake, formed as the sugar settles and partially caramelizes during slow baking. Shops that skip it are usually cutting corners or using a faster industrial process.

    Where Castella Is Made: Nagasaki’s Old Shopping Streets

    Most of Nagasaki’s historic castella makers are clustered near the city center, within walking distance of Nagasaki’s Chinatown and the Hamanomachi arcade, an easy add-on if you’re already sightseeing at Dejima or Glover Garden. Shops are generally open from around 9:00 or 9:30 AM to 6:00 or 7:00 PM daily, with no reservation needed — you can walk in, sample a piece at the counter, and buy a box on the spot.

    There’s no strong seasonal pull to visiting for castella specifically; it’s sold year-round. The one practical note is summer: because fresh castella has no preservatives, shops recommend eating it within about a week to ten days of purchase, and it’s best kept out of direct heat, which matters if you’re carrying a box around Kyushu in August.

    Where to Buy: Budget, Mid-Range, and Splurge Picks

    Budget (roughly ¥700–900): Individually wrapped slices from Bunmeido or similar brands are sold at convenience stores, supermarkets, and airport shops across Japan, not just Nagasaki. These are mass-produced and less refined than the artisan versions, but they’re a perfectly good, cheap way to try castella or grab a quick souvenir without a special trip.

    Mid-range (roughly ¥1,300–2,500 for a standard box): Bunmeido’s main Nagasaki shop and its long-running Bunmeido Kissa café let you sit down for cake and coffee, and their boxed castella is widely regarded as a reliable, well-balanced version. Bunmeido also has branches in Tokyo and other major cities, so if you can’t make it to Nagasaki, you can still buy the real product.

    Splurge (roughly ¥2,000–4,000+ for a premium box): Fukusaya, founded in 1624 and recognizable by its cannonball-and-turtle crest, is widely considered the gold standard, with a noticeably richer, denser crumb and a devoted following. Shooken, dating to 1681, is another old-guard option and is particularly known for its chocolate-marbled castella, a less traditional but popular variation. Both have compact main shops in central Nagasaki plus a handful of department store counters elsewhere in Japan (Fukusaya, for example, has outposts in Tokyo including inside Nihonbashi Mitsukoshi).

    If you’re combining castella-hunting with a broader look at Japan’s regional food rivalries, it’s worth comparing it mentally with how differently the same idea can turn out from region to region — the same spirit of local pride and technique shows up in things like the Osaka vs. Hiroshima okonomiyaki divide.

    Common Mistakes to Avoid

    • Assuming all castella is the same. Convenience-store castella and artisan castella from a 300-year-old shop are genuinely different products in texture and flavor. If you only try the packaged version, you’re missing the point.
    • Cutting off the zarame bottom. Some travelers trim away the sugary base thinking it’s excess residue. It’s meant to be eaten — it’s part of the texture contrast that makes good castella interesting.
    • Buying too early in a long trip. Because fresh castella has a limited shelf life and is best kept cool, it’s smarter to buy it near the end of your trip rather than at the start of a multi-week itinerary.
    • Not checking the box size. Shops sell castella by “go” (号) sizing — a 0.6-go box might suit one or two people as a gift, while a full 1-go log is a substantial cake meant for sharing. Ask staff which size fits your plans; they’re used to the question from tourists.

    Getting to Nagasaki and Bringing Castella Home

    From Fukuoka’s Hakata Station, the trip to Nagasaki takes roughly 1 hour 20 minutes to 1 hour 30 minutes using the limited express “Relay Kamome” to Takeo-Onsen, then transferring to the Nishi Kyushu Shinkansen for the final leg into Nagasaki Station. From Tokyo, flying into Nagasaki Airport takes about 2 hours and is often more practical than the full rail journey. Nagasaki Station itself sits within walking distance or a short tram ride of the historic shopping streets where the main castella shops are based.

    If you’re carrying boxed castella onward by shinkansen, standard box sizes fit fine as regular carry-on luggage, but if you’re already juggling suitcases on the same trip, it’s worth checking the shinkansen’s oversized luggage reservation rules before you travel so a cake box doesn’t become the least of your space problems. And if you want to explore Nagasaki hands-free before your train, most stations and shopping areas have coin lockers — see this guide to coin locker sizes and prices in Japan for planning ahead.

    Kyushu has other food traditions worth folding into the same trip, from Nagasaki’s own champon noodles to nagashi somen, the flowing-noodle experience associated with the island’s rural mountain areas. Castella just happens to be the one you can pack in a box and take home — as long as you eat it within the week.