Japan Trove

Author: JapanTrove Editorial

  • Don Quijote (Donki) Shopping Guide for Tourists

    Don Quijote (Donki) Shopping Guide for Tourists

    Don Quijote — “Donki” to locals — is Japan’s chaotic, wonderful discount megastore, and a must-visit for souvenir shopping. Here’s how to conquer it.

    What is Don Quijote?

    A maze-like discount chain (look for the blue penguin mascot, Donpen) selling everything: snacks, cosmetics, electronics, costumes, luxury bags, and bizarre novelties. Many branches are open late or 24 hours, and the big ones are tax-free.

    What to buy

    • Snacks & candy — Kit Kats, matcha treats, and regional flavors. See our Kit Kat flavors guide.
    • Cosmetics & skincare — Japanese skincare and drugstore buys at good prices.
    • Character goods — Studio Ghibli, Sanrio, Pokémon.
    • Kitchen & gadgets — quirky tools and cheap knives.
    • Only-in-Japan novelties — the top floors are a rabbit hole.

    Save the most: tax-free + coupons

    • Spend 5,000 yen+ and bring your passport for tax-free shopping.
    • Donki often has tourist coupons (online or via their app) you can stack on top of tax-free.
    • Prices vary by branch — the tourist-heavy stores aren’t always cheapest.

    Survival tips

    • The layout is deliberately confusing and the jingle is relentless — embrace the chaos.
    • Go late at night to dodge crowds at central branches.
    • Bring a bag; give yourself more time than you think.

    Donki is one stop — round out your haul with the best gifts from Japan and konbini must-buys.

    Know the floors before you go

    Bigger Donki branches are loosely themed by floor: snacks and drinks near the entrance, cosmetics and health goods a level up, then character goods, homeware, electronics, and the famous top-floor novelties and costumes. If you’re short on time, ask staff to point you to the floor you want rather than spiraling through the maze.

    Best time to go

    Central tourist branches (Shibuya, Shinjuku, Dotonbori) are calmest late at night — many are open 24 hours. Go after dinner to dodge the daytime crush, and keep your passport on you for tax-free checkout.

    What things typically cost

    • Snacks and drinks run JPY 100-500, similar to konbini pricing but with far more variety and occasional bulk discounts on multi-packs.
    • Cosmetics and drugstore items are often 10-20% cheaper than department store prices for the same brands, making Donki a smart stop specifically for stocking up on J-beauty favorites rather than a one-off browse.
    • A full tax-free shopping trip (5,000 yen+) can save a genuine 10% on top of already-discounted prices, and stacking a tourist coupon from the Donki app on top of that pushes savings further still.

    Common mistakes to avoid

    • Assuming every branch has the same prices — tourist-heavy locations in Shibuya or Dotonbori aren’t always the cheapest; a branch in a less touristy neighborhood can have lower prices on the same items if you have time to compare.
    • Skipping the app coupon before checkout — the Donki tourist coupon is typically shown at checkout and easy to miss if you didn’t download it in advance; grab it before you start shopping, not after you’re already in line.
    • Getting overwhelmed and leaving without your priority items — the maze-like layout genuinely disorients first-time visitors; deciding on 2-3 priority categories before entering keeps a visit focused rather than aimless.

    Donki as a one-stop souvenir solution

    Because it stocks nearly every souvenir category under one roof — snacks, cosmetics, character goods, kitchenware, novelties — a single well-planned Donki visit can realistically complete an entire gift list in one stop, which is part of why it’s such a popular last-day shopping destination before a flight home.

    Late-night shopping etiquette

    Many central branches stay genuinely lively at 1-2am, and shopping late is completely normal there, but keep noise down and be mindful of staff restocking shelves overnight — late hours are for shopper convenience, not an excuse to treat the space differently than you would during the day.
  • Tax-Free Shopping in Japan: How It Works for Tourists

    Tax-Free Shopping in Japan: How It Works for Tourists

    Tourists can shop tax-free in Japan and save the 10% consumption tax — but there are rules, thresholds, and a few gotchas. Here’s how to do it right.

    Who qualifies

    Foreign visitors on a “temporary visitor” status (short-term tourists) can buy tax-free. You’ll need your physical passport at the register — a photo usually isn’t accepted.

    The 5,000 yen rule

    • Minimum spend: 5,000 yen (before tax) at one store, in one day.
    • Two categories: “general goods” (electronics, clothing, bags) and “consumables” (cosmetics, food, drugstore items). Each category counts its own 5,000 yen threshold — but many stores let you combine them.
    • Consumables get sealed in a special bag you shouldn’t open until you leave Japan.

    How it works at the till

    1. Look for a “Tax-Free” sign (common at department stores, drugstores, Don Quijote, and electronics shops).
    2. Some stores deduct the tax on the spot; others refund it at a dedicated tax-free counter after you pay.
    3. Bring your passport; the purchase is recorded digitally to it.

    Good to know

    • Consumables must be unopened and taken out of Japan — don’t crack open that sealed bag early.
    • Customs may check your tax-free purchases when you depart.
    • Not everything is eligible, and some small shops don’t offer it.
    • Tax-free is separate from any store coupons — stack a tourist coupon on top where allowed (e.g. Don Quijote — see our Don Quijote guide).

    Where it pays off most

    Big-ticket electronics, cosmetics hauls, and gift shopping are where the 10% adds up. Planning a serious shopping day? Combine tax-free with our buying-from-Japan guide for items you can’t carry home.

    How much tax-free actually saves

    • The 10% consumption tax refund on a JPY 30,000 shopping day saves JPY 3,000 — add this up across a full trip’s cosmetics, electronics, and gift purchases and it becomes a meaningful chunk of a shopping budget.
    • Some larger stores deduct the tax immediately at checkout, effectively giving you the discounted price on the spot, while others require paying full price and processing the refund at a separate tax-free counter — ask which system a store uses before you check out.
    • Airport tax refund counters exist for purchases made at non-tax-free stores, but the process is slower and requires keeping every receipt; it’s simpler to shop at clearly marked tax-free stores throughout your trip rather than relying on airport processing.

    Common mistakes to avoid

    • Opening sealed consumable bags before leaving Japan — customs can and does check these at departure, and an opened bag can mean losing the tax exemption or facing questions at the gate; wait until you’re through security or even until you land home.
    • Forgetting your passport on a shopping day — without the physical passport in hand at checkout, tax-free processing simply isn’t possible, no exceptions for photos or digital copies.
    • Assuming small independent shops offer tax-free — it’s mainly larger stores and chains; boutique shops and most restaurants don’t participate, so check for the sign rather than assuming.

    Planning a dedicated tax-free shopping day

    If shopping is a real trip priority, consolidating bigger purchases into one or two dedicated days at large tax-free stores (department stores, electronics megastores, Donki) makes the passport-and-receipt process far more efficient than spreading purchases thinly across many small transactions throughout the trip.

    Combining tax-free with other savings

    Tax-free status stacks with sale prices and most store discounts, so timing a purchase during an end-of-season sale on top of the tax exemption can mean substantial total savings — worth checking whether a specific item you want is on sale before assuming the tax-free price alone is the best deal available.

  • Tokyo to Kyoto by Bullet Train: The Complete Guide

    Tokyo to Kyoto by Bullet Train: The Complete Guide

    Some links below are affiliate links. If you book through them, Japan Trove may earn a small commission at no extra cost to you.

    The bullet train from Tokyo to Kyoto is a rite of passage — fast, smooth, and with a chance to spot Mt. Fuji from your seat. Here’s exactly how to do it.

    The basics

    • Time: about 2 hours 15 minutes on the fastest trains.
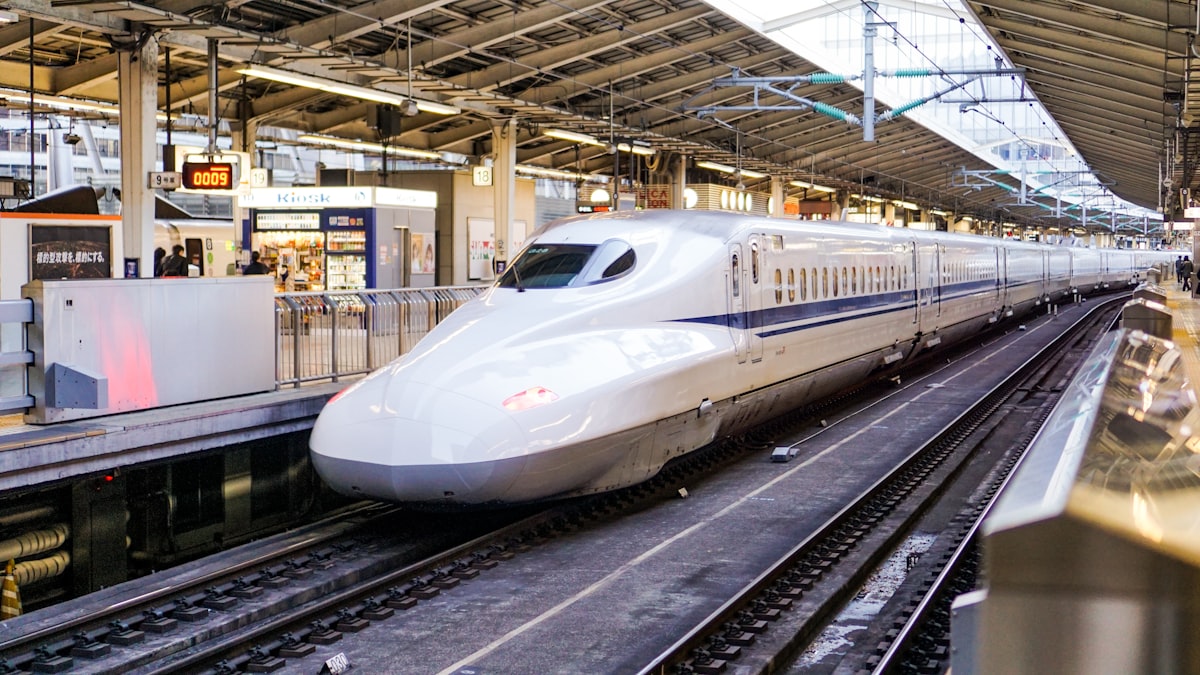
    • Line: the Tokaido Shinkansen, from Tokyo Station (or Shinagawa) to Kyoto Station.
    • Trains: Nozomi (fastest), Hikari (slightly slower, covered by the JR Pass), and Kodama (all-stops).

    Nozomi vs Hikari — which to take

    Nozomi is fastest but not covered by the standard Japan Rail Pass. If you have the pass, take a Hikari (only ~15 minutes slower). Paying cash? Nozomi is fine and runs most frequently.

    Reserved vs non-reserved seats

    • Non-reserved cars are cheaper and fine off-peak — just queue on the platform.
    • Reserved is worth it during holidays and busy seasons like cherry blossom time.
    • Green Car (first class) has roomier seats for a premium.

    Get the Fuji view

    Sit on the right-hand (D/E) side heading from Tokyo to Kyoto for the best Mt. Fuji view, roughly 40–45 minutes in. On clear days it’s spectacular.

    How to buy tickets

    • Ticket machines and JR ticket offices at the station (English available).
    • Reserve online in advance for peace of mind — handy at peak times. Compare rail options and passes on Klook .
    • Have an IC card for the local trains at each end.

    Pro tips

    • Grab an ekiben (station bento) before boarding — a classic shinkansen ritual.
    • Oversized luggage needs a reserved spot; otherwise use luggage forwarding to travel light.
    • Stay connected with an eSIM.

    Arriving in Kyoto? Jump to our Kyoto guide and where to stay.

    What the ride typically costs

    • An unreserved Nozomi seat Tokyo-Kyoto runs about JPY 13,320 one-way; a reserved seat adds a few hundred yen more, and Green Car (first class) runs roughly JPY 18,000-19,000.
    • Booking through official channels or reliable ticket machines avoids markup — there’s no meaningful discount for advance purchase on standard fares the way there might be for flights, so timing your purchase doesn’t change the price much.
    • An ekiben lunch (JPY 900-1,800) and a canned coffee or tea (JPY 130-160) round out a comfortable one-way trip budget without needing to plan a separate meal stop.

    Common mistakes to avoid

    • Boarding a Nozomi with a nationwide JR Pass — this is one of the most common and costly mistakes pass holders make; the standard Japan Rail Pass explicitly excludes Nozomi and Mizuho trains, and staff will require an upgrade payment or redirect you to a Hikari if you board by mistake.
    • Standing in line for a popular non-reserved car during a holiday weekend — non-reserved cars can fill to standing room during Golden Week, Obon, or New Year; reserving a seat in advance for these dates is worth the small extra step.
    • Missing the Fuji viewing window because you’re absorbed in a phone or laptop — the mountain is visible for only a few minutes around the 40-45 minute mark from Tokyo; a phone reminder timed to departure helps you look up at the right moment.

    What to do if it’s cloudy

    Since Fuji is often obscured, don’t build your whole trip’s excitement around the shinkansen sighting alone — treat it as a nice bonus on top of a dedicated Fuji-area stop like Kawaguchiko or Hakone, where you have more time and multiple chances across a stay to catch a clear view.

    Making a short stopover along the way

    The Tokaido Shinkansen passes through Nagoya, making it easy to break the Tokyo-Kyoto journey with a half-day stop if you have the time and a flexible ticket — see our Nagoya guide for what a quick stopover there can add to an otherwise point-to-point train ride.

  • Tattoos and Onsen: How to Enjoy Japan’s Hot Springs

    Tattoos and Onsen: How to Enjoy Japan’s Hot Springs

    Onsen (hot springs) are one of Japan’s great pleasures — but if you have tattoos, you’ve probably heard they can be a problem. Here’s the honest, up-to-date guide to soaking with ink.

    Why tattoos and onsen clash

    Historically, tattoos in Japan were associated with the yakuza (organized crime), so many bathhouses banned them to keep a family-friendly atmosphere. The rule is about appearances, not you personally — but it’s still widely enforced, especially at traditional public baths.

    Your options with tattoos

    • Tattoo-friendly onsen. A growing number welcome ink, especially in tourist areas. Look for “tattoo OK” / “tattoo friendly” listings before you go.
    • Cover-up patches. Small tattoos can be hidden with waterproof skin-tone stickers (sold online and at some pharmacies). Many baths allow entry if the tattoo is fully covered.
    • Private baths (kashikiri / family bath). The stress-free choice — rent a private bath by the hour, common at ryokan and onsen towns.
    • In-room onsen. Some ryokan rooms have a private open-air bath (rotenburo) — no rules, total privacy.

    Where it’s easiest

    Big resort areas like Hakone, Kinosaki, and Beppu have more tattoo-friendly and private options. See our guide to the best onsen towns in Japan to plan around private baths.

    Onsen etiquette (for everyone)

    • Wash and rinse thoroughly at the shower stations before entering the bath.
    • No swimsuits — you bathe nude. The small towel doesn’t go in the water.
    • Tie up long hair; keep voices low; no photos.

    New to Japanese customs? Pair this with our etiquette guide.

    Bottom line

    Tattoos don’t have to mean no onsen. Book a ryokan with a private bath, use a cover patch for small designs, or seek out tattoo-friendly spots — and you’ll still get that unforgettable soak. Make it part of a wider trip with our 7-day itinerary.

    What tattoo-friendly options cost

    • Cover-up patches run JPY 500-1,500 for a pack, sized to cover small-to-medium tattoos — worth buying a couple of sizes before your trip since availability in Japanese pharmacies can be inconsistent outside major cities.
    • Private family baths (kashikiri) at onsen towns run JPY 2,000-5,000 for a 45-60 minute rental, separate from the main communal bath admission, and typically need to be booked at the front desk on arrival since slots are limited.
    • A ryokan room with a private in-room open-air bath adds JPY 5,000-20,000 over a standard room, but completely removes any tattoo policy question for the length of your stay.

    Common mistakes to avoid

    • Assuming a “tattoo-friendly” label means a large tattoo is fine everywhere — some tattoo-friendly onsen still have size or placement limits (no face/neck ink, for example); check the specific policy for your tattoo’s size rather than assuming a blanket welcome.
    • Not calling ahead to confirm a private bath is available — especially at smaller, popular onsen towns, private baths can be fully booked on weekends; a quick call or online booking before you arrive avoids disappointment.
    • Using a cover patch that isn’t genuinely waterproof for extended soaking — test any patch at home in a bath first, since some cheaper covers lift after 10-15 minutes in hot water.

    Researching before you travel

    Several English-language apps and websites specifically list tattoo-friendly onsen and ryokan across Japan, updated by other tattooed travelers — checking one of these before finalizing your itinerary saves the stress of discovering a policy problem after you’ve already booked a non-tattoo-friendly property.

    Traveling as a group with mixed tattoo status

    If your travel group includes both tattooed and non-tattooed members, a private family bath or a ryokan with in-room bathing lets everyone soak together without singling anyone out or splitting up the group — often a smoother solution than each person separately navigating different individual policies at a shared communal bath.

  • Japanese Tea Set Guide: Matcha & Sencha Gear to Buy

    Japanese Tea Set Guide: Matcha & Sencha Gear to Buy

    Some links below are affiliate links. If you buy through them, Japan Trove may earn a small commission at no extra cost to you.

    A Japanese tea set is a beautiful, practical souvenir — and if you’ve fallen for matcha or sencha on your trip, the right gear makes brewing at home a joy. Here’s what to look for, whether for matcha or everyday green tea.

    For matcha

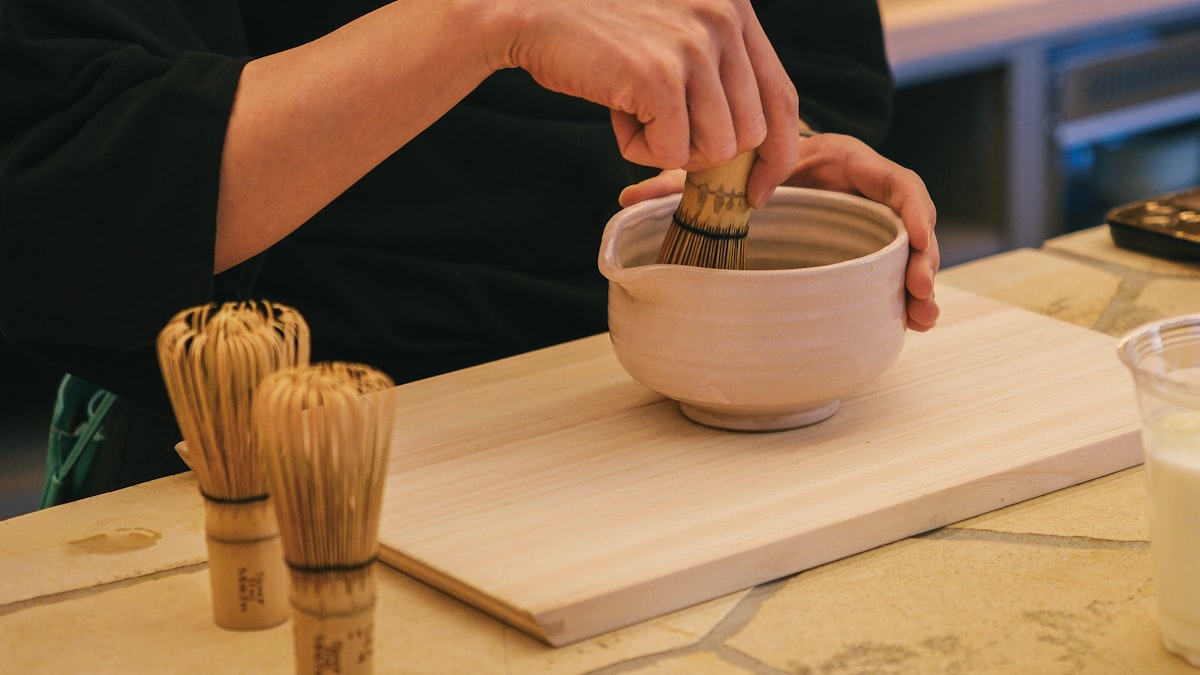
    To whisk matcha properly you’ll want a small kit:

    • Chawan — a wide tea bowl to whisk in.
    • Chasen — a bamboo whisk (the key tool for a good froth).
    • Chashaku — a bamboo scoop.
    • A fine sifter — sift the powder to avoid clumps.

    Pair it with good ceremonial-grade matcha — see our green tea guide.

    For sencha & everyday tea

    • Kyusu — a side-handled teapot, often with a built-in mesh filter; the classic for leaf tea.
    • Yunomi — everyday teacups (no handles).
    • Houhin — a handleless pot for delicate, cooler-brewed teas like gyokuro.

    Styles & pottery to know

    Japanese ceramics are a whole world: Tokoname (famous for kyusu), Hagi, Mino, and Arita/Imari porcelain among them. A handmade piece from a known kiln makes a special gift; a simple, sturdy set is perfect for daily use.

    Buying tips

    • Match the tool to your tea: kyusu for leaf tea, chawan + chasen for matcha.
    • Pack carefully — wrap ceramics well; a furoshiki cloth doubles as padding and a gift wrap.
    • Care: rinse the bamboo whisk and air-dry; hand-wash ceramics.

    Where to buy

    In Japan: department-store housewares floors, specialty tea and pottery shops, and Loft/Tokyu Hands. From abroad: matcha kits and kyusu are available on Amazon , or use a proxy service for specific artisan pieces. A tea set makes a memorable gift from Japan.

    What a tea set typically costs

    • A basic matcha starter kit (chawan, chasen, chashaku, sifter) runs JPY 4,000-8,000, while a handmade chawan from a named kiln alone can run JPY 5,000-30,000+ depending on the artisan and glaze technique.
    • A simple Tokoname kyusu teapot runs JPY 3,000-8,000, and a full everyday set (teapot plus 4-5 yunomi cups) runs JPY 8,000-20,000 for a cohesive, gift-worthy set.
    • Department store housewares floors typically price fairly consistently, while specialty pottery shops and artisan studios can vary widely based on the maker’s reputation — ask about the kiln and maker’s name if you want to understand what you’re paying for.

    Common mistakes to avoid

    • Buying a chasen (bamboo whisk) without checking the tine count — different whisks suit different matcha grades and whisking styles; a shop selling matcha can usually recommend a matching whisk if you mention which matcha you bought.
    • Skipping the sifter as an unnecessary extra — clumped matcha powder is one of the most common reasons home-brewed matcha tastes worse than what you had in Japan; the sifter genuinely matters for a smooth result.
    • Packing ceramics loosely — wrap each piece individually and pack centrally in your suitcase; a broken chawan is a disappointing way to end an otherwise great purchase.

    Learning to whisk matcha properly

    Many tea shops and some hotels offer a short matcha-whisking demonstration or mini lesson, often free with a purchase — worth asking about, since the wrist motion (a brisk “M” or “W” shape, not stirring) makes a genuine difference to the froth and is far easier to learn by watching than from written instructions alone.

    Caring for your set once home

    Bamboo chasen whisks should be rinsed immediately after use and air-dried on their stand (included with most kits) to prevent mold and preserve the tines, while ceramic chawan and kyusu should be hand-washed without harsh detergent — a little ongoing care keeps handmade pieces looking good for years rather than treating them as disposable souvenirs.

  • Where to Buy Nintendo Games in Japan (Region & Language Tips)

    Where to Buy Nintendo Games in Japan (Region & Language Tips)

    Some links below are affiliate links. If you buy through them, Japan Trove may earn a small commission at no extra cost to you.

    Japan is a gaming paradise, and picking up Nintendo games, consoles, and merch here is a highlight for many visitors. But there’s one big catch to know before you buy. Here’s the guide.

    Read this first: region & language

    • Nintendo Switch consoles are region-free — a Japanese Switch plays games from any region, and vice versa. Great news.
    • Game language: many Japanese physical games include English, but not all — check the box or listing for supported languages before buying.
    • Older consoles (3DS and earlier) were region-locked — Japanese games won’t run on a Western console.
    • Power/warranty: Japanese hardware works on Japan’s voltage; warranties are usually domestic only.

    Where to buy in Japan

    • Yodobashi Camera & Bic Camera — huge selections, tax-free for tourists (bring your passport).
    • Nintendo TOKYO / OSAKA — official stores with exclusive merch and plush.
    • Super Potato & retro shops in Akihabara and Den Den Town for classic games and consoles.
    • Book-Off & Hard-Off — great for used games at good prices.

    Buying from abroad

    Also worth grabbing

    amiibo, art books, and soundtrack CDs make great collectibles and gifts. Chasing Pokémon specifically? See where to buy Pokémon merch.

    What things typically cost

    • New Switch games run JPY 5,000-7,500, occasionally cheaper than Western retail depending on exchange rates and regional pricing decisions by publishers.
    • Used games at Book-Off or Geo run JPY 1,000-4,000 depending on age and popularity, with older or common titles sometimes under JPY 1,000 — genuinely good value for building a retro or budget game library.
    • Nintendo TOKYO and Nintendo OSAKA exclusive plush and merchandise run JPY 1,500-6,000, priced similarly to official merch elsewhere but with genuinely exclusive designs not sold in Western Nintendo stores.

    Common mistakes to avoid

    • Buying an older console assuming it’s region-free like the Switch — 3DS, DS, and earlier Nintendo handhelds and consoles are region-locked, meaning a Japanese cartridge or disc won’t play on a Western console; this rule genuinely differs from current Switch hardware.
    • Assuming every Japanese game includes English text — while increasingly common, it’s not universal; checking the box for language icons or asking staff before buying avoids an unwanted Japanese-only surprise.
    • Skipping the used game market out of an assumption it’s lower quality — Japanese resale culture keeps used games in excellent condition, often complete with original cases and manuals, making Book-Off and Geo genuinely worth checking before paying full price new.

    Visiting Nintendo TOKYO or OSAKA

    Beyond shopping, both official stores are worth a visit purely for the exclusive photo-friendly displays and rotating themed sections — expect queues for entry at busy times, since the stores limit the number of shoppers inside at once, so building in some wait time is worth planning for rather than treating it as a quick five-minute stop.

    Shipping games and consoles home

    If you’ve bought more than you can carry, most large electronics retailers can arrange international shipping for an added fee — worth asking about specifically for bulkier items like a boxed console or several games, which add up in checked-luggage weight faster than expected.

  • Japanese Fashion Brands Worth Knowing (and Where to Buy)

    Japanese Fashion Brands Worth Knowing (and Where to Buy)

    Some links below are affiliate links. If you buy through them, Japan Trove may earn a small commission at no extra cost to you.

    Japanese fashion spans everything from perfect everyday basics to avant-garde design and world-famous denim. Whether you’re shopping in Japan or from abroad, here are the brands and categories worth knowing.

    Everyday essentials

    • Uniqlo — affordable, high-quality basics and clever fabrics; see our Uniqlo vs Muji comparison.
    • Muji — minimalist, no-logo staples and lifestyle goods.
    • GU — Uniqlo’s trend-focused, budget sister brand.

    Premium & designer

    • Comme des Garçons, Yohji Yamamoto, Issey Miyake — Japan’s legendary avant-garde designers.
    • Sacai, Undercover, Kapital — beloved contemporary labels with cult followings.
    • Beams & United Arrows — influential select shops carrying their own lines and others.

    Denim & workwear

    Japan is the global capital of premium selvedge denim. Brands like Momotaro, Iron Heart, Studio D’Artisan, and Full Count are prized worldwide for their craftsmanship. Okayama (Kojima) is the denim heartland if you’re a serious fan.

    Streetwear & vintage

    • Streetwear: the birthplace of many iconic labels; explore Harajuku and Ura-Hara.
    • Vintage: Shimokitazawa and Koenji in Tokyo are treasure troves; see our Tokyo guide.

    Where to buy

    In Japan: department stores, select shops, and neighborhood boutiques (tax-free for tourists — bring your passport). From abroad: YesStyle and Amazon carry many pieces; for Japan-only items and vintage, use a proxy service like Buyee or ZenMarket.

    Pair your wardrobe finds with other great things to buy in Japan.

    What things typically cost

    • Uniqlo and GU basics run JPY 990-4,990 per piece, genuinely cheaper in Japan than most overseas Uniqlo locations, making it worth restocking wardrobe basics during a trip rather than waiting to buy at home.
    • Contemporary designer pieces (Sacai, Undercover, Kapital) run JPY 20,000-80,000+ per item, priced in line with international designer fashion, while select shops like Beams and United Arrows carry a wider range from accessible to premium within the same store.
    • Vintage and secondhand fashion in Shimokitazawa and Koenji runs JPY 1,000-10,000 depending on the piece and brand, often the best value category for genuinely unique finds.

    Common mistakes to avoid

    • Assuming Japanese sizing matches Western sizing — sizing runs smaller on average across most Japanese brands, including Uniqlo; trying on before buying, or checking size charts carefully for online-style browsing in-store, avoids a common fit disappointment.
    • Skipping select shops (Beams, United Arrows) in favor of only single-brand stores — these multi-brand shops are excellent for discovering newer or smaller Japanese labels you wouldn’t otherwise know to look for by name.
    • Not budgeting separately for denim — premium selvedge denim is priced as its own investment category (often JPY 20,000-50,000+) and easy to underestimate if you’re mentally budgeting fashion purchases at Uniqlo-level prices.

    Building a Japan-specific wardrobe haul

    A well-rounded trip haul often mixes categories rather than sticking to one — a few Uniqlo basics for practical value, one splurge designer or denim piece as a lasting investment, and a vintage find or two for something genuinely unique that won’t be sitting on a rack back home.

    Shopping districts for each category

    Harajuku and Ura-Hara suit streetwear and youth fashion hunting, Ginza and Omotesando suit designer and luxury browsing, and Shimokitazawa or Koenji suit vintage digging — picking the right neighborhood for your specific fashion interest saves a lot of time compared to wandering a single district hoping to find everything in one place.

  • Solo Travel in Japan: Why It’s So Good & How to Do It

    Solo Travel in Japan: Why It’s So Good & How to Do It

    Some links below are affiliate links. If you book through them, Japan Trove may earn a small commission at no extra cost to you.

    Japan might be the best country in the world for solo travel: extremely safe, easy to navigate, and full of experiences that are just as good — sometimes better — on your own. Here’s how to make the most of a solo trip.

    Why Japan is perfect for solo travelers

    • Safety. Low crime and easy to walk around late; solo travelers, including women, generally feel very comfortable.
    • Solo-friendly by design. Counter seats at ramen and sushi bars, single hotel rooms, and vending machines everywhere.
    • Easy logistics. Great signage, reliable trains, and translation apps mean you rarely feel stuck.

    Where to stay solo

    • Business hotels — cheap, clean single rooms; ideal bases. Book via Booking.com .
    • Capsule hotels — a fun, budget-friendly only-in-Japan experience.
    • Hostels — great for meeting people if you want company.

    Eating alone (no problem here)

    Solo dining is completely normal. Look for counter seats, ticket-machine restaurants (buy a meal ticket, hand it over — no awkward ordering), ramen shops, and standing bars. Konbini and depachika food halls are your friends too.

    Things that shine solo

    • Quiet temple mornings in Kyoto.
    • Wandering neighborhoods at your own pace in Tokyo.
    • A reflective soak at an onsen town.

    Practical solo tips

    • Get an eSIM and an IC card so you’re self-sufficient.
    • Share your itinerary with someone at home and keep some cash on hand.
    • Learn a few Japanese phrases — locals appreciate the effort.

    New to the country? Combine this with our first-timer tips and 7-day itinerary.

    What solo travel typically costs

    • Single business hotel rooms run JPY 6,000-12,000/night in most mid-size cities, not much more than a shared twin room split two ways once you account for the space and privacy difference.
    • Solo dining rarely carries a premium in Japan — ramen counters, kaiten-zushi, and set-meal shops are priced per person regardless of party size, unlike some countries where solo diners face minimum spend requirements or awkward seating.
    • A realistic solo daily budget for a comfortable mid-range trip runs JPY 12,000-18,000 including lodging, food, and local transport, similar to per-person costs for a couple since Japan doesn’t heavily incentivize group travel the way some destinations do.

    Common mistakes to avoid

    • Over-scheduling every single day — solo trips are the easiest to burn out on since there’s no travel companion suggesting a slower pace; building in at least one unplanned afternoon per week noticeably improves overall trip satisfaction.
    • Avoiding counter dining out of unfamiliarity — ramen shops, sushi counters, and standing bars are specifically designed around solo and quick dining; hesitating to sit alone at a counter means missing some of the best, most efficient food in the country.
    • Not researching capsule hotel gender policies before booking — most are single-gender by floor or property; check before assuming any capsule hotel works for solo bookings of any gender.

    Meeting other travelers if you want company

    Hostels with common areas, guided food or walking tours, and izakaya with shared counter seating are all easy, low-pressure ways to have social moments during an otherwise independent trip — solo travel in Japan doesn’t have to mean total isolation unless that’s specifically what you’re looking for.

    Solo-friendly cities beyond the capital

    Compact regional cities like Kanazawa, Takayama, and Nara are especially rewarding for solo travelers — easy to navigate without much planning, safe to explore after dark, and set up with good single-traveler accommodation options away from Tokyo’s larger scale and pace.

  • Best Onsen Towns in Japan (and Onsen Etiquette)

    Best Onsen Towns in Japan (and Onsen Etiquette)

    Some links below are affiliate links. If you book through them, Japan Trove may earn a small commission at no extra cost to you.

    Soaking in an onsen (hot spring) is one of Japan’s great pleasures — and staying overnight in an onsen town, with a ryokan dinner and a soak under the stars, is unforgettable. Here are the best onsen towns and how to enjoy them.

    Top onsen towns

    • Hakone — easiest from Tokyo, with Mt. Fuji views; see our day trips guide (great overnight too).
    • Kinosaki — a storybook town where you stroll between seven public baths in a yukata.
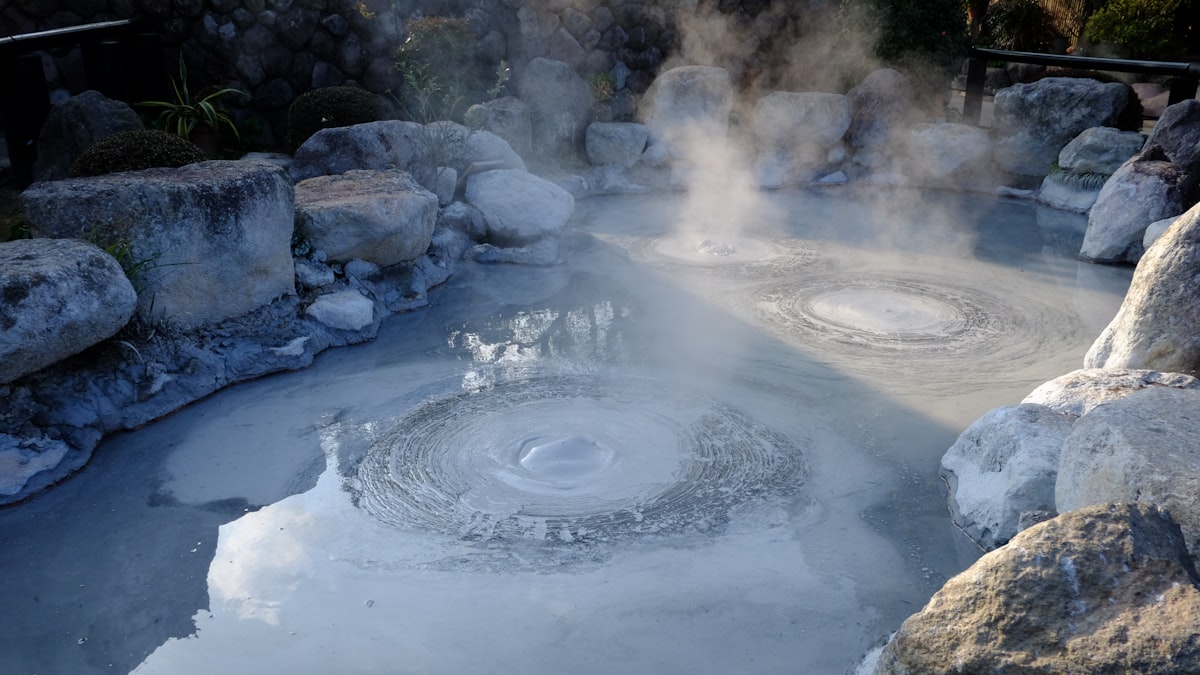
    • Kusatsu — one of Japan’s most famous hot-spring resorts, with a dramatic steaming water field.
    • Beppu & Yufuin (Kyushu) — a hot-spring wonderland and a chic, arty retreat side by side.
    • Nyuto Onsen (Tohoku) — remote, rustic milky baths deep in the mountains.

    Onsen etiquette (important)

    • Wash thoroughly at the shower stations before entering the bath.
    • No swimsuits — you bathe undressed; baths are usually gender-separated.
    • Keep the small towel out of the water (rest it on your head or the side).
    • Tie up long hair and don’t put it in the water.
    • Tattoos can be restricted at some baths — look for tattoo-friendly onsen or private (kashikiri) baths; a ryokan room with a private bath sidesteps the issue.

    Staying overnight

    The magic is a ryokan with a kaiseki dinner and your own or a shared onsen. Book early, especially in autumn and winter — filter for onsen ryokan on Booking.com and Agoda .

    When to go

    Onsen are wonderful year-round, but a snowy outdoor bath in winter is peak Japan. See our best time to visit guide, and slot an onsen night into your itinerary.

    What an onsen town stay costs

    • A ryokan stay with kaiseki dinner and breakfast runs JPY 20,000-45,000 per person depending on the town and season, with remote spots like Nyuto Onsen often pricing lower than easily accessible ones like Hakone despite the more memorable setting.
    • Day-use onsen access (without an overnight stay) runs JPY 700-2,000 at most towns, a good budget option if you’re passing through without time for a full stay.
    • Kinosaki’s seven-bath yukata-hopping system is included with many ryokan stays via a discount pass, letting you try multiple baths across the town for one modest add-on fee rather than paying full price at each.

    Common mistakes to avoid

    • Choosing a destination based on fame alone — Hakone’s convenience from Tokyo comes with bigger crowds than Kinosaki or Nyuto Onsen; if a quiet, immersive soak matters more than easy access, the less famous towns often deliver a better experience.
    • Booking a single-night stay when a town rewards two — Kinosaki specifically is built around strolling between baths over an unhurried one or two nights, and a rushed single night undercuts the whole point of the town’s design.
    • Forgetting winter road and train delays in remote areas like Nyuto Onsen — build extra travel time buffer into winter visits to the more rural onsen towns.

    Choosing a town to match your trip style

    Hakone suits a quick, well-connected escape from Tokyo with Fuji views bundled in; Kinosaki suits travelers who want a walkable, storybook town experience; and Nyuto Onsen or similar remote spots suit those chasing a genuinely rustic, off-the-beaten-path soak away from any crowd at all.

    Onsen towns for a winter escape

    Winter genuinely transforms an onsen town visit — soaking in a steaming outdoor bath while snow falls around you is one of the most consistently cited highlights by first-time visitors, and towns like Kusatsu and Nyuto Onsen lean into this with dramatic seasonal scenery that summer visits simply can’t match.

  • How to Use Japanese Trains: A Simple Guide for Tourists

    How to Use Japanese Trains: A Simple Guide for Tourists

    Some links below are affiliate links. If you buy through them, Japan Trove may earn a small commission at no extra cost to you.

    Japan’s trains are fast, punctual, and cover almost everywhere — and once you know the basics, they’re the best way to get around. Here’s a simple guide to riding them with confidence.

    The types of train

    • Local & rapid — city and suburban trains; tap in with an IC card.
    • Limited express — faster regional trains, sometimes needing a reserved seat.
    • Shinkansen (bullet train) — long-distance; buy a ticket (and optionally reserve a seat).
    • Subways & private railways — run by different companies but the same IC card works.

    The easiest way to pay: an IC card

    Get a Suica or Pasmo (or add one to your phone). Tap in at the gate, tap out at your destination, and the fare is calculated automatically. It also works on buses and at konbini.

    Finding your train

    • Use Google Maps — it shows the exact line, platform, departure time, and even which car to board.
    • Follow the colored line signs; stations are well-marked in English.
    • Check the train type on the platform board — a “rapid” or “express” may skip your stop.

    Shinkansen basics

    • Buy at a ticket machine or counter; you can also reserve online.
    • Non-reserved cars are cheaper and fine off-peak; reserve seats for busy times and with luggage.
    • Note the fastest Nozomi/Mizuho trains aren’t covered by the nationwide pass — check the JR Pass guide.

    Etiquette

    Keep quiet, set your phone to silent, queue on the platform markings, let people off first, and keep backpacks off your back in crowds. More in our etiquette guide.

    Handy tips

    • Luggage forwarding (takkyubin) saves hauling big bags on transfer days.
    • Rush hours (roughly 7–9am, 5–7pm) are packed — avoid if you can.
    • Get an eSIM so maps and times are always to hand.

    Ready to plan the route? Start with the 7-day itinerary.

    What train travel typically costs

    • Local and rapid train fares within a city run JPY 150-400 per ride, while limited express reserved seats add a modest surcharge (JPY 500-1,500) on top of the base fare for regional trips.
    • A shinkansen reserved seat typically costs a few hundred yen more than non-reserved, a small price for guaranteed seating during busy travel periods.
    • An IC card requires a refundable deposit (usually JPY 500 for a physical card) that’s returned when you cancel the card before leaving Japan — mobile IC cards on a compatible phone skip this deposit entirely.

    Common mistakes to avoid

    • Boarding a rapid or express train without checking if it skips your stop — these skip smaller stations to save time; the platform board and train livery usually indicate the service type, but double-checking with a maps app before boarding prevents an accidental overshoot.
    • Assuming every station is equally simple — large interchange stations (Shinjuku, Tokyo, Osaka) can require a genuine 10-15 minute walk between platforms on different lines; build transfer buffer time into any tight connection.
    • Standing near the doors during boarding without letting passengers off first — this is one of the most visible etiquette breaches for first-time visitors and slows down the whole platform.

    Reading a Japanese train platform board

    Most boards display the train type (local, rapid, express), departure time, and final destination, usually with an English toggle at major stations — learning to read just these three fields, even without full station name recognition, is often enough to confidently confirm you’re boarding the right train.

    Traveling with large luggage

    Rush-hour commuter trains and large suitcases are a genuinely difficult combination — if you must travel during peak hours with heavy bags, consider a limited express or shinkansen with dedicated luggage space instead of a standard commuter line, or shift your travel time by even 30-60 minutes to avoid the worst of the crowd.