Japan Trove

Author: JapanTrove Editorial

  • Japanese Drugstore Cold & Allergy Medicine: A Buying Guide for Travelers

    Japanese Drugstore Cold & Allergy Medicine: A Buying Guide for Travelers

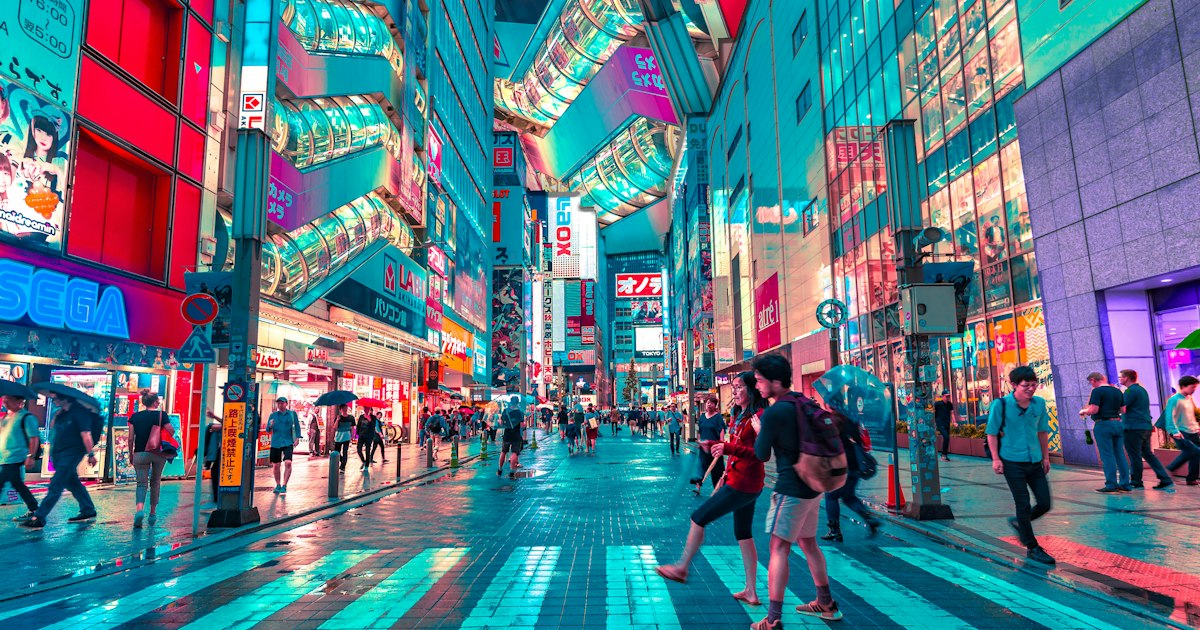
    Photo by Jezael Melgoza on Unsplash

    Getting sick or hit with a pollen attack mid-trip is miserable, but Japan’s drugstores (called doraggusutoa) are genuinely excellent once you know what you’re looking for. Shelves are organized by symptom, staff are used to helping confused tourists, and most products cost less than ¥1,500. The catch is that almost everything is labeled in Japanese, brand names don’t match what you know from home, and a few common foreign cold medicines are flagged as controlled substances at Japanese customs. Here’s how to shop smart.

    What counts as a “drugstore” here

    You want a doraggusutoa chain, not a hospital pharmacy. The big three are Matsumoto Kiyoshi, Sugi Drug, and Tsuruha Drug, with Welcia and Sundrug also everywhere. You’ll find at least one near any major train station, and in tourist areas like Shinjuku, Dotonbori, or Shibuya they’re sometimes open until midnight or even 24 hours. Standard neighborhood branches run roughly 9:00/10:00 to 21:00/22:00. These same stores double as general shopping stops for cosmetics and snacks, similar in spirit to the electronics megastores covered in our Bic Camera vs Yodobashi Camera guide — convenient, well-stocked, and tax-free on purchases over ¥5,000 before tax if you show your passport at the register (ask for “tax-free,” not all branches process it, and electronics/department store locations are more reliable for this than small street-corner shops).

    Cold medicine: decoding the shelf

    Japanese cold remedies are almost always labeled 総合感冒薬 (sōgō kanbō-yaku), meaning “general cold medicine” — an all-in-one tablet or powder for fever, cough, and runny nose. The most recognizable brands are:

    • Pabron Gold A (パブロンゴールドA) — ¥1,200–1,600 for a box of tablets or capsules, Taisho Pharmaceutical’s flagship all-purpose cold medicine.
    • Benza Block (ベンザブロック) — similar price range, slightly stronger antihistamine component, good if a stuffy nose is your main complaint.
    • Lulu Attack (ルルアタックEX) — around ¥1,300–1,800, a popular choice for sore throat plus fever.

    Budget option: store-brand equivalents (Matsumoto Kiyoshi’s own line, for example) run ¥700–900 and use nearly identical active ingredients. Mid-range means any of the brand names above. Splurge-tier is Pabron’s “Gold A Premium” or “Pro” variants (¥1,800–2,200), which add extra vitamin and expectorant components — nice to have but not essential for a short illness.

    For sore throat alone, look for 龍角散 (Ryukakusan) throat lozenges or powder (¥500–800) — a century-old herbal remedy Japanese travelers also pack as omiyage; see our omiyage etiquette guide if you’re bringing some home for coworkers.

    Hay fever and allergy medicine

    If you’re visiting between late February and April (cedar pollen, by far the worst season) or August–October (ragweed/mugwort), head straight for the section marked 花粉症 (kafunshō), meaning “hay fever.” Japan’s pollen season is intense enough that it’s a genuine public health topic on the news every spring, and drugstores stock entire dedicated shelves.

    • Allegra FX (アレグラFX) — ¥1,800–2,400 for 28 tablets, non-drowsy, the closest match to fexofenadine sold in the US.
    • Claritin EX (クラリチンEX) — similarly priced, loratadine-based, also non-drowsy.
    • Zyrtec / Precia (ジルテック/プレコール) — slightly more sedating but effective for nighttime symptoms.

    These switched from prescription-only to over-the-counter in Japan fairly recently, so they’re not cheap compared to US drugstore allergy aisles, but they’re identical active ingredients and work just as well. Nasal spray steroids like Nazal AR (¥1,200–1,500) are also OTC and useful if pills alone aren’t cutting it.

    Common mistakes travelers make

    • Buying by picture alone. Box art often shows a sneezing cartoon figure for both cold and allergy medicine — check for 感冒 (cold) vs 花粉症/アレルギー (allergy) in the text, or just show staff a translation of your symptom on your phone.
    • Assuming dosage matches home. Japanese OTC formulations are frequently gentler than US equivalents. Read the Japanese dosage chart (usually printed with numerals you can read even without kanji) rather than guessing.
    • Not checking for pseudoephedrine substitutes. True pseudoephedrine (Sudafed) is restricted in Japan. Most Japanese decongestants use methylephedrine instead, which is legal but weaker — don’t expect an identical effect.
    • Bringing in banned medicines. This is the big one: Vicks inhalers, Benzedrex, and some strong decongestant/stimulant combos containing pseudoephedrine above a certain threshold are illegal to import into Japan without prior clearance (a Yakkan Shoumei import certificate), and this has caught travelers off guard at customs. If you take a prescription stimulant, strong decongestant, or codeine-containing cough medicine regularly, check Japan’s Ministry of Health guidance before you pack it — don’t assume an over-the-counter status at home carries over.
    • Skipping the pharmacist counter. Some stronger items (marked “第1類医薬品,” Class 1) are kept behind the counter and require a short consultation with a pharmacist, even if no prescription is needed — look for a staffed counter rather than just a shelf.

    Tips for the language barrier

    Staff in central Tokyo and Osaka branches increasingly speak some English, and many stores have English-language pamphlets near the front register listing common remedies by symptom. If not, these phrases help: “Kaze o hikimashita” (I have a cold) or “Kafunshō desu” (I have hay fever). Pointing at your throat, nose, or forehead while saying “itai” (hurts) also works fine — pharmacists see this daily from tourists and are patient about it.

    It’s also worth packing a small travel first-aid kit from home with whatever you’re 100% sure works for you, especially if you have a known reaction to a specific active ingredient, since reading full ingredient lists in kanji under time pressure isn’t fun. But for anything you run out of or forgot, Japanese drugstores will take care of you quickly and affordably — often for less than you’d pay at a US pharmacy without insurance.
  • Uni in Japan: Where to Eat Hokkaido’s Prized Sea Urchin

    Uni in Japan: Where to Eat Hokkaido’s Prized Sea Urchin

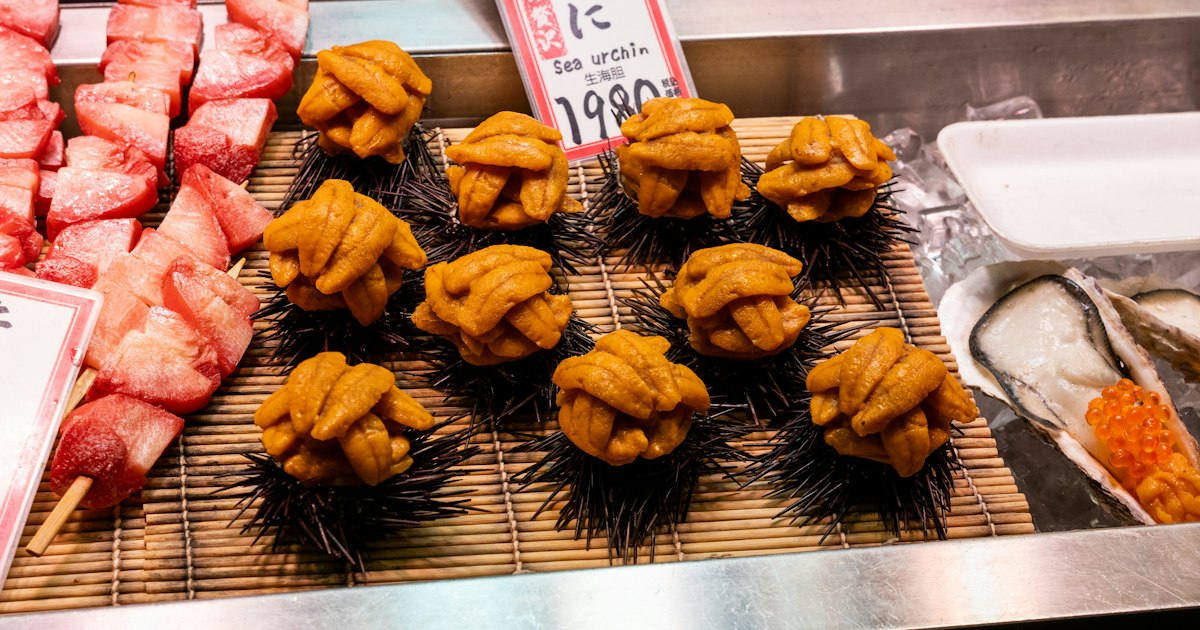
    Photo by EMANUELE Ricciardi on Unsplash

    If you’ve ever had a spoonful of uni so custardy and clean-tasting that it didn’t seem related to the tired, faintly ammonia-scented stuff in a Tokyo conveyor-belt restaurant, there’s a good chance it came from Hokkaido. Japan’s northernmost island supplies the country’s most prized sea urchin, and eating it where it’s caught — sometimes within hours of harvest — is one of the best reasons to build a trip around Hokkaido’s coast. Here’s what to know before you go, including the two main types, when to time your visit, and where to actually sit down and eat it without overpaying for frozen, alum-soaked leftovers.

    Bafun Uni vs. Murasaki Uni: Know the Difference

    Almost everything billed as “Hokkaido uni” falls into one of two species. Bafun uni (short-spined sea urchin) has smaller, deep-orange to brownish-gold roe with a dense, rich, slightly savory flavor — it’s the one most associated with Hakodate and the Okhotsk coast. Murasaki uni (long-spined sea urchin) is paler yellow, larger-grained, and sweeter, with a lighter, more delicate finish; Rishiri and Rebun islands off Wakkanai are famous for it, where the urchins feed on dense kelp beds and develop an outsized reputation for sweetness.

    Neither is objectively “better” — it’s a style preference, similar to comparing two single malts. If a menu lets you order both side by side (many Hakodate and Sapporo sushi counters do), it’s worth the extra 1,000–2,000 JPY to compare.

    The Alum Question: Why “Muen” Uni Costs More

    This is the detail most visitors miss. Raw uni roe is extremely fragile and collapses into mush within a day, so most commercial uni is briefly dipped in alum (myoban) to firm it up and extend its shelf life for shipping. It works, but it leaves a faint bitter or metallic edge if you’ve eaten the alternative.

    That alternative is muen uni (無塩, “no salt/alum”) — uni packed in its own liquid with no preservative, meant to be eaten within a day or two. It tastes noticeably sweeter and cleaner, with none of the bitterness. Muen uni is what you want to seek out at source in Hokkaido; it rarely survives shipping to restaurants outside the region, which is exactly why eating it on the island matters. Market stalls and sushi counters in Hakodate, Otaru, and Rishiri will often advertise it directly as 無塩うに.

    When to Go: Uni Season by Region

    Uni is sold year-round in Japan, but “in season” local uni is a different product, and the window is tighter than most people expect:

    • Rishiri & Rebun Islands: roughly early June through August, with the fishery often closing by late August. This is peak murasaki uni territory and the single best place in Japan to eat it fresh.
    • Shakotan Peninsula (near Otaru/Sapporo): a bafun and murasaki season running approximately June to August, coinciding with the peninsula’s famously turquoise “Shakotan Blue” coastline.
    • Hakodate: unusually, has two seasons — murasaki uni in spring (roughly April–June) and bafun uni in autumn (roughly September–December) — because of how the Tsugaru Strait’s currents shift.
    • Rausu/Shiretoko (Okhotsk side): summer season, generally July–September.

    Outside these windows, restaurants are serving frozen or processed stock, which is fine for a casual uni-don but not what you’re traveling for.

    Where to Actually Eat It

    Hakodate Morning Market (Hakodate Asaichi): A few minutes’ walk from JR Hakodate Station, this market is the easiest first stop for uni tourism. Dozens of stalls sell uni-ikura-don (sea urchin and salmon roe over rice) starting around 3,000–4,000 JPY, with “triple” bowls adding crab for 5,000–7,000 JPY. Most stalls open around 6am and wind down by early-to-mid afternoon (roughly 6am–2pm, with some stalls starting earlier in peak summer) — go early, since the best cuts sell out.

    Sapporo’s Nijo Market and Curb Market (Jogai Ichiba): Nijo Market, a short walk from Odori Station, and the larger Curb Market near Sapporo Station both have sit-down counters serving uni-don from about 2,500 JPY for a smaller mixed bowl up to 6,000–8,000 JPY for a premium bafun-only bowl. Shops generally run from around 7am to 6pm, though exact hours vary stall by stall.

    Otaru’s sushi row: Otaru, a 30–40 minute train ride from Sapporo, has one of the highest densities of good sushi counters in Japan, many specializing in Shakotan-caught uni in season. Expect counter courses from roughly 5,000 JPY to 15,000+ JPY, or à la carte uni nigiri from about 800–2,000 JPY a piece depending on grade. It pairs naturally with a stop in nearby Shakotan, and if you’re driving the coastal route yourself, it’s worth reading up on ETC cards and expressway tolls before picking up a rental car.

    Rishiri and Rebun Islands: The furthest to reach — fly or ferry via Wakkanai — but the reward is eating muen murasaki uni the same day it was opened, often at simple local shokudo for 3,000–5,000 JPY a bowl. July’s uni season also overlaps with Rishiri’s famous hiking trail up Mount Rishiri, making it an easy combination trip.

    Budget, Mid-Range, and Splurge

    • Budget (2,500–4,000 JPY): A mixed market uni-don with a modest portion, often from frozen or alum-treated stock outside peak season.
    • Mid-range (5,000–8,000 JPY): A generous market or casual sushi-ya bowl of in-season, muen uni, possibly paired with ikura or crab.
    • Splurge (15,000–40,000+ JPY per person): An omakase sushi course at a reservation-only Sapporo or Hakodate counter, where uni from a named producer or specific bay is presented as one of several courses alongside other Hokkaido seafood.

    Common Mistakes to Avoid

    • Ordering uni-don in Tokyo in January and expecting a Hokkaido-fresh experience. It will be perfectly nice, but it’s not the same product as muen uni eaten in season at the source.
    • Skipping the “no alum” question. If a stall or restaurant doesn’t label it, ask — “Kore wa myoban nashi desu ka?” (“Is this alum-free?”) is a useful phrase.
    • Assuming bigger is better. Larger, more uniform-looking uni blocks are sometimes a sign of alum treatment for shipping; fresh muen uni can look slightly irregular and still taste far better.
    • Treating Hakodate’s two seasons as one window. Visiting in, say, February or late July can mean missing both the spring murasaki and autumn bafun peaks.

    Bringing Some Home

    Fresh raw uni obviously doesn’t travel, but bottled and salt-processed uni (often sold as a paste or in small wooden boxes) is a legitimate, well-regarded souvenir from Hokkaido’s airports and department store food halls, and travels fine in checked luggage if sealed. If you’re bringing some back for colleagues, it’s worth a quick read of the etiquette around omiyage gift-giving, since a strong-smelling or unusual seafood item isn’t always the safest choice for an office gift. If your itinerary doesn’t reach Hokkaido at all, note that the Izu Peninsula, much closer to Tokyo, has its own respected local uni season around Shimoda — a good fallback covered in our guide to the Izu Peninsula’s coastline and day trips.

  • Kakimori: Tokyo’s Build-Your-Own Notebook and Ink-Blending Atelier

    Kakimori: Tokyo’s Build-Your-Own Notebook and Ink-Blending Atelier

    Photo by Brando Makes Branding on Unsplash

    Tucked into a quiet residential pocket of Kuramae, a few minutes’ walk from the Sumida River, Kakimori has quietly become one of Tokyo’s most satisfying shopping stops for anyone who likes paper, ink, or things made specifically for them. It’s not a souvenir shop in the usual sense — there’s no shelf of pre-made “Japan” branded goods. Instead, you build the object yourself, choosing every component, and walk out with a notebook or a bottle of ink that exists nowhere else. It takes time, it’s not cheap by stationery standards, and it’s exactly the kind of slow, tactile experience that’s hard to replicate once you’re home.

    What Kakimori Actually Is

    Kakimori opened in Kuramae in 2010 and built its reputation on a single idea: let customers design their own notebook from raw components rather than buy one off the shelf. The shop stocks walls of loose cover materials (leather, cloth-bound board, patterned paper), different paper stocks (blank, lined, graph, dot-grid), and binding hardware, and staff assemble your choices into a finished notebook at a binding station in the store while you wait. Next door, under the same company, is Inkstand by Kakimori, where you blend your own fountain pen ink from scratch. Together they make Kakimori less a shop than a small workshop you get to use.

    Building Your Own Notebook

    The notebook-building process works like this: pick a cover (from roughly ¥880 for simpler paper or cloth covers, more for leather), choose one or more interior paper pads (around ¥330–¥550 each, with options for blank, ruled, graph, or dot paper, plus specialty pads like sketch or calendar inserts), and select a binding method — a screw-post binding or a ring binding, both of which let you swap pages later. The binding/assembly fee itself is typically in the ¥300–¥400 range on top of your materials. All in, a single custom notebook usually lands somewhere between ¥1,500 and ¥3,500 depending on cover material and how many paper pads you add. Staff speak enough English to help with the format, size, and paper-weight choices, and the assembly happens in about 10–15 minutes.

    A few practical notes: the shop is small, and on weekends the binding counter can have a short wait, so budget extra time rather than arriving with ten minutes to catch a train. If you want a specific paper (Tomoe River paper, for instance, which is popular with fountain pen users for how well it handles ink), ask whether it’s in stock — selection rotates and not every paper type is always available. This is also a genuinely good place to think about omiyage for colleagues who appreciate stationery, since a modestly priced custom notebook feels personal without being extravagant — though keep in mind each one is one-of-a-kind and takes a few minutes to assemble, so building six of them for an office isn’t a quick errand.

    Mixing Your Own Ink at Inkstand

    If you only have time for one of Kakimori’s two experiences, the ink bar is the more memorable one. At Inkstand by Kakimori, a staff member walks you through blending pigments to create a fountain-pen-safe ink in a color you choose — you can start from a reference (a flower, a photo, a favorite color) and adjust with drops of concentrate until it matches. A session typically runs around 30–45 minutes and produces a bottle you keep, priced in the ballpark of ¥2,200–¥2,700 for a standard bottle size, with the exact price depending on bottle size and any add-ons like a nib test or a nameplate for the bottle. Because each session needs one-on-one staff time, reservations are strongly recommended and often booked through the Inkstand website in advance, especially for weekend slots — walk-ins are possible on quieter weekdays but aren’t guaranteed. If you don’t use a fountain pen at home, it’s worth noting a bottle of hand-mixed ink is a genuinely unusual gift, in the same spirit as picking up hand-finished craft goods like boxwood combs in Kyoto — something made to order rather than mass-produced.

    Getting There and Hours

    Kakimori is in Kuramae, Taito-ku, about a 7-minute walk from Kuramae Station (Toei Asakusa Line and Toei Oedo Line) or roughly 10 minutes from Asakusabashi Station on the JR Sobu Line, which connects easily from Tokyo Station or Akihabara. The neighborhood itself — sometimes nicknamed “Kura-mae” by locals who’ve watched it fill with small craft shops and cafés over the past decade — is walkable and worth drifting through before or after your visit rather than rushing in and out. The shop generally opens around 11:00 and closes around 18:00; it’s typically closed on Mondays, though holiday closures vary, so it’s worth checking the current calendar on Kakimori’s own site or social accounts shortly before your visit rather than relying on an old posting. Cash and card are both accepted, but note that Kakimori’s prices sit low enough per item that the tax-free threshold for foreign visitors (a minimum spend, usually around ¥5,000 before tax, at participating stores) may not kick in unless you’re buying several items — unlike a large electronics purchase at somewhere like Bic Camera or Yodobashi, this isn’t really a tax-free shopping stop.

    Best Time to Visit

    Weekday mornings right after opening are the quietest window, which matters because both the notebook counter and the ink bar move at a one-customer-at-a-time pace. If you’re traveling in spring or autumn — peak tourism season in Tokyo — expect more company, particularly on Saturday afternoons. There’s no strong seasonal reason to visit at one time of year over another; this is an indoor, climate-controlled stop that works as a rainy-day activity or a mid-trip breather from temple-and-shrine itineraries just as well as a dedicated errand.

    Common Mistakes to Avoid

    • Not reserving the ink-blending session. Walking in and hoping for a same-day Inkstand slot works sometimes on weekdays, but you risk being turned away on weekends. Book ahead if the ink bar is your main reason for coming.
    • Underestimating the time needed. Treat this as a 45–90 minute stop if you’re doing both the notebook and the ink bar, not a quick five-minute browse.
    • Forgetting the notebook is refillable. Because the binding uses screws or rings, you can mail-order or hand-carry replacement paper pads later — you’re not stuck rebuying a whole notebook once the pages run out.
    • Assuming English service is extensive. Staff can guide you through choices, but detailed custom requests may move slower in English — patience and simple reference photos help.

    Budget, Mid-Range, and Splurge Picks

    On a budget, a simple cloth-cover notebook with one paper pad and ring binding comes in under ¥2,000. Mid-range shoppers typically land around ¥2,500–¥3,500 by adding a nicer cover material and a second paper pad for a different purpose (notes versus sketching, for example). For a splurge, pair a leather cover notebook with an Inkstand custom ink bottle — together these can run ¥5,000–¥6,500, but you leave with two objects that are genuinely singular: a notebook built to your spec and a color that, as far as the shop’s records go, exists only in your bottle.

  • Omiyage Etiquette: The Unwritten Rules of Japan’s Workplace Souvenir Culture

    Omiyage Etiquette: The Unwritten Rules of Japan’s Workplace Souvenir Culture

    Photo by Nina Mercado on Unsplash

    If you’re heading back to the office after a trip to Japan, your coworkers already expect something — and it isn’t a postcard. Omiyage (お土産) is Japan’s deeply codified souvenir culture, where bringing back individually wrapped snacks for your workplace, family, and neighbors isn’t a nice gesture, it’s closer to a social obligation. Foreign visitors who skip it, or get the format wrong, won’t be scolded, but locals will quietly notice. Here’s how to buy, budget, and present omiyage like you’ve done this before.

    What Omiyage Actually Means (and Why It’s Not Optional)

    Omiyage specifically means a souvenir from a trip, distinct from a birthday present or thank-you gift (those have their own categories, zota and okaeshi). The core idea is that if you travel somewhere — even a weekend trip two hours from Tokyo — you bring back a small, shareable regional specialty for the people who covered your work while you were gone. It’s less about the gift itself and more about acknowledging that your absence inconvenienced others.

    This is why the single most important rule is that omiyage must be regionally specific. A box of Tokyo Banana bought at Haneda Airport signals “I went to Tokyo.” A generic box of chocolates from a convenience store signals nothing, and will quietly disappoint. Every region, city, and even individual train station in Japan sells its own branded specialty for exactly this reason — think momiji manju from Miyajima or zunda mochi from Sendai.

    The Golden Rules: Individually Wrapped, Shareable, and Not Too Fancy

    Four things make an omiyage “correct”:

    • Individually wrapped pieces. A single large cake won’t work in an office — you need 12, 16, or 24 individually sealed portions so colleagues can take one at their desk without cutting or sharing utensils.
    • Food, not objects. Edible omiyage is the default for coworkers. Non-food gifts (ceramics, textiles, stationery) are reserved for closer relationships or more formal exchanges, not the general office.
    • A shelf life of at least a week. You’ll often be handing these out a day or two after returning, sometimes longer if you distribute them gradually. Avoid anything that needs refrigeration unless you’re buying it the morning you fly home.
    • Modest, not showy. Spending too much on an office omiyage is almost as awkward as spending too little — it implies the recipient now owes you something substantial in return (a concept called “okaeshi” debt). Mid-range and visibly regional beats expensive and generic.

    Budget, Mid-Range, and Splurge Options by Price Point

    For a typical office of 10-20 people, Japanese business etiquette guides and department store staff generally suggest a total spend of ¥1,500-¥4,000 for a shareable box, meaning each individually wrapped piece costs roughly ¥80-¥200.

    • Budget (¥800-¥1,500 total): A box of regional senbei rice crackers is a safe, well-liked default — most regions sell their own variety, they travel well in a suitcase, and a bag of 15-20 pieces rarely exceeds ¥1,200.
    • Mid-range (¥1,500-¥3,000 total): This is the sweet spot for most office gifts — think a 12-16 piece box of a prefecture’s signature baked good or wagashi, the kind sold specifically at the train station or airport you’re departing from.
    • Splurge (¥4,000+): Reserve this for your direct manager or a small, close team — a nicer box from a department store basement food hall (depachika), or a bottle from one of the country’s whisky distilleries for a boss who drinks, falls here. Don’t scale this up for the whole office; it creates pressure rather than goodwill.

    Where and When to Buy

    The best omiyage shopping is almost never in a dedicated souvenir shop — it’s built into the infrastructure of departure. Major train stations (Tokyo Station’s Gransta underground mall, Shin-Osaka, Kyoto Station) have entire corridors of regional snack counters, typically open 8:00am-9:00pm or aligned with first/last train times. Airports are the fallback if you’re short on time, though selection skews toward the most famous, already-popular items rather than hidden local specialties.

    Department store basements (depachika) are the best option if you have an afternoon to spare — they’re usually open 10:00am-8:00pm, carry the widest range of regional and artisanal options, and staff will often vacuum-seal or box items for travel on request. If your trip takes you through Toyama or Fukui, this is also where a Kurobe Gorge Railway day trip or a visit to Echizen’s papermaking village pays off twice — you get the experience and the regionally specific gift in one stop, rather than scrambling at the airport on your last day.

    Timing matters: buy omiyage on your last one or two days, not early in the trip. Most are shelf-stable for a week or more, but buying early just means carrying extra weight through the rest of your itinerary.

    Common Mistakes Foreign Visitors Make

    • Buying one big item instead of many small ones. A single beautiful cake can’t be split 15 ways at 9am without a knife, plates, and an audience. It becomes a logistical problem instead of a gift.
    • Over-buying for one person. An expensive, individually chosen gift for a single coworker (rather than a shareable box for the team) can feel oddly personal or create an uncomfortable sense of obligation.
    • Grabbing something generic at the airport in a panic. Staff and coworkers can usually tell when a gift isn’t tied to a specific place — it reads as an afterthought rather than a thoughtful one.
    • Forgetting your own home or neighbors. Omiyage culture isn’t limited to the office — many travelers also bring something back for family and sometimes immediate neighbors, especially around New Year’s travel, when gift-giving norms are at their strictest.
    • Ignoring non-food gift-giving occasions. If you’re closer to someone — a host family, a close colleague — a small well-made object can work too. Browse somewhere distinctive rather than a generic gift shop; even a stop at Village Vanguard for something quirky and affordable beats a bland keychain.

    Presenting the Gift: Timing and Phrasing

    Hand out office omiyage on your first day back, ideally placed on a shared table (the break room, a meeting room counter) rather than distributed desk-to-desk, which lets people take a piece at their convenience. A simple phrase does the job: “Omiyage desu, dōzo” (“Here’s a souvenir, please help yourself”). You don’t need to make a speech or single anyone out — the box speaks for itself. If you’re also bringing something for a specific person, such as someone who covered a major task while you were away, it’s fine to hand that one over separately and a little more personally, but keep the explanation short.

    Get the regional specificity and the format right, and omiyage becomes one of the easiest wins of your trip — a two-minute purchase at a train station that buys you real goodwill back at the office.

  • Oshogatsu in Japan: Osechi Ryori, Hatsumode & New Year Traditions Explained

    Oshogatsu in Japan: Osechi Ryori, Hatsumode & New Year Traditions Explained

    Photo by Samuel Berner on Unsplash

    If you’re in Japan over the New Year, you’ll see a country that slows down, closes its shutters, and then floods its shrines with millions of people within the same 72 hours. Oshogatsu (お正月), Japan’s New Year holiday, is the single most important date on the calendar — bigger than Christmas, bigger than Golden Week — and it runs on its own rules. Shops shut, trains fill up, and entire neighborhoods smell like grilled mochi. Here’s what’s actually happening, what it costs, and how to take part without getting caught out.

    When Oshogatsu Happens and What Actually Closes

    The core holiday is January 1–3, called sanganichi. Many family-run restaurants, small shops, and even some museums close for all three days, re-opening gradually from January 4. Department stores and malls increasingly stay open (some close only on Jan 1), but check individual hours before planning a shopping day — a shop listed as open until 20:00 in December may run reduced hours of 11:00–17:00 during sanganichi. Supermarkets often close just for January 1. Convenience stores (7-Eleven, FamilyMart, Lawson) stay open 24/7 year-round and become genuinely essential during this stretch — it’s also peak season for convenience-store oden, which is sold through the coldest months and makes a cheap, warm meal (around ¥100–200 per item) when everything else is shuttered. Note too that waste collection schedules shift over the holiday — if you’re in a rental apartment or guesthouse, see our guide on sorting trash in Japan, since pickup days routinely get suspended or delayed around Jan 1–3.

    Osechi Ryori: The New Year Feast

    Osechi ryori is a set of symbolic dishes packed into stacked lacquer boxes called jubako, traditionally prepared before December 31 so families don’t have to cook — and so stores can rest — during the first days of the year. Each item has a meaning: black soybeans (kuromame) for health, herring roe (kazunoko) for fertility, rolled kelp (kobumaki) for happiness (“yorokobu”), and sweet chestnut-and-mashed-sweet-potato (kuri kinton) for wealth, since its golden color resembles coins.

    For visitors, the practical way to try osechi is to pre-order a set, which department stores and even convenience stores sell from November through late December for pickup around Dec 30–31. Expect roughly:

    • Budget: ¥3,000–6,000 for a single-tier box from a supermarket or convenience store, feeding 1–2 people.
    • Mid-range: ¥8,000–20,000 for a two- or three-tier set from a department store food hall (depachika), often with a mix of traditional and modern Western-style items.
    • Splurge: ¥25,000–60,000+ for elaborate sets from famous ryotei restaurants or hotels, sometimes requiring reservation by early December.

    If you’re traveling without a kitchen or fridge for a pre-order, your easiest option is a ryokan or hotel New Year’s dinner package, or simply visiting a depachika on Dec 30–31, where unsold osechi items are often discounted in the evening. Also look out for ozoni, a mochi-filled soup eaten on New Year’s morning — the broth and mochi shape vary by region (clear soy-based in Tokyo, white miso in Kyoto).

    Mochi and New Year Snacking

    Pounding mochi (mochitsuki) is a traditional New Year’s Eve activity, and you’ll sometimes see public mochi-pounding demonstrations at shrines, shopping streets, or hotel lobbies in late December. Decorative stacked mochi called kagami mochi (two round rice cakes topped with a small orange) are displayed in homes and shop entrances through early January as offerings, then traditionally broken up and eaten on kagami biraki (around Jan 11). If you want a sweeter regional take on rice-based New Year snacking, Sendai’s zunda mochi is worth seeking out, and rice crackers make reliably good omiyage to bring home — see our senbei buying guide for which varieties travel well and keep longest.

    Hatsumode: The First Shrine Visit of the Year

    Hatsumode (初詣) is the year’s first shrine or temple visit, made to pray for good fortune. It’s the busiest single religious event in Japan: Meiji Jingu in Tokyo alone draws over 3 million visitors across the first three days. Other major sites include Senso-ji in Asakusa, Fushimi Inari Taisha in Kyoto, and Sumiyoshi Taisha in Osaka.

    Timing matters a lot here:

    • Midnight Dec 31–Jan 1: The most crowded window, often with queues of an hour or more just to approach the main hall at famous shrines. Many run special all-night train service for this.
    • Daytime Jan 1–3: Still very busy but more manageable; this is when most Japanese families actually go.
    • After Jan 4, up to Jan 7 or even the 15th: Crowds drop sharply and you can experience the same shrine in near-normal conditions. If your main goal is photos and atmosphere rather than the “first visit” ritual itself, this is the smarter window.

    At the shrine, the ritual is simple: toss a coin into the offering box (a 5-yen coin, go-en, is considered lucky as it’s a pun on “connection”), bow twice, clap twice, pray, bow once. Many visitors also buy an omamori (protective amulet, ¥500–1,500) or draw an omikuji fortune slip (¥100–300) — if you draw bad luck, tying the paper to the designated rack on-site is believed to leave the misfortune behind rather than take it home.

    Common Mistakes to Avoid

    • Assuming everything stays open: Don’t plan a shopping-heavy itinerary for Jan 1–2; confirm hours in advance, especially for restaurants and smaller museums.
    • Underestimating hatsumode crowds and train changes: Some stations restrict entry or exit routes near major shrines during peak hours; allow extra time and expect station staff directing foot traffic.
    • Trying to book accommodation last-minute: Hotels near major shrines and in popular onsen towns sell out weeks ahead for Dec 29–Jan 3; if your New Year plans include a soak, somewhere like the Izu Peninsula is worth booking well before December.
    • Expecting osechi to be ready for walk-in purchase on Jan 1: Most sets must be ordered in advance; walking into a depachika on New Year’s Day looking for fresh osechi will usually disappoint.

    Other New Year Customs Worth Knowing

    You’ll also notice nengajo, New Year’s postcards designed to arrive exactly on Jan 1 (Japan Post processes huge volumes to make this happen), and otoshidama, small cash gifts in decorated envelopes given to children by relatives. Store “fukubukuro” (lucky grab bags), sold from Jan 1 or 2 at a fixed price with a surprise mix of goods worth more than you paid, are a genuinely fun way to shop during the holiday if you enjoy a bit of chance — department stores, electronics retailers, and specialty shops all run their own versions.

    Taken together, Oshogatsu rewards visitors who build in slack: fewer reservations, more flexibility, and an itinerary that treats the first few days of January as a cultural experience to watch and join rather than a normal sightseeing week to power through.

  • Visiting Japan’s Whisky Distilleries: Yamazaki, Hakushu & Yoichi Tours

    Visiting Japan’s Whisky Distilleries: Yamazaki, Hakushu & Yoichi Tours

    Photo by François Hoppet on Unsplash

    Japan’s whisky boom didn’t happen by accident — it started in the 1920s when Masataka Taketsuru brought distilling knowledge home from Scotland and helped found what became Suntory’s Yamazaki Distillery, then later built his own Nikka distillery in Yoichi, Hokkaido, chasing a climate that reminded him of the Scottish Highlands. Today Yamazaki, its sister distillery Hakushu, and Yoichi are the three most visit-worthy production sites in the country, and all three welcome travelers with proper tours, tasting counters, and gift shops stocked with distillery-only bottlings. None of them are difficult to reach, but each has its own booking quirks, so here’s what to actually expect.

    Yamazaki Distillery: Japan’s Original Whisky Birthplace

    Founded in 1923, Yamazaki sits in Shimamoto, Osaka Prefecture, right on the border with Kyoto, chosen for its soft water and the morning mist off three converging rivers. It’s the easiest of the three to reach: take the JR Kyoto Line (not all trains stop here, so check for a local or rapid service) from Kyoto Station (about 15 minutes) or Osaka Station (about 30 minutes) to JR Yamazaki Station, then walk roughly 7 minutes. Hankyu’s Oyamazaki Station on the Kyoto Line works too.

    All visits now require advance online reservation through Suntory’s official site — walk-ins are not guaranteed entry, especially on weekends. Reservations typically open about 3 months ahead and the popular tasting-included tours fill within days, so book the moment your travel dates are fixed. Pricing runs roughly ¥1,000 for a basic distillery tour with a highball at the end, up to ¥4,000–¥5,000 for premium tours that include tastings of single malts not sold in stores. The on-site Whisky Museum and shop are open to anyone who books a visit, roughly 9:30 to 17:00, with closures around New Year and occasional maintenance days. English-language tour slots exist but are limited, so confirm the language when booking.

    Since you’re already in the Kyoto–Osaka corridor, it’s easy to tack this onto an Osaka day: many visitors finish a Yamazaki tour and head into the city for dinner at Shinsekai, Osaka’s retro tower district, where deep-fried skewers pair surprisingly well with a glass of what you just tasted.

    Hakushu Distillery: Whisky in a Forest, Not a Factory

    Suntory’s second distillery, opened in 1973, is built inside a forest in Hokuto, Yamanashi Prefecture, at the base of the Southern Japan Alps — it’s often called the largest distillery in the world by land area, and it shows: there’s a bird sanctuary and wooded walking paths on the grounds. From Tokyo, take a JR Chuo Line limited express (Azusa or Kaiji) from Shinjuku to Kobuchizawa Station, about 2 hours, then transfer to a free shuttle bus that Suntory runs for ticketed visitors (reservation required, about 20 minutes to the distillery gate).

    Booking works the same as Yamazaki: reserve online in advance, expect similar pricing tiers (around ¥1,000 for the standard tour, more for tasting-heavy premium options), and don’t expect to walk in without a reservation. Hours are roughly 9:30 to 17:00 with similar seasonal closures. Autumn (late October into November) is the standout season here — the forest turns color and the whole property feels more like a mountain retreat than an industrial site. Spring’s fresh greenery is nearly as good; midsummer can be humid, and winter access depends on snow conditions around Kobuchizawa, so check JR service status if you’re visiting January–February.

    Yoichi Distillery: Nikka’s Original Hokkaido Site

    Masataka Taketsuru picked Yoichi, a small coastal town near Otaru in Hokkaido, because its cool climate and peaty character reminded him of Scotland. The distillery, dating to 1934, is the most atmospheric of the three — stone warehouses, coal-fired pot stills (still used for some production), and a small museum dedicated to Taketsuru and his Scottish wife Rita. From Sapporo, take a JR train to Otaru (about 40 minutes), transfer to a local train bound for Yoichi (about 25 minutes more), and the distillery gate is roughly a 3-minute walk from Yoichi Station — one of the most convenient station-to-distillery walks in Japan.

    Yoichi has historically been more flexible about reservations than the two Suntory sites, with self-guided walking routes through the grounds included in free admission, and a tasting hall where you pay per pour (a flight of a few drams usually runs somewhere in the ¥500–¥1,000 range). That said, Nikka has been tightening reservation requirements for guided tours in recent years, so check the official Nikka website before you go rather than assuming you can just show up. Hours are generally 9:00 to 17:00, with closures around the New Year holiday. Summer (June–August) is the easiest time to visit comfortably; Hokkaido winters are scenic but can disrupt train schedules, so build in buffer time if you’re visiting between December and March.

    Planning Your Trip: Budget, Season, and Logistics

    Realistically, you can’t do all three in one trip unless you’re dedicating serious time to Japan — Yamazaki/Hakushu sit in central Honshu while Yoichi is in Hokkaido, a separate flight or long train ride away. Most travelers pair Yamazaki with a Kyoto–Osaka itinerary, treat Hakushu as an add-on if they’re also doing Mt. Fuji or the Japan Alps, and visit Yoichi as part of a dedicated Hokkaido/Sapporo trip.

    • Budget: self-guided or basic reserved tours (~¥1,000), public transport only, one tasting included.
    • Mid-range: tasting-focused tours (~¥2,000–¥3,000) with 2–3 pours of limited bottlings, plus lunch at the on-site restaurant where available (Hakushu has one).
    • Splurge: premium tours (¥4,000–¥8,000+) with rare cask tastings, or hiring a car/driver to combine Yamazaki and Hakushu in a single long day from Kyoto or Tokyo.

    If you’re driving between distilleries rather than relying on trains — common for a Yamazaki-plus-Hakushu day trip, since public transit between them is slow — renting a car means dealing with expressway tolls, and it’s worth sorting out an ETC card before you leave the rental counter; see our guide to ETC cards and expressway tolls for how that works. Just remember that whoever’s driving can’t drink at the tasting counter — Japan has zero tolerance for drink-driving, and there’s no workaround here.

    Common Mistakes to Avoid

    The single biggest mistake is assuming you can walk in without checking reservation requirements first — Yamazaki and Hakushu both require advance booking, and slots for English tours or weekend dates disappear fast. Book as soon as your dates are confirmed, not after you land.

    Second, don’t expect to buy the famous aged expressions — Yamazaki 18, Yamazaki 25, or rare Nikka single casks — in the gift shop. These are allocated through lotteries or simply not stocked for walk-in sale; shops mostly carry the standard range, distillery-exclusive NAS (no-age-statement) bottlings, and merchandise. If a specific rare bottle is your goal, research the lottery system in advance rather than counting on finding it on-site.

    Third, don’t bring a drone expecting to get atmospheric shots of the grounds — distilleries are private industrial property with working equipment and fire-safety concerns, and drone use is generally not permitted without specific authorization. If aerial photography matters to your trip, it’s worth understanding Japan’s broader rules first; our overview of drone laws and photography permits in Japan covers where flying is and isn’t allowed.

    Finally, pace your day. Tastings are generous by some countries’ standards but still modest pours meant for appreciation, not a bar crawl — plan your onward travel (train connections, dinner reservations) with that in mind, and if you’re hopping from Yamazaki into Osaka’s izakaya scene afterward, a plate of hot karaage is the classic whisky-highball pairing to look for on the menu.

  • Izu Peninsula: Hot Springs, Coastline & Easy Day Trips from Tokyo

    Izu Peninsula: Hot Springs, Coastline & Easy Day Trips from Tokyo

    Photo by Greg Jurgajtis on Unsplash

    Less than an hour from Tokyo by train, the Izu Peninsula packs hot spring towns, rugged coastline, and mild winters into a shape that juts into the Pacific like a thumb off Shizuoka Prefecture. It’s an easy add-on for travelers who’ve already done Hakone and want more coastline, fewer crowds, and ryokan dinners built around just-caught seafood. You can do it as a long day trip from Tokyo or stretch it into two or three days with an onsen stay in the middle.

    Getting There: Trains, Cars, and Timing

    The two gateway stations are Atami and Mishima, both on the Tokaido Shinkansen. A Kodama shinkansen from Tokyo Station to Atami takes about 40-50 minutes and costs roughly ¥4,000-4,500 one way unreserved; the faster Hikari gets you to Mishima in a similar time. Both are covered by the Japan Rail Pass.

    For a one-seat ride deeper into the peninsula, JR’s Odoriko limited express runs from Tokyo Station down to Izukyu-Shimoda in about 2.5-3 hours (around ¥7,000 one way). Seats are reserved, so book ahead on weekends and during cherry blossom season — the train fills up. One catch: Odoriko continues past Atami onto Izukyu Corporation tracks, which the JR Pass does not cover, so pass holders need to pay a supplementary fare for the Atami-to-Shimoda stretch or simply ride JR as far as Atami and transfer.

    To reach Shuzenji, change at Mishima for the private Izuhakone Railway Sunzu Line (about 35 minutes, not JR Pass eligible). If you’re renting a car to cover the coastal roads at your own pace, our guide to ETC cards and expressway tolls is worth reading before you pick up the keys, since the Izu Skyline and coastal routes involve several toll sections.

    Atami and Ito: Onsen Towns Closest to Tokyo

    Atami is the most convenient base, with a retro seafront, a famous fireworks schedule in summer, and dozens of ryokan built into the hillside above the bay. If you don’t want to stay overnight, several hotels sell higaeri (day-use) onsen access for roughly ¥1,000-2,500, letting you soak for a few hours without a room. Atami’s Sun Beach and the Atami Baien plum garden (blooms January-February) are both walkable from the station.

    Ito, 20-25 minutes further by local train, has a quieter, more residential onsen-town feel and is the jumping-off point for the Jogasaki Coast. Budget travelers can find simple guesthouses from around ¥5,000-7,000 a night; mid-range ryokan with kaiseki dinner and private or shared onsen run ¥15,000-25,000 per person; splurge properties with ocean-view rooms and private baths start around ¥40,000 and climb well past that for peak-season weekends.

    Shuzenji: The Historic Spa Town Inland

    Shuzenji, in the center of the peninsula, is one of Izu’s oldest hot spring towns, built around a small river lined with bamboo groves. The Chikurin no Komichi bamboo path and the free foot bath (ashiyu) in the middle of the river are both free and take maybe 30-40 minutes to see properly. It’s a good half-day stop if you’re routing between Mishima and the coast rather than a full destination on its own — most visitors pair it with lunch and a short walk rather than a full day.

    The Jogasaki Coast and Shimoda: Cliffs, Beaches, and Black Ships History

    The Jogasaki Coast, south of Ito, is Izu’s best stretch of scenery: black volcanic cliffs formed by old lava flows, a 9 km coastal hiking trail, and the Kadowaki Suspension Bridge swaying 23 meters above the surf. It’s free to walk and reachable via Jogasaki-Kaigan Station on the Izukyu Line. The cliffs and wide ocean views make it a popular spot for photography — if you’re flying a drone for shots of the coastline, check our rundown of drone laws and photography permits in Japan first, since parts of the coast fall under flight restrictions near residential areas and parks.

    Further south, Shimoda is where Commodore Perry’s “Black Ships” landed in 1854, and the compact old town still has a Black Ships Festival each May along with Perry Road, a short canal-side lane of preserved buildings. Shimoda’s beaches (Shirahama in particular) are some of the clearest-water swimming spots within day-trip range of Tokyo, busy with families June through August. On the west coast, Dogashima is known for sightseeing boats that loop past wave-eroded rock formations — a worthwhile detour if you have a car.

    Best Time to Visit

    Late January through early March is prime time for Kawazu-zakura, an early-blooming pink cherry variety that flowers weeks before Tokyo’s. The Kawazu Cherry Blossom Festival lines the Kawazu River with thousands of trees and illuminates them at night. Early June brings hydrangeas to Shimoda Park. Summer (July-August) is peak beach season with higher hotel prices and crowded trains; autumn (November) brings foliage without the summer crowds. Winter is mild for a hot-spring trip — daytime temperatures often stay in the low teens Celsius, which makes an outdoor rotenburo bath genuinely pleasant rather than just bearable.

    Common Mistakes and Budget Tips

    • Underestimating distances within Izu. The peninsula is bigger than it looks on a Tokyo-area map — Atami to Shimoda by local train can take over 1.5 hours with transfers. Don’t plan to see Atami, Shuzenji, and Shimoda all in one day.
    • Skipping reservations for Odoriko. It’s an all-reserved-seat train on weekends and holidays; showing up without a reservation can mean standing in the aisle or waiting for the next departure.
    • Booking ryokan dinner times too late. Traditional ryokan often serve kaiseki dinner at a fixed early time (around 18:00) — confirm this when booking if you’re arriving late from Tokyo.
    • Forgetting that ryokan trash sorting has its own rules. Guesthouses and self-catering stays expect guests to sort waste correctly; our guide to trash and recycling in Japan covers the basics so you’re not guessing at the bins.
    • Not budgeting for station snacks. Atami and Ito stations both have good souvenir counters — local senbei makers sell wasabi- and seafood-flavored crackers that make better gifts than generic Tokyo omiyage; see our senbei buying guide if you want to know what you’re choosing between.

    For a tight budget trip, a day return from Tokyo to Atami (shinkansen both ways, a higaeri onsen, and lunch) can be done for around ¥10,000-12,000 per person. Stretch that to an overnight ryokan stay with two meals and you’re looking at ¥20,000-35,000 per person total — reasonable for the combination of coastline, hot springs, and genuinely good seafood you get in return.

  • Kurobe Gorge Railway: Toyama’s Open-Air Trolley Train Through Unazuki Onsen

    Kurobe Gorge Railway: Toyama’s Open-Air Trolley Train Through Unazuki Onsen

    Photo by Bbb xzh on Unsplash

    Tucked into the mountains behind Toyama Bay, the Kurobe Gorge Railway (黒部峡谷鉄道) is one of Japan’s most memorable short train rides: a narrow-gauge trolley line built nearly a century ago to haul workers and dam materials into a sheer granite gorge, now carrying sightseers instead. The open-air cars creak across bridges strung high above jade-green water, duck through unlit tunnels, and stop at a hot spring you can only reach by rail. It’s slow, a little cold, and completely unlike anything on a standard Tokyo-Kyoto itinerary.

    What the Kurobe Gorge Railway Actually Is

    The line runs 20.1 km from Unazuki Station to the end-of-the-line Keyakidaira Station, climbing through the Kurobe Gorge along a route originally cut for hydroelectric dam construction in the 1920s-30s. A one-way trip takes about 80 minutes at a walking-pace crawl, with the train winding past tunnels, 41 bridges, and viewpoints where the gorge drops away on both sides. Most cars are genuinely open-air, meaning no windows on the sides — you feel the temperature drop as you enter the mountains, and in tunnels you’ll get a faint mist on your face. This isn’t a polished theme-park ride; it’s a working mountain railway that happens to be scenic enough to attract tourists, and that rough-edged quality is a big part of its appeal.

    Getting There from Toyama

    Start at Toyama Station, reachable via the Hokuriku Shinkansen (about 2 hours from Tokyo, roughly 25 minutes from Kanazawa). From there, take the Toyama Chihou Railway local line to Unazuki Onsen Station — about 1 hour 20 minutes, with limousine-style express trains cutting that down somewhat. Here’s the detail that trips people up: Unazuki Onsen Station (the Chihou Railway stop) and Unazuki Station (the Kurobe Gorge Railway’s starting point) are two separate stations about a 5-minute walk apart, connected by a signed path along the river. Budget extra time for this transfer, especially with luggage.

    If you’re driving, there’s paid parking near Unazuki Station, and the drive from Toyama city takes roughly an hour on local roads. Anyone combining this with a rental car elsewhere in the region should check our guide to ETC cards and expressway tolls before setting off, since several approach routes use toll roads.

    Tickets, Fares, and Which Car to Choose

    There are two main car types. The standard open-air car (ippan-kyaku) is unreserved, first-come first-served, and the one-way adult fare for the full run from Unazuki to Keyakidaira is around ¥1,980 (children roughly half price). The “Relax” car is glass-enclosed with proper windows and padded seats, reservable in advance for a surcharge of around ¥530 on top of the base fare — worth it if you’re visiting during peak autumn weekends when standard cars fill up fast, or if you’d rather not sit exposed to the wind for 80 minutes each way.

    You don’t have to ride the whole line. Shorter fares exist to intermediate stops like Kuronagi and Kanetsuri, which can be a good option if you’re short on time or traveling with young kids who won’t sit still for a 2.5-hour round trip. Buy tickets at the Unazuki Station window on the day, or reserve Relax car seats in advance through the railway’s official booking channels, especially for November weekends.

    Stops Worth Getting Off For

    Kuronagi Station is the most popular midway stop, home to Kuronagi Onsen — a riverside hot spring reachable via a short walk and a tunnel from the platform, with an open-air bath you can soak in for a fee even as a day visitor. Kanetsuri Station has a free footbath (ashiyu) right by the platform, a nice quick stop if you don’t want the full detour to Kuronagi. At the end of the line, Keyakidaira has walking trails to the Sarutobi Gorge viewpoint and the Okukane suspension bridge, plus its own footbath and a small restaurant — plan for at least 30-40 minutes here before the return train, since the turnaround schedule isn’t generous.

    Best Season and Timing

    The line is seasonal, typically running from mid-to-late April through the end of November, closing entirely in winter because snow and avalanche risk make the gorge impassable. Early-to-mid June brings fresh green foliage and is noticeably less crowded than autumn. Late October into early November is peak season for fall colors and also the busiest and most expensive time to find a room in Unazuki — expect sold-out Relax cars and long lines for standard cars if you arrive without a plan. Midsummer is pleasant precisely because the gorge stays cool, often 10°C or more below the valley floor, which is refreshing in August but means you’ll want a jacket no matter when you visit. Services occasionally suspend for heavy rain or rockfall checks, so build slack into your schedule rather than treating this as a tightly timed connection.

    Common Mistakes to Avoid

    • Underdressing: the open-air cars and tunnels are cold even in summer — bring a light jacket regardless of season.
    • Confusing the two Unazuki stations: Unazuki Onsen Station (Chihou Railway) and Unazuki Station (Kurobe Gorge Railway) are separate buildings a short walk apart.
    • Assuming it runs year-round: the line closes for winter; check the operating calendar before building an itinerary around it.
    • Skipping advance booking in autumn: Relax car seats and even standard-car capacity get tight on November weekends.
    • Treating it as a quick side trip: round trip plus transfers from Toyama easily eats half a day — don’t schedule a tight connection afterward.

    If you’re planning to photograph the gorge with a drone, note that flight restrictions apply around many of Japan’s dam and forest areas — our guide to drone laws and photography permits in Japan is worth checking before you pack one.

    Where to Stay and Budget Options

    Unazuki Onsen itself is a proper hot spring town, not just a train depot, with ryokan ranging from simple guesthouses to riverside inns with gorge views. Budget travelers can do the trolley as a day trip from Toyama city and skip lodging entirely — the standard car plus a short stop at Kanetsuri’s footbath makes for a satisfying half-day for well under ¥5,000 per person including transit. Mid-range visitors might add a Relax car reservation and a soak at a public bathhouse in Unazuki before heading back. For a splurge, stay overnight at a ryokan with its own onsen bath and kaiseki dinner, then combine the trip with the nearby Tateyama Kurobe Alpine Route for a multi-day Toyama mountain itinerary — the two routes sit in the same region but offer completely different experiences, one a riverside gorge railway, the other a high-altitude crossing by cable car and bus.

  • Senbei: A Buying Guide to Japan’s Rice Cracker Varieties

    Senbei: A Buying Guide to Japan’s Rice Cracker Varieties

    Photo by Boxed Water Is Better on Unsplash

    Senbei are one of those souvenirs that look simple on a convenience store shelf but turn out to have real depth once you start paying attention — grilled versus fried, soy sauce versus sugar glaze, Niigata versus Saitama. If you buy them blind, you’ll likely end up with a generic bag that tastes fine but tells you nothing about where you traveled. This guide breaks down the actual varieties worth knowing, where to buy them at different price points, and the mistakes that trip up first-time buyers.

    Senbei vs. Arare vs. Okaki: Know the Difference First

    “Senbei” gets used as a catch-all in English, but in Japan it’s a specific category. True senbei are made from uruchimai — the same non-glutinous rice used for everyday cooking rice — rolled flat, dried, and then grilled or baked, usually brushed with soy sauce (shoyu) or salt (shio) near the end. Arare and okaki, by contrast, are made from mochigome (glutinous rice), the same rice used for mochi. Arare are the small bite-sized pieces often mixed into rice cracker assortments; okaki are a bit larger and puffier. All three sit in the same snack aisle and the terms blur in casual conversation, but if you ask a shop clerk for “senbei” specifically, they’ll usually point you to the thin, dense, grilled rice crackers rather than the puffy mixed bags.

    The Core Flavors Worth Trying

    • Shoyu (soy sauce): The baseline flavor and arguably the most traditional — dark, glossy, slightly sweet-salty, grilled until the edges char a little.
    • Shio (salt): Plainer and lighter, good if you want to taste the rice itself.
    • Zarame: Coated with coarse sugar crystals — a sweet counterpart to the savory styles, often thinner and lighter in texture.
    • Nori-maki: Wrapped in a strip of seaweed, usually soy-sauce based underneath.
    • Goma: Studded with black or white sesame seeds for a nutty finish.
    • Kaki no tane: Small crescent-shaped, spicy soy-sauce crackers almost always sold mixed with peanuts. This one is technically closer to arare but is so ubiquitous it deserves its own mention — it was invented in Nagaoka, Niigata, in the 1920s and is now one of Japan’s best-selling snack formats, sold everywhere from convenience stores to izakaya bar snacks.

    Where to Buy: Budget to Splurge

    Budget (¥100–¥300): Convenience stores and supermarkets carry single-serving bags of shoyu or kaki no tane senbei for around ¥130–¥250. Brands like Kameda Seika and Echigo Seika dominate these shelves and are genuinely good, not just convenient — Kameda’s kaki no tane is a reasonable benchmark for the style. This is also where you’ll find senbei sold loose near the register at some stores, similar to how you’d grab a cup of oden from the counter on a cold night — cheap, no-frills, and reliably decent.

    Mid-range (¥500–¥1,500): Department store basement food halls (depachika) sell individually wrapped assortment boxes, which are the standard choice for omiyage because they divide cleanly for sharing at an office. Look for boxes labeled with a specific producer name rather than a generic store brand — the difference in crispness and flavor balance is noticeable. Train station omiyage counters stock similar boxed sets in the ¥800–¥1,200 range, handy if you’re buying on your way out of a city.

    Splurge (¥2,000+): Hand-grilled senbei from specialty shops, sold by the piece (often ¥150–¥400 each) or in small artisan gift boxes running ¥2,000–¥4,000. These are thicker, hand-brushed with soy sauce in layers, and grilled over charcoal rather than machine-baked — the texture is noticeably crunchier and the shoyu flavor more concentrated. Asakusa’s Nakamise-dori in Tokyo has several shops grilling senbei in full view of the street, which is worth watching even if you don’t buy.

    Regional Specialties Worth Seeking Out

    Two regions matter more than any others for senbei. Niigata Prefecture is Japan’s largest rice-cracker producing region by volume — Kameda Seika is headquartered there, and the local rice (the same koshihikari-growing area is nearby) is often credited for the flavor. If you’re ever in Niigata, several factory shops sell fresher, locally-only varieties you won’t find in Tokyo. Soka, in Saitama Prefecture, is considered the historical birthplace of soy-sauce senbei; the old Nikko Kaido road through Soka still has a handful of long-running shops making thick, dark, deliberately old-fashioned shoyu senbei the traditional way. Neither city is a major tourist draw on its own, so this is really only worth a detour if you’re already passing through — otherwise, buy Niigata-brand senbei at any department store and you’re getting the same production lineage without the trip.

    If you’re building out a broader snack-souvenir list by region, it’s worth comparing senbei to other regional specialties like Sendai’s zunda mochi and other Tohoku snacks or Miyajima’s momiji manju — senbei is one of the few snack categories that isn’t tied to a single tourist town, which makes it a more flexible souvenir to buy wherever you happen to be.

    Timing and Shelf Life

    There’s no real season for senbei — production runs year-round and the snack doesn’t spoil the way fresh wagashi does. Sealed, individually-wrapped packs typically carry a best-by date of two to four months out, which makes them one of the safer souvenirs to buy early in a trip rather than scrambling at the airport on your last day. The one timing issue is humidity: Japan’s summer (June–September) is humid enough that an opened bag left unsealed overnight can go noticeably soft within a day. If you’re buying in summer, keep bags sealed with a clip until you’re ready to eat, and don’t buy loose, unwrapped senbei more than a day or two before you plan to finish them.

    Common Mistakes to Avoid

    • Buying only from airport or station souvenir counters: convenient, but prices run 20–40% higher than the same boxes in a depachika food hall, and the selection is usually the same handful of mass-market brands.
    • Assuming all senbei are soft enough for anyone: traditional hand-grilled shoyu senbei can be genuinely hard — harder than most Western crackers. If you or someone you’re gifting them to has dental crowns or bridges, stick to the thinner, lighter styles (zarame or nori-maki) rather than thick artisan senbei.
    • Confusing senbei with arare/okaki when asking for recommendations: shop staff will take the request literally, so if you actually want the small mixed crackers (which many travelers picture when they say “rice crackers”), ask for arare or kaki no tane instead.
    • Not checking the ingredient list for allergens: many savory senbei contain shrimp (ebi senbei) or are processed on shared lines with peanuts, especially kaki no tane blends. Packaging allergen labeling in Japan is reliable but in Japanese — a quick translation app check is worth it before gifting.
    • Overpaying for “gold leaf” or novelty senbei: a handful of tourist-area shops sell senbei dusted with edible gold flake at a steep markup; it’s a visual novelty more than a flavor upgrade, so treat it as a one-off gift item rather than your main purchase.

    Senbei won’t be the flashiest thing in your suitcase, but it’s one of the few Japanese snacks that travels well, keeps for weeks, and reads as thoughtful rather than generic — as long as you buy with some idea of what you’re actually choosing between.

  • Oden: Japan’s Winter Hot Pot Snack and Where to Find It at Convenience Stores

    Oden: Japan’s Winter Hot Pot Snack and Where to Find It at Convenience Stores

    Photo by Julien on Unsplash

    Walk into a Japanese convenience store on a cold evening between November and March and you’ll smell it before you see it: a steaming metal pot near the register, divided into compartments, each one holding something simmering in dark, savory broth. That’s oden, and it’s one of the best cheap, quick meals you can get in Japan without ever sitting down at a restaurant. Here’s how to order it, what to pick, and what it should cost you.

    What Is Oden, Exactly?

    Oden is a one-pot dish of various ingredients—daikon radish, boiled eggs, fish cakes, tofu, konjac—slow-simmered together in a light dashi broth seasoned with soy sauce and mirin. Everything sits in the same broth for hours, so the flavors blend: the daikon turns nearly translucent and soaks up the broth, the eggs turn a pale amber, and the fish cakes become soft and savory. It’s less a dish you cook than one you tend, which is exactly why convenience stores are so good at it—the pot simmers all day, and staff top it up as items sell.

    Regional variations exist (Kansai broth tends to be lighter and saltier, Nagoya has a miso-based version called miso oden), but the convenience store version you’ll encounter nationwide is the standard Kanto-style soy-dashi broth, and it’s remarkably consistent whether you’re in Sapporo or Fukuoka.

    Why Convenience Stores Are the Best Way to Try It

    You could seek out a dedicated oden restaurant (oden-ya), and it’s worth doing once for the atmosphere—but a sit-down oden dinner with drinks easily runs ¥3,000–6,000 per person. The convenience store version costs a fraction of that, requires no reservation or Japanese ability, and is available at nearly every 7-Eleven, Lawson, and FamilyMart in the country. For a traveler trying to eat well on a tight schedule between sightseeing stops, it’s hard to beat: you can grab a cup of oden, eat it standing at the store’s window counter if there is one, and be back on your way in five minutes.

    It also pairs naturally with other convenience store staples worth trying on the same trip—karaage (Japan’s fried chicken) is sold at the same hot case and makes a good non-broth companion if you want something to go alongside your oden cup.

    How to Order Oden at a Konbini, Step by Step

    The pot sits near the checkout counter, usually with a laminated sign showing photos and prices of each item. The process varies slightly by store policy (some are self-service with tongs, others have staff serve you for hygiene reasons), so watch what other customers are doing or simply ask the staff—pointing works fine.

    • Grab a cup: You’ll get a paper or plastic container, sometimes with a lid.
    • Choose your items: Point at what you want, or tell the staff the names if you know them. Staff will transfer each piece into your cup with tongs.
    • Get your broth: The cup is topped up with hot dashi broth before the lid goes on.
    • Ask for mustard: Karashi (hot Japanese mustard) usually comes in a small free packet—ask for “karashi” if it isn’t automatically included, and dab a little onto your eggs or daikon for a sharp kick that cuts the broth’s sweetness.
    • Pay at the register: Oden is priced and rung up per item, not as a set meal, so the cashier will total it up based on what’s in your cup.

    What to Pick: A Beginner’s Guide to the Pot

    If you’ve never seen an oden pot before, the compartments can be confusing. Here are the staples you’ll find at almost every store:

    • Daikon (radish): The most popular item by far—soft, broth-soaked, and mild. A safe first pick.
    • Tamago (boiled egg): Simmered for hours until the yolk firms up and takes on the broth’s color and flavor.
    • Konnyaku: A firm, chewy jelly made from konjac yam—low in flavor on its own but great at absorbing broth.
    • Chikuwa: A tube-shaped fish cake with a mild, slightly sweet taste.
    • Hanpen: A soft, spongy fish cake, almost like a savory marshmallow in texture.
    • Atsuage: Thick fried tofu, meaty and filling.
    • Chikuwabu: A wheat-gluten tube found mainly in Kanto-style oden—chewy, mild, and divisive among first-timers.
    • Gyusuji (beef tendon) skewers: A pricier, richer option for those who want more substance.

    A good first cup for someone trying oden for the first time: daikon, a boiled egg, and one fish cake (chikuwa or hanpen). That gives you the core textures and flavors without overcommitting.

    Price Guide: Budget, Mid-Range, and Splurge

    Budget (convenience store): Most individual items run roughly ¥90–150, with a few pricier items like beef tendon skewers reaching ¥200–250. A satisfying cup of four to six pieces typically costs ¥500–800 total—genuinely one of the cheapest hot meals available in Japan.

    Mid-range (supermarket depachika counters): Department store basement food halls often sell pre-packaged oden sets to take home, priced by weight or as a family-size tray, generally landing in the ¥1,000–2,500 range for enough to share.

    Splurge (dedicated oden-ya): A proper sit-down oden restaurant, often with counter seating and sake pairings, will run ¥3,000–6,000 per person for a full meal, and is a nice way to spend a cold evening if you have time for it, particularly in Tokyo neighborhoods with old-school izakaya culture.

    When to Go: Oden Season and Timing

    Oden is a cold-weather food, and convenience store pots generally appear around October and disappear by late March or April, with peak availability from December through February. Some stores quietly suspend their hot food pots during the hottest summer months or occasionally for hygiene/staffing reasons, so don’t count on finding it in July. If oden is a priority for your trip, plan your visit for winter—it also pairs well with other cold-season activities, so if you’re heading somewhere snowy like the Tateyama Kurobe Alpine Route, a konbini oden stop on the way is a natural fit.

    Common Mistakes to Avoid

    • Assuming it’s self-serve everywhere: Policies vary by store and even by time of day. Always glance at what other customers do, or just ask—don’t assume you can use the tongs yourself.
    • Double-dipping your own chopsticks into shared sauces or mustard packets: Japan takes shared-condiment hygiene seriously—the same etiquette you’ll find with Osaka’s kushikatsu skewers and their no-double-dipping rule applies broadly here.
    • Not asking for extra broth: If your cup looks dry, you can usually ask for a bit more dashi before the lid goes on—it’s typically free.
    • Ordering too much at once: Items are priced individually and add up fast. Start with three or four pieces rather than filling the cup.
    • Eating it ice-cold: Oden is meant to be eaten hot, soon after purchase. If you’re taking it back to a hotel, ask for it to be reheated or eat it within a few minutes of leaving the store.

    Oden won’t win any beauty contests in photos, but it’s one of the most genuinely local, unpretentious foods you can eat in Japan—standing at a convenience store counter on a freezing night, cup in hand, is a small travel memory that sticks. If you’re building out a broader list of Japanese comfort foods to try, pairing an oden stop with something like Sanuki Udon in Kagawa or a bowl of Zaru Soba rounds out a solid culinary itinerary beyond the big-city restaurant scene.