Japan Trove

Author: JapanTrove Editorial

  • Japanese Kites (Tako): A Collector’s Guide to Edo and Nagasaki Styles

    Japanese Kites (Tako): A Collector’s Guide to Edo and Nagasaki Styles

    Photo by Chintya Akemi Keirayuki on Unsplash

    Long before anime and manga became Japan’s best-known visual export, the country’s kite makers were already turning paper and bamboo into portraits of warriors, kabuki actors, and folk heroes. Japanese kites, or tako, come in dozens of regional styles, but two traditions dominate what collectors actually encounter: the bold, rectangular Edo-dako of Tokyo and the delicate, battle-ready hata of Nagasaki. Knowing the difference — and where to actually find well-made examples — will save you from buying a mass-produced souvenir-shop print when the real thing is often sitting one neighborhood away.

    Edo-dako: Tokyo’s Warrior Kites

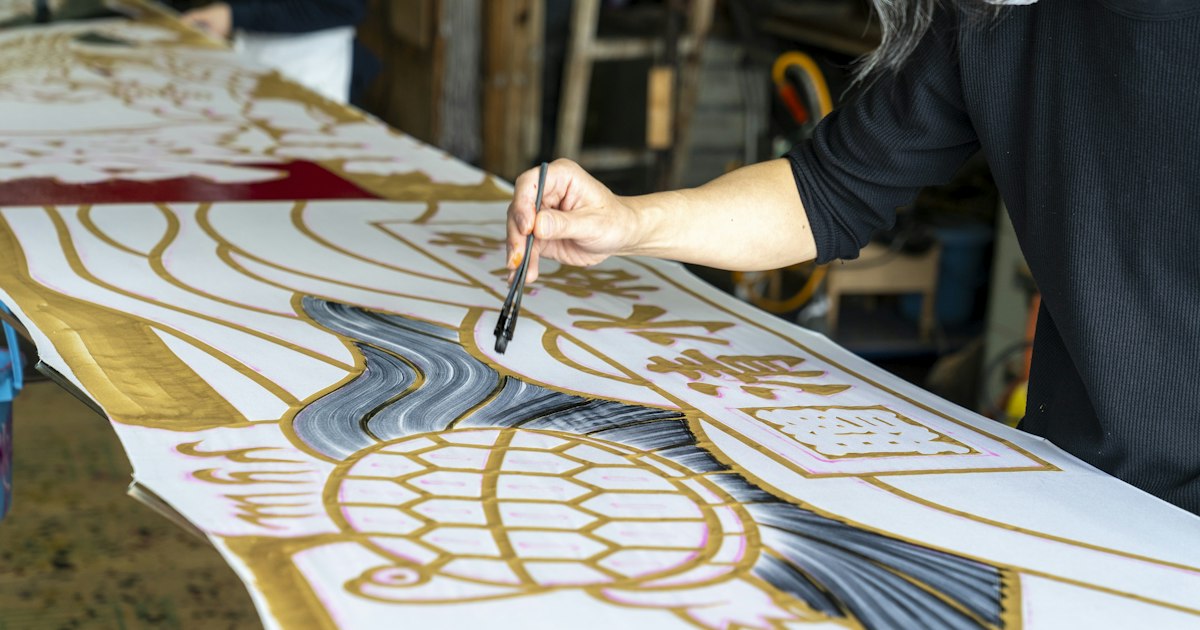
    Edo-dako are large, flat rectangles, typically ranging from about 45cm up to 1.5 meters or more on a side, stretched over a bamboo frame and covered in washi paper hand-painted with ukiyo-e-style imagery: Kintaro the golden boy, kabuki actor faces, or scenes from samurai legend. The painting technique descends directly from woodblock print design, which is why a good Edo-dako looks like a piece of ukiyo-e art that happens to fly. The kite is braced with a bowed bamboo string across the back (the yumi) that creates the distinctive humming sound as it rises — a design feature, not a flaw.

    These kites were historically flown over New Year and on Boys’ Day (May 5), when families would fly a kite bearing a child’s name or a heroic figure to celebrate a birth or wish for strength. If you’re in Japan over Oshogatsu, kite flying is one of the traditional pastimes alongside hanetsuki and hatsumode shrine visits — our guide to New Year traditions in Japan covers the full seasonal picture if you want context for why kites show up in so much New Year imagery.

    The best place to see Edo-dako up close without buying anything is the Kite Museum (Tako no Hakubutsukan) on the 5th floor of the Taimeiken restaurant building in Nihonbashi, Tokyo. Admission runs around ¥200 for adults, and the single room is packed floor to ceiling with kites from across Japan and the world — it’s open daily but closed Sundays and national holidays, so check before you make the trip since it keeps restaurant-adjacent hours. It’s a 5-minute walk from Nihonbashi Station (Tozai, Ginza, or Toei Asakusa lines).

    Nagasaki Hata: The Fighting Kites of Dejima

    Nagasaki’s kite culture tells a completely different story. During the Edo period, Nagasaki was Japan’s one open port, and the city’s kites — called hata, not tako, reflecting a word borrowed from Indonesian/Malay traders rather than Japanese — show clear Dutch and Chinese influence. A hata is diamond-shaped, built lighter than an Edo-dako, and flown specifically for aerial combat: fliers coat their kite string with ground glass and rice glue (called biidoro-ito) and try to saw through an opponent’s line mid-air. It’s genuinely a sport, not just a display craft, and it has its own vocabulary of maneuvers.

    The city holds its Hata-age Taikai (kite-flying competition) in late April, usually timed around the April 29 Showa Day holiday, at Nagasaki Peace Park — it’s free to watch and worth building a trip around if you’re a serious collector, since this is where you’ll see master fliers and can often buy directly from the kite makers running stalls. Outside festival season, small shops in and around the Hamanomachi covered arcade sell hata kites and spools of coated string, though stock varies — call ahead if you have a specific design in mind.

    Other Regional Styles Worth Knowing

    • Hamamatsu kites (Shizuoka): Giant kites flown in mass battles during the Hamamatsu Matsuri, May 3–5, each team flying a kite printed with their neighborhood’s crest.
    • Tsugaru kites (Aomori): Known for fierce samurai and demon faces painted in a distinctly rougher, more graphic style than Edo-dako.
    • Sagami/Shirasagi kites (Kanagawa): Often shaped as birds or insects rather than rectangles — closer to what Western visitors picture when they imagine a “Japanese kite.”

    Most collectors start with Edo-dako or hata simply because they’re the most documented and most available outside their home region, but if you’re building a serious collection, regional festivals are where the rarer styles actually surface.

    Where to Buy: Budget, Mid-Range, and Splurge

    Budget (¥1,000–3,000): Small, non-flying decorative kites meant for wall display, often sold as folk-craft souvenirs in Asakusa and at shrine festival stalls. These are machine-printed rather than hand-painted — fine as gifts, not true collector pieces.

    Mid-range (¥5,000–20,000): Genuinely flyable, hand-painted Edo-dako in the 60–90cm range, or a quality hata kite with a coated string set from Nagasaki. This is the sweet spot for most visitors who want an authentic, displayable piece without commissioning anything.

    Splurge (¥30,000–100,000+): Large-format, master-painted kites — sometimes made to order with a family crest or custom design — sold directly through workshops rather than retail shops. These are the pieces serious collectors fly once, frame, and never fly again.

    If you’re weighing whether a kite makes sense as a gift rather than a keepsake, it’s worth a quick read of our omiyage etiquette guide first — a large painted kite is a striking gift but an awkward one to hand over at the office, so it’s better suited to family or a dedicated collector friend than a standard souvenir-box exchange.

    Best Season for Buying and Seeing Kites Flown

    Kite shops and festival stalls are busiest — and best stocked — around two windows: late December into early January (New Year season, when Edo-dako sales peak) and late April to early May (Golden Week, which overlaps with both the Nagasaki Hata-age Taikai and the Hamamatsu Matsuri). Outside these windows, dedicated kite shops still operate but with thinner stock, so if your trip timing is flexible, building it around one of these festival dates will get you better selection and the chance to see kites actually flown rather than just hung on a wall.

    Common Mistakes First-Time Buyers Make

    The biggest mistake is buying a kite as a flat souvenir and forgetting it’s a 3D object with a bamboo frame — rolling it for a suitcase can snap the spars, so ask the shop for a flat box or tube, and plan for it as checked luggage rather than a carry-on. The second mistake is assuming all painted kites are hand-done; ask directly whether the design is hand-painted (tegaki) or printed, since the price difference is substantial and shops won’t always volunteer this. Finally, don’t assume a kite bought in Tokyo will be the right style for a Nagasaki-themed collection or vice versa — the two traditions don’t overlap in form, materials, or flying technique, so buy the regional style where it’s actually made rather than wherever happens to be convenient.

    For collectors who enjoy watching a craft practiced start to finish, pairing a kite-buying trip with another hands-on traditional craft stop rounds out the day well — Tokyo’s Kakimori notebook atelier is a similarly tactile, made-to-order experience if you want more than one craft souvenir from the same trip.
  • Nishijin-ori: Kyoto’s 1,200-Year-Old Silk Weaving District

    Nishijin-ori: Kyoto’s 1,200-Year-Old Silk Weaving District

    Photo by Michael Lee on Unsplash

    Long before Kyoto was a tourist destination, it was a textile factory. For over a millennium, the narrow lanes northwest of the Imperial Palace have produced some of the most prized woven silk in Japan — obi sashes, brocade, and kimono fabric so intricate that a single piece can take months to finish. This is Nishijin, and the cloth it produces, Nishijin-ori, is still handmade here by artisans working on wooden looms passed down through generations. If you want to see a living craft rather than a museum display, and maybe bring a piece of it home, this is where to go.

    What Is Nishijin-ori, and Why Kyoto?

    The name comes from the “western camp” (nishi no jin) of an army that occupied this part of the city during the Onin War in the 1460s. When the fighting ended, weavers who had scattered during the conflict regrouped in the area, and the district became synonymous with the craft. Nishijin-ori isn’t one technique but a family of them — tsuzure (hand-woven tapestry weave), kinran (gold brocade), and dozens of other named styles — unified by the use of pre-dyed threads woven into complex patterns, rather than printing a design onto finished fabric afterward. That’s the key difference from most textile production: the pattern is built thread by thread as the cloth is woven, which is why a formal obi can cost as much as a used car and take three to six months to produce on a traditional loom.

    Today Nishijin-ori is officially recognized as a traditional Japanese craft (dentō kōgei), and the district — centered on Horikawa-dori and Imadegawa-dori in Kamigyo Ward — still has working looms inside ordinary-looking houses, visible through open doors and windows if you walk the back streets slowly.

    Getting to the Nishijin District

    Nishijin isn’t on the main subway line, which is part of why it stays quiet compared to Gion or Arashiyama. The easiest approach is by bus: from Kyoto Station, city buses 9, 12, or 50 run to the Horikawa Imadegawa stop (around 230 yen, roughly 25-30 minutes depending on traffic). Alternatively, take the Karasuma subway line to Imadegawa Station and walk about 15-20 minutes west along Imadegawa-dori. If you’re coming from the Kinkaku-ji (Golden Pavilion) side of town, it’s a short bus or taxi hop south, which makes it easy to combine both in one morning.

    There’s no single “entrance” to the district — it’s a neighborhood, not a complex — so the Nishijin Textile Center (see below) is the most sensible first stop, both as an orientation point and because it’s free.

    The Nishijin Textile Center: Free Shows and Shopping

    The Nishijin Textile Center (Nishijin-ori Kaikan), on Horikawa-dori just south of Imadegawa, is the easiest way to understand the craft in under an hour. Admission is free. Inside, you’ll find weavers demonstrating hand looms on the ground floor, informational displays on the different Nishijin-ori techniques, and — the main draw for most visitors — kimono fashion shows held several times a day, where models walk a short runway in elaborate Nishijin silk kimono. Shows typically run on a rotating schedule through the afternoon; check the posted times when you arrive, as they shift seasonally. The building generally opens around 10:00am and closes in the late afternoon, but confirm hours before your visit since they’re occasionally adjusted for events.

    The ground-floor shop sells everything from small woven goods to full obi, and prices are clearly tagged, which makes it a useful place to calibrate your budget before you go hunting in smaller shops nearby. There’s also a kimono rental and dress-up corner if you want photos in full Nishijin silk, priced separately from general admission.

    Where to Buy Nishijin-ori: Budget to Splurge

    Prices vary enormously depending on how much hand-weaving went into the piece:

    • Budget (2,000-8,000 yen): Small accessories made from Nishijin fabric scraps or machine-assisted weaves — coin purses, business card holders, eyeglass cases, and omamori-style pouches. These are genuinely made with Nishijin textiles, just not the most labor-intensive weaves, and they make solid, authentic souvenirs.
    • Mid-range (10,000-40,000 yen): Neckties, tote bags, table runners, and smaller obi-style accessories woven with real jacquard patterns. This is the sweet spot for a memorable gift — distinctive, clearly handmade-adjacent, and not outrageous for an heirloom-quality textile.
    • Splurge (100,000 yen and up): A proper hand-woven obi, especially in the tsuzure technique, can run from 150,000 yen into the millions of yen for museum-grade work by a named artisan. These are investment pieces bought by people who wear kimono regularly, but even if you’re not buying, ask a shop if you can see one — the density of the weave is worth examining up close.

    Beyond the Textile Center, smaller family-run shops along Imadegawa-dori and the side streets near it sell directly from workshops, often at better prices than tourist-facing stores, though English signage is limited. If a shop looks closed but the door is open, it’s usually fine to peek in — just be polite and ask “Mite mo ii desu ka?” (Is it okay to look?) before touching anything.

    Best Time to Visit

    Nishijin has no real off-season since most of what you’re seeing is indoors, but there’s one date worth building a trip around: the 25th of each month is Tenjin-san, a large flea and antiques market at Kitano Tenmangu Shrine, a short walk from the textile district. Vintage kimono, obi, and textile remnants show up at a fraction of retail price, and it’s a good complement to a Nishijin visit on the same day. Weekday mornings are quietest at the Textile Center itself; weekends bring more tour groups timed around the fashion shows.

    Common Mistakes to Avoid

    The biggest mistake is assuming all “Nishijin” labeled goods sold around Kyoto were made in the district — the name is sometimes used loosely for anything in a similar style, so if authenticity matters to you, buy from the Textile Center or a shop that can show you where the piece was woven. Second, don’t rush the fashion show at the Textile Center — arrive 10-15 minutes early, as seating fills up with tour groups. Third, resist negotiating on price in small artisan shops; unlike flea markets, fixed-price textile goods aren’t haggled over, and it can come across as disrespectful to the work involved.

    Tax-Free Shopping and Shipping Home

    Larger Nishijin-ori purchases often clear the 5,000 yen minimum for Japan’s consumer tax exemption, so bring your passport — shops accustomed to tourists can process it on the spot, though smaller family workshops may not have the system set up, so ask before you commit to a big purchase. If you’re also comparing where to buy cameras or electronics tax-free while in Kyoto, the logic is similar to what’s covered in our Bic Camera vs Yodobashi Camera guide. For wrapping and presenting a Nishijin piece as a gift back home, it’s worth knowing the local etiquette — our guide to omiyage etiquette covers how these gifts are typically given and received. And if lacquerware is also on your shopping list, it pairs naturally with textiles as a craft souvenir — see our piece on Wajima-nuri lacquerware for another regional specialty worth seeking out.

  • Adding Suica or Pasmo to Apple Wallet: A Tourist’s Setup Guide

    Adding Suica or Pasmo to Apple Wallet: A Tourist’s Setup Guide

    Photo by Thiago Yonamine on Unsplash

    If you’re flying into Tokyo and dreading the ticket machine line, there’s good news: you can set up a working Suica or Pasmo card on your iPhone before you even board the plane. No kiosk, no Japanese-language menus, no 500-yen deposit. This guide walks through exactly which devices work, how to add the card, how to keep it topped up, and the mistakes that trip up first-timers.

    Do You Even Need a Physical Card?

    Suica (issued by JR East) and Pasmo (issued by Tokyo’s private railways and bus operators) are the two main prepaid IC cards used across Japan’s trains, subways, and buses. They’re also accepted as e-money at convenience stores, vending machines, and many shops nationwide — handy if you’re grabbing a bowl of oden at a convenience store counter and don’t want to fumble for coins. For most visitors with a compatible iPhone, there’s no real reason to bother with the plastic version anymore — the digital card works identically at every gate and reader, costs nothing to create, and can be topped up from your phone at 2am in your hotel room.

    The one caveat: physical Suica cards have occasionally been in short supply at stations over the past couple of years due to IC chip shortages, with JR East periodically restricting walk-up sales to residents. That makes the Apple Wallet route even more reliable for tourists right now, since it sidesteps station inventory entirely.

    Which iPhones and Apple Watches Actually Support This

    You need an iPhone 8 or later, or an Apple Watch Series 3 or later — and this works regardless of which country or region your device (or Apple ID) is set to. That region-lock used to be a real headache before 2017, but Apple opened FeliCa transit cards up to all markets, not just Japan-sold phones. The only common exception is the first-generation iPhone SE, which lacks the needed NFC hardware. If your phone is newer than about 2017, you’re almost certainly fine.

    Step-by-Step: Adding Suica or Pasmo in Wallet

    • Open the Wallet app and tap the + in the top corner.
    • Select “Travel Cards,” then choose Suica or Pasmo from the list.
    • Tap “Create” to set up a brand-new digital card, or “Transfer Existing Card” if you already own a physical one and want to move its balance onto your phone (this fully deactivates the physical card, so don’t do it until you’re sure).
    • Choose an initial top-up amount — you’ll be asked to load funds via Apple Pay as part of setup, typically in 1,000-yen increments.
    • Confirm, and the card appears in Wallet within seconds, ready to tap at any gate.

    The whole process takes about two minutes and can be done from your home country before you fly, as long as you have a working internet connection and an Apple Pay–eligible card.

    Topping Up: Cards, Cash, and Limits

    For years, only Japan-issued credit cards could reload a mobile Suica or Pasmo through Apple Pay, which frustrated a lot of visitors. That changed in late 2023: most Visa and Mastercard credit cards issued outside Japan can now top up directly in the Wallet app, no Japanese bank account required. Open the card in Wallet, tap “Top Up,” enter an amount, and authenticate with Face ID or Touch ID.

    If your card isn’t accepted for some reason, you can still add cash. Look for the green multi-function ticket machines at JR stations — select the “Mobile Suica / Apple Pay” charge option on the touchscreen, insert cash, and hold your iPhone against the reader pad to load the funds. Maximum balance on either card is 20,000 yen, and top-ups are generally accepted in round amounts like 1,000, 2,000, 3,000, 5,000, or 10,000 yen.

    Using It at Gates, Buses, and Shops

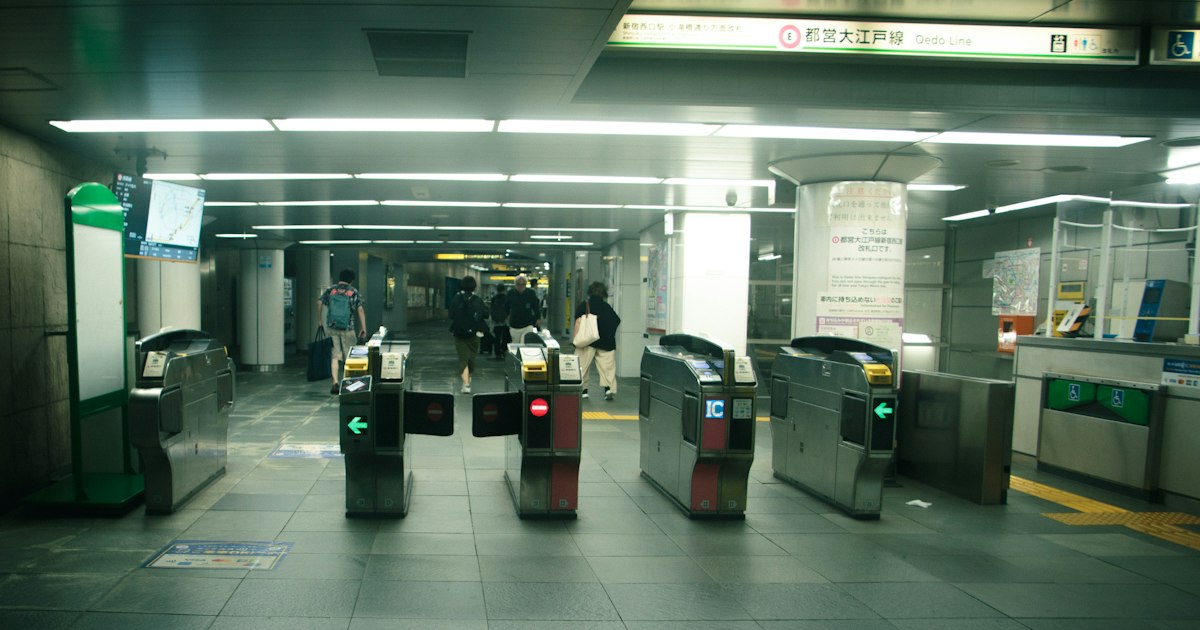
    Go to Settings > Wallet & Apple Pay > Express Transit Card, and set your Suica or Pasmo as the default. This is the single most important setup step — with Express Transit enabled, you tap your phone or watch directly on the reader with no Face ID, passcode, or double-click needed, exactly like a physical card. Skip this and you’ll be stuck authenticating at every single gate, which is slow and annoying during rush hour.

    One underrated feature: even after your iPhone’s battery fully dies, Express Transit usually keeps working off reserve power for a few hours, so you can still get through a final gate on your way to a charger. The card also works as tap-to-pay at convenience stores, vending machines, and an increasing number of retail counters — useful at electronics megastores like those compared in our Bic Camera vs Yodobashi Camera guide, though note that tax-free purchases there still need a passport scan separately from your IC card payment.

    Common Mistakes to Avoid

    • Not setting Express Transit as default — leads to failed taps and Face ID prompts mid-gate.
    • Adding both Suica and Pasmo — they’re functionally interchangeable for transit and shopping, so there’s no benefit to carrying both digitally; pick one and avoid Wallet confusing which card is default.
    • Assuming it works everywhere — some rural and scenic lines, including parts of the route up to the Tateyama Kurobe Alpine Route or smaller legs near the Kurobe Gorge Railway, still require paper tickets. Always check before assuming a tap-in gate exists.
    • Transferring a physical card too early — once you use “Transfer Existing Card,” the plastic version is dead. Only do this once you’re confident you won’t need a backup card for a travel companion.
    • Switching phones mid-trip without transferring out first — if you get a new iPhone, move the card via Wallet’s transfer settings before wiping your old device, or you’ll need to go through JR East’s refund process, which is far more painful for a short-term visitor than for a resident.

    Suica vs Pasmo: Does It Matter Which One You Pick?

    For a tourist, barely. Both are accepted on essentially the same network of trains, subways, buses, and shops across the country, including on regional lines you might ride on an Izu Peninsula day trip from Tokyo. Suica has a slight edge for name recognition abroad and is the default choice if you’re flying into Haneda or Narita, since JR East runs those airport lines. Pasmo is backed by Tokyo’s subway and bus operators and feels marginally more “local” if you’re based in a neighborhood served mainly by private railways. Either one will get you around Tokyo, Osaka, Kyoto, and most other major cities without issue — the real decision is just making sure you set it up correctly in Wallet before your first train ride, not which brand name is on it.

  • Hakata vs Utsunomiya: Japan’s Great Gyoza Rivalry

    Hakata vs Utsunomiya: Japan’s Great Gyoza Rivalry

    Photo by Huyen Bui on Unsplash

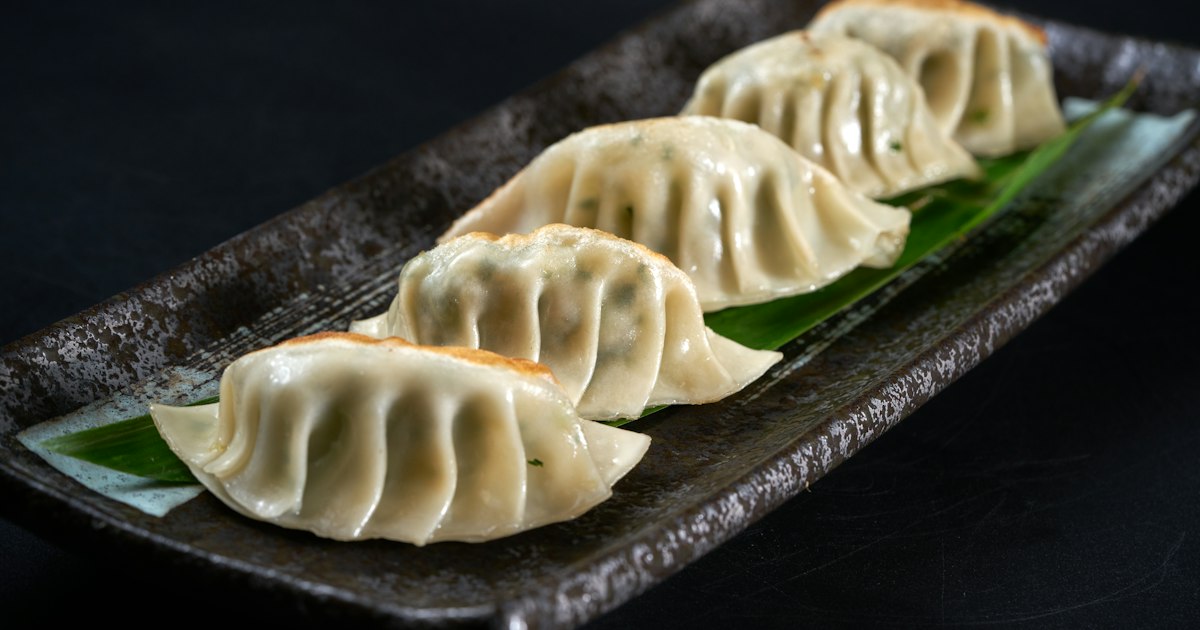
    Ask someone from Fukuoka and someone from Utsunomiya which city makes Japan’s best gyoza, and you’ll start an argument that’s been running for decades. Both cities have built genuine food cultures — and civic pride — around the pan-fried dumpling, but they taste almost nothing alike. One is tiny, garlicky-but-mild, and built for a late-night yatai stall; the other is big, loaded with cabbage and raw garlic, and sold from a dedicated “Gyoza Stadium.” Here’s how to eat your way through both.

    Two Cities, Two Gyoza Philosophies

    Gyoza arrived in Japan from China via soldiers and civilians returning from northeastern China after World War II, and both Fukuoka and Utsunomiya claim early, independent gyoza scenes that grew up around returnee communities in the late 1940s. From there the styles diverged completely. Hakata (the old city-center name still used for Fukuoka’s food culture) developed small, almost dainty dumplings meant to be eaten two or three bites at a time alongside beer or ramen. Utsunomiya, in landlocked Tochigi Prefecture, leaned into bulk — big, cabbage-heavy gyoza sold by the plate as a meal in themselves, with both fried (yaki) and boiled (sui) versions on most menus.

    Hakata Gyoza: Bite-Sized and Built for Late Nights

    Hakata-style gyoza (hitokuchi gyoza, or “one-bite gyoza”) are small, thin-skinned, and pan-fried in neat rows, usually arriving eight to ten per plate for around ¥400–¥600. The thin wrapper-to-filling ratio and light garlic make them an easy companion to tonkotsu ramen or a round of highballs, not a standalone meal.

    The classic way to eat them is at the yatai (open-air food stalls) along the Nakasu riverside and around Tenjin, where stalls typically set up from around 18:00 and run until 1:00–2:00 am, cash only, with seating for maybe eight to ten people elbow-to-elbow. Weather and construction can shut yatai down with no notice, so treat a specific stall as a “try to find it” rather than a guaranteed stop. For a sit-down version without the gamble, Gyoza no Tetsujin and Gyoza Taiho (near Nakasu, one of the shops credited with popularizing the hitokuchi style) serve the same dumplings daily, typically from lunch through late evening.

    Utsunomiya Gyoza: Gyoza City’s Garlic-Forward Classics

    Utsunomiya markets itself outright as “Gyoza no Machi” — Gyoza City — a title it adopted after statistics repeatedly showed its households among Japan’s top spenders on gyoza (it trades the top spot back and forth with Hamamatsu most years). There’s a gyoza statue outside JR Utsunomiya Station’s west exit, and the dumplings here are a different animal from Hakata’s: larger, stuffed generously with cabbage, and often more assertive with raw garlic.

    The easiest one-stop introduction is Utsunomiya Gyoza Stadium, a food-court-style complex a short walk from the station gathering roughly a dozen of the city’s well-known gyoza shops under one roof, generally open from around 11:00 to 19:00 or 20:00 (hours vary by shop, and some close one weekday). Expect to pay ¥300–¥500 for a plate of six. Minmin, near the station’s east side, is the most famous standalone shop and routinely has a queue out the door at lunchtime — arrive by 11:00 or plan for a 20–30 minute wait.

    Getting There: Trains, Times, and Ticket Prices

    Utsunomiya is the easier day trip from Tokyo. The Tohoku Shinkansen (Yamabiko or Nasuno trains) covers it in about 50 minutes for roughly ¥4,500 one way; the slower JR Utsunomiya Line local/rapid service takes about 1 hour 40 minutes to 2 hours for around ¥1,980 and is covered by wide-area rail passes that include the Tohoku corridor. Either way, it’s a realistic half-day or full-day round trip without an overnight stay.

    Fukuoka is a bigger commitment: the Sanyo/Tohoku Shinkansen from Tokyo takes around 5 hours and costs roughly ¥22,000 one way, while flying takes about 2 hours plus airport time. From Osaka, the Shinkansen to Hakata is about 2.5 hours for around ¥15,000. Most visitors fold Hakata gyoza into a broader Kyushu or Fukuoka city itinerary rather than a standalone trip — it pairs naturally with a ramen crawl or a stop at nearby Shinsekai-style retro food alleys if you’re routing through Osaka’s Shinsekai district on the same trip.

    Best Time to Go and How to Avoid the Lines

    Both cities’ gyoza scenes are year-round, but timing still matters. In Fukuoka, yatai are miserable and sometimes closed outright during the June–July rainy season and the worst of August’s humidity; late autumn through early spring, when the air is cooler, is the more comfortable season to eat standing or on a bench outdoors. In Utsunomiya, Gyoza Stadium and Minmin both get hit hardest at lunch on weekends, when tour groups and day-trippers from Tokyo stack up — a weekday lunch around 11:30, just after opening, is the easiest way to skip the worst of it.

    A common mistake in Fukuoka is wandering Nakasu at 19:00 expecting a full stall lineup — many yatai don’t set up until closer to 19:30–20:00, and some well-known ones only operate a few nights a week. In Utsunomiya, the mistake is assuming one plate is enough; portions are smaller than they look, and most regulars order two or three rounds, splitting yaki and sui styles to compare.

    Budget, Mid-Range, and Splurge Gyoza

    • Budget (¥300–¥600): A single plate at either Gyoza Stadium or a Hakata yatai counter — enough for a snack, not a meal.
    • Mid-range (¥1,000–¥2,000): A full sit-down meal — gyoza plus ramen or rice and a drink in Fukuoka; two or three gyoza plates plus a side at Minmin or a Gyoza Stadium shop in Utsunomiya.
    • Splurge: Neither city’s gyoza scene is really a splurge category — the appeal is precisely that it’s cheap, fast, and unpretentious. If you want to spend more, pair the meal with a proper Hakata ramen tasting or a Tochigi sake flight on the side rather than ordering premium gyoza.

    Mistakes to Avoid

    Bring cash — many yatai and smaller gyoza shops in both cities still don’t take cards, and ATMs aren’t always nearby. Don’t expect English menus at the most authentic stalls; pointing at what the table next to you is eating works fine. If you want to bring gyoza home, both cities sell frozen, vacuum-packed sets designed for travel (look for them at the station or airport) — they make a genuinely appreciated gift, so it’s worth knowing the basics of omiyage etiquette before you hand a box to a Japanese colleague or host. And if your gyoza crawl is part of a bigger regional-specialty trip, it’s worth comparing notes with Japan’s other famous single-dish pilgrimage, Sendai’s grilled beef tongue (gyutan) scene — a useful reminder that almost every Japanese city has staked a claim to one dish, and the fun is in tasting the differences rather than crowning a winner.

  • Melon Pan: Japan’s Beloved Sweet Bread and Where to Find the Best

    Melon Pan: Japan’s Beloved Sweet Bread and Where to Find the Best

    Photo by Yeh Xintong on Unsplash

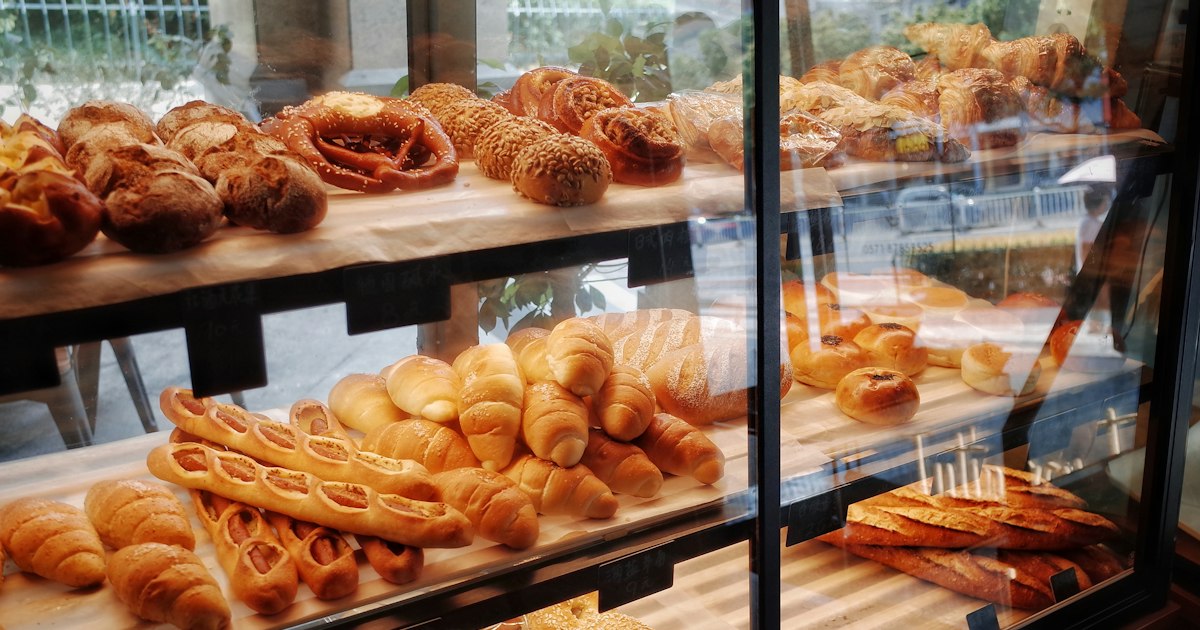
    Melon pan is the bread you’ll see piled in the window of nearly every Japanese bakery, convenience store, and train station kiosk — a round, golf-ball-textured bun with a crackly cookie crust and a soft, slightly sweet interior. Despite the name, it rarely contains actual melon. It’s one of Japan’s most accessible, affordable treats, and a genuinely good item to sample on day one of a trip, not just a novelty for Instagram.

    What Melon Pan Actually Is (and Isn’t)

    Melon pan is a yeasted bread dough wrapped in a thin layer of cookie dough (biscuit dough), then scored in a crosshatch pattern before baking so it cracks open like a cantaloupe rind. The “melon” refers to the shape and surface pattern, not the flavor — most versions taste like a lightly sweet vanilla cookie over soft milk bread, with no fruit flavor at all. Some regional and specialty versions do add real melon flavoring or even cream filling, so if you want actual melon taste, look for labels that say “メロン果汁入り” (contains melon juice) or ask for “メロン風味” (melon-flavored) versions — plain “メロンパン” is the classic, melon-less original.

    Texture is the main appeal: a firm, sugar-crusted shell gives way to pillowy bread underneath. It’s best eaten the same day it’s baked, ideally within a few hours, since the crust softens and loses its snap by the next morning.

    Where to Buy: Budget, Mid-Range, and Splurge Options

    Budget (¥110–¥160): Convenience stores (7-Eleven, Lawson, FamilyMart) and supermarket bakeries sell perfectly decent melon pan for around ¥120–¥150. This is a fine way to try one on arrival day with zero planning — similar in spirit to grabbing oden at a convenience store counter in winter, it’s a snack culture built around convenience, not ceremony.

    Mid-range (¥150–¥350): Neighborhood bakeries (machi no pan-ya) and chains like Vie de France or Shiro-Hige’s Cream Puff Factory bake fresher batches, often still warm in the morning. Look for a sign reading “焼きたて” (freshly baked) and ask staff when the next batch comes out — many bakeries bake melon pan two or three times a day.

    Splurge (¥400–¥900): Specialty melon pan shops sell oversized versions (some the size of a small cantaloupe), stuffed versions with custard or ice cream inside, or artisan takes using French butter and high-fat milk. These make a fun, photogenic treat but aren’t necessary to understand what makes melon pan good — the ¥150 version from a decent bakery is genuinely representative.

    Where to Find the Best: Specific Shops Worth Seeking Out

    • Kagetsudo (Asakusa, Tokyo) — Famous for enormous, warm melon pan with a thick cookie crust, sold from a stall near Nakamise shopping street. Expect a queue, especially on weekends; go on a weekday morning for a shorter wait. Roughly ¥280–¥350 each.
    • Yamashiroya and local bakeries in Kagurazaka, Tokyo — This quiet, cobblestoned former geisha district (see our Kagurazaka guide) has a mix of old-school Japanese bakeries and French-influenced patisseries, making it a good spot to compare a traditional melon pan against a butter-heavy French-style one in the same afternoon.
    • Kobe — Often cited as melon pan’s birthplace region, thanks to the city’s early 20th-century bakeries that experimented with Western breads. Kobe’s old foreign settlement bakeries still turn out well-regarded versions, and it’s worth a stop if you’re already in the Kansai area.
    • Department store basement food halls (depachika) — Almost every major department store basement (Isetan Shinjuku, Daimaru, Hankyu) has at least one bakery counter selling fresh melon pan, often with unusual seasonal flavors like matcha, hoji-cha, or chocolate chip versions layered into the crust.

    Best Time to Buy

    Morning is best — most bakeries bake their first batch between 7:00 and 9:00 AM, and melon pan is at its peak within an hour or two of coming out of the oven, when the crust is still crisp and slightly warm. Many popular bakery stalls (like Kagetsudo in Asakusa) sell out of the freshest batch by early afternoon on busy days, restocking a few more times before closing, typically around 18:00–19:00. There’s no strong seasonal angle the way there is with, say, winter oden — melon pan is sold year-round — but summer heat can make the cookie crust go soft faster if you’re carrying it around all day, so plan to eat it soon after buying rather than saving it for later.

    Common Mistakes Travelers Make

    • Expecting melon flavor. The single biggest letdown for first-timers is biting in expecting fruit flavor and getting vanilla-cookie bread instead. Go in knowing this and you’ll enjoy it much more.
    • Buying it too early in the day and eating it too late. The crust-to-bread contrast is the whole point; a melon pan that’s sat in a bag for six hours loses its crackle.
    • Assuming all melon pan is the same. Regional and shop-to-shop variation is significant — some are bready and light, others are dense and buttery, some add chocolate chips inside the dough. If your first one disappoints, try a different shop before writing off the whole category.
    • Not checking for cream or custard-filled versions if you want something richer. These are usually labeled “メロンパン(クリーム入り)” and cost a bit more, but satisfy a different craving than the plain version.

    Bringing Melon Pan Home as a Souvenir

    Fresh melon pan doesn’t travel well and isn’t a practical souvenir to carry home — it’s a same-day eat. If you want to bring a bread-adjacent gift back for coworkers or family, look instead for individually wrapped, shelf-stable melon pan–flavored snacks (cookies, rusks, or KitKat-style confections) sold at souvenir shops and airports, which hold up far better in a suitcase. For general guidance on what makes a thoughtful workplace gift versus what to skip, our omiyage etiquette guide covers the unwritten rules. If you’re assembling a broader snack box from Japan, pairing a shelf-stable melon pan treat with something like a few varieties of senbei gives recipients a mix of sweet and savory. Travelers who enjoyed melon pan in Tokyo and are heading toward the Tohoku region afterward might also want to try zunda mochi and other Sendai sweets as a regional counterpart — both are humble, everyday treats that say a lot about local taste.

    Quick Reference

    Expect to pay ¥110–¥160 at a convenience store, ¥150–¥350 at a neighborhood bakery, and up to ¥900 for oversized or filled specialty versions. Buy in the morning, eat within a couple of hours, and don’t expect it to taste like actual melon. With no reservation needed and shops open from early morning until evening (most bakeries run roughly 7:00/8:00 AM to 19:00/20:00), it’s one of the easiest, cheapest, and most satisfying food stops to slot into any Japan itinerary.

  • Noboribetsu Onsen: Hokkaido’s Hell Valley Hot Spring Town

    Noboribetsu Onsen: Hokkaido’s Hell Valley Hot Spring Town

    Photo by hiding ninja on Unsplash

    Noboribetsu Onsen is the hot spring town where Hokkaido’s volcanic underside is impossible to ignore. Walk five minutes from your ryokan and you’re standing at the rim of Jigokudani — “Hell Valley” — a steaming, sulfur-yellow crater that still bubbles and hisses. It’s one of the few onsen towns in Japan where the geology isn’t just marketing copy; you can see, hear, and smell exactly where your bathwater comes from. Here’s how to plan the trip properly.

    What Makes This Hell Valley Different

    Jigokudani is a collapsed volcanic crater right at the edge of town, and it’s the reason Noboribetsu exists as a spa destination at all. A paved boardwalk loop (roughly 1 km, free, open around the clock, best lit for walking from early morning to early evening) takes you past vents releasing sulfurous steam and mineral-stained rock in shades of orange and grey. It’s genuinely dramatic, especially at dusk when the steam catches the fading light — in summer, the valley is illuminated for an evening “Fire Festival” walk.

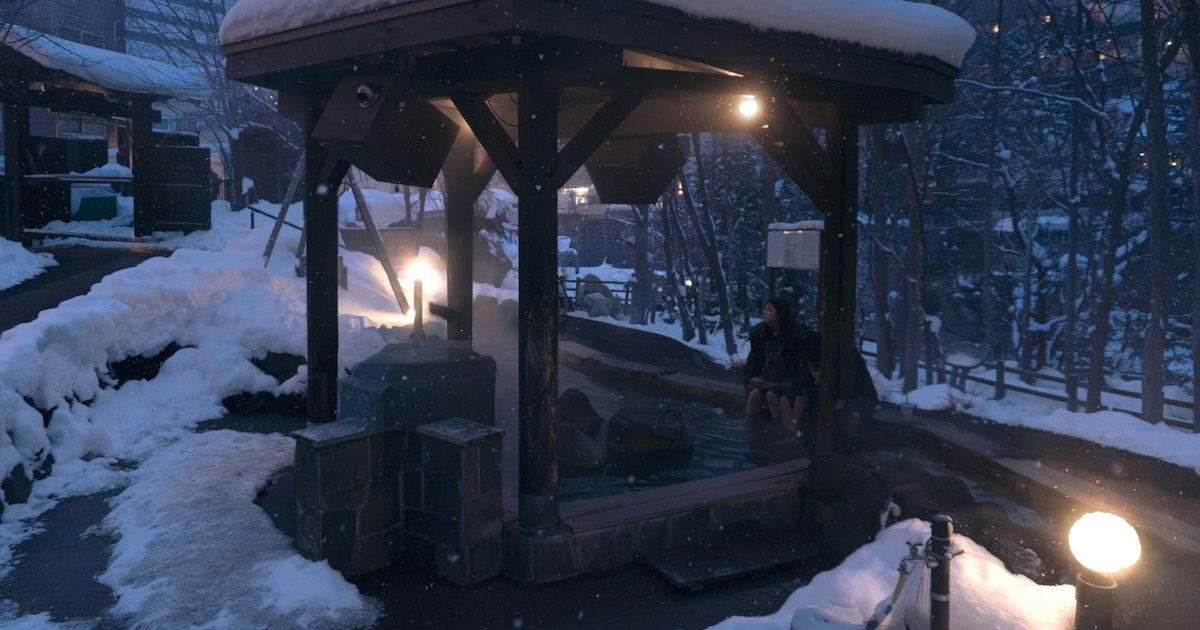
    About a 10-minute walk further uphill is Oyunuma, a pond fed directly by the volcanic source, and just below it the Oyunumagawa Natural Footbath — a stream where hot spring water cools as it flows downhill, so you can dip your feet in at a comfortable temperature for free. Bring a small towel; there’s nowhere to buy one on site.

    Noboribetsu’s water itself is the other draw: locals claim it has more spring types (sulfur, iron, salt, and several others) feeding the town than almost anywhere else in Japan, which is why so many ryokan here advertise multiple bath rooms under one roof rather than a single tub.

    How to Get There

    Noboribetsu is in southwestern Hokkaido, inland from the coast between Sapporo and Tomakomai, and it’s a manageable day trip or (better) overnight from Sapporo or New Chitose Airport.

    • From New Chitose Airport: Direct highway buses run to Noboribetsu Onsen in about an hour, for roughly ¥2,000–2,500 one-way. This is the easiest option if you’re arriving or departing by air.
    • From Sapporo: Direct highway buses (Donan Bus) take around 1 hour 40 minutes and cost roughly ¥2,500–2,800 one-way. Alternatively, take a JR limited express (Hokuto/Suzuran) from Sapporo Station to Noboribetsu Station (around 1 hour, limited express fare included), then a local bus from the station up into the onsen town itself (about 15 minutes, around ¥350). The bus is simpler since it drops you right in the town center; the train requires the extra transfer but runs more frequently.

    Either way, budget the better part of a travel day if you’re coming from Sapporo and back — it’s not a quick in-and-out like some hot spring towns closer to Tokyo, such as the ones covered in our Izu Peninsula guide.

    Best Time to Visit

    Noboribetsu works year-round, but the experience changes a lot by season. Winter (December–March) is the classic choice: snow around the crater rim, steam rising harder in the cold air, and the contrast of a hot bath against sub-zero temperatures is the whole point of onsen culture. Just note that Hokkaido winters are serious — pack real winter boots, since the paths into Jigokudani can be icy.

    Summer (July–August) brings warmer, greener valley walks and the town’s Jigoku Matsuri (Hell Festival) in late August, a three-day event with a parade featuring the town’s giant red oni (devil) statue, Yukyu-jin, which normally stands near the main bus stop year-round. Spring and autumn are quieter and avoid both snow hassle and summer crowds — early November is good for fall color on the hills around the crater.

    Whatever season, arrive at Jigokudani either early morning or after 5pm if you want it without tour-bus crowds; midday is when day-trippers from Sapporo pass through in large groups.

    Where to Stay: Budget to Splurge

    Noboribetsu is a classic case where the ryokan isn’t just a place to sleep — the bathing facilities themselves are the attraction, so it’s worth choosing carefully.

    • Budget: Smaller family-run ryokan and business hotels in town run roughly ¥8,000–12,000 per person per night without meals. Many still offer access to a decent onsen bath, just smaller than the big hotels.
    • Mid-range: Standard ryokan with half-board (dinner and breakfast included) typically run ¥15,000–25,000 per person per night. This is the sweet spot for most visitors and usually includes a multi-course kaiseki dinner featuring Hokkaido seafood and produce.
    • Splurge: Dai-ichi Takimotokan is the town’s best-known large-scale bathing complex, with dozens of indoor and outdoor pools drawing on several different spring sources under one roof — some travelers who aren’t staying overnight pay for day-use bathing (roughly ¥2,000–2,500) just to try it. Full-service stays at the larger flagship hotels run well above ¥30,000 per person with multiple dining options.

    Book dinner timing when you reserve — most ryokan serve set-time kaiseki dinners and won’t accommodate a late arrival without advance notice.

    Onsen Etiquette and Common Mistakes

    A few mistakes trip up first-time visitors here more than anywhere else in Hokkaido, simply because Noboribetsu’s baths are so central to the visit:

    • Tattoos: Many traditional baths still prohibit visible tattoos. If you have one, check with your ryokan before booking, bring a large waterproof cover sticker, or look specifically for a “tattoo-friendly” property — some of the larger hotels have started relaxing the rule or offer private family baths as a workaround.
    • Towel habits: The small hand towel is for modesty walking to the bath and for wiping off before you dry with a full-size towel back in your room — it never goes in the bathwater itself.
    • Shoes off, early and often: Between the ryokan entrance, your room, and the bath changing area, you’ll be removing shoes constantly. If you’re not used to this, our guide to shoe etiquette in Japan covers exactly where the line is and how slippers factor in.
    • Jigokudani timing: Don’t save the valley walk for after dinner thinking you’ll stroll back at night — some sections of the trail have limited lighting and the smell of sulfur is strongest (and the steam least photogenic) in full darkness. Go before or right after check-in.

    Beyond the Baths

    If you have an extra half-day, Noboribetsu Bear Park sits on a hilltop reachable by ropeway from the center of town (round-trip ropeway plus park entry runs roughly ¥2,500–3,000 for adults) and houses Hokkaido brown bears along with a small museum on Ainu culture and bear ecology.

    Before you leave, the main street through town has omiyage shops selling Hokkaido specialties — melon sweets, dairy products, and sulfur-spring bath salts packaged as souvenirs. If you’re bringing anything back for coworkers, it’s worth skimming our omiyage etiquette guide so individually wrapped portions don’t catch you off guard at checkout. And since you’re already in Hokkaido, it’s worth pairing this trip with the region’s other specialties — fresh sea urchin is one of the island’s signature foods, and our guide to Hokkaido uni points you toward where to eat it well, whether in Sapporo before you head to Noboribetsu or on the coast nearby.

    Noboribetsu rewards slowing down — it’s not a drive-by photo stop, it’s a town built entirely around soaking in the thing that makes the ground steam. Give it an overnight if you can.

  • Wajima-nuri: Ishikawa’s Premier Lacquerware and Where to Buy

    Wajima-nuri: Ishikawa’s Premier Lacquerware and Where to Buy

    Photo by Hendrik Morkel on Unsplash

    Wajima-nuri is widely considered Japan’s finest lacquerware, prized for a durability that lets a bowl survive decades of daily use without losing its shine. It comes from Wajima, a small city on the tip of the Noto Peninsula in Ishikawa Prefecture, where the craft has been refined since at least the 16th century. If you’re planning to buy a piece — or to visit the region where it’s made — here’s what you actually need to know, including an important update on how the 2024 earthquake has changed the picture.

    What Makes Wajima-nuri Different

    Most lacquerware is beautiful but fragile. Wajima-nuri is built to be used. The base layer uses jinoko, a powder made from local diatomaceous earth, mixed into the lacquer undercoat and reinforced with hemp cloth at stress points like rims and bottoms. Craftsmen then apply dozens of coats of urushi (lacquer sap), sanding between each one — a finished piece can go through 20 to more than 100 distinct steps and take anywhere from several weeks to over a year to complete. That’s why an authentic Wajima-nuri bowl feels noticeably heavier and more rigid than a cheap imitation, and why it can be used with hot soup daily for 20+ years without cracking.

    Decoration is the other half of the story. Look for maki-e (designs built up with sprinkled gold or silver powder) and chinkin (patterns carved into the lacquer and filled with gold leaf). These techniques are what separate a 5,000-yen rice bowl from a 500,000-yen jewelry box, and genuine hand-applied maki-e should show slight texture and depth under raking light, not a flat printed sheen.

    A Necessary Note: The 2024 Noto Earthquake

    The January 1, 2024 earthquake that struck the Noto Peninsula caused severe damage in Wajima city itself, including fires in the historic morning market area where many lacquerware shops and workshops were concentrated. Recovery has been ongoing but uneven, and some workshops, retail streets, and tourist facilities have faced long closures or relocations. Before building a trip around visiting Wajima in person, check current conditions directly — local tourism sites and the Ishikawa Prefecture travel pages carry the latest status on which shops, museums, and roads are operating. This isn’t a reason to skip the region, but it is a reason to confirm specifics rather than assume a pre-2024 guidebook is still accurate.

    The good news for shoppers: Wajima-nuri is sold well beyond Wajima itself, including in Kanazawa, Tokyo, and online, so you can buy genuine pieces even if your itinerary doesn’t make it out to the peninsula.

    How to Get to Wajima

    There’s no train service to Wajima — the rail line was discontinued years ago, well before the earthquake. The standard route is a highway bus from Kanazawa Station, run by Hokutetsu, taking roughly 2 to 2.5 hours one way depending on the route and stops. If you’re coming from Kanazawa for a day trip, that’s effectively 4-5 hours of travel alone, so plan for an overnight stay in the area if conditions allow, rather than rushing it as a day excursion. Given the post-earthquake disruptions, double-check current bus schedules and whether your planned stops are open before departure.

    If you’re already routing through the Hokuriku region — say, combining this with the Tateyama Kurobe Alpine Route or the Kurobe Gorge Railway in neighboring Toyama — Kanazawa makes a logical base, with Wajima as a further add-on if time and conditions allow.

    Where to Buy: Budget, Mid-Range, and Splurge

    Budget (around 2,000–8,000 yen): Lacquered chopsticks, small coasters, and single rice bowls (owan) are the easiest entry point and pack well for travel. These make solid, well-received gifts — if you’re buying for colleagues back home, it’s worth reading up on omiyage etiquette first, since presentation and individual wrapping matter more in Japan than you might expect.

    Mid-range (around 8,000–40,000 yen): Lidded soup bowls, trays, and small decorated boxes with simple maki-e accents fall in this range. This is where quality differences become obvious — ask whether a piece is honshitsu (real lacquer, multiple coats) versus a cheaper synthetic-lacquer hybrid, since both get sold to tourists.

    Splurge (40,000 yen and up, into the hundreds of thousands): Large decorated boxes, tea ceremony items, and museum-quality pieces with elaborate chinkin or maki-e work by named craftsmen. These are investment pieces meant to be heirlooms, not everyday tableware, though many are still functional.

    Outside Wajima, Kanazawa’s Omicho Market area and specialty craft stores near Kanazawa Station carry a solid range of genuine Wajima-nuri, and department stores in Tokyo (Mitsukoshi, Takashimaya, and similar) regularly stock curated selections in their craft or homeware floors, often with English-speaking staff and tax-free processing for purchases over 5,000 yen before tax.

    Best Time to Visit

    If you do make it to the Noto Peninsula, spring (April–May) and autumn (September–November) offer the most comfortable travel weather for a region with limited indoor tourist infrastructure. Winter brings heavy snow to parts of the peninsula and can disrupt bus schedules, which is worth factoring in given the already-reduced transit options post-earthquake. Regardless of season, call ahead or check online before traveling — opening hours for craft workshops and small retail shops in the region have been less predictable since 2024 than they were before.

    Common Mistakes to Avoid

    • Assuming “lacquerware” sold anywhere in Ishikawa is Wajima-nuri. Ask explicitly, or look for a certification sticker/tag — Yamanaka and other Ishikawa lacquerware traditions are also excellent but are distinct products, and sellers won’t always clarify unprompted.
    • Washing it like ceramic. Real urushi lacquerware should be hand-washed with mild soap and a soft sponge, never put in a dishwasher or microwave, and dried promptly rather than left to air-dry in standing water.
    • Buying the first thing you see at inflated tourist pricing without comparing. Prices for similar-tier pieces can vary meaningfully between shops, so it’s worth browsing a couple of stores before committing to a mid-range or splurge purchase.
    • Packing it loose in a suitcase. Most reputable shops will wrap pieces properly for travel, but ask for extra padding or a hard box for anything with delicate maki-e decoration — the lacquer surface itself is durable, but gold decoration can scratch against other items.

    Wajima-nuri rewards a bit of homework: knowing the difference between a genuine hand-finished piece and a quick synthetic imitation will save you from overpaying, and understanding the region’s current situation will save you a frustrating detour. Whether you buy it from a department store in Tokyo or track it down closer to its source in Ishikawa, it remains one of the most functional, long-lasting souvenirs you can bring home from Japan.

  • Gyutan: Sendai’s Grilled Beef Tongue and Where to Eat It

    Gyutan: Sendai’s Grilled Beef Tongue and Where to Eat It

    Photo by note thanun on Unsplash

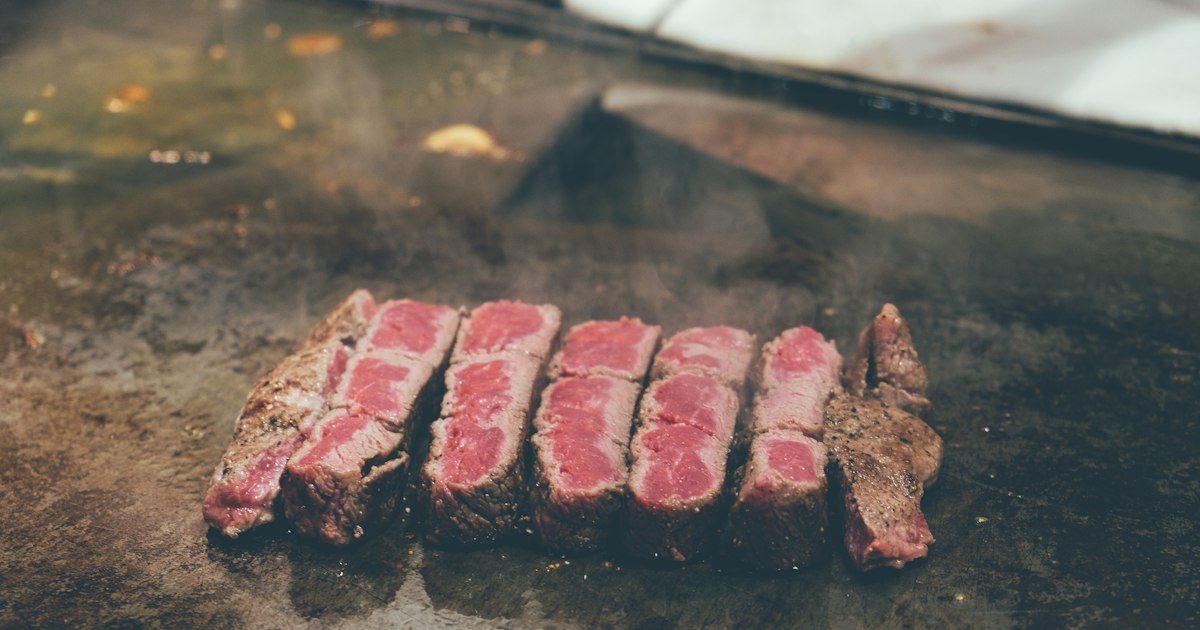
    If you ask someone from Sendai what to eat in their city, the answer comes back almost instantly: gyutan. Thick slices of grilled beef tongue, charred at the edges and chewy in the middle, served with barley rice and a bowl of oxtail soup — it’s one of the few regional Japanese dishes that didn’t exist a century ago and is now a full-blown culinary identity. If you’re passing through Tohoku, or even just changing trains at Sendai Station, this is worth the detour.

    What Gyutan Actually Is (and Why Sendai Claims It)

    Gyutan simply means “beef tongue.” It’s sliced thick — usually 7-10mm — scored lightly so it grills evenly, then cooked over charcoal until the outside is crisp and smoky and the inside stays springy and slightly fatty near the root end. It’s seasoned simply, often just salt, sometimes with a light miso or sauce marinade, and finished with a squeeze of lemon.

    The dish is a Sendai invention, not an ancient one. After World War II, a local restaurateur named Keishiro Sano started experimenting with beef tongue and oxtail, cuts that American occupation forces weren’t using, as a way to avoid wasting food. His shop, Aji Tasuke, is widely credited as the originator, and it’s still open in Sendai today. The dish caught on citywide through the 1960s-80s and is now treated as Sendai’s signature food in the way okonomiyaki belongs to Osaka or Hiroshima.

    The Classic Gyutan Teishoku Set

    Almost every shop serves the same basic format, called a teishoku (set meal), so it’s easy to know what you’re ordering even if the menu is only in Japanese:

    • Grilled beef tongue — usually 4-6 slices for a standard set
    • Mugimeshi — barley mixed into rice, the traditional pairing because it was cheap and filling in the postwar years
    • Tail soup (tēru sūpu) — a clear oxtail broth, often with scallion, that’s simmered for hours
    • Pickles and sometimes raw cabbage or a small side

    Expect to pay roughly 1,600-2,200 yen for a standard teishoku, 2,800-3,800 yen for a “thick-cut” (tokuatsu or tokuchō) version with fewer but noticeably thicker slices, and around 1,200-1,500 yen for a mini or lunch-only set at some shops. Many places also sell a tasting set with three cuts from different parts of the tongue — root, middle, tip — which is a good way to taste the texture range in one sitting.

    Where to Eat: Budget, Mid-Range and Splurge

    You don’t need to leave Sendai Station to eat well. The third floor has a dedicated strip nicknamed “Gyutan Street” (牛たん通り) with several competing shops side by side, and the S-PAL department store basement food court has more options. This is the easiest entry point if you’re short on time between trains.

    • Budget (1,300-1,800 yen): Chain shops like Rikyu (利久) have multiple branches inside and around Sendai Station. The food is consistently good, English menus are common, and turnover is fast — ideal if you have under an hour before a Shinkansen.
    • Mid-range (1,800-2,800 yen): Sasashige, Kiwamiya, and Tan-tan tend to use slightly thicker cuts and char over real charcoal rather than gas, which gives a smokier result. Several branches sit in the Ichibancho covered arcade and the Kokubuncho entertainment district, both walkable from the station.
    • Splurge (3,000-5,000+ yen): Aji Tasuke, the shop that started it all, is still running and worth the trip for the history alone, though it’s smaller and lines form at peak times. Thick-cut multi-course sets here and at similar long-established shops run higher but include a wider range of textures and sometimes grilled vegetables or tongue sashimi-adjacent preparations.

    Most individual shops seat 20-40 people, so queues of 15-30 minutes are normal at lunch (12:00-13:00) and dinner (18:30-20:00) on weekends. Typical hours run from around 11:00 to 22:00, sometimes with a short afternoon closure between lunch and dinner service at the smaller, non-chain locations — it’s worth a quick check of the specific shop’s hours on the day, since smaller operators occasionally close for a midweek rest day.

    How to Get There and Best Timing

    Sendai is about 90 minutes from Tokyo on the Tohoku Shinkansen (covered by the JR East or national JR Pass), making it an easy day trip or a one-night stop on a Tohoku itinerary. The station itself is the single best place to eat gyutan with zero extra travel, since the third-floor restaurant row exists specifically for travelers passing through.

    There’s no strong seasonal angle to gyutan — it’s a year-round grilled dish, not a seasonal ingredient — so the real timing consideration is crowds, not weather. Arrive right at opening (11:00) or go for a late lunch around 14:00 to skip the worst of the queue. If you’re visiting in winter, pairing a gyutan meal with a bowl of the tail soup is especially satisfying since it’s served hot and generously.

    Common Mistakes to Avoid

    • Ordering it rare or pink. Unlike steak, gyutan is always served well-grilled through. Don’t expect — or ask for — a rare center; that’s not how the dish is meant to be cooked.
    • Skipping the tail soup. It’s included in the set for a reason and is arguably as good as the tongue itself. Don’t let it go cold while you focus only on the meat and rice.
    • Assuming all shops are the same. Thickness, char, and seasoning vary meaningfully between the budget chains and the smaller charcoal-grill shops. If you only have time for one meal, lean toward charcoal-grilled over gas-grilled for a more pronounced smoky flavor.
    • Going only for dinner. Lunch sets at several shops are discounted compared to the dinner menu for the same core dish, so lunch is the better-value time to try it.

    Bringing Gyutan Home

    Vacuum-packed, frozen, or retort-pouch gyutan is sold at Sendai Station and in the airport, usually pre-sliced and seasoned for home grilling or microwave reheating, running roughly 1,500-3,000 yen depending on quantity and cut. It travels well in checked luggage if kept frozen until your flight, and it makes a distinctive gift precisely because it’s a single-city specialty rather than something sold nationwide. If you’re bringing it back for coworkers rather than just yourself, it’s worth knowing the informal rules — see our guide to omiyage etiquette for how individually wrapped, shareable gifts are expected to work in a Japanese office.

    Rounding Out a Sendai Visit

    Gyutan is usually just one stop on a short Sendai visit. Right alongside it, the city is equally known for a completely different regional specialty — sweetened mashed edamame used as a topping for mochi — which we cover in our guide to zunda mochi and other Tohoku snacks. If your trip lines up with a home match, Sendai’s J-League club, Vegalta Sendai, plays at a stadium a short ride from downtown, and our guide on watching J-League soccer in Japan covers how to get tickets and what to expect. Between a gyutan lunch at the station, a zunda sweet for the road, and an evening match, it’s an easy way to fill a full day in the city without needing a car.

  • Taking Your Shoes Off in Japan: Indoor Etiquette for Homes, Ryokan & Temples

    Taking Your Shoes Off in Japan: Indoor Etiquette for Homes, Ryokan & Temples

    Photo by Felix Rostig on Unsplash

    Nothing marks a first-time visitor to Japan faster than fumbling at a doorway, shoes half-on, while everyone else glides past in socked feet. Taking shoes off indoors isn’t a quaint custom reserved for shrines — it’s a daily, practical system that governs homes, ryokan, some restaurants, and dozens of temples and castles you’ll likely visit. Get the basics down before you go and it becomes second nature within a day or two. Here’s exactly where, when, and how it works.

    Why Shoes Come Off: The Logic Behind the Rule

    The custom isn’t really about cleanliness alone — it’s about separating “outside” dirt from the raised, often tatami-matted floor that Japanese households (and many traditional buildings) are built around. Floors are where people sit, kneel, and sometimes sleep, so they’re treated more like a bed than a walkway. Once you see it that way, the rule stops feeling arbitrary and starts feeling obvious: you wouldn’t walk on your bed in street shoes either.

    At the Genkan: The Step-by-Step Choreography

    Every Japanese home, and most ryokan and traditional restaurants, has a genkan — a sunken or lowered entry area just inside the door where shoes come off. The etiquette is simple once you know it:

    • Step out of your shoes while still standing in the genkan (the lower level), never on the raised floor behind you.
    • Turn your shoes around afterward so the toes point back toward the door — this is a small courtesy that locals do automatically, often with a quick foot-pivot rather than bending down.
    • Line your shoes neatly to one side, not in the middle of the entryway where others will trip over them.
    • Wear socks or bring a clean pair — bare feet in someone’s home or a ryokan is considered a little too casual. Slip-on shoes save time and dignity, since you’ll be doing this constantly.

    If you’re invited to someone’s home, it’s worth reading up on omiyage gift-giving etiquette too — arriving with a small, nicely wrapped gift and clean socks will make a strong first impression at the genkan before you’ve said a word.

    Ryokan Etiquette: Slippers, Tatami, and the Bathroom Switch

    Traditional inns layer the system further, and it trips up almost every first-timer:

    • Entrance: remove your outdoor shoes at the genkan and change into the ryokan’s indoor slippers, usually lined up in cubbies or offered by staff.
    • Your room: slippers come off again before stepping onto the tatami floor — leave them just outside the sliding door. Tatami is walked on in socks or bare feet only.
    • The toilet: almost every ryokan has a separate pair of “toilet slippers” waiting just inside the bathroom door. Swap into these, and — this is the mistake nearly everyone makes at least once — remember to swap back out before walking back through the hallway. Wandering the corridor in toilet slippers is a classic rookie error.
    • Outdoor areas: if your ryokan has a garden path or outdoor onsen building, you’ll typically find geta (wooden sandals) by the door for that short outdoor stretch.

    If you’re planning an onsen weekend, the Izu Peninsula is a popular, easy-access area from Tokyo with ryokan ranging from simple family-run inns (around ¥12,000–18,000 per person with two meals) to elaborate kaiseki retreats well over ¥40,000 — all running the same shoes-slippers-tatami system described above.

    Visiting a Japanese Home

    Private homes follow the genkan rules above, with a couple of added layers. If your host hands you house slippers, wear them through the hallways — but take them off before entering any tatami room, and definitely before stepping onto a dining area with a low table and cushions. Bathroom slippers work exactly like the ryokan version. If you’re visiting around New Year, when many families host relatives at home, it’s worth knowing the broader customs around that season — see our guide to Oshogatsu traditions, osechi ryori, and hatsumode — since shoe etiquette is just one piece of a bigger set of expectations around visiting someone’s home at that time of year.

    Temples, Shrines, and Castles: Where Shoes Actually Come Off

    Not every temple requires bare feet — outdoor shrine grounds and stone approach paths are fine in shoes. The rule kicks in once you step up onto a wooden veranda, tatami room, or interior hall. A few concrete, reliable examples:

    • Sanjusangendo (Kyoto): the famous 120-meter hall of 1,001 Kannon statues is walked entirely in socks; shoes go into plastic bags or shelves at the entrance. Open roughly 8:00–17:00 (shorter in winter), admission around ¥600.
    • Nijo Castle’s Ninomaru Palace (Kyoto): shoes off to walk the palace’s famous “nightingale floors,” which chirp underfoot by design as a security feature. Open 8:45–16:00 (last entry), closed some Tuesdays in Jan/Jul/Aug/Dec; castle grounds admission around ¥800–1,300 depending on what’s included.
    • Nikko Toshogu’s inner halls, including the Honji-do “crying dragon” room: shoes off, socks recommended since you’re on bare wood or tatami.

    Carry a lightweight tote bag for your shoes at busy sites — most provide plastic bags or wooden shelf lockers, but queues move faster if you’re not hunting for a spare bag. Autumn (November) and spring (late March–April) are the busiest seasons at these sights, so arriving at opening time means less crowding around the shoe-storage area itself, which gets surprisingly congested.

    Common Mistakes Foreign Visitors Make

    • Walking into the raised area with shoes still on to “just drop off a bag” — even a few seconds counts.
    • Forgetting socks entirely — bare feet are workable at home with close friends but feel too informal at a ryokan, temple, or someone else’s house. Convenience stores and 100-yen shops sell basic socks for ¥300–500 if you’re caught out.
    • Leaving toilet slippers on past the bathroom door — the single most common slip-up, even among seasoned travelers.
    • Not squaring up shoes at the door — small, but noticed.
    • Assuming all restaurants require it — izakaya and casual chains generally don’t; it’s mainly tatami-seating restaurants, traditional ryokan dining rooms, and temple/shrine interiors.

    It’s part of a broader pattern of small, systemized etiquette you’ll notice throughout Japan — the same instinct for order shows up in how households sort and dispose of trash, another area where a little advance knowledge saves visitors some awkward moments.

    Quick Packing Tips

    Pack slip-on or easily removable shoes, bring at least one clean pair of socks per day if you’ll be ryokan-hopping or temple-heavy on your itinerary, and consider a small drawstring bag for shoe storage at crowded sights. It’s a minor adjustment, but once the genkan choreography clicks, it becomes one of the more charming, low-cost rituals of traveling in Japan rather than a source of stress.

  • Yuzu: Japan’s Fragrant Citrus and the Products Worth Buying

    Yuzu: Japan’s Fragrant Citrus and the Products Worth Buying

    Photo by Akira on Unsplash

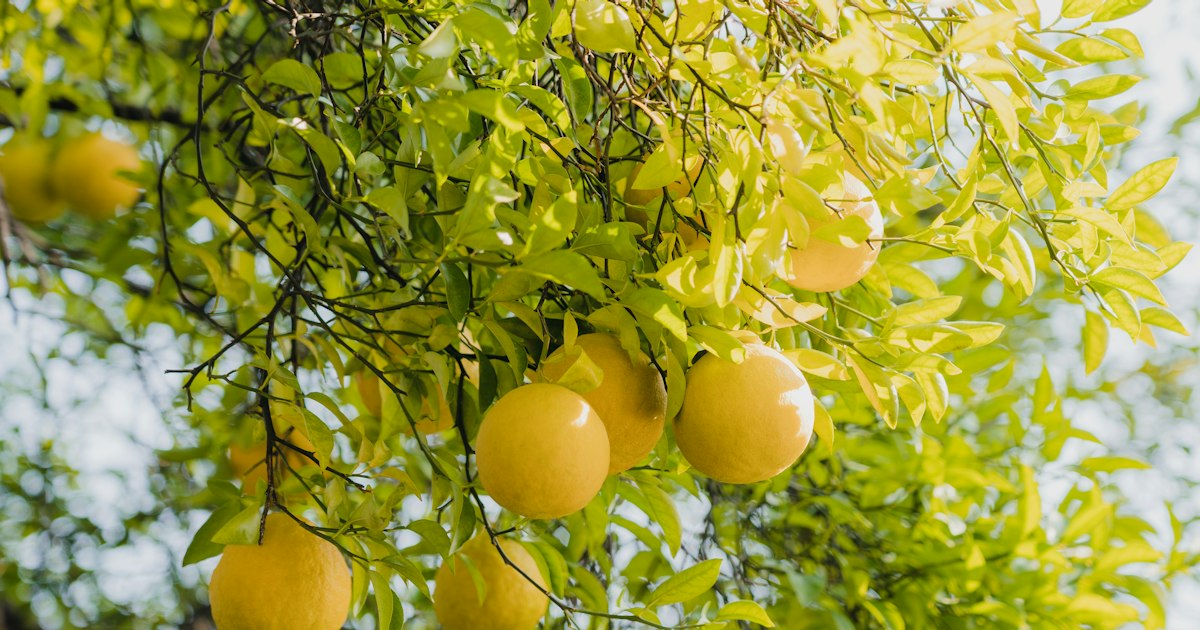
    Walk into any Japanese supermarket or department store food hall between October and February and you’ll catch it before you see it: a sharp, floral citrus scent that’s not quite lemon, not quite grapefruit, and unmistakably yuzu. This knobby yellow fruit is too sour and seedy to eat like an orange, but its zest, juice, and peel flavor an enormous range of condiments, sweets, and bath products that make some of the most distinctive souvenirs you can bring home from Japan. Here’s what’s actually worth buying, when to look for it, and how to avoid the tourist traps.

    What Makes Yuzu Different

    Yuzu (柚子) is a citrus fruit believed to have originated in China and cultivated in Japan for over a thousand years. Unlike a lemon or lime, almost nobody eats yuzu flesh directly — it’s too tart and full of seeds. Instead, the zest and juice are used sparingly to perfume dishes: a few shavings in miso soup, a squeeze in a dipping sauce, a curl of peel floating in a hot pot. The flavor is harder to pin down than lemon — floral, slightly bitter, with a perfume closer to a flower than a fruit. Once you’ve smelled real yuzu, the artificial “yuzu-flavored” candy at souvenir shops becomes easy to spot by comparison.

    When to Go: Season and the Winter Bath Tradition

    Yuzu ripens from green (used mostly for juice and vinegar) in late summer to its familiar bright yellow from November through December. This is peak season for fresh fruit in supermarkets, typically priced around ¥150–300 per fruit or ¥500–800 for a net bag of five or six. If your trip falls in this window, it’s also worth timing a visit to an onsen or sento around the winter solstice (toji), which falls on December 21 or 22 — in 2026, December 22. Many hot spring inns and public bathhouses fill their tubs with whole yuzu fruit for the day, a custom called yuzuyu believed to ward off colds and bring good luck. It’s a wonderfully fragrant, low-cost way to experience the fruit even if you never buy a single product — ask at your ryokan’s front desk whether they’re doing a yuzu bath that week, since not every property participates.

    Where Yuzu Comes From

    Kochi Prefecture on the island of Shikoku grows roughly half of Japan’s yuzu, with Tokushima Prefecture a close second. The single most famous yuzu-producing area is Umaji Village (Umaji-mura) in Kochi, a mountain village where yuzu farming is essentially the local economy. Umaji’s cooperative brand, Umaji no Mori, sells its juice, ponzu, and sweets both locally and in department stores nationwide — if you see that name on a label, you’re getting fruit from the source region. Umaji itself is remote (around 1.5 hours by car from Kochi city), so most visitors encounter the brand in Tokyo or Osaka stores rather than making the trip out, but it’s a worthwhile detour for anyone road-tripping through Shikoku in autumn.

    The Products Worth Buying

    Yuzu shows up in far more forms than most visitors expect. Here’s how to shop it by budget:

    • Budget (¥300–700): Yuzu kosho — a fermented paste of yuzu zest, chili, and salt — is the single most useful souvenir for a cook back home; a small tube or jar runs ¥400–600 at any supermarket and adds instant depth to grilled meat, noodles, or soup. Bottled yuzu ponzu (a citrus-soy dipping sauce) costs ¥350–500 for 360ml and is sold everywhere, including convenience stores. Seasonal yuzu Kit Kats (roughly October–February, ¥300–400 for a share bag) are a fun, easy omiyage for coworkers — see our omiyage etiquette guide if you’re buying for an office back home.
    • Mid-range (¥700–1,500): Honey yuzu tea (yuzu cha), a thick marmalade-like concentrate you spoon into hot water, comes in 400–500g jars for ¥800–1,200 and makes a genuinely useful gift — it keeps for months unopened. Umaji no Mori’s bottled yuzu juice (¥700–900 for 360ml) and yuzu vinegar are good mid-tier picks if you want traceable, single-origin fruit rather than a generic blend.
    • Splurge (¥1,500–5,000+): Kyoto’s Yakami Orchard is the name to know for serious yuzu — a multi-generation producer whose artisanal ponzu, yuzu kosho, and seasonal fruit preserves run ¥1,200–2,500 per item, with boxed gift sets reaching ¥4,000–5,000. These are the ones to buy if the gift recipient already cooks and will appreciate the difference.

    If you like winter snacking in general, yuzu kosho is also a classic condiment for oden broth — see our guide to oden at convenience stores for where to try it alongside your souvenir shopping.

    Where to Buy Yuzu Products in Japan

    Department store basement food halls (depachika) have the widest and best-curated selection — Isetan Shinjuku and Takashimaya Nihonbashi (both generally open 10:00–20:00) stock everything from supermarket brands to Yakami Orchard. Kaldi Coffee Farm, a nationwide import-grocery chain, reliably carries honey yuzu tea and yuzu-flavored snacks at lower prices than department stores, with most branches open roughly 10:00–20:00 or 21:00. Ordinary supermarkets are the cheapest source for fresh fruit and everyday bottled ponzu or kosho. Narita and Haneda airport shops stock boxed gift sets in the final departure area, useful if you’ve left souvenir shopping to the last minute, though prices run 10–20% higher than in the city.

    Common Mistakes to Avoid

    The biggest trap is assuming “yuzu flavor” on a package means real yuzu juice — many cheap candies and drinks use citric acid and artificial flavoring rather than actual fruit; check the ingredient list for 柚子果汁 (yuzu juice) or 柚子果皮 (yuzu peel) if authenticity matters to you. Second, don’t substitute lemon or lime when a recipe or sauce calls for yuzu once you’re home — the flavor profile is genuinely different, which is exactly why it’s worth bringing the real thing back. Third, if you’re shopping at a regional buying guide like this one for the first time in Japan, pace yourself on fermented pastes like yuzu kosho — it’s spicier than it looks, closer to a chili condiment than a citrus one.

    Bringing Yuzu Home

    Bottled sauces, pastes, and jarred tea are fine in checked luggage; if you’re only traveling with carry-on, remember liquids and gels (ponzu, juice, honey yuzu tea) fall under the standard 100ml container rule for cabin bags, so pack larger bottles in checked baggage instead. Fresh whole yuzu fruit is best enjoyed in Japan rather than carried home, since many countries restrict importing fresh citrus — stick to processed products (pastes, bottled sauces, dried peel, tea) for anything you plan to take across a border.