Japan Trove

Author: JapanTrove Editorial

  • Bic Camera vs Yodobashi Camera: Points Cards, Tax-Free & Which to Choose

    Bic Camera vs Yodobashi Camera: Points Cards, Tax-Free & Which to Choose

    Photo by taro ohtani on Unsplash

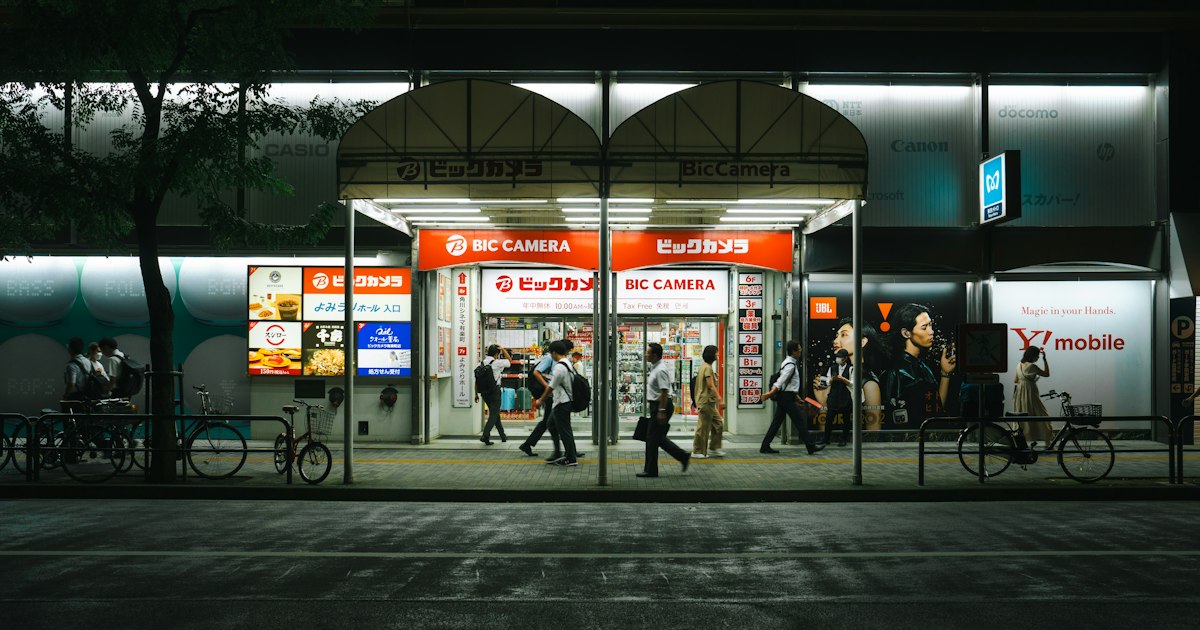
    If you’re buying a camera, rice cooker, or the latest gaming handheld in Japan, you’ll almost certainly end up choosing between Bic Camera and Yodobashi Camera. Both are nationwide electronics megastores with duty-free counters, English-speaking staff, and towers of merchandise that can overwhelm even confident shoppers. The two chains look similar from the outside, but their points systems and store layouts work differently enough that picking the wrong one — or using it the wrong way — can cost you real money. Here’s what actually matters.

    Bic Camera vs Yodobashi Camera: What’s the Difference?

    Both chains sell the same core categories: cameras, laptops, phones, home appliances, watches, toys, and increasingly cosmetics and souvenirs on their tax-free floors. The practical differences come down to store footprint and location:

    • Yodobashi Camera tends to build a small number of enormous flagship stores — Yodobashi Akiba next to Akihabara Station is the chain’s largest, spanning multiple buildings with electronics, a golf range, and a rooftop baseball field for demos.
    • Bic Camera runs more, slightly smaller branches spread across major stations, including a flagship in Yurakucho (walking distance from Ginza and Tokyo Station), a huge Shinjuku location split across east and west exits, and branches in Ikebukuro, Namba, and Umeda.

    In practice, both carry near-identical stock from the same Japanese brands (Panasonic, Sony, Zojirushi, Tiger, Nintendo), so for a single-item purchase, proximity to your hotel or train route usually matters more than brand loyalty.

    How Tax-Free Shopping Works at Both Chains

    Both Bic Camera and Yodobashi have dedicated tax-free counters (look for “Tax-Free” signage, usually on an upper floor). The rules are set by Japanese customs, not the store, so they’re identical at both chains:

    • You must be a foreign tourist (short-term visa status) and show your passport at checkout or the tax-free counter.
    • Minimum spend is ¥5,000 (before tax) in a single day at a single store to qualify for the 10% consumption tax exemption.
    • Electronics, appliances, and general goods no longer need to be sealed in special bags — only consumable items like food, drinks, and cosmetics still get sealed and must leave Japan unopened within 30 days.
    • Your passport gets an electronic record attached at purchase; customs may check this on departure, so keep tax-free receipts accessible until you’ve left the country.

    Both stores accept major foreign credit cards, Alipay, WeChat Pay, and increasingly cash-free payment for tax-free purchases, so there’s no real advantage either way on the mechanics of tax exemption itself.

    Points Cards: Bic Point vs Yodobashi Gold Point

    This is where things diverge and where most visitors lose value without realizing it. Both chains run loyalty programs — Bic Point and Yodobashi Gold Point — that return somewhere around 8–10% of your purchase as store credit usable on a future visit to the same chain.

    The catch: when you use the tax-free exemption, the points rate on that purchase is typically cut roughly in half (often down to around 5%, though the exact figure varies by product category and is posted at the register). The store effectively can’t give you both the full tax break and the full points rate on the same transaction.

    For most tourists this doesn’t matter much, since points only redeem at that same chain’s Japanese stores and expire within a year or two — not very useful if you’re flying home in a week. But it matters if:

    • You’re making multiple purchases on the same trip and could redeem points at a second visit before you leave.
    • You’re a frequent visitor to Japan who might come back within the points’ validity window.
    • You’re buying a big-ticket item (a camera body, a laptop) where even a 3–5 percentage point difference is thousands of yen.

    In that case, do the math: sometimes skipping the tax exemption and taking the full points rate is actually worse than taking tax-free and the reduced points, since the 10% tax saving is immediate and guaranteed while points require a return visit. For a one-time tourist purchase, always take the tax exemption.

    Both point cards can be issued on the spot to tourists with just a passport — no Japanese address or phone number required — but there’s little reason to sign up unless you’re buying enough to make the points meaningful before you leave.

    Flagship Stores and How to Get There

    Yodobashi Akiba sits directly connected to Akihabara Station (JR Yamanote/Chuo-Sobu lines, Hibiya and Tsukuba Express lines nearby), making it an easy add-on if you’re already exploring Akihabara’s electronics and anime shops. It’s open roughly 9:30 AM–10:00 PM daily and is large enough to need a floor map — electronics are on lower floors, with restaurants and a sports/outdoor section upstairs.

    Bic Camera Yurakucho is a 1–2 minute walk from Yurakucho Station (JR Yamanote/Keihin-Tohoku lines) or Ginza Station, and sits right at the edge of the Ginza shopping district, so it pairs naturally with a day of upscale window shopping. Hours are typically 10:00 AM–9:00 PM. Bic Camera’s Shinjuku East branch (the “Bicqlo” building, which shares space with a Uniqlo) is another strong option if you’re based around Shinjuku.

    Both chains also have large branches in Osaka (Yodobashi Umeda near Osaka Station; Bic Camera Namba near Namba Station), so travelers doing a Tokyo–Osaka itinerary don’t need to front-load all their electronics shopping in one city.

    Common Mistakes to Avoid

    • Not comparing prices between floors. Both stores sometimes have the same item at slightly different prices between a “new release” display and the regular shelf — scan the barcode with a price-comparison app if you’re unsure.
    • Forgetting your passport. No passport, no tax exemption — staff cannot apply it retroactively once you’ve left the counter.
    • Assuming voltage and plugs match home. Japan runs on 100V, and some appliances (rice cookers, hair tools) are built for Japanese electrical standards only — ask staff for an “overseas use” (kaigai taiô) model if you plan to use it outside Japan.
    • Buying the first thing you see. Both chains will often price-match a competitor’s listed price if you ask politely at the register, especially on cameras and laptops — it’s worth a try before you commit.

    Which Should You Choose?

    For most visitors, the honest answer is: whichever is closer to where you’re already going. If you’re spending a day in Akihabara, Yodobashi Akiba’s scale and the surrounding electronics district make it the obvious stop. If you’re based near Ginza, Tokyo Station, or Shinjuku, Bic Camera’s flagship branches are just as well-stocked and save you a detour. Big spenders on a single large purchase should take the tax exemption every time and treat points as a minor bonus rather than a deciding factor. And if electronics shopping isn’t scratching your itch for only-in-Japan retail, it’s worth pairing your trip with something quirkier — Village Vanguard’s chaotic variety-store shelves or Koenji’s vintage clothing racks make a good contrast to a sterile electronics floor.
  • Village Vanguard: Japan’s Quirky Variety Store and What to Buy

    Village Vanguard: Japan’s Quirky Variety Store and What to Buy

    Photo by EMANUELE Ricciardi on Unsplash

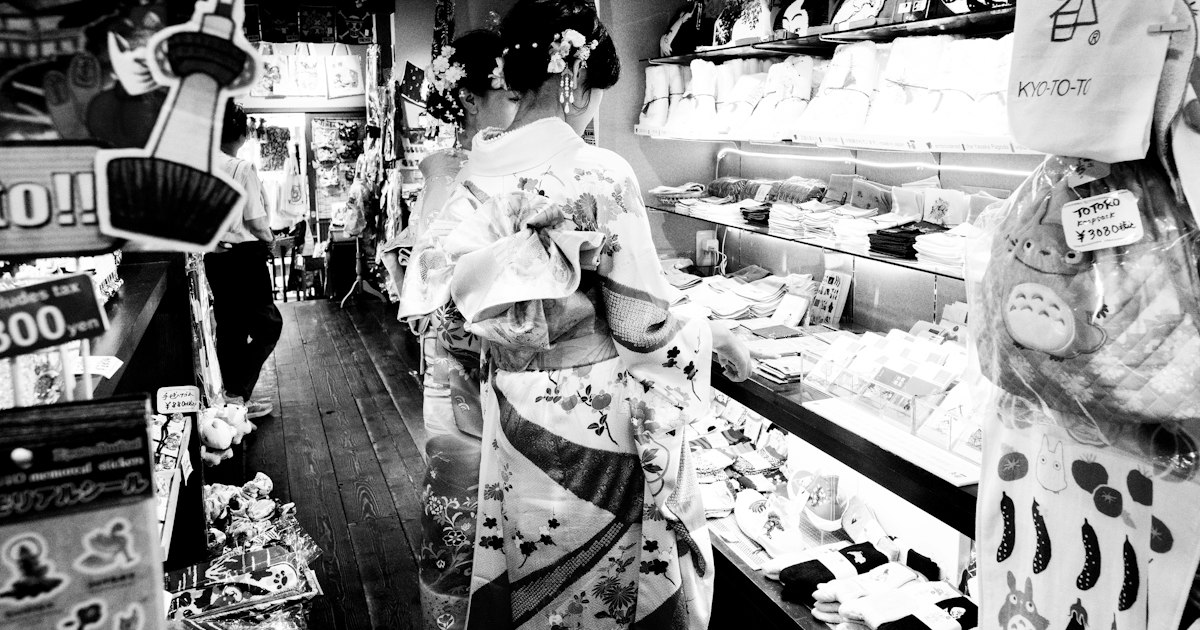
    Somewhere between a bookstore, a toy shop, a costume rental, and a flea market stall run by someone with very strong opinions, you’ll find Village Vanguard. Founded in Nagoya in 1986 and now scattered across shopping malls and youth-culture neighborhoods nationwide, Village Vanguard (ヴィレッジヴァンガード) calls itself a “shugeki-teki na hon-ya” — an “exciting bookstore” — though books are only a fraction of what’s piled, stacked, and crammed onto its shelves. For visitors, it’s one of the most entertaining 30-minute browses in the country, and a genuinely good source of only-in-Japan souvenirs that aren’t temple keychains or KitKats.

    What Exactly Is Village Vanguard?

    Picture a maze of narrow aisles under dim, warm lighting, with merchandise stacked floor to ceiling and little regard for category: manga sits next to taxidermy-style novelty toys, which sit next to incense, which sits next to a rack of ironic graphic T-shirts, which sits next to imported snacks. The chain’s signature is the hand-written “POP” card — a small cardboard sign with a staff member’s scrawled, often very funny or deadpan commentary explaining why a product is worth your money. Reading the POP cards is half the fun, even if your Japanese is limited; the enthusiasm usually translates even when the jokes don’t.

    This isn’t a tourist-oriented shop — it’s a genuine subculture institution for young Japanese shoppers into zines, indie music, horror movies, retro games, and offbeat humor. That’s exactly what makes it worth a visit: you’re browsing what locals actually buy for fun, not what’s been curated for foreigners.

    What to Buy

    Stock varies wildly store to store, but a few categories are reliable:

    • Novelty goods and gag gifts — weird socks, bizarre bath salts, prank items, and desk toys, typically ¥500–1,500.
    • Character and anime merchandise — acrylic stands, badges, and keychains tied to current anime and games, usually ¥400–1,200 each.
    • Graphic T-shirts and apparel — original or pop-culture-parody designs you won’t find at Uniqlo, generally ¥2,500–4,500.
    • Books, manga, and zines — a curated, idiosyncratic selection rather than a full bookstore catalog; manga volumes run the standard ¥500–700.
    • Imported and novelty snacks — American cereal, oddball flavored chips, and candy from around the world, often ¥300–900.
    • Horror, occult, and retro-game ephemera — a Village Vanguard specialty; expect everything from tarot decks to used Famicom cartridges in glass cases, priced individually and often collector-marked up.
    • Small interior goods (“zakka”) — quirky mugs, stationery, and room decor in the ¥800–2,500 range.

    Budget shoppers can walk out with a handful of stickers, candy, and a keychain for under ¥2,000. Mid-range shoppers tend to land on a graphic tee plus a couple of novelty items, around ¥5,000–7,000. The splurge territory is usually vintage games, imported collectibles, or limited-run anime goods, which can run ¥5,000–20,000 for rarer pieces — treat the glass display cases as the place to slow down and actually read the price tags, since they’re easy to miss amid the clutter.

    Where to Find the Best Branches

    Village Vanguard has locations in shopping malls across Japan, but mall branches tend to be smaller and more mainstream. For the full chaotic experience, visitors should prioritize standalone urban stores:

    • Shimokitazawa, Tokyo — the branch most locals point visitors to, multiple floors deep in a neighborhood already known for vintage clothing and indie music shops. It pairs naturally with a visit to Koenji’s vintage clothing and punk rock scene if you want a full day of Tokyo subculture shopping.
    • Shibuya and Shinjuku, Tokyo — smaller but convenient if you’re already sightseeing in central Tokyo.
    • Nagoya — the chain’s birthplace, with a strong concentration of stores in the Aichi region and a sense of shopping at the “original.”
    • Suburban Aeon Malls and station-front buildings nationwide — not flashy, but useful if you’re outside the major cities and just want a quick browse between trains.

    Store names and exact addresses change often as leases turn over, so search “ヴィレッジヴァンガード” plus the area name on Google Maps right before you go rather than relying on an old list — a surprising number of branches have closed or relocated in recent years as the chain has restructured.

    Timing, Hours, and Getting There

    Most urban branches open around 11:00 and close between 20:00 and 22:00, matching typical Japanese retail hours; mall locations follow the mall’s own hours, usually 10:00–21:00. There’s no real “best season” — unlike seasonal craft shops or festival stalls, Village Vanguard’s appeal is constant, though stock rotates with anime seasons (new merchandise tends to land when a hit show airs) and around Halloween, when the novelty and costume sections expand noticeably. Weekday afternoons are far less crowded than weekend evenings, which is worth knowing given how narrow the aisles are — two people with shopping baskets can struggle to pass each other in the busier stores.

    Common Mistakes to Avoid

    • Assuming it’s a normal bookstore. If you’re looking for current bestsellers or English-language books, you’ll be disappointed — the book selection is small and deliberately odd.
    • Skipping the upper or lower floors. Multi-floor branches like Shimokitazawa hide their best novelty and horror sections away from the street-level entrance.
    • Not reading the POP cards. They’re often the only indication of what a mystery item actually does or why it’s priced the way it is.
    • Expecting tax-free shopping everywhere. Not every branch is set up for duty-free purchases for tourists; larger stores in Tokyo are more likely to offer it than small mall locations, so ask at the register if it matters to you.
    • Treating it as a quick stop. The density of merchandise means a “five-minute look” routinely turns into forty-five minutes — budget accordingly if you’re on a tight sightseeing schedule.

    Who Will Love This Shop

    Village Vanguard rewards travelers who already enjoy Japan’s hobbyist and collector subcultures — the same instinct that draws people to train station stamp rallies or Japan’s beetle-collecting hobby culture will feel right at home sifting through its shelves of niche, enthusiast-made ephemera. It’s less about finding one perfect souvenir and more about the hunt itself — digging through a chaotic, lovingly curated pile until something makes you laugh or genuinely surprises you. For a country often associated with minimalist design and quiet shrines, Village Vanguard is a useful reminder that Japan does maximalist, weird, and funny just as well.

  • Trash & Recycling in Japan: How Travelers Should Sort Waste

    Trash & Recycling in Japan: How Travelers Should Sort Waste

    Photo by Mylène Larnaud on Unsplash

    You finish a can of coffee or a convenience store onigiri, turn around, and realize there isn’t a trash can anywhere in sight. This is one of the first things that throws visitors off in Japan — a country famous for cleanliness has remarkably few public bins. It’s not an oversight; it’s the result of a very specific system, and once you understand it, carrying your own trash for a few hours stops feeling strange and starts feeling normal. Here’s how sorting and disposal actually work, and how to avoid the mistakes most tourists make.

    Why Japan Has So Few Public Trash Cans

    Many public bins were removed from train stations and streets after the 1995 Tokyo subway sarin gas attack, when bins were seen as a security risk for hiding dangerous items. That policy mostly stuck, and it combined with a cultural expectation that you take your trash home (or back to where you bought the item) rather than leave it for someone else to manage. The result is a country where streets are spotless precisely because there’s nowhere to litter — people simply hold onto their rubbish until they find an appropriate bin.

    The Basic Sorting Categories You’ll Encounter

    Japanese municipalities split waste into categories, and the exact names and rules vary slightly by city, but as a traveler you’ll mainly run into:

    • Moeru gomi (燃えるごみ) — burnable waste: food scraps, tissues, most packaging.
    • Moenai gomi (燃えないごみ) — non-burnable: metal, ceramics, small electronics.
    • PET bottles (ペットボトル) — plastic drink bottles only, usually rinsed, with caps and labels removed and binned separately.
    • Cans and bottles (缶・びん) — aluminum/steel cans and glass bottles.
    • Plastics (プラスチック) — snack wrappers, trays, and other soft plastic packaging, kept separate from PET bottles in many areas.

    Bins are almost always labeled with small pictures even when the text is in Japanese, so you can usually match the shape of your item (bottle, can, wrapper) to the icon without reading a word of Japanese.

    Where You Can Actually Throw Away Trash

    As a visitor, your realistic disposal points are:

    • Convenience stores (7-Eleven, Lawson, FamilyMart) — nearly all have a small bin bank near the entrance, open whenever the store is (most are 24 hours). These are intended for items you bought there, so it’s good etiquette to use them after a konbini purchase rather than dumping a bag of loose travel trash.
    • Vending machines — almost every vending machine has a recycling bin attached, but it’s for cans, bottles, and sometimes cartons only.
    • Train station platforms — bins reappeared in many stations in recent years, usually past the ticket gates, sorted into burnable/PET/cans.
    • Food stalls and festival areas — at matsuri and street-food alleys, vendors typically set out sorted bins near their stalls. This is especially true at big events like Awa Odori, where food stands line the dance route, or in skewer-and-beer alleys like Shinsekai’s kushikatsu strip — look for the bin cluster near where you bought the food rather than carrying it elsewhere.
    • Your hotel room — standard hotels empty room bins daily as part of housekeeping, so you don’t need to sort anything there.

    Vending Machines and Convenience Store Bins: The Fine Print

    This is where most travelers slip up. Vending machine recycling bins are for the can or bottle you just bought at that machine — not a general trash can. Shoving in a tissue, a food wrapper, or an umbrella bag will sometimes jam the chute, and locals notice. Likewise, convenience store bins are meant for purchases made in that store; walking in just to dump a bag of trash from elsewhere is considered poor form, even though staff rarely say anything. If you buy a drink, finish it before you leave the area near the vending machine or store — that’s the easiest way to stay within the unwritten rules.

    If You’re Staying in a Vacation Rental or Kominka

    This is the one situation where sorting mistakes actually have consequences. Hotels handle your trash for you, but if you book an Airbnb, machiya, or a traditional kominka farmhouse stay, you become responsible for sorting your own waste according to the local municipal calendar. Collection happens on fixed days — burnable waste might be picked up twice a week, PET bottles and cans once a week, non-burnables only once or twice a month — and putting bags out on the wrong day means they simply get left behind. Many municipalities also require designated garbage bags sold at local supermarkets or convenience stores, printed with the ward or city’s logo; these typically cost around ¥20–50 per bag depending on size and region, and generic bags may be rejected. Good hosts leave a printed sorting guide and calendar in the house; if yours doesn’t, ask before your first collection day rather than guessing.

    Common Mistakes Travelers Make

    • Carrying trash into a shrine, temple, or scenic viewpoint bin that doesn’t exist — these areas are almost always bin-free to keep them pristine.
    • Mixing PET bottles with cans in combo bins without checking the icon, even though many stations and stores do separate them.
    • Leaving large items on the street, like a broken umbrella or a cheap suitcase bought for souvenirs — oversized item disposal (sodai gomi) requires a paid sticker, usually ¥200–2,000 depending on the item and city, arranged in advance through the local ward office. It’s not something a short-term visitor can realistically do, so it’s better to leave bulky purchases behind in your home country, pack light, or ship items home instead.
    • Assuming every bin accepts food waste — some station and convenience store bins are “bottles and cans only,” with nowhere for leftover food, so finish meals before disposing of containers.

    A Simple System for Your Trip

    The easiest habit is to carry a small resealable bag or a spare konbini bag in your daypack. Use it to hold wrappers, tissues, and empty containers between bin sightings, then sort everything in one go at the next convenience store or train station. Finish drinks near the vending machine you bought them from rather than carrying open containers around. If you’re hopping between regions — say, combining a street-food crawl in Shinsekai with a few evenings at a standing bar through Japan’s tachinomi culture — you’ll generate a lot of small cans and skewer sticks over a single night, and knowing that the bin by the register is fair game (because you bought the food there) makes the whole system much less stressful. Within a day or two, scanning for the bin icons becomes second nature, and the lack of public trash cans stops being a puzzle and starts making sense as part of why Japan’s streets stay so clean.

  • Getting a Haircut in Japan: How to Book a Salon and What to Expect

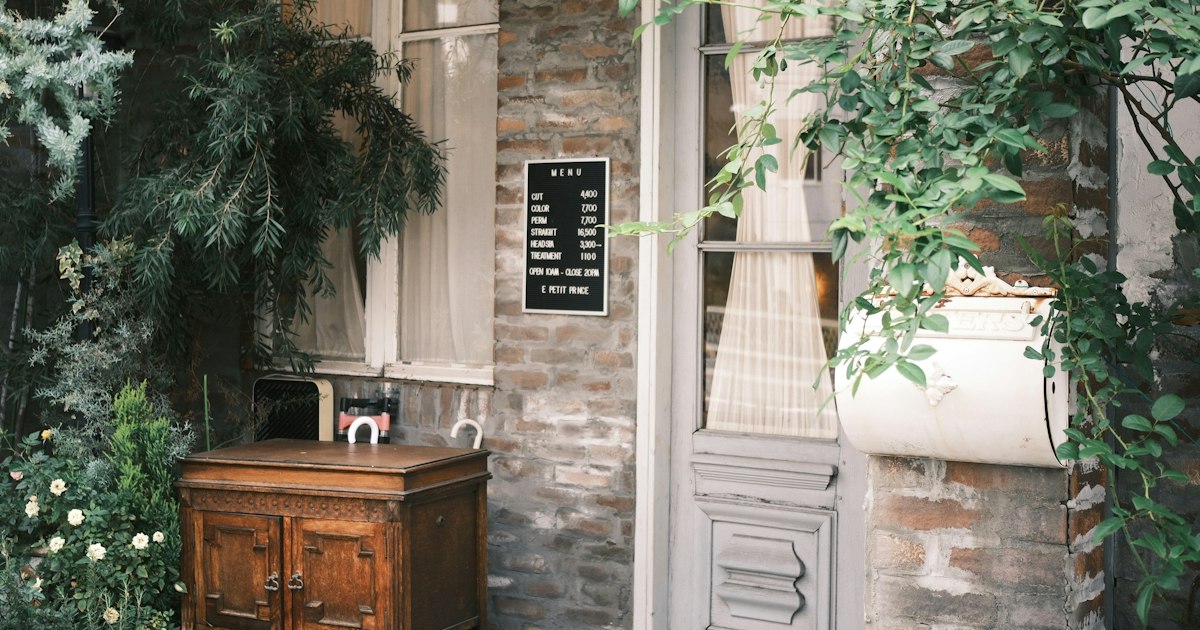
    Getting a Haircut in Japan: How to Book a Salon and What to Expect

    Photo by Hongwei FAN on Unsplash

    Running out of road before your flight home and realizing you need a trim is one of the more underrated travel stresses in Japan. The good news: Japanese salons range from ten-minute, no-frills cuts to elaborate two-hour experiences with a head massage thrown in, and most of the system is navigable even if you don’t speak Japanese. Here’s how to figure out which kind of haircut you actually want, how to book it, and what happens once you sit down in the chair.

    The Three Tiers of Haircuts in Japan

    Japan’s hair industry splits roughly into three categories, and picking the right one matters more than picking the right salon.

    • Quick-cut chains (budget): QB House is the best known, with branches inside train stations across Tokyo, Osaka, and other major cities. Cuts run about ¥1,200–¥1,500, take roughly 10 minutes, use an air-suction system instead of a wash, and are walk-in only—no reservation possible or needed. There’s no shampoo, no styling, and usually no English, but the process (sit, point at a length guide, done) is simple enough to manage with gestures.
    • Neighborhood salons (mid-range): A standard unisex salon (biyoin) or traditional barbershop (tokoya) charges around ¥3,500–¥6,000 for a men’s cut and ¥6,000–¥9,000 for a women’s cut, including shampoo and blow-dry. These are the most common salons in any residential area and are where most long-term residents go.
    • Designer salons (splurge): Concentrated in Harajuku, Omotesando, and Shibuya, these salons charge ¥8,000–¥20,000+ for a cut with a senior stylist, often more if you add color or a perm. Many have at least one English-speaking stylist and cater specifically to foreign clients.

    How to Book: Hot Pepper Beauty and Walk-Ins

    The dominant booking platform is Hot Pepper Beauty (Hotpepper Beauty), a website and app used by the vast majority of Japanese salons. You can browse by neighborhood, see stylist portfolios and prices, and book specific time slots—though the interface is mostly in Japanese, so a translation app or your phone’s built-in page translation helps. Some larger salons in tourist-heavy areas also take bookings directly via Instagram DM or a simple English booking form on their own website.

    Walk-ins work at QB House-style chains and many traditional tokoya barbershops, but trendy salons in Harajuku or Omotesando generally require a reservation, especially on weekends—showing up without one often means being turned away or told to come back in several hours. If you want a specific well-reviewed stylist, book 3–5 days ahead; for weekend slots at popular salons, a week out is safer.

    What a Typical Salon Visit Looks Like

    Budget more time than you would at home. A full-service cut at a mid-range or designer salon typically includes a consultation, shampoo (often with a scalp massage), the cut itself, and a blow-dry styling—the whole thing commonly takes 60–90 minutes, sometimes longer for women’s cuts with styling. Many salons also offer an optional head spa add-on (a deeper scalp massage and conditioning treatment) for an extra ¥1,000–¥3,000, which is worth trying at least once even if you’re not usually a spa person.

    Staff will usually hand you a tablet or paper form asking about allergies and hair concerns, and the stylist will do a consultation before touching scissors—this is the moment to communicate clearly, since cutting too much is hard to undo.

    Bridging the Language Gap

    Bring 2–3 reference photos on your phone showing the length and style you want, ideally from multiple angles. Japanese stylists are generally precise and will try to match a photo closely, which makes this far more reliable than verbal description alone. Useful phrases to have ready or typed into a translation app: “sukoshi” (a little), “mijikaku” (shorter), “onaji gurai” (about the same length), and “maegami” (bangs/fringe). If a salon’s listing on Hot Pepper Beauty or its own site explicitly says “English OK” or lists an English-speaking stylist, it’s worth paying slightly more for the peace of mind, particularly for a first visit or anything beyond a simple trim.

    Timing, Hours, and Common Mistakes

    Most salons open around 10:00 and close between 19:00 and 20:00, and nearly all close one weekday—commonly Monday or Tuesday—so don’t assume every salon is open daily. Avoid the turn-of-year period (roughly December 28 to January 3), when many salons close entirely and the rest are booked solid with people getting a fresh look before New Year visits to family or shrines. Weekday afternoons are the easiest slots to get on short notice; Saturdays fill up fastest.

    The most common mistakes travelers make: assuming any salon takes walk-ins (many don’t), underestimating how long a full-service visit takes and scheduling it too close to a train or flight, and not bringing a photo, which can lead to miscommunication on length or layering. It’s also worth knowing that tipping is not expected or practiced at any tier of salon in Japan—the listed price is the full price, though color, perm, or extra-long hair often carry a surcharge that’s usually disclosed on the booking page.

    Beyond the Cut: Traditional Hair Culture

    If you’re interested in Japanese hair care beyond a modern salon visit, it’s worth seeking out traditional tools and styling culture rather than just the haircut itself. Kyoto is the best place to see this up close—see our guide to Tsuge Kushi: Kyoto’s Boxwood Combs and Traditional Hair Accessories for where to find hand-carved boxwood combs still used by geiko and maiko today. For a more alternative, street-style take on Japanese hair and fashion, Tokyo’s Koenji vintage and punk rock neighborhood has salons that lean into bold color and cuts rather than the polished Omotesando look. And if you’re based near Tokyo’s old geisha quarter, the atmospheric streets of Kagurazaka are a pleasant place to wander while you wait for a nearby appointment.

    Which Option to Pick

    For a simple maintenance trim with no language ability and no time to spare, QB House or a similar quick-cut chain is hard to beat. For a proper cut with wash and style at a fair price, any neighborhood biyoin booked through Hot Pepper Beauty will do the job well. And if you want the full experience—head spa, a stylist who speaks English, and a result worth photographing—book a designer salon in Harajuku or Omotesando several days ahead and treat it as part of the trip rather than an errand.

  • Zunda Mochi: Sendai’s Sweet Edamame Paste and Other Tohoku Snacks

    Zunda Mochi: Sendai’s Sweet Edamame Paste and Other Tohoku Snacks

    Photo by Negley Stockman on Unsplash

    Mention “zunda” to most Japanese people and they’ll immediately picture Sendai — the largest city in the Tohoku region and the undisputed home of this bright green, slightly sweet edamame paste. Zunda mochi is soft pounded rice cake coated in mashed young soybeans, sugar, and a pinch of salt, and it’s become the edible calling card of Miyagi Prefecture, showing up on everything from mochi to soft-serve ice cream. If you’re routing a Tohoku trip around food, here’s what’s actually worth your time and money.

    What Is Zunda Mochi, Exactly?

    Zunda is made by boiling edamame, popping the beans out of their pods, and grinding them into a coarse, slightly grainy paste with sugar and a touch of salt. Unlike red bean (anko), which is deep reddish-brown and earthy, zunda is pale green and tastes fresher and lighter — closer to a sweet edamame hummus than a traditional Japanese sweet. The paste is then spread over or mixed with soft mochi to make zunda mochi, the classic format, though you’ll also see it as zunda daifuku (mochi stuffed with a bean filling), zunda shake (a thick, cold blended drink), and zunda-flavored soft-serve.

    The dish has roots going back centuries in the farming communities of Miyagi, where edamame was a summer staple, but it was popularized as a tourist souvenir starting in the 1980s–90s, particularly through the shop chain Zunda Saryo (ずんだ茶寮), which now has a near-monopoly presence at Sendai Station.

    Where to Try It in Sendai

    Sendai Station is genuinely the easiest place to do this — no taxi or bus required. On the station’s 3rd floor, the “Sen-eki” food and souvenir area has multiple zunda specialists clustered within a few minutes’ walk of each other:

    • Zunda Saryo — the best-known chain, with a sit-down cafe and a takeaway counter in the station. A plate of zunda mochi (a few small pieces) runs roughly ¥600–800; the zunda shake, a cold whipped drink that’s part milkshake, part smoothie, is around ¥500–600.
    • Zunda-ya — a similarly long-running competitor with its own takeaway boxes of individually wrapped zunda mochi, useful as omiyage (souvenir gifts) since they’re vacuum-sealed and travel well for a day or two.
    • Convenience stores and station kiosks — during spring and summer, Sendai-area 7-Eleven and Lawson branches often stock zunda-flavored snacks (bread, daifuku, even KitKat-style bars) for a fraction of the cafe price, if you just want a taste without sitting down.

    If you have more time, Sendai’s covered shopping arcades near the station (Clis Road and the Ichibancho arcade) have additional wagashi (traditional sweets) shops selling fresh zunda mochi made same-day, which has a noticeably better texture than the shelf-stable souvenir boxes.

    Best Season and Timing

    Zunda mochi is sold year-round because most shops use frozen edamame, but the freshest, most vividly flavored versions appear from July through September, when Miyagi’s edamame harvest is in season. If you’re visiting in midsummer, look for shops advertising “生ずんだ” (nama zunda, or fresh zunda) — the color is greener and the taste less sugar-forward than the frozen version used the rest of the year. Shops in the station food court typically open around 9:00–10:00 and close by 20:00–21:00, syncing with train traffic rather than separate hours, so there’s no need to plan a special visit window — it fits naturally around a shinkansen connection.

    Getting to Sendai

    Sendai is about 90 minutes from Tokyo Station on the Tohoku Shinkansen (Hayabusa or Yamabiko trains), and it’s fully covered by the Japan Rail Pass, so there’s no extra cost if you already have one. It also works well as a base for exploring the rest of Tohoku — Yamagata, Akita, and Aomori are all further up the same shinkansen line. If you’re planning to rent a car to reach more rural parts of Miyagi or neighboring prefectures, it’s worth reading up on ETC cards and expressway tolls beforehand, since Tohoku’s expressway network is the practical way to reach smaller towns that trains don’t serve well.

    Beyond Zunda: Other Tohoku Snacks Worth Packing

    Zunda is the headline act, but Tohoku’s other prefectures each have their own snack specialties that rarely make it onto standard Tokyo souvenir shelves:

    • Sasa kamaboko (Miyagi) — a steamed or grilled fish cake shaped like a bamboo leaf, mildly sweet and savory rather than a dessert. Sold at shops like Abe Kamaboko near Sendai Station, individually priced around ¥150–250 per piece.
    • Hagi no Tsuki (Miyagi) — Sendai’s other signature confection: a soft castella-style sponge shell wrapped around fresh whipped cream. Boxes of 6–8 pieces typically run ¥1,000–1,500 and are one of the most popular omiyage bought at Sendai Station, so buy early in the day if you want a full selection.
    • Kiritanpo (Akita) — mashed rice formed onto cedar skewers and grilled, usually eaten in a hot pot (kiritanpo nabe) rather than as a snack, but skewer versions are sold plain with sweet miso at festivals and rest stops.
    • Wanko soba (Iwate) — not a snack so much as an event: small bowls of soba served continuously in Morioka restaurants until you cap your bowl to signal you’re full. Worth doing once if your itinerary stretches north to Morioka.

    If seasonal regional food is part of what draws you to a trip like this, it’s worth comparing notes with Firefly Squid Season in Toyama — a similarly tight seasonal window built around one regional specialty, on the opposite coast.

    Common Mistakes to Avoid

    The biggest one is assuming zunda mochi travels indefinitely — the fresh cafe versions with real whipped cream or fresh mochi typically need to be eaten the same day, while only the individually wrapped, vacuum-sealed souvenir boxes (usually labeled with a shelf life of several days to a couple of weeks) are suited for checked luggage or gifting back home. Ask the shop staff directly (“Kore wa nan-nichi motte imasu ka?” — “how many days will this keep?”) if you’re unsure, since the two product lines often sit on the same shelf. Second, don’t assume zunda tastes like matcha because of the green color — it’s a legume-based paste, not a tea flavor, and the sweetness profile is quite different, which occasionally surprises first-time tasters expecting a green tea dessert.

    Budget, Mid-Range, and Splurge

    For a quick taste, a convenience-store zunda snack costs ¥150–300. A proper sit-down plate of zunda mochi or a zunda shake at Zunda Saryo or Zunda-ya runs ¥500–800 and is the standard mid-range experience most visitors go for. For a splurge, some of the wagashi shops in Sendai’s Ichibancho arcade sell same-day fresh zunda mochi gift sets made with premium Miyagi-grown edamame, priced from around ¥2,000–3,000 for a boxed set — a reasonable gift if you’re visiting someone’s home in Japan or want the best possible version rather than the station souvenir.

    If you end up staying overnight in the Miyagi or Yamagata countryside rather than just passing through, it’s also worth looking at kominka farmhouse stays, several of which serve home-style versions of regional dishes like zunda and kiritanpo that don’t appear on restaurant menus at all. And if edible souvenirs with a strong regional identity are your thing, Miyajima’s momiji manju makes a good point of comparison — a very different sweet, but the same idea of a single confection becoming a whole prefecture’s culinary calling card.

  • Shinsekai: Osaka’s Retro Tower District and Its Kushikatsu Alleys

    Shinsekai: Osaka’s Retro Tower District and Its Kushikatsu Alleys

    Photo by Dynamic Hong Kong on Unsplash

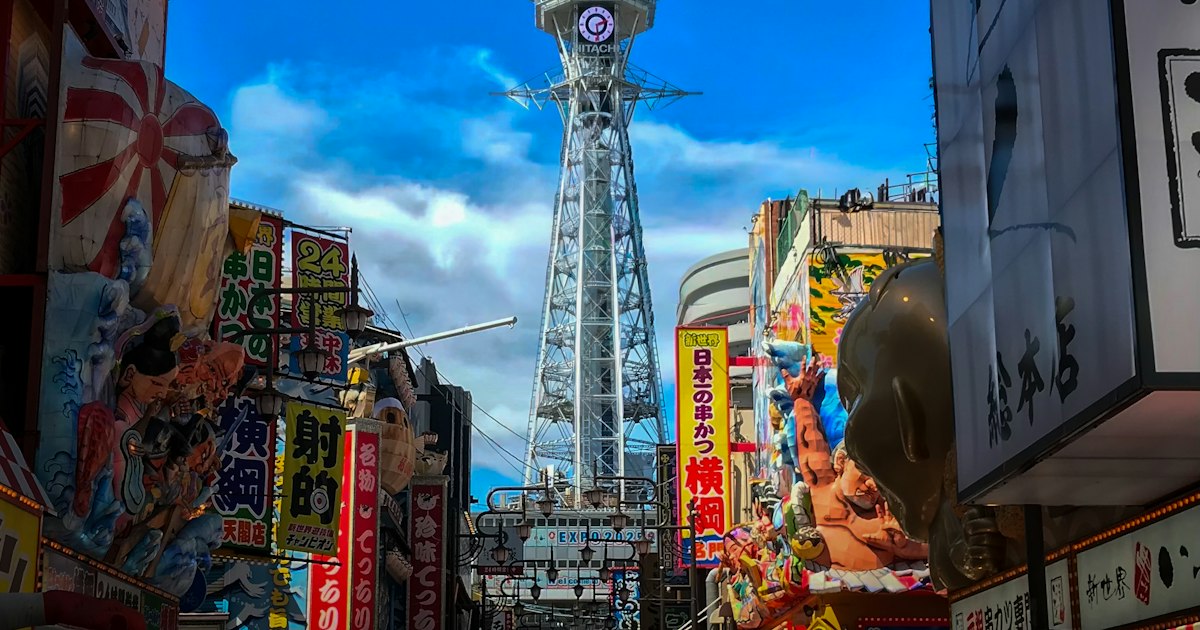
    Shinsekai means “New World,” and when it opened in 1912 that’s exactly what it was meant to be — a slice of Paris and Coney Island grafted onto southern Osaka, complete with its own Eiffel Tower knockoff. More than a century later, the utopian theme-park ambitions are long gone, replaced by something stranger and more likeable: a compact grid of neon-lit alleys, deep-fried skewer shops, retro arcades, and a tower that still glows over it all. It’s touristy, a little scruffy around the edges, and one of the most photogenic few blocks in the city.

    What Shinsekai Actually Is

    Shinsekai sits at the southern edge of central Osaka, wedged between Tennoji Park and the older working-class neighborhoods south of it. The district’s layout still follows its original 1912 plan: streets radiate out from Tsutenkaku Tower like spokes, a design borrowed from Paris’s Champs-Élysées, while the tower itself was inspired by the Eiffel Tower. The current tower isn’t the original — that one was dismantled for scrap metal during World War II — but the 1956 rebuild has become one of Osaka’s most recognizable landmarks anyway, especially at night when its LED sides flash and its beacon changes color to forecast the next day’s weather (blue for clear, orange for cloudy, and so on).

    The neighborhood’s reputation swung from glamorous to rough through the 20th century — it bordered Kamagasaki, a day-laborer district — before reinventing itself again in the 1990s and 2000s as a nostalgia destination. Today it’s safe and heavily visited, though it still feels grittier and more lived-in than Dotonbori a few kilometers north.

    Getting There

    The easiest approach is Dobutsuen-mae Station, served by the Midosuji Line, Sakaisuji Line, and Sennichimae Line — it’s a two-minute walk to the base of the tower. Ebisucho Station on the Sakaisuji Line is equally close and also connects to the Hankai Tramway, Osaka’s last surviving streetcar line, which is worth riding for its own retro charm if you have time. Shinsekai is also an easy 10-minute walk from JR Tennoji Station or Shin-Imamiya Station, both of which are on the JR Loop Line and connected to Kansai Airport via the Haruka limited express, so it works well as a first or last stop on a Kansai itinerary.

    Tsutenkaku Tower

    The tower’s observation deck runs roughly 10am to 8pm (last entry around 30 minutes before close), with adult admission around ¥900–¥1,000; tickets are sold at the base and lines build up on weekend afternoons. Inside, the main draw is Billiken, a squat, grinning good-luck statue enshrined on one of the observation floors — tradition says you rub the soles of his feet (not his head) to make a wish come true, and most visitors do. The view itself isn’t Tokyo Skytree-scale, but that’s the point: you’re looking down at Shinsekai’s own rooftop signage and pachinko lights rather than a generic skyline, which makes it one of the more atmospheric tower views in Japan.

    Kushikatsu Alleys: Eating Your Way Through

    Shinsekai is the spiritual home of kushikatsu — bite-sized meat, seafood, and vegetables skewered and deep-fried in a light batter — and the streets fanning out from the tower are lined with shops competing for your attention with hanging lanterns and life-size chef mascots. Daruma, founded here in 1929 and instantly recognizable by its scowling mascot logo, is the most famous chain and has several branches within a few blocks; expect skewers from around ¥100–¥250 each and a wait at peak dinner hours. For the full etiquette rundown — including the famous “no double-dipping” rule, where the communal sauce pot is off-limits to a skewer that’s already been bitten — see our dedicated guide to kushikatsu in Osaka. It’s genuinely enforced here, not just a tourist myth, and breaking it is the single most common mistake first-time visitors make — use the shredded cabbage provided at the table to scoop extra sauce instead of re-dipping.

    Most kushikatsu shops open for lunch around 11am and stay open until 11pm or later, and many don’t take reservations, so arriving right at opening or well before 6pm avoids the worst queues.

    Jan-Jan Yokocho and the Standing Bars

    Just south of the main tower strip, the covered arcade of Jan-Jan Yokocho is the district’s older, quieter half — a narrow lane of shogi and go parlors, cheap noodle counters, and standing bars that hasn’t changed much in decades. It’s a good place to see the neighborhood’s working-class roots up close, away from the souvenir shops. Several tachinomi (standing bars) here serve small plates and cheap draft beer to a mostly local, older crowd standing at counters rather than sitting; if the format is new to you, our guide to tachinomi culture and ordering etiquette covers the basics — pay as you go, keep your visit relatively short, and don’t expect an English menu.

    Best Time to Visit and Common Mistakes

    Shinsekai is genuinely a nighttime district — the neon signage and tower lighting are the main event, so aim to arrive around sunset and stay through dinner rather than treating it as a daytime stop. Weekday evenings are noticeably calmer than Friday and Saturday nights, when the main strip gets shoulder-to-shoulder. Any season works, since most of the experience is indoors or under the arcade roof, though summer evenings are muggy and a light jacket helps in winter since you’ll be walking between shops.

    • Mistake: double-dipping the sauce. It’s the one rule everyone enforces here — dip once before your first bite.
    • Mistake: eating at the first shop you see. The shops directly facing the tower tend to charge more for the same skewers as places one block over.
    • Mistake: skipping Jan-Jan Yokocho. Most visitors only see the tower-facing strip and miss the more atmospheric older arcade a minute away.
    • Mistake: assuming credit cards work everywhere. Many of the smaller stalls and standing bars are cash-only; bring yen.

    Budget, Mid-Range, and Splurge

    On a tight budget, you can eat well for under ¥1,500 by picking five or six skewers at a counter-style kushikatsu shop and pairing them with a ¥400 draft beer at a standing bar in Jan-Jan Yokocho. A mid-range dinner at a sit-down branch of Daruma or a similar established chain, with a full course of skewers, rice, and miso soup, runs closer to ¥3,000–¥4,000 per person. For a splurge, some of the larger kushikatsu restaurants near the tower offer premium courses with wagyu beef, whole prawns, and seasonal vegetables for ¥6,000–¥8,000, plus private tatami seating — worth it if you want the full experience without standing at a counter. Whichever tier you choose, pair it with the ¥900 trip up Tsutenkaku beforehand; watching the neon switch on from above makes the alleys below far more fun to wander afterward.

  • Kagurazaka: Tokyo’s Cobblestone Former Geisha District and French Cafes

    Kagurazaka: Tokyo’s Cobblestone Former Geisha District and French Cafes

    Photo by Denys Nevozhai on Unsplash

    Ten minutes from Tokyo Station by subway, Kagurazaka feels like it belongs to a different city entirely. Stone-paved alleys wind past lantern-lit ryotei that once hosted geisha parties, while the main slope is lined with French bakeries, wine bars, and bistros left over from a wave of French residents who settled here decades ago. It’s one of the few Tokyo neighborhoods where “old Edo” and “Little Paris” sit on the same block, and it rewards slow walking far more than a checklist of sights.

    Where Kagurazaka Is and How to Get There

    Kagurazaka sits in Shinjuku ward, just west of Iidabashi. The easiest approach is Kagurazaka Station on the Tozai Line — take Exit 1 and you’ll step out directly onto Kagurazaka-dori, the main slope. Alternatively, Iidabashi Station (served by the JR Chuo-Sobu Line, Tozai Line, Yurakucho Line, Namboku Line, and Toei Oedo Line) is a 5-minute walk from the base of the hill via the West Exit, and gives you a chance to pass Canal Café, a boathouse-style café overlooking the old Edo Castle moat, on the way.

    The whole area is compact — you can walk from the bottom of Kagurazaka-dori to Akagi Shrine at the top in about 15 minutes, with the real charm in the side alleys branching off along the way. There’s no admission fee for wandering the neighborhood itself.

    A Former Geisha District Hidden Down Cobblestone Alleys

    Kagurazaka was one of Tokyo’s recognized hanamachi (geisha districts) from the Meiji era through the postwar boom, and a small geisha association still operates here today, though sightings are rare and mostly limited to evening hours near the traditional restaurants. The best place to feel that history is Hyogo Yokocho, a narrow stone-paved lane just off the main street lined with black-fenced ryotei and old inns — it looks almost exactly as it did decades ago. A second alley, Kakurenbo Yokocho (“hide-and-seek alley”), is equally atmospheric and named for how easily people used to lose each other in its bends.

    Most of the ryotei down these alleys are reservation-only, sometimes requiring an introduction from an existing customer, so don’t expect to walk in. Treat them as photogenic backdrops for an evening stroll rather than restaurants to try on a whim. For a neighborhood with a similarly strong subcultural identity but a completely different flavor, Koenji’s vintage and punk scene makes an interesting contrast on the same trip.

    Little France: Why This Neighborhood Has So Many French Cafes

    Kagurazaka’s French connection isn’t marketing — it’s demographic. The Institut français du Japon–Tokyo and the Lycée français international de Tokyo (a French international school) are both based here, which drew a real community of French expats to the neighborhood starting in the 1960s–70s. Bakeries, bistros, and wine bars followed, and locals now half-jokingly call the area “Little Paris” or “Puchi Paris.”

    The best-known spot is Le Bretagne, a Breton galette (buckwheat crêpe) restaurant that’s been serving cider and savory galettes for decades — a galette lunch set runs roughly ¥1,800–2,500. Smaller boulangeries along the backstreets sell croissants and pain au chocolat for ¥350–500, and it’s easy to put together a picnic-style breakfast for under ¥1,000 before continuing uphill.

    Where to Eat and Drink, by Budget

    • Budget (under ¥1,500): A bowl of soba or udon at one of the small noodle counters near the station, or a bakery pastry and coffee eaten on a bench near Akagi Shrine.
    • Mid-range (¥3,000–6,000): A French bistro dinner with a glass of wine, or a galette set at Le Bretagne with cider. Many bistros are tiny (10–15 seats), so arrive right at opening (usually 11:30am or 6pm) if you don’t have a reservation.
    • Splurge (¥30,000+): Ishikawa, a three-Michelin-starred kaiseki restaurant tucked down one of Kagurazaka’s alleys, is one of Tokyo’s hardest reservations to get — book months ahead, ideally through a hotel concierge, as English-language walk-in booking isn’t realistic.

    For a lower-key evening, standing bars aren’t really a Kagurazaka specialty, but if that kind of casual drinking culture appeals to you, it’s worth knowing how it works elsewhere in the city — see our guide to tachinomi standing bar etiquette.

    Akagi Shrine and the Top of the Hill

    At the top of Kagurazaka-dori sits Akagi Shrine, a centuries-old shrine that got an unusual 2010 renovation by architect Kengo Kuma — the main hall keeps its traditional form, but the shrine office is now a glass-walled modern structure, with a small café (Akagi Café) inside serving coffee and light meals from around 11am to 8pm. It’s a good, quiet spot to rest before heading back down through the alleys.

    Partway up the main street, Zenkokuji Temple (enshrining Bishamonten) is the neighborhood’s spiritual anchor and worth a quick look even for non-worshippers — it sits right on the main road so there’s no detour required.

    Best Time to Visit and Local Festivals

    Kagurazaka is pleasant year-round and doesn’t have a must-see cherry blossom or foliage moment the way many Tokyo spots do — its appeal is architectural and atmospheric rather than seasonal. That said, a light rain actually improves the experience, since it darkens the cobblestones and makes the alley lanterns glow more visibly. Early evening (around sunset) is the best single window: shops are still open, restaurant lanterns are lit, and the alleys empty out of daytime foot traffic.

    In late July, Kagurazaka hosts its own Awa Odori dance festival, a smaller sister event to the famous original in Tokushima — dancers in traditional costume move up and down the main slope over several evenings. If you’re interested in the dance tradition itself, our guide to Tokushima’s original Awa Odori explains the steps and how visitors can join in.

    Common Mistakes to Avoid

    • Only visiting during the day. Kagurazaka’s alleys look pleasant in daylight but come alive at dusk, when lanterns are lit and the ryotei atmosphere is strongest.
    • Expecting to walk into a ryotei. Most traditional restaurants in Hyogo Yokocho are reservation-only, and some are introduction-only. Admire them from outside unless you’ve booked ahead.
    • Forgetting it’s a real street, not a pedestrian zone. Kagurazaka-dori carries car traffic, and its direction of flow changes over the course of the day to manage the narrow slope — look both ways even where it feels quiet.
    • Skipping reservations at Le Bretagne on weekends. It’s small and popular with both tourists and long-time residents; weekend lunch service fills up fast.
    • Rushing through in under an hour. The point of Kagurazaka is the side alleys, not the main road — budget at least 90 minutes to actually duck into Hyogo Yokocho and Kakurenbo Yokocho rather than just walking up and down the slope.

    Pair a Kagurazaka afternoon with nearby Iidabashi or a longer day in Shinjuku, and it works well as a half-day add-on rather than a standalone destination — compact, walkable, and unlike anywhere else in central Tokyo.

  • Tateyama Kurobe Alpine Route: Toyama’s Snow Corridor and Mountain Crossing

    Tateyama Kurobe Alpine Route: Toyama’s Snow Corridor and Mountain Crossing

    Photo by Dana Andreea Gheorghe on Unsplash

    The Tateyama Kurobe Alpine Route is one of the few places in Japan where you cross an entire mountain range without a car, a hiking permit, or a full day of climbing. Over about six hours you switch between a cable car, a highland bus, an underground trolleybus, a “cable-less” ropeway, and another cable car, threading through the Northern Japan Alps between Toyama Prefecture and Nagano Prefecture. In late April and May, the highlight is the Yuki-no-Otani snow corridor—a road cut through walls of snow that can reach 20 meters. The rest of the year, it’s simply one of the most dramatic mountain crossings you can do without technical gear.

    What the Alpine Route Actually Is

    This isn’t a single train or cable car—it’s a chain of seven different vehicles covering roughly 37 km and climbing to 2,450 meters at Murodo, the route’s highest point. Most travelers go one-way, entering on one side of the Alps and exiting on the other, rather than doing a round trip. The Toyama side starts at Tateyama Station; the Nagano side starts at Ogizawa. In between you’ll transfer at Bijodaira, Murodo, Daikanbo, and Kurobedaira, with a walk across the top of Kurobe Dam—Japan’s tallest dam at 186 meters—built into the middle of the journey.

    Because it’s a one-way crossing for most visitors, plan your onward transport in advance: you’ll end up on the opposite side of the Alps from where you started, which usually means either looping back by train or continuing on to Matsumoto or Nagano.

    The Yuki-no-Otani Snow Corridor

    The snow corridor is a walking path cut through accumulated snow near Murodo Station, and it’s the reason most people time their visit for spring. The walls are tallest right when the route opens for the season—typically mid-April—and they gradually melt down through late June, when the walking section usually closes for the year. If you want the classic photo of walls towering well above head height (12–20 m), aim for the opening weeks in late April; by early June the walls are usually down to a few meters.

    Dress like you’re going skiing, not sightseeing. Murodo sits at 2,450 m and stays near or below freezing through May even on sunny days—a warm jacket, gloves, and sturdy shoes are non-negotiable, and the path can be icy underfoot.

    How to Get There and Through

    From the Toyama side: Take the Toyama Chihō Railway from Dentetsu-Toyama Station (a short walk from JR Toyama Station) to Tateyama Station, about 1 hour. From there it’s cable car to Bijodaira, then highland bus up to Murodo.

    From the Nagano side: Take the JR Oito Line from Matsumoto to Shinano-Omachi (about 1 hour), then a local bus to Ogizawa (around 40 minutes). From Ogizawa, the Kanden Tunnel trolleybus takes you into the mountain to start the crossing in reverse.

    If you’re driving to either gateway station, note that private cars can’t enter the Alpine Route itself—you park at Tateyama or Ogizawa and switch to the route’s own vehicles. If you’re renting a car for the wider Toyama/Nagano leg of your trip, our guide to ETC cards and expressway tolls is worth reading before you set off, since the drive in involves toll roads on both sides.

    Tickets, Prices, and Luggage

    You can buy individual tickets for each leg at each station, or a through ticket covering the whole crossing in one direction. The full one-way through ticket (Tateyama to Ogizawa, or the reverse) generally runs in the ¥12,000–13,000 range per adult; children pay roughly half. Fares are adjusted periodically, so check the official Alpine Route website for the current breakdown before you go rather than relying on last year’s numbers.

    Because you’re changing vehicles seven times, hauling luggage the whole way is miserable. Both Tateyama and Ogizawa offer a same-day baggage forwarding service (around ¥2,000–3,000 per piece) that sends your bags ahead to a hotel or station on the other side, usually arriving the same evening. If you’re staying in Toyama city before or after, this is worth arranging the day before you cross.

    Best Time to Go

    The route opens mid-April and closes around November 30 each year. Broadly:

    • Late April–early May: tallest snow walls, but also Golden Week (April 29–May 5), when buses and cable cars run at capacity and queues at Bijodaira and Murodo can stretch for over an hour.
    • June–July: the snow corridor walking path is gone, but Murodo’s marshland trails (Mikurigaike pond, Midagahara) open up for easy alpine walks, and wildflowers start blooming.
    • Late June–mid-October: Kurobe Dam performs its scheduled water release (houshui), a genuinely impressive sight if your timing lines up—check the dam’s release schedule in advance.
    • October: autumn colors around Murodo and Bijodaira, with far shorter lines than spring.

    For fewer crowds, aim for weekday travel in June or October, and take the first bus/cable car of the morning—departures fill up fast after 9 a.m. in peak season.

    Common Mistakes

    The most common misstep is treating this as a half-day trip. Budget a full day for the one-way crossing once you add transfers on both ends, and don’t schedule a tight onward train right after you arrive at Ogizawa or Tateyama—delays from weather or bus queues are routine. Second, underdressing: even in August, wind at Murodo and Daikanbo can make it feel 15–20°C colder than at your hotel that morning. Third, assuming you can buy a through ticket for any departure time you want in Golden Week—during the busiest weeks, same-day tickets can sell out by mid-morning, so buy in advance or start early. Finally, don’t forget cash or IC card top-ups for local buses on the Nagano side; not every rural connecting bus takes credit cards.

    Budget, Mid-Range, and Splurge

    On a budget, do the crossing as a long day trip: take an early train from Toyama, cross to Ogizawa, and continue to Matsumoto or Nagano the same evening, skipping a mountain hotel stay entirely. Mid-range travelers often overnight in Toyama city the night before—handy if you’re also timing a visit around Toyama’s firefly squid season, which runs roughly March through May and overlaps neatly with the snow corridor’s best weeks. For a splurge, book a night at one of the mountain lodges near Murodo or Kurobedaira, which lets you catch sunrise over the Alps before the day-trip crowds arrive on the first bus up from Bijodaira.

    If you’re bringing a camera or drone for the scenery, check the rules first—flying over the dam area and other parts of the route falls under restrictions covered in our guide to drone laws and photography permits in Japan, since much of the Alpine Route sits inside a national park where drone use is tightly limited or banned outright.

  • Echizen Washi: Fukui’s 1,500-Year-Old Papermaking Village and Where to Buy

    Echizen Washi: Fukui’s 1,500-Year-Old Papermaking Village and Where to Buy

    Photo by Perry Merrity II on Unsplash

    Tucked into the hills of Echizen City in Fukui Prefecture, the Imadate district has been making paper by hand for roughly 1,500 years — long enough that locals still leave offerings to the goddess they credit with teaching them the craft. Echizen washi isn’t a museum piece; it’s the paper that Japan’s imperial court once demanded, the paper used to develop the watermark technology in yen banknotes, and the paper serious woodblock print artists and calligraphers still specify by name. If you’re building a Japan itinerary around traditional crafts, this is one of the few places where you can watch a sheet being pulled from a vat, buy it from the person who made it, and understand exactly why it costs what it costs.

    A Village Built Around One Goddess and One Craft

    According to local legend, some 1,500 years ago a woman appeared on the banks of the Okamoto River in what is now Imadate and taught the impoverished villagers, who had poor farmland, how to make paper from the mulberry growing along the valley. When asked her name, she vanished into the river. The villagers enshrined her as Kawakami Gozen, goddess of papermaking, and built Okamoto Otaki Shrine (岡太神社・大瀧神社) in her honor — its elaborate, richly carved roof is registered as an Important Cultural Property and is worth the walk up the hill on its own.

    The five hamlets that once made up this “paper village” — collectively called Goka — still house dozens of working mills, many run by families who’ve done this for ten generations or more. The most famous is the Iwano family, whose head, Iwano Ichibei, holds the title of Living National Treasure for Echizen Kizuki-hosho, a strong, high-grade paper historically used for art restoration and prints.

    Echizen Washi no Sato: What to See and Do

    The easiest way to experience the craft is at the Echizen Washi no Sato (越前和紙の里) complex, which groups together three sites within a few minutes’ walk:

    • Udatsu Craft Museum — a preserved Edo-period papermaking house where artisans demonstrate hand-forming sheets in the traditional nagashizuki method.
    • Paper & Culture Museum — a small history museum covering washi’s uses from imperial documents to banknotes.
    • Papyrus Kan — the hands-on studio, where you dip a frame (a “su”) into a vat of pulp and make your own postcard or larger sheet to take home.

    Combined admission to the two museums runs around ¥400 for adults; the papermaking experience at Papyrus Kan is separate, typically ¥500–800 for a postcard-sized sheet and more if you want a larger piece or a custom lampshade. Facilities are generally open 9:00 am–4:00 pm and close on Wednesdays and over the New Year holidays, so check ahead if you’re planning a weekday visit. Budget at least two to three hours if you want to see all three sites and try the papermaking experience without rushing.

    Getting There and Best Time to Visit

    Access got noticeably easier in March 2024, when the Hokuriku Shinkansen extended to Tsuruga and added a new stop, Echizen-takefu Station, close to Imadate. From there, or from JR Takefu Station on the conventional line, it’s about a 15–20 minute taxi ride (roughly ¥2,500–3,000) or a local community bus to Washi no Sato — buses run infrequently, so build in slack rather than timing a visit around one. If you’re touring Fukui by rental car, this is an easy add-on to a Fukui/Eiheiji itinerary; just make sure you’ve sorted an ETC card for the expressway tolls before you set out, covered in our guide to ETC cards and expressway tolls.

    Autumn (November) brings good foliage along the valley and comfortable walking weather; spring is pleasant too. Winter in this part of Fukui gets genuinely snowy, which makes the shrine and old paper houses photogenic but slows down bus schedules, so plan around a car or taxi if you go December–February. If you want to stay overnight in the area rather than day-tripping from Fukui City or Kanazawa, this region has traditional farmhouse lodging worth considering — see our guide to kominka stays for how that style of accommodation works.

    Where to Buy Echizen Washi

    Budget (under ¥1,000): Washi postcards, bookmarks, and small notepads sold in the Washi no Sato gift shop run roughly ¥300–800. These make honest, packable souvenirs and are genuinely handmade, not printed imitations.

    Mid-range (¥1,000–6,000): Look for washi lampshades, letter sets, and dyed decorative sheets (some mills specialize in indigo or patterned “chiyogami”-style paper). Business card paper and printing paper for calligraphy or nihonga (Japanese painting) also fall in this range and are popular with practitioners who want the real material rather than a machine-made substitute.

    Splurge (¥10,000 and up): Large-format Kizuki-hosho sheets, custom-commissioned decorative screens, or pieces from named master papermakers can run well into five figures. Several mills in the area will take custom orders — sizes, weights, and fiber blends — if you’re buying for a specific restoration, art, or interior design project rather than as a souvenir. Some workshops are open to visitors by appointment; asking at the Washi no Sato information desk is the easiest way to arrange this if your Japanese is limited.

    Buying Washi Outside Fukui

    If Imadate doesn’t fit your route, Echizen washi is stocked by a handful of long-established paper specialists elsewhere in Japan. Ozu Washi (小津和紙) in Nihonbashi, Tokyo — a paper merchant with roots going back to the Edo period — carries washi from multiple regions including Echizen, alongside knowledgeable staff who can explain the differences between grades. It’s a useful backup if you’re based in Tokyo and want authentic Echizen paper without the trip to Fukui. As with other regional craft shopping in Japan, it pays to compare a few makers before buying — our guide to Karatsu ware in Saga covers a similar approach for pottery, and the principles (buy from the source when you can, ask about the maker, don’t assume all “traditional” goods on sale are actually handmade) apply just as well here.

    Common Mistakes to Avoid

    • Treating it as a five-minute photo stop. Washi no Sato rewards a slower visit — the demonstrations and hands-on experience are the point, not just the shrine.
    • Confusing Echizen crafts. Fukui is also known for Echizen-yaki pottery and Echizen lacquerware (made in nearby Sabae), which are different crafts entirely despite the shared regional name — double-check labels if you’re buying for a specific purpose.
    • Not booking the papermaking experience ahead on weekends or holidays. Walk-ins are usually fine on weekdays, but tour groups can fill the Papyrus Kan studio during peak seasons.
    • Assuming buses run often. Public transport in Imadate is sparse; a taxi or rental car removes most of the friction.
    • Buying “washi” souvenirs elsewhere without checking origin. Machine-made paper is sold generically as “washi” in many souvenir shops — if authenticity matters to you, buying at Washi no Sato or a specialist like Ozu Washi is the safer bet.

    Echizen washi isn’t a flashy stop compared to Fukui’s dinosaur museum or Tojinbo cliffs, but it’s one of the more rewarding half-days you can spend in the prefecture if you care about craft and want a souvenir with real provenance — paper made in the same valley, by the same handful of families, for a millennium and a half.

  • Karatsu Ware: Saga’s Historic Tea-Ceremony Pottery and Where to Buy

    Karatsu Ware: Saga’s Historic Tea-Ceremony Pottery and Where to Buy

    Photo by Viviane Okubo on Unsplash

    Ask a tea-ceremony devotee to rank Japan’s ceramics and you’ll often hear the old saying “Ichi Raku, Ni Hagi, San Karatsu” — first Raku, second Hagi, third Karatsu. That third-place pottery is made in and around Karatsu, a quiet port city in Saga Prefecture on the northwest coast of Kyushu. Unlike the painted porcelain of nearby Arita, Karatsu ware is earthy stoneware — muted glazes, visible clay, and an intentional roughness that tea masters have prized for over 400 years. If you’re building a Kyushu itinerary around craft shopping, here’s what to know before you go, and where to actually spend your money.

    A Brief History Worth Knowing Before You Shop

    Karatsu ware traces back to the late 1500s, when Korean potters — brought to Japan during Toyotomi Hideyoshi’s campaigns on the Korean peninsula — settled in the Karatsu area and introduced climbing kiln (noborigama) technology and glazing techniques that didn’t previously exist in Japan. The city was also a major shipping port, and for centuries “Karatsu-mono” (Karatsu goods) became a generic term for pottery across western Japan, similar to how “china” became shorthand for porcelain in English. Understanding this backstory matters when you’re shopping, because sellers will often describe a piece by its lineage — which family kiln, which generation, which historical style it revives — and that context is a big part of what you’re paying for.

    The Styles You’ll Actually See in Shops

    Karatsu ware isn’t one look — it’s a family of related styles, and recognizing them will help you buy something you actually like rather than whatever’s closest to the door:

    • E-Karatsu — cream or grey glaze with simple iron-oxide brush paintings, often plants or grasses. The most recognizable style to newcomers.
    • Chosen-Karatsu (Korean Karatsu) — two glazes meeting on one piece, typically a dark iron glaze over a lighter straw-ash glaze, creating a dramatic split.
    • Madara-Karatsu — a mottled, milky-white glaze with grey or bluish speckling.
    • Kuro-Karatsu — deep black or near-black glaze, austere and minimalist.
    • Muji-Karatsu — plain, unadorned glaze that shows off the clay body and form itself.

    If you’re new to Japanese ceramics generally, this is a good moment to compare notes with other traditional crafts — if you’ve read about Kyoto’s boxwood combs, the same logic applies here: regional materials and techniques produce distinct “schools,” and knowing the vocabulary helps you avoid overpaying for something generic.

    Getting to Karatsu and When to Go

    Karatsu is an easy day trip or overnight from Fukuoka. The most direct route is the JR Chikuhi Line, which through-runs with the Fukuoka City Subway’s Airport (Kuko) Line — you can board at Fukuoka Airport, Tenjin, or Hakata Station and ride straight through to Karatsu Station without changing trains, in roughly 1 hour to 1 hour 20 minutes depending on the departure point, for around ¥1,150–1,300 one-way. Highway buses from Tenjin bus terminal cover the same route in about an hour for a similar fare.

    If you’re renting a car to explore the kilns scattered through the surrounding hills and villages — many of the best small studios aren’t near a train station — you’ll want to know how the expressway toll system works before you go; our guide to ETC cards and expressway tolls covers what rental counters do and don’t tell you.

    Timing matters more here than in most shopping destinations. The single best window is Golden Week (roughly April 29–May 5), when Karatsu hosts its annual pottery festival, Karatsu Yakimon Matsuri, drawing dozens of kilns to set up stalls in the city center around Karatsu Shrine and the old merchant streets — this is the one time of year you can compare huge numbers of kilns side by side and often buy directly at festival pricing. The other major date is Karatsu Kunchi (November 2–4), a UNESCO-listed festival of enormous lacquered floats — not pottery-focused, but if you’re in town for ware-shopping anyway, it’s worth timing your trip around it for the atmosphere. Outside these dates, spring and autumn are simply the most pleasant seasons for driving between rural kiln studios; summer is hot and humid, and some smaller family kilns close or reduce hours in winter.

    Where to Buy: Budget, Mid-Range, and Splurge

    Budget (¥3,000–10,000): Guinomi (small sake cups) and yunomi (tea cups) are the most affordable entry point into Karatsu ware and make genuinely useful souvenirs. Furusato Kaikan Alpino, a local-products hall a short walk from Karatsu Station, stocks pieces from a range of different kilns under one roof, which is the easiest option if you don’t have a car or a full day to spend driving between studios.

    Mid-range (¥15,000–50,000): This is where you start finding proper chawan (tea bowls) suitable for actual tea ceremony use, from working potters with their own kilns. Several family studios around the city sell direct from their showrooms, and buying this way often means meeting the potter and hearing directly how the piece was fired — anagama (wood-fired) kilns in particular produce unpredictable ash-glaze effects, so no two pieces are alike.

    Splurge (¥100,000 and up): The Nakazato Taroemon kiln, a short walk from Karatsu Castle, represents an unbroken family lineage stretching back to the 1600s; the 12th-generation potter was designated a Living National Treasure for his Chosen-Karatsu work. Pieces from this kiln, and from other well-known studios like Ryuta-gama, run well into six figures of yen for signed work by senior potters, and genuine antique Karatsu ware at auction or through reputable antique dealers can reach into the millions of yen. If you’re spending at this level, ask for a certificate of authenticity (kyoshomo) and box (tomobako) signed by the potter — these matter enormously for resale value and authentication.

    Common Mistakes to Avoid

    • Confusing Karatsu ware with Arita/Imari porcelain. Both are made in Saga Prefecture, but they’re completely different traditions — Karatsu is unglazed-looking stoneware for tea ceremony, Arita/Imari is painted white porcelain. Sellers assume you know the difference; ask if you’re unsure.
    • Showing up at small kilns without checking hours first. Many family studios are genuinely small operations — the potter may be at a market, in the kiln shed, or simply closed that day. A quick phone call or checking the kiln’s website before driving out saves a wasted trip.
    • Assuming you can bargain. Haggling isn’t customary at craft studios in Japan, even for expensive pieces. Prices are fixed.
    • Paying only by card. Smaller kiln shops, especially rural ones, are often cash-only or have unreliable card readers. Carry enough yen.
    • Not asking about shipping. Ceramics are heavy and breakable in a suitcase. Most established kilns and Alpino can arrange domestic or international shipping (takkyubin) for a fee — always ask before you carry a wrapped bowl through three more cities.

    Karatsu rewards travelers who slow down — it’s not a flashy craft town like some porcelain destinations, and that’s rather the point. Between the kiln visits, Karatsu Castle, and the pine-covered Niji-no-Matsubara coastline nearby, it’s an easy and worthwhile detour if you’re already making your way through Kyushu, whether by rental car or the direct train from Fukuoka.