Japan Trove

Author: JapanTrove Editorial

  • Karatsu Ware: Saga’s Historic Tea-Ceremony Pottery and Where to Buy

    Karatsu Ware: Saga’s Historic Tea-Ceremony Pottery and Where to Buy

    Photo by Viviane Okubo on Unsplash

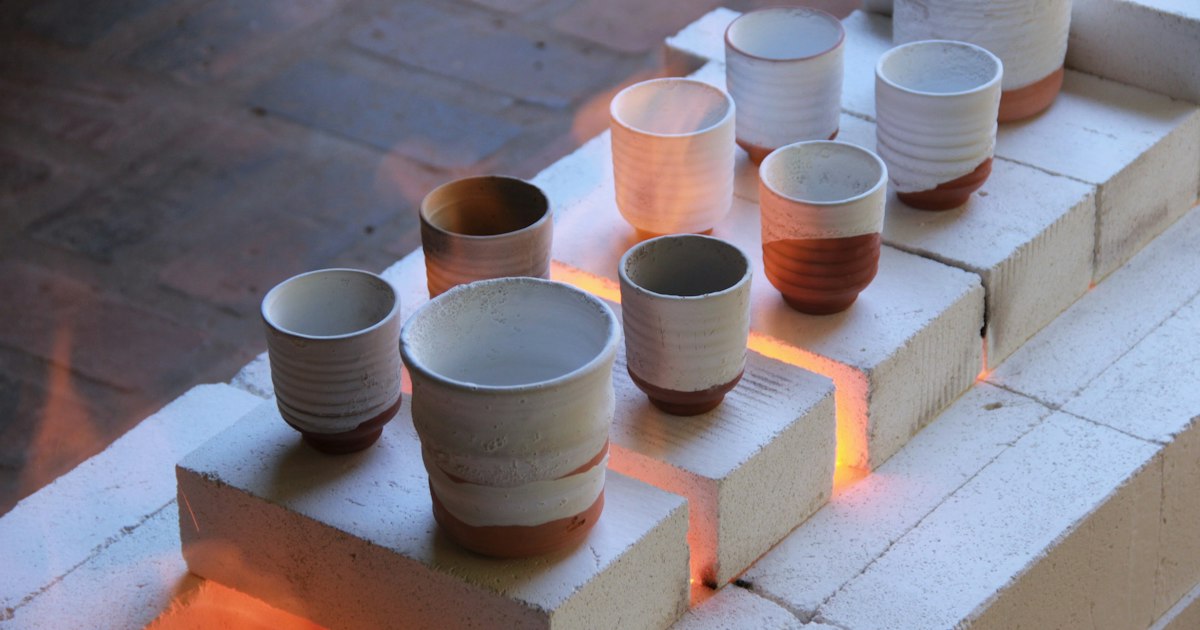
    Ask a tea-ceremony devotee to rank Japan’s ceramics and you’ll often hear the old saying “Ichi Raku, Ni Hagi, San Karatsu” — first Raku, second Hagi, third Karatsu. That third-place pottery is made in and around Karatsu, a quiet port city in Saga Prefecture on the northwest coast of Kyushu. Unlike the painted porcelain of nearby Arita, Karatsu ware is earthy stoneware — muted glazes, visible clay, and an intentional roughness that tea masters have prized for over 400 years. If you’re building a Kyushu itinerary around craft shopping, here’s what to know before you go, and where to actually spend your money.

    A Brief History Worth Knowing Before You Shop

    Karatsu ware traces back to the late 1500s, when Korean potters — brought to Japan during Toyotomi Hideyoshi’s campaigns on the Korean peninsula — settled in the Karatsu area and introduced climbing kiln (noborigama) technology and glazing techniques that didn’t previously exist in Japan. The city was also a major shipping port, and for centuries “Karatsu-mono” (Karatsu goods) became a generic term for pottery across western Japan, similar to how “china” became shorthand for porcelain in English. Understanding this backstory matters when you’re shopping, because sellers will often describe a piece by its lineage — which family kiln, which generation, which historical style it revives — and that context is a big part of what you’re paying for.

    The Styles You’ll Actually See in Shops

    Karatsu ware isn’t one look — it’s a family of related styles, and recognizing them will help you buy something you actually like rather than whatever’s closest to the door:

    • E-Karatsu — cream or grey glaze with simple iron-oxide brush paintings, often plants or grasses. The most recognizable style to newcomers.
    • Chosen-Karatsu (Korean Karatsu) — two glazes meeting on one piece, typically a dark iron glaze over a lighter straw-ash glaze, creating a dramatic split.
    • Madara-Karatsu — a mottled, milky-white glaze with grey or bluish speckling.
    • Kuro-Karatsu — deep black or near-black glaze, austere and minimalist.
    • Muji-Karatsu — plain, unadorned glaze that shows off the clay body and form itself.

    If you’re new to Japanese ceramics generally, this is a good moment to compare notes with other traditional crafts — if you’ve read about Kyoto’s boxwood combs, the same logic applies here: regional materials and techniques produce distinct “schools,” and knowing the vocabulary helps you avoid overpaying for something generic.

    Getting to Karatsu and When to Go

    Karatsu is an easy day trip or overnight from Fukuoka. The most direct route is the JR Chikuhi Line, which through-runs with the Fukuoka City Subway’s Airport (Kuko) Line — you can board at Fukuoka Airport, Tenjin, or Hakata Station and ride straight through to Karatsu Station without changing trains, in roughly 1 hour to 1 hour 20 minutes depending on the departure point, for around ¥1,150–1,300 one-way. Highway buses from Tenjin bus terminal cover the same route in about an hour for a similar fare.

    If you’re renting a car to explore the kilns scattered through the surrounding hills and villages — many of the best small studios aren’t near a train station — you’ll want to know how the expressway toll system works before you go; our guide to ETC cards and expressway tolls covers what rental counters do and don’t tell you.

    Timing matters more here than in most shopping destinations. The single best window is Golden Week (roughly April 29–May 5), when Karatsu hosts its annual pottery festival, Karatsu Yakimon Matsuri, drawing dozens of kilns to set up stalls in the city center around Karatsu Shrine and the old merchant streets — this is the one time of year you can compare huge numbers of kilns side by side and often buy directly at festival pricing. The other major date is Karatsu Kunchi (November 2–4), a UNESCO-listed festival of enormous lacquered floats — not pottery-focused, but if you’re in town for ware-shopping anyway, it’s worth timing your trip around it for the atmosphere. Outside these dates, spring and autumn are simply the most pleasant seasons for driving between rural kiln studios; summer is hot and humid, and some smaller family kilns close or reduce hours in winter.

    Where to Buy: Budget, Mid-Range, and Splurge

    Budget (¥3,000–10,000): Guinomi (small sake cups) and yunomi (tea cups) are the most affordable entry point into Karatsu ware and make genuinely useful souvenirs. Furusato Kaikan Alpino, a local-products hall a short walk from Karatsu Station, stocks pieces from a range of different kilns under one roof, which is the easiest option if you don’t have a car or a full day to spend driving between studios.

    Mid-range (¥15,000–50,000): This is where you start finding proper chawan (tea bowls) suitable for actual tea ceremony use, from working potters with their own kilns. Several family studios around the city sell direct from their showrooms, and buying this way often means meeting the potter and hearing directly how the piece was fired — anagama (wood-fired) kilns in particular produce unpredictable ash-glaze effects, so no two pieces are alike.

    Splurge (¥100,000 and up): The Nakazato Taroemon kiln, a short walk from Karatsu Castle, represents an unbroken family lineage stretching back to the 1600s; the 12th-generation potter was designated a Living National Treasure for his Chosen-Karatsu work. Pieces from this kiln, and from other well-known studios like Ryuta-gama, run well into six figures of yen for signed work by senior potters, and genuine antique Karatsu ware at auction or through reputable antique dealers can reach into the millions of yen. If you’re spending at this level, ask for a certificate of authenticity (kyoshomo) and box (tomobako) signed by the potter — these matter enormously for resale value and authentication.

    Common Mistakes to Avoid

    • Confusing Karatsu ware with Arita/Imari porcelain. Both are made in Saga Prefecture, but they’re completely different traditions — Karatsu is unglazed-looking stoneware for tea ceremony, Arita/Imari is painted white porcelain. Sellers assume you know the difference; ask if you’re unsure.
    • Showing up at small kilns without checking hours first. Many family studios are genuinely small operations — the potter may be at a market, in the kiln shed, or simply closed that day. A quick phone call or checking the kiln’s website before driving out saves a wasted trip.
    • Assuming you can bargain. Haggling isn’t customary at craft studios in Japan, even for expensive pieces. Prices are fixed.
    • Paying only by card. Smaller kiln shops, especially rural ones, are often cash-only or have unreliable card readers. Carry enough yen.
    • Not asking about shipping. Ceramics are heavy and breakable in a suitcase. Most established kilns and Alpino can arrange domestic or international shipping (takkyubin) for a fee — always ask before you carry a wrapped bowl through three more cities.

    Karatsu rewards travelers who slow down — it’s not a flashy craft town like some porcelain destinations, and that’s rather the point. Between the kiln visits, Karatsu Castle, and the pine-covered Niji-no-Matsubara coastline nearby, it’s an easy and worthwhile detour if you’re already making your way through Kyushu, whether by rental car or the direct train from Fukuoka.
  • Sanuki Udon: Kagawa’s Chewy Noodle Pilgrimage and How to Order

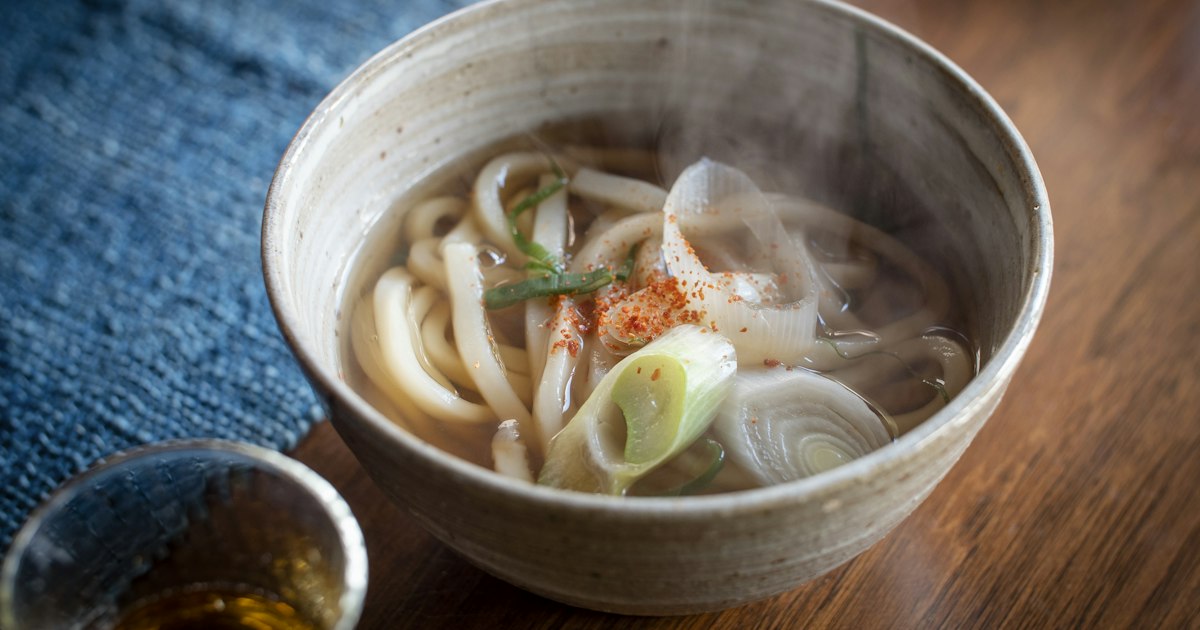
    Sanuki Udon: Kagawa’s Chewy Noodle Pilgrimage and How to Order

    Photo by Jinomono Media on Unsplash

    Kagawa Prefecture is the smallest prefecture in Japan, but it eats more udon per person than anywhere else in the country. Locals call it “Udon-ken” — Udon Prefecture — only half-jokingly, and the noodle culture here is different from what you’ll find in a Tokyo udon shop. Shops are cheap, self-service, and often run by families who’ve been boiling the same recipe for decades out of a converted garage or farmhouse. Visiting a handful of them in one day, known informally as an udon pilgrimage, is one of the most rewarding low-cost food experiences in Japan. Here’s how to actually do it.

    Why Kagawa Is Japan’s “Udon Prefecture”

    Kagawa’s old name was Sanuki Province, which is why the noodles are called Sanuki udon. The region’s flat, dry Setouchi climate is good for growing wheat, and the local water and salt levels happen to suit noodle-making, so udon became a daily staple rather than an occasional treat. Today there are several hundred udon shops packed into a prefecture you can drive across in under two hours, and the noodle chain Marugame Seimen — now found across Japan and internationally — takes its name from the Kagawa city where it started.

    Kake, Bukkake, or Zaru? A Quick Order Guide

    Menus are short but the terminology trips up first-timers. The main styles are:

    • Kake udon — noodles in hot dashi broth, the plainest and cheapest option.
    • Bukkake udon — noodles topped with a small amount of concentrated, undiluted sauce (not swimming in broth), served hot or cold. This is Kagawa’s signature style.
    • Kamatama udon — hot noodles straight from the pot mixed with a raw egg and soy sauce, silky and rich.
    • Zaru / hiyashi udon — cold noodles for dipping, popular in summer.

    If you’ve already read our guide to zaru soba etiquette, the slurping and dipping mechanics carry over directly to zaru and bukkake udon — loud slurping is normal and helps cool the noodles as you eat.

    How Self-Service Udon Shops Actually Work

    Most everyday shops in Kagawa are “self” (セルフ) style, and the system is the same reason locals eat here almost daily — it’s fast and cheap. The general sequence:

    • Tell the staff your noodle order and size (small/regular/large, or 小/並/大) — they boil it fresh in front of you.
    • Take your bowl and walk down a counter of self-serve tempura, inari sushi, and croquettes; add whatever you want to your tray.
    • If it’s a kake-style bowl, ladle hot dashi broth from a communal pot yourself and cut your own scallions from a bin.
    • Pay at the register at the end — everything on your tray gets totaled together.

    Budget for this: a small kake or bukkake udon typically runs about ¥250–450, and a couple of tempura pieces add ¥100–150 each, so a full, satisfying meal usually costs ¥400–700. It’s genuinely one of the best-value hot meals in Japan.

    Where to Eat, by Budget

    Budget: Rural self-service shops are the heart of the pilgrimage — many are open only a few hours a day (often roughly 8:30am–2pm, or until the noodles sell out) and some barely look like restaurants from outside. Expect to pay under ¥500 for a full bowl.

    Mid-range: Sit-down udon restaurants in Takamatsu, Marugame, and Kotohira serve set meals with tempura, rice, and pickles for around �¥800–1,300, with table service and English-friendly menus more common near stations and tourist sites.

    Splurge / experience: Book a session at Nakano Udon School in Kotohira, where you knead and stretch your own noodles (including the traditional step of stepping on the dough) under a teacher’s guidance, then eat what you made. Sessions run roughly ¥1,600–1,800 per person and take about 40–50 minutes — a fun rainy-day activity that pairs naturally with a visit to nearby Kotohira-gu shrine, famous for its long stone staircase.

    Getting to Kagawa and Getting Around

    Takamatsu is the prefecture’s transport hub. From Okayama, the JR Marine Liner crosses the Seto-Ohashi Bridge to Takamatsu Station in about an hour, making it an easy add-on from a Kansai or Hiroshima itinerary via the Sanyo Shinkansen. Takamatsu Airport also has direct flights from Tokyo Haneda (roughly 80 minutes). If you’re arriving from Tokyo and enjoy overnight trains, the Sunrise Seto sleeper train runs directly from Tokyo Station to Takamatsu, arriving early morning — a scenic, novel way to start an udon-focused trip.

    Once in Kagawa, the local Kotoden railway connects Takamatsu with Kotohira, but many of the best-known rural shops are only reachable by car, since they’re tucked into farmland with no station nearby. Renting a car is the most efficient way to hit several shops in a day; if you’re driving between towns on the expressway, our guide to ETC cards and expressway tolls covers how to set up the toll card most rental counters will offer you. If you’d rather not drive, “udon taxi” services are available in the region — a driver who knows the back-road shops takes you on a set multi-stop course, typically charged by the hour and split among passengers.

    Best Season and Common Mistakes

    Udon is eaten year-round in Kagawa — hot kake and kamatama in winter, cold bukkake and zaru in the humid summer — so there’s no wrong season to visit. The main scheduling issue is hours, not weather: the most famous rural shops sell out and close early, sometimes by early afternoon, and are busiest on weekends and holidays. Visiting on a weekday morning is the easiest way to avoid a queue.

    The most common mistakes first-timers make: assuming a self-service shop has table service and waiting to be seated; not realizing the tempura and rice balls on the counter are self-serve and get added to your bill at checkout; and trying to cram too many shops into one day. Two or three shops, eaten in small portions, is plenty — the noodles are heavier than they look, and part of the fun is picking a variety of toppings rather than filling up at the first stop.

    If you have extra time on Shikoku, Kagawa pairs well with a side trip to neighboring Tokushima, especially in summer around the Awa Odori dance festival, or with the art islands of the Seto Inland Sea reachable from Takamatsu’s port.

  • Kushikatsu in Osaka: Deep-Fried Skewers and Shinsekai’s No-Double-Dipping Rule

    Kushikatsu in Osaka: Deep-Fried Skewers and Shinsekai’s No-Double-Dipping Rule

    Photo by Julien on Unsplash

    In Osaka, deep-fried skewers on a stick are less a snack than a small ritual — one with a rule that trips up nearly every first-time visitor. Kushikatsu (also spelled kushiage) are bite-sized pieces of meat, seafood, and vegetables, breaded and fried, then dunked into a shared pot of thin, savory-sweet sauce. That shared pot is exactly where the trouble starts. Here’s how to eat kushikatsu the right way, where to find the best of it, and what it actually costs.

    What Kushikatsu Actually Is

    Kushikatsu started as working-class food in Osaka’s Shinsekai and Nishinari districts in the early 20th century, built for factory workers who needed cheap, fast calories between shifts. A skewer holds one or two pieces of a single ingredient — pork, beef, quail egg, lotus root, cheese, shrimp, shiitake, asparagus — coated in a light panko breading and deep-fried to order. Unlike tempura, the batter is drier and crunchier, and unlike yakitori, nothing is grilled; everything goes into hot oil. Each skewer typically runs ¥120–¥350 depending on the ingredient and the shop, and a satisfying meal of 8–10 skewers plus a drink lands around ¥2,000–¥3,500 per person at a casual counter.

    The No-Double-Dipping Rule (Sōsu Nido-zuke Kinshi)

    Every kushikatsu counter shares one communal vat of dark, Worcestershire-style dipping sauce. Because dozens of diners use the same pot, the rule is absolute: you dip once, take a bite, and never re-dip a skewer you’ve already put your mouth on. Signs reading “ソース二度づけ禁止” (no double-dipping) are posted at nearly every shop in Shinsekai, sometimes in English too. If you want more sauce for a second bite, use the cabbage instead — free, unlimited raw cabbage is provided at most counters specifically as a sauce-scooping tool. Cup a cabbage leaf, ladle sauce onto your skewer or the leaf itself, and eat that way. Staff will politely (or not so politely, at old-school shops) call out anyone who dips twice, so this is genuinely the one etiquette point worth memorizing before you sit down.

    Where to Eat It in Shinsekai

    Shinsekai, the retro neighborhood clustered around Tsutenkaku Tower, is the spiritual home of kushikatsu and the easiest place to try several shops in one outing.

    • Daruma — the most famous chain, founded in 1929. The original Shinsekai branch (near Tsutenkaku) is often crowded with a line out front; skewers run roughly ¥150–¥400 each. Open daily, typically 11:00–22:30.
    • Yaekatsu — a Shinsekai institution since 1954, known for a thicker, more old-fashioned batter and a lively, no-frills dining room. Budget ¥2,500–¥3,500 for a full meal with drinks.
    • Kushikatsu Daruma vs. smaller family-run counters — for a cheaper, more local experience, wander the side streets off Jan Jan Yokocho, a covered arcade in Shinsekai lined with tiny standing counters where skewers can be as low as ¥100–¥150 each and beer is ¥400–¥500. It’s a similar atmosphere to the standing-bar culture described in our guide to tachinomi, Japan’s standing bar culture — order at the counter, eat quickly, and don’t linger over a single beer if the shop is packed.

    Getting there: Shinsekai is a 5-minute walk from Dobutsuen-mae Station (Midosuji, Sakaisuji, and Sennichimae subway lines) or Shin-Imamiya Station (JR Osaka Loop Line and Nankai lines). From Namba it’s about 10 minutes by subway.

    Budget, Mid-Range, and Splurge Options

    Kushikatsu scales well across budgets:

    • Budget (¥1,500–¥2,500): Standing-only counters in Jan Jan Yokocho or Shinsekai back streets. Order 6–8 skewers and a highball; no reservation needed, expect to eat standing or on a stool at a shared counter.
    • Mid-range (¥2,500–¥4,000): Sit-down chains like Daruma or Yaekatsu, or Dotonbori branches that stay open late (many until 23:00 or midnight) for post-dinner grazing.
    • Splurge (¥6,000–¥12,000+): Omakase-style kushiage counters, common in Kyoto and upscale Osaka neighborhoods like Kitashinchi, where a chef fries a fixed course of 12–20 skewers using premium ingredients (wagyu, seasonal fish, foie gras) and pairs each with a specific sauce or salt rather than the communal dip. These require reservations and run more like a tasting menu than a casual meal.

    Best Time to Go

    Kushikatsu is eaten year-round and isn’t seasonal food, but timing your visit still matters practically. Lunch (11:00–14:00) is quietest and some shops offer set lunch skewer plates for ¥1,000–¥1,500. Dinner from 17:00 onward gets busy fast, especially on weekends, and popular Shinsekai shops can have 30–45 minute waits by 19:00. Arriving right at opening or after 21:00 avoids most of the queue. Shinsekai is also at its liveliest and most atmospheric after dark, when Tsutenkaku Tower is lit up — so if you can tolerate a short wait, evening is worth it for the scenery alone.

    Common Mistakes to Avoid

    • Double-dipping — covered above, but worth repeating: it’s the single fastest way to get an awkward correction from staff.
    • Skipping the cabbage — it’s not a garnish, it’s your sauce-delivery tool and a free palate cleanser between fried bites. Eat it throughout the meal.
    • Over-ordering at once — skewers are fried to order and best eaten immediately; order in small rounds of 3–4 rather than a giant batch that goes cold and limp.
    • Assuming it’s the same as tempura or yakitori — the breading, technique, and sauce culture are distinct; don’t expect tempura’s light tenpura sauce or yakitori’s tare glaze.
    • Not checking cash-only policies — many old-school Shinsekai counters are still cash-only or have low card minimums; carry ¥5,000–¥10,000 in cash for an evening out.

    Kushikatsu pairs naturally with a broader crawl through Osaka’s fried and street-food scene — if you’re building out a food-focused itinerary, it’s worth comparing notes with other regional specialties like karaage, Japan’s fried chicken, or the open-air stall culture at Fukuoka’s yatai food stalls, which shares the same communal, order-as-you-go energy. But for a single evening in Osaka, a few rounds of hot skewers, a cold beer, and careful cabbage-dipping in Shinsekai is hard to beat.

  • Watching J-League Soccer in Japan: Tickets, Stadiums & Fan Culture

    Watching J-League Soccer in Japan: Tickets, Stadiums & Fan Culture

    Photo by Yanhao Fang on Unsplash

    Japanese football doesn’t get the same hype abroad as sumo or baseball, but a J-League match is one of the most enjoyable and affordable nights out you can have in Japan. The stadiums are clean and easy to navigate, the crowds are famously well-behaved, and the atmosphere in the supporter sections — with drums, flags, and 90 minutes of continuous chanting — rivals anything in Europe or South America. Here’s what you actually need to know to buy tickets, pick a stadium, and blend in like a regular.

    Understanding the League and Season

    J-League is split into three professional divisions: J1 (the top flight, around 20 clubs), J2, and J3. Most visitors will want a J1 match for the best atmosphere and biggest stadiums, though J2 games are cheaper and often just as passionate — smaller clubs tend to have the loudest ultras precisely because promotion or relegation is on the line.

    For decades the season ran March to early December, with a mid-summer break. J-League has been transitioning to a fall-to-spring calendar (roughly August to May) starting with the 2026–27 season, similar to European leagues, so double-check the current fixture calendar on the official J-League site or a club’s homepage before booking flights — don’t assume the old March–December window still applies. Whichever calendar is in effect, avoid outdoor day games in July and August if you can; the heat and humidity are brutal, and evening “nighter” kickoffs (typically 19:00) are far more comfortable.

    How to Buy Tickets

    Tickets go on sale in stages — season-ticket holders and club members first, then general public sales roughly 2–4 weeks before kickoff. For non-marquee matches you can often just buy at the stadium box office on match day, but for derbies (Saitama Derby between Urawa Reds and Omiya Ardija, the Yokohama Derby, or anything involving Vissel Kobe or Urawa Reds) buy in advance.

    • General admission (自由席, jiyuseki): roughly ¥2,000–3,500, unreserved seating in end/side sections.
    • Reserved seating (指定席, shiteiseki): roughly ¥4,000–8,000 depending on category and opponent.
    • Category S / hospitality seats: ¥10,000–20,000+, padded seats, better sightlines, sometimes food included.

    Main platforms: the official J-League Ticket site, Ticket Pia, e+ (eplus), and Lawson Ticket (which lets you pay and print at any Lawson convenience store — handy if you don’t have a Japanese credit card). Club official sites usually link directly to whichever vendor they use. Most platforms now accept English and foreign cards, but some smaller-club sites are Japanese-only; a hotel concierge or Google Translate’s camera mode handles this fine.

    Best Stadiums to Experience

    Not every J-League stadium is worth the trip, but a handful stand out:

    • Saitama Stadium 2002 (Urawa Reds) — capacity 63,700, the loudest, most intense home crowd in Japan. Reds supporters fill the entire stadium with flags and chanting for the full 90 minutes.
    • Nissan Stadium, Yokohama (Yokohama F. Marinos) — Japan’s largest stadium (72,000+), hosted the 2002 World Cup final; a good pick if you want scale.
    • Todoroki Stadium (Kawasaki Frontale) — smaller and steep-sided, so you’re right on top of the pitch; Frontale’s supporters are known for creative pre-match entertainment.
    • Kashima Soccer Stadium (Kashima Antlers) — a rural, single-purpose football ground (no athletics track), which makes for excellent sightlines; Antlers are the league’s most decorated club.

    Getting to the Stadium

    Most J1 stadiums are built for match-day crowds and are walkable from a dedicated station, or reachable by shuttle bus from a nearby major station — Saitama Stadium, for example, is a 15-minute walk from Urawa-Misono Station, with additional shuttle buses running from Higashi-Urawa on match days. Trains after the final whistle get packed fast, so don’t dawdle if you need a specific connection.

    If you’re chasing games at smaller regional clubs in Hokkaido, Kyushu, or the San’in coast, a rental car can be the only practical option — in which case it’s worth reading up on ETC cards and expressway tolls before you go, since most stadium parking lots and toll gates assume you already have one set up. For long hauls between away games — say, catching a Sunday match in Hiroshima and needing to be in Tokyo by Monday — a sleeper train can save you a hotel night. And if you miss the last train home after a night game, a manga kissa is a legitimate, cheap way to wait out the gap until trains restart around 5am.

    Fan Culture and Etiquette

    J-League crowds are organized and rule-following, and it pays to know the unwritten code before you sit down:

    • Supporter sections (usually behind each goal) stand and sing for the entire match, led by a capo with a megaphone and drums. If you sit in the home end, you’re expected to at least stand and clap along — sitting quietly reading the program is considered rude.
    • Away fans are strictly segregated into a designated block, often with extra staff and sometimes fencing. Never wear the away team’s colors in a home supporter section, or vice versa.
    • Trash goes home with you. Fans famously clean up their own section after the match, sorting recycling into the correct bins — join in rather than leaving your cup on the seat.
    • Scarves (マフラータオル, muffler towels) are the classic souvenir, sold at club shops and pop-up stalls outside the stadium for ¥2,500–3,500, and held aloft during the pre-match anthem.
    • After a win, expect the home end to keep singing for 15–20 minutes after the final whistle as players applaud each stand in turn — don’t rush for the exit if you want to see this.

    Post-match, most fans head to nearby izakaya or standing bars near the station to relive the game — if you want to drink alongside locals without committing to a full sit-down meal, a tachinomi standing bar is exactly the right register for a quick post-match pint.

    Common Mistakes to Avoid

    • Buying from unofficial resale sites. Ticket touting outside stadiums is illegal in Japan and reseller markups on sites like Yahoo Auctions can be steep with no refund protection if the match is postponed for weather.
    • Assuming credit cards work everywhere. Many stadium food stalls and some smaller club shops are cash-only; bring ¥5,000–10,000 in cash for match day.
    • Underestimating derby demand. Marquee fixtures (Saitama Derby, anything against Kashima or Kobe) can sell out within hours of general sale opening.
    • Skipping the weather check. Most J-League stadiums have partial or no roof cover; a sudden downpour in June or a scorching August afternoon will genuinely ruin an uncovered general-admission seat.

    Budget, Mid-Range, and Splurge Options

    • Budget (~¥2,000–3,000): general admission in an end stand, ideally in or near the supporter section for the full atmosphere.
    • Mid-range (~¥5,000–7,000): reserved back/side stand seating — good sightlines, a bit more personal space, still an easy walk from the same station.
    • Splurge (¥10,000+): Category S or hospitality seating, sometimes bundled with a pre-match meal or lounge access — worth it for a Cup final or a once-in-a-trip derby.

    Even at the budget end, a J-League match is one of the best-value evenings in Japan — cheaper than a baseball game, easier to get tickets for than sumo, and a genuine window into how Japanese fans express themselves as a group rather than as individuals.

  • Momiji Manju: Miyajima’s Maple-Leaf Cake and Where to Buy It

    Momiji Manju: Miyajima’s Maple-Leaf Cake and Where to Buy It

    Photo by Elevate on Unsplash

    Shaped like a maple leaf and sold from bakery windows all along Miyajima’s main street, momiji manju is one of the few souvenir snacks in Japan that’s genuinely worth eating on the spot rather than saving for later. It’s a small sponge cake, usually filled with sweet red bean paste, baked in individual maple-leaf molds — and on an island famous for its autumn foliage and the floating torii gate of Itsukushima Shrine, the shape isn’t a gimmick, it’s the point. Here’s what it actually is, which shops are worth your time, and how to work a stop into a Miyajima day trip without wasting your visit standing in the wrong line.

    What Momiji Manju Actually Is

    Momiji manju (紅葉饅頭) is a castella-style sponge cake baked in a hinged iron mold shaped like a maple leaf, similar in spirit to Japan’s taiyaki (fish-shaped cake) but denser and cakier rather than waffle-crisp. The classic filling is tsubuan or koshian (chunky or smooth red bean paste), but nearly every shop on the island now sells custard, chocolate, cheese, matcha, and seasonal fruit versions too. The cake was reportedly created in the Meiji era by a Miyajima confectioner and popularized further when it appeared in a well-known manzai comedy sketch decades later, which is part of why it’s now considered Hiroshima Prefecture’s signature omiyage (souvenir food) alongside oysters.

    Individual pieces cost roughly ¥120–180 depending on filling and shop. Gift boxes of 5 pieces run about ¥700–900, and boxes of 10–12 run ¥1,400–1,900 — useful math if you’re buying for coworkers back home, since most shops box mixed-flavor assortments on request.

    Fresh vs. Fried: The Age-Momiji Question

    The single most useful thing to know before you go is that there are two very different ways to eat momiji manju on Miyajima, and they are not interchangeable. Regular momiji manju is a soft, cool cake meant for slow eating or gifting — it keeps for several days to a week unrefrigerated depending on the shop, which makes it a real souvenir option. Agemomiji (揚げもみじ), or fried momiji manju, is dipped in a light tempura-style batter and deep-fried to order, served hot in a paper sleeve. It has a crisp shell and a molten, almost custardy interior even with red bean filling, and it does not travel — eat it within minutes, standing on the street. Treat it as a snack, not a souvenir.

    If you only have time for one version, fried is the better on-island experience; boxed fresh manju is the better gift. Doing both in one visit is easy since most fried stands are steps from the boxed-cake shops.

    Where to Buy It on Miyajima

    Momiji manju shops cluster along Omotesando shopping street, the covered arcade running from the ferry terminal toward Itsukushima Shrine, so you’ll pass a dozen options without trying. A few worth singling out:

    • Yamadaya (やまだ屋) — the largest chain, with a main shop near the ferry pier that has a glass-walled kitchen where you can watch the molds being filled and flipped. Reliable quality, widest flavor range, and the easiest to find with tired kids or limited time.
    • Nishiki-do (紅葉堂) — widely credited as the originator of the fried version; their agemomiji stand usually has the longest line on Omotesando, but it moves fast. Worth the wait if you’re only trying fried manju once.
    • Fujiiya (藤い屋) — an older, smaller-batch maker with a slightly firmer cake and less-sweet anko; good if the other shops feel too sugary.
    • Momiji Doujou — lets you press and bake your own momiji manju by hand for a small fee (roughly ¥500–700), a fun activity stop if you’re traveling with kids or just want a souvenir with a story.

    Most shops open around 9:00–9:30 and close between 17:30–18:00, tracking the last ferries off the island rather than a fixed schedule — hours shift seasonally, so don’t plan a last-minute purchase after 18:00.

    Getting There and Timing Your Visit

    Miyajima is a short ferry ride from Miyajimaguchi Station, reachable by JR San’yo Line (about a 25-minute local train from Hiroshima Station) or the Hiroshima Electric Railway tram (slower, around 70 minutes, but scenic and covered by some transit passes). From Miyajimaguchi Pier, both the JR West ferry and the Miyajima Matsudai Kisen ferry cross to the island in about 10 minutes for roughly ¥200–360 one way; the JR ferry is covered by the Japan Rail Pass if you’re using one. Boats run frequently, generally every 15–20 minutes during the day.

    For food shopping specifically, arrive before midday if you can — Omotesando gets very crowded by early afternoon, especially on weekends and during the November foliage peak, and the fried-manju stands develop their longest lines between 11:00 and 14:00. Early morning or late afternoon (after 15:30) gives you a much easier walk and shorter waits. If you’re visiting for the maple colors that inspired the cake’s shape, mid-to-late November is peak season island-wide, which is also peak crowding — budget extra time for everything, including buying manju.

    Since you’ll likely pass Itsukushima Shrine on the same visit, it’s worth knowing what the shrine’s amulets actually mean before you buy one as a companion souvenir — see our guide to omamori and what they mean.

    Common Mistakes to Avoid

    • Buying boxed manju too early in the trip. Fresh cake softens and can go slightly stale within a few days; if Miyajima is early in your itinerary, buy on your way home instead, or ask the shop about shelf life for the specific filling (custard and cream versions spoil faster than red bean).
    • Trying to eat agemomiji later. It’s genuinely bad reheated or cold — the batter turns soggy. Only buy fried versions when you’re ready to eat immediately.
    • Assuming all shops taste the same. Sweetness, cake density, and bean-paste texture vary noticeably between Yamadaya, Nishiki-do, and Fujiiya. If you have time, buy single pieces from two or three shops before committing to a gift box.
    • Skipping the checked-baggage problem. If you’re flying home the same day or soon after, boxed manju is not vacuum-sealed and can crush in a suitcase — carry it in your day bag or a rigid tote, and know that most fillings are not freezer-stable for long-haul travel.

    Budget, Mid-Range, and Splurge Options

    For a quick taste without commitment, a single fresh manju at any Omotesando shop (¥120–150) or one fried agemomiji (¥150–200) covers the budget end. Mid-range is a small gift box of 5–6 mixed flavors (¥700–1,000), enough for a couple of coworkers or to sample the range yourself. For a splurge or proper omiyage haul, Yamadaya’s large boxes (10–20 pieces, roughly ¥1,900–3,500) include premium seasonal fillings like matcha or chestnut and come in presentation packaging appropriate for formal gift-giving back home. None of this is expensive by Japanese souvenir standards, which is part of why momiji manju remains the default gift choice for anyone visiting the Hiroshima area — it’s cheap enough to buy in bulk and distinctive enough that recipients recognize it as a real regional specialty rather than a generic sweet.

    If you’re building out a broader list of regional foods worth seeking out on this trip, momiji manju pairs naturally with other single-region specialties like Nagoya’s hitsumabushi or regional karaage styles — each tied tightly enough to one place that eating it there, rather than a Tokyo department-store version, is genuinely part of the experience.

  • Drone Laws & Photography Permits in Japan: What Travelers Need to Know

    Drone Laws & Photography Permits in Japan: What Travelers Need to Know

    Photo by Erik Groh on Unsplash

    Japan looks made for drone photography — terraced rice fields, volcanic coastlines, snow-dusted castle towns — but it’s also one of the more tightly regulated countries in Asia for flying one. The rules changed significantly in 2022 with a new national registration system, and most visitors don’t discover the details until their drone is confiscated at customs or a park ranger flags them down mid-flight. Here’s what actually applies to a traveler bringing a drone into Japan, not just the headline law.

    The 100-gram threshold that decides everything

    Japan’s Civil Aeronautics Act regulates any drone weighing 100 grams or more (including battery), which covers almost every consumer model — even the DJI Mini series sits well above that line. Drones under 100g are exempt from national registration and most Aviation Act flight restrictions, though they’re still subject to local park rules, the Small Unmanned Aircraft Flight Prohibition Act around sensitive sites, and Radio Law rules on frequency use. If your drone is 100g or heavier, assume the full rulebook below applies to you.

    Registering your drone before you fly

    Any drone 100g+ must be registered with Japan’s Ministry of Land, Infrastructure, Transport and Tourism (MLIT) through the online DIPS2.0 system before its first flight in Japan — this applies to foreign visitors, not just residents. You’ll need a passport, a credit card, and the drone’s serial number; registration for overseas addresses is permitted. Fees run roughly ¥900–2,400 per drone depending on the method, and you’ll receive a registration number that must be displayed on the aircraft (a sticker or engraving works). Processing has historically taken anywhere from a few days to a couple of weeks, so apply well before your trip — do not plan to register at the airport. Flying an unregistered drone can carry a fine of up to ¥500,000.

    Unlike some countries, Japan does not require a pilot license (the national Level 1/2 qualification introduced in December 2022) for ordinary recreational flying. That license only matters for advanced operations like flying beyond visual line of sight over people — well outside what a typical traveler attempts.

    No-fly zones that catch almost every tourist

    Even with a registered drone, you need prior approval from MLIT (also filed through DIPS2.0, ideally submitted at least 10 business days ahead) to fly:

    • Inside a Densely Inhabited District (DID) — which covers the vast majority of central Tokyo, Kyoto, Osaka, and every other major city
    • Above 150 meters altitude
    • At night
    • Beyond your visual line of sight
    • Within 30 meters of people, vehicles, or buildings not involved in the flight
    • Over crowds or events

    Separately, the Small Unmanned Aircraft Flight Prohibition Act bans flying near the Imperial Palace, the Diet building, ministries, nuclear facilities, US and Self-Defense Force bases, and airports, regardless of DID status — no permit process gets you around this one. Violations here can mean fines up to ¥500,000 and, in serious cases, criminal penalties. Practically speaking, this means the postcard shots of Kinkaku-ji, Shibuya Crossing, or Fushimi Inari’s torii tunnels are off-limits by drone without a hard-to-obtain permit — and many of these sites also have their own outright bans on private property, so permission from MLIT wouldn’t help anyway.

    Where you can actually fly legally

    The good news: rural and less-populated Japan is wide open. Farmland, coastline, and mountain areas outside DID zones generally don’t require the special permission described above, only registration. Hokkaido is the classic choice — the rolling lavender fields and patchwork hills around Furano & Biei are largely outside dense urban districts and reward aerial shots of the color-block terrain, especially in July when the lavender peaks. Further north, the remote flower islands of Rebun & Rishiri off Wakkanai offer coastal cliffs and near-total quiet, though check conditions carefully since strong sea winds are common even in summer.

    Smaller castle towns can also work well if you check local ordinances first — somewhere like Tsuwano in the San’in region has far less air traffic and foot traffic than Kyoto, making it easier to plan a compliant flight, though you should still confirm you’re outside any DID boundary using MLIT’s public map viewer on the DIPS2.0 site before taking off.

    One important caveat: national parks are a separate layer of regulation. Many, including parts of Fuji-Hakone-Izu, the Japan Alps, and Shiretoko, restrict or ban drones in their special protection zones under Ministry of Environment rules, independent of the Aviation Act. Always check with the specific park office, not just the aviation map, before flying in protected nature areas.

    If you’re driving to a remote shooting location

    Many of the best legal drone spots — coastal cliffs, farmland ridges, mountain passes — are only practical to reach by rental car, since trains won’t get you to the exact vantage point. If that’s your plan, budget for expressway tolls, which add up fast on long rural routes; renting an ETC card at the counter saves you from fumbling cash at toll gates and often unlocks discounted rates. Our guide to ETC cards and expressway tolls covers what it costs and how to set it up.

    Beyond drones: general photography permit rules

    Drones aren’t the only thing that needs clearance. Tripods and monopods are banned or restricted at many shrines, temples, museums, and train stations, both for safety and to keep pathways clear during busy hours. Commercial or professional shoots (anything involving a crew, models, or clear commercial intent) at public gardens and parks — Shinjuku Gyoen and the Tokyo Metropolitan Gardens among them — require a separate advance application and fee, even without a drone involved. If you’re shooting content for work rather than personal memories, check the specific venue’s website before you show up with gear.

    Common mistakes that get travelers fined or stopped

    • Assuming a “toy” drone is exempt. Most beginner and mid-range consumer drones exceed 100g once the battery is in.
    • Registering after arrival. DIPS2.0 processing isn’t instant — start it from home.
    • Trusting Google Maps instead of the official DID map. City boundaries don’t match DID boundaries; use MLIT’s map tool to check your exact launch point.
    • Flying near a shrine or temple “because it’s outside the city.” Religious sites frequently have their own private bans regardless of aviation law.
    • Skipping travel insurance with liability coverage. It’s not legally required for basic flights, but damage to a parked car or a stranger’s property comes out of your pocket otherwise.

    None of this makes drone photography in Japan impossible — it just rewards planning. Register before you leave home, stick to areas clearly outside DID zones and national park restrictions, and treat rural Hokkaido and quieter regional towns as your friendliest legal options.

  • ETC Cards & Expressway Tolls: A Practical Guide for Renting a Car in Japan

    ETC Cards & Expressway Tolls: A Practical Guide for Renting a Car in Japan

    Photo by Antonella Vilardo on Unsplash

    Renting a car opens up a version of Japan that trains simply can’t reach — the lavender hills of Biei, the back roads into a centuries-old thatched farmhouse, or a mountain castle town an hour from the nearest station. But the moment you merge onto a Japanese expressway, you’ll notice something: almost every car glides through the tollgate without stopping. That’s ETC, and if you don’t understand it before you pick up your rental, you’ll either hold up a line of cars or pay far more than you need to. Here’s what first-time renters need to know.

    What Is an ETC Card, and Why You Need One

    ETC (Electronic Toll Collection) is Japan’s automatic toll-payment system. A small in-car unit reads a chip-embedded card as you pass under the tollgate antenna, the barrier lifts, and the toll is billed later — no stopping, no cash, no fumbling for change at highway speed. Nearly every rental car in Japan comes pre-fitted with an ETC unit, but the unit itself is useless without a card inserted into it. Without one, you have to use the manned or cash “ippan” (general) lanes instead, which is slower, occasionally confusing if you don’t read Japanese, and disqualifies you from ETC-only discounts.

    Getting an ETC Card as a Visitor

    Here’s the catch: Japan’s personal ETC cards are issued against a Japanese credit card and address, so tourists generally can’t apply for one directly. The practical workaround is to rent one from your car rental company at pickup. Major chains — Toyota Rent a Car, Nippon Rent-A-Car, Times Car, ORIX Rent-A-Car — all offer this as a simple add-on, typically for a flat fee of around ¥330 (tax included) for the whole rental period, sometimes bundled free with a full-coverage insurance package. Tolls you incur are tracked automatically and charged to the credit card you used to book the car, appearing as a lump sum when you return the vehicle or on your statement afterward.

    Ask for this specifically when you book or at the counter — staff will say “ETC card, tsukemasu ka?” (will you add an ETC card?). It’s worth doing even for a short trip; the discounts alone (below) often cover the fee.

    How ETC Lanes Work at the Tollgate

    At entrances and exits, lanes are marked overhead: purple signage with “ETC” means automatic lanes, while lanes marked in orange or with a hand/coin icon are general lanes for cash or credit card payment with a staffed booth. Slow to about 20 km/h as you approach an ETC lane — the barrier needs a moment to read the card and lift, and rear-ending the car ahead because it stopped is the single most common rental mishap in these lanes. If the light stays red or beeps, stop completely; it usually means the card wasn’t inserted properly or the card’s balance/registration failed, and you’ll need to press the intercom button for assistance. Double-check the ETC card is actually seated in the dashboard unit before you leave the rental lot — it’s easy to drive off with it still in the rental agent’s hand.

    Understanding Expressway Tolls and Typical Costs

    Unlike many countries, Japanese expressway tolls are distance-based, calculated from where you enter to where you exit, and they add up faster than visitors expect. As rough benchmarks for a standard-size rental car: Tokyo to Nagoya via the Tomei Expressway runs roughly ¥6,800–7,000, and continuing on to Osaka pushes the total toward ¥8,500–9,000. Shorter regional hops — say, one interchange to the next in Hokkaido or Tohoku — are usually in the ¥500–1,500 range. Mountain and rural expressways (useful for reaching places like Furano and Biei or a countryside kominka stay) tend to be cheaper per kilometer than the dense Tokyo–Osaka corridor. For an exact quote before you go, NEXCO’s official toll search tools let you enter your entrance and exit interchanges for a precise fare — worth five minutes the night before a long driving day.

    Budget travelers can often shadow the expressway on free “shindo” national routes, which takes longer but costs nothing in tolls; this trade-off makes sense for trips under about two hours. For longer hauls — reaching a remote castle town like Tsuwano in the San’in region, for instance — the time saved on the expressway is usually worth the toll.

    Discounts You Can Use With ETC

    ETC unlocks discounts that cash-paying drivers simply can’t get:

    • Deep-night discount: 30% off tolls for travel between midnight and 4:00 a.m., ETC-only.
    • Weekend/holiday discount: On many regional expressways (not the busiest Tokyo–Nagoya–Osaka trunk routes), Saturdays, Sundays, and public holidays bring up to 30% off for standard cars.
    • Round-trip and multi-day passes: NEXCO and regional operators periodically sell ETC-linked expressway passes for tourists in specific regions (Hokkaido, Kyushu, Tohoku) offering unlimited driving within a zone for a flat fee over several days — worth checking if your itinerary covers a lot of ground, such as island-hopping logistics near Rebun and Rishiri via Wakkanai.

    None of these apply if you’re paying cash at a general lane, which is one more reason the ¥330 ETC card rental fee pays for itself on almost any multi-day trip.

    Common Mistakes to Avoid

    A few habits trip up first-time renters every year:

    • Forgetting to remove the card at drop-off. The ETC card belongs to the rental company; leaving it behind or losing it can incur a replacement fee of several thousand yen.
    • Braking hard at the gate. Slow smoothly to around 20 km/h; the barrier lifts in about a second once the card is read correctly.
    • Assuming all lanes are ETC. Misreading the purple ETC signage and entering a general lane at speed is jarring and occasionally triggers an automatic fine notice — read the overhead signs early, not at the last second.
    • Not budgeting for tolls separately from fuel. On a long itinerary — say, driving from Nagano near Zenko-ji out toward the coast — tolls can end up costing more than gasoline, so factor them into your trip budget upfront rather than being surprised at return.

    Is Renting with ETC Worth It?

    For a single short hop between two nearby towns, cash lanes and free roads are fine. But for anything involving a real cross-prefecture drive, the ETC card rental fee is trivial next to the time saved, the crash risk avoided at unfamiliar tollgates, and the discounts you’d otherwise miss. Add the card at pickup, confirm it’s inserted before you leave the lot, and the rest of Japan’s expressway network becomes as easy as any other stretch of your trip.

  • Tsuge Kushi: Kyoto’s Boxwood Combs and Traditional Hair Accessories

    Tsuge Kushi: Kyoto’s Boxwood Combs and Traditional Hair Accessories

    Photo by PJH on Unsplash

    Tucked between the geiko houses and teahouses of Gion, Kyoto’s boxwood comb shops sell one of Japan’s quietest luxury goods: a hand-carved, hand-polished comb that can outlast the person who bought it. Tsuge kushi (黄楊櫛 or 柘植櫛) look simple — a plain wooden comb with no lacquer, no paint, no decoration — but the craft behind them is deep, the price range is wide, and the souvenir shelves near Kiyomizu-dera are full of imitations that look almost identical. Here’s how to shop for the real thing.

    What Makes a Tsuge Kushi Different

    “Tsuge” refers to Japanese boxwood, a slow-growing hardwood traditionally sourced from Satsuma (present-day Kagoshima) and the Izu Islands. A single tree can take 60 to 80 years to reach a usable trunk diameter, which is part of why good combs aren’t cheap. After cutting, the wood is dried for years — sometimes a decade — before a craftsperson carves the teeth by hand and finishes the surface with camellia (tsubaki) oil rather than lacquer or varnish.

    The result is a comb that doesn’t generate static, glides through hair without snagging or pulling, and actually gets smoother with use as the oil works into the grain. This is the opposite of the plastic or bamboo “tsuge-style” combs sold as ¥500–¥1,500 souvenirs in Nishiki Market or along Sannenzaka — those are fine as gifts, but they aren’t boxwood and won’t perform the same way.

    Where to Shop in Gion

    The best-known specialist is Kazurasei (かづら清老舗), a long-established hair-accessory shop in Gion, a short walk from Yasaka Shrine and Gion-Shijo Station. Kazurasei has supplied combs, kanzashi (hair ornaments), and tsubaki hair oil to Kyoto’s geiko and maiko community for generations, and its retail counter sells the same lines to visitors — boxwood combs, hairpins, and small grooming sets displayed by size and tooth width. Staff are used to explaining the difference between a fine-tooth comb (for detangling and daily use) and a coarse-tooth comb (for styling thicker sections of hair), which is genuinely useful if you’ve never bought one before.

    Beyond Kazurasei, the pedestrian lanes around Yasaka Shrine, Ninenzaka, and Sannenzaka have several smaller craft and accessory shops carrying boxwood combs alongside tsumami-zaiku fabric hairpins — worth browsing for comparison, but check the material tag before assuming “wood-colored” means boxwood. Most of these shops keep standard Kyoto retail hours, roughly 10:00 to 18:00, and are open daily, though some close on scattered weekdays in winter — it’s worth a quick call or a look at the shop’s posted hours if you’re making a special trip.

    How Much to Budget

    Prices scale with size, tooth density, and how long the wood was seasoned:

    • Budget (¥2,000–¥5,000): Small pocket combs or simple hairpins in boxwood, sometimes blended with other woods. Good as a first purchase or a gift.
    • Mid-range (¥6,000–¥15,000): Full-size, fine-tooth boxwood combs meant for daily detangling and styling — the most common “serious” purchase for visitors.
    • Splurge (¥20,000–¥50,000+): Large, densely-toothed combs made from long-seasoned wood, or sets that pair a comb with a matching hairpin and a small bottle of tsubaki oil. These are the pieces geiko and maiko actually use, and shops will often show you the difference in wood grain and weight if you ask.

    Most shops accept cash and major IC cards; some smaller stalls near the temple approaches are cash-only, so carry yen if you’re browsing outside the main Gion shops.

    Best Time to Visit and How to Get There

    Gion is walkable from Gion-Shijo Station (Keihan Line) or Kawaramachi Station (Hankyu Line), and it’s a natural stop if you’re already heading to Yasaka Shrine or Kiyomizu-dera. Shop in the morning on a weekday if you can — by early afternoon, the lanes around Yasaka Shrine fill with tour groups, and it’s harder to get unhurried advice on comb sizing. If your Kyoto itinerary includes a temple or shrine visit the same day, you’ll find the omamori you pick up along the way makes a natural pairing with a boxwood comb as a set of traditional souvenirs — for background on what those amulets actually mean, see Omamori: Japan’s Shrine and Temple Amulets and What They Mean.

    There’s no strong seasonal reason to time a comb purchase around cherry blossoms or autumn leaves — shops are open year-round — but if you’re building out a broader Kyoto day, consider combining Gion with a trip to the sake breweries of Fushimi; see Nada & Fushimi: Japan’s Sake Brewing Districts and How to Visit for how to structure that visit.

    Common Mistakes to Avoid

    • Assuming “wood-look” means boxwood. Many souvenir combs are stained bamboo or other light woods finished to resemble tsuge. Ask directly — reputable shops will tell you the wood species without hesitation.
    • Buying the wrong tooth spacing. Fine-tooth combs are for detangling and fine or thin hair; wide-tooth combs are for thick hair and styling. Bring a sample of your hair thickness in mind, or ask staff to recommend based on your hair type.
    • Getting the comb wet. Unlike lacquered combs, oil-finished boxwood should stay dry. Water strips the camellia oil finish and can warp the wood over time.
    • Skipping the oil. A small bottle of tsubaki (camellia) oil, sold alongside the combs, is meant to be reapplied periodically — it’s what keeps the comb smooth and prevents the wood from drying out.

    Caring for Your Comb

    Wipe the comb with a dry or barely damp cloth after use — never submerge it. Every few months, apply a drop of camellia oil to the teeth and rub it in with a soft cloth or tissue; this is the same oil traditionally used on the comb’s wood and, historically, on hair itself. Store it in the small cloth or paper sleeve most shops provide, away from direct sunlight, which can dry and crack the wood over years. Treated this way, a good tsuge kushi is genuinely a lifetime object, and it’s one of the few Kyoto souvenirs that gets better, not worse, with age.

    If you’re assembling a broader list of traditional Japanese crafts to bring home, it’s worth browsing regional specialties beyond Kyoto too — the faceless good-luck dolls of the Hida mountains make an interesting contrast in craft philosophy; see Sarubobo: Hida Takayama’s Faceless Good-Luck Doll and Where to Buy for that guide.

  • Kabutomushi Culture: Japan’s Beetle-Collecting Hobby and Where to Buy Live Beetles

    Kabutomushi Culture: Japan’s Beetle-Collecting Hobby and Where to Buy Live Beetles

    Photo by Henry Lai on Unsplash

    Every summer, long before cicadas start droning and convenience stores stock up on barley tea, Japanese kids are already checking the sap trees at the local park before school. Kabutomushi (rhinoceros beetles) and kuwagata (stag beetles) are as much a fixture of the Japanese summer as fireworks and shaved ice, and the hobby around them — hunting, breeding, trading, and buying — runs surprisingly deep. If you’re visiting in June, July, or August, it’s a genuinely fun rabbit hole to fall into, even if you have zero interest in bugs back home.

    What Is Kabutomushi Culture, Anyway?

    Beetle-collecting (mushi-tori) has been a childhood rite of passage in Japan for generations, and it never really faded the way it has elsewhere. Toy makers still sell kabutomushi-themed card games and figures, pet shops carry breeding tanks and larval food blocks year-round, and it’s completely normal for a grown adult to have a few stag beetle larvae quietly maturing in a plastic case in their closet. There’s even a competitive edge to it: certain kuwagata species with unusually large mandibles or kabutomushi with long horns command real money among collectors, similar to how a rare stamp or coin gets valued. If you enjoy Japan’s other quiet collecting hobbies, like the eki stamp rallies at train stations, this is the same impulse aimed at the natural world instead.

    Meet the Beetles: Kabutomushi vs. Kuwagata

    The two stars are easy to tell apart. Kabutomushi (Trypoxylus dichotomus), the Japanese rhinoceros beetle, is glossy reddish-brown with a single large curved horn on the male’s head — it’s the one most tourists picture. Kuwagata is a catch-all term for stag beetles, identified by their pincer-like mandibles; common species include nokogirikuwagata (sawtooth stag beetle) and the prized ohkuwagata (giant stag beetle, Dorcus hopei binodulosus), which can reach 7–8 cm and is the most expensive domestic species. Both are strictly seasonal as adults — they emerge from underground pupation in early summer and typically live only four to eight weeks, though kuwagata adults can occasionally overwinter. The larval stage, by contrast, lasts one to three years, which is why breeding shops sell larvae in clear cases at all times of year.

    Best Season and Time to Go Beetle Hunting

    Late June through mid-August is peak season nationwide, with early July usually the sweet spot in most of Honshu (Hokkaido runs a few weeks later, Kyushu and Okinawa a bit earlier). Beetles feed on tree sap at night and retreat by mid-morning, so the two reliable windows are just after dark (around 8–10pm) and at dawn (5–6am) before joggers and crows beat you to the trees. Hot, humid, still nights right after rain tend to be best — wind and cool temperatures suppress activity. Avoid nights around the full moon if you can; beetles are less active when there’s ambient light competing with your flashlight.

    How to Catch Your Own

    You don’t need special equipment — a flashlight (ideally red-filtered, which disturbs beetles less), a net, and a small ventilated case will do. Head for satoyama-style secondary forest with kunugi and konara oak, the two tree species whose sap the beetles feed on; you’re looking for dark wet patches on the bark, usually a meter or two off the ground. Many public parks in suburban Tokyo, Saitama, and Chiba have known “beetle trees” that locals return to year after year — ask at a nearby konbini or park office and staff will often point you in the right direction.

    The classic DIY method is a banana trap: mash a ripe banana with a splash of sake or beer and a spoonful of brown sugar, seal it in a pantyhose foot or mesh bag, and tie it to a tree trunk in the early evening. Check it after dark or at dawn — the fermented smell reliably pulls beetles in from a distance. If you’re staying somewhere rural for this, a night in a traditional kominka farmhouse near satoyama woodland puts you right next to good hunting grounds instead of commuting out from a city hotel.

    Where to Buy Live Beetles

    If hunting at night isn’t your idea of a vacation activity, buying is easy and completely normal in Japan.

    • Specialty insect shops (konchu-ten): Long-established stores like Mushisha in Kunitachi, Tokyo, sell live kabutomushi and kuwagata alongside breeding supplies, and staff are used to explaining care to beginners. Hours are typically 11am–7pm, closed one weekday.
    • Department store “insect fairs”: Big department stores and complexes such as Sunshine City in Ikebukuro run a “World Insect Exhibition” (世界の昆虫展) most summers, usually late July through August, with a sales corner for both native and imported species alongside the exhibits. Check current-year dates locally, as they shift slightly year to year.
    • Home centers and pet sections: Chains like Kohnan and Cainz stock live beetles in a dedicated summer corner from June onward, usually the cheapest reliable source for common species.
    • Novelty vending machines: A handful of roadside stations (michi-no-eki) and rural shops have installed vending machines that dispense live beetles in small cases — a fun photo op, though the selection is limited to a couple of common species and you’re paying a premium for novelty.

    Budget, Mid-Range, and Splurge Prices

    Prices vary a lot by species, size, and where you buy:

    • Budget (¥500–1,500): A common male kabutomushi or small kuwagata from a home center or supermarket summer stand.
    • Mid-range (¥1,500–5,000): Larger, well-matched pairs from a specialty shop, or larvae sets for breeding at home.
    • Splurge (¥10,000–100,000+): Prize-quality ohkuwagata with jaw length well above average, or imported giants like Hercules beetles — these are sold and auctioned like show animals, with size in millimeters driving the price.

    Before You Buy: A Customs Reality Check

    This is the part most tourists miss: you almost certainly cannot take a live beetle home. The US, EU, UK, Australia, and most other countries have strict biosecurity laws banning the import of live insects without specialized permits, precisely to prevent invasive species and agricultural pests from spreading — and Japanese customs takes the export side seriously too for certain protected native species. Treat buying a beetle as something to enjoy and release (or gift to a Japanese friend) before you fly out, not a souvenir to pack. If you do go wild-collecting, it’s also worth knowing that removing insects is prohibited in many national parks and protected forests, and releasing any foreign-bought beetle into the wild in Japan is discouraged, since escaped non-native stag beetles have already caused real problems by interbreeding with native populations.

    Timed right, a beetle-hunting evening pairs naturally with the rest of a Japanese summer trip — the season overlaps almost exactly with fireworks festival season, so it’s easy to spend a humid evening checking sap trees and still make it to a hanabi show by nine.

  • Tsuwano: San’in’s Quiet “Little Kyoto” Castle Town

    Tsuwano: San’in’s Quiet “Little Kyoto” Castle Town

    Photo by Nicholas Ng on Unsplash

    Tsuwano doesn’t try very hard to be famous, which is exactly why it’s worth the detour. Tucked into a narrow mountain valley in eastern Shimane Prefecture, this former castle town earned the nickname “Little Kyoto of San’in” for its white-walled samurai lanes and canals full of drifting carp — but unlike Kyoto, you can walk the whole historic core in under two hours and rarely share the street with more than a handful of other travelers. It’s a genuinely good day trip or overnight stop for anyone routing between Hiroshima, Yamaguchi, and the San’in coast.

    Getting There: Trains, the Steam Locomotive, and Timing Your Visit

    Tsuwano sits on the JR Yamaguchi Line, which links Shin-Yamaguchi Station (a Sanyo Shinkansen stop) to Masuda on the San’in coast. From Shin-Yamaguchi, local trains to Tsuwano take roughly 1 hour 40 minutes to 2 hours, sometimes with a change at Yamaguchi Station, and this is a rural single-track line with only a handful of departures a day — check the timetable before you build your day around it. Coming from the San’in side, Masuda is about 20–25 minutes from Tsuwano.

    The real draw for train fans is the SL Yamaguchi-go, a restored steam locomotive that runs the Shin-Yamaguchi–Tsuwano route on select weekends and holidays, roughly late March through November. The ride takes about two hours and requires a seat reservation on top of the regular fare, so book ahead if you want a window seat. If you enjoy this kind of small-scale railway ritual, it pairs well with the mindset behind eki stamp rallies — Tsuwano Station has its own stamp worth tracking down at the ticket window.

    If you’re coming from further afield in San’in and want a scenic overnight option instead of flying, the Sunrise Izumo sleeper train terminates at Izumo City, from where you can work your way along the coast toward Masuda and Tsuwano by local train over a day or two.

    Tonomachi Street: Carp Canals and White-Walled Lanes

    The heart of Tsuwano is Tonomachi, a roughly 1-kilometer stretch of former samurai residences with plastered white walls, black tile roofs, and stone-lined canals running alongside the road. Hundreds of ornamental carp — some Tsuwano families have kept them since the Edo period as an emergency food reserve — swim in the clear water, and in June and July the canal banks fill with blooming morning glories. It’s free to walk, open all day, and best appreciated slowly: duck into the old sake and washi paper shops, and don’t rush past the small side alleys.

    Renting a bicycle at the station area (roughly ¥700–1,000 for a few hours, cash, ID sometimes requested) is the easiest way to cover Tonomachi plus the shrine and church without backtracking on foot, especially if you’re doing this as a day trip with a train to catch.

    Taikodani Inari Shrine and the Castle Ruins Above Town

    A ten-minute walk from Tonomachi brings you to Taikodani Inari Shrine, founded in 1773 and considered one of Japan’s five major Inari shrines. Its signature feature is a tunnel of roughly 1,000 vermilion torii gates climbing the hillside — a smaller, quieter cousin of Kyoto’s Fushimi Inari, and one you can usually photograph without a crowd in the frame. The shrine grounds are free and open from early morning to dusk; if you’re the type to collect protective charms as souvenirs, this is a good stop, and our guide to omamori explains what the different types actually mean before you buy one.

    From near the shrine, the Tsuwano Castle Ropeway (chairlift) carries visitors partway up Mt. Ryukoyama toward the ruins of Tsuwano Castle. It typically operates March through November and closes for winter, with a round-trip fare in the ¥450–500 range for adults — confirm current hours locally since schedules shift seasonally. From the lift’s upper station it’s a 15–20 minute uphill walk to the stone-wall ruins, but the payoff is a genuinely excellent panorama of the valley, the town’s tiled roofs, and the surrounding rice terraces. Go in late afternoon for the best light, or in autumn when the hillside foliage turns.

    The Catholic Church and Tsuwano’s Hidden Christian History

    A short walk from Tonomachi stands the Tsuwano Catholic Church, a small 1931 Gothic-style building notable for its stained glass set above tatami-mat flooring — an unusual, quietly moving combination. The church commemorates a darker chapter: during the Meiji-era persecution of Japan’s “Hidden Christians,” dozens of believers exiled from Urakami (Nagasaki) were imprisoned and some died in Tsuwano. A memorial chapel at Otome Toge, a 15–20 minute walk or short drive outside the town center, marks the site. Entry to both is free or low-cost, and neither takes long to visit, but they add real historical weight to what otherwise reads as a purely scenic stop.

    Where to Eat and What to Buy

    Tsuwano’s signature dish is uzume-meshi — rice in dashi broth topped with grated mountain yam, mushrooms, and vegetables, served in small lacquered bowls at restaurants along Tonomachi for roughly ¥1,000–1,500. Some local restaurants also serve carp as sashimi (arai) or in a miso soup (koigoku), a legacy of the same fish you see swimming in the canals. If you’d rather stick to something familiar, nearby Yamaguchi and Fukuoka are well known for karaage, and a cold plate of zaru soba is a common lunch option in the warmer months at teahouses along the main street.

    For shopping, look for Sekishu washi — handmade paper from the Iwami region of Shimane — sold as postcards, lampshades, and stationery in shops along Tonomachi. It’s a lighter, more packable souvenir than most regional crafts. If your Japan itinerary includes wood or lacquer crafts elsewhere, our piece on Hakone’s yosegi zaiku puzzle boxes covers a comparable regional-craft shopping approach.

    Practical Tips and Common Mistakes

    • Don’t treat it as a quick stopover between shinkansen stations. Because Yamaguchi Line trains run infrequently, arriving without checking the return timetable is the single most common mistake — you can easily get stuck for two or three hours. Screenshot the schedule before you leave your hotel Wi-Fi.
    • Best season: late June–July for morning glories along the canals and the Sagi-mai (Heron Dance) festival at Yasaka Shrine on July 20 and 27; November for foliage around the castle ruins; and early spring for mild weather with fewer visitors. Winter is very quiet, atmospheric, but the castle ropeway is usually closed.
    • Budget: a day trip covering shrine, church, and lunch can run under ¥3,000 excluding transport. Mid-range: an overnight in a Tonomachi-area ryokan or pension with dinner runs considerably more but lets you see the town in the quiet of early morning. Splurge: pair Tsuwano with a countryside stay — if you want the full traditional-house experience rather than a standard ryokan room, our guide to kominka farmhouse stays covers how to book one in rural regions like this.
    • Luggage: Tsuwano Station has coin lockers, but they’re limited in number and size — don’t count on fitting a large suitcase if you arrive on a busy weekend with the SL running.

    Tsuwano rewards travelers who’ve already done Kyoto and Kanazawa and want to see what a castle town looks like without the crowds, the queues, or the souvenir megastores. Budget a half-day minimum, a full day if you want the castle ruins and the church properly, and build in slack around those train times — the town itself will do the rest of the work.