Japan Trove

Author: JapanTrove Editorial

  • Narita Express vs Keisei Skyliner: Which to Take from Narita Airport

    Narita Express vs Keisei Skyliner: Which to Take from Narita Airport

    Photo by Tan on Unsplash

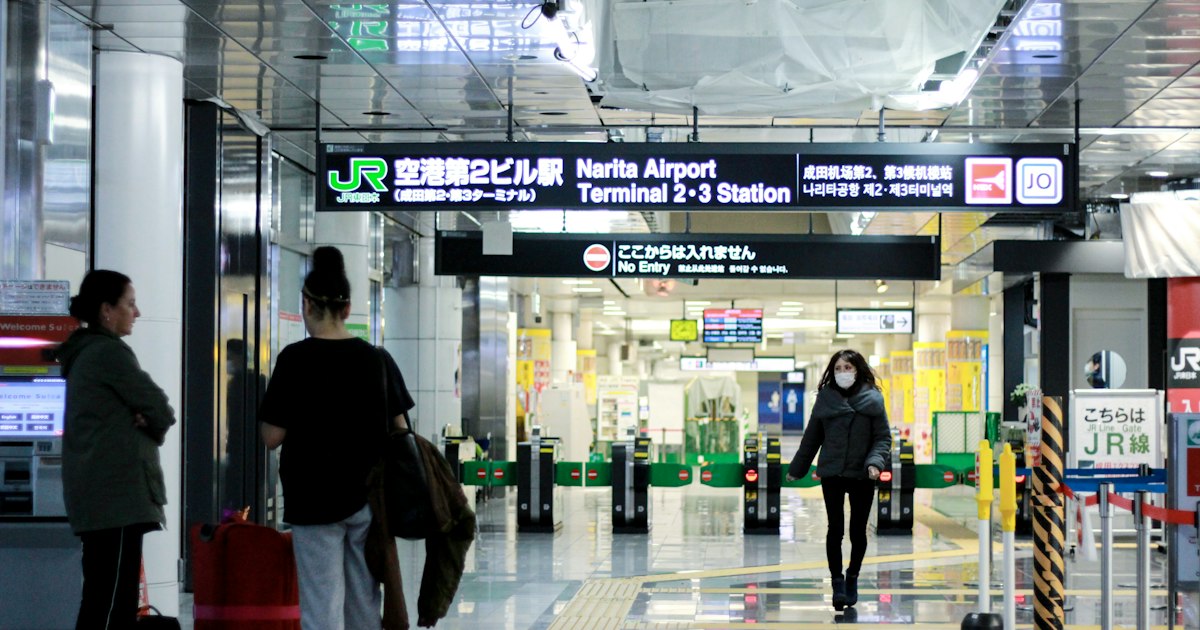
    Landing at Narita after a long flight, you’re faced with your first real decision in Japan: how to get into Tokyo. The two best options are the JR Narita Express (N’EX) and the Keisei Skyliner, and most first-time visitors have never heard of either until they’re standing in the arrivals hall trying to choose. Both are fast, reliable, and far better than a taxi (which can run ¥20,000–¥25,000 to central Tokyo). Here’s how they actually compare, so you can pick the right one before you’ve even cleared customs.

    The Quick Answer

    If you’re heading to Tokyo Station, Shinagawa, Shibuya, Shinjuku, Ikebukuro, or Yokohama — and especially if you’re also using a Japan Rail Pass — take the Narita Express. If you’re headed to Ueno, Nippori, Asakusa, or anywhere on the northeast side of Tokyo, or you simply want the cheapest and fastest ride to a JR/Keisei connection point, take the Keisei Skyliner. Both depart from the same terminals, so you’re not locking yourself into a bad route either way.

    Narita Express (N’EX): Comfort and Direct Reach

    The Narita Express is operated by JR East and is the more versatile of the two because it runs through, without a transfer, to multiple major Tokyo hubs: Tokyo Station (about 55–60 minutes), Shinagawa, Shibuya, Shinjuku, and Ikebukuro, plus a branch to Yokohama. All seats are reserved, the cars have generous luggage racks near the doors, and there are power outlets at most seats — useful if your phone died on the flight.

    Standard one-way fares run around ¥3,070 to Tokyo Station and ¥3,250 to Shinjuku or Shibuya for an ordinary reserved seat (Green Car upgrades cost more). Foreign visitors can often save with the discounted “N’EX Tokyo Direct Ticket,” a round-trip fare bought in advance at roughly ¥4,070–¥4,370 depending on destination — worth it if you already know you’ll fly out of Narita again. The Narita Express is also fully covered by the Japan Rail Pass, which matters if you’re activating a 7, 14, or 21-day pass on arrival day; in that case it’s effectively free.

    Trains run roughly every 30–60 minutes from early morning (first departure around 7:30–8am) until about 9:45–10pm. Because every seat is reserved, you cannot board without a seat reservation during busy periods, so book at the JR ticket counter or machines in the arrival lobby as soon as you land, especially around holidays.

    Keisei Skyliner: Speed and Value

    The Keisei Skyliner is the faster and generally cheaper option, but it only goes to two stations: Nippori and Ueno, both on Tokyo’s east side. The ride to Ueno takes about 41 minutes — the fastest airport-to-city train in the Tokyo area. From either station you can transfer to the JR Yamanote Line or Tokyo Metro to reach almost anywhere else in the city within another 20–30 minutes.

    Regular one-way fare is ¥2,570 for adults. Foreign tourists can buy a discounted ticket (around ¥2,200–¥2,300) through Keisei’s own site or travel platforms like Klook and Voyagin before arrival — showing your passport at the counter also gets a tourist discount on the spot. Trains run every 20 minutes through the day, from roughly 7:30am to around 10:30pm, and all seats are reserved but easy to book at airport kiosks even with no advance planning.

    The Skyliner isn’t covered by the Japan Rail Pass since Keisei is a private railway, but it pairs well with a Tokyo Subway Ticket or a prepaid IC card for onward travel. If you’re setting up contactless payment for the rest of your trip, our guide on adding Suica or Pasmo to Apple Wallet is worth reading before you land — tapping through the Ueno transfer gates is much faster than fumbling with a paper ticket while jet-lagged.

    Comparing the Two Side by Side

    • Speed: Skyliner wins to Ueno (41 min) vs. N’EX to Tokyo Station (55–60 min).
    • Price: Skyliner is cheaper (~¥2,200–2,570) than N’EX (~¥3,070–3,250) for a one-way adult fare.
    • Destinations without a transfer: N’EX reaches far more stations directly — Shibuya, Shinjuku, Ikebukuro, Yokohama. Skyliner only reaches Ueno/Nippori directly.
    • Luggage space: Both have dedicated racks, but N’EX cars feel slightly roomier for oversized suitcases.
    • JR Pass coverage: N’EX only. If you’re activating a pass on day one, it’s essentially a free ride.

    Common Mistakes to Avoid

    The biggest mistake is assuming you can just walk up and board — both trains require seat reservations, and during peak season (cherry blossom weeks, Golden Week, New Year) same-day seats can sell out on the first one or two departures. Book at the ticket counter in the arrivals area the moment you land, even before collecting bags if the queue looks long.

    The second mistake is boarding the wrong train entirely: Narita Airport has two JR platforms shared with local trains and Keisei has a similarly shared setup, so double-check the signage and the destination board rather than just following the crowd. Staff at both counters speak enough English to confirm your platform.

    The third mistake is buying a round-trip discount ticket for the wrong leg of your trip — the N’EX round-trip deal is only worthwhile if you’re flying out of Narita again at the end of your stay, not if you’re departing from Haneda.

    Which One Fits Your Trip?

    If your hotel is near Tokyo Station, Shinagawa, or you’re continuing on to Yokohama, or you already hold a Japan Rail Pass, the Narita Express is the simpler, if pricier, choice. If you’re staying anywhere near Ueno, Asakusa, or planning to browse boutique neighborhoods like Daikanyama after a quick transfer, the Skyliner saves both time and money. Either way, budget travelers can also combine the Skyliner with the Tokyo Subway 24/48/72-hour ticket bundles sold at the same counter for a cheaper total transit cost over a multi-day stay.

    One last tip: Narita’s terminals have a surprising number of decent shops for last-minute omiyage if you’re departing rather than arriving — if you haven’t picked up gifts yet, our guide to Tokyo Banana and other iconic omiyage sweets covers what’s actually worth grabbing before you board either train home.
  • Francfranc: Japan’s Stylish Home Decor Chain

    Francfranc: Japan’s Stylish Home Decor Chain

    Photo by Yanhao Fang on Unsplash

    If you’ve ever wandered into a Japanese apartment and wondered where the owner found that perfectly proportioned mug, the scented reed diffuser on the shelf, or the compact sofa that somehow fits a six-tatami room, there’s a good chance the answer is Francfranc. It’s Japan’s answer to a cooler, more design-forward version of a lifestyle megastore, and for visitors it’s one of the easiest places to bring home a genuinely useful souvenir instead of another box of sweets.

    What Is Francfranc, Exactly?

    Francfranc (pronounced “fran-fran”) is a Japanese home furnishings and lifestyle retailer that’s been shaping how young, urban Japanese households furnish their homes since the early 1990s. The brand’s whole identity is built around small-space living: furniture and accessories designed for compact apartments, in colorways and silhouettes that feel more European boutique than big-box store. Think IKEA’s product range crossed with the aesthetic sensibility of a Scandinavian design shop, scaled down for Tokyo-sized rooms.

    Stores carry everything from sofas, dining tables, and storage furniture down to glassware, kitchen tools, bedding, bath products, candles, and seasonal decor. Most locations are mid-sized shop spaces inside shopping centers and department stores rather than freestanding warehouses, so you can browse one in 20–30 minutes.

    Where to Find It

    Francfranc has dozens of stores across Tokyo and other major cities, but a few are worth seeking out specifically:

    • Daikanyama — this upscale, boutique-lined neighborhood is closely associated with the brand’s origins and aesthetic, and it’s an easy place to browse Francfranc alongside other interior and lifestyle shops. If you’re making a day of it, pair your visit with our guide to Daikanyama’s boutique neighborhood.
    • Shibuya and Harajuku — both have well-stocked branches inside major commercial buildings, convenient if you’re already shopping the area.
    • Tokyo Dome City (LaQua) and Odaiba’s DiverCity — larger-format stores with fuller furniture selections, good if you want to see sofas and bed frames in person.
    • Ginza and Tokyo Station-area department stores — smaller, gift-and-accessory-focused branches, ideal for a quick souvenir stop.

    Store hours generally follow the mall or department store they’re housed in — typically 10:00 or 11:00 to 20:00 or 21:00 — so check the specific building’s hours rather than assuming a single standard time. Most locations are a short walk from a JR or subway station; if you haven’t set up contactless transit payment yet, our guide to adding Suica or Pasmo to Apple Wallet will save you fumbling with ticket machines between stops.

    What to Buy: Budget to Splurge

    Budget (under ¥2,000): This is where Francfranc shines for travelers. Glassware and mugs typically run ¥880–1,500, small kitchen tools and dish racks ¥500–1,800, and seasonal items like Halloween or Christmas ornaments ¥400–1,500. These pack well in a suitcase and make distinctive gifts.

    Mid-range (¥2,000–8,000): Reed diffusers and room fragrance sets (Francfranc’s own scent line is a signature product) run roughly ¥2,500–4,500. Bedding accessories, cushions, and bath textiles land in the ¥2,000–6,000 range. Small lighting pieces and tabletop decor also fall here.

    Splurge (¥10,000+): Dining chairs, side tables, and accent furniture start around ¥10,000–30,000, with sofas and larger case goods reaching ¥50,000–150,000+. These aren’t realistic carry-home purchases unless you’re shipping internationally or relocating, but they’re worth seeing in person if you’re furnishing a home in Japan or curious about the design quality.

    Best Time to Shop

    Francfranc runs strong seasonal collections, and timing your visit around one of them is genuinely worthwhile rather than just a sales gimmick. Halloween decor appears from early September, Christmas and winter-illumination items from late October through December, and New Year/Oshogatsu-themed tableware in late December — useful context if you’re also reading up on Oshogatsu traditions. Spring brings cherry blossom-motif glassware and pastel kitchenware, while summer sees cooling items — glass tumblers, bamboo and rattan accents, and citronella-scented candles. If you want the widest seasonal selection and shortest lines, a weekday morning shortly after opening is your best bet; weekends in central Tokyo locations get crowded.

    Common Mistakes to Avoid

    • Buying electrical items without checking voltage. Japan runs on 100V, and small appliances like aroma diffusers with ultrasonic humidifier functions or warming trays are built for that standard. They’ll often still work on 110–120V systems (the US, for instance) but may run slightly underpowered; always check the plate on the unit before assuming compatibility, and know they won’t work at all on 220–240V systems without a converter.
    • Assuming everything is tax-free. Francfranc stores participate in Japan’s consumption tax exemption for tourists, but only above the standard ¥5,000 minimum per receipt, and you’ll need your passport at checkout. Combine several small purchases into one transaction to clear that threshold.
    • Underestimating fragility. Glassware and ceramics are a huge part of the product range, and checked luggage is rough on them. Ask staff for extra bubble wrap or a box at checkout — most stores will accommodate this if asked, though it’s not automatic.
    • Forgetting the return policy before you fly home. Japanese retail returns work differently than in many other countries, and once you’ve left the country, exchanging a defective item becomes impractical. Read our guide to returns, exchanges, and receipts in Japan before you buy anything you’re not sure about, and keep every receipt until you’re home and have inspected your purchases.

    A Few Practical Notes

    Credit cards and IC transit cards are accepted at essentially all Francfranc locations, and staff in the major Tokyo branches are generally used to tourists, though English signage is limited. If you’re drawn to the brand’s minimalist, pared-down aesthetic, it pairs well with a broader interest in Japanese home goods — the kind of restrained, functional design sensibility you’ll also notice in traditional crafts like Wajima lacquerware, just filtered through a contemporary, mass-market lens. Francfranc won’t replace a trip to a traditional craft workshop, but for furnishing a short-term rental, decorating a dorm room, or simply finding a well-designed, reasonably priced gift that doesn’t scream “souvenir,” it’s one of the most useful stops on a Tokyo shopping itinerary.

  • Atami: Tokyo’s Retro Seaside Hot Spring Getaway

    Atami: Tokyo’s Retro Seaside Hot Spring Getaway

    Photo by waa towaw on Unsplash

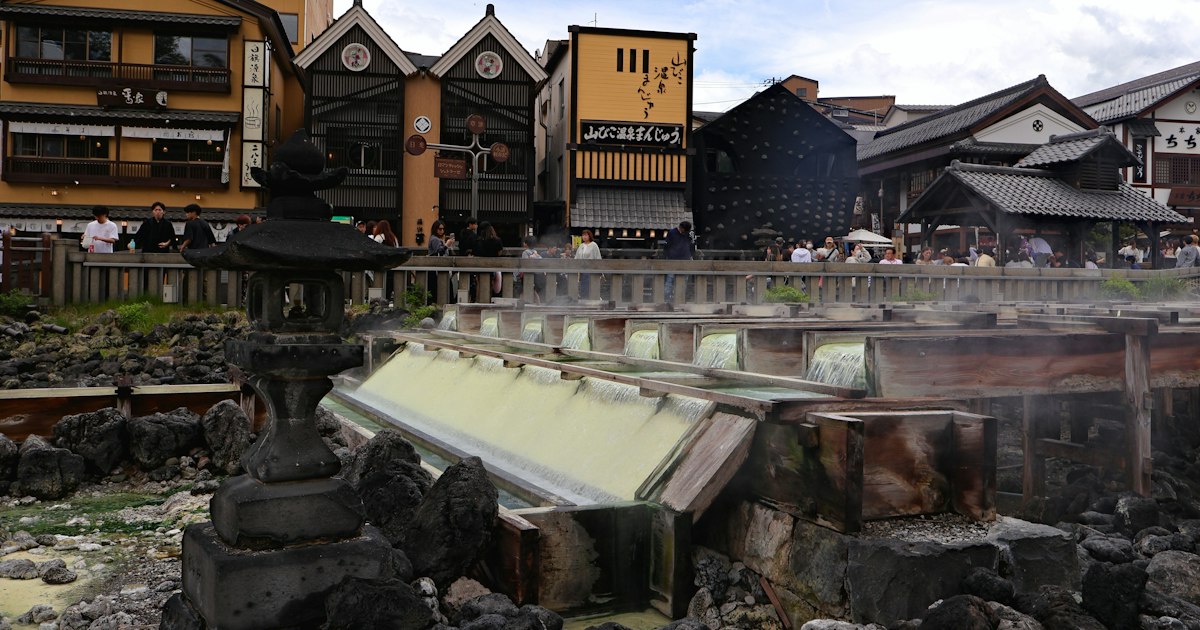
    An hour from Tokyo Station, the Shinkansen slips through a tunnel and suddenly the Pacific is right there, with a tiered seaside town of ryokan and onsen hotels climbing the hillside above it. That’s Atami — a hot spring resort that boomed during Japan’s postwar honeymoon era, faded a little in the 1990s, and has spent the last decade clawing its way back into fashion with renovated ryokan, a lively retro shopping street, and some of the most frequent fireworks shows in the country. It’s an easy day trip if you’re short on time, but it rewards an overnight stay far more than most destinations this close to Tokyo.

    Why Atami, and When to Go

    Atami’s hot springs have been documented since at least the 8th century, and the modern town took shape as a rail-accessible resort once the Tokaido line arrived in the early 20th century. The result is a slightly time-warped atmosphere: Showa-era hotel towers, a covered shopping arcade, steep stairstep streets, and a harbor view that looks a bit like a smaller, mellower version of the Amalfi coast.

    Seasonally, two windows stand out. Mid-January through early March brings the Atami Plum Festival (Atami Ume Matsuri) at Atami Baigaien, one of the earliest plum blossom displays in Japan (entry around ¥300, free before the festival opens some years — check the current dates). Summer and early autumn bring Atami’s famous fireworks: the city runs roughly 10 or more large fireworks displays a year over Atami Bay, far more than most towns manage, including a dramatic winter countdown show. If you want to see one, check the schedule before booking, since hotel rates spike and rooms sell out on fireworks nights.

    Getting There from Tokyo

    Atami is one of the simplest side trips from Tokyo. The JR Tokaido-Sanyo Shinkansen (Kodama or Hikari trains) covers Tokyo Station to Atami in about 45-55 minutes, with an unreserved seat running roughly ¥3,600-4,000 one-way. It’s not covered by a flat commuter pass, but reserved and unreserved seats can both be bought at any JR ticket machine or the JR East/Central apps.

    The cheaper, slower option is the regular JR Tokaido Line, which takes about 1 hour 45 minutes from Tokyo Station and costs around ¥1,980 one-way — and this one you can simply tap through with a Suica or Pasmo IC card, no ticket needed. If you haven’t set one up yet, it’s worth doing before you go; see our guide on adding Suica or Pasmo to Apple Wallet so you can tap in at the gate rather than queuing for a paper ticket. Either way, note the last Tokyo-bound Shinkansen from Atami typically leaves around 9:30-10pm — don’t assume you can linger at dinner and still make a late train without checking times first.

    The Hot Spring Experience: Day Baths to Ryokan Stays

    You don’t need to stay overnight to soak. Several facilities near Atami Station offer day-use bathing (higaeri onsen) for roughly ¥1,000-1,500, including small public bathhouses and hotel baths that open their doors to non-guests for a few hours in the afternoon. This is the easiest way to experience Atami’s naturally salty, slightly brown spring water if you’re only passing through for the day.

    For the full experience, though, stay the night. Ryokan here range from simple family-run inns to oceanfront resort hotels, and most include kaiseki dinner and breakfast in the room rate. If this is your first ryokan stay, brush up on basics like changing into the provided yukata and leaving outdoor shoes at the genkan — our guide to indoor footwear etiquette in homes, ryokan, and temples covers exactly where shoes come off and when slippers are expected.

    Beyond the Baths: Top Things to See and Do

    Atami rewards a half-day of wandering beyond the bathtub. The MOA Museum of Art, perched on a hill with a sweeping bay view, holds a notable collection of Japanese and East Asian art (admission around ¥1,600; closed Thursdays). Atami Castle is a more kitschy, family-oriented stop with observation decks and a small aquarium-style attraction — fun if you have kids in tow, skippable if you don’t. Atami Baigaien, the plum garden mentioned above, is pleasant even outside peak bloom thanks to its stream-side paths and small shrine.

    If fireworks dates line up with your trip, Atami Sun Beach is the place to watch from, with the show launched over the bay and visible from much of the waterfront for free. Watching a professional display here pairs naturally with picking up handheld sparklers to try yourself later — see our rundown of senko hanabi and summer firework souvenirs if you want to bring some home.

    Atami also makes a convenient gateway if you have more than a day to spend in the area — it sits right at the entrance to the Izu Peninsula, and buses and local trains connect onward to Ito, Shimoda, and the coastal onsen towns covered in our Izu Peninsula guide.

    Where to Shop and What to Bring Home

    Atami Ginza, the covered-and-open shopping street running from near the station down toward the beach, is the main strip for food stalls, souvenir shops, and casual dining. Look for onsen manju (steamed buns filled with sweet bean paste, often sold warm from streetside steamers for around ¥130-180 each) and mikan (mandarin orange) products — Shizuoka’s citrus belt runs right through this coast, so mikan juice, jelly, and dried peel sweets are everywhere and genuinely local, unlike some “regional” souvenirs that are mass-produced elsewhere. Keep your receipts if you buy anything pricier like lacquerware or ceramics from a specialty shop, since return policies for tourists work differently here than at home — our guide on returns, exchanges, and receipts in Japan explains what’s realistic to expect.

    Budget, Mid-Range, and Splurge Planning

    On a tight budget, a day trip works fine: Shinkansen or Tokaido Line fare, a ¥1,000-1,500 day bath, lunch at a casual seafood or noodle counter on Atami Ginza, and a stroll through the plum garden or along the beach can all be done for well under ¥10,000 per person.

    Mid-range travelers should budget for one night at a standard onsen ryokan or hotel with half-board (dinner and breakfast included), typically ¥15,000-25,000 per person depending on season and whether the room has an ocean view or private bath.

    For a splurge, Atami has a handful of well-regarded resort ryokan with large oceanfront rooms, kaiseki dinners built around local seafood, and open-air baths facing the water — rates for these commonly run ¥35,000-70,000+ per person per night, climbing further on weekends, holidays, and fireworks nights. Book these well in advance; the good ocean-view rooms sell out fastest.

    Common Mistakes to Avoid

    The biggest mistake is treating Atami as a quick photo stop rather than giving it an overnight — the baths, the evening light on the bay, and the after-dark shopping street are a big part of the appeal. A second common error is confusing Atami with other Izu towns like Ito when booking a ryokan online; double-check the station name on your reservation. Finally, if you’re visiting during a fireworks date or the plum festival, book transportation and lodging early — these are well known to Tokyo day-trippers, and both trains and hotels fill up fast on those specific dates.

  • Tokyo Banana and Japan’s Iconic Omiyage Sweets: A Buyer’s Guide

    Tokyo Banana and Japan’s Iconic Omiyage Sweets: A Buyer’s Guide

    Photo by Brooke Lark on Unsplash

    If you’ve stood in the basement food halls of Tokyo Station and watched the crowds funnel toward a particular yellow-and-brown box, you’ve found Tokyo Banana — the single most recognizable souvenir sweet in Japan. But Tokyo Banana is really just the most famous entry in a much bigger national tradition: omiyage, the boxed, individually wrapped, shelf-stable sweets that every region in Japan produces as a point of local pride. Here’s how to buy them well, what they actually cost, and which regional versions are worth seeking out beyond Tokyo.

    What Tokyo Banana Actually Is

    Tokyo Banana is a banana-shaped sponge cake (a kind of soft castella) filled with banana custard cream, made by a company called Grapestone. It launched in 1991 and has since become shorthand for “I went to Tokyo.” The original flavor is mild and genuinely tasty rather than novelty-only, which is part of why it has stayed popular for over three decades while countless competitor sweets have come and gone. Grapestone also runs rotating collaborations and seasonal flavors — cherry blossom versions in spring, chocolate-dipped “Setsu” varieties in winter — so the lineup looks slightly different depending on when you visit.

    A box of 4 individually wrapped cakes runs roughly ¥700, a box of 8 around ¥1,300–1,400, and larger 12- or 16-piece boxes scale up from there. Prices are fixed nationwide at official retailers, so there’s no advantage to hunting for a “cheaper” location — the only real variable is convenience.

    Where to Buy It (and When the Shops Are Open)

    Tokyo Banana is sold almost everywhere tourists pass through, but the flagship locations are:

    • Tokyo Station — Gransta Tokyo, the underground shopping concourse on the Yaesu side, has multiple Tokyo Banana counters and the dedicated “Tokyo Banana no Ki” shop. Most stalls here open around 8:00am and close around 10:00pm daily, making it easy to grab a box right before boarding a Shinkansen.
    • Haneda Airport — Terminals 2 and 3 both carry the full lineup, with shop hours generally matching flight schedules (early morning to late evening). This is the best last-minute option if you’re flying out and forgot to buy earlier.
    • Narita Airport — available in both Terminal 1 and Terminal 2 departure areas.
    • Tokyo Skytree and major department stores — Isetan Shinjuku, Daimaru Tokyo (directly above Tokyo Station), and Shibuya Scramble Square all stock it in their basement food halls (depachika).

    If you’re planning your route by train, it’s worth having Suica or Pasmo set up in advance so you’re not fumbling with ticket machines on a tight connection — see our guide on adding Suica or Pasmo to Apple Wallet before you land.

    Beyond Tokyo Banana: Regional Sweets Worth Knowing

    Part of the fun of omiyage culture is that nearly every prefecture has its own “must-buy” sweet, usually tied to a local ingredient or landmark. A few that consistently live up to the hype:

    • Shiroi Koibito (Hokkaido) — thin langue de chat cookies sandwiching white chocolate, made by ISHIYA in Sapporo. A box of 12 is around ¥1,080. Pairs well with a Hokkaido itinerary that includes somewhere like Noboribetsu Onsen.
    • Momiji Manju (Hiroshima/Miyajima) — maple-leaf-shaped steamed cakes filled with sweet red bean, matcha, or custard, sold all along Miyajima’s main street.
    • Yatsuhashi (Kyoto) — cinnamon-dusted mochi triangles folded around sweet bean or fruit fillings; look for the long-established makers Shogoin or Izutsu near the city’s temple districts.
    • Unagi Pie (Hamamatsu, Shizuoka) — a crisp butter cookie with a faint eel-bone extract flavor that’s much milder and more pleasant than it sounds.
    • Hiyoko Manju (Fukuoka) — small chick-shaped cakes with sweet white bean filling, a Kyushu classic.

    If you’d rather bring home something savory instead of sweet, rice crackers (senbei) and condiments like yuzu kosho make excellent alternatives, especially for recipients who aren’t big on sugar.

    Budget, Mid-Range, and Splurge Options

    Omiyage shopping scales easily to any budget:

    • Budget (¥500–1,000): A 4-piece Tokyo Banana box, a small bag of regional senbei, or a 6-piece box of Shiroi Koibito. Good for coworkers or acquaintances where the gesture matters more than the quantity.
    • Mid-range (¥1,200–2,500): 8- to 12-piece boxes of Tokyo Banana or Shiroi Koibito, or a mixed box from a depachika food hall. This is the standard range for office omiyage and close friends.
    • Splurge (¥3,000+): Limited-edition collaboration boxes (Tokyo Banana has done tie-ins with popular anime and character brands), large assortment boxes with 16–20 pieces, or artisan confectionery from a department store’s premium counter. These work well as a single gift for a host family or a boss.

    Timing and Common Mistakes

    The biggest mistake visitors make is buying omiyage too early in the trip. Most fresh-cream sweets like Tokyo Banana have a shelf life of roughly two weeks unrefrigerated — fine if you’re buying on your way to the airport, risky if you buy it on day two of a three-week trip and plan to carry it through humid summer weather. If you’re buying early, choose shelf-stable options instead: senbei, hard cookies, and dried goods last far longer than custard-filled cakes.

    Second mistake: assuming city-center shops are cheaper than airport ones. They’re not — prices are standardized — so buy wherever is most convenient rather than detouring to “save money.” Third mistake: not checking whether the box needs to be eaten cold. A few seasonal or chocolate-based items (especially anything from Hokkaido in summer) need to stay out of direct heat, so avoid leaving them in a hot car or a non-air-conditioned hotel room for long.

    Season matters for flavor variety, too. Spring (late March–April) brings sakura-themed packaging and flavors across nearly every omiyage brand; winter brings richer chocolate and matcha variations. If a specific seasonal flavor matters to you, buy it as soon as you see it — these runs sell out and don’t always get restocked.

    Giving Omiyage the Right Way

    If you’re bringing sweets home for a Japanese host, colleague, or homestay family rather than just as a personal souvenir, there’s a layer of etiquette worth knowing — how it’s presented, who gets one, and what to say when handing it over. Our guide to omiyage etiquette and Japan’s workplace souvenir culture covers this in detail, and it’s worth a read before you go if gift-giving is part of your trip. For visitors just looking for a tasty, well-packaged reminder of Tokyo to take home or share, though, you really can’t go wrong grabbing a box of the original banana-cream classic on your way out of town — it’s a cliché for a reason.

  • Daikanyama: Tokyo’s Stylish Boutique Neighborhood

    Daikanyama: Tokyo’s Stylish Boutique Neighborhood

    Photo by Hyungjun Goo on Unsplash

    Tucked between Shibuya and Ebisu, Daikanyama feels like Tokyo with the volume turned down. There are no pachinko parlors, no crowds elbowing past giant video screens — just tree-lined slopes, independent boutiques, and cafés where the coffee is taken seriously. It’s the neighborhood Tokyoites point to when they want to show visitors a side of the city that isn’t Shibuya Crossing. If you like slow mornings, well-edited clothing racks, and architecture worth photographing, set aside half a day for it.

    Where It Is and How to Get There

    Daikanyama Station sits on the Tokyu Toyoko Line, exactly one stop from Shibuya (about 3 minutes, roughly 150–160 JPY). This makes it an easy add-on to a Shibuya day rather than a destination requiring its own itinerary. If you’re coming from further afield on the JR network, ride to Shibuya first and transfer to the Toyoko Line, or simply walk — it’s about 20–25 minutes on foot from Shibuya Station through the quieter backstreets, and roughly 15 minutes from Ebisu Station, which makes a Daikanyama-to-Ebisu walk a nice way to link two neighborhoods in one afternoon. Make sure your IC card is loaded before you go; if you haven’t set one up yet, our guide on adding Suica or Pasmo to Apple Wallet covers the setup so you’re not fumbling with ticket machines at the gate.

    The Neighborhood’s Anchor: Tsutaya Books T-Site

    Most visits start at Tsutaya Books (also called T-Site), a complex of three interconnected glass pavilions designed by Klein Dytham architecture. It opens daily from 7:00 AM to 11:00 PM — unusually early and late for a Japanese bookstore — and functions as much as a lifestyle hub as a place to buy books. Browse design and photography titles, duck into the attached Anjin lounge for coffee and a cocktail list later in the day, and don’t skip the garden courtyard out back, which is popular with local dog owners (there’s even a dedicated dog park area nearby). English-language sections are limited, so this is more of an atmosphere stop than a shopping one unless you read Japanese.

    Boutique Shopping: What to Expect and What to Buy

    Daikanyama’s retail identity is small, curated shops rather than department stores or chains. Expect:

    • Budget (under 5,000 JPY): Independent zine and postcard shops, small ceramics stalls, and casual cafés with pastries from 400–700 JPY.
    • Mid-range (5,000–30,000 JPY): Selvedge denim, Japanese-made leather goods, and contemporary fashion labels at boutiques like Okura (Japanese textile-inspired clothing) or the shops scattered through Log Road Daikanyama.
    • Splurge (30,000 JPY+): Designer flagship stores and made-to-order tailoring — Daikanyama has long attracted labels that want a quieter, more design-forward storefront than Omotesando offers.

    Cow Books, a secondhand bookstore specializing in literature and counterculture titles, is worth a stop even if you don’t read Japanese — the shopfront and curated window displays are a neighborhood landmark in themselves. Most boutiques open around 11:00 AM and close between 7:00 and 8:00 PM; very few open before 11, so there’s no point arriving at 9 AM expecting shops to be running — that’s a café-and-walk window instead.

    Log Road and Hillside Terrace

    Log Road Daikanyama is a short pedestrian strip built along a former railway track, lined with Nordic-leaning cafés, a Fred Segal outpost, and Spring Valley Brewery, Kirin’s craft beer taproom (pints from around 800 JPY, flight sets available). It’s one of the most photogenic stretches in the neighborhood, especially in spring when the cherry trees along the old track bloom. Hillside Terrace, a few minutes further on, is a 1970s–90s architectural complex by Fumihiko Maki — low-rise, concrete, and genuinely influential in Japanese urban design circles. It mixes galleries, a Danish furniture showroom, and quiet courtyards. Even if you have no interest in architecture, it’s a pleasant, uncrowded place to sit for twenty minutes.

    Best Time to Visit

    Daikanyama rewards a weekday morning-to-afternoon visit — weekends bring more foot traffic, though nothing close to Shibuya-level crowds. Cherry blossom season (late March to early April) along Log Road and the Shibuya River walkway toward Nakameguro is the single best window, and it conveniently connects to Nakameguro’s famous river-side blossoms about a 15-minute walk south. Autumn (November) is a close second for foliage and mild walking weather. Summer is workable but shadeless in stretches; winter is quiet and fine for shopping since most of the appeal here is indoors or under awnings anyway.

    Common Mistakes to Avoid

    • Treating it as a half-day-only destination. Daikanyama is compact — most visitors cover the main streets in 2–3 hours. Pair it with Ebisu or Nakameguro rather than building a whole day around it alone.
    • Expecting tax-free shopping everywhere. Many boutiques here are small, independent operations that don’t process duty-free paperwork, unlike department stores. If tax-free purchases matter to you, ask before you buy, and keep receipts — our guide to returns, exchanges, and receipts in Japan explains what tourists should know before buying, including the minimum spend thresholds for tax exemption.
    • Visiting on a Monday without checking hours. It’s not universal, but a meaningful number of independent boutiques and cafés in Daikanyama take Monday as their weekly closure. Check a shop’s website or Google listing the day before if there’s something specific you want to see.
    • Assuming it’s bargain shopping. This is a design-conscious, mid-to-high-price neighborhood. If you’re hunting for deep discounts, Shimokitazawa or Koenji will serve you better.

    Rounding Out the Trip

    If you’re building a souvenir list while you’re in the area, Daikanyama’s boutiques lean toward fashion and homeware rather than classic omiyage, so save food and gift shopping for a department store basement (depato chika) elsewhere, or a dedicated stop like Tokyo’s Kakimori stationery atelier, where you can build a custom notebook as a gift that’s genuinely hard to find outside Japan. And if any of your purchases are headed back to a workplace rather than family or friends, it’s worth a quick read of our guide to omiyage etiquette — the unwritten rules around individually wrapped items and per-person quantities trip up a lot of first-time visitors.

    Daikanyama won’t overwhelm you with sights, and that’s the point. It’s a neighborhood built for wandering at a slower pace, with enough good coffee and well-made things along the way that a loosely planned afternoon here tends to work out better than a tightly scheduled one.

  • Yakitori: Japan’s Grilled Chicken Skewers and How to Order

    Yakitori: Japan’s Grilled Chicken Skewers and How to Order

    Photo by Jay on Unsplash

    Smoke curling up from a charcoal grill, the hiss of chicken fat hitting hot binchotan, a row of salarymen hunched over beer and skewers after work — yakitori is one of Japan’s most approachable foods, but it comes with its own vocabulary and unwritten rules. This guide covers what to actually order, what it costs, and how to avoid the small mistakes that mark out a first-timer.

    What Yakitori Actually Is

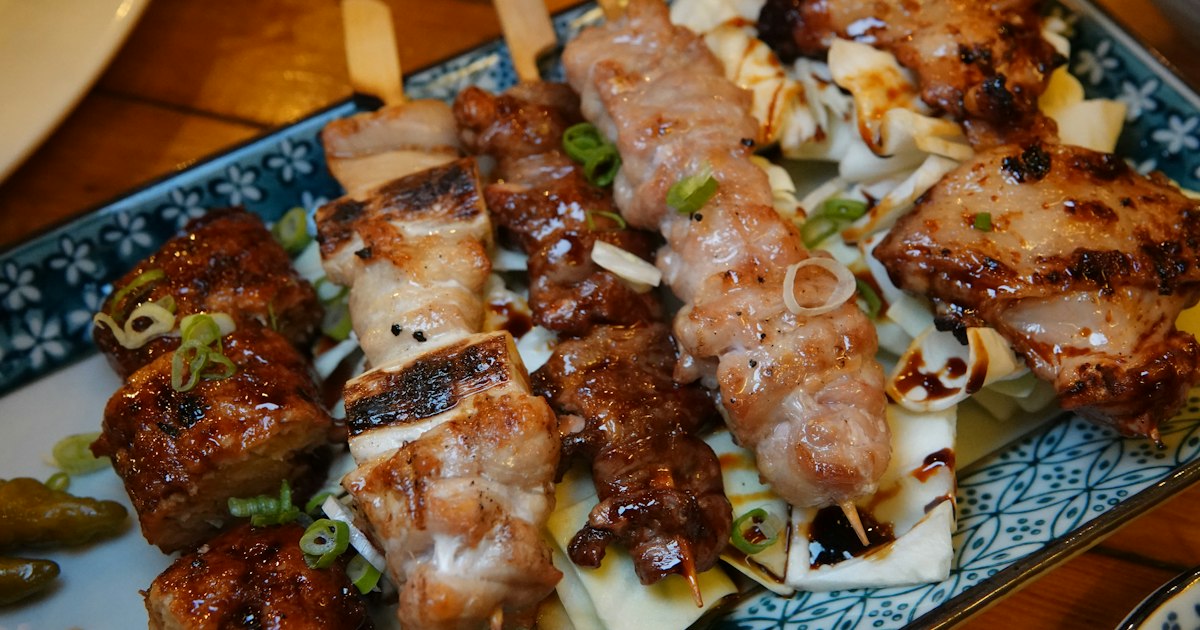
    Yakitori (焼き鳥, literally “grilled bird”) refers to skewered, charcoal-grilled chicken, but the term covers far more than breast meat. A proper yakitori-ya will serve ten to twenty different cuts and preparations, including parts most Western menus never touch: momo (thigh), negima (thigh alternated with leek), tsukune (minced chicken meatballs, often served with a raw egg yolk for dipping), kawa (crispy grilled skin), reba (liver), hatsu (heart), nankotsu (cartilage, prized for its crunch), and bonjiri (tail, fatty and rich). Skewers are grilled over binchotan charcoal, which burns hotter and cleaner than regular charcoal and is a big part of why good yakitori tastes smoky but never acrid.

    Each skewer comes in one of two seasonings: tare, a sweet-savory soy-based glaze brushed on during grilling, or shio, simply salted. If you’re unsure which to get, order shio for anything with strong natural flavor (liver, cartilage, skin) and tare for leaner cuts like breast or meatballs.

    How to Order Like a Local

    At a standalone yakitori counter, there’s usually no English menu, and that’s part of the experience. The easiest approach: ask for an omakase course (chef’s choice), common at mid-range and upscale shops, which runs you through 8-12 skewers in sequence for a fixed price. If there’s no omakase option, order a few skewers at a time rather than everything at once — yakitori is meant to arrive hot off the grill in small batches, not as one big platter.

    Useful phrases: “Osusume wa?” (What do you recommend?), “Tare de” / “Shio de” (With tare / with salt, when asked), and simply pointing at the item on a photo menu or at other tables’ plates works fine too. Most shops bring a small starter dish (often cabbage with miso, or edamame) that’s not free — it’s the equivalent of a seating charge (otsumami or otoshi), typically ¥300-¥500, and is standard izakaya practice, not a scam.

    Where to Eat: Budget to Splurge

    Budget (¥300-¥500 per person, per skewer): Chain izakaya like Torikizoku built their entire business on uniform pricing — every item on the menu costs the same, somewhere around ¥350-¥400 depending on the current rate, whether it’s a chicken skewer, a salad, or a highball. It’s not artisanal, but it’s consistent, cheap, and has English-friendly touch-panel ordering at most branches, making it a good first stop if you’re nervous about ordering in Japanese.

    Mid-range (¥3,000-¥6,000 per person): This is where yakitori shines. Neighborhood yakitori-ya charge roughly ¥150-¥350 per skewer, and a satisfying meal with drinks lands in the ¥3,000-¥5,000 range. Classic hunting grounds include Omoide Yokocho, the narrow lantern-lit alley just northwest of Shinjuku Station’s west exit; Yurakucho’s “yakitori alley,” a string of tiny stalls tucked under the JR train tracks near Yurakucho Station; Nonbei Yokocho in Shibuya, just across the river from Shibuya Station; and Hoppy Street in Asakusa. These alleys are atmospheric, smoky, and often standing-room-only, which is part of the charm.

    Splurge (¥10,000-¥20,000+ per person): At the top end, shops like Birdland in Ginza or Torishiki in Ebisu (both Michelin-starred) serve omakase courses built around rare, carefully sourced chicken, with reservations required well in advance — often only bookable through a hotel concierge or a Japanese phone number. If you want this experience, book as soon as your dates are fixed.

    Best Time to Go

    Yakitori is an evening food. Most dedicated yakitori-ya open around 5pm and serve until 11pm or midnight; very few open for lunch, and the ones that do usually offer a simplified set rather than the full menu. Arrive right at opening (5:00-5:30pm) if you want a seat without a wait at popular alley spots — by 7pm, the small counters in Omoide Yokocho or Yurakucho fill up fast, especially Thursday and Friday nights. Yakitori has no strong seasonal peak the way some foods do, but summer evenings add outdoor seating and cold beer to the equation, while winter is when skewers like skin and tail feel especially good alongside a hot broth dish — if you’re traveling in the colder months, pair a yakitori crawl with a stop for oden from a convenience store on the walk back to your hotel.

    Common Mistakes to Avoid

    • Removing meat from the skewer with your hands or chopsticks. Etiquette-conscious diners eat yakitori directly off the stick; pulling it off onto a plate is sometimes done at very casual places but looks odd at a proper counter.
    • Assuming every shop takes cards. Many of the smallest alley stalls are cash-only or IC-card only. Loading your Suica or Pasmo onto your phone before you go covers both transport to these neighborhoods and payment at a surprising number of counters.
    • Walking in as a large group without calling ahead. Many yakitori-ya have fewer than 10 counter seats. Groups of four or more should reserve, especially for dinner after 7pm.
    • Skipping the “weird” parts out of caution. Cartilage, skin, and heart are often the most popular items on the menu for a reason — crunchy, rendered, and nothing like the parts get a reputation for. Try one before writing off the rest.
    • Not asking about the otoshi/otsumami charge. It’s small and standard, not a tourist tax — budget an extra few hundred yen per person and move on.

    Beyond Chicken: What to Pair It With

    Yakitori shops nearly always serve more than chicken — look for shiitake, shishito peppers, and tsukune alongside beer, highballs, or chilled sake. If you’re building out a broader grilled-food tour of Japan, it’s worth comparing yakitori’s charcoal-and-skewer approach to Sendai’s grilled beef tongue (gyutan), another regional specialty built around a single cut done exceptionally well. Both reward going somewhere unglamorous and letting the smoke do the talking.

  • Returns, Exchanges & Receipts in Japan: What Tourists Should Know Before Buying

    Returns, Exchanges & Receipts in Japan: What Tourists Should Know Before Buying

    Photo by Clay Banks on Unsplash

    You buy a jacket in Shibuya, get home to your hotel, and realize it doesn’t fit. In most countries, that’s a quick trip back to the store with a receipt. In Japan, it might not be — and knowing that before you shop can save you a surprisingly frustrating afternoon. Japan has no consumer law requiring stores to accept returns for “I changed my mind,” and the culture around receipts, exchanges, and tax-free paperwork works differently enough from Western norms that it’s worth understanding before you start filling your suitcase.

    Why Japan’s “No Returns” Culture Surprises Visitors

    Unlike the US or UK, Japan has no blanket legal right to return merchandise simply because you’ve had second thoughts. Returns and exchanges are entirely a matter of individual store policy, and the default policy at most small and mid-size shops — boutiques, souvenir stores, department store concessions — is “final sale” once you’ve paid and left the counter. This isn’t stores being unfriendly; it reflects a retail culture built around careful pre-purchase decision-making and meticulous quality control at the point of sale, so the assumption is you inspected the item before paying. Staff will often double-check sizing, color, or specifications with you before ringing it up for exactly this reason. Large chains (Uniqlo, Muji, Bic Camera, Yodobashi Camera) are more flexible and do allow exchanges or refunds within a set window, but always with the original receipt and, usually, tags still attached.

    Tax-Free Purchases: The Receipt You Cannot Lose

    If you’re using Japan’s visitor tax-free shopping scheme (available at stores displaying a “Tax-Free” sign, with a minimum spend of 5,000 yen per store per day), the receipt stops being optional paperwork and becomes a legal travel document. At checkout, staff scan your passport, process the 10% consumption tax exemption, and either hand you a receipt stapled into your passport or attach a tax-free form. Customs officers at the airport can ask to see both the goods and the paperwork before you leave the country, so don’t pack tax-free electronics or cosmetics at the bottom of a checked bag where you can’t retrieve them. If you’re comparing where to buy bigger electronics purchases, Bic Camera vs Yodobashi Camera walks through how each chain handles tax-free processing and points cards, which matters because a lost tax-free receipt generally cannot be reissued — the tax exemption is void and you’ve effectively paid full price.

    Defective or Wrong-Size Items: What Actually Works

    The “no returns” rule loosens considerably if an item is genuinely defective — a broken zipper, a malfunctioning electronic, food that’s visibly spoiled. Japanese retailers take defect complaints seriously and will typically exchange or refund without argument, provided you have the receipt and it’s within a reasonable window (often 7–14 days, sometimes 30 for electronics). What doesn’t work as well is “it doesn’t fit” or “I found it cheaper elsewhere” — clerks may still help, especially at larger chains, but don’t expect it as a right. A practical workaround for clothing: try things on in-store whenever possible, since fitting rooms are standard even at smaller boutiques, and ask “shichaku dekimasu ka?” (can I try this on?) if it isn’t obvious. For items like Japanese drugstore medicines, where dosing and ingredients differ from what you’re used to at home, it pays to read labels carefully before buying rather than hoping for an exchange later — the Japanese Drugstore Cold & Allergy Medicine guide covers how to pick the right product the first time.

    Department Stores vs. Convenience Stores vs. Electronics Retailers

    Policies vary meaningfully by retail category, so it helps to know the landscape:

    • Department stores (Isetan, Takashimaya, Mitsukoshi): Generally the most accommodating for exchanges on clothing and gifts, especially at the information counter on the ground floor, open roughly 10:00–20:00. Bring the receipt and original packaging; staff are used to foreign customers and often speak some English.
    • Convenience stores and quirky variety shops: Nearly always final sale on opened items. If you grab something on impulse at a shop like the one covered in Village Vanguard: Japan’s Quirky Variety Store and What to Buy, treat the purchase as a keeper — these are small, independently-run sections with no real returns infrastructure.
    • Electronics retailers (Bic Camera, Yodobashi): The most tourist-friendly for exchanges, typically 1–8 days for unopened items, longer with a manufacturer warranty for defects. Keep the box, cables, and receipt together until you’ve confirmed everything works on your home region’s voltage and plugs.

    Lost Your Receipt? Your Options

    If you’ve misplaced a receipt, your options narrow fast but aren’t always zero. Paying by credit card gives you a backup: most Japanese retailers can look up a transaction by card number and date, so bring the card you used and the approximate time of purchase. Paying cash with no receipt is the hardest case — stores have no obligation to help, though some will still offer store credit if the item is unused, tagged, and clearly from their shop (a distinctive bag or wrapping helps your case). This is one more reason to keep paper and digital receipts organized during a trip; a simple habit is photographing each receipt immediately after an unusual or expensive purchase, which also helps if you need to reconcile spending once you’re home.

    Common Mistakes Tourists Make

    A few avoidable errors come up again and again. First, assuming a “final sale” sign only applies to clearance items — in Japan it often just means standard policy. Second, removing tags or packaging before deciding whether to keep something; once tags are off, most stores will refuse any exchange outright. Third, losing track of which receipts are tax-free forms that customs may check — don’t consolidate them with regular receipts in a way that makes them hard to find at the airport. Finally, expecting phone or email support for in-store purchases; Japanese retail resolution happens in person, at the original store, which matters if you’re buying something in Osaka on day two of a two-week trip and won’t pass back through that city. If you’re stacking up souvenirs for coworkers or family, it’s also worth reading Omiyage Etiquette before you buy — knowing the gifting norms up front avoids the situation where you’d want to exchange something simply because it turned out to be the wrong kind of gift.

    None of this means Japanese retail is unfriendly to tourists — quite the opposite, service is typically attentive and quality control is high, which is exactly why return policies lean strict. Shop a little more deliberately than you might at home, keep every receipt until you’ve left the country, and you’ll rarely need a return policy at all.

  • Senko Hanabi: Japan’s Handheld Sparklers and Summer Firework Souvenirs

    Senko Hanabi: Japan’s Handheld Sparklers and Summer Firework Souvenirs

    Photo by Solanin on Unsplash

    Every July, Japanese supermarkets, convenience stores, and Don Quijote outlets quietly roll out boxes of paper-wrapped sparklers next to the seasonal mosquito coils and watermelon-flavored snacks. These are senko hanabi (線香花火) — literally “incense-stick fireworks” — and they’re one of the cheapest, lightest, and most quietly moving souvenirs you can bring home from a Japan trip. Unlike the loud bottle rockets and fountains sold alongside them, senko hanabi are a slow, meditative ritual: a tiny ember that blooms, drips, and fades over about 60-90 seconds. This guide covers what to look for, what they cost, where to find the good ones, and how to actually use them without the fireball dropping off two seconds in.

    What Makes Senko Hanabi Different

    There are two distinct types sold in Japan, and knowing the difference matters when you’re shopping. The first and far more common type is suteyaki — a sparkler with a twisted wire or paper stem and the gunpowder packed at one end, the same basic format sold worldwide. These are mass-produced, often imported, and sold in bags of 20-30 for as little as ¥300-600 at any convenience store or supermarket in summer.

    The second, more special type is nerite senko hanabi — hand-rolled in washi (Japanese paper) around a pinch of black powder, with no wire at all. You hold the twisted paper tail, and as it burns, a glowing orange ball of liquid fire forms at the tip and goes through four visually distinct stages before it drips and dies: botan (peony), matsuba (pine needle), yanagi (willow), and chirigiku (scattering chrysanthemum). Nerite sparklers are the traditional craft version, and most of the ones still made by hand in Japan today come from a small number of workshops, including long-running producers in Yanagawa, Fukuoka Prefecture, who still twist each one by hand using domestic washi. If you want the “real” version rather than a generic import, look for the word 手すき (hand-made) or 国産 (domestically produced) on the box, and check that the stick itself is paper, not metal wire.

    Where to Buy: Budget, Mid-Range, and Splurge

    Budget (¥300-800): Convenience stores (7-Eleven, Lawson, FamilyMart) and supermarkets stock basic mixed firework packs in summer that usually include a handful of wire-stem senko hanabi along with fountains and smoke items. Don Quijote has the widest selection and best prices for this tier — look in the seasonal aisle, not the toy section.

    Mid-range (¥800-2,000): Department store toy floors and seasonal pop-up “hanabi” corners (common at Tokyu Hands/Hands, Loft, and depachika basements from late June through July) sell boxed sets of 10-20 nerite-style or higher-quality suteyaki sparklers, often in a nicer presentation box that travels well. This is the sweet spot for a souvenir you’d actually want to give as a gift rather than just burn through yourself — worth keeping in mind if you’re navigating omiyage etiquette for coworkers back home, since a small, inexpensive, individually wrapped box like this fits the unwritten rules well.

    Splurge (¥2,000-5,000+): Artisan nerite senko hanabi from named workshops, sold in lacquered or washi-wrapped gift boxes of 10-20 sticks, show up at specialty craft stores, some department store craft fairs, and online direct from the makers. These are genuinely a different experience to light — longer burn times, more consistent fireball formation, and a satisfying ritual quality. If you’re the type of traveler who already collects small traditional crafts, this pairs naturally with browsing something like the regional kite traditions guide — both are seasonal, handmade, and tied to specific towns rather than mass production.

    For something more unexpected, variety stores are worth a look too. Village Vanguard often stocks novelty and retro-packaged sparkler sets alongside its usual mix of odd souvenirs, which makes for a fun browse even outside summer.

    Best Season — and When They Vanish

    Senko hanabi are strictly seasonal retail items. Shelves start filling in mid-to-late June, peak through July and August, and are largely gone by early September, replaced by autumn goods. If you’re visiting outside June-August, your best bet is a specialty fireworks or craft store in a city, or ordering from a workshop’s own site before you arrive. Don’t expect to find them in a random konbini in November — they simply aren’t stocked.

    How to Light Them Without Losing the Fireball

    The single most common mistake is holding the stick horizontally. Senko hanabi need to be held at roughly a 30-45 degree downward angle — tail up, burning end down — so the molten powder ball can hang and grow instead of sliding off the end. Other frequent mistakes:

    • Lighting it from a candle, not a lighter flame directly in wind. A gust at the moment of ignition is the most common cause of a sparkler fizzling out in the first five seconds. Light it from a steady candle flame if you can, especially outdoors.
    • No water nearby. Always have a bucket, cup, or bottle of water next to you — not just for safety, but because you’ll want somewhere to drop the spent stick once it’s done rather than leaving ash on the ground.
    • Using them where fireworks aren’t allowed. Many Tokyo parks and most apartment building grounds prohibit any fireworks, including hand sparklers, due to fire risk and noise complaints. Check signage or ask — riverbanks, designated beach areas, and ryokan gardens with staff permission are usually safe bets.
    • Treating cheap wire sparklers and nerite paper sparklers the same way. Wire suteyaki burn hotter and faster and are more forgiving of angle; delicate nerite ones reward patience and a steady hand, and will disappoint you if you’re expecting the same brightness as a Western sparkler.

    Where to Actually Use Them in Japan

    If you want the classic experience — not just buying a box to take home — look for a quiet riverside spot, a ryokan garden, or a coastal town in the evening. Hot spring towns with a slower pace, like Noboribetsu Onsen in Hokkaido or anywhere along the Izu Peninsula, are well suited to it since many ryokan have a garden, riverside path, or beach area where guests can light sparklers after dinner — ask at the front desk, as some properties provide a bucket of water and point you to a permitted spot as a small seasonal touch.

    Packing, Disposal, and Taking Them Home

    Unused senko hanabi pack flat and light, and a sealed box of 10-20 is a fine carry-on or checked-bag souvenir (they contain only a small, non-restricted amount of black powder consistent with consumer fireworks, but if you’re uncertain, check your airline’s specific policy before flying, since rules vary by carrier and country). Once you’ve used them, spent sticks should go in burnable waste after being fully soaked and cooled — if you’re unsure how a municipality sorts this kind of item, the general principles in Japan’s trash-sorting guide apply here too: rinse off any ash, let it dry, and bin it as burnable (moeru gomi) rather than leaving it for someone else to deal with.

    Senko hanabi are not a flashy souvenir, and that’s the point — they’re inexpensive, meaningful to light with family or friends, and genuinely unique to Japan’s summer culture. A ¥1,000 box from a department store pop-up will outlast almost any other souvenir purchase in terms of the story it comes with.

  • Yuzu Kosho and Beyond: A Japanese Condiment Pantry Souvenir Guide

    Yuzu Kosho and Beyond: A Japanese Condiment Pantry Souvenir Guide

    Photo by Chris Bahr on Unsplash

    Of all the souvenirs stacked in a Japanese suitcase, a small jar of yuzu kosho does more heavy lifting than almost anything else. It’s compact, it doesn’t break the bank, and it turns a boring weeknight dinner back home into a reminder of your trip. But yuzu kosho is just the entry point into a much deeper pantry of Japanese condiments worth bringing home. Here’s how to shop for them like someone who knows what they’re doing.

    What Is Yuzu Kosho, and Why It’s the One to Start With

    Yuzu kosho is a paste made from fermented yuzu peel, chili peppers, and salt, originally from Kyushu (especially Oita and Miyazaki prefectures). It comes in green (made from unripe yuzu, sharper and more herbal) and red (made from ripe yuzu, slightly sweeter and milder) versions. A little goes a long way—stir a quarter-teaspoon into miso soup, grilled chicken, or even pasta, and you’ll understand why it has a cult following outside Japan. If you want the deeper backstory on the fruit itself and which yuzu-based products are actually worth the shelf space in your luggage, we’ve covered that separately in Yuzu: Japan’s Fragrant Citrus and the Products Worth Buying.

    Expect to pay around ¥500–800 for a 60–90g squeeze tube from a supermarket, and ¥800–1,500 for a glass jar version from a department store food hall or specialty producer. Tubes travel better than jars—no glass to worry about, no risk of leakage into your clothes.

    The Core Pantry Lineup Beyond Yuzu Kosho

    Once you’ve got yuzu kosho, build out the rest of the shelf with these, all of which pack well and have genuinely different flavors from what’s sold abroad:

    • Shichimi togarashi (seven-spice chili blend) – ¥300–600 for a shaker bottle; Yagenbori in Tokyo’s Asakusa is the famous source, custom-blended on request.
    • Miso paste – regional styles vary enormously (white/sweet Kyoto saikyo miso vs. dark, salty Sendai miso); 500g tubs run ¥500–1,200.
    • Ponzu – citrus-soy sauce, usually sold in 150–360ml bottles for ¥300–700; great for travelers since it’s shelf-stable once opened.
    • Furikake – dry rice seasoning, sold in small foil packets (¥150–400 each) or gift boxes; this is the single easiest condiment souvenir since it’s dry, light, and TSA-friendly.
    • Goma dare (sesame dressing) – thick, nutty, and sold in 180ml squeeze bottles for ¥400–600.

    If you’re also hunting for crunchy, shelf-stable snack souvenirs to go alongside these condiments, rice crackers pair naturally with the same shopping trip—see our Senbei: A Buying Guide to Japan’s Rice Cracker Varieties for what to look for.

    Where to Buy: Markets, Depachika, and Specialty Shops

    The single best place to shop for condiments in one stop is a depachika—the basement food floor of a department store. Isetan Shinjuku (open 10:00–20:00 daily) and Takashimaya locations in Kyoto, Osaka, and Tokyo stock curated, often regional, condiment brands you won’t find in a regular supermarket, frequently with free tasting samples at the counter. Expect to pay a slight premium (10–20%) over supermarket prices in exchange for better curation and gift-ready packaging.

    Fresh food markets are the other classic stop. Kyoto’s Nishiki Market (most shops open roughly 9:00–18:00, though individual stalls vary and some close on Wednesdays) has several long-running shops selling house-made yuzu kosho, shichimi, and pickling condiments. Tokyo’s Tsukiji Outer Market (most stalls open around 5:00–14:00, closed Sundays and irregular Wednesdays) is strong on dried bonito flakes, soy sauces, and seafood-adjacent condiments like ikura shoyu-zuke. Osaka’s Kuromon Ichiba Market runs similar hours and has a more tourist-friendly, English-signage feel if it’s your first market visit.

    For a dedicated specialty producer, Yagenbori in Asakusa (near Senso-ji) will blend a custom shichimi togarashi to your taste in a few minutes for about ¥650–1,000 depending on container—genuinely one of the more memorable souvenir-shopping experiences in Tokyo.

    Supermarkets and Convenience Finds for Budget Shoppers

    You don’t need a specialty shop to leave with a good haul. Regular supermarkets (Life, Seijo Ishii, Aeon) and import-leaning chains like Kaldi Coffee Farm carry reliable national brands at the lowest prices—this is where to go if you want quantity over curation. Narita and Haneda airport duty-free shops also stock condiment gift sets in the ¥1,000–3,000 range for last-minute shopping after security, though selection is narrower and markup is real. If you’re navigating any of Tokyo’s big electronics-and-everything stores on the same shopping day, our comparison of Bic Camera vs Yodobashi Camera covers tax-free paperwork that applies to food purchases over ¥5,000 at participating stores too.

    Best Season and Timing to Buy

    Green yuzu kosho is typically made in late summer (July–September) using unripe yuzu; red yuzu kosho follows in autumn/winter (November–January) once the fruit ripens. Shops restock seasonally, so a late-autumn or winter trip gives you the best shot at fresh red yuzu kosho and seasonal gift sets. New Year (early January) is also when condiment gift boxes are at their most elaborate, tied into osechi ryori culture—if you’re traveling then, our guide to Oshogatsu in Japan explains the broader New Year food traditions these gift sets are designed around.

    Packing, Customs, and Common Mistakes

    The most common mistake is buying glass jars and packing them in a carry-on—anything liquid or paste-like over 100ml will be confiscated at security. Pack jars in checked luggage, wrapped in clothing, or buy tube/packet formats designed for exactly this problem. Second mistake: assuming all condiments clear customs everywhere. Products containing meat or meat extracts (some dashi and ramen seasoning bases) are restricted or banned in many countries, including the US and EU; plain miso, soy sauce, yuzu kosho, and furikake are almost always fine, but always check your home country’s specific agricultural import rules before you buy in bulk. Third: buying only from the airport. Prices are higher and selection is thinner than what you’ll find at a depachika or local market earlier in your trip.

    Budget, Mid-Range, and Splurge Picks

    • Budget (under ¥1,000): Supermarket yuzu kosho tube, a furikake variety pack, a shichimi shaker.
    • Mid-range (¥1,000–3,000): Depachika gift box with 3–4 regional condiments, a Yagenbori custom shichimi blend in a nice tin.
    • Splurge (¥3,000+): Artisan miso or soy sauce sets from a long-established brewery, often sold in wooden presentation boxes at department stores—a strong choice if you’re following proper omiyage etiquette for a work colleague back home.

    However much you end up bringing back, buy a little more than you think you’ll need—these are the souvenirs that actually get used, and the ones you’ll wish you’d stocked up on the moment the jar runs dry.

  • Oirase Gorge: Aomori’s Streamside Forest Walk

    Oirase Gorge: Aomori’s Streamside Forest Walk

    Photo by Kristaps Ungurs on Unsplash

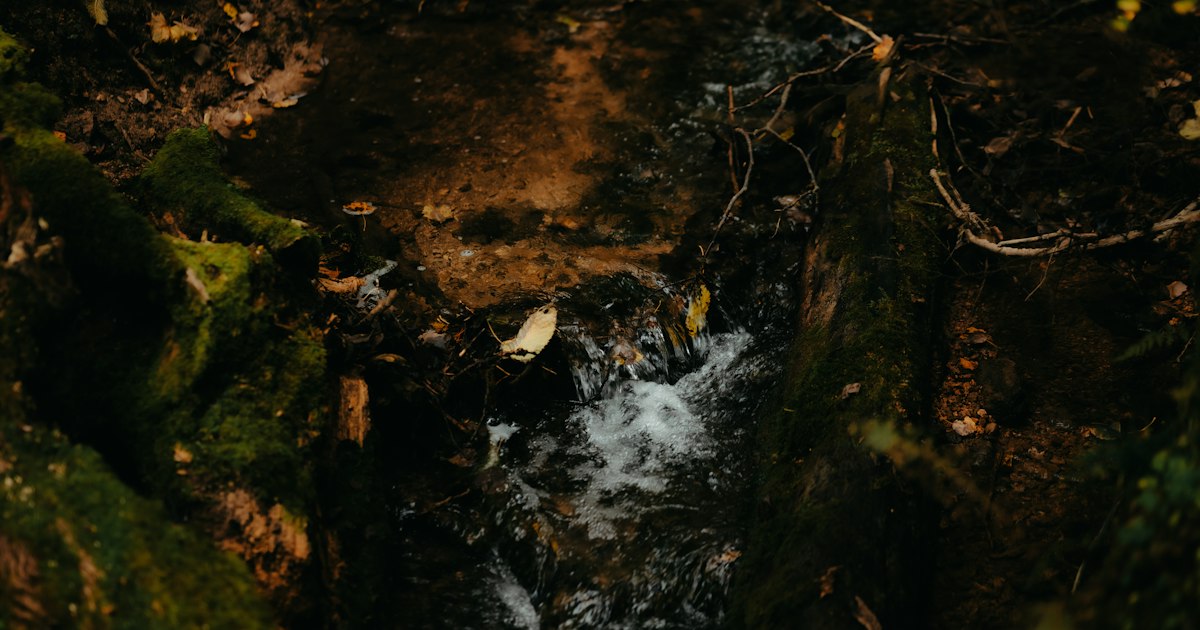
    Oirase Gorge (奥入瀬渓流, Oirase Keiryu) is the kind of place that photographs look exaggerated of — mossy boulders, a clear stream tumbling over rock shelves, and a canopy of beech and maple arching over a flat, walkable path. It runs for about 14 kilometers between Lake Towada and the village of Yakeyama in Aomori Prefecture, inside Towada-Hachimantai National Park, and it’s one of the few famous nature walks in Japan that almost anyone can do, regardless of hiking experience. No entrance fee, no technical terrain — just a riverside trail that rewards an unhurried pace.

    Getting There from Aomori or Hachinohe

    The nearest Tohoku Shinkansen stations are Shin-Aomori and Hachinohe, and both connect to the gorge by seasonal JR bus. From Hachinohe Station, the bus to Yakeyama (the northern end of the trail) takes roughly 2 hours; from Aomori Station or Shin-Aomori, it’s closer to 2.5–3 hours to reach Yakeyama or continue on to the Towadako terminal at the lake. Fares run in the ¥2,000–¥3,000 range one-way depending on where you board and get off. These bus routes typically operate from late April through early November and run far less frequently (or not at all) outside that window, so always check the current JR Bus Tohoku timetable before building your day around a specific departure.

    If you’re renting a car, be aware of the “mycar regulation”: during peak autumn foliage weekends (usually mid-to-late October, dates shift slightly each year), private vehicles are barred from the road between Yakeyama and Nenokuchi during daytime hours. You park at a designated lot outside the restricted zone and ride a shuttle bus in — a minor hassle that’s worth planning for rather than discovering at a roadblock.

    How to Walk It: Full Trail vs. the Highlight Stretch

    The full 14km path from Nenokuchi (at Lake Towada) to Yakeyama takes about 4–5 hours at a relaxed pace with stops for photos, and it’s flat and well-maintained enough for most fitness levels. Most visitors, though, don’t walk the whole thing. The single best stretch — roughly 3km between Nenokuchi and Choshi Otaki waterfall — packs in the most famous scenery (mossy rock gardens, the clearest stretches of stream, and two or three named waterfalls) in about 60–90 minutes of walking.

    A common approach: take the bus to one end, walk the highlight section, then catch a later bus from the other end rather than backtracking. Bicycle rental is also available near Yakeyama and Nenokuchi for travelers who’d rather cycle one direction and ride the bus back the other — expect to pay roughly ¥500 per hour. There are few convenience stores or vending machines directly on the trail, so carry water and snacks, and pack out your own trash — rural stretches of Japan like this often have no public bins at all, a point worth knowing before you set out (see our guide to trash and recycling in Japan for how locals handle this).

    The Waterfalls and Stops Worth Slowing Down For

    Choshi Otaki is the gorge’s signature waterfall and the only one that falls directly from the main stream rather than a side tributary — a wide, roaring curtain about 7 meters high that’s the most-photographed spot on the trail. Further along you’ll pass Kumoi no Taki, Shiraito no Taki (a thin, veil-like fall true to its “white thread” name), and Ryusei no Taki. Between the named falls, the real draw is simply the water itself — impossibly clear, threading around moss-covered boulders in a way that looks engineered but isn’t.

    Best Season and Timing

    Oirase rewards a visit almost any time of year, but each season looks different:

    • Fresh green (shinryoku), early-to-mid May: Bright new leaves, high water flow from snowmelt, fewer crowds than autumn.
    • Summer: The canopy keeps the trail noticeably cooler than the rest of Aomori — a good midday escape from the heat.
    • Autumn foliage, mid-to-late October: The most popular and most crowded window, with reds and golds along the whole stream. Expect bus and shuttle delays on weekends; go on a weekday if you can.
    • Winter: Parts of the stream freeze into dramatic ice formations, with evening illumination events in some years, but trail conditions turn icy and some sections or facilities close. This is a visit for travelers comfortable with winter footwear and shorter daylight, not a casual stroll.

    Where to Eat and Stay Nearby

    Budget: Pack a convenience-store lunch before you leave Aomori or Hachinohe — options along the trail are limited to a handful of rest houses near Ishigedo and Yakeyama selling noodles and snacks for roughly ¥800–¥1,200.

    Mid-range: Oirase Keiryukan, right on the trail near Yakeyama, is the most convenient hotel for an overnight stop, with onsen baths and set-course dinners — a practical base if you want to walk the gorge at dawn before the bus crowds arrive.

    Splurge: Lakeside ryokan around Towada-ko (Lake Towada) offer kaiseki dinners built around local Aomori ingredients and lake views; pair a night there with the roughly 50-minute Lake Towada sightseeing cruise (around ¥1,500 for adults) the next morning.

    If your Tohoku itinerary continues toward Sendai, it’s worth detouring for the region’s other signature foods — see our guides to zunda mochi and other Tohoku snacks and Sendai’s grilled beef tongue.

    Common Mistakes to Avoid

    • Treating it as a quick photo stop. The bus schedule out here is sparse — missing a return bus can mean a long wait. Build in buffer time rather than cutting it close.
    • Visiting mid-October without a weekday option. Peak foliage weekends bring serious bus and shuttle congestion; if your schedule is flexible, shift to a weekday.
    • Assuming you’ll find food or drinks along the way. Outside of Yakeyama and Ishigedo, there’s nothing. Bring your own.
    • Not checking the seasonal bus calendar. These routes don’t run year-round, and schedules shift slightly each year — confirm dates before you commit to a plan.

    Oirase pairs naturally with other Japan nature day trips if you’re comparing options — it has a similar slow, scenic-walk appeal to the Kurobe Gorge Railway in Toyama, and travelers building a broader “nature escape” itinerary around Tokyo might also look at the Izu Peninsula’s hot springs and coastline. Oirase’s advantage is simplicity: no technical hiking, no entrance fee, just a path, a stream, and a lot of moss — which is exactly why it’s worth the trip north.