Japan Trove

Category: Uncategorized

  • Mount Nokogiri: Chiba’s Cliffside Buddha and Ferry Day Trip from Tokyo

    Mount Nokogiri: Chiba’s Cliffside Buddha and Ferry Day Trip from Tokyo

    Photo by Kate Kasiutich on Unsplash

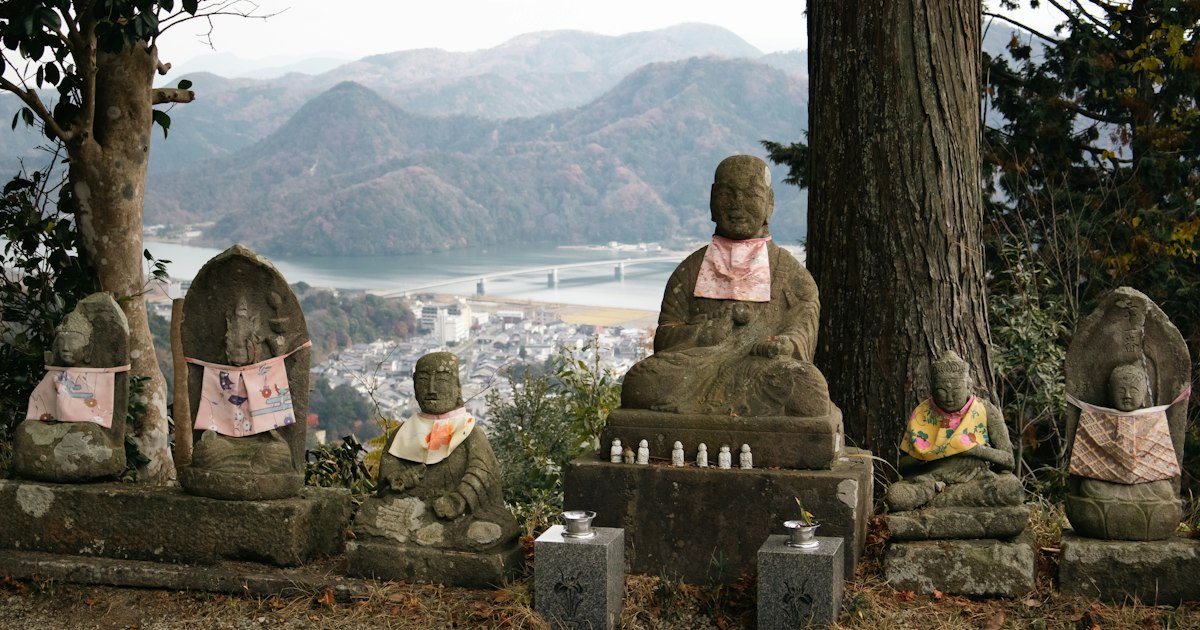
    An hour and a half from central Tokyo, a jagged ridge of quarried stone rises out of Chiba’s Boso Peninsula, topped with a cliff-edge platform that drops away into thin air and a 31-meter Buddha carved directly into the rock face. Mount Nokogiri (鋸山, “Saw Mountain,” named for its serrated quarry-cut profile) is one of the most rewarding half-day detours from Tokyo that most visitors never hear about — partly because getting there properly means crossing Tokyo Bay by ferry instead of just hopping a train. Here’s how to do the whole loop in a day, what it costs, and where people usually go wrong.

    What’s actually up there

    Mount Nokogiri was quarried for stone (known as Boshu stone) from the Edo period through the early 20th century, which is why the cliffs look carved into geometric blocks and overhangs rather than naturally eroded. The grounds now belong to Nihon-ji Temple (日本寺), a sprawling complex founded in 725 that covers much of the mountain. Two things draw people up here:

    • Jigoku Nozoki (“Hell’s Peek”) — a narrow stone outcrop jutting over a sheer drop, with a low railing and a view straight down the quarry face to Tokyo Bay. On a clear winter day you can see Mount Fuji across the water.
    • The Nihon-ji Daibutsu — Japan’s largest stone-carved sitting Buddha, a Yakushi Nyorai figure about 31 meters tall, originally carved in 1783 and restored in 1969. Unlike the bronze Daibutsu in Kamakura or Nara, this one is cut straight out of the mountain.

    There’s also the Hyakushaku Kannon, a smaller cliff-carved figure near the quarry entrance, and a long network of stone-step trails connecting everything — expect genuine stair climbing, not a flat garden stroll.

    Getting there: the ferry route (the fun way)

    The classic way to do this trip is as a loop using the Tokyo Bay Ferry (Tokyo-wan Ferry), which crosses the bay between Kurihama (Kanagawa, on the Miura Peninsula) and Kanaya (Chiba, at the foot of Mount Nokogiri):

    • From Tokyo, take the Keikyu Line to Keikyu Kurihama Station (about 70–80 minutes from Shinagawa), then a short bus or 15-minute walk to Kurihama Port.
    • The ferry crossing takes about 40 minutes. One-way adult fare is roughly ¥900; a bicycle or large luggage costs a small surcharge. Ferries run roughly hourly, more frequently on weekends — check the current timetable before you go, since missing one means a long wait.
    • From Kanaya Port, it’s a 5–10 minute walk to the base of the Nokogiriyama Ropeway.

    Doing the crossing gives you open-deck bay views and, on clear days, Fuji in the distance — arguably as scenic as the mountain itself.

    Getting there: the train route (the simpler way)

    If you’d rather skip the ferry, take the JR Sobu/Uchibo Line from Tokyo Station toward Kimitsu/Tateyama and get off at Hamakanaya Station, the closest stop to the ropeway base. It’s a direct-ish regional train but usually requires a change at Soga or Kimitsu; total travel time is around 1.5–2 hours, and there’s no need for a reserved-seat limited express unless one happens to be running that day. A regular IC-card fare from Tokyo is roughly ¥1,980 one-way. Many visitors do the loop in one direction — ferry out from Kurihama, train back from Hamakanaya (or vice versa) — rather than doubling back the same way.

    Ropeway, hiking, and admission costs

    From the Kanaya side, the Nokogiriyama Ropeway whisks you to the mountaintop observation deck in about 4 minutes:

    • Round trip: approximately ¥1,200 for adults, ¥600 for children.
    • One-way: approximately ¥620 adult — useful if you plan to hike down.
    • Last ascent is typically mid-to-late afternoon (earlier in winter), so don’t arrive late and assume you can ride up.

    The ropeway deck is a separate area from the Nihon-ji temple grounds where the Daibutsu and Jigoku Nozoki actually are — you still need to walk/climb between them, and pay Nihon-ji’s own entry fee: approximately ¥700 for adults, ¥400 for children. Budget travelers who don’t mind stairs can skip the ropeway entirely and hike up via the marked trails from near Hamakanaya Station, which saves the ropeway fee but adds roughly an hour of climbing on uneven stone steps — wear real shoes, not sandals.

    Best time to go and timing mistakes to avoid

    Spring (cherry blossoms, March–April) and autumn (foliage, November) are the most comfortable and photogenic seasons; midsummer is brutally humid on the exposed cliff sections, and the stone steps get slick in rain, so check the forecast. Winter mornings after a cold front are your best shot at seeing Mount Fuji from Jigoku Nozoki.

    The most common mistake is underestimating total time: between the ferry or train, the ropeway, the walk to Nihon-ji’s upper gate, and the maze of trails to see both the Daibutsu and Hell’s Peek, this easily eats 4–5 hours round trip from Tokyo. Start early — ideally catching a morning ferry or train before 10am — because both the ferry and the ropeway have real last-departure times, not round-the-clock service, and getting stranded on the Chiba side after the last ferry means a long detour by train. Bring cash in small denominations; the ropeway counter and temple entrance both take cash, and food stalls near Kanaya Port often don’t take cards.

    Eating and extending the trip

    Kanaya and the surrounding Boso coast are known for fresh seafood — look for set meals featuring local fish at the small restaurants near Kanaya Port before you catch your return ferry or train. If you’re visiting in autumn, this stretch of coastal Chiba is also a good spot to try sanma, the grilled autumn saury that shows up on menus up and down Japan’s coastline this time of year.

    If you want more flexibility than the ferry/train schedule allows, Chiba’s Boso Peninsula is also popular with riders doing a rented scooter or motorcycle loop along the coastal roads, which lets you combine Mount Nokogiri with other peninsula stops in one day. And if cliffside day trips from Tokyo are your thing, the Enoshima Electric Railway on the opposite side of Tokyo Bay makes a good companion trip for another weekend.

    For travelers who like offbeat, slightly haunting sightseeing in the same vein as a cliff carved with a giant Buddha, Nagasaki’s abandoned Gunkanjima and Yamaguchi’s Iwakuni are both worth bookmarking for future trips further afield.
  • Gunkanjima: Touring Nagasaki’s Abandoned Battleship Island

    From a distance, Hashima Island looks exactly like its nickname suggests: a grey concrete warship anchored off the coast of Nagasaki. Up close, it’s something stranger — a crumbling, vine-choked city that once packed thousands of coal miners and their families onto 6.3 hectares of reclaimed rock, then emptied overnight when the mine closed in 1974. Gunkanjima (“Battleship Island”) is one of the eeriest and most photogenic day trips in Kyushu, but it’s also one of the more logistically fussy ones — tours get cancelled for weather more often than almost any other attraction in Japan. Here’s how to actually get there and see it.

    What Gunkanjima Is, and Why It’s a UNESCO Site

    Hashima Island was a Mitsubishi-operated undersea coal mine from 1887 until its closure in 1974. At its peak in the 1950s, around 5,300 people lived on the tiny island — one of the highest population densities ever recorded anywhere in the world — packed into Japan’s first large-scale reinforced-concrete apartment blocks. When the coal ran out, the entire population left within months, and the island has sat abandoned ever since, slowly being pulled apart by typhoons and salt air. In 2015, it was inscribed as part of the UNESCO World Heritage Site “Sites of Japan’s Meiji Industrial Revolution,” recognized for its role in Japan’s rapid industrialization. It also has pop-culture cachet as visual inspiration for the villain’s lair in the James Bond film Skyfall (that scene was built on a soundstage, not filmed on the actual island).

    Getting to Nagasaki Port

    You can’t visit Hashima independently — it’s only reachable by licensed tour boat, and all of them depart from Nagasaki Port. Most tours leave from either the Nagasaki Port Terminal (Ourakaigan-dori area) or the nearby Nagasaki Port Turminal building, both a short taxi or tram ride from Nagasaki Station. If you’re arriving by Shinkansen via the new Nishi Kyushu route from Hakata, note that it’s a transfer-heavy journey; if you’re coming from further afield, it’s worth planning food for the ride — see our guide to ordering food on the Shinkansen so you’re not hunting for a convenience store at a transfer station. Once in Nagasaki, trams run frequently from the station to Ourakaigan-dori stop, about a 10-minute walk from most tour departure points.

    Booking a Boat Tour: Operators and Prices

    Several companies run the route, and prices and schedules are reset each season, so always confirm on the operator’s site before you plan your day — but as a rough budget guide:

    • Gunkanjima Cruise (Yamasa Kaiun) and Gunkanjima Concierge are the two main operators. Round-trip cruise-plus-landing packages typically run around ¥4,000–¥5,000 for adults, roughly half that for children, booked either online in advance or at the pier counter.
    • On top of the cruise fare, there is a separate island landing fee of around ¥300 per adult, paid to the city of Nagasaki at the island itself (bring small cash). If the boat can’t land due to weather, this fee isn’t charged.
    • Tours generally run 2.5–3 hours total: about 40–50 minutes each way by boat, plus roughly 30–40 minutes actually walking on the island.
    • Most operators run 2–4 departures a day depending on season, commonly in the late morning and early afternoon; the first boat of the day has a slightly better chance of calm seas.

    Book online a few days ahead in peak travel seasons (spring cherry blossom season, Golden Week, summer holidays) — boats are small and seats sell out. Bring your passport; some operators ask for ID at check-in.

    Why Tours Get Cancelled, and How to Hedge Against It

    This is the single biggest thing to plan around: landing on Hashima is weather-dependent, and the dock has no breakwater, so even moderate swells make it unsafe to tie up. Cancellation rates are genuinely high — some operators quote roughly a 30–40% chance of landing being called off on any given day, more in winter and typhoon season (roughly June through October). When landing is cancelled, most operators still run the boat on a “cruise-only” circuit around the island so you get photos from the water, usually at a reduced fare or partial refund, rather than cancelling the whole trip outright.

    To improve your odds: visit in spring (April–May) or autumn (October–November), when seas tend to be calmer and skies clearer; book a morning departure, since conditions sometimes deteriorate in the afternoon; and if Gunkanjima is the main reason for your Nagasaki stop, build in two full days so you have a backup slot if day one is scrubbed.

    What You’ll Actually See on the Island

    Set expectations correctly: this isn’t a free-roam ruins tour. For safety, visitors are restricted to a single fixed concrete walkway with three designated viewing stops, and you’re not allowed to enter any building or step off the path — many structures are too unstable. A guide (usually Japanese-speaking, though some tours offer English audio guides or multilingual pamphlets) narrates the site’s history at each stop: the old mine shaft entrances, the hulking apartment blocks, and the seawall that gives the island its warship silhouette. It’s a shorter, more controlled experience than photos of the island’s interior ruins might suggest — the dramatic shots of collapsed stairwells and gutted rooms you’ve seen online were mostly taken by researchers and photographers with special access, not standard tourists. Even with those limits, the scale of the place and the sheer density of crumbling concrete against the open sea make the 30-odd minutes on the walkway worth it.

    Budget, Mid-Range, and Splurge Options

    • Budget: Book the standard cruise-and-landing ticket directly through the operator’s website rather than a third-party reseller, and skip optional add-ons like guided English audio devices if you’re comfortable following along visually.
    • Mid-range: Combine the Gunkanjima tour with Nagasaki’s other half-day sights — Glover Garden, the Nagasaki Peace Park, or Dejima — using the same tram day pass, which is usually sold for a few hundred yen at the Nagasaki Station tram office.
    • Splurge: A few operators offer smaller-boat or photography-focused charters with more time circling the island for shots, at a higher per-person rate — worth it if photography is your main goal and a standard group tour’s fixed walkway stops feel too brief.

    Common Mistakes to Avoid

    • Not building in a buffer day. If you fly out of Nagasaki or Fukuoka the same evening as your tour, a weather cancellation can mean missing the island entirely.
    • Forgetting cash for the landing fee. Card payment isn’t always available at the pier kiosk collecting the ¥300 island fee.
    • Wearing the wrong shoes. The walkway is uneven concrete and can be slippery with sea spray; sandals or heels aren’t practical.
    • Assuming you can explore freely. If you want the full “urban explorer” experience of the interior ruins, know that it isn’t offered to the general public — manage your expectations before you book.

    If you’ve got extra days around Nagasaki and enjoy independently exploring coastal scenery, it’s also worth looking into renting a scooter to tour the Nishizaki peninsula or nearby coastline at your own pace, or extending the trip toward Yamaguchi to see the arched bridge at Iwakuni on the way back toward Honshu.

  • Visiting Japan’s Big Beer Breweries: Asahi, Kirin, Sapporo & Suntory Factory Tours

    Visiting Japan’s Big Beer Breweries: Asahi, Kirin, Sapporo & Suntory Factory Tours

    Photo by jack berry on Unsplash

    Japan’s big four beer makers — Asahi, Kirin, Sapporo, and Suntory — all open their doors to visitors, and most of these tours are free, require only a short reservation, and end with a glass of beer that was brewed in the tanks you just walked past. For beer-curious travelers, a factory tour is also one of the few places in Japan where you get a genuinely hands-on, English-friendly look at how a Japanese industry actually works. Here’s what each company offers, how to book, and how to avoid the mistakes that trip up first-time visitors.

    Why Tour a Japanese Beer Factory

    Unlike many Japanese factory tours that are strictly observational, beer brewery tours almost always end with a tasting room, where adults (20 and over, with ID) get two to three small glasses of beer brewed on-site, often including limited varieties you can’t buy in stores or overseas. Tours run 60–90 minutes, are led in Japanese with English pamphlets or audio guides at the larger sites, and are free at nearly every location except Sapporo’s museum. The catch is that nearly all of them require advance reservation through the company’s Japanese-language website, and popular weekend slots in cherry blossom and summer season fill up one to two weeks ahead.

    Asahi Breweries: Tokyo’s Golden Flame and Factory Tours Nationwide

    Asahi’s most photographed building isn’t a brewery at all — it’s the Asahi Beer Hall in Sumida, Tokyo, topped by Philippe Starck’s golden “Flamme d’Or” sculpture, directly across the Sumida River from Senso-ji in Asakusa. It’s a restaurant and rooftop beer garden, not a working factory, but it’s worth the five-minute walk across the bridge if you’re already in Asakusa.

    For an actual production tour, Asahi runs free factory tours at several plants around the country, including Ibaraki (Moriya), Nagoya, Suita (Osaka), and Kyushu (Hita). Tours include a walk through the brewing and bottling lines followed by tastings of freshly poured Asahi Super Dry and seasonal brews. Reservations go through Asahi’s official tour booking page, typically two to four weeks out, and most factories close for tours on Mondays and around New Year’s. If your itinerary runs between Tokyo and Nagoya or Osaka by shinkansen, it’s easy to slot a factory visit into a travel day — just check the tour schedule against your train times, and see our guide to ordering food on the shinkansen if you’re grabbing lunch en route.

    Kirin Brewery Yokohama: Tokyo’s Easiest Factory Tour

    If you only have time for one brewery tour, Kirin’s Yokohama Factory in Namamugi is the most convenient from central Tokyo — about 30 minutes by train. It’s a short walk from Namamugi Station on the Keikyu Main Line, or slightly longer from Shin-Koyasu Station on the JR Keihin-Tohoku Line; on weekends a free shuttle bus often runs from the nearest stations. The free, roughly 70-minute tour covers the brewing process and finishes in a tasting lounge with several freshly poured beers, including one variety brewed only at that factory. Booking is online through Kirin’s tour reservation site, English-language tour slots are limited, and the factory is closed on Mondays and scheduled maintenance days, so check the calendar before building your day around it.

    Sapporo Beer Museum: Japan’s Only Beer Museum

    Sapporo is the one brewer whose flagship experience isn’t a working factory but a museum — housed in a handsome red-brick former sugar refinery at Sapporo Garden Park in Hokkaido, a roughly 10–15 minute walk from Higashi-Sapporo Station on the Tozai subway line, or a short bus ride from JR Sapporo Station. Entry to the museum exhibits is free; a guided tasting course costs around ¥500 for adults and includes tasting three Sapporo beers, including the Hokkaido-only Classic. Hours are typically 11:00–18:00, and the museum closes for a few days around New Year. Right next door is the Sapporo Beer Garden, a cavernous beer hall serving Genghis Khan grilled mutton with all-you-can-drink beer — a natural lunch stop before or after the museum. Sapporo’s history is also tied to Tokyo: the brand grew out of the old Yebisu Brewery, whose name now lives on in Ebisu, Tokyo’s beer-hall neighborhood, built on the former brewery grounds and worth a visit if your trip doesn’t reach Hokkaido.

    Suntory: Beer Factories and the Whisky Side Trip

    Suntory is better known abroad for whisky, but its beer arm, The Premium Malt’s, runs free factory tours at its Musashino Brewery in Fuchu (western Tokyo) and its Kyoto Brewery in Nagaokakyo, both reachable by local train in under an hour from central Tokyo or Kyoto respectively. Tours last about 70–90 minutes and end with tastings of unpasteurized draft beer that’s hard to find even in Japanese supermarkets. If beer isn’t the only reason you’re interested in Suntory, the company’s Yamazaki Distillery near Kyoto and Hakushu Distillery near Mt. Fuji are genuinely worth combining into the same trip — but book those separately and far earlier, since whisky distillery tours routinely sell out one to two months in advance, especially in autumn and around holidays.

    Planning Your Brewery Day: Booking, Timing, and Mistakes to Avoid

    • Book in Japanese if you can. Most reservation pages are Japanese-only; Google Translate’s page-translate feature handles the forms fine, but have your full name in katakana-friendly romaji and a Japanese phone number or email ready.
    • Bring ID. Tasting rooms check age (20+) for anyone drinking, and staff may ask to see a passport.
    • Avoid Mondays. Many factories (including Kirin Yokohama) close tours on Mondays, and all of them close around New Year’s (late December–early January); some also shut briefly in midsummer for maintenance.
    • Don’t stack two tours in one day. Travel time between factories plus tour length (60–90 minutes) eats a full morning or afternoon; pair one brewery tour with one other activity nearby rather than trying to see two breweries in a day.
    • Designated drivers get juice, not sympathy. Non-tasting tours and soft-drink options exist at every brewery, so drivers and under-20 visitors can still join.

    Budget, Mid-Range, and Splurge Options

    On a budget, the factory tours themselves (Asahi, Kirin, Suntory) cost nothing beyond train fare, and the tasting glasses are included — this is one of the best free activities in Japan for beer drinkers. For a mid-range day, pair a tour with lunch at an attached beer hall or garden (Sapporo Beer Garden and Asahi’s Sumida beer hall both run roughly ¥3,000–5,000 per person for a meal with drinks). For a splurge, combine a Suntory beer factory visit with a pre-booked Yamazaki or Hakushu whisky tasting flight, which can run ¥3,000–10,000 depending on the pours selected. However you plan it, round out the evening at a classic Tokyo drinking spot — Hoppy Street in Asakusa is the retro counterpoint to the breweries’ slick tasting rooms, and our guide to Hoppy, Tokyo’s retro shochu-and-soda drink, explains where to find it.

  • Oyaki: Nagano’s Stuffed Buckwheat Dumpling and Where to Try It

    Oyaki: Nagano’s Stuffed Buckwheat Dumpling and Where to Try It

    Photo by Spencer Davis on Unsplash

    If you’ve only ever heard of Nagano for its skiing and its snow monkeys, you’re missing the prefecture’s most quietly satisfying food: oyaki. These palm-sized stuffed dumplings have been keeping mountain villages fed for centuries, and they’re one of the easiest, cheapest, and most authentic things you can eat on a trip through central Japan. Here’s what oyaki actually is, where it comes from, and exactly where to find a good one.

    What Is Oyaki?

    Oyaki (おやき) is a round or half-moon dumpling made from a wheat-flour dough — sometimes blended with buckwheat flour, since Nagano is Japan’s soba heartland — wrapped around a savory or sweet filling, then pan-fried and steamed or baked. The result is a slightly chewy, bready shell with a hot, dense filling inside, somewhere between a steamed bun and a savory pancake. It’s eaten by hand, usually as a snack or light meal, and it’s filling enough to replace lunch for around the price of a convenience store rice ball.

    Don’t confuse it with gyoza (thin-wrapped, boiled or fried, usually meat-filled) or with manju (sweet, yeasted bun). Oyaki’s dough is thicker and heartier, and the fillings lean vegetable-forward and savory far more often than sweet.

    A Brief History: Mountain Food Born From Necessity

    Nagano’s mountain basins are too cold and too high for reliable rice paddies, so for generations farming families grew wheat and buckwheat instead and built meals around them. Oyaki developed as a way to stretch those grains and use up whatever vegetables were in season or stored for winter — pickled greens, pumpkin, eggplant, root vegetables. Traditionally, the dumplings were cooked on a flat griddle over an irori (sunken hearth) and finished by wrapping them in hoba (magnolia) leaves and roasting them in the embers, which is still how some countryside restaurants serve them today for the smoky aroma.

    The Fillings You’ll Actually Find

    Every oyaki shop has its own lineup, but these are the standards worth seeking out:

    • Nozawana — chopped, pickled nozawana greens (Nagano’s famous local pickle), usually the single most iconic filling and a good one to start with.
    • Kabocha — mashed, lightly sweetened pumpkin, a reliable crowd-pleaser if you’re unsure about pickled greens.
    • Nasu miso — eggplant simmered with sweet miso, rich and savory.
    • Anko — sweet red bean paste, the dessert option, usually sold alongside the savory varieties.
    • Kiriboshi daikon or kinpira gobo — shredded dried daikon or burdock root, seasoned and stir-fried, found at more traditional shops.

    Most shops sell them individually for roughly ¥150–¥280 per piece, or in boxed sets of five to eight for gift-giving, usually ¥900–¥1,800 per box.

    Where to Try Oyaki in Nagano

    Budget: The approach street to Zenkoji Temple, Nakamise-dori, in central Nagano City, has several small oyaki stalls and shops selling them fresh and warm for eating on the walk up to the temple — expect to pay ¥150–¥250 a piece, cash-friendly, no reservation needed. This is the single easiest place for a visitor to try two or three fillings back to back. Most of these stands open around 9:00 or 9:30 and close by 17:00, with shorter hours in deep winter.

    Mid-range: Sit-down restaurants specializing in oyaki, often attached to soba shops, will serve a set of three or four oyaki plus a small side of pickles or soup for around ¥1,000–�al; some pair it with a soba lunch set for ¥1,500–¥2,000. These are worth it if you want to sit, rest your feet, and eat slowly rather than snack on the move.

    Splurge / countryside experience: Rural restaurants in the hills around Nagano City, Obuse, and Hakuba still cook oyaki the traditional irori way over an open hearth, sometimes as part of a full countryside-set meal running ¥2,500–¥4,000 per person. These spots are harder to reach without a car but give you the smoky, leaf-wrapped version that’s closest to how farmhouses actually made it.

    You’ll also find packaged oyaki at highway service areas along the Nagano and Joshinetsu expressways, at roadside michi-no-eki stations, and in the basement food halls (depachika) of department stores near Nagano Station — handy if you’re road-tripping or want something to eat on the train.

    Best Season and Timing to Visit

    Oyaki is sold year-round, but autumn (October–November) is prime time for the nozawana filling, right after the local pickle harvest, and it’s genuinely the best version of that filling you’ll get. Winter is oyaki’s natural habitat — it’s a hot, carb-heavy snack built for cold weather, and it pairs well with a ski trip to Hakuba or a soak afterward; if you’re bundling up for the mountains, it’s worth packing a traditional padded layer like the ones covered in our guide to hanten and tanzen jackets. Spring and summer versions lean more on kabocha, eggplant, and seasonal greens. Eat it as soon as you buy it — oyaki is at its best within the first 20–30 minutes, while the shell is still warm and slightly crisp from the pan.

    Getting to Nagano

    Nagano City is about 80–100 minutes from Tokyo Station on the Hokuriku Shinkansen, with one-way fares around ¥8,000–¥8,500 for an unreserved seat (less with a rail pass that covers the route). If you’re grabbing food for the ride, note that most Shinkansen trolley cart service has been scaled back in favor of QR-code ordering and station kiosks — our guide to ordering food on the Shinkansen covers what’s still actually available onboard. Once in Nagano, Zenkoji Temple and Nakamise-dori are a short bus or 25-minute walk from Nagano Station. If you’d rather eat on the platform than in the temple town, several Nagano-area stations also sell hearty ekiben boxes; see our guide to kamameshi clay-pot rice ekiben for stations where that’s a specialty.

    Common Mistakes to Avoid

    • Assuming it’s all buckwheat. Most oyaki dough today is wheat flour or a wheat-buckwheat blend, not pure soba. If you specifically want a buckwheat-heavy version, ask the shop — “soba-ko iri” (buckwheat flour included) is the phrase to listen for.
    • Buying a box to eat later. Oyaki dries out and the shell toughens within an hour or two. Buy it to eat on the spot, not as a snack for the train ride home unless you plan to reheat it.
    • Only trying one filling. Because they’re cheap and small, it’s easy and worthwhile to buy two or three different fillings and compare — nozawana and kabocha side by side is the classic combo.
    • Expecting a dessert. Most oyaki are savory. If you want the sweet anko version, say so — it’s usually a smaller part of the lineup and sometimes sells out first.
    • Skipping the countryside version because of the crowds in town. The Nakamise-dori stalls are convenient but mass-produced; if you have a car or a free afternoon, a hearth-cooked oyaki outside the city is a genuinely different, better experience.
  • Hiyashi Chuka: Japan’s Cold Summer Ramen and Where to Try It

    Hiyashi Chuka: Japan’s Cold Summer Ramen and Where to Try It

    Photo by Donghun Shin on Unsplash

    Walk past almost any ramen shop or neighborhood diner in Japan between May and September and you’ll spot a cloth banner reading “冷やし中華はじめました” (hiyashi chuka hajimemashita) — “we’ve started serving hiyashi chuka.” It’s one of the clearest seasonal signals in Japanese food culture, and for visitors sweating through a humid Tokyo or Osaka afternoon, it’s one of the most satisfying things you can order. Here’s what the dish actually is, where it comes from, and how to find a good bowl without overpaying or ordering the wrong thing by accident.

    What Exactly Is Hiyashi Chuka?

    Hiyashi chuka is chilled Chinese-style wheat noodles, tossed or chilled after boiling, then arranged under a tangle of thinly julienned toppings — usually a sheet of egg cooked into thin strips (kinshi tamago), ham or roast pork, cucumber, tomato wedges, and often imitation crab stick (kani kama) or bean sprouts. A small dollop of hot mustard (karashi) sits on the side, meant to be mixed in gradually rather than all at once. The whole thing is doused in a cold sauce — most commonly a sweet-tart soy-vinegar blend, though sesame-based and miso-based versions show up depending on the shop and region.

    It’s not the same as hiyamugi or zaru soba — those are thinner wheat or buckwheat noodles served plain with a dipping sauce. Hiyashi chuka noodles are the same yellow, slightly chewy noodles used in regular ramen, just served cold with the sauce poured directly over the top rather than used as a dip.

    A Contested Origin Story

    Like a lot of beloved Japanese dishes, nobody fully agrees on who invented it. Two cities claim the title. In Sendai, a restaurant called Ryutei says it created the dish in 1937, arranging toppings in a deliberately colorful five-section pattern that’s still associated with “Sendai-style” hiyashi chuka today. In Tokyo’s Kanda neighborhood, the long-running Chinese restaurant Kikusui claims an even earlier version from around 1933. Both cities still serve their version proudly, and neither is likely to concede the point — which is part of the fun if you’re food-touring either city.

    When to Order It — and When Not To

    This is a strictly seasonal dish. Shops typically start serving it in late April or May, once daytime temperatures climb, and pull it from the menu by late September or early October. Outside that window, don’t expect to find it — asking for hiyashi chuka in January will usually just get you a polite “sorry, not right now.” If you’re traveling in summer, especially July and August when humidity makes hot ramen unappealing, this is exactly the dish to look for. Lunch is the classic time to eat it; most shops serving it keep lunch hours roughly 11:00–14:30 and reopen for dinner around 17:00–21:00, with the noodle itself available throughout service during the season.

    What You’ll Pay and Where to Find It

    Hiyashi chuka is refreshingly cheap for how satisfying it is:

    • Budget (¥500–700): Convenience stores (7-Eleven, Lawson, FamilyMart) and supermarkets sell pre-packaged versions in the chilled noodle section every summer, sauce packet included. It’s not restaurant-quality, but it’s a legitimate, tasty option if you’re eating on the move — the same aisle where you’ll find the chilled sandwiches covered in our katsu sando guide.
    • Mid-range (¥800–1,200): This is the sweet spot — your average neighborhood ramen-ya or Chinese diner (machi chuka). Expect a generous plate with egg, ham, cucumber, and tomato, soy-vinegar sauce, and usually a side of gyoza if you want to add one for another ¥400–500.
    • Splurge (¥1,500–2,500+): Department store basement food halls (depachika) and higher-end Chinese restaurants dress the dish up with crab meat, shrimp, char siu pork, and sometimes a vinegar-sesame sauce with a richer, nuttier flavor. Worth it once per trip if you want the “deluxe” version.

    You don’t need a reservation or Japanese menu-reading skill — most shops post a laminated photo menu, and the dish’s name is usually written clearly enough to point at even if you can’t read the kanji.

    Regional Styles Worth Knowing

    If you’re traveling between cities, the sauce and presentation genuinely change. Tokyo and the Kanto region generally lean toward a lighter, tangier soy-vinegar sauce. Sendai-style keeps the five-color topping arrangement and a slightly sweeter dressing. Nagoya and parts of Kansai sometimes serve a sesame-based version that tastes closer to cold tantanmen. None of these are better or worse — they’re worth trying side by side if your itinerary covers more than one region, the same way it’s worth comparing regional takes on hambagu or other yoshoku dishes as you move around the country.

    Common Mistakes Visitors Make

    • Dumping in all the mustard at once. The karashi blob on the side is meant to be mixed in gradually, to taste — a full dollop stirred into the whole bowl can overwhelm the dish.
    • Expecting it outside summer. Menus rotate it out completely once the weather cools, so don’t plan a trip around it for a spring or winter visit.
    • Confusing it with zaru soba or hiyashi udon. If you specifically want the Chinese-style egg-noodle version with toppings piled on top, say “hiyashi chuka” — soba and udon shops serve a different cold noodle experience entirely, dipping-sauce style.
    • Ordering it cold on a genuinely chilly or rainy day expecting it to be filling enough. It’s a light lunch dish; if you want something heartier, pair it with gyoza or a side of fried rice.

    Pairing It Like a Local

    Hiyashi chuka shows up constantly at casual lunch spots and is also a staple on the summer menu at retro Tokyo drinking spots. If you’re in Tokyo and want to turn lunch into an early evening of grazing, neighborhoods built around old-school eating and drinking culture — like the ones covered in our Ebisu beer-hall guide — often have diners serving it alongside cold beer or a glass of Hoppy, the retro shochu-and-soda drink that pairs surprisingly well with vinegary summer food.

    If you’re traveling by train and craving something cold on a hot platform transfer, note that chilled noodle dishes are much less common as ekiben than hot options — our guide to ordering food on the Shinkansen covers what’s actually available onboard, so you’ll know whether to grab your hiyashi chuka fix at the station before boarding instead.

    The Bottom Line

    Hiyashi chuka is cheap, fast, visually pretty, and exactly what your body wants during a Japanese summer. You don’t need to seek out a famous shop to get a good one — the neighborhood place with the faded cloth banner outside is usually all you need. Just go between May and September, point at the photo menu, and go easy on the mustard.

  • Monaka: Japan’s Wafer-Shelled Red Bean Sweet and Where to Buy It

    Monaka: Japan’s Wafer-Shelled Red Bean Sweet and Where to Buy It

    Photo by Yosuke Ota on Unsplash

    Bite into a good monaka and you get a split second of crackle before the shell gives way to a dense, sweet filling—usually red bean paste. It’s one of Japan’s oldest confections and one of the easiest to get wrong as a souvenir, because the thing that makes it special (a paper-thin, crisp wafer) is also the thing that ruins it if you store it badly. Here’s how monaka is made, what to look for, and exactly where to buy it—whether you want a ¥150 convenience store treat or a boxed set from a 500-year-old wagashi house.

    What Exactly Is Monaka?

    Monaka (最中) is a wagashi (traditional Japanese sweet) made of two thin wafers pressed from mochiko (glutinous rice flour) batter baked between hot iron molds—the same basic technique used for taiyaki and imagawayaki molds, just much thinner and crisper. The wafers are stamped with a pattern on the way out: cherry blossoms, chrysanthemums, temple gates, or a regional symbol depending on where you buy it. Sandwiched between the two wafers is a filling, most commonly smooth or chunky azuki red bean paste (anko), though shiro-an (white bean), kuri (chestnut), matcha, or even ice cream versions are widely sold.

    The name comes from a Heian-era poem referencing the full autumn moon (“mochizuki no naka”)—a nod to the round shape of early versions. Today monaka come in round, square, flower, and novelty shapes, and the wafer itself is sometimes sold separately as a crisp, barely-sweet snack on its own (look for bags labeled “monaka no kawa” in supermarkets—they’re the shells without filling).

    The One Thing That Ruins Monaka: Moisture

    This is the most common mistake visitors make: buying a box of monaka early in a trip and letting it sit in a hotel room or suitcase for a week. The wafer is hygroscopic—it pulls moisture out of the filling and out of the air, and within a day or two a crisp monaka turns chewy and soft, which defeats the entire point of the sweet.

    Better wagashi shops solve this by selling the wafers and the filling in separate compartments inside the same box, so you assemble each piece yourself right before eating (look for the phrase “ご自分で挟んでお召し上がりください” on the packaging, or just ask—staff are used to the question). If you’re buying monaka to eat within the day, pre-assembled boxes are fine. If you’re buying them as a gift to open a few days later, ask specifically for the self-assembly style, or buy them on your last full day in Japan rather than your first.

    Budget Option: Convenience Store Freezer Cases

    The cheapest, lowest-commitment way to try monaka is the ice cream version, sold in every convenience store and supermarket freezer section year-round for roughly ¥120–¥180. These use crisp wafer shells (sometimes shaped like a cone or cup rather than a flat sandwich) filled with vanilla, azuki, or matcha ice cream instead of bean paste—Lotte’s long-running “Monaka Jumbo” bar is the most widely recognized brand and a good benchmark if you want to compare the ice cream style against the traditional bean-paste version. They’re genuinely satisfying in summer heat and require zero planning—just grab one at any Lawson, 7-Eleven, or FamilyMart.

    Mid-Range: Department Store Food Halls (Depachika)

    For traditional anko-filled monaka at a reasonable price, head to the basement food hall (depachika) of any major department store—Isetan Shinjuku, Nihombashi Mitsukoshi, and Takashimaya Shinjuku all have dedicated wagashi counters stocking monaka from multiple regional makers side by side, which makes comparison shopping easy. Expect individual pieces around ¥150–¥400 and gift boxes of 5–10 pieces running ¥1,000–¥3,000. Most depachika floors open around 10:00 and close between 20:00 and 21:00; go on a weekday morning if you want to avoid the pre-closing rush and get first pick of fresher stock, since popular counters sell out of same-day batches by early evening.

    These counters are also where you’ll find monaka with seasonal wafer designs—a good complement if you’re already tracking seasonal wagashi like the one covered in our sakura mochi guide, since both sweets rotate shapes and flavors with the calendar.

    Splurge: Old-Line Wagashi Houses

    If you want the best version of the real thing, visit a long-established wagashi maker directly rather than buying through a department store counter. Toraya—one of Japan’s oldest confectionery houses, with a history stretching back roughly 500 years—sells refined monaka through its boutiques, including locations in Tokyo Midtown and inside several department stores, with prices generally higher than mass-market versions but noticeably better bean paste and crisper shells. In Kyoto and Kanazawa, cities with deep tea-ceremony traditions, small neighborhood wagashi shops often make monaka in-house daily in small batches—worth seeking out if you’re wandering Kyoto’s Gion area or central Kanazawa and want something more personal than a boxed souvenir.

    Best Season and Timing to Buy

    Monaka is sold year-round, but the wafer designs change seasonally: cherry blossom shapes appear from March to April, hydrangea or fan motifs through summer, maple leaf and chrysanthemum shapes from September through November, and plum or pine designs around New Year. If you want a monaka whose shape actually matches your trip’s season, buy it close to your travel dates rather than weeks ahead. For practical timing, buy monaka on a day you’ll actually eat it or within 24–48 hours if pre-assembled—shelf life on filled monaka is short compared to many Japanese sweets, which is part of why it’s rarely sold far in advance.

    Taking Monaka Home

    Monaka travels well compared to most Japanese sweets—no refrigeration needed for the bean-paste versions, and the box shape is sturdy for a suitcase. The catch is the moisture issue above: if you’re flying home in a day or two, buy pre-assembled boxes; if you have a longer trip ahead, buy the self-assembly style or wait until your last stop. It also makes a light, pack-friendly snack for a long train ride—something to keep in mind alongside the options covered in our guide to ordering food on the Shinkansen, or as a sweet counterpart to station-platform finds like the regional specialties in our kamameshi ekiben guide. And if convenience-store snacking is already part of your Japan routine, pairing a monaka ice cream bar with something like the fried pork sandwiches in our katsu sando guide makes for a solid, cheap combination on a travel day.

  • Sakura Mochi: Japan’s Cherry-Blossom Wrapped Rice Cake and Where to Buy It

    Sakura Mochi: Japan’s Cherry-Blossom Wrapped Rice Cake and Where to Buy It

    Photo by Davey Gravy on Unsplash

    Every year as cherry blossoms creep north across Japan, convenience stores, train station kiosks, and centuries-old wagashi shops fill their shelves with a soft pink rice cake wrapped in a dark, fragrant leaf. That’s sakura mochi — one of the most recognizable seasonal sweets in Japan, and one that genuinely confuses first-time visitors, because the leaf isn’t decoration. It’s meant to be eaten, it tastes faintly salty rather than sweet, and the two regional versions look almost nothing alike. Here’s how to find good sakura mochi, what you’re actually eating, and how to avoid the rookie mistakes.

    What Sakura Mochi Actually Is

    Sakura mochi is a small rice cake (mochi) wrapped around sweet red bean paste (anko), then wrapped again in a pickled cherry (sakura) leaf. The leaf is preserved in salt for months, which gives it a distinctive savory, slightly sour, floral note that balances the sugar in the bean paste. It’s a textbook example of a Japanese sweet built around contrast rather than pure sweetness — similar in spirit to how a salted plum cuts through rice, or how matcha’s bitterness offsets sugar in other wagashi.

    There are two completely different styles, and which one you get depends on where in Japan you are:

    • Kanto-style (Tokyo and east Japan): called chomeiji, after the Tokyo temple where it was supposedly invented in the early 1700s. The outer layer is a thin, crepe-like pancake made from wheat flour batter, wrapped around anko, then folded in the pickled leaf. It looks like a pink pancake taco.
    • Kansai-style (Kyoto, Osaka, and west Japan): called domyoji, after a temple in Osaka. The outer layer is made from coarsely ground glutinous rice (domyoji flour), giving it a grainy, chewy, almost mochi-ball texture rather than a smooth pancake. It’s rounder and denser.

    Neither is “more authentic” — they’re regional variants that both remain standard today. If you want to try both, that alone is a good excuse to compare a Tokyo wagashi shop against one in Kyoto or Osaka.

    Do You Eat the Leaf?

    This is the single most common point of confusion for visitors. The leaf is edible and traditionally eaten along with the mochi — it’s been salt-cured specifically to be eaten, not just used as a wrapper like a bamboo leaf on a chimaki. That said, plenty of Japanese people also peel it off and eat around it, finding the texture too fibrous or the salt too strong on its own. Both ways are completely normal. If you do eat it, take a bite with the mochi rather than nibbling the leaf by itself — it’s meant to be tasted in combination, not solo.

    When to Find It: Season and Timing

    Sakura mochi is a strictly seasonal item, which is part of its appeal. Shops typically start stocking it in mid-to-late February, well before cherry blossoms actually bloom, and keep it available through April, with some shops stretching into early May in cooler regions like Tohoku or Hokkaido. Peak availability and peak variety line up with Japan’s cherry blossom forecast — late March to early April in Tokyo and Kyoto, a week or two earlier in Kyushu, and later into April or even May further north.

    A few practical timing notes:

    • Fresh sakura mochi from wagashi shops is usually made daily and meant to be eaten the same day or next day — it doesn’t contain preservatives the way packaged convenience store versions do.
    • Convenience store and supermarket versions (Lawson, 7-Eleven, FamilyMart, and major supermarket bakeries) appear reliably from late February and are the easiest option if you’re short on time between sightseeing stops.
    • Specialty shops sometimes sell out of their daily batch by early afternoon, especially on weekends during peak bloom — morning is the safer bet if you have a specific shop in mind.

    Where to Buy It: Budget to Splurge

    Budget (¥120–¥200 per piece): Convenience stores are the easiest entry point. A single wrapped sakura mochi at Lawson, 7-Eleven, or FamilyMart typically runs ¥130–¥180 during spring. Quality is decent but mass-produced — fine for a quick taste, less interesting texturally than fresh versions.

    Mid-range (¥200–¥400 per piece): Neighborhood wagashi (traditional sweets) shops are the sweet spot for both quality and price. In Tokyo, Chomeiji Sakuramochi Yamamotoya in Mukojima (near Sumida Park, a well-known cherry blossom spot along the Sumida River) has been making the original Kanto-style version since 1717 and sells it for around ¥200–¥230 a piece. In Kyoto, shops near Kiyomizu-dera or along Shijo-dori carry fresh domyoji-style sakura mochi from local confectioners, generally ¥250–�far more for boxed sets. Department store basement food halls (depachika) in Tokyo, Osaka, and Kyoto also carry several competing brands side by side, which makes comparison easy — look for counters in Isetan Shinjuku, Daimaru, or Takashimaya during March.

    Splurge (¥800–¥2,000+ for boxed sets): Long-established wagashi makers like Toraya or regional specialty shops sell gift-box sets combining sakura mochi with other seasonal sweets, aimed at the gift-giving (omiyage) market. These are worth it mainly if you want a presentation-quality box to bring to a host or as a souvenir rather than to eat on the spot.

    How to Get There: Good Hunting Grounds

    You don’t need to seek out a single destination shop — sakura mochi shows up anywhere there’s a cherry blossom crowd. A few reliable areas:

    • Mukojima/Sumida Park, Tokyo: home turf of the original chomeiji-style sakura mochi, walkable from Asakusa and a natural pairing with a riverside hanami walk. Reachable via Tokyo Metro Asakusa Line or Tobu Skytree Line to Asakusa, then a short walk or bus across the river.
    • Kyoto’s Higashiyama and Kiyomizu-dera approach streets: dense with small wagashi shops selling fresh domyoji-style versions, especially useful if you’re already sightseeing in the area.
    • Dazaifu, Fukuoka: if you’re visiting during plum or cherry blossom season in Kyushu, local sweets shops near the shrine approach sell seasonal mochi alongside the famous umegae-mochi; see our guide to Dazaifu’s shrine town and blossom season for timing.
    • Any department store depachika in a major city — the fastest way to compare three or four brands in one stop without hunting down individual addresses.

    Most wagashi shops keep standard Japanese retail hours, roughly 9:00 or 10:00 to 18:00 or 19:00, and many close one day a week (often Wednesday or Thursday) — check a shop’s listed hours before making a special trip, since small confectioners don’t always post updates in English.

    Common Mistakes to Avoid

    • Assuming it’s shelf-stable: Fresh sakura mochi from a specialty shop is a same-day item. Don’t buy it in the morning planning to eat it after a full day of sightseeing in a hot bag — the mochi dries out and the texture suffers.
    • Confusing it with sakura-flavored anything: Spring in Japan brings a flood of cherry-blossom-themed snacks (sakura Kit Kats, sakura lattes, sakura-flavored everything). Actual sakura mochi is specifically the rice-cake-and-pickled-leaf combination described above — a distinct traditional wagashi, not a flavor gimmick.
    • Buying it outside February–May: Unlike mochi in general, sakura mochi is genuinely seasonal. Outside of roughly February to early May, most shops simply don’t make it — don’t expect to find it in autumn or summer.
    • Assuming Kanto and Kansai versions are interchangeable: If a shop’s version looks different from one you had elsewhere, that’s a regional style difference, not a bad batch.

    If you’re building out a Japan sweets itinerary, sakura mochi pairs naturally with other convenience-store-to-artisan-shop food exploring — much like hunting down a good katsu sando or comparing kamameshi ekiben at different train stations. Spring travel in Japan is as much about seasonal eating as it is about the blossoms themselves, and sakura mochi is one of the easiest, cheapest ways to taste that season directly.

  • Hoppy: Tokyo’s Retro Shochu-and-Soda Drink and Where to Try It

    Hoppy: Tokyo’s Retro Shochu-and-Soda Drink and Where to Try It

    Photo by Denys Nevozhai on Unsplash

    Before craft beer, before highball booms, there was Hoppy — a malty, beer-flavored soda invented in postwar Tokyo as a cheap stand-in for the real thing. Locals still drink it the original way: poured over shochu in a frosted mug, in a backstreet izakaya where the stools spill out onto the sidewalk. It’s one of the cheapest, most atmospheric drinking experiences in the city, and almost no foreign visitors know how to order it correctly. Here’s what Hoppy is, where it comes from, and where to actually go drink it.

    What Is Hoppy, Exactly?

    Hoppy is a hop-flavored malt beverage, not a beer — it’s only around 0.8% ABV on its own, closer to a non-alcoholic cousin of beer than a drink that will get you tipsy by itself. It was developed in 1948 by the Tokyo drinks maker Kokka Jozo, right after the war, when real beer was expensive and heavily taxed. The idea was simple: make something that tasted and foamed like beer, sell it cheap, and let drinkers add their own alcohol. It caught on fast with laborers and factory workers in Tokyo’s old downtown (shitamachi) neighborhoods and never really left.

    There are two versions: White Hoppy (the original, pale and crisp) and Black Hoppy (kuro), a darker, maltier version closer to a low-alcohol stout. Most izakaya carry both, and it’s worth trying one of each if you’re drink-hopping.

    How Hoppy Is Actually Served

    This is the part that trips people up. Hoppy doesn’t come as one drink — it comes as two separate items that you combine yourself:

    • Naka (“inside”) — a shot of shochu, served in a mug, usually with ice.
    • Soto (“outside”) — a small bottle of the Hoppy soda itself, poured over the shochu at the table.

    The standard ratio is roughly one part shochu to five parts Hoppy, sometimes called “Gokugo” (5:1), though regulars who want it stronger order “Rokugo” (6:1 shochu-heavy) and ask staff to pour the naka themselves. Once your glass is empty, the trick is to order another naka (around 300–450 yen) rather than a whole new soto bottle — the leftover ice and residual Hoppy in your glass is enough to mix with the fresh shot, so a new bottle isn’t usually necessary until the fizz is gone. Ordering a full round of both every time is a classic rookie move that burns through money fast.

    The Shitamachi Connection

    Hoppy is inseparable from Tokyo’s old downtown. Kokka Jozo is headquartered in Kinshicho, east of Asakusa, and the drink’s heartland is the cluster of neighborhoods around there — Kinshicho, Asakusa, Tachikawa, and Kita-Senju — where cheap, open-air izakaya culture never really modernized. The most famous strip is Hoppy Street (Hoppy-dori) in Asakusa, a narrow lane of izakayas with tables spilling onto the pavement, a short walk from Senso-ji and the Asakusa ROX shopping building. It’s touristy by local standards now, but it’s still the easiest place for a first-timer to find an English-friendly menu and an authentic retro atmosphere at the same time. If you want the same drinking culture without the crowds, Kinshicho’s station-side alleys and Tachikawa’s izakaya backstreets serve the same drink to an almost entirely local crowd.

    Best Places to Try It

    Budget: Any stall on Asakusa’s Hoppy Street — look for shops with handwritten laminated menus and plastic stools. A full round of naka plus soto runs about 700–900 yen, cheaper than a pint of draft beer almost anywhere else in Tokyo. Hoppy Nakamura is one of the street’s best-known names and a good anchor point if you want to orient yourself before wandering to quieter neighbors.

    Mid-range: Standing bars (tachinomi) around Kinshicho Station mix Hoppy alongside grilled skewers and oden, with slightly higher prices (naka around 400–500 yen) for table seating and a calmer pace.

    Splurge-adjacent: A few modern izakaya and retro-revival bars in Shibuya and Shimokitazawa now put Hoppy on craft-cocktail-style menus for 600–800 yen a round, aimed at younger Tokyoites rediscovering it — a good option if you want the flavor without the plastic-stool atmosphere. For a broader look at Tokyo’s beer-drinking neighborhoods generally, the Ebisu beer-hall district makes a good contrast — polished where Hoppy Street is scruffy, but equally rooted in local drinking history.

    Hours, Prices, and Getting There

    Asakusa’s Hoppy Street stalls typically open early afternoon, around 11am–3pm depending on the shop, and run until 11pm or midnight — many are built for daytime drinking (hiruzake), so don’t assume you need to wait for evening. Take the Ginza, Asakusa, or Tobu Skytree line to Asakusa Station and walk toward Asakusa ROX; the street is tucked just behind the main Nakamise shopping arcade, not directly on it, so it’s easy to miss on a first pass. Many of the older shops are cash-only, so carry coins and small bills — a night of several rounds plus grilled skewers rarely exceeds 2,500–3,000 yen per person.

    Common Mistakes to Avoid

    The biggest one: assuming Hoppy itself is alcoholic. Ordering just a bottle of Hoppy with no shochu gets you a drink that tastes like beer but won’t do anything — you need to order the naka alongside it. The second mistake is over-ordering soto bottles instead of naka refills, which wastes money and dilutes the flavor. Third, don’t expect English menus outside Asakusa’s main tourist strip; pointing at a neighboring table’s drink and saying “Hoppy, white” (shiro) or “black” (kuro) works fine. Finally, weekends on Hoppy Street get crowded with tour groups by early evening — a weekday visit around 4–6pm gets you the same izakayas with mostly local regulars.

    Best Time to Go

    Hoppy is a year-round drink, but it earns its reputation in summer, when the low-alcohol, high-fizz format makes it an easy afternoon sipper in the heat — this is also when outdoor seating on Hoppy Street is at its liveliest. In winter, Black Hoppy’s maltier, warming character makes more sense, paired with a hot pot of oden from the same stall. If you’re building a broader old-Tokyo food crawl, Hoppy pairs naturally with autumn classics like grilled sanma, another shitamachi staple that shows up on the same izakaya menus. And if the shochu side of the equation interests you more than the soda, it’s worth knowing that the spirit itself has a completely different, much more serious drinking culture in Kagoshima, where shochu originates — a useful contrast to the cheap, fizzy, Tokyo-only drink Hoppy represents.

  • Hambagu: Japan’s Yoshoku Hamburger Steak and Where to Try It

    Hambagu: Japan’s Yoshoku Hamburger Steak and Where to Try It

    Photo by Hazel J on Unsplash

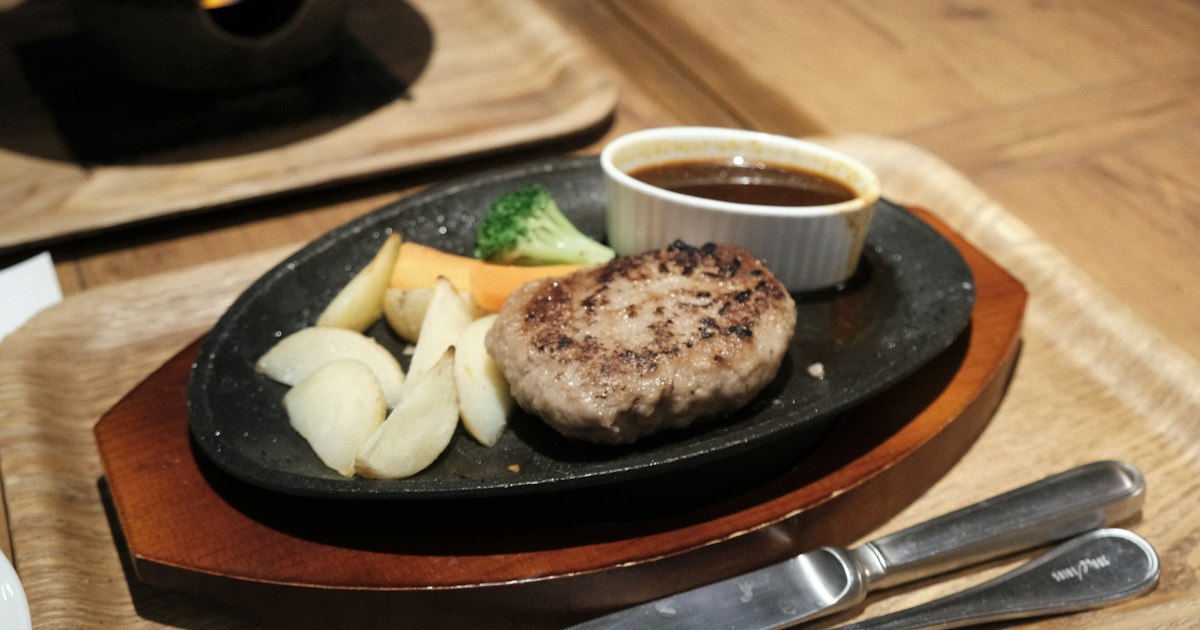
    If you see “hamburger” on a Japanese menu and picture a bun, you’re in for a surprise — and a good one. Hambagu (ハンバーグ) is a thick, juicy patty of ground beef and pork served on a plate with rice, no bread in sight, usually drowned in a glossy brown sauce. It’s one of the most comforting dishes in Japan’s yoshoku repertoire, eaten by salarymen on lunch breaks and kids at birthday dinners alike. Here’s what it actually is, where to find it in different price ranges, and how to order it like a regular.

    What Exactly Is Hambagu?

    Hambagu belongs to yoshoku — Western-style dishes that Japanese cooks adapted after the country opened to foreign trade in the late 1800s and especially after World War II. Unlike a Salisbury steak or a burger patty, hambagu is deliberately soft: the beef-pork mix (usually 70/30 or 50/50) is bound with panko, egg, and grated onion, then pan-fried and often finished with a splash of water or stock under a lid so the inside stays pillowy rather than dense. The classic sauce is demi-glace, a sweet-savory reduction often cut with ketchup and Worcestershire sauce — a very Japanese shortcut version of French demi-glace. Other common sauces include ponzu-oroshi (citrus soy with grated daikon), wafu (soy-butter), and teriyaki.

    It’s almost always served teishoku-style: a set with rice, miso soup, shredded cabbage, and a small pickle. This is a different animal from the convenience-store katsu sando world — if you want the handheld, portable side of yoshoku, that’s covered in our guide to katsu sando.

    Budget Option: Family Restaurant Chains

    The easiest and cheapest way to try hambagu is at a family restaurant (famiresu). Bikkuri Donkey (びっくりドンキー), found in most mid-size and large cities, is the national name for it — a hambagu set with rice and a self-serve salad bar typically runs ¥900–1,400, with larger “mega” patty sizes topping out around ¥1,700. Most locations open around 11:00 am and run through 10:00–11:00 pm, with no reservation needed. Ootoya (大戸屋) and Yayoiken (やよい軒), both teishoku chains, also carry a hambagu teishoku in the ¥900–1,100 range, and since they’re everywhere near train stations, they’re a reliable fallback if you’re hungry and don’t want to plan ahead.

    Common mistake: ordering “medium” doneness out of steak habit. Hambagu isn’t served rare — it’s ground meat cooked through — so there’s no doneness choice at most of these chains. If a menu does mention doneness (a few specialty restaurants sear the outside and leave the center softer, almost tartare-adjacent), it will say so explicitly; don’t assume.

    Mid-Range: Specialty Hambagu Restaurants

    Tokyo has a tier of restaurants that do nothing but hambagu and steak, and the quality jump from the family chains is real. Tsukiji Hamburg, a small chain with several Tokyo branches, uses 100% beef patties (no filler pork) and grills them to order; lunch sets run roughly ¥1,200–1,800 and come with rice, soup, and a choice of sauce. These places get busy at lunch — arrive by 11:30 am or expect a short wait, especially on weekdays when office workers pack in.

    At this tier, pay attention to the sauce list on the table: demi-glace is the default, but ponzu-oroshi is lighter and a good choice in summer, while wafu with grated daikon cuts through the richness if you’re eating a large patty. Cutting the hambagu in half crosswise before eating — rather than slicing off bites from one end — lets the juices (and any residual pink from the center) show, which is part of how regulars judge freshness.

    Splurge: Wagyu and Hotel Hambagu

    Because hambagu is defined by the meat, upgrading the beef is the obvious luxury move. Kobe and Omi beef hambagu courses at hotel restaurants or steakhouses in beef-producing regions run ¥3,000–6,000 for a set with rice, soup, and sometimes a smaller companion steak or foie gras garnish. If you’re traveling through Kansai, pairing a splurge hambagu meal with a stop in Kagoshima or another wagyu region is worth it if beef quality matters to you — Kagoshima wagyu hambagu, where available, is noticeably richer than standard mixed-meat versions.

    A cheaper way to taste premium beef hambagu without the restaurant markup is the depachika (department store basement food hall) frozen or chilled bento section, where Kobe-beef hambagu bento boxes sell for around ¥1,500–2,500 — a good grab-and-go option if you’re staying somewhere with a microwave.

    Hambagu on the Go: Ekiben and Bento

    Hambagu shows up as an ekiben (station bento) filling at larger stations, usually paired with rice and a few sides, priced around ¥900–1,300. It’s not as iconic a station food as the rice-based bento covered in our kamameshi guide, but it’s a solid, filling option if you’re boarding a shinkansen around lunchtime and want something more substantial than a sandwich. Check the bento shelf near the ticket gates rather than inside the platform kiosks — selection and freshness are usually better before you pass through.

    Best Time to Go and Practical Tips

    Lunch is the best value window almost everywhere — hambagu teishoku sets are typically ¥200–400 cheaper at lunch than the same dish ordered à la carte at dinner, and specialty restaurants often add a small side or drink to the lunch set that disappears in the evening menu. Weekday lunch (12:00–1:00 pm) at popular specialty spots means a wait; going at 11:30 am or after 1:30 pm avoids it.

    If you’re washing it down with a drink, hambagu pairs well with a cold beer, and Tokyo’s Ebisu neighborhood has both beer halls and a few yoshoku-leaning restaurants worth combining into one outing. One last common mistake: don’t ask for the patty “to go” expecting a sandwich — hambagu is a plated dish, and if you want a true handheld burger with a bun, you’ll want a Western-style burger chain instead, not a yoshoku restaurant.

  • Katsu Sando: Japan’s Convenience Store Fried Pork Sandwich and Where to Find the Best

    Katsu Sando: Japan’s Convenience Store Fried Pork Sandwich and Where to Find the Best

    Photo by Sunny Nguyen on Unsplash

    Somewhere between a snack and a full meal sits one of Japan’s most satisfying inventions: the katsu sando. It’s just a breaded, deep-fried pork cutlet pressed between two slices of soft white bread — but the combination of crisp pork, pillowy shokupan, and sweet-tangy sauce has made it a cult favorite with visitors and locals alike. Better still, you can buy a decent one for under ¥500 at almost any convenience store, or splurge on a wagyu version that costs more than a nice dinner. Here’s how to navigate the whole range.

    What Exactly Is a Katsu Sando?

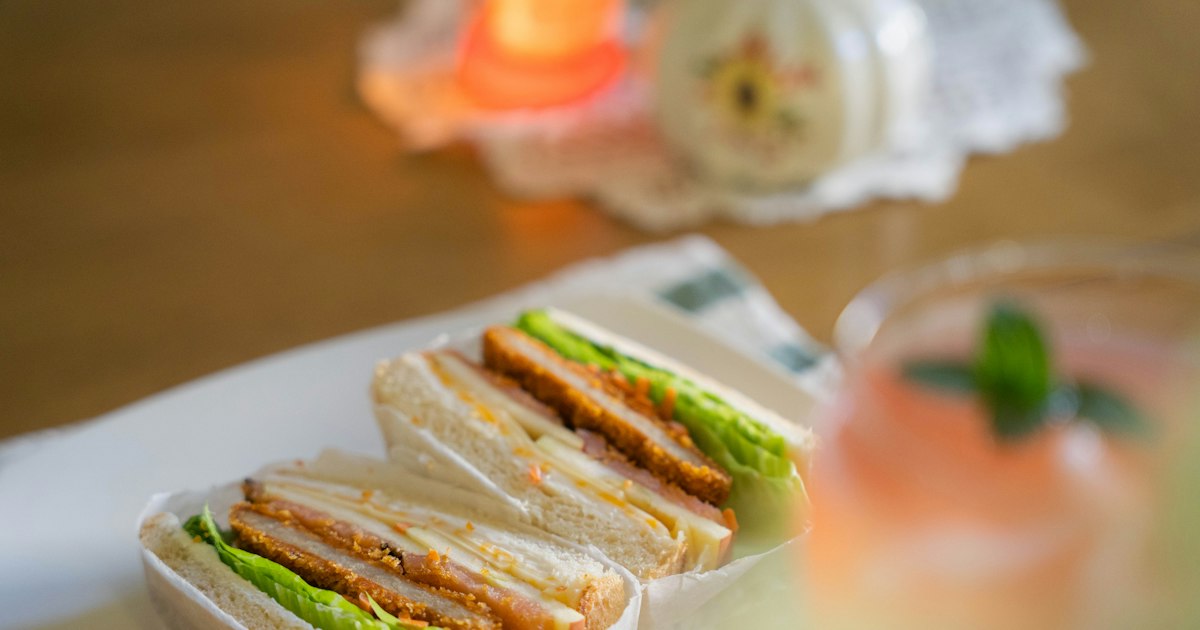
    Katsu sando (カツサンド) is short for “katsu sandwich” — tonkatsu (breaded, fried pork loin or fillet) layered inside crustless shokupan, Japan’s fluffy milk-bread, with a Worcestershire-based tonkatsu sauce and sometimes a smear of karashi mustard. The crusts are trimmed off and the sandwich is cut into neat rectangles, which is part of why it photographs so well and why it became an internet-famous food over the past decade. It traces back to Tokyo department store basement food halls and specialty tonkatsu restaurants in the mid-20th century, long before it became a convenience store staple.

    Budget Option: Convenience Store Katsu Sando (¥350–¥550)

    This is the easiest way to try one. 7-Eleven, Lawson, and FamilyMart all stock katsu sando in the chilled sandwich section near the onigiri and other sandwiches, typically priced between ¥350 and ¥550 depending on the chain and whether it’s a standard pork loin version or a slightly thicker fillet cut. Quality varies — Lawson in particular has a reputation among Japanese shoppers for above-average fried items and sandwiches, so it’s worth checking a couple of nearby stores if you have options.

    Timing matters more than people expect. Convenience stores restock fresh sandwiches several times a day, and stock sitting since the morning delivery by late afternoon will taste noticeably more tired than one bought shortly after a restock (late morning, around 10–11am, is a reliable window before the lunch rush thins out the shelves). Always check the “best by” time printed on the label — these sandwiches are meant to be eaten the same day, often within a few hours.

    If you’re traveling in Hokkaido, don’t skip Seicomart, the region’s own convenience chain — its in-house hot food counter often has fresh fried items that outshine the big national chains’ pre-packaged offerings. And if you’re stepping out into typical Japanese drizzle to go store-hopping, the convenience store umbrella culture is worth knowing about too.

    Mid-Range: Specialty Tonkatsu Shops and Department Store Basements (¥800–¥1,800)

    For a meaningfully better sandwich, go to a dedicated tonkatsu restaurant that sells sando as takeout. Maisen, founded in 1965 and still operating from a converted bathhouse in Aoyama, Tokyo (a short walk from Omotesando Station, exit A2), is the benchmark — its rosu (loin) and hire (fillet) katsu sando run roughly ¥1,000–¥1,600 for a takeout pack and use noticeably fresher oil and thicker-cut pork than any convenience store version. Expect a short queue around lunchtime (11:30am–1:30pm); going right at opening avoids the wait.

    Department store basement food halls, known as depachika, are another reliable mid-range source. Isetan Shinjuku’s basement food floor carries katsu sando from several well-regarded vendors, and these make genuinely good gift boxes if you want to bring something home for a host. Go before 6pm — the evening rush of office workers buying dinner takeout can clear out the good stuff fast, and some stalls start marking down prices for same-day sale closer to closing.

    Splurge: Wagyu Katsu Sando (¥3,000–¥5,000+)

    Wagyumafia, the Tokyo-based wagyu specialist with shops in Roppongi and other locations, built part of its reputation on an extravagant wagyu katsu sando — thick-cut, marbled wagyu breaded and fried, served in small portions given the richness. Prices run well into the ¥3,000–¥5,000+ range for a sandwich that’s closer to a fine-dining course than a quick bite. It’s genuinely excellent if you want to taste what wagyu does to this format, but it’s a special-occasion purchase, not a snack.

    Common Mistakes to Avoid

    • Buying one that’s sat too long. A soggy, cold katsu sando is a different (worse) food than a fresh one — check the time stamp and buy from a store that’s clearly had recent deliveries.
    • Refrigerating and reheating later. The bread turns gummy in a fridge. If you can’t eat it within a few hours, it’s better to buy fresh again later than to save it.
    • Confusing katsu sando with katsudon. Katsudon is the same fried pork served over rice in a bowl with egg — a completely different dish, usually found at restaurants rather than convenience stores.
    • Assuming all branches of one chain are equal. Sandwich quality and freshness can vary store to store even within the same chain, especially between high-traffic urban locations and quieter suburban ones.
    • Skipping the sauce check. Some convenience store versions come with a thin layer of sauce already applied, while higher-end versions include a small extra sauce packet — don’t assume there’s enough seasoning without checking.

    Best Time to Eat It

    There’s no real seasonal angle here — katsu sando is sold year-round and tastes the same in July as in January, unlike seasonal foods such as sanma. The timing that actually matters is time of day: mid-morning for convenience store freshness, right at opening for specialty shops to avoid queues, and before early evening at depachika before the dinner rush picks over the selection. It also makes an excellent cold-weather station platform snack if you’re traveling by train — similar in spirit to grabbing a kamameshi ekiben for a long ride, except a katsu sando travels better since it doesn’t need reheating.

    Pairing It Properly

    If you want to turn a katsu sando into more of an occasion, pick one up and head to Ebisu, where the neighborhood’s beer-hall heritage makes it a natural spot to pair a crisp pork cutlet sandwich with a cold draft. It’s a simple but genuinely good combination, and Ebisu’s walkable beer gardens make for an easy, low-key afternoon stop between sightseeing.

    Whether you grab one from a Lawson fridge for ¥400 on your way to the station or queue up at Maisen for the real thing, katsu sando is one of the few Japanese foods that rewards curiosity at every price point. Start cheap, work your way up, and you’ll understand exactly why this humble sandwich has such a following.