Japan Trove

Category: Uncategorized

  • Warabimochi: Japan’s Jiggly Bracken-Starch Sweet and Where to Buy It

    Warabimochi: Japan’s Jiggly Bracken-Starch Sweet and Where to Buy It

    Photo by Antonio Araujo on Unsplash

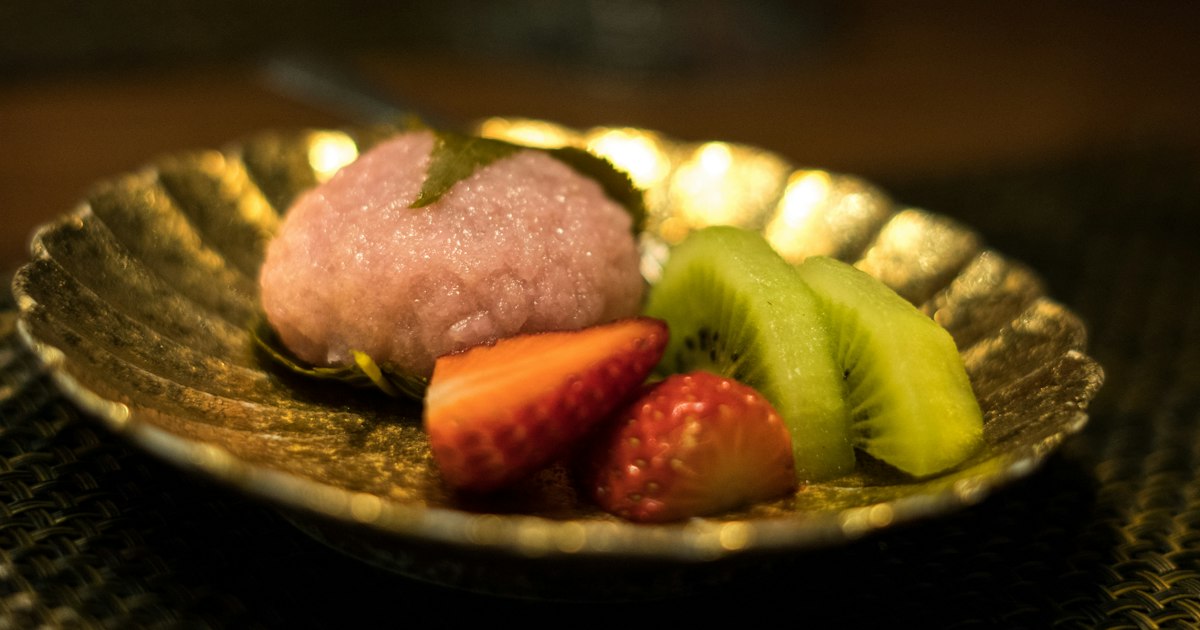
    If you’ve seen a Japanese dessert that looks like translucent amber cubes trembling on a plate, dusted in pale yellow powder and drizzled with dark syrup, you’ve met warabimochi. It’s one of Japan’s oldest confections, and despite the name, it has almost nothing in common with the chewy rice mochi most visitors already know. Here’s what it actually is, why the “real” version is surprisingly hard to find, and where to track one down.

    What Warabimochi Actually Is

    Warabimochi (蕨餅) is made by heating warabiko — starch extracted from the root of bracken fern — with water and sugar until it thickens into a soft, quivering gel. It’s then cut into bite-sized cubes, coated in kinako (roasted soybean flour) and often finished with a drizzle of kuromitsu (dark brown sugar syrup). Unlike mochi, which is pounded glutinous rice and has a stretchy, dense chew, warabimochi barely holds its shape — it jiggles on the spoon and dissolves almost instantly in the mouth. If you’ve tried daifuku, think of warabimochi as its opposite in texture: cool, slippery, and nearly weightless rather than chewy and sticky. For comparison, our guide to daifuku and ichigo daifuku covers the rice-based side of the mochi world.

    Why “Real” Warabimochi Is Rare and Expensive

    This is the detail most visitors miss, and it explains the big price gaps you’ll see on menus. Genuine bracken starch is harvested by hand from wild fern roots, and the extraction process is slow and labor-intensive — it can take months to produce a usable batch. As a result, 100% hon-warabiko (true bracken starch) warabimochi is genuinely rare, has a cloudy brownish-grey tint, and costs noticeably more. The vast majority of warabimochi sold in supermarkets, convenience stores, and even some sweets shops is made partly or entirely with substitutes like sweet potato starch, tapioca starch, or kudzu starch, which gel in a similar way but cost a fraction of the price. These versions are usually clearer and whiter. Neither is “fake” exactly — it’s a legitimate, long-standing substitution — but if you want the real thing, look for labels or shop descriptions that specifically say hon-warabimochi or 本わらび粉使用 (uses real bracken starch).

    Best Season and Timing to Buy It

    Warabimochi is traditionally a summer sweet, classified as suzumi-gashi (a “cooling” confection) meant to feel refreshing in humid weather. You’ll see it everywhere from roughly May through September, with convenience store chains rotating it into their chilled dessert cases specifically for summer. It’s sold year-round at dedicated sweets shops, but summer is when selection and festival-stall versions peak. Freshness matters more here than with almost any other Japanese sweet: real warabimochi starts to firm up and weep liquid within a few hours at room temperature and even faster in the fridge, since refrigeration actually accelerates the starch re-hardening (a process called retrogradation). Buy it the day you plan to eat it, and if a shop offers an eat-in option, take it — that’s the only way to taste it at peak texture.

    Where to Buy It: Budget to Splurge

    Options range enormously by price and quality:

    • Budget (¥150–300): Convenience stores (7-Eleven, Lawson, FamilyMart) stock individually packaged warabimochi cups in the chilled dessert section during warmer months. These use starch substitutes but are a perfectly good, cheap introduction, and the kinako packet is usually separate so you can shake it fresh.
    • Mid-range (¥400–1,200): Specialty sweets shops and depachika (department store basement food halls) sell small boxed sets of 6–8 pieces, often with a small bottle of kuromitsu on the side. Kyoto and Nara stations both have shops selling tourist-friendly boxed versions that travel reasonably well if eaten within the day.
    • Splurge (¥1,600–4,000+): Historic teahouses serving warabimochi made fresh to order with real bracken starch, eaten on the spot with matcha. Kagizen Yoshifusa, a long-established confectionery in Kyoto’s Gion district, is one of the most famous destinations for this — its warabimochi set (served with tea) typically runs in the ¥1,600–2,000 range when eaten in the tea room, and the portion is smaller than a convenience-store cup, which reflects the cost of real bracken starch rather than any attempt to overcharge tourists.

    Kyoto and Nara: The Classic Hunting Grounds

    Kansai is the undisputed home turf for warabimochi, partly thanks to a long confectionery tradition and partly because Kyoto’s humid summers made cooling sweets especially popular historically. In Kyoto, beyond Kagizen Yoshifusa in Gion (easily reached on foot from Gion-Shijo Station), several matcha-focused tea shops around Uji — famous for matcha more broadly — serve warabimochi as part of parfaits or set menus, usually open from around 10am to 5 or 6pm, with last orders often earlier. In Nara, shops near Nara Park sell warabimochi alongside the more famous mochi-pounding demonstrations, making it an easy add-on to a deer park visit. None of these require reservations for a quick takeaway purchase, but eat-in tea room seating can involve a short wait on weekends.

    Common Mistakes to Avoid

    A few things trip up first-timers:

    • Refrigerating it “to keep it fresh.” Do the opposite — keep it at cool room temperature and eat it the same day. The fridge actively ruins the texture.
    • Assuming it’s shelf-stable like youkan. It isn’t. If you’re comparing Japanese sweets for souvenir durability, dense sweets like youkan travel far better than warabimochi, which really is a same-day treat.
    • Expecting a chewy texture. If you go in expecting mochi-like stretch, the delicate, almost gelatin-like softness can feel underwhelming rather than delightful. Reset your expectations and it becomes one of the more interesting textures in Japanese sweets.
    • Skipping the kuromitsu. Plain kinako-only versions are good, but the molasses-like depth of kuromitsu is what makes the dish — don’t be shy about using the whole packet.

    Pairing It With the Rest of Your Trip

    Warabimochi fits naturally into a hot-weather itinerary alongside other classic Japanese cooling treats — it’s worth trying next to a bottle of Calpis on a sweltering August afternoon, or as a lighter counterpoint after a heavier meal elsewhere in Kansai. Because it’s so time-sensitive, don’t buy it as an early-trip souvenir to save for later — treat it instead as a snack to track down specifically on the day you’re sightseeing in Kyoto, Nara, or Uji, and enjoy it within hours of purchase for the texture it’s actually famous for.
  • Rafute: Okinawa’s Braised Pork Belly and Where to Try It

    Rafute: Okinawa’s Braised Pork Belly and Where to Try It

    Photo by 8-Low Ural on Unsplash

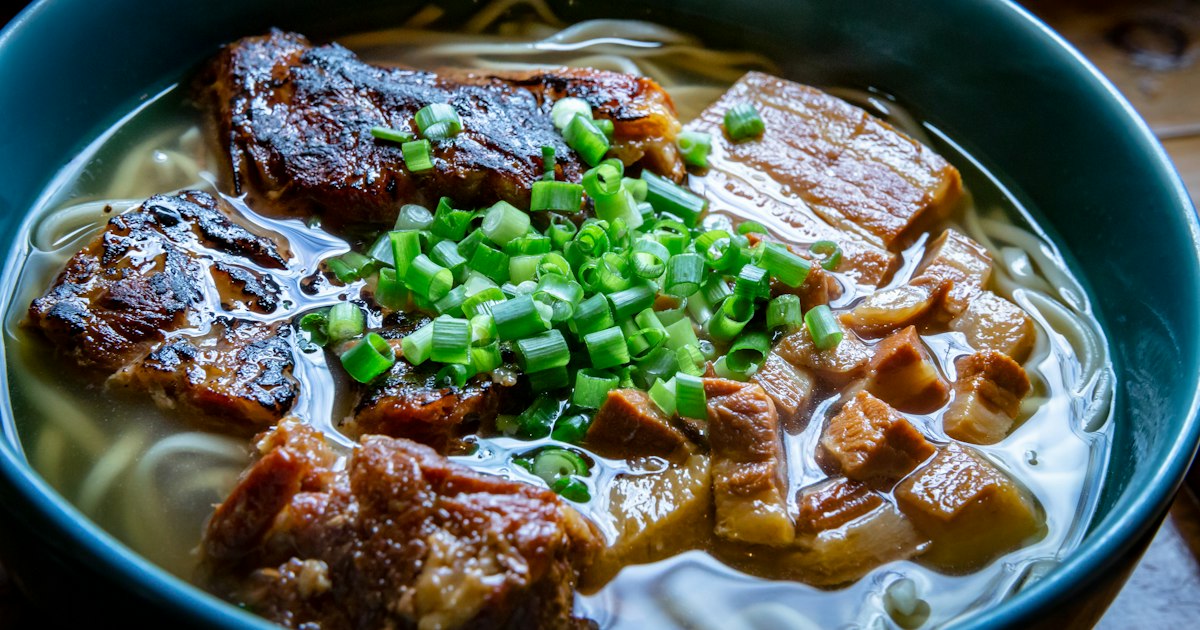
    Okinawa’s food culture doesn’t look like the rest of Japan’s, and nothing proves that faster than rafute (ラフテー). This slow-braised pork belly — soft enough to cut with a spoon, glazed dark with soy sauce, brown sugar, and the local rice liquor awamori — is the dish most Okinawans point to when asked what makes their island’s cooking different. If you’re flying into Naha expecting sushi and ramen, rafute is your reset button.

    What Exactly Is Rafute?

    Rafute is a block of pork belly, skin often left on, simmered for hours until the fat turns translucent and the meat falls apart at the touch of chopsticks. The flavor base is soy sauce, kokuto (Okinawan brown sugar), and awamori, Okinawa’s distilled rice spirit, which gives the dish a faint sweetness and depth that mainland Japan’s similar braised pork, buta no kakuni, doesn’t have. The dish traces back to Ryukyu Kingdom-era court cuisine, which borrowed heavily from Chinese cooking — the lineage shows in the technique, which resembles Chinese red-braised pork more than anything typically found in Tokyo or Osaka.

    It’s usually served as a small side dish, two or three thick squares per plate, rather than a full entrée. That surprises first-timers who order it expecting a main-course-sized portion.

    How It’s Made (and Why It Takes So Long)

    Good rafute starts with par-boiling the pork belly plain for 30-60 minutes to render out excess fat and soften the skin, then braising it again — sometimes a third time — in the soy-sugar-awamori mixture over low heat for another hour or two. Some cooks add dashi or a splash of miso for extra savoriness. The result is pork that holds its shape on the plate but dissolves almost immediately once you bite into it. Because of the multiple cooking stages, restaurants braise it in advance; very few places make it to order, so don’t expect it fast at a packed lunch counter — it’s usually ready and waiting.

    Where to Try Rafute in Okinawa

    You’ll find rafute almost anywhere Okinawan home cooking is served, but a few categories of spots are worth knowing:

    • Okinawan izakaya in Naha — Restaurants along and just off Kokusai-dori specializing in “Okinawa ryori” (Okinawan cuisine) almost always have rafute on the menu alongside other local staples like mimiga (pickled pig’s ear) and umi budou (sea grapes). These are sit-down, order-several-small-plates places, so rafute arrives as one dish among many.
    • Makishi Public Market — Naha’s covered market has a second-floor food court above the meat and fish stalls downstairs. It’s touristy but convenient, and several stalls serve rafute donburi (rafute over rice) for a quick, cheap lunch.
    • Okinawa soba shops — Many soba shops add a slice of rafute as a topping option on top of the usual pork rib or pork belly soba, which is a good way to try it without committing to a full dish.
    • Hotel breakfast buffets — Larger resort hotels in Naha and along the west coast frequently include rafute in their breakfast spread, which is a low-pressure way to taste it before seeking out a dedicated restaurant.

    Budget, Mid-Range, and Splurge Options

    Rafute scales well across budgets, which makes it an easy dish to work into a trip regardless of spending style.

    • Budget (~700-900 yen): Rafute donburi or a rafute soba at a market food court or casual soba shop. Expect counter seating, fast turnover, and no English menu, though picture menus are common.
    • Mid-range (~1,200-1,800 yen): An Okinawan teishoku (set meal) at a sit-down izakaya, which pairs rafute with rice, soup, and a small side or two. This is the most common way locals eat it and gives you the best sense of how it fits into a full Okinawan meal.
    • Splurge (5,000-8,000+ yen): A multi-course Okinawan kaiseki dinner at a traditional restaurant, often in a converted old house with tatami seating, where rafute appears as one course among many — alongside Ishigaki beef, Ryukyu-style tempura, and awamori tastings. These dinners usually require a reservation and run longer, closer to 90 minutes to two hours.

    Best Time to Go and How to Get There

    Rafute isn’t seasonal — it’s served year-round — but it’s a particularly welcome, warming dish during Okinawa’s cooler months (December to February), when the humidity drops and a rich, slow-braised dish feels more appealing than it does in August’s heat. Lunch sets are consistently better value than dinner at the same restaurants, so if you’re trying to sample a lot of Okinawan dishes on a budget, aim for lunch.

    Naha doesn’t have the dense train network of mainland cities — the Okinawa Urban Monorail (Yui Rail) covers the main tourist corridor from the airport through Kokusai-dori to Shuri Castle, but reaching restaurants off that line usually means a local bus. If this is your first time riding one in Japan, it’s worth reading up on how flat-fare and rear-door boarding actually works before you go, since Okinawa’s bus system follows the same general rules as the rest of the country. If you’re combining Okinawa with a wider trip through southern Japan, the Ibusuki sand baths in Kagoshima make a logical pairing — both are classic “southern Japan does things differently” experiences.

    Common Mistakes to Avoid

    The biggest mistake is ordering rafute expecting a generously portioned main dish — it’s a rich side, so pair it with rice, soba, or other small plates rather than planning a meal around it alone. The second is confusing it with char siu or standard kakuni; the awamori and kokuto give it a distinct sweetness that’s worth tasting on its own terms rather than comparing it to pork dishes you already know, like the steamed buns at 551 Horai in Osaka. And because it’s fatty, pace yourself if you’re also working through a full Okinawan tasting menu — a little goes a long way. If you’re more interested in Japan’s regional rice bowl specialties generally, it’s also worth comparing rafute donburi against something like kaisendon to see how differently Japan’s regions build a bowl around local ingredients.

    Bringing Rafute Home

    Vacuum-packed, shelf-stable rafute is a common souvenir at Naha Airport’s gift shops and at Okinawan specialty stores on the mainland, including Tokyo locations that stock Okinawan products. It’s precooked and just needs reheating, so it travels well in checked luggage and makes a far more distinctive gift than the usual box of sweets — just double-check your home country’s rules on importing cooked pork products before you pack it.

  • Kaisendon: Japan’s Fresh Seafood Rice Bowl and Where to Order It

    Kaisendon: Japan’s Fresh Seafood Rice Bowl and Where to Order It

    Photo by Zion C on Unsplash

    Kaisendon (海鮮丼) is one of the simplest pleasures in Japanese food: a bowl of warm, vinegared or plain rice topped with a rotating cast of raw seafood — maguro tuna, salmon, uni, ikura, scallop, shrimp, squid — arranged so generously that the rice barely shows. Unlike sushi, there’s no technique to master and no counter etiquette to worry about. You just dig in. But knowing where to order it, when to go, and what you’re actually paying for makes a big difference between a forgettable bowl and one you’ll be describing to friends back home.

    What Makes a Good Kaisendon

    A good kaisendon comes down to two things: how recently the fish was cut, and how the rice is seasoned. The best versions use rice dressed lightly in sushi vinegar (sumeshi), which cuts through the richness of fatty tuna or uni. Cheaper versions sometimes use plain steamed rice, which is fine but noticeably less balanced. Toppings vary by region and season — a bowl in Hokkaido will lean on salmon roe, crab, and uni, while a Tokyo market bowl is built around tuna grades (akami, chutoro, otoro) and seasonal white fish. There’s no single “correct” kaisendon; part of the fun is that it changes depending on where in Japan you order it.

    Tokyo: Tsukiji Outer Market vs. Toyosu Market

    Tokyo’s seafood wholesale business moved from Tsukiji to Toyosu in 2018, which splits visitors between two very different experiences.

    Tsukiji Outer Market is the old market district that stayed behind — a dense warren of narrow lanes near Tsukiji Station (Hibiya Line) and Tsukijishijo Station (Oedo Line), still packed with seafood stalls, knife shops, and small kaisendon counters. Most shops open around 5:00–7:00 AM and wind down by early-to-mid afternoon; many individual stalls close on Wednesdays, so it’s worth checking a shop’s posted hours rather than assuming it’s open. Expect to pay roughly 1,500–3,000 yen for a solid bowl here, with lines forming early at the handful of well-known counters.

    Toyosu Market is the actual working wholesale market now, located on reclaimed land in the bay area. The public retail and dining zone (Uogashi Yokocho) opens early, generally from around 5:00–6:00 AM, and most shops close by early-to-mid afternoon. The market is closed on Sundays and on additional days set by an irregular holiday calendar published online — always double-check the date before you go, since it isn’t simply “weekdays only.” Toyosu’s kaisendon tends to run slightly higher, from about 2,500 yen for a standard bowl up to 6,000–10,000+ yen for a deluxe version loaded with uni, otoro, and ikura. The famous tuna auction viewing deck requires booking a free slot in advance and fills up fast.

    If you’re staying near Haneda, Toyosu is an easy early-morning add-on; comparing routes with our guide to the Tokyo Monorail vs. Keikyu Line can help you work out timing if you’re heading straight from the airport. From central Tokyo, Toyosu is also within reach of the bay area water routes — the Tokyo Water Bus from Asakusa to Odaiba is a scenic, slower alternative if you want to combine the market with a morning on the water before the crowds build.

    Beyond Tokyo: Regional Kaisendon Worth the Trip

    Tokyo isn’t the only — or even the best — place to eat kaisendon.

    • Hakodate Morning Market (Hokkaido): Famous for “nokkedon,” where you buy a rice ticket (around 300–500 yen) and then walk between stalls choosing your own toppings — uni, crab, salmon roe, scallop — paying per item as you go. A full self-assembled bowl typically runs 1,800–3,500 yen. Hokkaido’s cold waters make this one of the country’s best regions for uni and crab specifically.
    • Omicho Market (Kanazawa): A smaller, more manageable market than Tokyo’s, with excellent snow crab and sweet shrimp (amaebi) bowls, generally 2,000–4,000 yen.
    • Numazu (Shizuoka): A working fishing port close to the Izu Peninsula, popular with day-trippers combining it with Mt. Fuji views; known for fresh sakura ebi (cherry shrimp) and aji (horse mackerel) bowls at lower prices than Tokyo, often under 2,000 yen.

    If a regional market isn’t directly on a train line, you may need to transfer onto a local bus from the nearest station — our guide to riding local buses in Japan covers how flat-fare, rear-door boarding works, which comes up often in smaller fishing towns that don’t have IC-card-friendly transit.

    Best Season and Time of Day

    Kaisendon is available year-round, but specific toppings peak seasonally: uni and bonito are best in early summer, fatty tuna and oysters are better in winter, and salmon roe (ikura) is richest in autumn when salmon run. For timing within a day, mornings are non-negotiable — most market kaisendon counters are built around the wholesale trading schedule, so the best selection and freshest cuts are available before 10:00 AM. By early afternoon, popular items sell out and some stalls close entirely.

    Budget, Mid-Range, and Splurge

    Roughly speaking: budget bowls (1,500–2,500 yen) get you a mix of 4–6 standard toppings like tuna, salmon, and squid over rice; mid-range bowls (2,500–5,000 yen) add higher tuna grades, uni, or crab in better quantity; splurge bowls (6,000–10,000+ yen) are usually themed “special” or “deluxe” sets piled with otoro, uni, and ikura together, sometimes served with miso soup and a small side. Market stalls often display photos with prices out front, so you can compare before committing — don’t be shy about walking the row first.

    Common Mistakes First-Timers Make

    • Going late morning or in the afternoon. By then, the best cuts are gone and some counters have already closed for the day.
    • Assuming everything is open every day. Both Tsukiji Outer Market stalls and Toyosu Market as a whole have irregular closures — check the specific closure calendar, especially around weekends and holidays, before building your morning around it.
    • Skipping the rice ticket system at nokkedon-style markets. In Hakodate and similar markets, you buy rice separately from toppings — show up without understanding this and you’ll be confused standing at the counter.
    • Paying by card only. Many small market stalls are cash-only or have low card minimums; carry some yen.
    • Not checking allergy or raw-fish comfort level before ordering a “chef’s choice” bowl — these often include items like raw shrimp or sea urchin that aren’t always obvious from a glance.

    Getting There

    For Tokyo, Toyosu Market is served by the Yurikamome line (Shijo-mae Station) or a short walk/bus from Toyosu Station on the Yurikamome and Tokyo Metro Yurakucho lines; Tsukiji Outer Market is walkable from Tsukiji or Tsukijishijo stations. For regional markets, check whether your destination station connects by local bus, since many fishing-port markets sit a short ride from the nearest rail stop rather than right outside it.

  • BAPE, Neighborhood & Human Made: A Buyer’s Guide to Harajuku’s Streetwear Boutiques

    BAPE, Neighborhood & Human Made: A Buyer’s Guide to Harajuku’s Streetwear Boutiques

    Photo by Jesus Esteban on Unsplash

    Harajuku didn’t just host Japanese streetwear’s rise in the 1990s — it’s still where the three brands that defined it keep their flagship stores. A Bathing Ape (BAPE), Neighborhood, and Human Made all have a presence within a 10-minute walk of each other, mostly clustered around Cat Street and Jingumae. If you’re flying in specifically to shop, or just want to make the most of a Harajuku afternoon, here’s what each brand actually sells, what it costs, and how to avoid the mistakes that waste a trip.

    Harajuku’s Streetwear Map: Where Each Brand Lives

    Cat Street (Neko Machi) is the spine of this shopping run — a quieter, boutique-lined lane connecting Harajuku to Shibuya, as opposed to the chaos of Takeshita Street. BAPE’s main Harajuku store sits just off Cat Street, Human Made has multiple small shops clustered nearby (including its own cafe and bookstore-style spaces), and Neighborhood keeps a lower-profile store a short walk further toward Jingumae. None of these are mall stores — they’re standalone boutiques with their own hours, so it’s worth checking Google Maps the morning of your visit, since streetwear brands occasionally shift locations or close for inventory.

    Most stores open between 11:00 and 12:00 and close around 20:00, seven days a week. Weekday mornings right after opening are the calmest time to shop — weekends, especially Saturday afternoons, bring crowds and resellers who camp out for new drops.

    BAPE: What to Buy and What It Costs

    BAPE is the most recognizable of the three and the easiest for first-time buyers to navigate, since the Harajuku store carries the full range rather than a curated capsule. Expect:

    • Graphic tees: roughly ¥6,000–9,000
    • Camo and logo hoodies: roughly ¥18,000–28,000
    • The iconic Shark full-zip hoodie: often ¥35,000 and up
    • Baby Milo kids’ and novelty items: ¥4,000–10,000

    BAPE sizing tends to run slightly smaller than US streetwear norms — if you’re between sizes, size up, especially for hoodies you want to layer. Staff can usually check stock at other Tokyo locations (there’s also a store in Shibuya) if your size is sold out.

    Neighborhood: Harajuku’s Quietest Big Name

    Neighborhood is the brand most likely to disappoint someone expecting a flashy storefront — it’s deliberately understated, reflecting its biker-and-military design roots. The product mix leans heavier than BAPE or Human Made: technical jackets, workwear, and collaboration pieces with brands like Vans or Porter. Prices sit noticeably higher too — tees start around ¥7,000–9,000, but jackets and outerwear regularly run ¥30,000–60,000 or more. Stock is seasonal and limited, so if you’re hunting a specific past-season piece, secondhand stores (Kinji, 2nd Street, Jackpot, and similar shops scattered around Harajuku and Shimokitazawa) are often a better bet than the boutique itself, which only carries current-season stock.

    Human Made: Nigo’s Americana Dream

    Human Made, designed by BAPE founder Nigo, leans into a vintage-Americana, heart-logo aesthetic rather than streetwear bravado — think varsity jackets, cardigans, and workwear-inspired basics. Rather than one flagship, Human Made operates several small adjacent spaces in the area, including a dedicated store and a cafe/goods shop, so budget time to walk the block rather than expecting one big store. Typical pricing:

    • Tees: ¥8,000–12,000
    • Sweatshirts and cardigans: ¥20,000–30,000
    • Jackets: ¥30,000 and up

    Human Made products move fast on social media the moment a new heart-print or collaboration drops, so if you see something you like, don’t assume it’ll still be there if you come back later in the trip — stock does not get restocked mid-season.

    Budget, Mid-Range, and Splurge Strategies

    Not every streetwear trip needs a four-figure receipt. If you want the look without the flagship prices:

    • Budget: Secondhand and resale shops around Harajuku and Koenji carry last-season BAPE and Human Made pieces at 30–60% off original retail. For general trend pieces rather than grail items, GU is a smart adjacent stop for cheap basics to mix with one statement piece.
    • Mid-range: A single BAPE tee or Human Made basic (¥6,000–12,000) is an easy, packable souvenir that doesn’t require chasing a specific drop.
    • Splurge: Shark hoodies, Neighborhood outerwear, and rare collaboration pieces are the collector-grade buys — expect to pay full retail or more if it’s sold out and you’re relying on resale.

    Pair the trip with a stop at nearby ABC Mart for exclusive Japan-only sneaker colorways, or extend the afternoon into Shibuya for a very different crowd-driven shopping scene at Shibuya 109.

    Avoiding Fakes, Resellers, and Rookie Mistakes

    Counterfeit BAPE in particular is common in street markets and general souvenir shops across Tokyo — only buy from the official boutiques listed here, authorized department store counters, or reputable resale chains (2nd Street, Ragtag, Kinji). If a “BAPE” or “Human Made” item is being sold at a stall with no receipt or tags, assume it’s fake. A few other common mistakes:

    • Assuming restocks happen often. Limited colorways sell out and generally don’t come back — buy on sight if it’s a must-have.
    • Paying by card without checking the tax-free threshold. Many of these boutiques offer tax-free shopping for purchases over ¥5,000 (before tax) in a single transaction, but you’ll need your passport on hand at checkout.
    • Skipping try-on. Japanese cuts run narrower through the shoulders than US/EU sizing even when the size label matches — try before you buy, especially for outerwear.
    • Treating it as a one-stop trip. Because the three brands are spread across several small storefronts rather than one mall, give yourself 2–3 hours to walk the area properly rather than rushing between addresses.

    Getting There and Best Time to Shop

    Harajuku Station (JR Yamanote Line) or Meiji-Jingumae Station (Chiyoda and Fukutoshin lines) both put you within a 5–10 minute walk of Cat Street. If you’re coming straight from the airport, Haneda connects into central Tokyo via monorail or train — see our comparison of Tokyo Monorail vs. Keikyu Line for the faster route in. Spring and autumn are the most comfortable seasons for a walking-heavy shopping day, and early on a weekday morning remains the best window to browse without fighting crowds for fitting room space or waiting to even get through the door during a new drop.

  • Ibusuki Sand Baths: Kagoshima’s Steam-Powered Beach Onsen Experience

    On a narrow strip of black sand on Japan’s southern tip, staff with wooden shovels bury fully-clothed visitors up to their necks in steaming volcanic sand — and people line up for the privilege. Welcome to Ibusuki, a hot spring town in Kagoshima Prefecture famous for sunamushi onsen, or “sand-steaming baths,” where geothermally heated groundwater warms the beach sand itself rather than a tub of water. It’s one of the strangest, most photogenic onsen experiences in Japan, and unlike most hot spring towns, you don’t need to stay overnight to try it.

    What Makes Ibusuki’s Sand Baths Different

    Most Japanese onsen rely on piped-in hot spring water. In Ibusuki, hot water flows naturally beneath Surigahama Beach and heats the sand above it to roughly 50–55°C near the burial depth. Staff dig a shallow trench, you lie down in a cotton yukata, and they shovel warm sand over your body up to the neck. The weight and heat combine to produce a much more intense sweat than a regular soak — locals have practiced this for over 300 years, originally as a folk remedy for joint pain and circulation.

    A typical session lasts 10–15 minutes. Staff keep time and will dig you out if you start to overheat, so you don’t need to manage it yourself.

    Getting to Ibusuki from Kagoshima

    Ibusuki sits about an hour south of Kagoshima city, at the base of the Satsuma Peninsula. From Kagoshima-Chūō Station, the JR Ibusuki-Makurazaki Line runs regular trains to Ibusuki Station in roughly 60–80 minutes. A faster, more scenic option is the limited express Ibusuki no Tamatebako, a quirky black-and-white sightseeing train that covers the same route in about 50 minutes and runs just a few times a day — reserving a seat in advance is worth it, especially in peak travel seasons.

    From Ibusuki Station, the main sand bath facility is a 10–15 minute walk along the coast, or a short ride on a local bus bound for the Sunamushi Onsen stop. If you haven’t used Japan’s local buses before, it’s worth knowing most routes here use flat-fare, rear-door boarding rather than the IC-tap-in/tap-out system common in big cities — see our guide to riding local buses in Japan before you go so you’re not fumbling for coins at the front door.

    Saraku Sand Bath Hall: What to Expect

    The main public facility is Saraku Sand Bath Hall (砂むし会館 砂楽), right on Surigahama Beach. It’s open daily, generally from around 8:30am to 9pm (last entry around 8:30pm), 365 days a year, though hours can shift slightly with the tide and weather since the baths are literally on the beach.

    Entry costs roughly ¥1,100 for adults, which includes yukata rental and access to the regular hot spring bath afterward to rinse off. A hand towel usually isn’t included and costs a small rental fee (around ¥200) if you don’t bring your own — pack a travel towel to skip that cost. Bring cash; smaller facilities in Ibusuki aren’t all set up for cards.

    The process: change into the provided yukata, walk down to the beach pit area, lie down where directed, and let staff bury you. You’ll feel the weight settle in within a minute or two, followed by a steady, heavy sweat. After your 10–15 minutes, you shake off, head inside, shower, and finish with a soak in the indoor bath to warm back up and rinse the sand out of everywhere sand likes to hide.

    Best Time to Visit

    Because the heat comes from the ground rather than the sun, sand baths work year-round — winter is actually a favorite time, since the contrast between cold sea air and the hot sand feels dramatic and the indoor bath afterward is especially welcome. Summer (July–August) is popular but the sand runs hotter and the midday sun adds to the heat load, so mornings or early evenings are more comfortable. Typhoon season (roughly late August through September) and heavy rain can occasionally close the outdoor pits for safety, so if you’re visiting then, build in a flexible day or check conditions locally before committing travel time.

    Weekday mornings right after opening tend to be quietest; weekend afternoons and holiday periods can mean a short wait for a burial spot.

    Budget, Mid-Range, and Splurge Options

    • Budget: Saraku Sand Bath Hall (~¥1,100) is the standard, well-run public option and the one most first-timers try.
    • Mid-range: A few smaller local sand bath facilities around town charge similar or slightly lower prices with a more old-school, less touristy feel — ask at the Ibusuki tourist information office near the station for current options, since smaller places sometimes have limited hours.
    • Splurge: Several beachfront ryokan in Ibusuki, including the well-known Hakusuikan, have their own private sand bath areas on the beach for overnight guests, paired with kaiseki dinners and ocean-view rooms. Staying overnight lets you do a sand bath at sunrise or sunset without the daytime crowds — a worthwhile upgrade if Ibusuki is more than a quick stopover for you.

    Common Mistakes to Avoid

    • Staying buried too long. Ten to fifteen minutes is plenty; the heat is more intense than it looks, and dehydration sneaks up fast. Drink water before and after.
    • Wearing jewelry or watches in. Metal gets hot and sand gets into clasps. Leave valuables in the lockers provided.
    • Forgetting a change of underwear. You wear the rental yukata directly over your underwear (no swimsuit needed), and sand finds its way in regardless — a spare pair makes the rest of your day more comfortable.
    • Treating it like a quick photo op and skipping the indoor bath. The post-sand soak isn’t optional fluff — it’s how you actually rinse off and it’s included in your entry fee.
    • Not booking the scenic train seat ahead. The Ibusuki no Tamatebako has limited, reservable seating and sells out on weekends and holidays.

    Quick Tips Before You Go

    Pack a swimsuit if you’re shy about wearing just underwear under the yukata — it’s allowed. Bring a plastic bag for damp clothes afterward, and flip-flops or sandals make the walk between the changing room and the beach pits much easier than regular shoes. If you’re combining Ibusuki with other Kyushu stops, it pairs well with a slower-paced day trip like Yanagawa’s canal boats up in Fukuoka for contrast — one a water-based wind-down, the other a heat-based one. And if the idea of unusual spa treatments appeals to you, it’s worth knowing Japan’s wellness scene extends well beyond onsen — see our guide to head spa treatments in Tokyo for another distinctly Japanese way to relax.

    Ibusuki won’t take more than half a day if you’re efficient, which makes it a solid add-on to a Kagoshima itinerary rather than a destination you need to dedicate a full trip to — just budget enough time to actually enjoy the indoor bath afterward instead of rushing straight back to the train.

  • Calpis (Calpico): Japan’s Fermented Milk Soda and Where to Try the Original

    Calpis (Calpico): Japan’s Fermented Milk Soda and Where to Try the Original

    Photo by Kaho Lee on Unsplash

    If you’ve wandered past a Japanese vending machine and spotted a white bottle with blue polka dots, you’ve met Calpis — known outside Japan as Calpico. It’s a cultured, slightly tangy milk soda that’s been a summer staple since 1919, and it tastes like nothing most foreign visitors have had before: part yogurt, part lemonade, part soda pop. This guide covers what it actually is, which version to buy where, and how to avoid the rookie mistakes that lead people to either miss the good stuff or end up drinking it wrong.

    What Calpis Actually Is

    Calpis is made by fermenting milk with lactic acid bacteria, similar to the process used for yogurt, then diluting the resulting base with water or soda and sugar. The name comes from a blend of “calcium” and “sarpis,” a Sanskrit word for a clarified dairy product. The result is cloudy white, mildly sweet, faintly sour, and much lighter than it sounds — it’s often compared to a liquid, fizzy yogurt drink. In Japan it’s sold under the Calpis name; in North America and parts of Europe, the exact same company (Asahi, which owns the brand) markets it as Calpico, reportedly because “Calpis” sounded too close to an unfortunate English word for overseas ears.

    There are three main formats you’ll encounter:

    • Calpis concentrate — a syrup you dilute yourself with water, milk, or soda water at home (around ¥450–600 for a 470ml bottle at supermarkets).
    • Calpis Soda — the ready-to-drink carbonated version, the one you’ll find in vending machines and convenience stores (roughly ¥140–170 for a 500ml PET bottle).
    • Calpis Water — a non-carbonated, pre-diluted version, slightly milder and less fizzy than the Soda.

    Where to Buy It: Budget to Splurge

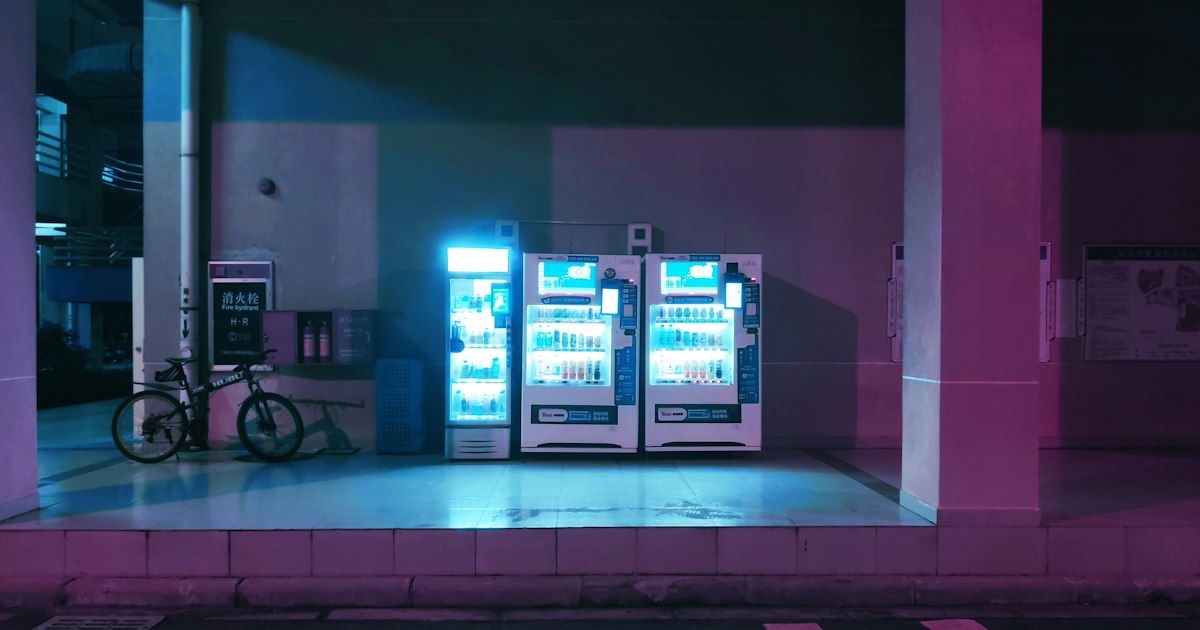
    Budget (convenience store / vending machine): Any 7-Eleven, Lawson, or FamilyMart sells Calpis Soda or Calpis Water chilled for ¥140–170. Vending machines are everywhere and run about the same price, sometimes a touch higher at train stations or tourist areas. If you’re already tracking Japan’s vending machine culture for the hot canned coffees and corn soup in winter, Calpis Soda is the cold-season counterpart worth knowing about — see our guide to hot vending machine drinks in Japan for how that system works generally.

    Mid-range (supermarkets): Supermarkets like Life, Seijo Ishii, or Ito-Yokado carry the full range — concentrate, soda, water, and seasonal flavors (lychee, white peach, and yuzu versions show up from spring through summer). Buying the concentrate here is the cheapest way to drink a lot of Calpis over a trip, since one 470ml bottle makes roughly 4 liters of diluted drink.

    Splurge / bulk (Costco): Costco Japan sells large multi-packs of Calpis Soda and the concentrate at a price-per-unit that beats convenience stores, though you need a membership and a reason to buy in bulk. If you’re already planning a Costco run for other souvenirs, it’s worth tossing a case in the cart — our Costco Japan guide covers membership rules and whether the trip is worth it for a short-term visitor.

    Tracking Down the “Original” Experience

    Calpis doesn’t really have a single pilgrimage-site “birthplace” cafe the way some Japanese foods do, but there are a few ways to get closer to the original, old-school version of the drink rather than just the mass-market bottle:

    • Calpis-flavored soft serve and kakigori (shaved ice) at summer festivals and department store food courts — look for “カルピス” written on menu boards, especially June through August when it’s marketed as a cooling treat. Expect ¥400–700 for a cup.
    • The concentrate, diluted at the classic 1:4 or 1:5 ratio with cold water — this is closer to how the drink tasted when it launched in 1919 and is noticeably less sweet than the pre-made Soda version.
    • Calpis mixed with shochu (called “Calpis Sour” or “Calpis Chu-Hai”) at izakaya — a common, mild highball-style order that bartenders will recognize immediately even if you just point at a vending machine bottle and say “this, with shochu.”

    Best Season and Timing to Try It

    Calpis is marketed heavily as a summer drink in Japan — convenience store chillers fill up with it from late April through September, and that’s also when seasonal fruit flavors (peach, grape, lychee) appear and disappear. If you’re visiting outside summer, the standard Calpis Soda and Water are sold year-round, but the limited flavors are harder to find from October onward. For iced versions and shaved ice, aim for July–August when heat makes the vendors push it hardest; for the home-dilution concentrate, timing doesn’t matter since it’s a pantry item sold all year.

    Common Mistakes to Avoid

    • Confusing the concentrate with the ready-to-drink bottle. The concentrate bottle looks almost identical to the Soda bottle at a glance. Drinking the concentrate straight is intensely sweet and sour — check the label for “希釈用” (for dilution) before buying if you plan to drink it on the spot.
    • Assuming it’s a yogurt drink with live cultures like a probiotic yogurt beverage. The fermentation happens during production, but the final bottled product isn’t a probiotic supplement — don’t buy it expecting the same effect as drinking yogurt.
    • Shaking a warm bottle and expecting it to behave like soda. Calpis Soda is only lightly carbonated. It won’t foam over dramatically, but it also won’t taste as good warm — buy it cold or expect a flat, overly sweet experience.
    • Overlooking the non-soda “Water” version. Travelers who don’t like the fizz often assume Calpis is always carbonated and skip it. Calpis Water (non-carbonated) is usually right next to the Soda on the same shelf.

    Pairing and Bringing It Home

    Calpis pairs well with salty or sour snacks — it cuts through fried convenience store food nicely, and some travelers enjoy it alongside tangy Japanese pickles; if you’re already collecting distinctly Japanese fermented flavors for your trip, it’s worth reading about umeboshi, Japan’s pickled plum, as a savory counterpart to Calpis’s sweet-tart profile. For bringing bottles home, the concentrate travels better than the carbonated Soda (no fizz to worry about in checked luggage, and it’s not a liquid-restricted item in checked bags, though it will count toward carry-on liquid limits if hand-carried). A 470ml concentrate bottle weighs enough that packing two or three is usually the practical limit before it eats your luggage weight allowance.

    Calpis is one of the easiest “try something uniquely Japanese” experiences on a trip — it’s cheap, sold on every corner, and doesn’t require planning a special visit. Grab one cold from any convenience store fridge, and if you like it, pick up the concentrate before you fly home so the taste doesn’t stay a one-trip memory.

  • Umeboshi: Japan’s Pucker-Inducing Pickled Plum and the Best Brands to Buy

    Umeboshi: Japan’s Pucker-Inducing Pickled Plum and the Best Brands to Buy

    Photo by Jinomono Media on Unsplash

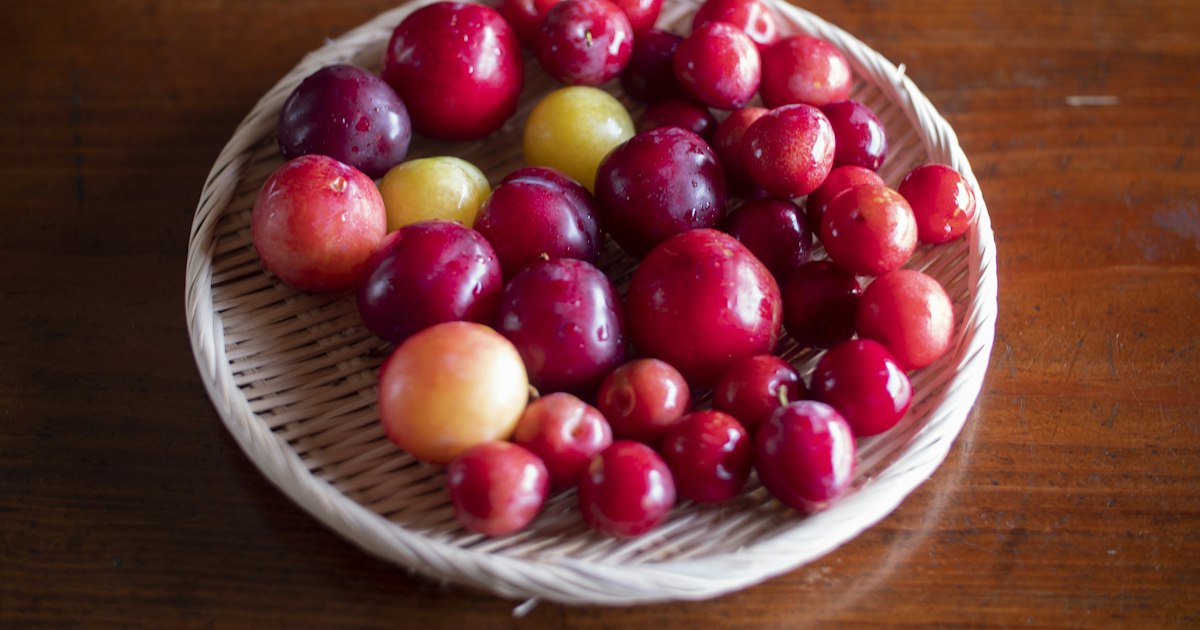
    Somewhere between a condiment, a hangover cure, and a childhood memory, umeboshi is one of those foods that divides visitors to Japan instantly: you either pucker and reach for water, or you’re hooked for life. If you’ve seen a single startling red-pink circle tucked into the center of a rice ball at a convenience store and wondered what it was, this is it. Here’s what umeboshi actually is, how to try it without wasting money on the wrong grade, and which brands are worth packing in your suitcase.

    What Umeboshi Actually Is

    Umeboshi are Japanese plums — technically a relative of the apricot called ume — that are salt-pickled, sun-dried, and often colored and flavored with red shiso (perilla) leaves. The result is intensely sour, intensely salty, and sometimes sweet if honey or sugar has been added to soften the edge. Traditional umeboshi can be startlingly salty, with sodium content around 10-20% depending on the brand; modern “mild” (usuzuke or hachimitsu/honey) versions cut that down to roughly 5-8% salt and add sweetness, which is almost always the better entry point for first-timers.

    They show up everywhere in Japanese food culture: as the salty-sour heart of an onigiri rice ball, as a small side dish next to a bowl of rice, stirred into dressings, or eaten whole as a digestive aid at the end of a heavy meal. If you’ve ordered oyakodon or katsudon, you may have noticed a single umeboshi tucked on the side of the tray at some shokudo-style restaurants — it’s there to cut the richness, not as decoration.

    How to Try Your First One Without Regret

    Common mistake #1: buying a bag of traditional, heavily salted umeboshi as a first try. The sourness and salt hit hard, and a lot of visitors assume all umeboshi tastes like that and never try it again. Start with something labeled hachimitsu ume (honey plum) or katsuobushi ume (bonito-flavored), which are widely available and much gentler.

    Common mistake #2: eating a whole one in one bite expecting it to behave like a regular dried fruit. The pit is large relative to the flesh — bite around it gradually rather than trying to chew through. Common mistake #3: assuming vacuum-sealed supermarket packs and the loose, pit-in tubs at a department store food hall (depachika) are the same quality — they’re not, and the depachika versions are almost always fresher and better, just pricier.

    Where to Buy It

    You don’t need to seek out a specialty shop; umeboshi is a supermarket and convenience-store staple. For the widest selection in one place, a depachika (department store basement food floor) is hard to beat — Takashimaya, Isetan, and Daimaru locations in Tokyo, Osaka, and Kyoto all carry multiple regional brands, usually from 10am to 8pm, with staff happy to let you sample before buying. Specialty shops near famous ume-producing regions, especially Wakayama Prefecture (which produces roughly half of Japan’s umeboshi, centered on the town of Minabe), sell the premium end of the market in gift boxes.

    For everyday eating rather than gifting, regular supermarkets (Life, Seijo Ishii, Ito-Yokado) stock reliable mid-range bags for 400-900 JPY. If you’re already stocking up on Japanese pantry items in bulk, Costco Japan sells large tubs of umeboshi at a noticeably lower per-gram price than convenience stores, though the flavor skews traditional and salty rather than mild. Train station kiosks and bento counters — the same places that sell eki soba and station bento — almost always have umeboshi onigiri for 130-180 JPY, which is the cheapest and fastest way to try it in context, wrapped in rice.

    Best Brands to Buy, by Budget

    Budget (under 1,000 JPY): Kibun and Kinoshita are reliable supermarket brands sold nationwide in resealable pouches of 10-20 plums; look for the mild “hachimitsu” line as your starting point. These are perfectly good everyday umeboshi and the ones most Japanese households actually eat.

    Mid-range (1,000-3,000 JPY): Nakata Shokuhin and Kishu Umeboshi (both based in Wakayama) sell well-regarded gift-box sets of larger, meatier plums with noticeably better texture than supermarket versions — these are what most Japanese people buy as souvenirs or gifts for family. Look for the grade labels “3L” or “4L,” which indicate larger plum size and generally better quality and texture, not just bigger fruit.

    Splurge (5,000 JPY+): Premium Wakayama brands like Umeya Shoten and Kishu Umegen sell top-grade “nanko-ume” plums — the specific cultivar most prized for umeboshi — in lacquered gift boxes, sometimes aged for a year or more before sale, with a softer, almost custard-like texture that’s genuinely different from anything mass-produced. These make excellent, well-packaged gifts and travel fine in checked luggage since they’re vacuum-sealed.

    Best Season and Timing to Buy

    Fresh ume fruit is harvested in June, and that’s when you’ll see unripe green plums for sale briefly if you want to pickle your own — not practical for most visitors. For buying finished umeboshi, timing barely matters since it’s a shelf-stable, year-round product; the pickling process and salt content mean most varieties keep for 6-12 months unopened, and some traditional high-salt versions keep for years. The one seasonal wrinkle: late December through early January sees a bump in gift-box sales ahead of New Year, when osechi (New Year’s food boxes) sometimes include umeboshi, so selection in depachika food halls is at its best then but prices on gift sets don’t discount.

    Getting There and Practical Tips

    If you want the full regional experience rather than just buying a bag, Wakayama’s Minabe area is reachable by JR from Osaka (around 2 hours to Minabe Station via the Kuroshio limited express, roughly 5,000-6,000 JPY one-way) and has small family-run shops selling direct-from-producer umeboshi, though this is a niche day trip best combined with other Wakayama plans rather than a dedicated visit. For nearly everyone else, a depachika visit in Tokyo, Osaka, or Kyoto accomplishes the same goal — tasting multiple brands side by side — in twenty minutes with zero travel.

    A few practical notes for buying as a souvenir: vacuum-sealed pouches travel far better than loose tubs with liquid brine, which can leak in luggage; airport duty-free shops rarely carry umeboshi, so buy before you head to the airport; and if you’re flying to the US, dried/pickled umeboshi in sealed commercial packaging is generally fine to bring back, though double-check current customs rules for your destination country since produce regulations change. Finally, don’t buy umeboshi as your only snack for a long flight unless you genuinely love sour food — it’s a condiment, not trail mix, and the salt will leave you thirsty for hours.

  • 551 Horai: Osaka’s Iconic Steamed Pork Bun and the Line Worth Standing In

    551 Horai: Osaka’s Iconic Steamed Pork Bun and the Line Worth Standing In

    Photo by Danish Prakash on Unsplash

    If you spend even half a day wandering Namba or Shin-Osaka Station, you’ll see it: a steady line of people waiting in front of a red-and-white counter, clutching numbered tickets, waiting for pale, pillowy buns to come out of a steamer. That’s 551 Horai, and in Osaka it’s less a snack than a civic institution. Here’s what it is, where to get it, and how to avoid the rookie mistakes that waste time or money.

    What Is 551 Horai, and Why Do Osakans Queue for It?

    551 Horai (蓬莱551, usually written simply “551”) is an Osaka-born Chinese-food chain founded in 1945, built almost entirely around one item: the butaman, a steamed bun filled with seasoned minced pork, onion, and a savory-sweet sauce. It’s similar in concept to a Chinese baozi, but 551’s version has a distinct, slightly sweet dough and a filling built to be eaten plain — no dipping sauce needed, no chopsticks required.

    The local joke is that Osakans “won’t carry 551 across the Yodogawa River” — meaning they treat it as something you eat in Osaka, not something worth exporting, because the chain has deliberately stayed concentrated in the Kansai region (Osaka, Kyoto, Hyogo, Nara) rather than expanding nationwide. There’s no permanent branch in Tokyo; the chain occasionally appears at Tokyo department-store food fairs for a few days, but if you want it reliably, you need to be in Kansai. That scarcity is part of why the lines exist — it’s a true regional specialty, not something you can pick up at any convenience store.

    The Namba Honten: 551 Horai’s Flagship Store

    The main store (honten) sits in Namba, a short walk from Namba Station — reachable via the Osaka Metro Midosuji Line, the Nankai Namba terminal, or the Kintetsu/Hanshin lines that converge in the area. It’s a full restaurant as well as a takeout counter, so you can sit down and order butaman alongside fried rice, ramen, and other Cantonese-leaning dishes, not just grab buns and go.

    This location tends to have the most reliable stock and the widest menu, but it also draws tour groups, so midday on weekends can mean a genuine wait. If you want the sit-down experience, go early for lunch (opening is typically around 11:00) rather than at the noon peak.

    Where Else to Find 551 Horai Across Osaka

    You don’t have to go to Namba. 551 Horai runs dozens of takeout counters across Osaka, and for visitors, three locations matter most:

    • Shin-Osaka Station — the single busiest counter in the chain, because it sits right where Shinkansen travelers grab a box of buns for the trip home. Expect the longest lines here, especially in the evening rush and around holiday travel windows.
    • Kansai International Airport (KIX) — convenient for a last pre-flight bite or an omiyage (souvenir) purchase, located in the terminal shopping area before security.
    • Department store basements (depachika) in Umeda, Tennoji, and Shinsaibashi — these often have shorter lines than Namba or Shin-Osaka since they’re less of a single-purpose destination.

    Opening hours vary by location: standalone shops generally run from around 10:00 to 21:00, while department store counters follow the store’s hours (often closing earlier, around 20:00 or 20:30). Station kiosks tend to open earliest and close latest. Always check the specific branch, since hours shift seasonally and around holidays.

    How to Order, What It Costs, and What Else Is on the Menu

    Ordering is simple: take a numbered ticket (or queue directly at busier counters), tell the staff how many buns you want, and pay at the register before or after collection depending on the branch. Buns are sold both individually, for eating on the spot, and boxed in sets of 2, 5, 10, or more for takeaway.

    As a rough guide to pricing (expect gradual increases over time, so treat these as approximate): a single butaman runs a little over ¥200, with boxed sets scaling up from there — a box of 10 generally lands somewhere in the ¥2,000–2,500 range. Beyond the pork bun, the two other menu items worth knowing:

    • Shumai — open-topped pork dumplings, sold boxed, a natural pairing if you’re building an omiyage box with some variety.
    • Mango ice cream bars — an unexpected but genuinely popular side item, often sold from a small freezer case near the counter. Many locals buy one to eat while waiting for their buns to steam.

    If you’re assembling a broader Osaka snack crawl, this pairs well with other regional rice and bowl dishes — see our guide to oyakodon and katsudon if you want something more substantial for lunch before or after.

    Timing Your Visit: When the Lines Are Shortest

    Lines move fast — 551 Horai’s counters are set up for volume, so even a long-looking queue often clears in 10–15 minutes. That said, timing still matters:

    • Worst times: lunchtime (12:00–13:30) at Namba, and the evening Shinkansen rush (17:00–19:30) at Shin-Osaka Station.
    • Best times: mid-morning (10:00–11:00) right after opening, or mid-afternoon (14:00–16:00), when both tourist and commuter traffic dips.
    • Seasonal note: lines lengthen noticeably around Golden Week, Obon, and New Year’s, when travel volume through Shin-Osaka and KIX spikes and buns are being bought in bulk as gifts.

    If you’re killing time at a station waiting for a quieter window, it’s worth knowing how other station food stalls work too — our guide to eki soba standing noodle stalls covers the fast-ordering etiquette that applies at busy station counters generally.

    Common Mistakes First-Timers Make

    • Buying too far ahead of eating. The buns are best eaten within a short window of purchase — they lose their steamed texture and go slightly gummy as they cool. If you’re buying to eat immediately, don’t buy an hour before you plan to eat.
    • Assuming you can find it in Tokyo. Outside of occasional department-store pop-up fairs, 551 Horai doesn’t have permanent Tokyo locations. Don’t save your “must-try” list item for a Tokyo leg of the trip — get it in Kansai.
    • Not checking if reheating is possible. If you’re taking a box home as a souvenir (rather than eating on the spot), you’ll need to steam or microwave them later — they’re not meant to be eaten cold, and many travelers forget they’ll need kitchen access.
    • Underestimating how fast the queue actually moves. Some visitors skip the line assuming it’ll take 30+ minutes; in practice it’s usually much faster, and skipping means missing out.

    Quick Tips for Taking 551 Horai Home

    Boxed sets travel reasonably well for a few hours if kept cool, which is why they’re a standard omiyage pickup at Shin-Osaka before boarding the Shinkansen. If you’re flying out of KIX and want to bring buns back to your home country, be aware that fresh meat-filled products like these typically can’t clear customs in most countries — treat it as a trip souvenir to eat before departure, not a take-home gift across borders.

    After you’ve had your fill of something savory, Osaka’s sweet shops are worth a stop too — if red bean and mochi desserts are more your speed, our guides to ichigo daifuku and youkan cover two more classic options you’ll spot in the same department store basements as 551 Horai’s counters.

  • Yanagawa: Fukuoka’s Canal-Boat Town Day Trip

    Yanagawa: Fukuoka’s Canal-Boat Town Day Trip

    Photo by Artem Shuba on Unsplash

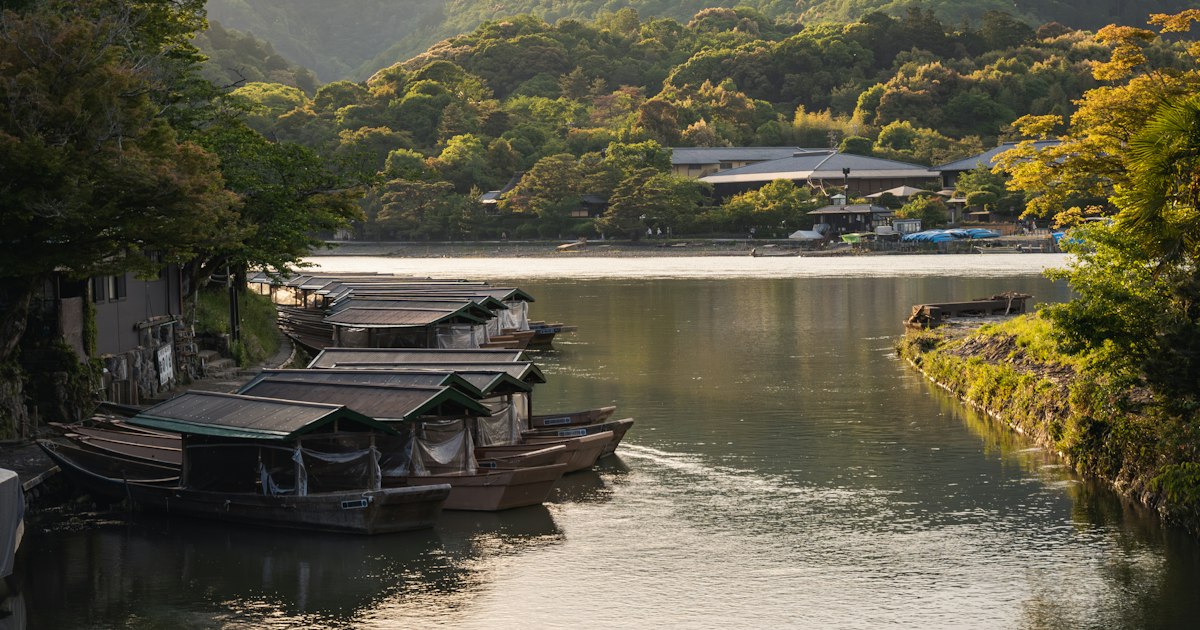
    An hour south of Fukuoka city, the small town of Yanagawa is laced with narrow canals that locals have used for irrigation and transport for over 400 years. Today the main reason to visit is a slow, flat-bottomed boat ride through those canals, poled by a guide who sings and ducks under stone bridges, followed by a lunch of steamed eel. It’s an easy, low-effort day trip that feels completely different from the shopping streets and ramen counters of central Fukuoka — and it works as a half-day or full-day add-on if you’re already based in Fukuoka or Kumamoto.

    What Yanagawa actually is

    Yanagawa was the seat of the Tachibana clan during the Edo period, and the castle town they built still drains through roughly 60 km of canals (hori) that crisscross the town between rice fields and old samurai houses. The canals aren’t a tourist reconstruction — they’re the original waterworks, now lined with willow trees and used almost entirely for sightseeing boats. The town itself is small enough to see on foot in an afternoon: the boat route, the former Tachibana villa and garden (Ohana), and a cluster of eel restaurants are all within a 15–20 minute walk of each other.

    Getting there from Fukuoka

    Take the Nishitetsu Tenjin Omuta Line from Nishitetsu Fukuoka (Tenjin) Station. The limited express (tokkyu) takes about 50 minutes to Nishitetsu Yanagawa Station and costs roughly ¥950 one-way; local trains run more often but take closer to 70–80 minutes with a transfer. From Hakata Station, you’ll need to get to Tenjin first (a short subway or walk), so budget a bit of extra time if you’re starting there. From the station, it’s about a 10–15 minute walk to the main boat docks, or a short taxi ride (around ¥700–900) if you’re carrying luggage or it’s raining. There’s no need to rent a car — the whole appeal of Yanagawa is a compact, walkable town built around water, not roads. If you want a quick bite before boarding, Nishitetsu Fukuoka Station has a few quick-service noodle counters similar to the standing eki soba stalls found at stations around the country — handy if your train is tight on time.

    Riding the boat (donko-bune)

    Several boat companies operate from different docks around town — Yanagawa Kankou, Ohana Matsuoka, and Yanagawa Donko Boat are the main ones — but they all run the same basic experience: a flat punt poled by a single guide, carrying 20–25 passengers along a roughly 4 km route that takes about 70 minutes, ending near the Ohana garden. Adult fares run about ¥1,800–2,000, with discounts for elementary-school-age children (roughly ¥900–1,000); exact prices vary slightly by operator and season, so check the board at whichever dock you walk up to. Boats generally run daily from around 9:00 or 10:00 am until 4:00 pm, departing whenever there are enough passengers rather than on a fixed timetable, so you usually don’t need to book ahead on a normal day — just show up at a dock. Boats are suspended in heavy rain or when water levels are too low, which happens occasionally, so build in flexibility rather than treating it as the single fixed event of your day.

    The guide narrates in Japanese (sometimes with a laminated English sheet) and will duck the boat under very low stone bridges — lean in when told to. If you’re comparing this to other Japan boat rides, it’s a much slower, more rural experience than something like the Tokyo Water Bus along the Sumida River, which is a commuter-style city cruise; Yanagawa is closer to being poled through someone’s backyard.

    Best season and timing

    Yanagawa is a year-round destination, but the canals change character with the seasons:

    • Late March–early April: plum and early cherry blossoms along the banks; comfortable boat temperatures.
    • Early June: hydrangeas (ajisai) bloom thickly along the water, one of the most photographed times of year.
    • Late November–early December: autumn foliage around the Ohana garden, with cooler but still comfortable boat rides.
    • Mid-December–February: “kotatsu boats” — the same boats fitted with heated blankets and a charcoal brazier, often with hot amazake (sweet, low-alcohol rice drink) served on board. This is a genuinely different, cozier version of the ride, closer in spirit to the roadside hot canned drinks culture of Japanese winters than the summer version of the same route.

    Midsummer (late July–August) is the one stretch to think twice about — the ride is pleasant but the midday heat and humidity on an open boat with no shade can be rough; aim for an early morning departure if you’re visiting then.

    What to eat: unagi seiro mushi

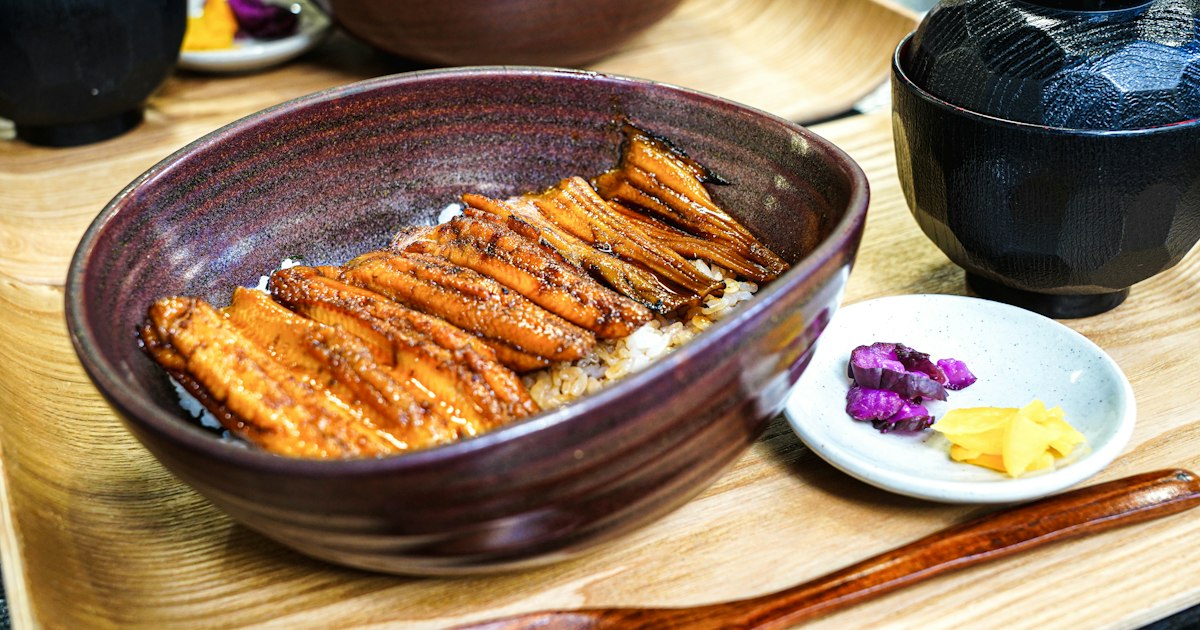
    Yanagawa’s signature dish is unagi no seiro mushi — grilled eel and sweetened rice steamed together in a lacquered box, finished with a thin layer of egg. It’s a regional variation on the more familiar unagi don you’ll find elsewhere (see our guide to donburi-style rice bowls for how these bowl dishes generally work), but steaming rather than simply topping the rice makes it noticeably richer. Expect to pay roughly ¥3,000–4,500 for a set meal at one of the specialist eel restaurants clustered near the boat docks and Ohana garden; lines form at the well-known spots around lunchtime (roughly 11:30 am–1:30 pm), so either arrive right at opening or expect a 20–30 minute wait on weekends.

    Ohana: the garden and former villa

    The boat route ends near Ohana, the former seaside villa and garden of the Tachibana family, now partly a museum and partly a ryokan. Entry to the garden and historic rooms runs around ¥600–700 for adults, and it’s worth the 30–40 minutes it takes to walk through — the pond garden framed by pine trees is a quieter counterpoint to the boat ride’s motion and narration. It’s an easy add-on since it’s essentially the endpoint of the boat route anyway.

    Common mistakes to avoid

    The most common misstep is treating Yanagawa as a quick stop — if you only do a drive-by for photos and skip the boat, you’ve missed the actual point of the town. Conversely, trying to combine Yanagawa with a second major destination (like Dazaifu or Kurume) on the same day often backfires because the train connections aren’t direct and you’ll spend more time in transit than at either place; pick one or the other unless you’re starting very early. Cash is still worth carrying — some of the smaller boat-ticket counters and eel restaurants don’t take cards, even though convenience stores and the station do. Finally, don’t skip checking the weather the morning of your visit: boats run rain or shine up to a point, but heavy rain can cancel sailings outright, and there’s no way to confirm this remotely before you’re standing at the dock.

  • Mister Donut: Japan’s Beloved Donut Chain and the Cult of the Pon de Ring

    Mister Donut: Japan’s Beloved Donut Chain and the Cult of the Pon de Ring

    Photo by PJH on Unsplash

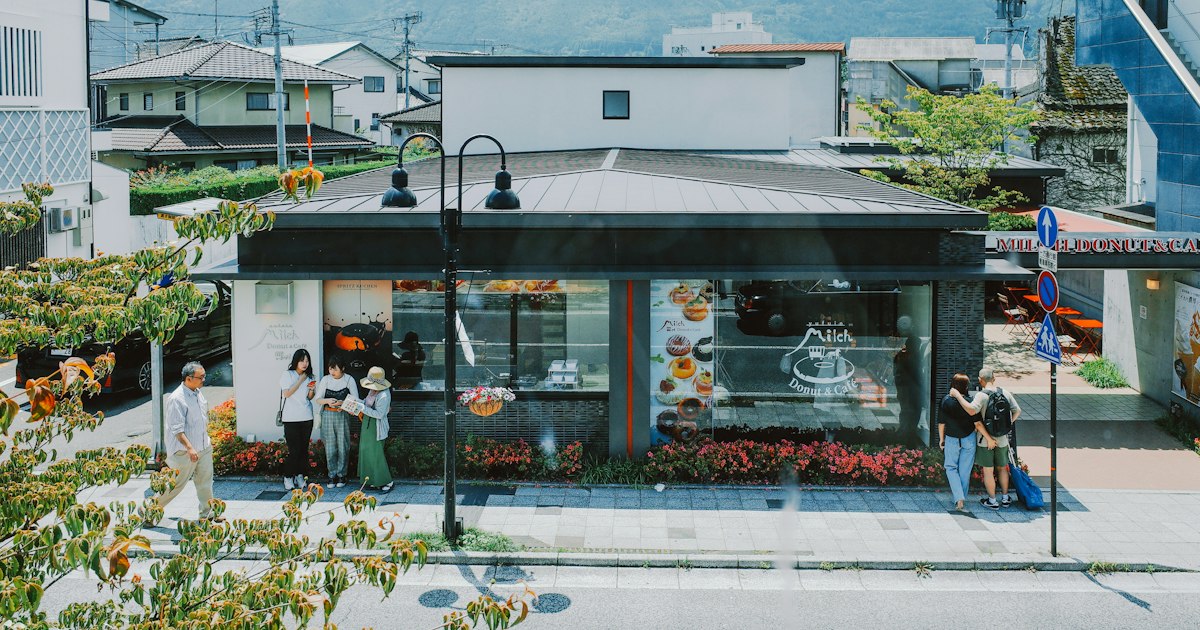
    Walk into almost any Japanese shopping mall, train station concourse, or suburban roadside strip, and you’ll eventually spot the pink-and-white logo of Mister Donut. Known locally as “Misdo” (ミスド), it’s the donut chain that quietly outlasted Krispy Kreme’s Japan expansion and Dunkin’s near-total withdrawal from the country, and it did it with a donut most Westerners have never heard of: the Pon de Ring. If you’re planning a Japan trip and want a cheap, genuinely good snack between sightseeing stops, here’s what you need to know before you order.

    What Makes Mister Donut Different From a Western Donut Shop

    Mister Donut Japan isn’t a franchise import — it’s operated by Duskin Co., a Japanese company that opened its first store in Takatsuki, Osaka, in 1971. Over five decades it localized the menu so heavily that it now barely resembles the American chain it licensed its name from. There’s no cake donut dominance here; the lineup leans toward lighter, chewier, less sugary textures that suit Japanese palates, plus savory items like curry pan and misdo’s own fried chicken, which you won’t find at most Western donut counters. With roughly 900 locations nationwide, it’s the largest donut chain in Japan by a wide margin.

    The Pon de Ring: Why This One Donut Has a Cult Following

    The Pon de Ring (ポン・デ・リング) is Mister Donut’s signature item and the reason the chain has such devoted fans. Instead of standard wheat dough, it’s made with a wheat-and-tapioca-starch blend, which gives it a bouncy, mochi-like chew instead of the usual soft crumb. It’s shaped as a ring of eight connected dough balls — visually distinctive and easy to pull apart by hand, which is part of the appeal. The plain glazed version costs around ¥151-194 depending on the store and any price revisions in effect, and it comes in rotating flavors: matcha, chocolate, kinako (roasted soybean flour), and seasonal versions tied to sakura season in spring or chestnut in autumn. If you only try one thing at Mister Donut, make it this one — it’s genuinely unlike donuts you’ll find outside Japan, in the same way daifuku trades Western-style sweetness for a chewier, rice-based texture.

    What Else to Order and What It Costs

    Beyond the Pon de Ring, the menu is worth browsing rather than rushing. A few reliable picks:

    • French Crullers — light, eggy, slightly caramelized exterior, around ¥162-183
    • Honey Dip — the closest thing to a classic American glazed donut, around ¥151
    • Old Fashioned — denser, less sweet, good with black coffee, around ¥172
    • Angel Custard Cream and seasonal fruit donuts — limited-run items, often ¥200-280
    • Curry pan and savory buns — a non-sweet option if you want something closer to a light lunch, roughly ¥230-280

    Most stores run a “Pon de Set” style deal where ordering a drink alongside a donut adds only around ¥100-150 to the total rather than paying full drink price separately — ask staff or check the register display, since this isn’t always posted on the main menu board. A box of a dozen mixed donuts to take home typically runs ¥1,800-2,400, which makes Mister Donut a cheap, crowd-pleasing option if you’re bringing a snack back to a hostel or Airbnb group. For a coffee pairing on the go, Japan’s hot vending machine canned coffee is a decent backup if the in-store line is long.

    Where to Find One and When They’re Open

    Mister Donut locations cluster in shopping malls (AEON Mall food courts are a near-guarantee), train station buildings, and suburban roadsides — they’re less common in the densest parts of central Tokyo than konbini or standalone cafés, so it’s worth checking a map before you build a stop around one. Typical hours run from around 7:00 or 9:00 to 21:00 or 22:00, though station-adjacent locations sometimes open earlier for the commuter crowd and mall locations follow the mall’s own hours. Seating varies a lot: some stores have full café-style seating with drink refills, others are takeout-counter only, especially smaller station kiosks. If you’re combining a donut run with a day of station-hopping, it pairs naturally with a stop at an eki soba stall for something more substantial before or after.

    Best Timing and Seasonal Reasons to Visit

    Mister Donut leans hard into limited-time flavors and character collaborations, so timing your visit can genuinely change what you get to try. Spring (roughly February-April) usually brings sakura-themed pink donuts and sakura-flavored drinks. Autumn brings chestnut (kuri) and sweet potato flavors. Mister Donut also regularly runs “Misdo de Pon” promotions where a minimum purchase gets you a limited character toy — Pokémon, Chiikawa, and Sanrio collaborations have all appeared in recent years, and these tend to draw longer lines and can sell out mid-promotion, so go earlier in the run if a specific toy matters to you. Weekday mid-morning (around 10:00-11:00) and mid-afternoon (14:00-16:00) are the quietest windows; avoid the lunch rush (12:00-13:00) at mall locations, when office workers and students pack in.

    Common Mistakes First-Timers Make

    • Assuming it’s a cake-donut shop like at home. If you order expecting a dense American-style donut, the Pon de Ring’s bouncy texture can be a surprise — in a good way, but know what you’re getting into.
    • Skipping the drink set deal. Ordering a donut and a separate drink at full price instead of asking about the combo pricing means overpaying by a meaningful margin.
    • Not checking seating availability. Smaller locations are takeout-only; if you want to sit and eat, look for a larger mall or roadside store.
    • Visiting right when a collab drops. Toy promotions can mean 20-30 minute waits on launch day — go a few days in rather than opening day if you can.
    • Forgetting cash works everywhere but IC cards (Suica/Pasmo) and apps are faster. Most locations accept both, but tapping an IC card speeds up the line considerably during busy hours.

    Budget, Mid-Range, and Splurge Options

    On a budget, a single Honey Dip or Pon de Ring plus a set-price coffee comes in under ¥350 — a legitimately cheap snack by Tokyo standards. Mid-range, a box of 6-8 mixed donuts for ¥1,200-1,600 is a good way to sample flavors across a group or bring something back for travel companions. For a splurge, seasonal or collaboration items with premium fillings (custard, matcha cream, limited fruit donuts) run ¥250-350 each, and pairing a full dozen box with a few of the French Crullers and Old Fashioneds makes for a solid afternoon tea spread if you’re hosting friends in a rental kitchen. However you order, it’s one of the easiest, least expensive ways to taste something distinctly Japanese without needing a reservation or speaking much Japanese at all — just point at the case.