Japan Trove

Category: Travel

Practical, up-to-date guides for traveling in Japan — itineraries, rail passes, eSIMs, where to stay, seasonal timing, etiquette, and the local know-how that makes a trip smoother. Written with real Japanese sources so you get the answer that actually works on the ground, not the recycled tourist one.

  • Watching J-League Soccer in Japan: Tickets, Stadiums & Fan Culture

    Watching J-League Soccer in Japan: Tickets, Stadiums & Fan Culture

    Photo by Yanhao Fang on Unsplash

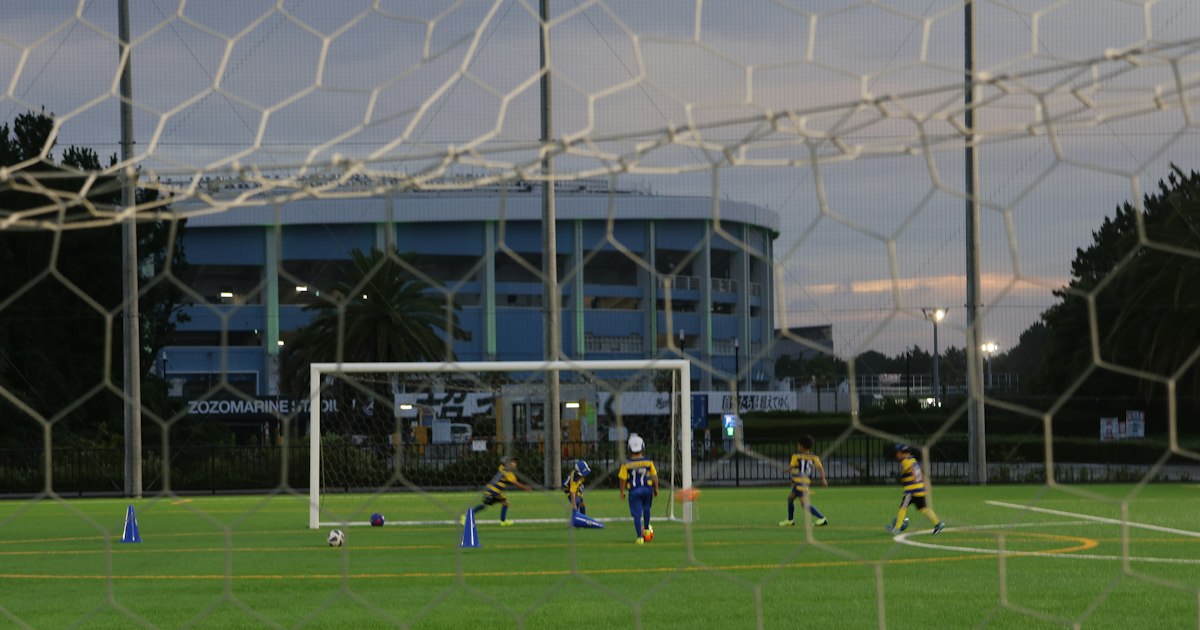
    Japanese football doesn’t get the same hype abroad as sumo or baseball, but a J-League match is one of the most enjoyable and affordable nights out you can have in Japan. The stadiums are clean and easy to navigate, the crowds are famously well-behaved, and the atmosphere in the supporter sections — with drums, flags, and 90 minutes of continuous chanting — rivals anything in Europe or South America. Here’s what you actually need to know to buy tickets, pick a stadium, and blend in like a regular.

    Understanding the League and Season

    J-League is split into three professional divisions: J1 (the top flight, around 20 clubs), J2, and J3. Most visitors will want a J1 match for the best atmosphere and biggest stadiums, though J2 games are cheaper and often just as passionate — smaller clubs tend to have the loudest ultras precisely because promotion or relegation is on the line.

    For decades the season ran March to early December, with a mid-summer break. J-League has been transitioning to a fall-to-spring calendar (roughly August to May) starting with the 2026–27 season, similar to European leagues, so double-check the current fixture calendar on the official J-League site or a club’s homepage before booking flights — don’t assume the old March–December window still applies. Whichever calendar is in effect, avoid outdoor day games in July and August if you can; the heat and humidity are brutal, and evening “nighter” kickoffs (typically 19:00) are far more comfortable.

    How to Buy Tickets

    Tickets go on sale in stages — season-ticket holders and club members first, then general public sales roughly 2–4 weeks before kickoff. For non-marquee matches you can often just buy at the stadium box office on match day, but for derbies (Saitama Derby between Urawa Reds and Omiya Ardija, the Yokohama Derby, or anything involving Vissel Kobe or Urawa Reds) buy in advance.

    • General admission (自由席, jiyuseki): roughly ¥2,000–3,500, unreserved seating in end/side sections.
    • Reserved seating (指定席, shiteiseki): roughly ¥4,000–8,000 depending on category and opponent.
    • Category S / hospitality seats: ¥10,000–20,000+, padded seats, better sightlines, sometimes food included.

    Main platforms: the official J-League Ticket site, Ticket Pia, e+ (eplus), and Lawson Ticket (which lets you pay and print at any Lawson convenience store — handy if you don’t have a Japanese credit card). Club official sites usually link directly to whichever vendor they use. Most platforms now accept English and foreign cards, but some smaller-club sites are Japanese-only; a hotel concierge or Google Translate’s camera mode handles this fine.

    Best Stadiums to Experience

    Not every J-League stadium is worth the trip, but a handful stand out:

    • Saitama Stadium 2002 (Urawa Reds) — capacity 63,700, the loudest, most intense home crowd in Japan. Reds supporters fill the entire stadium with flags and chanting for the full 90 minutes.
    • Nissan Stadium, Yokohama (Yokohama F. Marinos) — Japan’s largest stadium (72,000+), hosted the 2002 World Cup final; a good pick if you want scale.
    • Todoroki Stadium (Kawasaki Frontale) — smaller and steep-sided, so you’re right on top of the pitch; Frontale’s supporters are known for creative pre-match entertainment.
    • Kashima Soccer Stadium (Kashima Antlers) — a rural, single-purpose football ground (no athletics track), which makes for excellent sightlines; Antlers are the league’s most decorated club.

    Getting to the Stadium

    Most J1 stadiums are built for match-day crowds and are walkable from a dedicated station, or reachable by shuttle bus from a nearby major station — Saitama Stadium, for example, is a 15-minute walk from Urawa-Misono Station, with additional shuttle buses running from Higashi-Urawa on match days. Trains after the final whistle get packed fast, so don’t dawdle if you need a specific connection.

    If you’re chasing games at smaller regional clubs in Hokkaido, Kyushu, or the San’in coast, a rental car can be the only practical option — in which case it’s worth reading up on ETC cards and expressway tolls before you go, since most stadium parking lots and toll gates assume you already have one set up. For long hauls between away games — say, catching a Sunday match in Hiroshima and needing to be in Tokyo by Monday — a sleeper train can save you a hotel night. And if you miss the last train home after a night game, a manga kissa is a legitimate, cheap way to wait out the gap until trains restart around 5am.

    Fan Culture and Etiquette

    J-League crowds are organized and rule-following, and it pays to know the unwritten code before you sit down:

    • Supporter sections (usually behind each goal) stand and sing for the entire match, led by a capo with a megaphone and drums. If you sit in the home end, you’re expected to at least stand and clap along — sitting quietly reading the program is considered rude.
    • Away fans are strictly segregated into a designated block, often with extra staff and sometimes fencing. Never wear the away team’s colors in a home supporter section, or vice versa.
    • Trash goes home with you. Fans famously clean up their own section after the match, sorting recycling into the correct bins — join in rather than leaving your cup on the seat.
    • Scarves (マフラータオル, muffler towels) are the classic souvenir, sold at club shops and pop-up stalls outside the stadium for ¥2,500–3,500, and held aloft during the pre-match anthem.
    • After a win, expect the home end to keep singing for 15–20 minutes after the final whistle as players applaud each stand in turn — don’t rush for the exit if you want to see this.

    Post-match, most fans head to nearby izakaya or standing bars near the station to relive the game — if you want to drink alongside locals without committing to a full sit-down meal, a tachinomi standing bar is exactly the right register for a quick post-match pint.

    Common Mistakes to Avoid

    • Buying from unofficial resale sites. Ticket touting outside stadiums is illegal in Japan and reseller markups on sites like Yahoo Auctions can be steep with no refund protection if the match is postponed for weather.
    • Assuming credit cards work everywhere. Many stadium food stalls and some smaller club shops are cash-only; bring ¥5,000–10,000 in cash for match day.
    • Underestimating derby demand. Marquee fixtures (Saitama Derby, anything against Kashima or Kobe) can sell out within hours of general sale opening.
    • Skipping the weather check. Most J-League stadiums have partial or no roof cover; a sudden downpour in June or a scorching August afternoon will genuinely ruin an uncovered general-admission seat.

    Budget, Mid-Range, and Splurge Options

    • Budget (~¥2,000–3,000): general admission in an end stand, ideally in or near the supporter section for the full atmosphere.
    • Mid-range (~¥5,000–7,000): reserved back/side stand seating — good sightlines, a bit more personal space, still an easy walk from the same station.
    • Splurge (¥10,000+): Category S or hospitality seating, sometimes bundled with a pre-match meal or lounge access — worth it for a Cup final or a once-in-a-trip derby.

    Even at the budget end, a J-League match is one of the best-value evenings in Japan — cheaper than a baseball game, easier to get tickets for than sumo, and a genuine window into how Japanese fans express themselves as a group rather than as individuals.
  • Drone Laws & Photography Permits in Japan: What Travelers Need to Know

    Drone Laws & Photography Permits in Japan: What Travelers Need to Know

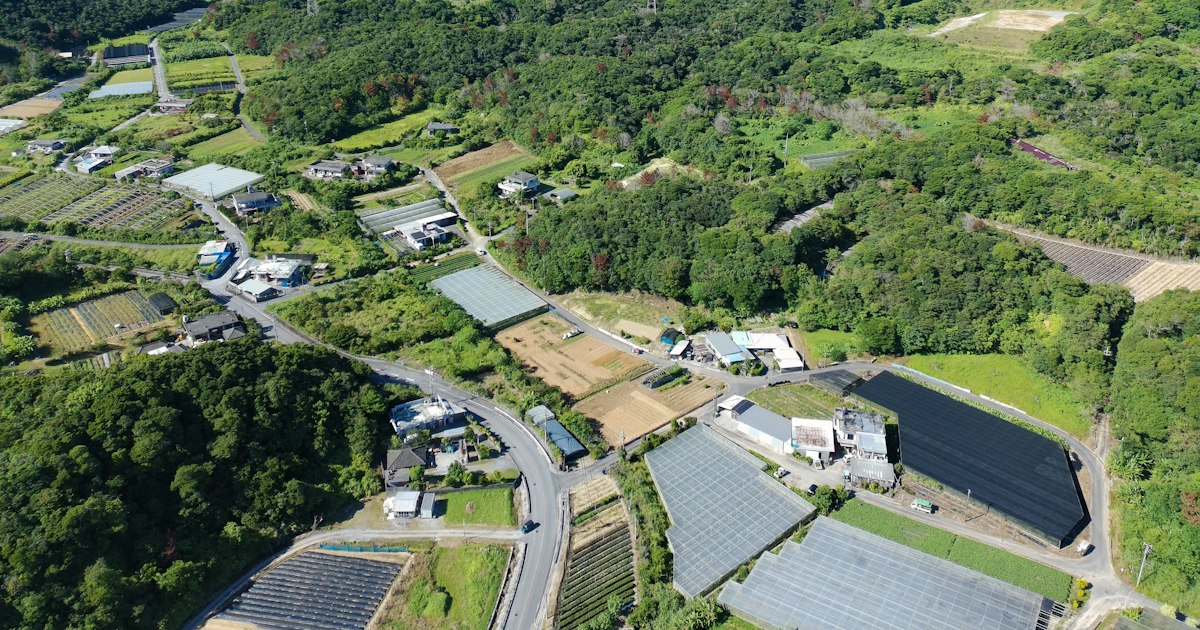
    Photo by Erik Groh on Unsplash

    Japan looks made for drone photography — terraced rice fields, volcanic coastlines, snow-dusted castle towns — but it’s also one of the more tightly regulated countries in Asia for flying one. The rules changed significantly in 2022 with a new national registration system, and most visitors don’t discover the details until their drone is confiscated at customs or a park ranger flags them down mid-flight. Here’s what actually applies to a traveler bringing a drone into Japan, not just the headline law.

    The 100-gram threshold that decides everything

    Japan’s Civil Aeronautics Act regulates any drone weighing 100 grams or more (including battery), which covers almost every consumer model — even the DJI Mini series sits well above that line. Drones under 100g are exempt from national registration and most Aviation Act flight restrictions, though they’re still subject to local park rules, the Small Unmanned Aircraft Flight Prohibition Act around sensitive sites, and Radio Law rules on frequency use. If your drone is 100g or heavier, assume the full rulebook below applies to you.

    Registering your drone before you fly

    Any drone 100g+ must be registered with Japan’s Ministry of Land, Infrastructure, Transport and Tourism (MLIT) through the online DIPS2.0 system before its first flight in Japan — this applies to foreign visitors, not just residents. You’ll need a passport, a credit card, and the drone’s serial number; registration for overseas addresses is permitted. Fees run roughly ¥900–2,400 per drone depending on the method, and you’ll receive a registration number that must be displayed on the aircraft (a sticker or engraving works). Processing has historically taken anywhere from a few days to a couple of weeks, so apply well before your trip — do not plan to register at the airport. Flying an unregistered drone can carry a fine of up to ¥500,000.

    Unlike some countries, Japan does not require a pilot license (the national Level 1/2 qualification introduced in December 2022) for ordinary recreational flying. That license only matters for advanced operations like flying beyond visual line of sight over people — well outside what a typical traveler attempts.

    No-fly zones that catch almost every tourist

    Even with a registered drone, you need prior approval from MLIT (also filed through DIPS2.0, ideally submitted at least 10 business days ahead) to fly:

    • Inside a Densely Inhabited District (DID) — which covers the vast majority of central Tokyo, Kyoto, Osaka, and every other major city
    • Above 150 meters altitude
    • At night
    • Beyond your visual line of sight
    • Within 30 meters of people, vehicles, or buildings not involved in the flight
    • Over crowds or events

    Separately, the Small Unmanned Aircraft Flight Prohibition Act bans flying near the Imperial Palace, the Diet building, ministries, nuclear facilities, US and Self-Defense Force bases, and airports, regardless of DID status — no permit process gets you around this one. Violations here can mean fines up to ¥500,000 and, in serious cases, criminal penalties. Practically speaking, this means the postcard shots of Kinkaku-ji, Shibuya Crossing, or Fushimi Inari’s torii tunnels are off-limits by drone without a hard-to-obtain permit — and many of these sites also have their own outright bans on private property, so permission from MLIT wouldn’t help anyway.

    Where you can actually fly legally

    The good news: rural and less-populated Japan is wide open. Farmland, coastline, and mountain areas outside DID zones generally don’t require the special permission described above, only registration. Hokkaido is the classic choice — the rolling lavender fields and patchwork hills around Furano & Biei are largely outside dense urban districts and reward aerial shots of the color-block terrain, especially in July when the lavender peaks. Further north, the remote flower islands of Rebun & Rishiri off Wakkanai offer coastal cliffs and near-total quiet, though check conditions carefully since strong sea winds are common even in summer.

    Smaller castle towns can also work well if you check local ordinances first — somewhere like Tsuwano in the San’in region has far less air traffic and foot traffic than Kyoto, making it easier to plan a compliant flight, though you should still confirm you’re outside any DID boundary using MLIT’s public map viewer on the DIPS2.0 site before taking off.

    One important caveat: national parks are a separate layer of regulation. Many, including parts of Fuji-Hakone-Izu, the Japan Alps, and Shiretoko, restrict or ban drones in their special protection zones under Ministry of Environment rules, independent of the Aviation Act. Always check with the specific park office, not just the aviation map, before flying in protected nature areas.

    If you’re driving to a remote shooting location

    Many of the best legal drone spots — coastal cliffs, farmland ridges, mountain passes — are only practical to reach by rental car, since trains won’t get you to the exact vantage point. If that’s your plan, budget for expressway tolls, which add up fast on long rural routes; renting an ETC card at the counter saves you from fumbling cash at toll gates and often unlocks discounted rates. Our guide to ETC cards and expressway tolls covers what it costs and how to set it up.

    Beyond drones: general photography permit rules

    Drones aren’t the only thing that needs clearance. Tripods and monopods are banned or restricted at many shrines, temples, museums, and train stations, both for safety and to keep pathways clear during busy hours. Commercial or professional shoots (anything involving a crew, models, or clear commercial intent) at public gardens and parks — Shinjuku Gyoen and the Tokyo Metropolitan Gardens among them — require a separate advance application and fee, even without a drone involved. If you’re shooting content for work rather than personal memories, check the specific venue’s website before you show up with gear.

    Common mistakes that get travelers fined or stopped

    • Assuming a “toy” drone is exempt. Most beginner and mid-range consumer drones exceed 100g once the battery is in.
    • Registering after arrival. DIPS2.0 processing isn’t instant — start it from home.
    • Trusting Google Maps instead of the official DID map. City boundaries don’t match DID boundaries; use MLIT’s map tool to check your exact launch point.
    • Flying near a shrine or temple “because it’s outside the city.” Religious sites frequently have their own private bans regardless of aviation law.
    • Skipping travel insurance with liability coverage. It’s not legally required for basic flights, but damage to a parked car or a stranger’s property comes out of your pocket otherwise.

    None of this makes drone photography in Japan impossible — it just rewards planning. Register before you leave home, stick to areas clearly outside DID zones and national park restrictions, and treat rural Hokkaido and quieter regional towns as your friendliest legal options.

  • ETC Cards & Expressway Tolls: A Practical Guide for Renting a Car in Japan

    ETC Cards & Expressway Tolls: A Practical Guide for Renting a Car in Japan

    Photo by Antonella Vilardo on Unsplash

    Renting a car opens up a version of Japan that trains simply can’t reach — the lavender hills of Biei, the back roads into a centuries-old thatched farmhouse, or a mountain castle town an hour from the nearest station. But the moment you merge onto a Japanese expressway, you’ll notice something: almost every car glides through the tollgate without stopping. That’s ETC, and if you don’t understand it before you pick up your rental, you’ll either hold up a line of cars or pay far more than you need to. Here’s what first-time renters need to know.

    What Is an ETC Card, and Why You Need One

    ETC (Electronic Toll Collection) is Japan’s automatic toll-payment system. A small in-car unit reads a chip-embedded card as you pass under the tollgate antenna, the barrier lifts, and the toll is billed later — no stopping, no cash, no fumbling for change at highway speed. Nearly every rental car in Japan comes pre-fitted with an ETC unit, but the unit itself is useless without a card inserted into it. Without one, you have to use the manned or cash “ippan” (general) lanes instead, which is slower, occasionally confusing if you don’t read Japanese, and disqualifies you from ETC-only discounts.

    Getting an ETC Card as a Visitor

    Here’s the catch: Japan’s personal ETC cards are issued against a Japanese credit card and address, so tourists generally can’t apply for one directly. The practical workaround is to rent one from your car rental company at pickup. Major chains — Toyota Rent a Car, Nippon Rent-A-Car, Times Car, ORIX Rent-A-Car — all offer this as a simple add-on, typically for a flat fee of around ¥330 (tax included) for the whole rental period, sometimes bundled free with a full-coverage insurance package. Tolls you incur are tracked automatically and charged to the credit card you used to book the car, appearing as a lump sum when you return the vehicle or on your statement afterward.

    Ask for this specifically when you book or at the counter — staff will say “ETC card, tsukemasu ka?” (will you add an ETC card?). It’s worth doing even for a short trip; the discounts alone (below) often cover the fee.

    How ETC Lanes Work at the Tollgate

    At entrances and exits, lanes are marked overhead: purple signage with “ETC” means automatic lanes, while lanes marked in orange or with a hand/coin icon are general lanes for cash or credit card payment with a staffed booth. Slow to about 20 km/h as you approach an ETC lane — the barrier needs a moment to read the card and lift, and rear-ending the car ahead because it stopped is the single most common rental mishap in these lanes. If the light stays red or beeps, stop completely; it usually means the card wasn’t inserted properly or the card’s balance/registration failed, and you’ll need to press the intercom button for assistance. Double-check the ETC card is actually seated in the dashboard unit before you leave the rental lot — it’s easy to drive off with it still in the rental agent’s hand.

    Understanding Expressway Tolls and Typical Costs

    Unlike many countries, Japanese expressway tolls are distance-based, calculated from where you enter to where you exit, and they add up faster than visitors expect. As rough benchmarks for a standard-size rental car: Tokyo to Nagoya via the Tomei Expressway runs roughly ¥6,800–7,000, and continuing on to Osaka pushes the total toward ¥8,500–9,000. Shorter regional hops — say, one interchange to the next in Hokkaido or Tohoku — are usually in the ¥500–1,500 range. Mountain and rural expressways (useful for reaching places like Furano and Biei or a countryside kominka stay) tend to be cheaper per kilometer than the dense Tokyo–Osaka corridor. For an exact quote before you go, NEXCO’s official toll search tools let you enter your entrance and exit interchanges for a precise fare — worth five minutes the night before a long driving day.

    Budget travelers can often shadow the expressway on free “shindo” national routes, which takes longer but costs nothing in tolls; this trade-off makes sense for trips under about two hours. For longer hauls — reaching a remote castle town like Tsuwano in the San’in region, for instance — the time saved on the expressway is usually worth the toll.

    Discounts You Can Use With ETC

    ETC unlocks discounts that cash-paying drivers simply can’t get:

    • Deep-night discount: 30% off tolls for travel between midnight and 4:00 a.m., ETC-only.
    • Weekend/holiday discount: On many regional expressways (not the busiest Tokyo–Nagoya–Osaka trunk routes), Saturdays, Sundays, and public holidays bring up to 30% off for standard cars.
    • Round-trip and multi-day passes: NEXCO and regional operators periodically sell ETC-linked expressway passes for tourists in specific regions (Hokkaido, Kyushu, Tohoku) offering unlimited driving within a zone for a flat fee over several days — worth checking if your itinerary covers a lot of ground, such as island-hopping logistics near Rebun and Rishiri via Wakkanai.

    None of these apply if you’re paying cash at a general lane, which is one more reason the ¥330 ETC card rental fee pays for itself on almost any multi-day trip.

    Common Mistakes to Avoid

    A few habits trip up first-time renters every year:

    • Forgetting to remove the card at drop-off. The ETC card belongs to the rental company; leaving it behind or losing it can incur a replacement fee of several thousand yen.
    • Braking hard at the gate. Slow smoothly to around 20 km/h; the barrier lifts in about a second once the card is read correctly.
    • Assuming all lanes are ETC. Misreading the purple ETC signage and entering a general lane at speed is jarring and occasionally triggers an automatic fine notice — read the overhead signs early, not at the last second.
    • Not budgeting for tolls separately from fuel. On a long itinerary — say, driving from Nagano near Zenko-ji out toward the coast — tolls can end up costing more than gasoline, so factor them into your trip budget upfront rather than being surprised at return.

    Is Renting with ETC Worth It?

    For a single short hop between two nearby towns, cash lanes and free roads are fine. But for anything involving a real cross-prefecture drive, the ETC card rental fee is trivial next to the time saved, the crash risk avoided at unfamiliar tollgates, and the discounts you’d otherwise miss. Add the card at pickup, confirm it’s inserted before you leave the lot, and the rest of Japan’s expressway network becomes as easy as any other stretch of your trip.

  • Koenji: Tokyo’s Vintage Clothing & Punk Rock Neighborhood

    Koenji: Tokyo’s Vintage Clothing & Punk Rock Neighborhood

    Photo by Ivan Yurkin on Unsplash

    While tour buses idle outside Harajuku, Koenji quietly gets on with being Tokyo’s real vintage-clothing capital. This low-rise neighborhood in Suginami Ward, about ten minutes west of Shinjuku, has spent five decades collecting secondhand clothing dealers, punk and hardcore live houses, and a街-level DIY energy that Shimokitazawa’s gentrification has largely traded away. There’s no single “sight” to check off — the appeal is wandering narrow arcades, flipping through 500-yen bins and rare Levi’s alike, and ending the night in a sweaty basement club. Here’s how to do it properly.

    Where Koenji Is and How to Get There

    Koenji Station is on the JR Chuo-Sobu Line, the orange local (each-station) train — about 10 minutes from Shinjuku and 4 minutes from Nakano. From Tokyo Station, a direct local train takes roughly 25–30 minutes; alternatively, ride the faster Chuo Rapid Line to Nakano or Shinjuku and transfer to the local line, since most rapid services don’t stop at Koenji. There’s no need for a taxi or bus — everything worth seeing is within a 10-minute walk of the station’s north and south exits.

    The neighborhood splits cleanly: the north side (Kitaguchi) has the PAL and Look shopping arcades plus the famous “Kitakore” building, a cluster of tiny punk and vintage boutiques stacked on top of each other; the south side (Minamiguchi) is quieter, with more record shops, cafes, and standing bars tucked into back alleys.

    Vintage Shopping: Where to Dig for Treasure

    Koenji has an unusually high density of used-clothing stores for a neighborhood this size — easily 50+ shops within a 15-minute walk. A few reliable anchors:

    • Kinji Used Clothing — a long-running secondhand chain (also in Harajuku and Shimokitazawa) with a huge, densely packed Koenji branch. Basic tees and shirts start around 500–1,500 yen; jackets and outerwear run 2,000–6,000 yen.
    • Flamingo — another chain staple, strong on Americana, work jackets, and band tees, similarly priced to Kinji.
    • Kitakore Building — a ramshackle multi-story building on the north side housing a handful of independent punk-fashion and one-of-a-kind vintage shops. Prices here skew higher and more curated — think 5,000–30,000 yen for standout pieces like military surplus, leather, or rare band merch.

    Budget for a full afternoon: 3,000–8,000 yen gets you a couple of solid finds at the chain stores. Mid-range shoppers hunting curated vintage denim, band tees, or 90s streetwear should expect 5,000–20,000 yen per item. Splurge territory — rare vintage Levi’s (pre-1970s), original tour merch, or vintage designer pieces — can run 20,000–100,000+ yen at the more specialized boutiques.

    Cash matters here: many of the smaller independent shops are cash-only or have low card minimums, so carry at least 10,000–15,000 yen in cash if you’re planning to buy. Convenience store ATMs (7-Eleven, Family Mart) near the station accept foreign cards.

    Most vintage shops open around 12:00–13:00 and close by 20:00, and quite a few keep irregular closing days (futeikyū), especially midweek. If you’re making a special trip for one specific shop, check its Instagram or Twitter/X the morning of — hours shift often and aren’t always reflected on Google Maps.

    The Punk Rock Scene: Live Houses and Record Shops

    Koenji has been a punk and underground-rock hub since the late 1970s, and it still hosts a cluster of small live houses (raibuhausu) within a few blocks of the station — venues like UFO CLUB, 20000V, and Koenji SHOW BOAT regularly book local punk, hardcore, and garage-rock acts. Tickets for a weeknight show typically run 2,000–3,500 yen, often with an additional one-drink charge (500–700 yen) paid at the door. Shows usually start early by Western standards — doors around 18:00–19:00 — so you can catch a set and still make a late train home.

    Alongside the live houses, Koenji has a strong scattering of used-record shops specializing in vinyl — punk, rockabilly, reggae, and Japanese underground pressings are all easy to find, often at better prices than the bigger record stores in Shibuya or Shimokitazawa.

    Koenji Awa Odori: Tokyo’s Biggest Street Dance Festival

    If you can time your visit for the last weekend of August, Koenji hosts its Awa Odori — a dance festival modeled on the original event from Tokushima, and now one of the largest in the Kanto region, drawing well over a million spectators across two days. Dozens of dance troupes (ren) in traditional costume parade through the shopping streets to taiko drums and shamisen, and the whole neighborhood turns into a street party. It’s free to watch from the sidelines, though the best viewing spots along the main route fill up fast — arrive at least an hour before a parade slot if you want a clear view. For background on the original festival this one draws from, see our guide to Awa Odori in Tokushima.

    Best Time to Visit and Practical Tips

    Weekday afternoons (roughly 13:00–17:00) are the quietest time to browse shops without crowds. Weekends bring more foot traffic and more shops staying open into the evening, which is useful if you also want to catch a live show. Avoid the very end of December through early January — a large share of small independent shops close for New Year’s, sometimes for a week or more.

    Aside from Awa Odori weekend, Koenji doesn’t get uncomfortably crowded, and there’s no need to book anything in advance for shopping. If you’re staying out late for a show and don’t want to worry about the last train, Koenji is close enough to Shinjuku that a manga kissa near the station makes a cheap, workable overnight fallback.

    Common Mistakes to Avoid

    • Showing up before noon — most vintage shops simply aren’t open yet, and you’ll be stuck looking at shuttered doors.
    • Confusing Koenji with Shimokitazawa — both are vintage-shopping neighborhoods on rail lines out of Shinjuku, but Koenji is grittier, cheaper, and more punk-focused, while Shimokitazawa has become more polished and theater-adjacent. If you only have time for one and want the rawer, less touristy experience, pick Koenji.
    • Assuming cards work everywhere — bring cash, especially for the smaller independent boutiques.
    • Skipping the arcades off the main street — the PAL and Look shopping streets get the foot traffic, but some of the best-priced finds are in the quieter alleys branching off them.

    Where to Eat and Drink After Shopping

    Koenji’s south side has a good concentration of cheap izakaya and standing bars, a great fit if you want a quick, casual drink between shops or before a live show — our guide to tachinomi standing bar culture covers the etiquette if you haven’t tried one. Expect to spend 1,500–3,000 yen for a couple of drinks and small plates at a typical standing bar here, noticeably cheaper than equivalent spots in Shinjuku or Shibuya.

    Koenji rewards slow wandering more than a checklist. Budget half a day minimum, wear comfortable shoes for uneven arcade pavement, and don’t be afraid to duck into shops that look closed-for-business from the outside — in this neighborhood, that’s often just the aesthetic.

  • Kominka Stays: Sleeping in Japan’s Traditional Farmhouses

    Kominka Stays: Sleeping in Japan’s Traditional Farmhouses

    Photo by kai muro on Unsplash

    Long before capsule hotels and glass-walled apartments defined Japanese travel, families lived in kominka — thick-beamed farmhouses with soot-blackened rafters, irori sunken hearths, and roofs of thatch or heavy tile built to survive deep snow. Many of these houses are now inns, and sleeping in one is one of the most atmospheric things you can do in rural Japan: you’re not looking at a museum piece, you’re cooking rice over a fire pit inside one. Here’s how to actually plan a stay, not just admire the photos.

    What Is a Kominka, Exactly?

    “Kominka” (古民家) literally means “old private house,” generally referring to wooden homes built before 1950, though the most prized examples date to the Edo or Meiji periods. Two features define the experience: the irori, a sunken square hearth in the floor used for cooking and heating, and exposed structural beams — often massive, curved timbers selected for their natural shape rather than cut straight. Roof style varies by region: the steep, hands-together “gassho-zukuri” thatched roofs of Shirakawa-go and Gokayama exist specifically to shed heavy snow, while farmhouses in Kyoto’s Miyama or Tokushima’s Iya Valley tend toward wide tiled or thatched roofs suited to different climates.

    Owners generally fall into two camps: family-run minshuku (guesthouse-style, often with home-cooked meals and shared bathrooms) and renovated boutique properties, sometimes operated as single-house rentals or as part of a “distributed hotel” brand where several restored kominka in one village function as scattered rooms of a single inn, with a shared reception building.

    Where to Find Them: Best Regions for Kominka Stays

    Shirakawa-go and Gokayama (Gifu/Toyama) — the UNESCO-listed gassho-zukuri villages are the most famous kominka destination. A handful of the farmhouses inside Shirakawa-go’s Ogimachi village itself take overnight guests (only around a dozen do, and they book out months ahead for winter). Gokayama, less crowded and about 30–40 minutes further by car or bus, has similar houses at lower prices. If you’re routing through Toyama anyway, it’s worth pairing with the coast — see our guide to firefly squid season in Toyama if you’re visiting between March and May.

    Hida-Takayama (Gifu) — a well-preserved Edo-era town with several kominka inns in the surrounding countryside, easily combined with a stop for the region’s famous good-luck charm; see our sarubobo guide for where to shop in town before heading out to a farmhouse.

    Miyama (Kyoto Prefecture) — Kayabuki-no-Sato is a working village of around 40 thatched-roof houses roughly 90 minutes from Kyoto Station by bus/train combination; a few operate as inns, giving you a rural counterpoint to temple-heavy Kyoto itineraries.

    Iya Valley (Tokushima, Shikoku) — one of Japan’s most remote, dramatic settings, with vine bridges and steep mountainsides; kominka here are often standalone rentals rather than staffed minshuku, so you need a rental car.

    Nagano and the Japan Alps — scattered kominka stays exist around Matsumoto and the old post towns of the Nakasendo (Tsumago, Magome). If your trip already includes Zenko-ji’s old pilgrimage town, several farmhouse inns are within an hour’s drive.

    Budget, Mid-Range, and Splurge Options

    Budget (¥8,000–15,000 per person, with two meals): Family-run minshuku in Gokayama or Miyama, shared bathrooms, futon on tatami, home-cooked mountain vegetable dinners. Expect basic heating (a kerosene stove or the irori itself) rather than central air — bring warm layers if visiting outside summer.

    Mid-range (¥20,000–40,000 per night, often per house or per two people): Renovated single-house rentals with private modern bathrooms, kitchens, and Wi-Fi, common in Iya Valley and parts of Kyoto’s countryside. You get privacy and self-catering flexibility but no included meals.

    Splurge (¥40,000–100,000+ per person, per night): “Distributed hotel” brands that restore multiple kominka into a single luxury property — think a proper reception lodge, kaiseki dinners using local ingredients, and one restored house per couple or family. These exist in Niigata, Nara, Hyogo, and elsewhere and are usually the most comfortable way to experience the aesthetic without sacrificing heating or plumbing.

    Getting There and Best Season to Visit

    Almost none of these properties are near a shinkansen station — that’s the point. Typical routing is shinkansen or limited express to a regional hub, then a local bus, rental car, or inn pickup for the final leg. For Shirakawa-go/Gokayama, most travelers take a bus from Takayama, Kanazawa, or Toyama Station; if you’re coming a longer distance, consider whether a Green Car seat is worth it for the approach leg, since the rural transfers afterward are unavoidable regardless of how you started. Iya Valley and most Miyama properties effectively require a rental car — public transit exists but runs a handful of times a day.

    Season matters more here than almost anywhere else in Japan. Winter (late December–February) is when Shirakawa-go’s thatched roofs under snow look most like the postcards, but rooms in the village itself sell out 3–6 months ahead and heating is genuinely basic — the irori keeps the main room warm, not the whole house. Autumn (October–November) gives you foliage with milder temperatures and easier booking. Summer is green and lush but Iya Valley and Miyama can be hot and humid with limited air conditioning in older buildings. Spring works well if you’re combining a kominka stay with cherry blossoms or, further north, timing it around Toyama’s firefly squid season.

    Booking, Amenities, and Etiquette

    Book directly with the inn by phone or email where possible — many smaller minshuku aren’t on major international booking platforms, and some only take reservations in Japanese. Where they do appear online, book 2–3 months ahead for shoulder season and 4–6 months for winter weekends. Confirm meal plans explicitly: many kominka minshuku default to two meals included (dinner and breakfast), and cancelling that plan last-minute is considered rude given the amount of prep involved.

    Expect to remove shoes at the entrance, sleep on futon rather than a bed (ask in advance if you have mobility concerns), and in older properties, share a bathroom down the hall. Wi-Fi is common now but not universal — don’t assume it in the countryside. If the irori is lit, don’t step over it or place bags on the hearth’s wooden frame; ask before adding your own wood.

    Common Mistakes to Avoid

    • Assuming central heating. Old timber-and-paper construction is drafty by design. Winter stays without a private modern bathroom can mean a genuinely cold walk down the hall at night — pack layers and slippers.
    • Booking Shirakawa-go last-minute. The village caps overnight guests to protect the historic site; if you don’t plan months ahead for winter, Gokayama or Hida-Takayama are far more realistic fallbacks with a similar feel.
    • Skipping the rental car for Iya Valley or Miyama. Bus schedules can be as sparse as 3–4 runs a day; without a car you may be stuck at the property or paying for taxis with long waits.
    • Not confirming payment method. Many small family-run inns are still cash-only. Bring enough yen, since the nearest ATM may be a real drive away.
    • Treating it like a hotel. These are often someone’s family home for generations. Quiet hours, shared spaces, and set mealtimes are the norm — it’s a homestay experience more than a hospitality-industry one, and that’s exactly what makes it worth doing.
  • Manga Kissa: Japan’s Internet Cafes as a Budget Overnight Stay

    Manga Kissa: Japan’s Internet Cafes as a Budget Overnight Stay

    Photo by Leongsan on Unsplash

    Miss the last train, land on a red-eye flight with nowhere booked yet, or just want to stretch a shoestring budget across a few more nights in Tokyo? The manga kissa (漫画喫茶, “comic cafe”) is one of Japan’s most useful budget-travel secrets. For the price of a mid-range restaurant meal, you get a private reclining booth, unlimited soft drinks, a shower, and free Wi-Fi — open 24 hours, no reservation required. It’s not a hotel, but for one night it doesn’t need to be.

    What Is a Manga Kissa, Exactly?

    Manga kissa started as comic-book reading lounges — walls of manga volumes, individual booths with a TV or PC, and pay-by-the-hour pricing. Today most chains have expanded into full “complex cafes” (kanzen kanshitsu, or “internet cafe”) with private lie-flat or semi-flat booths, showers, drink bars, and sometimes laundry machines. You’ll find them clustered near major train stations — Shinjuku, Shibuya, Ikebukuro, Osaka’s Namba, and Fukuoka’s Tenjin all have dense clusters open around the clock.

    Crucially, they’re licensed as “internet cafes,” not lodging, so there’s no front-desk check-in the way a hotel requires — you pick a plan at a ticket machine or counter, get assigned a booth number, and that’s it.

    How Much Does It Cost?

    Pricing is almost always tiered by time block, and the overnight “night pack” (yoru pack, ヨルパック) is the one budget travelers want:

    • First-time membership card: 300–500 yen, one-time, required by most chains (bring your passport)
    • 3-hour pack: roughly 1,300–1,900 yen
    • Night pack (around 9pm/10pm–morning, 6–9 hours): roughly 1,900–2,900 yen
    • Drink bar (soft drinks, tea, coffee): usually included in the pack price, sometimes a flat 200–300 yen add-on
    • Shower: 300–500 yen extra, towel usually included or rented for ~100 yen

    All told, a night at a manga kissa typically runs 2,000–3,500 yen — well under even a capsule hotel (4,000–6,000 yen) and far below a business hotel room. Payment is by cash or IC card (Suica/Pasmo) at most locations; some now take credit cards too, but don’t count on it everywhere.

    What You Actually Get (Amenities)

    Booth types vary by chain and location, so check the seat map at booking:

    • Flat mat booths (フラットシート): the closest thing to a bed — a reclining seat that folds fully flat, curtained off, roughly 1×2 meters
    • Reclining chair booths: a large massage-chair-style seat, fine for a nap but not great for a full night’s sleep
    • Pair/box seats: larger enclosed rooms for two people, sometimes with a small sofa

    Every booth has a PC with internet access, and most chains offer free manga and magazines to read. Showers, sinks with toiletries for sale, vending machines, and sometimes simple food (curry rice, instant ramen) round things out. What you generally don’t get: a proper bed, silence (thin partitions, not soundproof walls), or daylight — many booths are windowless. Bring earplugs and an eye mask if you’re a light sleeper.

    Best Chains and Where to Find Them

    A few nationwide chains are reliable for foreign visitors because they’re large, well-signed, and used to non-Japanese-speaking guests:

    • Kaikatsu Club (快活CLUB): Japan’s largest chain, strong on flat-mat booths, found in almost every major city
    • Manboo (まんぼう): similar footprint, popular in Tokyo and Osaka entertainment districts
    • Bagus (バグース): common in Kansai, often has darts/karaoke combos
    • Media Cafe Popeye: frequent choice near Shinjuku and Shin-Osaka stations
    • Jiyu Kukan (自遊空間): good density around Tokyo’s Yamanote line stations

    Look for locations inside or right outside major stations — they’re the most convenient for an early departure, and useful if you’re trying to time a first Shinkansen out or, say, an early-morning outing like the sumo stable morning practice tours in Tokyo, which often start before 7am.

    When a Manga Kissa Makes Sense (and When It Doesn’t)

    It’s the right call when you’ve missed the last train (Tokyo’s subway and JR lines stop around midnight–1am) and a taxi back to your hotel would cost more than the night itself; when you land on a cheap red-eye and need a few hours before check-in opens; or when you’re stretching a trip during a sold-out period, like around a big hanabi taikai fireworks festival, when every hotel and capsule bed nearby is booked solid.

    It’s the wrong call if you need real sleep before a demanding travel day — the lighting, noise, and short seats add up over multiple nights. If you’re chasing overnight travel with a proper bed and moving distance at the same time, Japan’s sleeper trains like the Sunrise Izumo and Sunrise Seto are the better splurge, and for a long daytime journey in real comfort, the Green Car or Gran Class seats are worth the upgrade instead.

    Booking, Checking In, and Etiquette

    Most locations don’t take advance reservations for casual overnight stays — you simply walk in, and during peak periods (weekend nights, festival season, New Year) popular locations near stations can fill up by 11pm–midnight. If you’re relying on one as a backup plan, scope out two or three options near your station in advance using Google Maps, and have a backup neighborhood in mind.

    At check-in, staff will ask for ID (your passport works) to issue the membership card, then assign your booth. Basic house rules apply everywhere: no loud calls or video without headphones, no bringing in outside food in some locations (drinks from the bar are fine), and keep noise down after a certain hour since most guests are sleeping. Smoking booths and floors are usually separated from non-smoking — double-check if it matters to you, as older locations can still be smoky near entrances.

    Common Mistakes to Avoid

    • Assuming English support: ticket machines increasingly have an English toggle, but staff may not speak much English — a translation app helps for questions about shower timing or extending your stay
    • Forgetting the membership fee: that 300–500 yen card fee is separate from your time pack and is charged the first visit to each chain (each chain’s card is separate — a Kaikatsu Club card won’t work at Manboo)
    • Not checking the extension cutoff: night packs have a fixed end time; overstaying gets billed at the hourly rate, which adds up fast
    • Leaving valuables unsecured: booths have curtains, not locking doors — use the small lockers most locations provide for bags and electronics
    • Booking the wrong seat type: reclining chairs are fine for a two-hour nap but rough for six-plus hours; pay the small difference for a flat-mat booth if you actually need to sleep

    Used well, a manga kissa isn’t a downgrade so much as a different kind of Japan experience — cheap, always open, and oddly comfortable once you’ve found your chain of choice. Keep one in your back pocket for the nights your itinerary doesn’t quite line up with the trains.

  • Sleeper Trains in Japan: Riding the Sunrise Izumo & Sunrise Seto

    Sleeper Trains in Japan: Riding the Sunrise Izumo & Sunrise Seto

    Photo by Julien on Unsplash

    Japan’s bullet trains are so fast and frequent that overnight trains have mostly disappeared — except for one pair. The Sunrise Izumo and Sunrise Seto are the last regularly scheduled sleeper trains in the country, coupling together for the run out of Tokyo each night before splitting in two and rolling on to opposite ends of western Japan. For train fans, budget travelers who want to skip a hotel night, or anyone tired of domestic flights, it’s one of the most memorable ways to get around the country.

    What Are the Sunrise Izumo and Sunrise Seto?

    Both trains leave Tokyo Station coupled as a single 14-car set and travel together as far as Okayama, where they split. The Sunrise Izumo continues northwest through Okayama and Tottori prefectures to Izumoshi, near Izumo Taisha, one of Japan’s most important Shinto shrines. The Sunrise Seto crosses the Seto Ohashi Bridge into Shikoku and terminates in Takamatsu, the gateway city for the Seto Inland Sea art islands. Because they run as one train for most of the journey, you can book either destination from the same nightly departure.

    These are JR East and JR West joint services, operated with the 285 series sleeper trainset that has been in use since 1998. There is no dining car, so plan your food before boarding — a station bento from Tokyo Station is the easiest option, and it’s worth reading our bento box buying guide if you want to pick something more interesting than a standard convenience-store box. (If that link doesn’t resolve, use our general bento guide at japantrove.com.)

    The Route and Schedule

    The Sunrise Izumo/Seto departs Tokyo Station at 21:50 nightly from a dedicated platform, with an additional stop at Yokohama shortly after. It then runs through Shizuoka, Hamamatsu, and Toyohashi before reaching Okayama around 6:00 the next morning, where the two trains uncouple. The Sunrise Seto arrives in Takamatsu around 7:27, while the Sunrise Izumo continues on through Yonago and Matsue, reaching Izumoshi around 9:58. In the opposite direction, both trains depart their western terminals in the evening and arrive back in Tokyo the next morning around 7:00–8:00. Times shift slightly with each JR timetable revision, so confirm exact departure and arrival times on the JR West or JR East website before you travel.

    Because the whole point is sleeping through the journey, timing works out well if you’d otherwise burn a full travel day on the Shinkansen — you go to bed in Tokyo and wake up already in Izumo or on Shikoku, with a full day ahead of you.

    Room Types and What They Cost

    Fares are built in three layers: the base fare, the limited express (tokkyu) surcharge, and — for private rooms — a bed charge on top. Approximate one-way totals from Tokyo to Izumoshi or Takamatsu:

    • Nobinobi Zaseki (budget): Open carpeted sleeping berths with no bed or blanket provided (bring your own or rent one onboard) and no extra room charge — you pay only the base fare plus limited express fee, roughly ¥11,000–13,000 total. This is the only seat type covered in full by the Japan Rail Pass with no supplement.
    • Single (mid-range): A private single-occupancy compartment with a real bed, reading light, and a door that locks. Expect roughly ¥18,000–21,000 total including the room charge. This is the most common way to ride if you want privacy without splurging.
    • Single Twin / Single Deluxe (splurge): Larger private rooms with a wider bed and more floor space; Single Deluxe is the largest solo cabin on the train, closer to a small hotel room with a window seat. Expect roughly ¥26,000–29,000 total one-way.
    • B Twin / Sunrise Twin: Two-person compartments for couples or friends traveling together, priced per room rather than per person.

    If you’re weighing whether to spend on a private cabin versus riding cheap and comparing it to how JR prices its other premium seating, our guide to Green Car & Gran Class is a useful reference point — the Sunrise’s Single Deluxe sits in roughly the same comfort tier as Gran Class, just horizontal.

    How to Book Tickets

    This is the part that trips people up. Sunrise Izumo/Seto tickets go on sale exactly one month before the travel date, at 10:00 AM Japan time, through JR ticket windows (Midori no Madoguchi), JR travel agencies, or the JR East/JR West online reservation systems. Nobinobi Zaseki, being free of a room charge, is by far the most popular option and regularly sells out within minutes of going on sale — especially for Friday and Saturday departures, and during Golden Week, Obon, and New Year. If you want that berth, be at a ticket machine or on the booking site right at the 10:00 AM mark exactly 30 days ahead.

    Private rooms are easier to secure but still book up on weekends and holiday periods a week or two out. If you’re relying on a Japan Rail Pass, note that the pass covers Nobinobi Zaseki entirely, but for any private room you’ll need to pay the bed charge separately even with a valid pass — the base fare and limited express fee are covered, the room itself is not.

    What to Expect Onboard

    Every car has shared shower rooms operated with a card (sold from a vending machine onboard, limited quantity per departure, so don’t wait until the last stop before Okayama to grab one). There are vending machines for drinks and snacks but no proper meal service, which is why stocking up at Tokyo Station beforehand matters. Private rooms have a reading light, a small table, and an outlet; Nobinobi Zaseki berths are simply carpeted platforms divided by low partitions, comfortable enough for a night but worth bringing an eye mask and earplugs for. Announcements are made in Japanese and English at major stops, and the train is generally quiet after lights-out, but it is still a shared space — light sleepers should budget for a private room.

    Best Timing and Common Mistakes

    Weekday departures (Sunday through Thursday night) are noticeably easier to book than Friday and Saturday, and almost any date is harder during Golden Week (late April–early May), Obon (mid-August), and the New Year holidays. The most common mistakes are assuming you can just show up and buy a ticket at the station (Nobinobi Zaseki is reserved-only and routinely sold out), forgetting that there’s no dining car, and not checking which half of the train your carriage is in — Izumo and Seto cars are adjacent but split at Okayama, so boarding the wrong car means ending up in the wrong city.

    If you’re arriving in Takamatsu on the Sunrise Seto, it’s a natural jumping-off point for the Seto Inland Sea art islands — Naoshima, Teshima, and the wider Setouchi Triennale circuit are all a short ferry ride from the port, and our guide to Teshima is a good next stop if you want somewhere quieter than Naoshima. Arriving fresh off an overnight train and straight onto a morning ferry is one of the more efficient ways to start a Shikoku or art-island itinerary without losing a travel day to transit.

  • Green Car & Gran Class: Japan’s First-Class Train Seats Explained

    Green Car & Gran Class: Japan’s First-Class Train Seats Explained

    Photo by Marek Lumi on Unsplash

    Japan’s trains are already famous for being clean, punctual, and comfortable in standard class — so why would anyone pay extra? Because on long Shinkansen rides, overnight-adjacent journeys, or trips with heavy luggage, the difference between “fine” and “genuinely relaxing” is real. Green Car and Gran Class are Japan Railways’ two tiers of premium seating, and they’re far less complicated (and often less expensive) than international business or first class. Here’s exactly what you’re paying for and when it’s worth it.

    What Exactly Is “Green Car”?

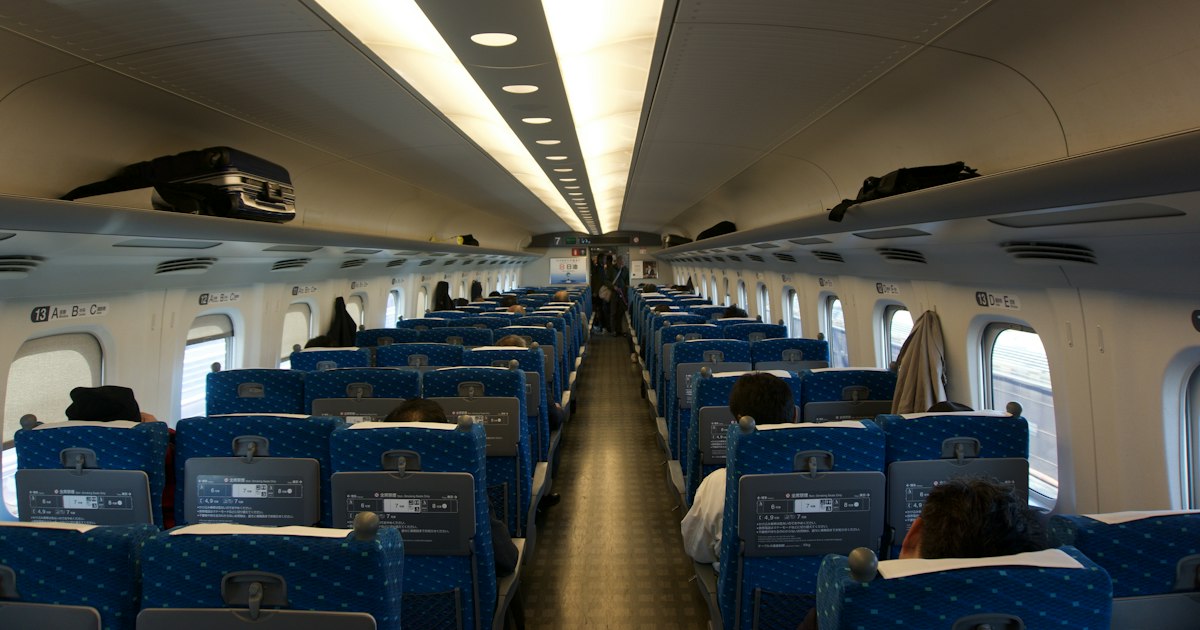
    Green Car (グリーン車, guriin-sha) is JR’s long-standing first-class car, found on most Shinkansen trains, many limited express services, and some Tokyo-area commuter lines. It’s marked with a green four-leaf-clover logo on the platform and the carriage exterior. On Shinkansen, Green Car typically means 2+2 seating (instead of 2+3 in standard class), meaning every seat is a window or aisle seat with noticeably more legroom, a footrest, individual reading lights, and a quieter car since it’s usually less crowded. There’s no meal service or lounge access — it’s an upgraded seat, not a first-class cabin experience.

    You pay for Green Car as an add-on: a “Green fee” (グリーン料金) stacked on top of your normal base fare and any limited express/Shinkansen surcharge. You can’t buy a Green Car ticket alone — it always sits on top of a regular ticket.

    Gran Class: The Actual First Class

    Gran Class is a step above Green Car and only exists on specific Shinkansen routes: the Tohoku/Hokkaido Shinkansen (Hayabusa and some Komachi services running E5/E6 series trains between Tokyo and Aomori/Hakodate) and the Hokuriku Shinkansen (Kagayaki services on E7/W7 series trains between Tokyo and Kanazawa/Tsuruga). It is not available on the Tokaido/Sanyo Shinkansen between Tokyo, Osaka, and points west — a common point of confusion for first-time visitors planning a Kansai trip.

    Gran Class seats are wide, leather, 1+2 across the aisle, and recline further than any other seat on a Japanese train. A dedicated attendant serves a light meal or snack, plus tea, coffee, wine, or Japanese sake, all included in the fare. It’s the closest thing Japan has to a domestic first-class cabin, and on a three-to-four-hour ride to Hokkaido or Kanazawa, it genuinely feels like a mini flight experience rather than a train ride.

    How Much Extra Does It Cost

    Prices scale with distance, so think in terms of the surcharge rather than a flat fee. As a rough guide:

    • Green Car surcharge on Tokaido Shinkansen (e.g., Tokyo–Osaka on Nozomi/Hikari): roughly ¥4,000–5,500 on top of the standard reserved-seat fare, bringing a one-way Tokyo–Osaka Green Car ticket to somewhere around ¥18,000–20,000.
    • Green Car on shorter Shinkansen hops (e.g., Tokyo–Nagano, Tokyo–Sendai): typically an extra ¥2,000–3,500.
    • Gran Class: generally an additional ¥10,000–15,000 over the standard fare for longer routes like Tokyo–Hakodate or Tokyo–Kanazawa — meaning a full Gran Class fare often lands between ¥27,000 and ¥33,000 one way, meal and drinks included.

    These figures move with JR’s periodic fare revisions, so treat them as planning estimates and confirm the exact price at booking — JR’s ticket machines and the official booking apps always show the current fare before you pay.

    Commuter Green Car: Tokyo’s Everyday Upgrade

    Separate from the Shinkansen version, JR East runs Green Car double-decker carriages on the Shonan-Shinjuku Line, Ueno-Tokyo Line, Yokosuka Line, and Chuo Line rapid services around Tokyo. These don’t require reservations — you just tap a Green Car IC ticket (bought from the small green ticket machines on the platform or added directly through a Suica/PASMO-linked app) and sit in any open seat. Fares are flat-ish by distance band, roughly ¥800–1,000 for most trips, and it’s a nice way to guarantee a seat with luggage during rush hour, say if you’re heading out to Nakameguro or beyond during a crowded commute window.

    How to Book Green Car and Gran Class Seats

    You can reserve both at any JR ticket counter (midori-no-madoguchi), at the green ticket vending machines found in every major station, or online through JR’s official reservation platforms (JR East’s train reservation site, or the Tokaido/Sanyo Shinkansen’s EX app for routes through Osaka). Gran Class in particular sells out on holidays and during peak season, so book as early as possible — JR opens reservations one month ahead to the day. If you’re heading to snow country, this matters most right before ski season opens; travelers booking a Shinkansen-plus-bus route up to Hakuba Valley around New Year or February weekends should lock in Green Car seats well ahead for the heavy-luggage leg to Nagano.

    Note that the standard 7-day/14-day/21-day Japan Rail Pass no longer includes Green Car access as of the October 2023 price revision unless you specifically buy the Green Car version of the pass, which costs meaningfully more than the ordinary pass. Gran Class is never covered by any JR Pass, at any tier — you always pay the difference or the full fare out of pocket.

    Is It Worth It? Budget, Mid-Range, and Splurge Picks

    Budget: Stick with standard reserved seats for rides under 90 minutes — the difference in comfort is minor and not worth the surcharge. This covers most day trips, including regional hops toward Setouchi Triennale islands via Okayama or Takamatsu.
    Mid-range: Green Car earns its keep on trips over two hours, especially with luggage, kids, or a laptop you want to work on. It’s also worth it on limited express trains with only single-digit Green Car seats, like the Shiokaze service to Matsuyama for a visit to Dogo Onsen, where the extra space and quiet make a real difference on a three-hour ride.
    Splurge: If your route includes Hayabusa to Hakodate or Kagayaki to Kanazawa, Gran Class is a genuine treat and, per-hour, is often cheaper than premium airline seating for a comparable distance.

    Common Mistakes to Avoid

    The biggest mistake is assuming Gran Class exists everywhere — it doesn’t run on the busiest tourist route, Tokyo–Kyoto–Osaka, so don’t build an itinerary around it without checking the specific train series first. The second is boarding a Green Car without a valid Green ticket or Green Car IC charge; conductors do check, and you’ll be asked to pay the fare on the spot, sometimes at a higher on-board rate. Third, don’t confuse “Green Car” with “first class” in the Western sense — there’s no separate check-in, lounge, or boarding priority, so arrive with the same timing buffer you would for any Shinkansen departure. Finally, remember seat reservations are per-train: a Green Car reservation ties you to that specific departure, so if you need flexibility, ask the ticket agent about open-ticket options before committing.

  • Nakameguro: Tokyo’s Canal-Side Cafes, Cherry Blossoms & Boutiques

    Nakameguro: Tokyo’s Canal-Side Cafes, Cherry Blossoms & Boutiques

    Photo by Jenna Neal on Unsplash

    Nakameguro doesn’t have a single “must-see” landmark, and that’s exactly why it rewards a slow afternoon. The neighborhood is built around a half-mile stretch of the Meguro River, lined with 800-some cherry trees, third-wave coffee roasters, vintage clothing racks, and shops that opened because their owners genuinely wanted to live nearby — not because a guidebook told them to. It’s a 15-minute train ride from Shibuya, but it feels like a different city.

    Getting There and When to Go

    Nakameguro Station sits on both the Tokyu Toyoko Line and the Tokyo Metro Hibiya Line, which makes it easy to reach from almost anywhere in the city. From Shibuya, it’s two stops on the Toyoko Line (about 6 minutes, roughly ¥160). If you’re coming from Roppongi, Ginza, or Ueno, the Hibiya Line runs direct with no transfers.

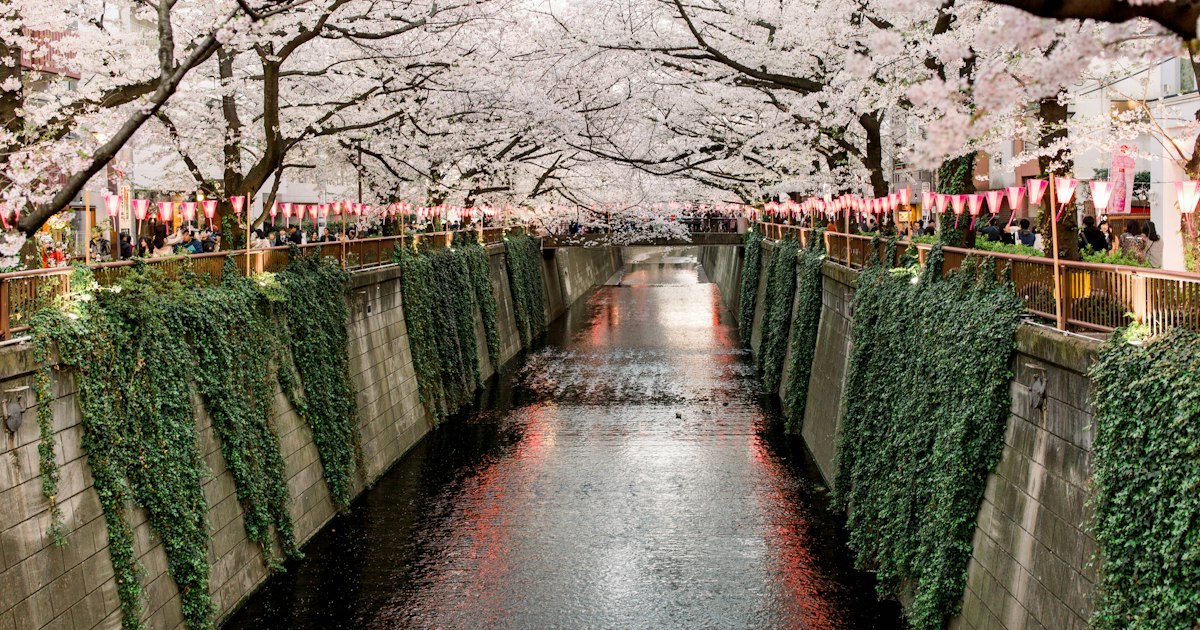
    Cherry blossoms typically peak in Tokyo between late March and the first week of April, and Nakameguro is one of the city’s most photographed hanami spots because the trees form a tunnel directly over the river. During peak bloom, the Nakameguro Sakura Festival hangs paper lanterns along the water for evening illumination, usually running until around 9pm. The catch: this is also when the neighborhood is at its most crowded, with the riverside path reduced to a slow shuffle on weekend afternoons. If you want photos without a wall of people, go on a weekday morning before 9am, or accept the crowds and enjoy the festival atmosphere instead. Outside sakura season, the same walk is quiet and pleasant nearly any time of year, with the trees turning good shades of orange and red in late November.

    Cafes Worth the Detour

    Coffee is Nakameguro’s other main draw. Starbucks Reserve Roastery Tokyo (2-19-23 Kamimeguro), a four-story flagship with an on-site roaster, is the most famous stop — it opens at 7am and closes at 11pm, and lines can form on weekends, so an early morning or weekday visit is easiest. Drinks and small food items run roughly ¥600–¥1,800.

    For something more low-key, Onibus Coffee has a tiny original location tucked on a residential side street a few minutes from the station, serving single-origin pour-overs for around ¥500–¥600. It’s standing-room only inside, which keeps it from ever feeling like a tourist stop. A short walk toward Daikanyama brings you to Log Road Daikanyama, a row of shops built along a former train line that includes Spring Valley Brewery — a good spot for a flight of craft beer (around ¥1,500–¥2,000) if coffee isn’t your thing. If you’re chasing dessert rather than caffeine, Nakameguro’s cafes lean toward pancakes and cheesecake rather than traditional sweets, but if you want to track down Japan’s classic custard treat elsewhere in the city, our guide to purin covers where to find the real old-fashioned version.

    Boutiques and Independent Shops

    Nakameguro’s shopping is small-scale and specific rather than mall-like, which is its appeal. Cow Books, an independent bookstore right on the riverside path, stocks used and rare titles (mostly Japanese, some English) and is open Tuesday to Sunday, roughly noon to 8pm, closed Mondays. Traveler’s Factory, near the station, is the flagship store for the Traveler’s Notebook brand and a good stop for anyone into stationery or journaling — leather notebook covers start around ¥5,000, with refills and accessories from ¥400.

    The area under the elevated train tracks near the station, redeveloped as a row of glass-fronted shops and restaurants, is worth a slow walk-through for fashion and homeware boutiques you won’t find in department stores. If you’re shopping for souvenirs with real craft behind them, keep an eye out for shops selling tenugui (traditional dyed cotton cloths, from about ¥1,000) — a lighter, cheaper alternative to ceramics for a suitcase. For something with more collector value, our guides to Edo Kiriko cut glass and sashiko and boro textiles point to specific Tokyo shops worth combining with a Nakameguro visit, since both crafts show up in the neighborhood’s better boutiques.

    Budget, Mid-Range, and Splurge

    • Budget (under ¥2,000): A pour-over at Onibus Coffee, a walk along the river, and window shopping under the elevated tracks costs almost nothing beyond a train fare and a coffee.
    • Mid-range (¥2,000–¥6,000): A drink and pastry at the Starbucks Reserve Roastery, plus a notebook or tenugui from one of the boutiques, fits comfortably in this range.
    • Splurge (¥6,000+): Several small izakaya and bistro restaurants along the river do multi-course lunches or dinners in the ¥5,000–¥10,000 range; pair one with a bottle from a boutique wine shop for a proper evening out.

    Common Mistakes to Avoid

    The biggest mistake is timing: full bloom only lasts about a week to ten days, and it shifts year to year depending on spring weather, so check a current-year sakura forecast rather than assuming late March will always work. The second is assuming the whole neighborhood is walkable in twenty minutes — the interesting shops and cafes spread out over both banks of the river and into the side streets toward Daikanyama, so budget at least two hours if you want to actually browse rather than just photograph the trees. Third, many of the smaller boutiques and cafes close one day a week (often Monday or Tuesday) and don’t open until 11am or noon, so this isn’t a neighborhood for an early-morning shopping run outside of the coffee spots. Finally, cash still matters here — some of the smallest independent shops and cafes are card-only or cash-only in either direction, so carry some yen as a backup.

    A Good Half-Day Plan

    Start at Nakameguro Station around 9 or 10am, walk the river path toward Daikanyama while the crowds are thin, stop for coffee at Onibus or the Roastery, browse Cow Books and the under-track shops as they open around 11am–noon, and finish with a late lunch at one of the riverside bistros before the afternoon crowds arrive. It’s an easy add-on to a Shibuya or Daikanyama day, and unlike many Tokyo neighborhoods built for one big attraction, Nakameguro rewards simply wandering.

  • Bringing Medicine Into and Out of Japan: Customs Rules for Travelers

    Bringing Medicine Into and Out of Japan: Customs Rules for Travelers

    Photo by Redd Francisco on Unsplash

    Japan has some of the strictest medicine import rules of any major travel destination, and they catch out well-meaning travelers every year — sometimes with a common cold medicine or ADHD prescription confiscated right at the airport. The good news is that the rules are clear and well-documented once you know where to look. Here’s exactly what you can bring in, what requires paperwork, what’s simply banned, and how to stock up on Japanese pharmacy favorites to take home.

    Medications That Are Banned or Tightly Restricted

    Japan’s Stimulants Control Law (覚醒剤取締法) is far broader than most travelers expect. It covers not just illegal drugs but many common prescription and over-the-counter medications sold freely elsewhere:

    • Adderall, Vyvanse, and other amphetamine-based ADHD medications — illegal to bring into Japan, even with a valid prescription and even in small quantities. Travelers who need ongoing stimulant treatment typically switch to a non-stimulant alternative like atomoxetine (Strattera) before their trip, in consultation with their doctor.
    • Pseudoephedrine-containing decongestants — this includes Sudafed, Actifed, and Vicks inhalers. Vicks inhalers in particular are a frequent confiscation because travelers assume an inhaler for stuffy noses is harmless.
    • Codeine in high concentrations and other narcotic painkillers — allowed only within strict limits and often only with prior permission (see below).
    • CBD products — legal CBD in your home country may still contain trace THC, which is illegal in Japan regardless of concentration. Bring only products with documentation confirming zero THC content, and even then, expect scrutiny.

    When in doubt, check the Japanese Ministry of Health, Labour and Welfare’s official “Import of Medications for Personal Use” page before you pack, or contact the nearest Japanese embassy or consulate. Don’t rely on forum posts or guesses — the penalties for bringing in banned substances range from confiscation to prosecution.

    The One-Month Rule for Everyday Medications

    For medications that aren’t banned, Japan allows travelers to bring in a personal supply without any special certificate, as long as it fits within these limits:

    • Up to a one-month (30-day) supply of prescription medication
    • Up to a two-month supply of non-prescription (over-the-counter) medication and vitamins
    • Up to 24 units of items like contact lenses per type

    This covers the vast majority of leisure travelers — blood pressure pills, antihistamines, birth control, antidepressants, and similar daily medications for a two-week trip are almost never a problem. Keep medication in its original packaging with your name matching your passport, and carry a copy of the prescription or a doctor’s letter (ideally in English, listing the generic/active ingredient name, not just the brand) in case customs asks.

    Getting a Yakkan Shoumei for Larger Quantities

    If you’re staying longer than a month, need more than a two-month OTC supply, or are carrying injectable medications (like EpiPens or insulin pens) beyond a small personal set, you’ll need a Yakkan Shoumei — an import certificate issued by Japan’s regional Bureau of Health and Welfare (地方厚生局).

    Key points on applying:

    • Apply through the regional bureau covering your port of entry (Tokyo and Osaka bureaus handle most applications by mail or online submission).
    • Processing officially takes about one to two weeks once documents are complete, but agencies and the bureaus themselves recommend applying one to two months ahead to allow for corrections and mailing time.
    • You’ll need the medication’s generic name, dosage, and quantity, plus a doctor’s prescription or letter.
    • The certificate is free to obtain directly from the bureau, though private agencies charge a service fee (typically ¥5,000–¥15,000) to prepare and submit it for you.
    • Print the certificate and carry it with your medication when you enter Japan — you may be asked to show it at customs.

    This is the single most common paperwork travelers overlook, especially digital nomads, long-stay visitors, and anyone managing a chronic condition with a multi-month supply.

    Narcotic and Psychotropic Medications Need a Separate Process

    Medications classified as narcotics under Japanese law — certain strong opioid painkillers, some sleep medications, and select psychiatric drugs — fall outside the standard Yakkan Shoumei system entirely. These require permission from Japan’s Narcotics Control Department (麻薬取締部) rather than the Bureau of Health and Welfare, and the process is stricter and slower. If your prescription includes anything in this category, start the inquiry well before booking flights, since approval isn’t guaranteed and typically requires more lead time than a standard Yakkan Shoumei.

    Buying Medicine in Japan to Bring Home

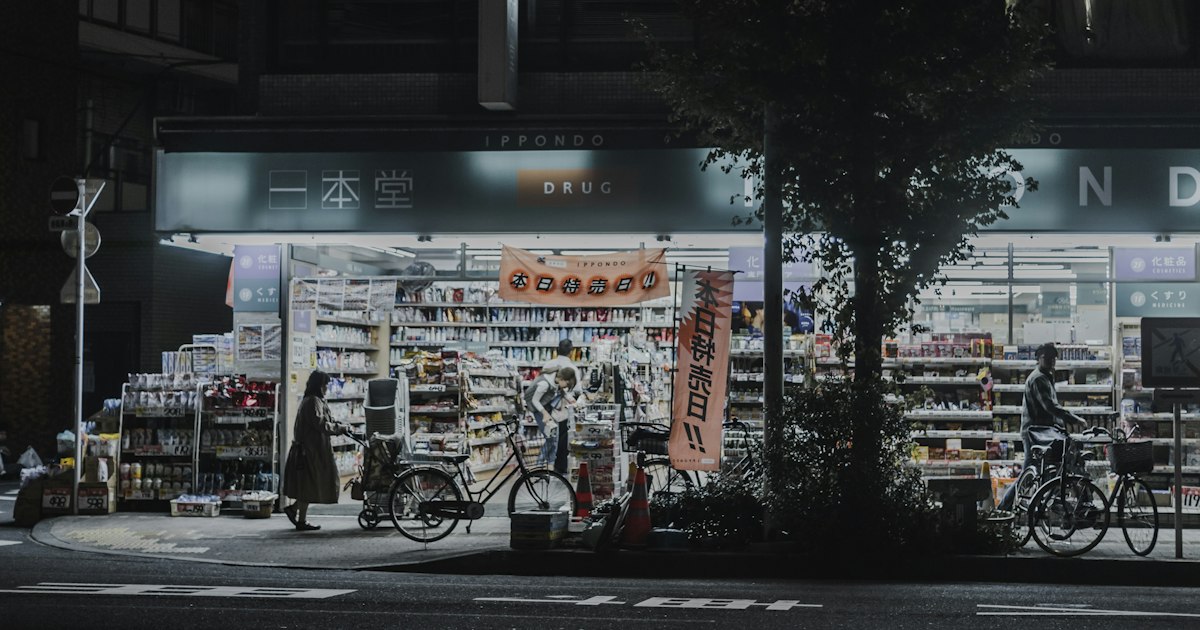
    Japanese drugstores are a shopping destination in their own right, and many travelers stock up on OTC staples that aren’t available (or are far pricier) back home. Chains like Matsumoto Kiyoshi, Sundrug, and Don Quijote are everywhere near train stations and tourist areas, generally open from around 9:00 or 10:00am until 9:00pm–midnight depending on location. If you’re browsing a bargain shopping street, the Osu Shopping Arcade in Nagoya has several drugstores mixed in among its otaku and vintage shops, worth a stop if you’re in the area.

    Popular budget picks and rough prices:

    • Loxonin S (loxoprofen painkiller, 12 tablets) — around ¥900
    • Eve Quick (headache tablets, 40 count) — around ¥700–900
    • Salonpas pain-relief patches (40 count) — around ¥600
    • Sante FX or similar cooling eye drops — around ¥600–1,000

    When you’re heading home, remember the rules run both ways: check your destination country’s import limits, since some Japanese OTC formulations contain ingredients restricted elsewhere. Most countries allow a reasonable personal-use quantity in original packaging without issue, but if you’re unsure, declare it.

    Common Mistakes to Avoid

    • Packing decongestant inhalers or cold medicine without checking ingredients — pseudoephedrine hides in many familiar brand names.
    • Assuming a prescription automatically makes a drug legal — it doesn’t for banned substances like amphetamine-based ADHD medication.
    • Leaving Yakkan Shoumei applications until the week before departure — processing plus mailing time can easily exceed two weeks.
    • Packing medication loose or relabeled — always keep it in original, labeled packaging.
    • Not carrying English documentation — a prescription in your home language alone may slow things down at customs.

    Quick Pre-Departure Checklist

    • Confirm none of your medications are on Japan’s banned list (check the MHLW site directly)
    • Calculate whether your supply exceeds the one-month (prescription) or two-month (OTC) threshold
    • Apply for a Yakkan Shoumei at least a month ahead if you’re over the limit or carrying injectables
    • Check separately for narcotic-classified medications, which need Narcotics Control Department approval
    • Pack a doctor’s letter or prescription copy in English, plus original packaging

    With a little advance planning, medication is one of the easier parts of a Japan trip to get right — and one of the worst to get wrong at the airport. If you’re also sorting out how to pack everything for train travel around the country, the guide to Shinkansen oversized luggage rules is worth a read before you finalize your itinerary.