Japan Trove

Category: Travel

Practical, up-to-date guides for traveling in Japan — itineraries, rail passes, eSIMs, where to stay, seasonal timing, etiquette, and the local know-how that makes a trip smoother. Written with real Japanese sources so you get the answer that actually works on the ground, not the recycled tourist one.

  • Mailing Postcards & Stamps from Japan: A Traveler’s Guide

    Mailing Postcards & Stamps from Japan: A Traveler’s Guide

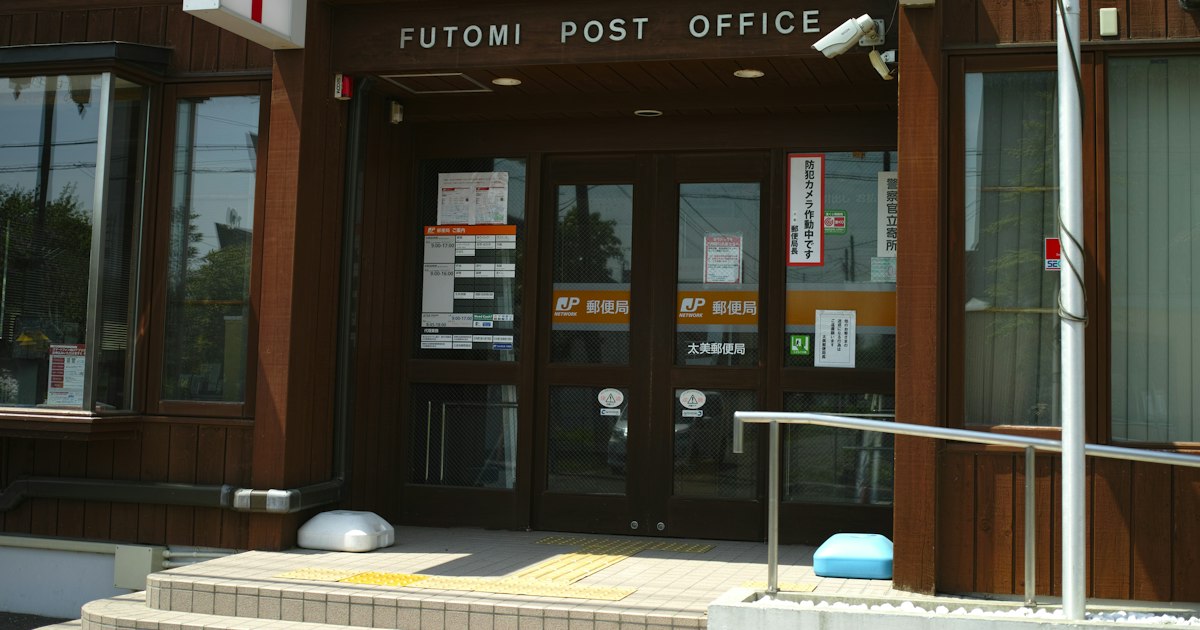
    Photo by Magic Mary on Unsplash

    Sending a postcard home is one of the cheapest, most satisfying souvenirs you can bring back from Japan — except you don’t keep it, someone else gets the joy of finding it in their mailbox weeks later. The process is simple once you know where to buy stamps, where the mailboxes are, and how long it actually takes. Here’s everything you need to pull it off without a wasted trip to the post office.

    Where to Buy Stamps (Kitte)

    Japanese postage stamps (切手, kitte) are sold at every post office counter, but you don’t need to track one down specifically for this — stamps are also sold at convenience stores (Lawson, FamilyMart, 7-Eleven) if you ask at the register, though stock is often limited to the most common denominations. Post offices themselves are the most reliable source and often sell postcard-friendly novelty stamp sheets featuring seasonal designs, anime characters, or regional motifs, which make nice souvenirs even unused.

    As of 2024, a standard postcard mailed internationally from Japan costs 85 yen. Domestic postcards cost 63 yen. Always confirm current rates at the counter, since postal rates do shift periodically — the clerk will weigh and check your postcard if you’re unsure which stamp denomination to use, which is the safest way to avoid an underpaid card getting held up overseas.

    Finding a Mailbox

    Japan’s post boxes are bright red, cylindrical or box-shaped, and genuinely everywhere — outside post offices, near train stations, by convenience stores, and along shopping streets. Each box has two slots: one for regular mail (普通) and one for larger or non-standard items (大型・その他). Postcards always go in the regular slot. If a box looks locked or unusually quiet, don’t worry — these are just emptied on a set schedule printed on a small sign on the box itself, often once or twice daily.

    If you’d rather hand your postcard directly to a person, any post office counter will take it, stamp it, and send it off the same day, which is reassuring if you’re nervous about a card sitting in a random street box.

    Post Office Hours and Logistics

    Regular post offices (郵便局) are typically open 9:00 AM–5:00 PM on weekdays and closed on weekends and public holidays — a schedule that catches a lot of travelers off guard since so much else in Japan runs late and seven days a week. Larger central post offices in big cities, however, often have extended hours, and some — like Tokyo Central Post Office near Tokyo Station — stay open into the evening or even operate a 24-hour counter for mail and parcels. If you’re arriving via Narita, note that post office hours are a different beast entirely from the efficient airport transfers covered in our Narita Express vs. Keisei Skyliner guide — don’t assume postal services will be as convenient as the trains.

    Budget tip: if you’re buying stamps for a handful of postcards, convenience stores are fastest and open 24 hours, but for anything requiring weighing, customs forms, or unusual destinations, go to a proper post office.

    Best Time to Mail Postcards

    There’s no bad season to send a postcard, but timing matters if you want it to arrive before you’re home. International postcards from Japan typically take 1–2 weeks to North America, Europe, and Australia via standard airmail — occasionally longer during the New Year period (late December–early January) when Japan’s domestic mail volume spikes with nengajo (New Year’s cards) and processing slows everywhere. If you’re traveling during Golden Week (late April–early May) or Obon (mid-August), post offices will have reduced hours or closures, so mail postcards before or after those windows if timing matters to you.

    A nice trick: buy and write your postcards early in the trip, while you’re still near post offices in Tokyo or Kyoto, rather than scrambling on your last day when you might be somewhere rural with no post office in sight.

    Common Mistakes to Avoid

    • Underpaying postage. Oversized or thick novelty postcards sometimes exceed standard postcard weight/size limits and need extra postage — have the counter clerk check if your card feels unusually heavy or textured.
    • Assuming weekend post office access. Regular post offices are closed Saturday and Sunday; plan around this rather than discovering it on a Sunday afternoon.
    • Writing the address in the wrong format. For international mail, write the destination country name clearly in English/Roman letters, and write the address in the normal format for that country (not Japanese order) so it’s legible to the receiving postal service.
    • Forgetting customs forms for anything beyond a postcard. If you’re mailing a small gift alongside your postcard — say, a little omiyage sweet from our Tokyo Banana and Japan’s Iconic Omiyage Sweets guide — that becomes a parcel, not a postcard, and needs a customs declaration at the counter.

    Where to Find Beautiful Postcards to Send

    Souvenir shops near major shrines and stations sell standard tourist postcards, but for something more distinctive, look in neighborhoods known for craft and design. Daikanyama’s boutique shops often stock beautifully designed stationery and postcard sets from independent Japanese illustrators, a step up from generic rack postcards. If you’re drawn to traditional crafts, postcards featuring textile and washi paper motifs pair nicely with a stop at Nishijin-ori in Kyoto, where you can see the silk-weaving tradition that inspires a lot of that imagery firsthand.

    Budget option: 100-yen shops and train station kiosks sell perfectly decent postcards for 100–200 yen each. Mid-range: boutique stationery shops run 300–600 yen for higher-quality card stock and original art. Splurge: limited-edition museum or temple postcard sets, sometimes boxed, can run 1,000–2,000 yen but make excellent gifts in their own right.

    Final Tip: Send One to Yourself

    A postcard mailed to your own address is a small, inexpensive time capsule — it’ll arrive after you’re home, stamped and dated, as a tangible memory of the trip. Combine it with a quick post office stop near your hotel on day one or two, before the itinerary gets busy, and you’ll have one less thing to worry about later.
  • Tokyo Character Street: A Shopper’s Guide to Tokyo Station’s Anime Arcade

    Tokyo Character Street: A Shopper’s Guide to Tokyo Station’s Anime Arcade

    Photo by Kanchan Raj Pandey on Unsplash

    Tucked into the basement of Tokyo Station, between bullet train platforms and ramen stalls, is one of the most efficient souvenir stops in the entire city: Tokyo Character Street. In roughly 100 meters of corridor, you’ll find more than 20 officially licensed shops covering Pokémon, Studio Ghibli, Sanrio, Jump manga titles, NHK characters, and more — all walkable in under an hour, and conveniently positioned for anyone already passing through on a train connection. If you’re heading to or from the Shinkansen and want to squeeze in meaningful shopping without a dedicated detour, this is the place.

    What Tokyo Character Street Actually Is

    Tokyo Character Street (東京キャラクターストリート) is a themed retail corridor on the first basement level (B1) of Tokyo Station, inside the Yaesu-side underground shopping zone known as “Tokyo Station Ichibangai.” It’s not a single store but a collection of brand-specific shops lined up side by side, each one a compact, dedicated outpost for a particular franchise or character line. Expect shops for Pokémon Center TOKYO-DX (the biggest and busiest), Studio Ghibli’s Donguri Kyowakoku, Sanrio Character Shop (Hello Kitty and friends), Jump Shop (One Piece, Naruto, Dragon Ball, and other Shonen Jump titles), Ultraman World M78, NHK Character Street (Domo-kun and NHK educational mascots), Kirby’s Pupupu Market, Chiikawa, Rilakkuma Store, and several rotating seasonal or collaboration pop-ups. The lineup shifts occasionally as leases turn over, but the core anchors — Pokémon, Ghibli, Sanrio, and Jump — have been fixtures for years.

    Hours, Access, and Finding It Inside Tokyo Station

    Most shops on Tokyo Character Street are open daily from 10:00 to 20:30 or 21:00, though a few individual shops close slightly earlier (Pokémon Center TOKYO-DX, for example, typically runs 10:00–20:30). There’s no single closing time for the whole street, so check the hours posted at each shop’s entrance if you’re cutting it close.

    To find it, head to the B1 level and follow signage for “Tokyo Station Ichibangai” or “Character Street” — it’s on the Yaesu side of the station (opposite the Marunouchi/Imperial Palace side), near the Yaesu North Exit basement concourse. If you arrive by Shinkansen, follow signs toward the Yaesu side exits and look for basement-level directories; station staff at the ticket gates can point you toward “Character Street” by name, since it’s a well-known local landmark, not an obscure shop. If you’re arriving from Narita or Haneda airport, our guide to Narita Express vs Keisei Skyliner can help you plan a route that lands you directly at Tokyo Station rather than Ueno or Shinjuku, saving a transfer.

    What to Buy and Realistic Prices

    Pricing varies widely by franchise and item type, but here’s a realistic budget breakdown based on what’s typically stocked:

    • Budget (¥500–¥1,500): Rubber straps, acrylic keychains, single stickers, small plushie charms, postcards, and gacha capsule toys (most gacha machines run ¥300–¥500 per pull). Jump Shop and Sanrio both stock a deep range of sub-¥1,000 items.
    • Mid-range (¥1,500–¥5,000): Standard plush toys, mugs, T-shirts, tote bags, and character-branded stationery sets. Pokémon Center exclusive plush (Pikachu in regional costumes, for instance) often lands in the ¥2,000–¥3,500 range.
    • Splurge (¥6,000 and up): Limited-edition figures, large plush, Ghibli art reproductions or ceramics from Donguri Kyowakoku, and region- or store-exclusive collaboration items. Pokémon Center TOKYO-DX exclusives and Ghibli porcelain pieces are the most likely to hit this bracket.

    Store-exclusive items are the real draw here — many shops stock Tokyo Station-only or Tokyo-limited variants you won’t find at other branches, which is worth knowing if you’re comparing against Pokémon Center or Jump Shop locations elsewhere in the city.

    Best Time to Visit

    Because it sits inside a major transit hub, Character Street gets crowded during commuter rush hours (roughly 8:00–9:30 and 17:30–19:00 on weekdays) simply from foot traffic passing through the concourse, even though the shops themselves are leisure destinations. For calmer browsing, aim for weekday mid-mornings (10:00–11:30) right after opening. Weekends, especially Saturday afternoons, bring in families and tend to be the busiest shopping periods, with lines forming outside Pokémon Center TOKYO-DX and Jump Shop at peak times. If your itinerary is flexible, visiting on a weekday just after the shops open gives you the best shot at browsing without queuing, and checkout lines are noticeably shorter.

    Common Mistakes to Avoid

    • Treating it as a quick five-minute stop. With 20+ shops, even a light browse takes 45–60 minutes. Budget more if you plan to actually buy things, since checkout lines at Pokémon Center and Jump Shop can take 10–15 minutes during busy periods.
    • Forgetting it’s inside the paid ticket area in parts. Tokyo Station Ichibangai, including Character Street, is accessible without a Shinkansen ticket — it’s in the general station concourse — but double-check your route if you’re navigating from a platform, since some basement corridors do require passing through ticket gates. If you’re unsure, ask station staff before tapping through.
    • Not keeping receipts for tax-free purchases. Most shops here are not set up for on-the-spot tax exemption the way large department stores are, so don’t count on duty-free pricing. Keep every receipt regardless — see our guide on returns, exchanges, and receipts in Japan for what to do if an item is damaged or you need to swap a size.
    • Assuming all shops take the same payment method. Most now accept IC cards and major credit cards, but a few smaller specialty shops are cash-preferred for low-value items. If you’ve already set up Suica or Pasmo on your phone, it’s worth testing at checkout before assuming it’ll work everywhere.
    • Skipping it because you’re “just passing through.” Because it’s inside the station, it’s one of the few souvenir stops in Tokyo genuinely compatible with a tight transit schedule — you don’t need a separate subway trip.

    Pairing It With the Rest of Tokyo Station

    Character Street is just one wing of Tokyo Station Ichibangai, which also includes the famous “Okashi Land” sweets corridor and a ramen alley. If you still need standard omiyage (gift-boxed snacks for coworkers or family back home) after character shopping, the nearby confectionery shops are a convenient next stop — our guide to Tokyo Banana and Japan’s iconic omiyage sweets covers what to grab and how to choose between the dozens of similar-looking boxed gift sets sold throughout the station. Between the two, you can realistically cover character goods and food gifts in a single basement-level loop without ever leaving the station building — ideal if you’re catching a train within the next hour or two.

  • Narita Express vs Keisei Skyliner: Which to Take from Narita Airport

    Narita Express vs Keisei Skyliner: Which to Take from Narita Airport

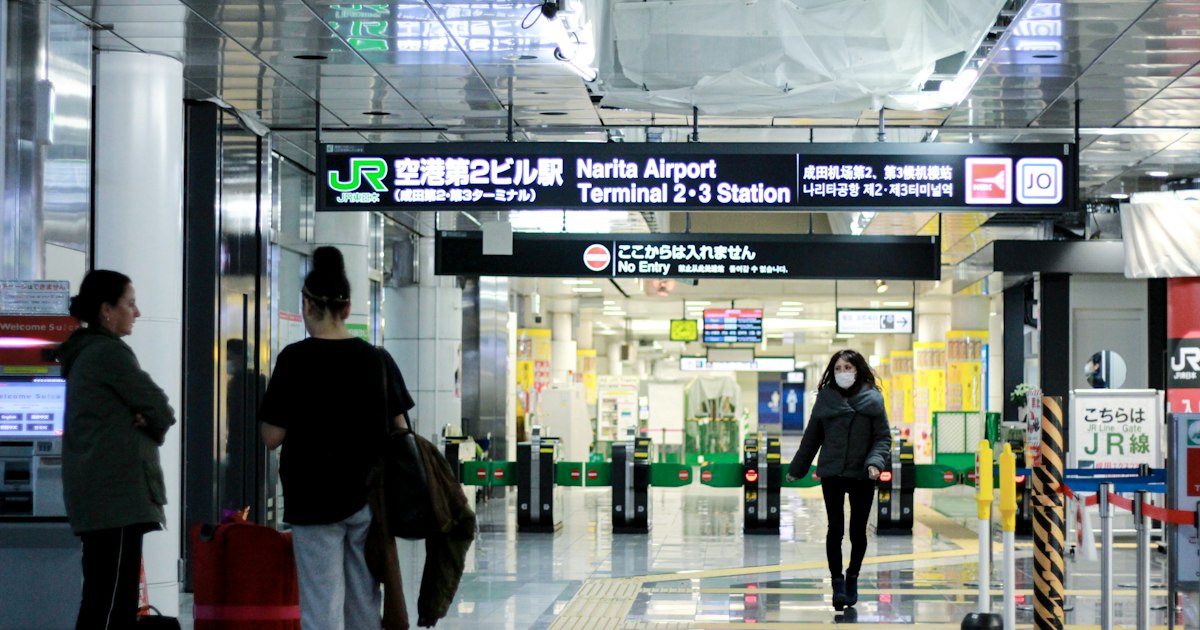
    Photo by Tan on Unsplash

    Landing at Narita after a long flight, you’re faced with your first real decision in Japan: how to get into Tokyo. The two best options are the JR Narita Express (N’EX) and the Keisei Skyliner, and most first-time visitors have never heard of either until they’re standing in the arrivals hall trying to choose. Both are fast, reliable, and far better than a taxi (which can run ¥20,000–¥25,000 to central Tokyo). Here’s how they actually compare, so you can pick the right one before you’ve even cleared customs.

    The Quick Answer

    If you’re heading to Tokyo Station, Shinagawa, Shibuya, Shinjuku, Ikebukuro, or Yokohama — and especially if you’re also using a Japan Rail Pass — take the Narita Express. If you’re headed to Ueno, Nippori, Asakusa, or anywhere on the northeast side of Tokyo, or you simply want the cheapest and fastest ride to a JR/Keisei connection point, take the Keisei Skyliner. Both depart from the same terminals, so you’re not locking yourself into a bad route either way.

    Narita Express (N’EX): Comfort and Direct Reach

    The Narita Express is operated by JR East and is the more versatile of the two because it runs through, without a transfer, to multiple major Tokyo hubs: Tokyo Station (about 55–60 minutes), Shinagawa, Shibuya, Shinjuku, and Ikebukuro, plus a branch to Yokohama. All seats are reserved, the cars have generous luggage racks near the doors, and there are power outlets at most seats — useful if your phone died on the flight.

    Standard one-way fares run around ¥3,070 to Tokyo Station and ¥3,250 to Shinjuku or Shibuya for an ordinary reserved seat (Green Car upgrades cost more). Foreign visitors can often save with the discounted “N’EX Tokyo Direct Ticket,” a round-trip fare bought in advance at roughly ¥4,070–¥4,370 depending on destination — worth it if you already know you’ll fly out of Narita again. The Narita Express is also fully covered by the Japan Rail Pass, which matters if you’re activating a 7, 14, or 21-day pass on arrival day; in that case it’s effectively free.

    Trains run roughly every 30–60 minutes from early morning (first departure around 7:30–8am) until about 9:45–10pm. Because every seat is reserved, you cannot board without a seat reservation during busy periods, so book at the JR ticket counter or machines in the arrival lobby as soon as you land, especially around holidays.

    Keisei Skyliner: Speed and Value

    The Keisei Skyliner is the faster and generally cheaper option, but it only goes to two stations: Nippori and Ueno, both on Tokyo’s east side. The ride to Ueno takes about 41 minutes — the fastest airport-to-city train in the Tokyo area. From either station you can transfer to the JR Yamanote Line or Tokyo Metro to reach almost anywhere else in the city within another 20–30 minutes.

    Regular one-way fare is ¥2,570 for adults. Foreign tourists can buy a discounted ticket (around ¥2,200–¥2,300) through Keisei’s own site or travel platforms like Klook and Voyagin before arrival — showing your passport at the counter also gets a tourist discount on the spot. Trains run every 20 minutes through the day, from roughly 7:30am to around 10:30pm, and all seats are reserved but easy to book at airport kiosks even with no advance planning.

    The Skyliner isn’t covered by the Japan Rail Pass since Keisei is a private railway, but it pairs well with a Tokyo Subway Ticket or a prepaid IC card for onward travel. If you’re setting up contactless payment for the rest of your trip, our guide on adding Suica or Pasmo to Apple Wallet is worth reading before you land — tapping through the Ueno transfer gates is much faster than fumbling with a paper ticket while jet-lagged.

    Comparing the Two Side by Side

    • Speed: Skyliner wins to Ueno (41 min) vs. N’EX to Tokyo Station (55–60 min).
    • Price: Skyliner is cheaper (~¥2,200–2,570) than N’EX (~¥3,070–3,250) for a one-way adult fare.
    • Destinations without a transfer: N’EX reaches far more stations directly — Shibuya, Shinjuku, Ikebukuro, Yokohama. Skyliner only reaches Ueno/Nippori directly.
    • Luggage space: Both have dedicated racks, but N’EX cars feel slightly roomier for oversized suitcases.
    • JR Pass coverage: N’EX only. If you’re activating a pass on day one, it’s essentially a free ride.

    Common Mistakes to Avoid

    The biggest mistake is assuming you can just walk up and board — both trains require seat reservations, and during peak season (cherry blossom weeks, Golden Week, New Year) same-day seats can sell out on the first one or two departures. Book at the ticket counter in the arrivals area the moment you land, even before collecting bags if the queue looks long.

    The second mistake is boarding the wrong train entirely: Narita Airport has two JR platforms shared with local trains and Keisei has a similarly shared setup, so double-check the signage and the destination board rather than just following the crowd. Staff at both counters speak enough English to confirm your platform.

    The third mistake is buying a round-trip discount ticket for the wrong leg of your trip — the N’EX round-trip deal is only worthwhile if you’re flying out of Narita again at the end of your stay, not if you’re departing from Haneda.

    Which One Fits Your Trip?

    If your hotel is near Tokyo Station, Shinagawa, or you’re continuing on to Yokohama, or you already hold a Japan Rail Pass, the Narita Express is the simpler, if pricier, choice. If you’re staying anywhere near Ueno, Asakusa, or planning to browse boutique neighborhoods like Daikanyama after a quick transfer, the Skyliner saves both time and money. Either way, budget travelers can also combine the Skyliner with the Tokyo Subway 24/48/72-hour ticket bundles sold at the same counter for a cheaper total transit cost over a multi-day stay.

    One last tip: Narita’s terminals have a surprising number of decent shops for last-minute omiyage if you’re departing rather than arriving — if you haven’t picked up gifts yet, our guide to Tokyo Banana and other iconic omiyage sweets covers what’s actually worth grabbing before you board either train home.

  • Daikanyama: Tokyo’s Stylish Boutique Neighborhood

    Daikanyama: Tokyo’s Stylish Boutique Neighborhood

    Photo by Hyungjun Goo on Unsplash

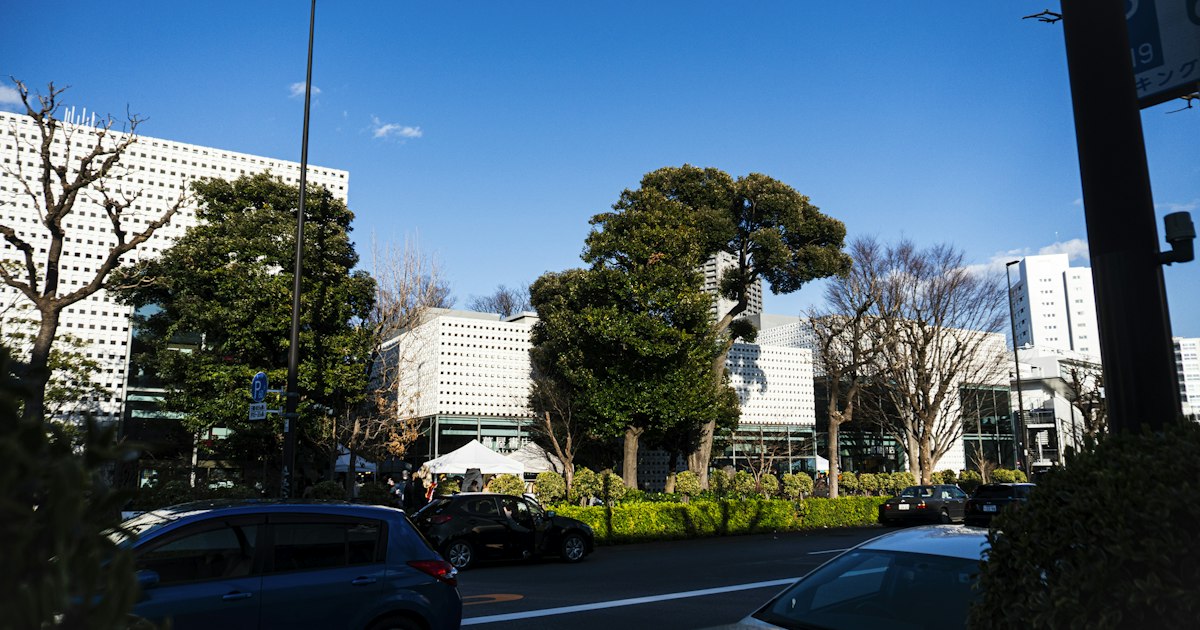
    Tucked between Shibuya and Ebisu, Daikanyama feels like Tokyo with the volume turned down. There are no pachinko parlors, no crowds elbowing past giant video screens — just tree-lined slopes, independent boutiques, and cafés where the coffee is taken seriously. It’s the neighborhood Tokyoites point to when they want to show visitors a side of the city that isn’t Shibuya Crossing. If you like slow mornings, well-edited clothing racks, and architecture worth photographing, set aside half a day for it.

    Where It Is and How to Get There

    Daikanyama Station sits on the Tokyu Toyoko Line, exactly one stop from Shibuya (about 3 minutes, roughly 150–160 JPY). This makes it an easy add-on to a Shibuya day rather than a destination requiring its own itinerary. If you’re coming from further afield on the JR network, ride to Shibuya first and transfer to the Toyoko Line, or simply walk — it’s about 20–25 minutes on foot from Shibuya Station through the quieter backstreets, and roughly 15 minutes from Ebisu Station, which makes a Daikanyama-to-Ebisu walk a nice way to link two neighborhoods in one afternoon. Make sure your IC card is loaded before you go; if you haven’t set one up yet, our guide on adding Suica or Pasmo to Apple Wallet covers the setup so you’re not fumbling with ticket machines at the gate.

    The Neighborhood’s Anchor: Tsutaya Books T-Site

    Most visits start at Tsutaya Books (also called T-Site), a complex of three interconnected glass pavilions designed by Klein Dytham architecture. It opens daily from 7:00 AM to 11:00 PM — unusually early and late for a Japanese bookstore — and functions as much as a lifestyle hub as a place to buy books. Browse design and photography titles, duck into the attached Anjin lounge for coffee and a cocktail list later in the day, and don’t skip the garden courtyard out back, which is popular with local dog owners (there’s even a dedicated dog park area nearby). English-language sections are limited, so this is more of an atmosphere stop than a shopping one unless you read Japanese.

    Boutique Shopping: What to Expect and What to Buy

    Daikanyama’s retail identity is small, curated shops rather than department stores or chains. Expect:

    • Budget (under 5,000 JPY): Independent zine and postcard shops, small ceramics stalls, and casual cafés with pastries from 400–700 JPY.
    • Mid-range (5,000–30,000 JPY): Selvedge denim, Japanese-made leather goods, and contemporary fashion labels at boutiques like Okura (Japanese textile-inspired clothing) or the shops scattered through Log Road Daikanyama.
    • Splurge (30,000 JPY+): Designer flagship stores and made-to-order tailoring — Daikanyama has long attracted labels that want a quieter, more design-forward storefront than Omotesando offers.

    Cow Books, a secondhand bookstore specializing in literature and counterculture titles, is worth a stop even if you don’t read Japanese — the shopfront and curated window displays are a neighborhood landmark in themselves. Most boutiques open around 11:00 AM and close between 7:00 and 8:00 PM; very few open before 11, so there’s no point arriving at 9 AM expecting shops to be running — that’s a café-and-walk window instead.

    Log Road and Hillside Terrace

    Log Road Daikanyama is a short pedestrian strip built along a former railway track, lined with Nordic-leaning cafés, a Fred Segal outpost, and Spring Valley Brewery, Kirin’s craft beer taproom (pints from around 800 JPY, flight sets available). It’s one of the most photogenic stretches in the neighborhood, especially in spring when the cherry trees along the old track bloom. Hillside Terrace, a few minutes further on, is a 1970s–90s architectural complex by Fumihiko Maki — low-rise, concrete, and genuinely influential in Japanese urban design circles. It mixes galleries, a Danish furniture showroom, and quiet courtyards. Even if you have no interest in architecture, it’s a pleasant, uncrowded place to sit for twenty minutes.

    Best Time to Visit

    Daikanyama rewards a weekday morning-to-afternoon visit — weekends bring more foot traffic, though nothing close to Shibuya-level crowds. Cherry blossom season (late March to early April) along Log Road and the Shibuya River walkway toward Nakameguro is the single best window, and it conveniently connects to Nakameguro’s famous river-side blossoms about a 15-minute walk south. Autumn (November) is a close second for foliage and mild walking weather. Summer is workable but shadeless in stretches; winter is quiet and fine for shopping since most of the appeal here is indoors or under awnings anyway.

    Common Mistakes to Avoid

    • Treating it as a half-day-only destination. Daikanyama is compact — most visitors cover the main streets in 2–3 hours. Pair it with Ebisu or Nakameguro rather than building a whole day around it alone.
    • Expecting tax-free shopping everywhere. Many boutiques here are small, independent operations that don’t process duty-free paperwork, unlike department stores. If tax-free purchases matter to you, ask before you buy, and keep receipts — our guide to returns, exchanges, and receipts in Japan explains what tourists should know before buying, including the minimum spend thresholds for tax exemption.
    • Visiting on a Monday without checking hours. It’s not universal, but a meaningful number of independent boutiques and cafés in Daikanyama take Monday as their weekly closure. Check a shop’s website or Google listing the day before if there’s something specific you want to see.
    • Assuming it’s bargain shopping. This is a design-conscious, mid-to-high-price neighborhood. If you’re hunting for deep discounts, Shimokitazawa or Koenji will serve you better.

    Rounding Out the Trip

    If you’re building a souvenir list while you’re in the area, Daikanyama’s boutiques lean toward fashion and homeware rather than classic omiyage, so save food and gift shopping for a department store basement (depato chika) elsewhere, or a dedicated stop like Tokyo’s Kakimori stationery atelier, where you can build a custom notebook as a gift that’s genuinely hard to find outside Japan. And if any of your purchases are headed back to a workplace rather than family or friends, it’s worth a quick read of our guide to omiyage etiquette — the unwritten rules around individually wrapped items and per-person quantities trip up a lot of first-time visitors.

    Daikanyama won’t overwhelm you with sights, and that’s the point. It’s a neighborhood built for wandering at a slower pace, with enough good coffee and well-made things along the way that a loosely planned afternoon here tends to work out better than a tightly scheduled one.

  • Adding Suica or Pasmo to Apple Wallet: A Tourist’s Setup Guide

    Adding Suica or Pasmo to Apple Wallet: A Tourist’s Setup Guide

    Photo by Thiago Yonamine on Unsplash

    If you’re flying into Tokyo and dreading the ticket machine line, there’s good news: you can set up a working Suica or Pasmo card on your iPhone before you even board the plane. No kiosk, no Japanese-language menus, no 500-yen deposit. This guide walks through exactly which devices work, how to add the card, how to keep it topped up, and the mistakes that trip up first-timers.

    Do You Even Need a Physical Card?

    Suica (issued by JR East) and Pasmo (issued by Tokyo’s private railways and bus operators) are the two main prepaid IC cards used across Japan’s trains, subways, and buses. They’re also accepted as e-money at convenience stores, vending machines, and many shops nationwide — handy if you’re grabbing a bowl of oden at a convenience store counter and don’t want to fumble for coins. For most visitors with a compatible iPhone, there’s no real reason to bother with the plastic version anymore — the digital card works identically at every gate and reader, costs nothing to create, and can be topped up from your phone at 2am in your hotel room.

    The one caveat: physical Suica cards have occasionally been in short supply at stations over the past couple of years due to IC chip shortages, with JR East periodically restricting walk-up sales to residents. That makes the Apple Wallet route even more reliable for tourists right now, since it sidesteps station inventory entirely.

    Which iPhones and Apple Watches Actually Support This

    You need an iPhone 8 or later, or an Apple Watch Series 3 or later — and this works regardless of which country or region your device (or Apple ID) is set to. That region-lock used to be a real headache before 2017, but Apple opened FeliCa transit cards up to all markets, not just Japan-sold phones. The only common exception is the first-generation iPhone SE, which lacks the needed NFC hardware. If your phone is newer than about 2017, you’re almost certainly fine.

    Step-by-Step: Adding Suica or Pasmo in Wallet

    • Open the Wallet app and tap the + in the top corner.
    • Select “Travel Cards,” then choose Suica or Pasmo from the list.
    • Tap “Create” to set up a brand-new digital card, or “Transfer Existing Card” if you already own a physical one and want to move its balance onto your phone (this fully deactivates the physical card, so don’t do it until you’re sure).
    • Choose an initial top-up amount — you’ll be asked to load funds via Apple Pay as part of setup, typically in 1,000-yen increments.
    • Confirm, and the card appears in Wallet within seconds, ready to tap at any gate.

    The whole process takes about two minutes and can be done from your home country before you fly, as long as you have a working internet connection and an Apple Pay–eligible card.

    Topping Up: Cards, Cash, and Limits

    For years, only Japan-issued credit cards could reload a mobile Suica or Pasmo through Apple Pay, which frustrated a lot of visitors. That changed in late 2023: most Visa and Mastercard credit cards issued outside Japan can now top up directly in the Wallet app, no Japanese bank account required. Open the card in Wallet, tap “Top Up,” enter an amount, and authenticate with Face ID or Touch ID.

    If your card isn’t accepted for some reason, you can still add cash. Look for the green multi-function ticket machines at JR stations — select the “Mobile Suica / Apple Pay” charge option on the touchscreen, insert cash, and hold your iPhone against the reader pad to load the funds. Maximum balance on either card is 20,000 yen, and top-ups are generally accepted in round amounts like 1,000, 2,000, 3,000, 5,000, or 10,000 yen.

    Using It at Gates, Buses, and Shops

    Go to Settings > Wallet & Apple Pay > Express Transit Card, and set your Suica or Pasmo as the default. This is the single most important setup step — with Express Transit enabled, you tap your phone or watch directly on the reader with no Face ID, passcode, or double-click needed, exactly like a physical card. Skip this and you’ll be stuck authenticating at every single gate, which is slow and annoying during rush hour.

    One underrated feature: even after your iPhone’s battery fully dies, Express Transit usually keeps working off reserve power for a few hours, so you can still get through a final gate on your way to a charger. The card also works as tap-to-pay at convenience stores, vending machines, and an increasing number of retail counters — useful at electronics megastores like those compared in our Bic Camera vs Yodobashi Camera guide, though note that tax-free purchases there still need a passport scan separately from your IC card payment.

    Common Mistakes to Avoid

    • Not setting Express Transit as default — leads to failed taps and Face ID prompts mid-gate.
    • Adding both Suica and Pasmo — they’re functionally interchangeable for transit and shopping, so there’s no benefit to carrying both digitally; pick one and avoid Wallet confusing which card is default.
    • Assuming it works everywhere — some rural and scenic lines, including parts of the route up to the Tateyama Kurobe Alpine Route or smaller legs near the Kurobe Gorge Railway, still require paper tickets. Always check before assuming a tap-in gate exists.
    • Transferring a physical card too early — once you use “Transfer Existing Card,” the plastic version is dead. Only do this once you’re confident you won’t need a backup card for a travel companion.
    • Switching phones mid-trip without transferring out first — if you get a new iPhone, move the card via Wallet’s transfer settings before wiping your old device, or you’ll need to go through JR East’s refund process, which is far more painful for a short-term visitor than for a resident.

    Suica vs Pasmo: Does It Matter Which One You Pick?

    For a tourist, barely. Both are accepted on essentially the same network of trains, subways, buses, and shops across the country, including on regional lines you might ride on an Izu Peninsula day trip from Tokyo. Suica has a slight edge for name recognition abroad and is the default choice if you’re flying into Haneda or Narita, since JR East runs those airport lines. Pasmo is backed by Tokyo’s subway and bus operators and feels marginally more “local” if you’re based in a neighborhood served mainly by private railways. Either one will get you around Tokyo, Osaka, Kyoto, and most other major cities without issue — the real decision is just making sure you set it up correctly in Wallet before your first train ride, not which brand name is on it.

  • Taking Your Shoes Off in Japan: Indoor Etiquette for Homes, Ryokan & Temples

    Taking Your Shoes Off in Japan: Indoor Etiquette for Homes, Ryokan & Temples

    Photo by Felix Rostig on Unsplash

    Nothing marks a first-time visitor to Japan faster than fumbling at a doorway, shoes half-on, while everyone else glides past in socked feet. Taking shoes off indoors isn’t a quaint custom reserved for shrines — it’s a daily, practical system that governs homes, ryokan, some restaurants, and dozens of temples and castles you’ll likely visit. Get the basics down before you go and it becomes second nature within a day or two. Here’s exactly where, when, and how it works.

    Why Shoes Come Off: The Logic Behind the Rule

    The custom isn’t really about cleanliness alone — it’s about separating “outside” dirt from the raised, often tatami-matted floor that Japanese households (and many traditional buildings) are built around. Floors are where people sit, kneel, and sometimes sleep, so they’re treated more like a bed than a walkway. Once you see it that way, the rule stops feeling arbitrary and starts feeling obvious: you wouldn’t walk on your bed in street shoes either.

    At the Genkan: The Step-by-Step Choreography

    Every Japanese home, and most ryokan and traditional restaurants, has a genkan — a sunken or lowered entry area just inside the door where shoes come off. The etiquette is simple once you know it:

    • Step out of your shoes while still standing in the genkan (the lower level), never on the raised floor behind you.
    • Turn your shoes around afterward so the toes point back toward the door — this is a small courtesy that locals do automatically, often with a quick foot-pivot rather than bending down.
    • Line your shoes neatly to one side, not in the middle of the entryway where others will trip over them.
    • Wear socks or bring a clean pair — bare feet in someone’s home or a ryokan is considered a little too casual. Slip-on shoes save time and dignity, since you’ll be doing this constantly.

    If you’re invited to someone’s home, it’s worth reading up on omiyage gift-giving etiquette too — arriving with a small, nicely wrapped gift and clean socks will make a strong first impression at the genkan before you’ve said a word.

    Ryokan Etiquette: Slippers, Tatami, and the Bathroom Switch

    Traditional inns layer the system further, and it trips up almost every first-timer:

    • Entrance: remove your outdoor shoes at the genkan and change into the ryokan’s indoor slippers, usually lined up in cubbies or offered by staff.
    • Your room: slippers come off again before stepping onto the tatami floor — leave them just outside the sliding door. Tatami is walked on in socks or bare feet only.
    • The toilet: almost every ryokan has a separate pair of “toilet slippers” waiting just inside the bathroom door. Swap into these, and — this is the mistake nearly everyone makes at least once — remember to swap back out before walking back through the hallway. Wandering the corridor in toilet slippers is a classic rookie error.
    • Outdoor areas: if your ryokan has a garden path or outdoor onsen building, you’ll typically find geta (wooden sandals) by the door for that short outdoor stretch.

    If you’re planning an onsen weekend, the Izu Peninsula is a popular, easy-access area from Tokyo with ryokan ranging from simple family-run inns (around ¥12,000–18,000 per person with two meals) to elaborate kaiseki retreats well over ¥40,000 — all running the same shoes-slippers-tatami system described above.

    Visiting a Japanese Home

    Private homes follow the genkan rules above, with a couple of added layers. If your host hands you house slippers, wear them through the hallways — but take them off before entering any tatami room, and definitely before stepping onto a dining area with a low table and cushions. Bathroom slippers work exactly like the ryokan version. If you’re visiting around New Year, when many families host relatives at home, it’s worth knowing the broader customs around that season — see our guide to Oshogatsu traditions, osechi ryori, and hatsumode — since shoe etiquette is just one piece of a bigger set of expectations around visiting someone’s home at that time of year.

    Temples, Shrines, and Castles: Where Shoes Actually Come Off

    Not every temple requires bare feet — outdoor shrine grounds and stone approach paths are fine in shoes. The rule kicks in once you step up onto a wooden veranda, tatami room, or interior hall. A few concrete, reliable examples:

    • Sanjusangendo (Kyoto): the famous 120-meter hall of 1,001 Kannon statues is walked entirely in socks; shoes go into plastic bags or shelves at the entrance. Open roughly 8:00–17:00 (shorter in winter), admission around ¥600.
    • Nijo Castle’s Ninomaru Palace (Kyoto): shoes off to walk the palace’s famous “nightingale floors,” which chirp underfoot by design as a security feature. Open 8:45–16:00 (last entry), closed some Tuesdays in Jan/Jul/Aug/Dec; castle grounds admission around ¥800–1,300 depending on what’s included.
    • Nikko Toshogu’s inner halls, including the Honji-do “crying dragon” room: shoes off, socks recommended since you’re on bare wood or tatami.

    Carry a lightweight tote bag for your shoes at busy sites — most provide plastic bags or wooden shelf lockers, but queues move faster if you’re not hunting for a spare bag. Autumn (November) and spring (late March–April) are the busiest seasons at these sights, so arriving at opening time means less crowding around the shoe-storage area itself, which gets surprisingly congested.

    Common Mistakes Foreign Visitors Make

    • Walking into the raised area with shoes still on to “just drop off a bag” — even a few seconds counts.
    • Forgetting socks entirely — bare feet are workable at home with close friends but feel too informal at a ryokan, temple, or someone else’s house. Convenience stores and 100-yen shops sell basic socks for ¥300–500 if you’re caught out.
    • Leaving toilet slippers on past the bathroom door — the single most common slip-up, even among seasoned travelers.
    • Not squaring up shoes at the door — small, but noticed.
    • Assuming all restaurants require it — izakaya and casual chains generally don’t; it’s mainly tatami-seating restaurants, traditional ryokan dining rooms, and temple/shrine interiors.

    It’s part of a broader pattern of small, systemized etiquette you’ll notice throughout Japan — the same instinct for order shows up in how households sort and dispose of trash, another area where a little advance knowledge saves visitors some awkward moments.

    Quick Packing Tips

    Pack slip-on or easily removable shoes, bring at least one clean pair of socks per day if you’ll be ryokan-hopping or temple-heavy on your itinerary, and consider a small drawstring bag for shoe storage at crowded sights. It’s a minor adjustment, but once the genkan choreography clicks, it becomes one of the more charming, low-cost rituals of traveling in Japan rather than a source of stress.

  • Visiting Japan’s Whisky Distilleries: Yamazaki, Hakushu & Yoichi Tours

    Visiting Japan’s Whisky Distilleries: Yamazaki, Hakushu & Yoichi Tours

    Photo by François Hoppet on Unsplash

    Japan’s whisky boom didn’t happen by accident — it started in the 1920s when Masataka Taketsuru brought distilling knowledge home from Scotland and helped found what became Suntory’s Yamazaki Distillery, then later built his own Nikka distillery in Yoichi, Hokkaido, chasing a climate that reminded him of the Scottish Highlands. Today Yamazaki, its sister distillery Hakushu, and Yoichi are the three most visit-worthy production sites in the country, and all three welcome travelers with proper tours, tasting counters, and gift shops stocked with distillery-only bottlings. None of them are difficult to reach, but each has its own booking quirks, so here’s what to actually expect.

    Yamazaki Distillery: Japan’s Original Whisky Birthplace

    Founded in 1923, Yamazaki sits in Shimamoto, Osaka Prefecture, right on the border with Kyoto, chosen for its soft water and the morning mist off three converging rivers. It’s the easiest of the three to reach: take the JR Kyoto Line (not all trains stop here, so check for a local or rapid service) from Kyoto Station (about 15 minutes) or Osaka Station (about 30 minutes) to JR Yamazaki Station, then walk roughly 7 minutes. Hankyu’s Oyamazaki Station on the Kyoto Line works too.

    All visits now require advance online reservation through Suntory’s official site — walk-ins are not guaranteed entry, especially on weekends. Reservations typically open about 3 months ahead and the popular tasting-included tours fill within days, so book the moment your travel dates are fixed. Pricing runs roughly ¥1,000 for a basic distillery tour with a highball at the end, up to ¥4,000–¥5,000 for premium tours that include tastings of single malts not sold in stores. The on-site Whisky Museum and shop are open to anyone who books a visit, roughly 9:30 to 17:00, with closures around New Year and occasional maintenance days. English-language tour slots exist but are limited, so confirm the language when booking.

    Since you’re already in the Kyoto–Osaka corridor, it’s easy to tack this onto an Osaka day: many visitors finish a Yamazaki tour and head into the city for dinner at Shinsekai, Osaka’s retro tower district, where deep-fried skewers pair surprisingly well with a glass of what you just tasted.

    Hakushu Distillery: Whisky in a Forest, Not a Factory

    Suntory’s second distillery, opened in 1973, is built inside a forest in Hokuto, Yamanashi Prefecture, at the base of the Southern Japan Alps — it’s often called the largest distillery in the world by land area, and it shows: there’s a bird sanctuary and wooded walking paths on the grounds. From Tokyo, take a JR Chuo Line limited express (Azusa or Kaiji) from Shinjuku to Kobuchizawa Station, about 2 hours, then transfer to a free shuttle bus that Suntory runs for ticketed visitors (reservation required, about 20 minutes to the distillery gate).

    Booking works the same as Yamazaki: reserve online in advance, expect similar pricing tiers (around ¥1,000 for the standard tour, more for tasting-heavy premium options), and don’t expect to walk in without a reservation. Hours are roughly 9:30 to 17:00 with similar seasonal closures. Autumn (late October into November) is the standout season here — the forest turns color and the whole property feels more like a mountain retreat than an industrial site. Spring’s fresh greenery is nearly as good; midsummer can be humid, and winter access depends on snow conditions around Kobuchizawa, so check JR service status if you’re visiting January–February.

    Yoichi Distillery: Nikka’s Original Hokkaido Site

    Masataka Taketsuru picked Yoichi, a small coastal town near Otaru in Hokkaido, because its cool climate and peaty character reminded him of Scotland. The distillery, dating to 1934, is the most atmospheric of the three — stone warehouses, coal-fired pot stills (still used for some production), and a small museum dedicated to Taketsuru and his Scottish wife Rita. From Sapporo, take a JR train to Otaru (about 40 minutes), transfer to a local train bound for Yoichi (about 25 minutes more), and the distillery gate is roughly a 3-minute walk from Yoichi Station — one of the most convenient station-to-distillery walks in Japan.

    Yoichi has historically been more flexible about reservations than the two Suntory sites, with self-guided walking routes through the grounds included in free admission, and a tasting hall where you pay per pour (a flight of a few drams usually runs somewhere in the ¥500–¥1,000 range). That said, Nikka has been tightening reservation requirements for guided tours in recent years, so check the official Nikka website before you go rather than assuming you can just show up. Hours are generally 9:00 to 17:00, with closures around the New Year holiday. Summer (June–August) is the easiest time to visit comfortably; Hokkaido winters are scenic but can disrupt train schedules, so build in buffer time if you’re visiting between December and March.

    Planning Your Trip: Budget, Season, and Logistics

    Realistically, you can’t do all three in one trip unless you’re dedicating serious time to Japan — Yamazaki/Hakushu sit in central Honshu while Yoichi is in Hokkaido, a separate flight or long train ride away. Most travelers pair Yamazaki with a Kyoto–Osaka itinerary, treat Hakushu as an add-on if they’re also doing Mt. Fuji or the Japan Alps, and visit Yoichi as part of a dedicated Hokkaido/Sapporo trip.

    • Budget: self-guided or basic reserved tours (~¥1,000), public transport only, one tasting included.
    • Mid-range: tasting-focused tours (~¥2,000–¥3,000) with 2–3 pours of limited bottlings, plus lunch at the on-site restaurant where available (Hakushu has one).
    • Splurge: premium tours (¥4,000–¥8,000+) with rare cask tastings, or hiring a car/driver to combine Yamazaki and Hakushu in a single long day from Kyoto or Tokyo.

    If you’re driving between distilleries rather than relying on trains — common for a Yamazaki-plus-Hakushu day trip, since public transit between them is slow — renting a car means dealing with expressway tolls, and it’s worth sorting out an ETC card before you leave the rental counter; see our guide to ETC cards and expressway tolls for how that works. Just remember that whoever’s driving can’t drink at the tasting counter — Japan has zero tolerance for drink-driving, and there’s no workaround here.

    Common Mistakes to Avoid

    The single biggest mistake is assuming you can walk in without checking reservation requirements first — Yamazaki and Hakushu both require advance booking, and slots for English tours or weekend dates disappear fast. Book as soon as your dates are confirmed, not after you land.

    Second, don’t expect to buy the famous aged expressions — Yamazaki 18, Yamazaki 25, or rare Nikka single casks — in the gift shop. These are allocated through lotteries or simply not stocked for walk-in sale; shops mostly carry the standard range, distillery-exclusive NAS (no-age-statement) bottlings, and merchandise. If a specific rare bottle is your goal, research the lottery system in advance rather than counting on finding it on-site.

    Third, don’t bring a drone expecting to get atmospheric shots of the grounds — distilleries are private industrial property with working equipment and fire-safety concerns, and drone use is generally not permitted without specific authorization. If aerial photography matters to your trip, it’s worth understanding Japan’s broader rules first; our overview of drone laws and photography permits in Japan covers where flying is and isn’t allowed.

    Finally, pace your day. Tastings are generous by some countries’ standards but still modest pours meant for appreciation, not a bar crawl — plan your onward travel (train connections, dinner reservations) with that in mind, and if you’re hopping from Yamazaki into Osaka’s izakaya scene afterward, a plate of hot karaage is the classic whisky-highball pairing to look for on the menu.

  • Trash & Recycling in Japan: How Travelers Should Sort Waste

    Trash & Recycling in Japan: How Travelers Should Sort Waste

    Photo by Mylène Larnaud on Unsplash

    You finish a can of coffee or a convenience store onigiri, turn around, and realize there isn’t a trash can anywhere in sight. This is one of the first things that throws visitors off in Japan — a country famous for cleanliness has remarkably few public bins. It’s not an oversight; it’s the result of a very specific system, and once you understand it, carrying your own trash for a few hours stops feeling strange and starts feeling normal. Here’s how sorting and disposal actually work, and how to avoid the mistakes most tourists make.

    Why Japan Has So Few Public Trash Cans

    Many public bins were removed from train stations and streets after the 1995 Tokyo subway sarin gas attack, when bins were seen as a security risk for hiding dangerous items. That policy mostly stuck, and it combined with a cultural expectation that you take your trash home (or back to where you bought the item) rather than leave it for someone else to manage. The result is a country where streets are spotless precisely because there’s nowhere to litter — people simply hold onto their rubbish until they find an appropriate bin.

    The Basic Sorting Categories You’ll Encounter

    Japanese municipalities split waste into categories, and the exact names and rules vary slightly by city, but as a traveler you’ll mainly run into:

    • Moeru gomi (燃えるごみ) — burnable waste: food scraps, tissues, most packaging.
    • Moenai gomi (燃えないごみ) — non-burnable: metal, ceramics, small electronics.
    • PET bottles (ペットボトル) — plastic drink bottles only, usually rinsed, with caps and labels removed and binned separately.
    • Cans and bottles (缶・びん) — aluminum/steel cans and glass bottles.
    • Plastics (プラスチック) — snack wrappers, trays, and other soft plastic packaging, kept separate from PET bottles in many areas.

    Bins are almost always labeled with small pictures even when the text is in Japanese, so you can usually match the shape of your item (bottle, can, wrapper) to the icon without reading a word of Japanese.

    Where You Can Actually Throw Away Trash

    As a visitor, your realistic disposal points are:

    • Convenience stores (7-Eleven, Lawson, FamilyMart) — nearly all have a small bin bank near the entrance, open whenever the store is (most are 24 hours). These are intended for items you bought there, so it’s good etiquette to use them after a konbini purchase rather than dumping a bag of loose travel trash.
    • Vending machines — almost every vending machine has a recycling bin attached, but it’s for cans, bottles, and sometimes cartons only.
    • Train station platforms — bins reappeared in many stations in recent years, usually past the ticket gates, sorted into burnable/PET/cans.
    • Food stalls and festival areas — at matsuri and street-food alleys, vendors typically set out sorted bins near their stalls. This is especially true at big events like Awa Odori, where food stands line the dance route, or in skewer-and-beer alleys like Shinsekai’s kushikatsu strip — look for the bin cluster near where you bought the food rather than carrying it elsewhere.
    • Your hotel room — standard hotels empty room bins daily as part of housekeeping, so you don’t need to sort anything there.

    Vending Machines and Convenience Store Bins: The Fine Print

    This is where most travelers slip up. Vending machine recycling bins are for the can or bottle you just bought at that machine — not a general trash can. Shoving in a tissue, a food wrapper, or an umbrella bag will sometimes jam the chute, and locals notice. Likewise, convenience store bins are meant for purchases made in that store; walking in just to dump a bag of trash from elsewhere is considered poor form, even though staff rarely say anything. If you buy a drink, finish it before you leave the area near the vending machine or store — that’s the easiest way to stay within the unwritten rules.

    If You’re Staying in a Vacation Rental or Kominka

    This is the one situation where sorting mistakes actually have consequences. Hotels handle your trash for you, but if you book an Airbnb, machiya, or a traditional kominka farmhouse stay, you become responsible for sorting your own waste according to the local municipal calendar. Collection happens on fixed days — burnable waste might be picked up twice a week, PET bottles and cans once a week, non-burnables only once or twice a month — and putting bags out on the wrong day means they simply get left behind. Many municipalities also require designated garbage bags sold at local supermarkets or convenience stores, printed with the ward or city’s logo; these typically cost around ¥20–50 per bag depending on size and region, and generic bags may be rejected. Good hosts leave a printed sorting guide and calendar in the house; if yours doesn’t, ask before your first collection day rather than guessing.

    Common Mistakes Travelers Make

    • Carrying trash into a shrine, temple, or scenic viewpoint bin that doesn’t exist — these areas are almost always bin-free to keep them pristine.
    • Mixing PET bottles with cans in combo bins without checking the icon, even though many stations and stores do separate them.
    • Leaving large items on the street, like a broken umbrella or a cheap suitcase bought for souvenirs — oversized item disposal (sodai gomi) requires a paid sticker, usually ¥200–2,000 depending on the item and city, arranged in advance through the local ward office. It’s not something a short-term visitor can realistically do, so it’s better to leave bulky purchases behind in your home country, pack light, or ship items home instead.
    • Assuming every bin accepts food waste — some station and convenience store bins are “bottles and cans only,” with nowhere for leftover food, so finish meals before disposing of containers.

    A Simple System for Your Trip

    The easiest habit is to carry a small resealable bag or a spare konbini bag in your daypack. Use it to hold wrappers, tissues, and empty containers between bin sightings, then sort everything in one go at the next convenience store or train station. Finish drinks near the vending machine you bought them from rather than carrying open containers around. If you’re hopping between regions — say, combining a street-food crawl in Shinsekai with a few evenings at a standing bar through Japan’s tachinomi culture — you’ll generate a lot of small cans and skewer sticks over a single night, and knowing that the bin by the register is fair game (because you bought the food there) makes the whole system much less stressful. Within a day or two, scanning for the bin icons becomes second nature, and the lack of public trash cans stops being a puzzle and starts making sense as part of why Japan’s streets stay so clean.

  • Getting a Haircut in Japan: How to Book a Salon and What to Expect

    Getting a Haircut in Japan: How to Book a Salon and What to Expect

    Photo by Hongwei FAN on Unsplash

    Running out of road before your flight home and realizing you need a trim is one of the more underrated travel stresses in Japan. The good news: Japanese salons range from ten-minute, no-frills cuts to elaborate two-hour experiences with a head massage thrown in, and most of the system is navigable even if you don’t speak Japanese. Here’s how to figure out which kind of haircut you actually want, how to book it, and what happens once you sit down in the chair.

    The Three Tiers of Haircuts in Japan

    Japan’s hair industry splits roughly into three categories, and picking the right one matters more than picking the right salon.

    • Quick-cut chains (budget): QB House is the best known, with branches inside train stations across Tokyo, Osaka, and other major cities. Cuts run about ¥1,200–¥1,500, take roughly 10 minutes, use an air-suction system instead of a wash, and are walk-in only—no reservation possible or needed. There’s no shampoo, no styling, and usually no English, but the process (sit, point at a length guide, done) is simple enough to manage with gestures.
    • Neighborhood salons (mid-range): A standard unisex salon (biyoin) or traditional barbershop (tokoya) charges around ¥3,500–¥6,000 for a men’s cut and ¥6,000–¥9,000 for a women’s cut, including shampoo and blow-dry. These are the most common salons in any residential area and are where most long-term residents go.
    • Designer salons (splurge): Concentrated in Harajuku, Omotesando, and Shibuya, these salons charge ¥8,000–¥20,000+ for a cut with a senior stylist, often more if you add color or a perm. Many have at least one English-speaking stylist and cater specifically to foreign clients.

    How to Book: Hot Pepper Beauty and Walk-Ins

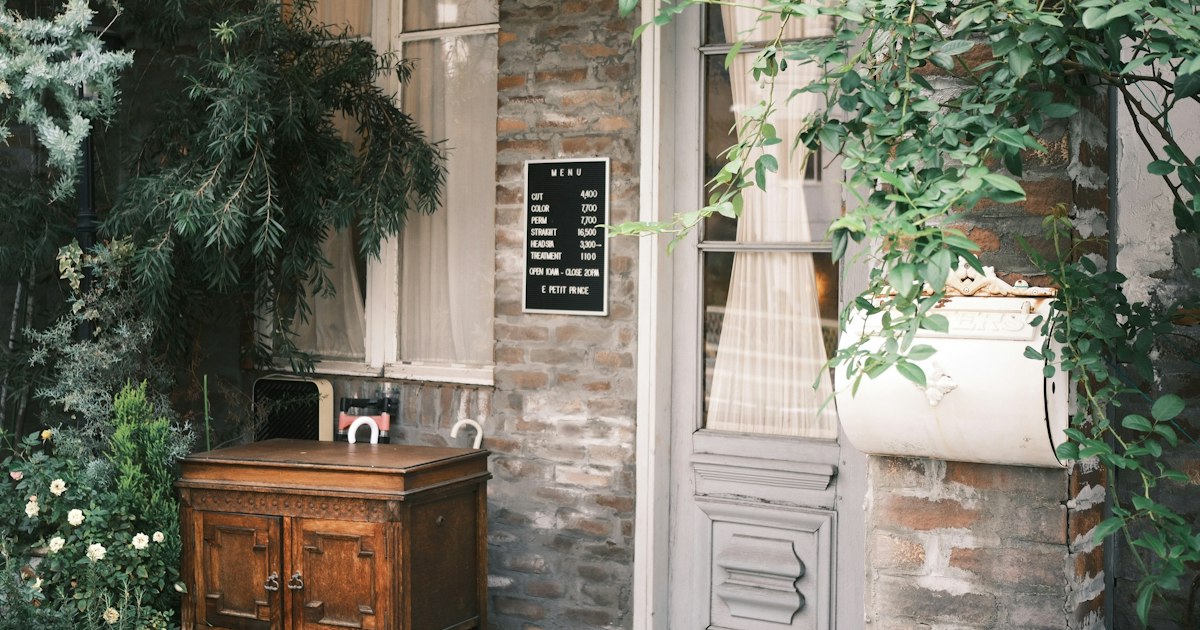
    The dominant booking platform is Hot Pepper Beauty (Hotpepper Beauty), a website and app used by the vast majority of Japanese salons. You can browse by neighborhood, see stylist portfolios and prices, and book specific time slots—though the interface is mostly in Japanese, so a translation app or your phone’s built-in page translation helps. Some larger salons in tourist-heavy areas also take bookings directly via Instagram DM or a simple English booking form on their own website.

    Walk-ins work at QB House-style chains and many traditional tokoya barbershops, but trendy salons in Harajuku or Omotesando generally require a reservation, especially on weekends—showing up without one often means being turned away or told to come back in several hours. If you want a specific well-reviewed stylist, book 3–5 days ahead; for weekend slots at popular salons, a week out is safer.

    What a Typical Salon Visit Looks Like

    Budget more time than you would at home. A full-service cut at a mid-range or designer salon typically includes a consultation, shampoo (often with a scalp massage), the cut itself, and a blow-dry styling—the whole thing commonly takes 60–90 minutes, sometimes longer for women’s cuts with styling. Many salons also offer an optional head spa add-on (a deeper scalp massage and conditioning treatment) for an extra ¥1,000–¥3,000, which is worth trying at least once even if you’re not usually a spa person.

    Staff will usually hand you a tablet or paper form asking about allergies and hair concerns, and the stylist will do a consultation before touching scissors—this is the moment to communicate clearly, since cutting too much is hard to undo.

    Bridging the Language Gap

    Bring 2–3 reference photos on your phone showing the length and style you want, ideally from multiple angles. Japanese stylists are generally precise and will try to match a photo closely, which makes this far more reliable than verbal description alone. Useful phrases to have ready or typed into a translation app: “sukoshi” (a little), “mijikaku” (shorter), “onaji gurai” (about the same length), and “maegami” (bangs/fringe). If a salon’s listing on Hot Pepper Beauty or its own site explicitly says “English OK” or lists an English-speaking stylist, it’s worth paying slightly more for the peace of mind, particularly for a first visit or anything beyond a simple trim.

    Timing, Hours, and Common Mistakes

    Most salons open around 10:00 and close between 19:00 and 20:00, and nearly all close one weekday—commonly Monday or Tuesday—so don’t assume every salon is open daily. Avoid the turn-of-year period (roughly December 28 to January 3), when many salons close entirely and the rest are booked solid with people getting a fresh look before New Year visits to family or shrines. Weekday afternoons are the easiest slots to get on short notice; Saturdays fill up fastest.

    The most common mistakes travelers make: assuming any salon takes walk-ins (many don’t), underestimating how long a full-service visit takes and scheduling it too close to a train or flight, and not bringing a photo, which can lead to miscommunication on length or layering. It’s also worth knowing that tipping is not expected or practiced at any tier of salon in Japan—the listed price is the full price, though color, perm, or extra-long hair often carry a surcharge that’s usually disclosed on the booking page.

    Beyond the Cut: Traditional Hair Culture

    If you’re interested in Japanese hair care beyond a modern salon visit, it’s worth seeking out traditional tools and styling culture rather than just the haircut itself. Kyoto is the best place to see this up close—see our guide to Tsuge Kushi: Kyoto’s Boxwood Combs and Traditional Hair Accessories for where to find hand-carved boxwood combs still used by geiko and maiko today. For a more alternative, street-style take on Japanese hair and fashion, Tokyo’s Koenji vintage and punk rock neighborhood has salons that lean into bold color and cuts rather than the polished Omotesando look. And if you’re based near Tokyo’s old geisha quarter, the atmospheric streets of Kagurazaka are a pleasant place to wander while you wait for a nearby appointment.

    Which Option to Pick

    For a simple maintenance trim with no language ability and no time to spare, QB House or a similar quick-cut chain is hard to beat. For a proper cut with wash and style at a fair price, any neighborhood biyoin booked through Hot Pepper Beauty will do the job well. And if you want the full experience—head spa, a stylist who speaks English, and a result worth photographing—book a designer salon in Harajuku or Omotesando several days ahead and treat it as part of the trip rather than an errand.

  • Kagurazaka: Tokyo’s Cobblestone Former Geisha District and French Cafes

    Kagurazaka: Tokyo’s Cobblestone Former Geisha District and French Cafes

    Photo by Denys Nevozhai on Unsplash

    Ten minutes from Tokyo Station by subway, Kagurazaka feels like it belongs to a different city entirely. Stone-paved alleys wind past lantern-lit ryotei that once hosted geisha parties, while the main slope is lined with French bakeries, wine bars, and bistros left over from a wave of French residents who settled here decades ago. It’s one of the few Tokyo neighborhoods where “old Edo” and “Little Paris” sit on the same block, and it rewards slow walking far more than a checklist of sights.

    Where Kagurazaka Is and How to Get There

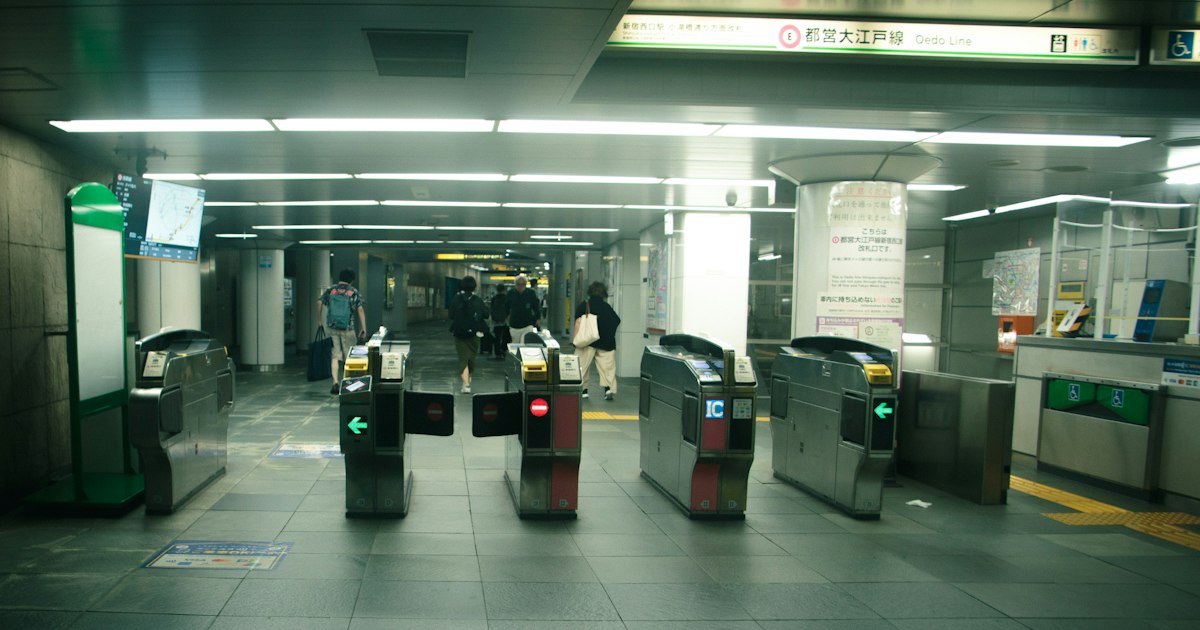
    Kagurazaka sits in Shinjuku ward, just west of Iidabashi. The easiest approach is Kagurazaka Station on the Tozai Line — take Exit 1 and you’ll step out directly onto Kagurazaka-dori, the main slope. Alternatively, Iidabashi Station (served by the JR Chuo-Sobu Line, Tozai Line, Yurakucho Line, Namboku Line, and Toei Oedo Line) is a 5-minute walk from the base of the hill via the West Exit, and gives you a chance to pass Canal Café, a boathouse-style café overlooking the old Edo Castle moat, on the way.

    The whole area is compact — you can walk from the bottom of Kagurazaka-dori to Akagi Shrine at the top in about 15 minutes, with the real charm in the side alleys branching off along the way. There’s no admission fee for wandering the neighborhood itself.

    A Former Geisha District Hidden Down Cobblestone Alleys

    Kagurazaka was one of Tokyo’s recognized hanamachi (geisha districts) from the Meiji era through the postwar boom, and a small geisha association still operates here today, though sightings are rare and mostly limited to evening hours near the traditional restaurants. The best place to feel that history is Hyogo Yokocho, a narrow stone-paved lane just off the main street lined with black-fenced ryotei and old inns — it looks almost exactly as it did decades ago. A second alley, Kakurenbo Yokocho (“hide-and-seek alley”), is equally atmospheric and named for how easily people used to lose each other in its bends.

    Most of the ryotei down these alleys are reservation-only, sometimes requiring an introduction from an existing customer, so don’t expect to walk in. Treat them as photogenic backdrops for an evening stroll rather than restaurants to try on a whim. For a neighborhood with a similarly strong subcultural identity but a completely different flavor, Koenji’s vintage and punk scene makes an interesting contrast on the same trip.

    Little France: Why This Neighborhood Has So Many French Cafes

    Kagurazaka’s French connection isn’t marketing — it’s demographic. The Institut français du Japon–Tokyo and the Lycée français international de Tokyo (a French international school) are both based here, which drew a real community of French expats to the neighborhood starting in the 1960s–70s. Bakeries, bistros, and wine bars followed, and locals now half-jokingly call the area “Little Paris” or “Puchi Paris.”

    The best-known spot is Le Bretagne, a Breton galette (buckwheat crêpe) restaurant that’s been serving cider and savory galettes for decades — a galette lunch set runs roughly ¥1,800–2,500. Smaller boulangeries along the backstreets sell croissants and pain au chocolat for ¥350–500, and it’s easy to put together a picnic-style breakfast for under ¥1,000 before continuing uphill.

    Where to Eat and Drink, by Budget

    • Budget (under ¥1,500): A bowl of soba or udon at one of the small noodle counters near the station, or a bakery pastry and coffee eaten on a bench near Akagi Shrine.
    • Mid-range (¥3,000–6,000): A French bistro dinner with a glass of wine, or a galette set at Le Bretagne with cider. Many bistros are tiny (10–15 seats), so arrive right at opening (usually 11:30am or 6pm) if you don’t have a reservation.
    • Splurge (¥30,000+): Ishikawa, a three-Michelin-starred kaiseki restaurant tucked down one of Kagurazaka’s alleys, is one of Tokyo’s hardest reservations to get — book months ahead, ideally through a hotel concierge, as English-language walk-in booking isn’t realistic.

    For a lower-key evening, standing bars aren’t really a Kagurazaka specialty, but if that kind of casual drinking culture appeals to you, it’s worth knowing how it works elsewhere in the city — see our guide to tachinomi standing bar etiquette.

    Akagi Shrine and the Top of the Hill

    At the top of Kagurazaka-dori sits Akagi Shrine, a centuries-old shrine that got an unusual 2010 renovation by architect Kengo Kuma — the main hall keeps its traditional form, but the shrine office is now a glass-walled modern structure, with a small café (Akagi Café) inside serving coffee and light meals from around 11am to 8pm. It’s a good, quiet spot to rest before heading back down through the alleys.

    Partway up the main street, Zenkokuji Temple (enshrining Bishamonten) is the neighborhood’s spiritual anchor and worth a quick look even for non-worshippers — it sits right on the main road so there’s no detour required.

    Best Time to Visit and Local Festivals

    Kagurazaka is pleasant year-round and doesn’t have a must-see cherry blossom or foliage moment the way many Tokyo spots do — its appeal is architectural and atmospheric rather than seasonal. That said, a light rain actually improves the experience, since it darkens the cobblestones and makes the alley lanterns glow more visibly. Early evening (around sunset) is the best single window: shops are still open, restaurant lanterns are lit, and the alleys empty out of daytime foot traffic.

    In late July, Kagurazaka hosts its own Awa Odori dance festival, a smaller sister event to the famous original in Tokushima — dancers in traditional costume move up and down the main slope over several evenings. If you’re interested in the dance tradition itself, our guide to Tokushima’s original Awa Odori explains the steps and how visitors can join in.

    Common Mistakes to Avoid

    • Only visiting during the day. Kagurazaka’s alleys look pleasant in daylight but come alive at dusk, when lanterns are lit and the ryotei atmosphere is strongest.
    • Expecting to walk into a ryotei. Most traditional restaurants in Hyogo Yokocho are reservation-only, and some are introduction-only. Admire them from outside unless you’ve booked ahead.
    • Forgetting it’s a real street, not a pedestrian zone. Kagurazaka-dori carries car traffic, and its direction of flow changes over the course of the day to manage the narrow slope — look both ways even where it feels quiet.
    • Skipping reservations at Le Bretagne on weekends. It’s small and popular with both tourists and long-time residents; weekend lunch service fills up fast.
    • Rushing through in under an hour. The point of Kagurazaka is the side alleys, not the main road — budget at least 90 minutes to actually duck into Hyogo Yokocho and Kakurenbo Yokocho rather than just walking up and down the slope.

    Pair a Kagurazaka afternoon with nearby Iidabashi or a longer day in Shinjuku, and it works well as a half-day add-on rather than a standalone destination — compact, walkable, and unlike anywhere else in central Tokyo.