Japan Trove

Category: Uncategorized

  • Tea Ceremony Experiences in Kyoto & Tokyo: What to Expect

    Tea Ceremony Experiences in Kyoto & Tokyo: What to Expect

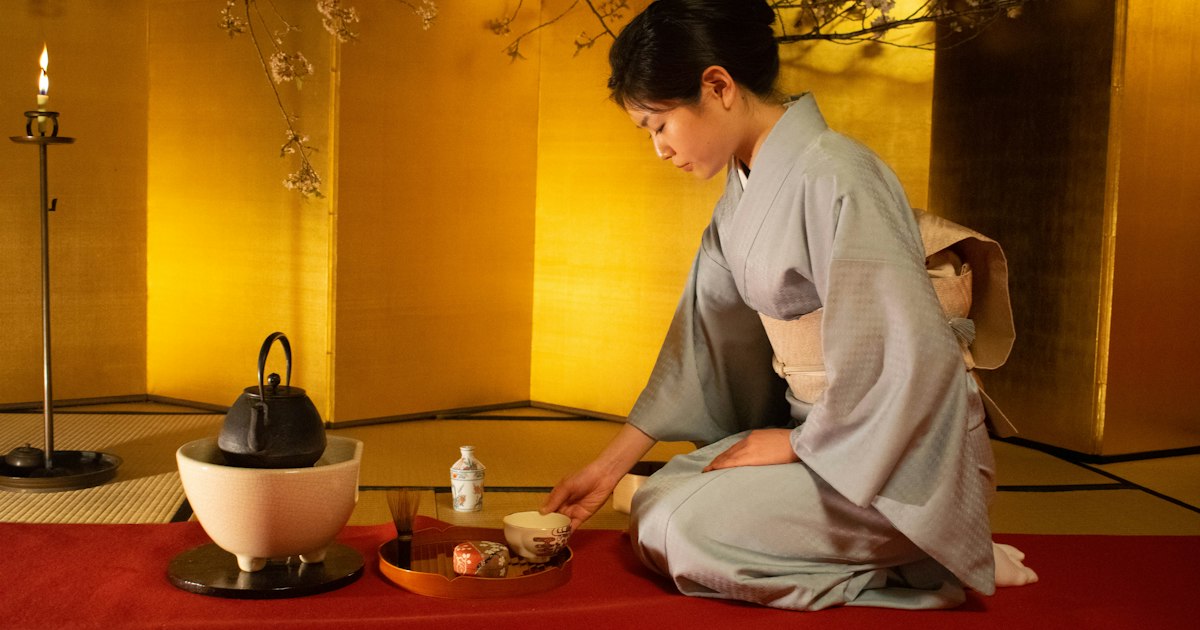
    Photo by Roméo A. on Unsplash

    A tea ceremony looks simple from the doorway — someone kneels, whisks a bowl of matcha, hands it over. In practice it’s a tightly choreographed ritual built around hospitality, seasonal awareness, and a surprising amount of etiquette you’re not expected to know in advance. That’s the point: a good host walks you through it. Here’s what actually happens, what it costs in Kyoto versus Tokyo, and how to avoid the handful of mistakes that trip up almost every first-timer.

    What Actually Happens During a Tea Ceremony

    Most visitor-facing ceremonies run 45–75 minutes and follow the same basic shape: you’re seated (usually on a low stool or in seiza-style kneeling, often with a cushion offered if your knees object), served a small seasonal wagashi sweet, and then shown how to receive, rotate, and drink a bowl of whisked matcha. The host explains each gesture — why you bow before drinking, why you turn the bowl so you’re not sipping from its “front,” why you wipe the rim after. Many Kyoto and Tokyo studios aimed at tourists run this almost entirely in English, and some let you whisk your own bowl after watching a demonstration, which is the part most people enjoy most.

    This is a watered-down but genuine version of chanoyu, the tea ceremony tradition formalized by Sen no Rikyu in the 16th century and still taught through schools like Urasenke, whose headquarters (Konnichian) is in Kyoto. A full, traditional ceremony with a kaiseki meal can run four hours; nothing marketed to tourists goes anywhere near that long.

    Kyoto: Where to Try It and What It Costs

    Kyoto has the highest concentration of English-friendly tea houses, many clustered near Kiyomizu-dera and Gion. Camellia Tea Ceremony runs two locations in this area and charges roughly ¥2,500–¥5,500 depending on whether you just watch or also practice whisking your own bowl; sessions run on a fixed schedule throughout the day, book a slot online in advance. En Tea Ceremony Experience, also near Kiyomizu-dera, is similarly priced and popular enough that same-day walk-ins often get turned away in spring and autumn. For something more contemplative, Jotokuji Temple’s Ju-An experience pairs a short zazen meditation session with tea, which suits visitors who want the ceremony folded into a quieter, more spiritual visit rather than a standalone activity.

    If you want to see where tea culture is actually sold and taught rather than performed, central Kyoto’s old merchant streets (and the Teramachi arcade) have working tea shops selling matcha, whisks (chasen), and tea bowls at real prices — worth a browse even if you’re not doing a ceremony.

    Tokyo: Where to Try It and What It Costs

    Tokyo’s options split into two categories: casual garden teahouses and dedicated ceremony studios. Hamarikyu Gardens, near Shiodome Station, has the Nakajima-no-Ochaya teahouse sitting over a pond — garden admission is ¥300, and a matcha-and-wagashi set inside the teahouse runs about ¥720. It’s not a guided ceremony with etiquette instruction, just an authentic, inexpensive way to drink proper matcha in a beautiful setting, and it’s open daily (check seasonal hours, roughly 9:00–17:00). Happo-en Garden in Minato also runs a more formal seated tea ceremony experience with English explanation, generally in the ¥2,000–¥4,000 range for a standard session. For a closer equivalent to Kyoto’s tourist-oriented studios, operators like Tea Ceremony Juan and Maikoya run bookable sessions near Asakusa and Shibuya, typically ¥3,000–¥6,000, often combinable with kimono rental.

    Tokyo’s traditional merchant district of Nihonbashi is also worth knowing about if you want to buy real tea ceremony utensils rather than souvenirs — its flagship department stores carry proper tea bowls, whisks, and ceremonial-grade matcha tins alongside the kimono and lacquerware sections.

    Budget, Mid-Range, and Splurge Options

    • Budget (¥300–¥1,000): A garden teahouse like Hamarikyu — real matcha and a sweet, no formal instruction, no reservation needed.
    • Mid-range (¥2,500–¥6,000): A group session at a dedicated studio in Kyoto or Tokyo, 45–75 minutes, English-guided, usually includes making your own bowl of tea. This is the sweet spot for most first-time visitors.
    • Splurge (¥10,000–¥20,000+): A private ceremony with a certified tea master, sometimes paired with kimono rental and a kaiseki-style light meal, or a small-group session inside a historic machiya townhouse. Worth it if tea ceremony is the main reason you’re in Kyoto rather than one stop among many.

    Best Time to Go and How to Book

    Tea ceremony itself isn’t strongly seasonal — sessions run year-round — but the sweets and the garden settings change with the season, so spring (cherry blossoms) and autumn (foliage) are the most visually rewarding times, and also the busiest for booking. Book at least a few days ahead for popular Kyoto studios during March–April and October–November; same-day availability is more realistic in summer and winter. If you’re splitting your trip between the two cities, the Shinkansen between Kyoto and Tokyo takes under three hours, so it’s entirely feasible to do a Kyoto morning ceremony and still make a Tokyo evening plan the same day.

    Common Mistakes First-Timers Make

    The most common error is clothing: tight skirts, short shorts, or stiff jeans make kneeling or sitting on a low stool genuinely uncomfortable for 45+ minutes. Wear loose, comfortable pants or a longer, flexible skirt. Second, remove or minimize jewelry and watches before the session — hosts will ask anyway, since metal can scratch antique tea bowls. Third, don’t wear strong perfume or cologne; part of the ritual is appreciating the tea’s aroma, and heavy scent is considered genuinely rude in this context, more so than in most other Japanese social settings. Finally, resist the urge to photograph every step mid-ceremony — most studios allow photos before or after but ask you to put phones away during the actual tea-making, similar to the etiquette expected at a kabuki theatre performance, where quiet attention is part of what you’re paying for.

    Getting There and What to Wear

    Most Kyoto studios near Kiyomizu-dera and Gion are a 5–15 minute walk from the Gion-Shijo or Kiyomizu-Gojo bus stops, but the approach streets are narrow, uneven, and packed with pedestrians during peak hours — if you’re pressed for time or it’s raining, taking a taxi directly to the entrance is often faster and less stressful than navigating the crowds on foot. In Tokyo, Hamarikyu Gardens and Happo-en are both a short walk from their nearest stations (Shiodome and Shirokanedai, respectively), so public transit works fine. Whatever you wear, bring socks without holes — shoes come off before you step onto the tatami, and bare feet aren’t appropriate in a formal tearoom.

    Done once, a tea ceremony is a pleasant 45-minute cultural curiosity. Done with even a little background on what the gestures mean, it becomes one of the more genuinely moving things you can do on a Japan trip — a few minutes where someone has thought carefully about exactly how to make you feel welcome.
  • Pachinko Parlors: A Visitor’s Guide to Japan’s Pinball-Slot Game

    Pachinko Parlors: A Visitor’s Guide to Japan’s Pinball-Slot Game

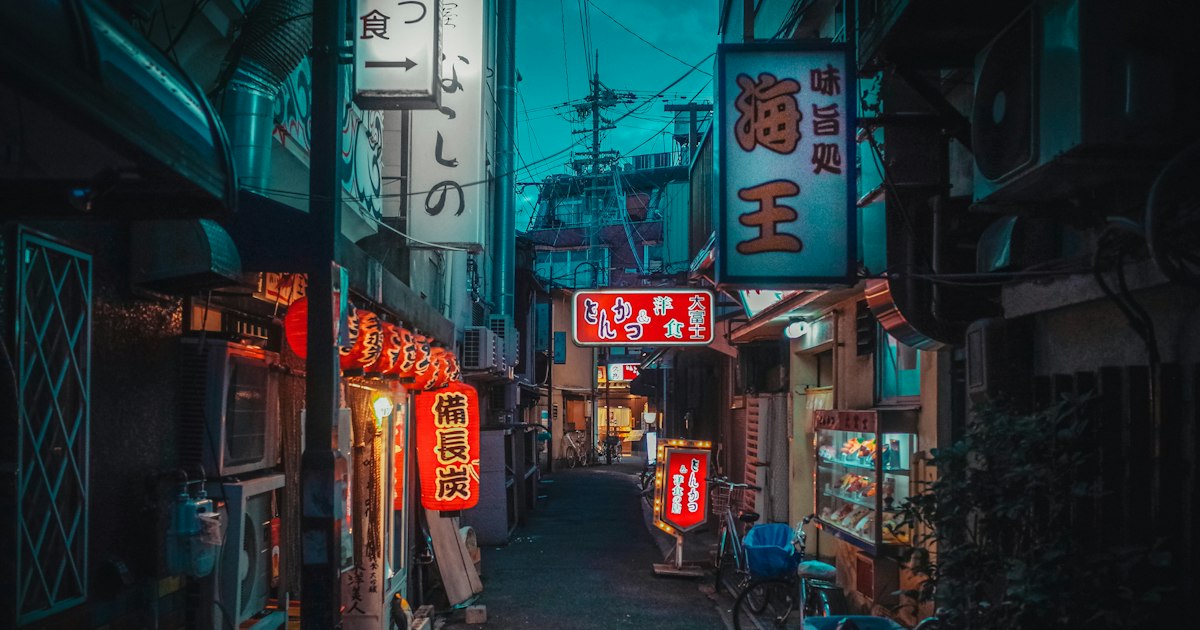
    Photo by masahiro miyagi on Unsplash

    Walk past almost any train station in Japan and you’ll hear it before you see it: a wall of chiming bells, synthesized fanfares, and a dull roar of cascading metal balls. That’s a pachinko parlor, and despite looking like a slot-machine hall from the outside, it’s one of the most distinctly Japanese entertainment experiences you can have — equal parts pinball, gambling, and sensory overload. Here’s what it actually is, how to play a round without embarrassing yourself, and whether it’s worth your time.

    What Is Pachinko, Exactly?

    Pachinko is a mechanical game that’s part pinball, part slot machine. You load small steel balls into a vertical machine, fire them up into a pegged playing field using a dial, and watch them fall through pins toward a center “chance” slot. If a ball lands in the right spot, it triggers a digital slot-reel animation on the machine’s screen; certain combinations unlock a bonus round that pays out hundreds or thousands of extra balls.

    Technically, pachinko isn’t gambling under Japanese law — you can’t win cash directly from the machine. Instead, you cash out your balls for prize tokens at a counter inside the parlor, then walk those tokens to a separate, unaffiliated exchange booth (usually a small window just outside or around the corner) where they’re converted to yen. This “triangle” system is a legal workaround that’s been in place for decades, and every parlor in the country runs on it.

    How to Play: Step by Step

    • Pick a machine. Empty machines with balls still sitting in the tray are usually fair game; if in doubt, ask staff (“sumimasen, kore wa ii desu ka?” — “excuse me, is this one okay?”).
    • Buy balls. Feed a bill into the machine’s built-in note reader or a nearby ball-vending unit. Most halls price balls between ¥1 and ¥4 each; a ¥1,000 note typically buys 250–1,000 balls depending on the parlor’s rate.
    • Fire away. Turn the dial on the lower right — don’t release it, just hold it at a steady position. Balls fire continuously as long as you hold the dial; find the sweet spot where balls fall naturally into the central pocket.
    • Watch the reels. When a ball drops into the chance slot, the screen spins. Triple matching symbols (often 7-7-7) trigger a bonus round that dumps balls into your tray.
    • Cash out. Press the call button for staff, who’ll print a receipt or hand you a box of balls to take to the counter, where they’re weighed and exchanged for special prize tokens — not cash.
    • Exchange the tokens. Take the tokens to the external TUC (Tokyo Union Circulation) booth to receive yen.

    Finding a Parlor: Hours, Locations, and Getting There

    Pachinko parlors are everywhere — near train stations, along shopping streets, in suburban strip malls — but the biggest and flashiest clusters are in entertainment districts. In Tokyo, try Kabukicho in Shinjuku or Ikebukuro’s east side; in Osaka, Dotonbori and Namba are packed with multi-floor halls run by national chains like Maruhan, Dynam, and DAIICHI. These chain locations tend to be the most tourist-friendly: brighter, newer machines, and staff used to foreigners wandering in out of curiosity.

    Most parlors open around 9:00–10:00 AM and close by 10:45–11:00 PM, with exact hours set by local prefectural ordinance rather than the company. Weekend mornings can draw small queues of regulars waiting for the doors to open, chasing machines that haven’t paid out in a while — not something you need to worry about as a casual visitor. If you’re staying at a chain like those covered in our business hotel comparison, there’s a good chance a parlor is within a five-minute walk, since both cluster around train stations. For getting around after a late-night session, see our guide to hailing a taxi with apps like GO and S.Ride.

    You must be 18 or older to play, and staff do occasionally check ID at the entrance, especially at night.

    The Money Side: Budget, Mid-Range, and Splurge

    Pachinko can be as cheap or as expensive as you let it be:

    • Budget (¥500–1,000): Many parlors run “low-rate” sections where balls cost ¥1 each instead of the standard ¥4. Ask for “ichi-en pachinko” (1-yen pachinko) — it buys you 30–60 minutes of play for the price of a coffee, with minimal real financial risk.
    • Mid-range (¥2,000–5,000): Standard-rate machines (¥4/ball) are what most locals play. A few thousand yen gets you a proper session with a real shot at a bonus round, and if you hit one, you can walk away with your initial stake back or more.
    • Splurge (¥10,000+): Pachislot machines — the slot-machine cousins of pachinko, using ¥20 tokens instead of balls — have higher variance and can burn through ¥10,000 in under an hour if luck isn’t on your side. These are popular with serious regulars chasing big jackpots, not casual tourists.

    Treat any money you put in as the cost of the experience, not an investment. Parlors are businesses, and the house edge is real.

    Etiquette, Noise, and Smoking Rules

    Bring earplugs or noise-canceling headphones if you’re sensitive to sound — pachinko halls are genuinely some of the loudest indoor spaces in Japan, often exceeding 80 decibels on the main floor. Since a 2020 national law change, most parlors are now fully non-smoking indoors, though some retain separate enclosed smoking rooms; look for signage at the entrance if it matters to you.

    Photography inside is almost universally prohibited — machines, screens, and other players are all off-limits to cameras, so leave the phone in your pocket once you’re past the door. Staff will stop you quickly if you try, and it’s considered quite rude. If you want a game you can freely photograph and that rewards skill rather than luck, the arcade crane games covered in our UFO Catcher guide are a friendlier alternative just a few floors away in most game centers.

    Common Mistakes First-Timers Make

    • Sitting at a machine mid-session. If balls are actively cycling through a machine or a jacket is on the seat, it’s occupied — always check with staff before sitting down.
    • Expecting English support. Outside a handful of major chain locations, signage and machine instructions are Japanese-only. Google Translate’s camera mode helps with button labels, but don’t expect a menu explanation.
    • Not budgeting a hard stop. Set a cash limit before you sit down and stick to it — the chimes and animations are designed to keep you playing past when you meant to quit.
    • Confusing pachinko with pachislot. They’re often in the same building but are different machines with different rules and far different volatility — ask staff which section you’re in if you want the gentler, ball-based game.

    Even if you don’t spend a single yen, poking your head into a pachinko parlor for five minutes is worth it just for the sheer sensory experience — it’s one of the few places in Japan that’s genuinely louder and more overstimulating than Shibuya Crossing at rush hour.

  • Minakami: Gunma’s Whitewater Rafting and Onsen Adventure Town

    Minakami: Gunma’s Whitewater Rafting and Onsen Adventure Town

    Photo by Derin Cag on Unsplash

    Ninety minutes north of Tokyo, Minakami swaps neon for pine forests, river canyons, and some of Gunma’s most atmospheric hot springs. It’s one of the few places in the Kanto region where you can spend the morning getting soaked on a Class III-IV rapid and the evening soaking silently in a mountain onsen. Here’s how to plan the trip properly, with real prices and the mistakes that trip up first-timers.

    Getting to Minakami

    The fastest route from Tokyo is the JR Joetsu Shinkansen from Tokyo or Ueno Station to Jomo-Kogen Station (around 70-75 minutes). From there, local buses run to Minakami town and the main onsen district (Yubiso), taking another 30-40 minutes and costing roughly 700-900 JPY one way. Buses are timed loosely around train arrivals but are not frequent, so check the schedule before you leave rather than assuming one will be waiting — this is the single most common planning mistake visitors make here.

    If you’re building the trip around a Shinkansen ride, it’s worth knowing the difference between reserved and non-reserved seats; Jomo-Kogen is a quieter stop so non-reserved cars are rarely full, which can save you a booking fee.

    The budget alternative is the JR Joetsu Line local line from Takasaki straight to Minakami Station, which takes about 70-80 minutes and lands you closer to the rafting outfitters’ pickup points than Jomo-Kogen does. If you already hold a Seishun 18 Ticket, this is the route to use — it covers the whole journey from Tokyo on local trains for a fraction of the Shinkansen fare, though it adds well over an hour of travel time. Once in town, taxis are limited and don’t cruise for fares the way they do in cities, so if you need one, call ahead or ask your ryokan — the general etiquette and fare logic in our guide to taxis in Japan still applies.

    Whitewater Rafting on the Tone River

    Minakami sits on the upper Tone River (Tonegawa), and its rafting season typically runs from late April through early November, with outfitters such as Canyons, Jack, and Outdoor Support Center NOA running multiple daily departures from bases around Minakami and Doai. A standard half-day rafting trip runs about 2-2.5 hours on the water and costs roughly 9,000-10,500 JPY per adult, usually including wetsuit, helmet, and a hot shower or onsen voucher afterward — ask when booking, as this varies by company.

    Timing matters more here than at most rafting destinations. Late April through June is snowmelt season, when water levels are highest and the rapids are at their most aggressive — this is the window serious rafters target. By mid-to-late summer (July-August) flows drop and the ride becomes noticeably gentler and more family-friendly, with some companies accepting children from around age 8-10. Early autumn adds pleasant foliage views along the gorge but water is cold by October, so a wetsuit (provided) is non-negotiable even if the air feels warm.

    Book at least a few days ahead in peak season (May weekends and August) — walk-up slots do exist but fill fast. Bring a swimsuit to wear under the wetsuit, a towel, and a full change of clothes; the river water is cold year-round because it’s glacier- and snowmelt-fed, and underestimating that is the second most common mistake after missing the bus.

    Beyond Rafting: Bungee, Canyoning, and Tanigawa-dake

    If rafting isn’t adrenaline enough, Minakami is also home to one of Japan’s few permanent bungee jumps, operated at the old Doai Bridge by Bungy Japan — a roughly 42-meter drop over the gorge, priced at around 16,000-17,000 JPY per jump (repeat jumps are discounted). Canyoning — rappelling and sliding down waterfalls in a wetsuit — runs through similar outfitters to rafting, roughly May through September, for about 10,000-12,000 JPY for a half day.

    For a quieter adventure, Tanigawa-dake is one of Japan’s most storied (and historically dangerous on its technical routes) peaks, but the Tenjindaira ropeway on its flank gives casual hikers access to alpine trails without the technical climbing. The ropeway runs roughly April through November depending on snow conditions, with a round trip costing around 2,600 JPY.

    Onsen Culture: Rustic Baths to Legendary Outdoor Pools

    Minakami’s hot springs are spread across several hamlets rather than one central bath street, and they range from simple public baths to destination ryokan. Takaragawa Onsen Osenkaku is the headline attraction — a network of large riverside outdoor baths (some mixed-gender, with rental yukata for those who prefer coverage) set against forest and rock. Day-use entry is typically around 1,500-1,800 JPY, generally available from morning until mid-afternoon (hours shift seasonally, so confirm before you go); it gets busy on weekends, so arrive early.

    Houshi Onsen Chojukan, further up the valley, is far smaller and quieter — a creaky wooden bathhouse dating back centuries, prized for its atmosphere rather than scale. Both are a bus or taxi ride from Minakami Station, and neither is walkable from the station, so factor that into your schedule if you’re day-tripping.

    If you’d rather skip transfers, Minakami Onsen and Yubiso Onsen have smaller public bathhouses right near the station area, usually 500-700 JPY for day use — a good option if you’ve arrived tired from rafting and don’t want another bus ride.

    Where to Stay

    Budget travelers can find simple guesthouses and minshuku around Minakami Station from roughly 5,000-7,000 JPY per person, though options thin out compared to a city — if you’d rather play it safe with a familiar standard, the nearest reliable chain hotels are back in Takasaki or Jomo-Kogen area; our rundown of business hotel chains in Japan is more useful for that connecting city than for Minakami itself. Mid-range travelers should look at the ryokan clustered in Yubiso and Jomo, often 12,000-20,000 JPY per person including a kaiseki-style dinner and breakfast. For a splurge, a night at Takaragawa Osenkaku with dinner included — so you can use the baths at leisure after the day-trippers leave — runs roughly 25,000-40,000 JPY per person depending on room and season.

    Best Time to Visit and Common Mistakes

    For rafting thrills, go late April to June; for a calmer, warmer trip with family, July-August; for scenery with your onsen, October’s foliage is hard to beat, though rafting operators start winding down by then. Winter (December-March) shuts down rafting almost entirely but opens up Minakami’s ski resorts (Kagura and Tanigawadake Tenjindaira among them) as a different kind of day trip.

    The mistakes worth avoiding: treating Minakami like a walkable town (it’s spread out, and buses are infrequent — plan routes in advance); skipping a wetsuit on a “warm” summer day (the river itself stays cold); and trying to pack rafting, bungee, and a leisurely onsen soak into a single rushed day trip from Tokyo. Minakami rewards an overnight stay far more than a frantic there-and-back — the whole point of the place is slowing down once you’re out of the water.

  • Ramune: Japan’s Marble-Stoppered Soda and Where to Try It

    Ramune: Japan’s Marble-Stoppered Soda and Where to Try It

    Photo by Yosuke Ota on Unsplash

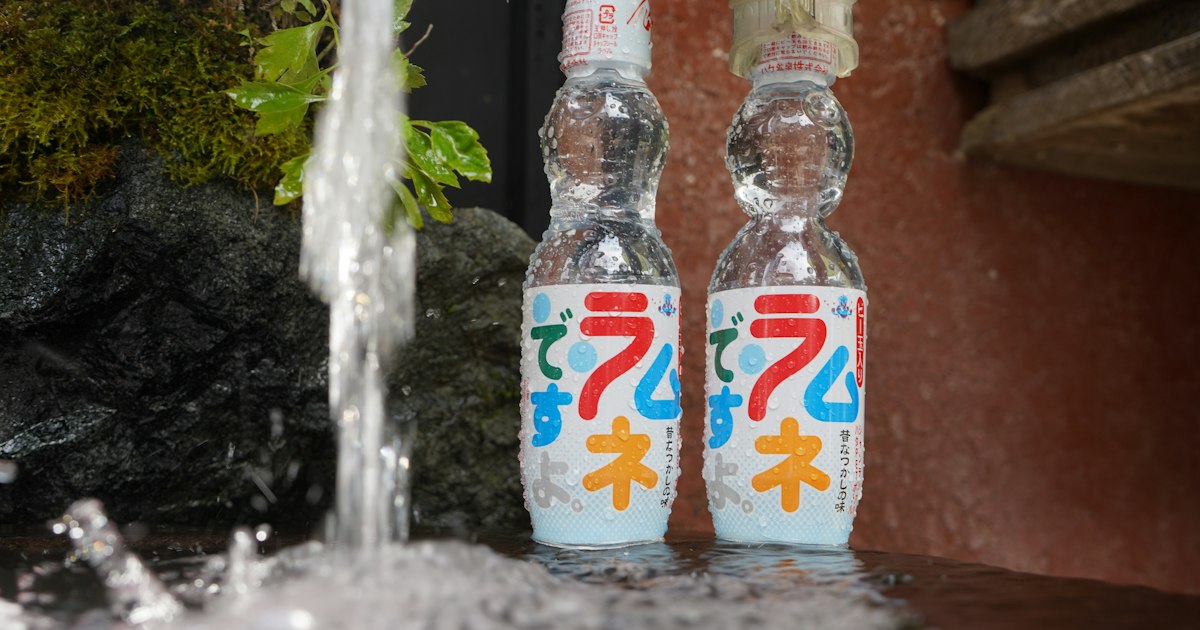
    Walk past any convenience store cooler or summer festival stall in Japan and you’ll spot it: a stubby glass bottle with a glass marble trapped in its neck, fizzing faintly under the lights. That’s ramune, Japan’s original soft drink, and figuring out how to open one without spraying yourself is practically a rite of passage for first-time visitors. Here’s what it actually is, how to drink it properly, and where to find the best versions.

    What Is Ramune, Actually?

    Ramune’s name is a Japanese transliteration of “lemonade,” and the drink dates back to 1884, when it was introduced as an import from the West. The glass Codd-neck bottle — sealed by a marble pressed against a rubber ring inside the neck by the carbonation itself — was a British design from the 1870s that fell out of use almost everywhere except Japan, where it became permanently associated with ramune. The oldest and best-known maker is Kobe-based Hata Kosen, which has been bottling ramune since 1888 and still uses the traditional glass bottle for its flagship “original” flavor, a pale, faintly citrusy soda that doesn’t map neatly onto any Western soft drink — think somewhere between lemon-lime soda and bubblegum, minus the sweetness overload.

    Today most mass-market ramune (Sangaria and Shirakiku are the other big names) comes in cheaper plastic versions of the same bottle shape, but the original glass-and-marble format is still widely sold and is the one worth seeking out for the experience.

    How to Open a Ramune Bottle (Without Soaking Your Shirt)

    Every ramune bottle comes with a small plastic opener in a seal around the cap — don’t throw it away before you’ve used it. Peel it off, place the ring of the opener over the bottle’s mouth, and press straight down firmly with your thumb. You’ll feel a pop as the marble drops from the neck into the wider chamber below. The common mistake is pressing at an angle or hesitating halfway — the carbonation reacts the moment the marble shifts, and an uneven push is what causes the foam-up-and-over spill that catches people off guard. Push straight down, in one motion, and hold the bottle slightly away from you just in case.

    Once it’s open, the marble rattles around a narrowed section of the neck that keeps it from falling back up and blocking your mouth as you drink — an oddly satisfying piece of 19th-century engineering. You can’t fully remove the marble without breaking the bottle, so don’t bother trying; shaking it to “get it out” is the second most common rookie move, and it just means more spilled soda.

    Flavors Worth Seeking Out

    Original (sometimes labeled “ramune” or “lemon-lime”) is the classic and the one most convenience stores stock. Beyond that, seasonal and regional flavors are where it gets fun: melon, strawberry, lychee, Calpico-style yogurt, and blue “Hawaii” flavor (a blue-curaçao-colored, cotton-candy-adjacent taste with no actual tropical fruit in it) are common year-round. Novelty maker Tomomasu produces joke flavors — curry, wasabi, cola, even octopus — sold mostly as souvenirs rather than something locals drink regularly; you’ll find these in gift shops and at stores like Don Quijote, often boxed as a mixed set for around ¥600–¥900 for four or five mini bottles. They’re a fun, lightweight gift to bring home, though they taste exactly as strange as they sound.

    Where to Buy Ramune in Japan

    Budget (¥120–¥180): Convenience stores (7-Eleven, Lawson, FamilyMart) and supermarkets stock plastic-bottle ramune year-round, chilled and ready to drink, open 24 hours. This is the easiest, cheapest way to try it, though you miss the marble-bottle ritual since most convenience-store versions use a plastic cap instead.

    Mid-range (¥200–�003>¥350): Look for the genuine glass Hata Kosen bottles at department store food halls, retro candy shops (dagashi-ya), and souvenir sections of train stations. These are worth the small premium for the real glass-and-marble mechanism. If you’re exploring old-fashioned candy culture, Kashiya Yokocho (Candy Alley) in Kawagoe, a short train ride from central Tokyo, has several shops selling glass-bottle ramune alongside traditional dagashi snacks — most shops there open around 10am and close in the late afternoon, with some closed on Mondays.

    Splurge / experience (¥300–¥500): Festival stalls (yatai) at summer matsuri charge more for the same bottle, but you’re paying for the atmosphere — drinking ramune in a yukata among lantern light is the quintessential version of this experience. Street food crawls like Kuromon Ichiba Market in Osaka also sell cold ramune as a palate-cleanser between stalls, which is a good way to work one into a food-focused day without seeking out a dedicated shop.

    Best Time and Place to Drink It

    Ramune is technically available all year, but it’s a summer drink through and through — it’s marketed, stocked, and sold overwhelmingly between June and late August, when festival season is in full swing. If your trip overlaps with Obon in mid-August, that’s prime ramune territory: nearly every yatai row at a bon odori festival will have a tub of it on ice. Outside of summer you’ll still find it in convenience stores and specialty shops, but the festival-stall version — cold, fizzy, handed to you in the middle of a crowd — is the one people actually remember.

    If you want a quieter, more composed way to try retro Japanese drinks and sweets together, pairing ramune with a bowl of anmitsu or mitsumame at an old-school kissaten (coffee shop) makes for a good non-festival alternative — both are holdovers from the same early-20th-century era of Japanese food culture.

    Taking Ramune Home

    The glass bottles are heavier and more breakable than they look, so if you’re buying a few as gifts, wrap them well inside your checked luggage or buy from an airport shop just before departure. Unopened bottles survive air travel fine as long as they’re cushioned — clothing works as well as anything. If you’d rather not risk it, the plastic-bottle versions and the novelty mini-bottle gift sets travel much more safely and are sold in most souvenir shops at train stations and airports, so there’s no need to carry a fragile 200ml glass bottle across the country if you’re not planning to drink it right away.

  • Kare Pan: Japan’s Curry-Filled Bread and Where to Find It

    Kare Pan: Japan’s Curry-Filled Bread and Where to Find It

    Photo by Aasing Gwok on Unsplash

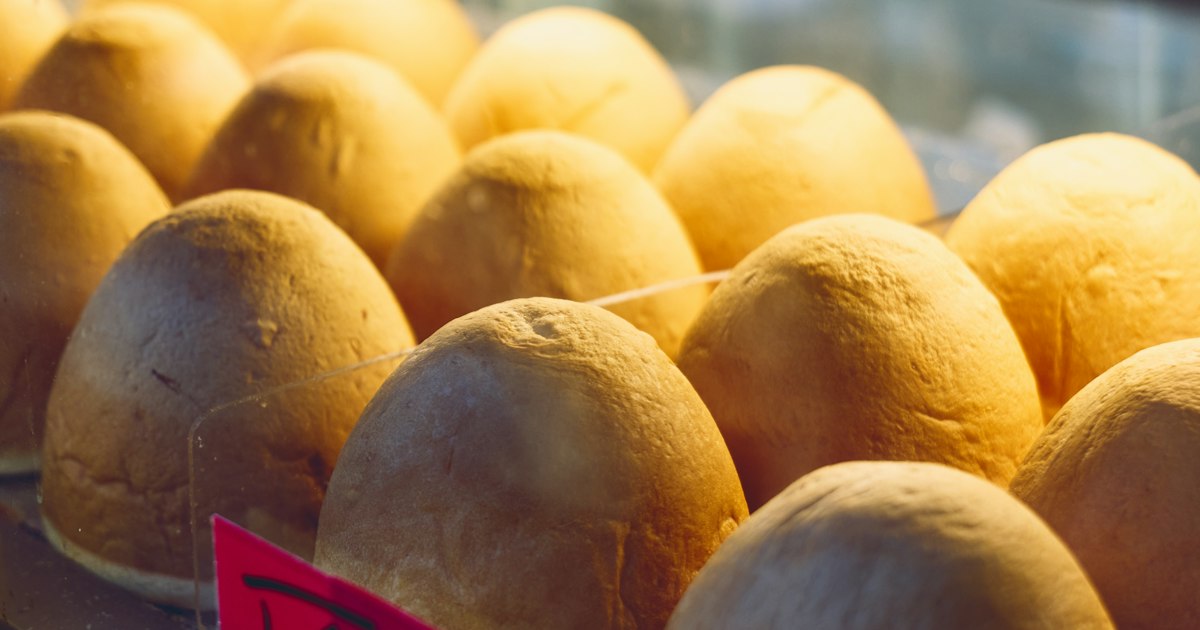
    Walk into almost any convenience store, train station kiosk, or neighborhood bakery in Japan and you’ll spot a golden, football-shaped bun behind the glass. That’s kare pan (カレーパン) — bread stuffed with thick Japanese-style curry, coated in panko breadcrumbs, and deep-fried or baked until the crust shatters. It’s one of the country’s great grab-and-go foods: cheap, filling, and available at 2am just as easily as at lunchtime. Here’s how to find the good ones, what to pay, and how to eat one without wearing it.

    What Is Kare Pan, Exactly?

    Kare pan starts with a soft, slightly sweet yeast dough wrapped around a spoonful of Japanese curry — thicker and milder than Indian or Thai curry, closer to a curry-flavored stew. The filled dough is rolled in panko, then deep-fried (furai, フライ) for a shatteringly crisp shell, or baked (yaki, 焼き) for a lighter, less greasy version that’s become more common at convenience stores in the last decade. Inside, the curry stays hot and a little runny, which is exactly why the first bite matters — more on that below.

    Fillings vary by maker: plain beef or pork curry is standard, but you’ll also find katsu kare pan (with a piece of fried pork cutlet inside), cheese curry pan, and seasonal versions with keema (minced meat) or vegetable curry.

    The Birthplace Debate: Morishita’s Cattlea Bakery

    Most food writers in Japan point to a single shop as the origin of kare pan: Cattlea (カトレア), a small bakery in Morishita, in Tokyo’s Koto Ward, that dates back to the 1920s. The story goes that the bakery’s owners wanted to adapt the already-popular Western-style curry rice into a portable bread, inspired by cutlet sandwiches (katsu) that were dipped and fried. The result — curry wrapped in dough, breaded, and deep-fried — became the template every convenience store version still follows today.

    Cattlea is a short walk from Morishita Station (Toei Shinjuku and Oedo Lines) and still sells its original-recipe curry pan for roughly ¥220–250. It’s a tiny, old-school operation: they bake in limited batches and routinely sell out by early afternoon, and they’re closed on Sundays and Mondays. If you want to try the “original,” go early on a weekday and treat it as a bonus stop on a Tokyo itinerary rather than the main event — there isn’t much else to see in the immediate area, so it pairs well with a morning in nearby Kiyosumi Shirakawa or a visit to the Edo-Tokyo Museum area.

    Convenience Store Kare Pan: The Budget Classic

    For most visitors, the easiest and cheapest way to try kare pan is at a 7-Eleven, Lawson, or FamilyMart. Expect to pay around ¥140–190, and most chains stock both a fried and a baked version side by side. These are made fresh daily and restocked a few times a day, so morning and early-evening shelves tend to have the newest batches. If you’re staying at a budget chain like the ones covered in our guide to business hotel chains, there’s almost certainly a convenience store within a block or two, making kare pan one of the easiest breakfasts in the country — just be aware most are sold cold or at room temperature, not hot off the fryer.

    Bakery and Specialty Shop Kare Pan: Mid-Range to Splurge

    Independent bakeries (pan-ya) and chain bakeries like Vie de France or Saint Marc Café sell a step up from the convenience store version, usually ¥250–350, often made fresh that morning and still warm. Department store basement food halls (depachika) — the kind you’ll find under flagship stores in districts like Nihonbashi — frequently carry artisan versions from well-known bakeries, sometimes ¥350–500, with richer dough or premium fillings like Hokkaido beef curry or cheese-and-curry combinations. These make a good mid-afternoon snack while exploring a shopping district, and they’re worth the upgrade if you’ve only had the convenience-store version so far.

    For a genuine splurge, some specialty curry-bread shops in Tokyo and Osaka sell katsu kare pan or double-filling versions for ¥400–600, baked to order so the crust is still crackling when you buy it. These shops often have limited stock and close whenever they sell out, so there’s no fixed “best time” beyond simply going earlier in the day.

    How to Eat It Right (and Common Mistakes)

    • Don’t eat it stone cold. Curry filling congeals and the panko loses its crunch. Convenience stores sell kare pan unheated by default — ask staff to warm it (“atatamete kudasai”) if a microwave or oven is available at the register.
    • Bite from the end, not the middle. The curry is loosest in the center; biting there is how shirts get ruined. Start from a tip and work inward.
    • Hold it over the wrapper or a napkin. Treat it like a taco — some filling will escape no matter how careful you are.
    • Don’t confuse it with age-pan or korokke pan. Age-pan is a sweet fried bread coated in sugar or cinnamon with no curry inside; korokke pan is filled with a potato croquette, not curry. They sit near each other on convenience store shelves and look similar in low light.
    • Fried vs. baked isn’t just a health choice — it’s a texture choice. If you only try one, go fried first; it’s the version that made the food famous.

    When and Where to Fit It Into Your Trip

    Kare pan has no real season — it’s sold year-round and makes just as much sense in August as in January, though a hot, fresh one on a cold day is hard to beat. It’s also genuinely good travel food: dense enough to hold you over, cheap enough to buy two, and sturdy enough to survive a bag. It’s a solid alternative to an ekiben box if you’re boarding a shinkansen and don’t want to deal with chopsticks and a tray — unwrap, eat, done. Pick one up at the station convenience store on your way to the platform rather than searching for a specific bakery against a departure clock.

    If you’re building a broader cheap-eats itinerary, kare pan sits comfortably alongside other quick, inexpensive Japanese staples — it’s worth comparing against a sit-down option like the chains in our gyudon chains comparison when you’re deciding between a five-minute stand-and-eat snack and an actual seated meal.

    The Bottom Line

    You don’t need to plan a special trip around kare pan — it will find you at nearly every convenience store you pass. But if you want the full range, start cheap with a conbini version to understand the basic flavor, upgrade to a bakery or depachika one for better dough and filling, and if you’re in eastern Tokyo anyway, swing by Cattlea in Morishita for the shop most food historians credit with inventing the whole category. At ¥140 to ¥600 depending on where you buy it, it’s one of the lowest-risk, highest-reward snacks in the country.

  • Gyudon Chains Compared: Yoshinoya vs Sukiya vs Matsuya

    Gyudon Chains Compared: Yoshinoya vs Sukiya vs Matsuya

    Photo by Nicholas Ng on Unsplash

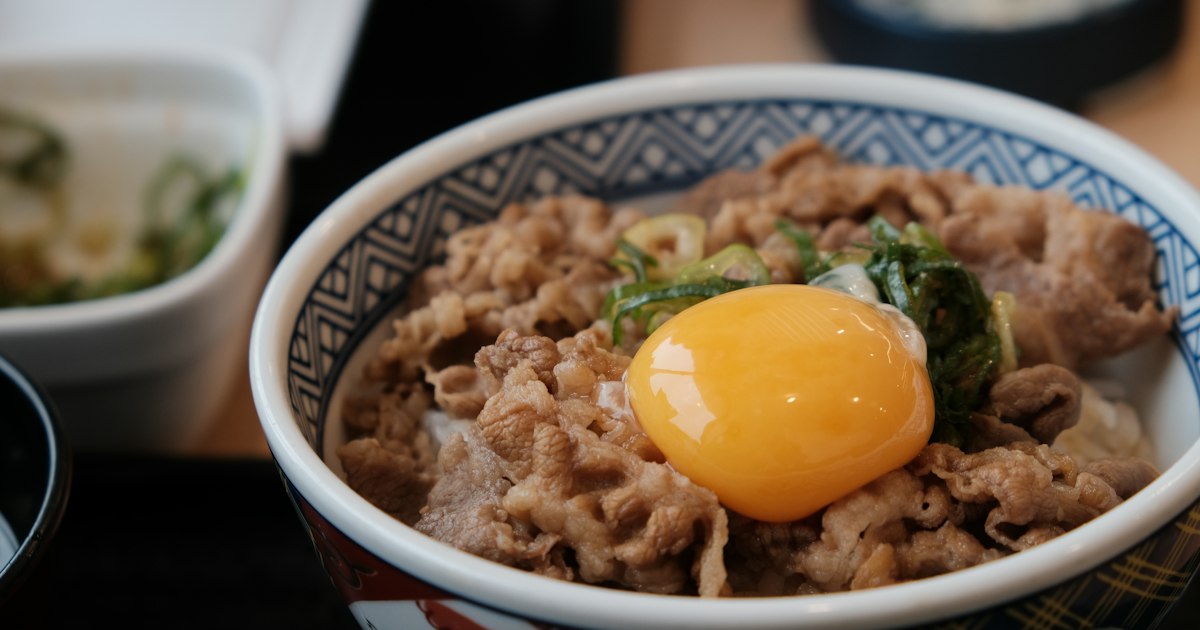
    If you’ve walked past a Japanese train station at lunchtime, you’ve seen the orange, red, and blue signs fighting for the same hungry commuters: Yoshinoya, Sukiya, and Matsuya. All three sell gyudon — a bowl of rice topped with thin-sliced beef and onion simmered in a sweet-savory sauce — for roughly the price of a convenience store sandwich, served in under two minutes. They look interchangeable from the outside, but regulars have strong opinions about which is “better,” and the ordering systems, menus, and flavor profiles are genuinely different. Here’s what actually sets them apart, and how to navigate each one without fumbling at the machine while a line forms behind you.

    The Three Chains at a Glance

    All three are nationwide chains with thousands of locations, open long hours (many 24/7, especially near stations and highways), and serving a regular-size gyudon for somewhere in the ¥400–500 range as of 2025 — prices creep up a little most years, so treat these as ballpark figures rather than guarantees. The core differences:

    • Yoshinoya — the oldest (founded 1899), sweetest and most intensely onion-forward sauce, pay-after-you-eat at most locations.
    • Sukiya — the largest chain by store count, the most customizable menu (cheese, kimchi, mega-size options), pay-after-you-eat.
    • Matsuya — ticket-vending-machine entry, a slightly lighter and more savory sauce, and the only one of the three that includes free miso soup with most sets.

    Yoshinoya: The Original, Sweet and Rich

    Yoshinoya’s gyudon sauce leans sweet, built on soy sauce, mirin, and sake with a generous hit of onion that’s simmered until soft. It’s the flavor most non-Japanese visitors picture when they hear “gyudon,” largely because Yoshinoya was the first of the three to expand internationally. At most Yoshinoya locations you take a seat, order verbally or via a tablet at the table, and pay at the register on your way out. A regular bowl plus an egg (tamago) or extra sauce (tsuyu-dakú) are the classic upgrades long-time customers order on autopilot. Many branches near stations and highway interchanges run 24 hours, which makes Yoshinoya a reliable option for a cheap meal after a late train or before an early Shinkansen — handy to know if you’re timing a trip around the reserved vs non-reserved Shinkansen seating rules and need to grab food fast before boarding.

    Sukiya: The Customization King

    Sukiya has more locations in Japan than either competitor and the broadest menu of the three, which is both its strength and its slight weakness — ordering can feel like reading a diner menu rather than a quick bowl of beef and rice. Beyond the standard gyudon, Sukiya pushes variations hard: cheese gyudon, curry gyudon, kimchi gyudon, and a “mega” size for serious appetites, alongside a genuinely good value “mini” bowl for anyone who just wants a taste. Ordering is verbal at the counter or table, with payment on exit, same as Yoshinoya. If you’re traveling with kids or picky eaters, Sukiya’s variety makes it the easiest of the three to please a group — everyone can order something slightly different without leaving the restaurant.

    Matsuya: The Ticket Machine and the Free Miso Soup

    Matsuya is the odd one out procedurally: you order and pay upfront at a vending-machine-style ticket machine by the entrance, then hand the printed ticket to staff once you sit down. This trips up a lot of first-time visitors who walk in and try to find a human to order from — look for the machine with illuminated buttons just inside the door, insert cash or a card, press the button matching the photo of what you want, and take the ticket it spits out. The payoff is that Matsuya includes a small cup of miso soup free with most set meals, a nice touch the other two don’t really match. Flavor-wise, Matsuya’s sauce is less sweet and more straightforwardly savory than Yoshinoya’s, which some visitors find more appetite-friendly for an early breakfast bowl — Matsuya was also early to push breakfast sets with a raw egg, nori, and pickles alongside the beef.

    How to Order Without Embarrassing Yourself

    A few habits will save you confusion at any of the three:

    • Check which system you’re in before you sit down. Ticket machine (mostly Matsuya) means pay first; counter/table ordering (mostly Yoshinoya and Sukiya) means pay on the way out.
    • Size words matter. Most menus run small (mini), regular, large (ōmori), and extra-large — the price jump between sizes is usually modest, so if you’re hungry, size up rather than ordering a second bowl.
    • Beni shoga (pickled red ginger) is self-serve and free at most counters — a small bowl of it sits near the condiments, often alongside shichimi chili pepper. It’s a classic palate-cleanser between bites of rich beef, in the same spirit as the pickling traditions covered in our guide to Japanese tsukemono.
    • Don’t expect English menus everywhere. Bigger city branches usually have photo menus or English subtitles on the touchscreen, but small-town locations may not — pointing at the picture works fine.

    Budget, Mid-Range, and Splurge Options

    Gyudon is inherently a budget category, but there’s still room to spend more or less:

    • Budget: A mini or regular bowl with no extras runs roughly ¥400–500 at any of the three — one of the cheapest hot, sit-down meals in Japan, and a good fallback if you’re also budgeting hard on lodging at a business hotel chain like Toyoko Inn or APA.
    • Mid-range: Add a raw or onsen egg, extra sauce, and a side salad or miso soup, and you’re still usually under ¥800 for a genuinely filling meal.
    • Splurge: Sukiya’s mega-size bowls or any of the three’s premium beef-cut specials (sometimes using wagyu or thicker-cut beef, rotated as limited-time items) can push ¥900–1,200, still cheap by Western fast-food standards.

    Timing, Location, and Common Mistakes

    Gyudon chains have no real “season” — they’re a year-round, any-time-of-day option, which is exactly their appeal. They cluster around train stations, so they’re a natural stop before or after a day trip; if you’re heading out to somewhere like Kawagoe or Mount Takao, grabbing a fast bowl at the station beforehand means you won’t be hunting for lunch once you’re out hiking. The most common mistake visitors make is treating these restaurants like a sit-and-chat café — they’re built for speed, with counter seating designed for solo diners and a social norm of eating fairly quickly and not lingering once you’ve finished. The second most common mistake is missing the ticket machine at Matsuya and standing awkwardly at the counter waiting to be noticed — staff generally won’t take a verbal order there, so look for the machine first. Lastly, don’t skip the free water, tea, or soup refill stations near the counter; several locations offer unlimited barley tea self-serve, which is easy to miss if you’re focused on the food.

    None of the three is objectively “best” — it comes down to whether you want Yoshinoya’s rich sweetness, Sukiya’s variety, or Matsuya’s lighter sauce and free soup. The good news is you’ll almost never have to choose far in advance: in any city center, odds are good you’ll spot all three signs within a five-minute walk of each other.

  • Tempura: Japan’s Deep-Fried Classic and How to Order It Omakase-Style

    Tempura: Japan’s Deep-Fried Classic and How to Order It Omakase-Style

    Photo by bady abbas on Unsplash

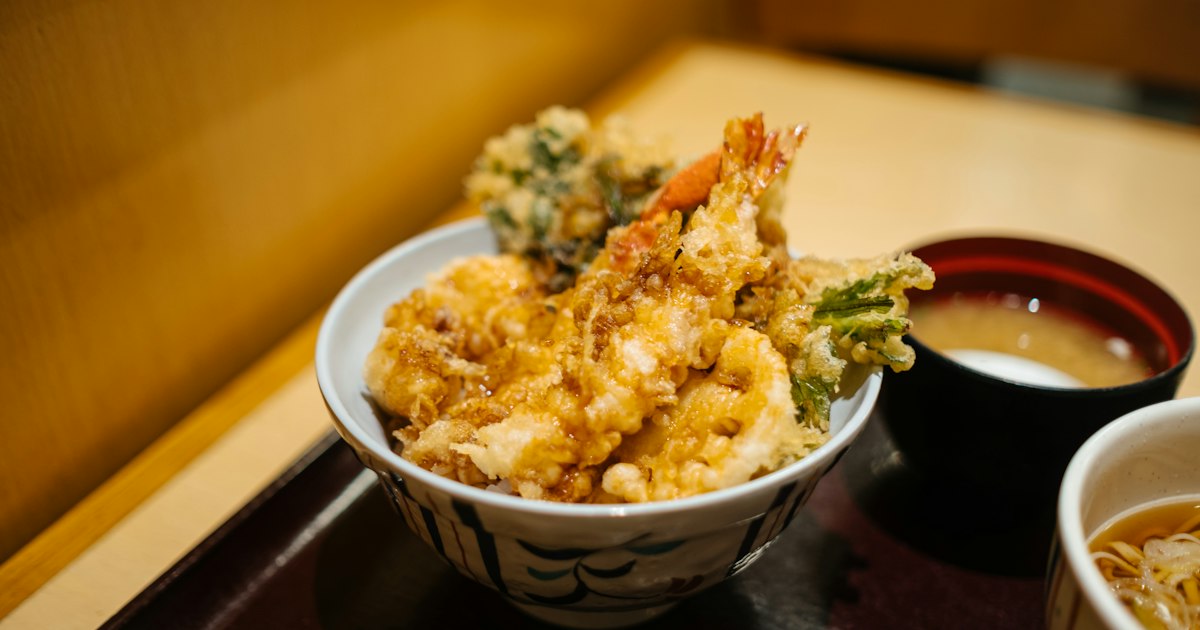
    Tempura looks simple — batter, hot oil, a few seconds in the pot — but the gap between a convenience-store tempura rice bowl and an eight-course counter meal at a specialist restaurant is enormous. Knowing where that gap is, and how to navigate an omakase-style tempura counter without feeling lost, is the difference between a forgettable fried snack and one of the best meals of your trip. Here’s how to find good tempura at every budget and how to handle yourself once you’re sitting at the counter.

    What Actually Makes Tempura Different

    Tempura arrived in Japan with Portuguese traders and missionaries in the mid-1500s, and the technique was adapted over the following centuries into something distinctly Japanese: an ultra-light, lacy batter made from cold water, flour, and sometimes egg, fried quickly at a precise temperature so the coating stays crisp and nearly transparent rather than thick and bready. Good tempura chefs fry each ingredient individually, adjusting oil temperature and timing by what’s going into the pot — a slice of eggplant needs longer than a shrimp — which is exactly why an omakase counter, where a chef fries to order and serves piece by piece, produces dramatically better results than a buffet tray that’s been sitting under a heat lamp.

    Oil matters too. Old-school shops often fry in a blend that includes sesame oil, which gives the batter a faint nutty aroma and a slightly deeper color than the pale, almost white tempura you’ll get at casual chains using pure vegetable oil.

    Where to Eat It: Budget, Mid-Range, and Splurge

    Budget (¥800–¥1,800): Tendon (tempura over a bowl of rice, drizzled with a sweet-savory sauce) is the easiest entry point. Casual tendon and soba shops serve a solid bowl for ¥900–¥1,500 at lunch, and department store basement food halls almost always have a tempura counter selling fresh-fried pieces by weight or piece for an afternoon snack.

    Mid-range (¥2,500–¥6,000): Set-course tempura restaurants plate a fixed selection — usually shrimp, white fish, squid, and two or three vegetables — with rice, miso soup, and pickles, no counter theatrics required. Tsunahachi in Shinjuku and Tempura Daikokuya and Funabashiya in Asakusa are long-running, tourist-friendly options in this range; expect a wait on weekends since they don’t always take reservations for small groups.

    Splurge (¥8,000–¥30,000+): This is the omakase counter tier — Michelin-starred rooms like Tempura Kondo in Ginza or Mikawa Zezankyo near Monzen-Nakacho, where lunch omakase runs roughly ¥8,000–¥15,000 and dinner can climb well past ¥20,000 per person. These seats need reservations weeks to months in advance, often only by phone or through your hotel concierge, and many don’t accept same-day walk-ins at all.

    How an Omakase Tempura Counter Actually Works

    At a proper tempura omakase, you sit directly in front of the fryer, and the chef serves each piece the moment it’s done — no shared plate, no waiting for the whole table. The typical sequence moves from something light and delicate (a small fish like kisu, or a single shrimp) through richer items, builds toward the seasonal vegetable course, and usually finishes with anago (conger eel) or a kakiage (a mixed vegetable or shrimp fritter) served over rice, plus miso soup and pickles to close the meal. A full course commonly runs twelve to fifteen pieces over roughly ninety minutes, so pace yourself — this isn’t a meal to rush.

    You’ll typically be given a choice between dipping each piece in tentsuyu (a light dashi-based sauce) or a small mound of flavored salt, sometimes matcha salt or yuzu salt. Good chefs will tell you which is better suited to each piece; it’s completely normal to ask.

    What to Order by Season

    Tempura is a year-round dish, but the best counters change their lineup constantly to track what’s in season, which is a big part of the appeal of eating it as omakase rather than off a fixed menu.

    • Spring: bamboo shoots, fresh shiso leaves, and sakura shrimp (tiny shrimp fried into a crisp fritter)
    • Summer: anago, sweet corn kakiage, and myoga ginger buds
    • Autumn: matsutake mushroom, kabocha squash, and ginkgo nuts
    • Winter: oysters, lotus root, and firmer white fish like kisu

    If you want to taste a season at its peak, ask your server what’s freshest that week rather than pointing at a photo on a menu — at omakase counters the chef is often buying from the same handful of fish and vegetable sellers every morning, so the answer changes daily.

    Etiquette and Common Mistakes

    The single biggest mistake is letting tempura sit. It’s served piece by piece specifically so you eat it within seconds of it leaving the oil — if you wait for everyone at the table to be served, or stop to take photos of every piece, the batter goes soft and you lose the entire point of eating at a counter. Eat as it arrives.

    Other things to know before you sit down:

    • Don’t drown the piece in tentsuyu — a quick dip is enough; too much sauce turns the crisp batter soggy instantly.
    • Mention allergies and dislikes (especially shellfish) when you book, not after you sit down — omakase means the chef is choosing, and substitutions are much easier to arrange in advance.
    • Many high-end counters are cash-only or card-only in ways that vary shop to shop, so confirm payment methods when you reserve.
    • Reservations for dinner at well-known counters often need to be made 2–4 weeks out, sometimes longer around holidays; lunch is usually easier to get same-week.
    • Most traditional tempura shops close one day a week, commonly Sunday or Monday, and some shut for a few days around New Year — always check before making a special trip.

    Getting There and Planning Your Visit

    Tokyo’s classic tempura neighborhoods are Ginza, Asakusa, and Nihonbashi — the latter a historic merchant district where several tempura houses trace their roots back well over a century; if you’re exploring the area’s old shopping streets and department stores, read our guide to Nihonbashi’s historic merchant district for what else to see nearby. If you’re based in Osaka instead, you don’t need a reservation at all to get a tempura fix — stalls inside Kuromon Ichiba Market fry fresh seafood tempura to order as part of a street food crawl.

    A small bowl of tsukemono almost always comes with your tempura set or course, acting as a palate cleanser between the richer fried pieces — don’t skip it, and don’t be surprised if an omakase counter serves a different pickle than the shop down the street. If your dinner reservation runs late and the trains have stopped, a short cab ride back to your hotel is often easier than it sounds; our guide to hailing a taxi in Japan with apps like GO and S.Ride covers fares and etiquette so you’re not caught off guard.

    Whichever budget tier you pick, the rule stays the same: tempura is a dish best eaten the second it’s served, in a place where someone is frying it fresh for you specifically. Build fifteen minutes of slack into your evening, sit at the counter if you can get a seat, and let the chef decide the order.

  • White Day in Japan: The Reverse Valentine’s Chocolate Frenzy

    White Day in Japan: The Reverse Valentine’s Chocolate Frenzy

    Photo by Olek Buzunov on Unsplash

    If you’re in Japan in mid-March and notice department store basements packed with men anxiously comparing gift boxes, you’ve stumbled onto White Day — one of the more delightfully specific customs you’ll encounter on a trip here. On February 14, it’s customary in Japan for women to give chocolate to men (coworkers, bosses, friends, crushes). A month later, on March 14, the men are expected to reciprocate with a gift of their own. For visitors, it’s a fun cultural quirk to witness and a genuinely good excuse to shop for beautifully packaged Japanese sweets.

    What Is White Day, and Why Does It Exist?

    White Day isn’t an import — it was invented in Japan. In 1980, the National Confectionery Industry Association (with marshmallow and cookie makers as key backers) promoted March 14 as a day for men to return the favor to women who’d given them Valentine’s chocolate, originally pitching marshmallows as the ideal gift (hence the old nickname “Marshmallow Day”). The marshmallow angle has faded, but the core idea stuck: White Day is now a fixture of the Japanese retail calendar, with department stores building entire seasonal campaigns around it from late February through March 14.

    It lands just 11 days after another women-and-girls-focused occasion, Hina Matsuri, Japan’s Girls’ Day doll festival on March 3 — so if your trip spans early-to-mid March, you’ll see a solid month of pink-and-white seasonal displays before shelves flip over to cherry blossom goods in late March.

    The Unwritten Rules: Giri Choco, Honmei Choco, and “Sanbai Gaeshi”

    To understand what men are shopping for, it helps to know the Valentine’s Day side of the equation. Japanese women typically give two categories of chocolate: giri choco (“obligation chocolate”) for coworkers and bosses, and honmei choco (“true feeling chocolate”) for a partner or crush. On White Day, the return gift is expected to roughly match the weight of the original gesture — and there’s a semi-serious guideline called sanbai gaeshi (“triple return”), meaning the return gift should be worth about three times what was received. In practice, most people don’t take this literally, but it does explain why White Day gifts often skew a bit more generous or elegant than the original box of convenience-store chocolate.

    Common White Day gifts go beyond chocolate: cookies, baked goods, candy, and historically marshmallows, plus non-edible add-ons like accessories or handkerchiefs for a honmei-choco partner. You’ll also see “flower and sweets” sets at florists and department stores during this window.

    What to Buy: Budget, Mid-Range, and Splurge Gift Guide

    If you want to pick up a White Day gift (or just a good edible souvenir using the same seasonal displays), here’s a realistic price range:

    • Budget (¥500–¥1,200): Convenience stores and standard supermarkets stock individually wrapped cookie and chocolate assortments in this range — fine for casual coworker gifts, less exciting as a souvenir.
    • Mid-range (¥1,200–¥3,000): This is where it gets interesting for travelers. Hokkaido’s Shiroi Koibito (“White Lover”) — a white chocolate-filled langue de chat cookie — is practically made for this holiday by name alone; a 12-cookie box runs about ¥1,200–¥1,500 and is sold at most major train station gift shops and department stores nationwide. Royce’ nama (raw) chocolate, also from Hokkaido, is another reliable mid-range pick at roughly ¥850–¥1,500 per box, widely available at airport shops and department store food halls even outside Hokkaido.
    • Splurge (¥3,000–¥10,000+): Depachika (department store basement food halls) carry limited-edition White Day boxes from patisseries like Henri Charpentier, Pierre Hermé Paris, and Japanese chocolatiers, often in elaborate seasonal packaging. These sell out fast closer to March 14, so shop early in the month if you want a specific design.

    If chocolate isn’t your target but you want a gift with Japanese character, a Sonny Angel or Smiski blind box is a popular, low-cost alternative gift among younger people in Japan and travels well in a suitcase without melting.

    Where to Shop for White Day Gifts in Tokyo

    The single best place to see White Day retail culture in full force is a depachika. Nihonbashi, Tokyo’s historic merchant district, is ideal for this: Mitsukoshi Nihonbashi’s basement food hall and Takashimaya Nihonbashi both run dedicated White Day pop-up sections from around late February through March 14, typically open the same hours as the store itself (roughly 10:00–20:00, though exact hours vary by section and day). Both stores are a short walk from Nihonbashi Station or Mitsukoshimae Station on the Tokyo Metro, so it’s an easy add-on to a central Tokyo itinerary.

    Shinjuku’s big terminal department stores (Isetan, Takashimaya Times Square) run similarly extensive campaigns if Nihonbashi isn’t on your route. For a quicker, lower-stakes option, any JR station’s “ekinaka” shopping concourse (Tokyo Station, Shinjuku Station) will have a seasonal White Day shelf stocked with Shiroi Koibito, Royce’, and regional specialty boxes.

    Timing and Common Mistakes

    Shop in the first half of March rather than waiting until March 13–14 — the best-designed boxes and limited collaborations sell out, and depachika aisles get genuinely crowded in the final 48 hours as the gift-giving deadline approaches. A few things visitors get wrong:

    • Assuming it’s romantic-only. Most White Day exchanges in Japan are between coworkers or friends, not couples — it’s closer to a workplace gift-exchange norm than a date-night occasion.
    • Buying something that needs refrigeration for a long trip. Nama chocolate and fresh cream-filled items are delicate; if you’re flying out within a day or two, baked cookies (Shiroi Koibito, butter sables) travel far more reliably than fresh truffles.
    • Confusing it with Valentine’s Day gifting direction. Remember the roles are reversed from what Western visitors expect: on February 14 women give, on March 14 men give back.

    White Day won’t be the headline event of your Japan trip, but if your dates happen to overlap with early-to-mid March, it’s worth detouring into a depachika for ten minutes — the seasonal packaging alone is worth seeing, and you’ll walk away with a box of something genuinely good to eat.

  • Obon: Japan’s Summer Festival of the Dead and Bon Odori Dancing

    Obon: Japan’s Summer Festival of the Dead and Bon Odori Dancing

    Photo by note thanun on Unsplash

    Every August, paper lanterns go up outside houses, families crowd onto trains back to their hometowns, and parks across Japan fill with drumbeats and circling dancers in yukata. This is Obon, Japan’s Buddhist festival honoring the spirits of ancestors — and its public face, the Bon Odori dance, is one of the most accessible, free, and genuinely fun cultural events a visitor can stumble into. Here’s what it actually is, when to catch it, and how to plan a trip around it without getting steamrolled by Japan’s single busiest travel week.

    What Obon Actually Celebrates

    Obon (お盆) is a Buddhist observance rooted in the belief that ancestral spirits return to visit their living relatives once a year. Families light small fires called mukaebi outside their homes on the first evening to guide spirits in, and visit and clean ancestral graves. On the final night, okuribi fires — or in some regions, floating lanterns set adrift on rivers (toro nagashi) — send the spirits back. It isn’t a solemn, hushed affair like a Western wake; it’s closer to a family reunion with a dance party attached, which is exactly where Bon Odori comes in.

    Obon is not an official national public holiday, but it functions like one. Many companies close for three to five days, and it’s one of the two biggest domestic travel weeks in Japan (alongside New Year’s and Golden Week).

    When It Happens — and Why the Dates Are Confusing

    This is the single biggest point of confusion for visitors. Obon’s timing splits into two camps:

    • Hachigatsu Bon (August Bon) — August 13–16, observed by most of Japan, including Kyoto, Osaka, and most rural regions. This is the main event most travelers plan around.
    • Shichigatsu Bon (July Bon) — July 13–16, observed in parts of Tokyo, Yokohama, and some other eastern areas that switched to the solar calendar’s equivalent month after the 1873 calendar reform.

    Because of this split, you can realistically catch Bon Odori events somewhere in Japan across both July and August — Tokyo neighborhoods often run their dances in mid-July, while the rest of the country peaks in mid-August. Local tourism sites and ward offices post exact dates each year; they shift slightly, so confirm before you build an itinerary around a specific festival.

    Bon Odori: How the Dancing Actually Works

    Bon Odori (“Bon dance”) is a circle dance performed around a raised wooden scaffold called a yagura, where drummers and sometimes singers set the rhythm. Dancers move in a loop around the tower, repeating simple, choreographed arm and step patterns set to regional folk songs — the most famous being “Tankō Bushi” (a coal miners’ song) and “Tokyo Ondo,” both danced in nearly identical form at festivals nationwide.

    You do not need to know the steps beforehand. Just join the outer edge of the circle and copy the people in front of you — most locals are relearning the moves themselves, and newcomers are welcomed, not judged. Many neighborhood festivals rent yukata on-site or nearby (roughly ¥3,000–6,000 for a basic rental including obi and sandals), though plenty of attendees come in regular clothes. Food stalls (yatai) selling yakisoba, kakigori shaved ice, and grilled corn ring the dance area, with most snacks priced ¥400–800.

    Where to Experience Obon

    Tokushima’s Awa Odori (August 12–15) is Japan’s largest and most famous Bon dance festival, drawing roughly a million visitors over four days. Choreographed dance troupes (ren) parade through the streets in distinctive sedge hats, accompanied by shamisen, drums, and flutes. Street viewing is free; reserved grandstand seats along the main routes cost around ¥2,000–4,500 and sell out well in advance through the official festival site.

    Kyoto’s Gozan no Okuribi (August 16) is the city’s dramatic send-off for Obon spirits — giant bonfires are lit in sequence on five mountainsides ringing the city, starting with the famous “大” (dai) character on Mount Nyoigatake at 8:00pm, followed by the others roughly five minutes apart. Free viewing spots line the Kamogawa riverbanks and various bridges; arrive at least an hour early for a clear sightline, as this is one of Kyoto’s most-watched summer events.

    Tokyo’s neighborhood festivals are smaller but numerous — local shrines, temples, parks, and even apartment complexes run their own Bon Odori through July and August, usually free to attend. These are lower-key than Tokushima’s spectacle but arguably the best way to dance alongside locals rather than watch from behind a rope line.

    If you’re interested in how Japan’s other seasonal festivals compare, Tanabata: Japan’s Star Festival and Where to Celebrate It covers the other major summer celebration, held in early July in most of the country.

    Planning Around Japan’s Busiest Travel Week

    Obon (mid-August especially) is one of the worst times to travel domestically in Japan if you haven’t planned ahead — and one of the best times if you have, since you’ll be sharing the experience with Japanese families rather than other tourists.

    • Shinkansen: Reserved seats on routes like Tokyo–Osaka or Tokyo–Hiroshima sell out days or weeks ahead for the Obon week. See Reserved vs Non-Reserved Shinkansen Seats: Jiyuseki Explained before you go — during Obon, even the unreserved (jiyuseki) cars can mean standing for an hour or more, so booking reserved seats the moment they open (one month ahead) is worth the extra cost.
    • Flights and hotels: Domestic flight prices and hotel rates in popular regions can roughly double compared to a normal week. Book accommodation as early as you can if your trip overlaps August 13–16.
    • Getting home after a late dance: Local trains often wind down by midnight, and Bon Odori festivals frequently run past that. If you’re stuck without a train, see Hailing a Taxi in Japan: Apps, Fares & Etiquette (GO, S.Ride) for ordering a ride home without the language barrier being an issue.
    • Budget alternative: If your trip dates are flexible and don’t strictly require travel during the Obon crunch, the Seishun 18 Ticket: Japan’s Budget Local Train Pass Explained is worth knowing about for unlimited local-train travel on a budget during its seasonal sale windows.

    Common Mistakes to Avoid

    • Assuming one date applies everywhere. Confirm whether you’re chasing July Bon (Tokyo area) or August Bon (most of the rest of Japan) before booking around a specific event.
    • Trying to book last-minute Shinkansen seats mid-August. Reserved seats on peak routes can be fully booked days out; have a backup plan or book early.
    • Skipping the free viewing spots for paid grandstands. At events like Awa Odori and Gozan no Okuribi, free street-level viewing is genuinely good — paid seating buys comfort and a guaranteed spot, not a meaningfully better view.
    • Treating it as purely a spectator event. Bon Odori circles are open to anyone who wants to join in; standing at the edge watching is fine, but dancing is half the fun and no one will mind if you’re off-beat.

    Obon rewards travelers who build a little flexibility into their schedule — the festivals themselves cost little or nothing, but the trains and hotels around them need booking well ahead. Time it right, and you’ll get neighborhood dancing, mountainside bonfires, and one of the most genuinely communal nights Japan’s festival calendar has to offer.

  • Kabuki Theatre: A First-Timer’s Guide to Watching a Show

    Kabuki Theatre: A First-Timer’s Guide to Watching a Show

    Photo by Pat Krupa on Unsplash

    Kabuki looks intimidating from the outside — the stylized makeup, the archaic language, the four-hour running times — but it’s one of the most accessible traditional art forms in Japan for a first-time visitor, precisely because theatres have built systems to let you drop in for a single act, rent an English guide, and leave understanding exactly what you watched. Here’s how to actually do it, without wasting money on the wrong ticket or showing up on the wrong day.

    What Kabuki Actually Is (In Plain Terms)

    Kabuki is a form of stylized theatre that began in the early 1600s, performed entirely by male actors, including those playing female roles (onnagata). Stories mix historical drama, revenge plots, dance, and comedy, told through exaggerated poses (kata), rhythmic dialogue, and live shamisen-and-drum music. You don’t need to follow every line of dialogue — the visual storytelling, the sudden quick-change costume reveals (hikinuki), and the stylized freeze-frame poses (mie) carry a lot of the meaning on their own.

    Where to Watch Kabuki in Japan

    You have four realistic options, depending on your itinerary:

    • Kabuki-za (Tokyo, Ginza) — the main stage, with performances nearly every month. Address: 4-12-15 Ginza, Chuo-ku. Exit directly from Higashi-Ginza Station (Toei Asakusa or Hibiya Line, Exit 3). Box office generally opens around 10:00, with matinee programs starting near 11:00 and evening programs around 16:30; each program runs roughly four hours including two or three intermissions.
    • Minamiza (Kyoto, Gion) — Japan’s oldest kabuki theatre site, most famous for the “Kaomise” grand lineup every December, when top actors’ names are displayed on the kanban signboard outside.
    • Shochikuza (Osaka, Dotonbori) — hosts occasional kabuki runs, usually a few times a year, worth checking if you’re based in Osaka.
    • Kanamaru-za (Kotohira, Kagawa) — Japan’s oldest existing kabuki playhouse, built in 1835. It operates as a museum you can tour year-round for about ¥550, but once a year in April it hosts the “Konpira Grand Kabuki” with major Tokyo actors — a genuinely special, hard-to-repeat experience if your trip timing lines up.

    If a trip to Kyoto or Shikoku is part of the plan, check how you’re routing there — our guide to reserved vs non-reserved Shinkansen seats is useful for deciding whether to book ahead for a performance day when trains run fuller than usual.

    Buying Tickets: Full Program vs. Single-Act

    This is the part most first-timers get wrong. At Kabuki-za, you have two very different ways to buy in:

    • Full program tickets cover an entire matinee or evening program (multiple acts). Prices vary by seat class and show but typically range from around ¥4,000 for upper balcony seats to ¥20,000+ for the best first-floor seats. Book these online in advance through the official Kabuki-za website, especially for popular months.
    • Single-act tickets (hitomaku kenbutsu / “ichimaku-mi”) let you watch just one act from a dedicated fourth-floor gallery. These are sold same-day only, in person, at a separate entrance beside the main doors, generally for around ¥2,000–¥2,500 per act, cash only, and they’re not bookable in advance. This is the best option if you just want a taste of kabuki without committing a whole afternoon or a large budget — arrive at least 30–45 minutes before the act starts, as the allotment for popular acts sells out.

    What to Expect Once You’re Inside

    Rent the English earphone guide (usually around ¥1,000 plus a refundable deposit) at a counter near the entrance — it gives real-time plot explanation and cultural notes synced to the performance, not a subtitle translation, so it’s genuinely useful rather than distracting. A separate Japanese-language program guide (program booklet, “program”) is sold for a few hundred yen and worth it even if you don’t read Japanese, for the cast photos and scene summaries.

    Dress is casual — there’s no dress code. Latecomers are held outside the auditorium until the next scene break or intermission, so build in buffer time getting to the theatre. Photography and video during the actual performance are prohibited, though photos are usually fine in the lobby and at the signboards outside.

    One quirky detail: the term “makunouchi bento” (the standard boxed lunch sold at train stations and convenience stores across Japan) originated from bento eaten during kabuki intermissions (“maku” = act). Kabuki-za’s basement food hall sells a range of these, along with sweets, and you can also pre-order a bento to pick up during intermission — worth doing if you’re staying for a full program, since intermissions run 15–30 minutes and the food hall gets crowded fast.

    Budget, Mid-Range, and Splurge Options

    • Budget (~¥2,000–¥2,500): A single-act ticket at Kabuki-za’s fourth-floor gallery. Seats are further from the stage but the view is still clear, and it’s the lowest-commitment way to try kabuki.
    • Mid-range (~¥6,000–¥12,000): A second- or third-floor seat for a full program. Good sightlines, full story arc, manageable cost.
    • Splurge (~¥15,000–¥22,000+): First-floor seats close to the stage (often called “ichikai” or similar depending on the theatre), or the once-a-year Konpira Grand Kabuki at Kanamaru-za in April, which combines a historic 1835 wooden theatre with top-tier actors — a bucket-list pairing rather than a routine outing.

    Best Time to Go and Common Mistakes

    Kabuki-za runs programs most months, so there’s no single “best season” — the better question is which show. December’s Kaomise lineup in Kyoto and April’s Konpira Grand Kabuki in Shikoku are the two calendar-fixed highlights worth planning a trip around; otherwise, check the current Kabuki-za or Shochikuza lineup a few weeks before your trip and pick based on which actors or plays are running.

    Common mistakes first-timers make: buying a full-program ticket without realizing it’s 4+ hours when they only wanted a quick cultural taste (the single-act option solves this); skipping the earphone guide and then following nothing; and assuming you can walk up and buy a good seat the same day during a popular run — single-act tickets are same-day, but full-program good seats often sell out days or weeks ahead.

    Getting There and After the Show

    Kabuki-za’s Higashi-Ginza exit puts you right at the door, so there’s rarely a need for a taxi to get there — but if you’re coming from a hotel without convenient train access, or leaving late after an evening program ends past 20:30, it’s worth knowing the basics of taking a taxi in Japan for fares and etiquette. Ginza sits right next to Nihonbashi, so if your show lets out in daylight hours, it’s an easy walk or short ride into Nihonbashi’s historic merchant district and flagship department stores to extend the afternoon with some shopping before dinner.