Japan Trove

Category: Uncategorized

  • Kawagoe: Tokyo’s “Little Edo” Day Trip and Sweet Potato Treats

    Kawagoe: Tokyo’s “Little Edo” Day Trip and Sweet Potato Treats

    Photo by Airu on Unsplash

    Less than an hour from central Tokyo, Kawagoe packs Edo-period warehouse streets, a 400-year-old bell tower, a candy-shop alley, and some of Japan’s best sweet potato desserts into a single, easy day trip. Locals call it “Koedo,” or Little Edo, because its merchant district survived the fires and rebuilding that erased most of old Tokyo. It’s compact enough to see on foot in half a day, which makes it one of the most efficient day trips out of the capital — especially if you pair sightseeing with a serious amount of snacking.

    Getting There from Tokyo

    Kawagoe has three realistic rail options, and the one you pick depends on where you’re staying:

    • Tobu Tojo Line from Ikebukuro — the fastest option. The limited express “Kawagoe” train covers the distance in about 30 minutes for a regular fare of around ¥480, with no extra limited-express surcharge. Regular rapid trains take closer to 35-45 minutes for the same fare.
    • Seibu Shinjuku Line from Seibu-Shinjuku Station — useful if you’re near Shinjuku. The “Koedo” limited express reaches Hon-Kawagoe Station in about 44 minutes but adds a seat-reservation fee on top of the roughly ¥480 base fare; regular trains take 50-60 minutes without the surcharge.
    • JR Saikyo/Kawagoe Line direct from Shinjuku or Ikebukuro — no transfer needed, arriving at Kawagoe Station in about an hour for roughly ¥620-650. This is the simplest option if you’d rather not think about which line to board.

    If you’re traveling on a wider JR itinerary and already have a rail pass that covers local lines, the JR route costs you nothing extra — worth checking if you’re using something like the Seishun 18 Ticket on a slower-paced, budget rail trip through the Kanto region. Note that Kawagoe Station (JR/Tobu) and Hon-Kawagoe Station (Seibu) are about 1km apart, so check which one your train actually uses before you book onward plans.

    Kurazukuri Street and the Old Town

    From either station, it’s a 20-25 minute walk (or a short bus ride) to Kurazukuri Street, the row of black-tiled kura (storehouse-style) merchant buildings that gives Little Edo its name. These thick-walled, fireproof warehouses date mostly from the Meiji era, after a major 1893 fire, and today house shops, cafés, and small museums. It’s free to walk the street itself; the Kurazukuri Shiryokan museum charges a small admission (around ¥100) to go inside one of the original buildings, but it’s closed on Mondays, so avoid planning your trip for that day if you want to see the interior.

    At the end of the street stands Toki no Kane, the wooden bell tower that’s become Kawagoe’s unofficial symbol. The current structure dates to 1894 and still rings four times a day — 6am, noon, 3pm, and 6pm — though you’re mostly there for photos rather than the sound itself, since the street gets busy with other visitors doing the same thing.

    Just off the main street is Kashiya Yokocho, or Candy Alley, a short lane of old-fashioned sweet shops selling hand-pulled candy, dagashi (penny candy), and rice crackers much as they would have decades ago. It’s free to wander and a good spot for small, cheap souvenirs in the ¥200-500 range.

    Kita-in Temple and Hikawa Shrine

    A 15-20 minute walk from Kurazukuri Street, Kita-in Temple is worth the detour for two reasons: its collection of roughly 540 stone Rakan (disciples of Buddha) statues, each carved with a different expression, and the fact that some of its buildings were actually relocated from Edo Castle in the 17th century — making them the only surviving structures from the original castle anywhere in Japan. Entry to the Rakan garden and historic hall area runs around ¥400 for adults.

    Kawagoe Hikawa Shrine, a bit farther out, is known for its “enmusubi” (matchmaking) blessings and, in summer, for hanging over 2,000 wind chimes across its grounds during a festival that typically runs from early July through mid-September. If your trip lands in that window, it’s a photogenic, free add-on to the main loop.

    Sweet Potato Treats to Try

    Kawagoe’s connection to sweet potatoes (satsumaimo) goes back to the Edo period, when the sandy, volcanic-ash soil of the surrounding Kanto plain proved ideal for growing them, and roasted “Kawagoe-imo” became a popular Edo-era snack. That legacy is everywhere on Kurazukuri Street and Candy Alley today:

    • Imo soft serve — purple or golden sweet potato soft-serve ice cream, typically ¥400-500, sold from stands along the main street.
    • Daigaku imo — bite-sized candied sweet potato chunks coated in a sugar-and-sesame glaze, usually sold by weight or in small bags around ¥400-600.
    • Imo chips and senbei — thin-sliced, baked or fried sweet potato crisps, a good packable souvenir at roughly ¥400-600 a bag.
    • Purple sweet potato Mont Blanc or tarts — richer, café-style desserts in the ¥600-900 range, found in a few of the sit-down shops on the side streets.
    • Yaki-imo (roasted sweet potato) — sold whole, especially in autumn, for around ¥300-500 depending on size.

    Autumn (roughly October through November) is harvest season and when the sweet potatoes taste best and are most widely available; some shops scale back the fresh offerings in late spring and summer. If dessert-hopping is your main goal, this is the season to prioritize.

    Best Time to Visit

    Kawagoe works as a day trip year-round, but a few windows stand out: autumn for sweet potato season and fall foliage, late March to early April for cherry blossoms along the Shingashi River near Kita-in, and early January for Kita-in’s lively Daruma market. Summer is workable but Kurazukuri Street has little shade and can feel brutal at midday — aim for a morning start and save indoor stops (museums, cafés) for the early afternoon heat. Weekends and holidays bring heavy crowds to the main street and long lines at the most popular soft-serve stands; a weekday morning gives you a noticeably calmer version of the same experience.

    Getting Around and Common Mistakes

    Everything described here is walkable from either station, though the “Koedo Loop” tourist bus (a one-day pass runs around ¥500) is handy if you want to save your legs or if it’s raining. A few things catch first-time visitors off guard:

    • Monday closures — several small museums and some shops close on Mondays; check before building your whole itinerary around indoor stops.
    • Underestimating the walk — Kurazukuri Street, Candy Alley, and Kita-in together add up to a few kilometers of walking on uneven stone paths; comfortable shoes matter more than they look like they would.
    • Kimono rental without a reservation — walking Kurazukuri Street in rented kimono is popular, and on weekends the walk-in shops can sell out of sizes; booking ahead avoids disappointment.
    • Treating it as a quick stop — the station-to-old-town walk eats real time in both directions; budget at least 4-5 hours total if you want to see the old town, eat properly, and visit Kita-in without rushing.

    If you’d rather not walk the station-to-town stretch at all, a taxi is a reasonable option for a small group splitting the fare — see our guide on taking a taxi in Japan for how fares and apps work outside central Tokyo.

    Budget, Mid-Range, and Splurge Options

    For a bare-bones trip, take the regular (non-limited-express) train, skip Kita-in’s admission, and stick to free streets plus a couple of ¥300-500 snacks — doable for well under ¥2,000 round-trip including food. A mid-range day adds the limited express train, Kita-in’s ¥400 admission, a proper sit-down lunch (Kawagoe is also known for unagi, with set meals typically ¥2,000-3,000), and a sweet potato dessert or two, landing somewhere around ¥4,000-6,000 per person. For a splurge, book a short kimono rental (roughly ¥3,000-5,000 for a few hours) to photograph the old town in costume, or treat yourself to a multi-course kaiseki-style lunch at one of the higher-end restaurants tucked into the kura buildings.

    Kawagoe rewards an unhurried pace more than a packed checklist — if you’ve already done a brisk nature-focused day trip like Mount Takao, this is a good contrast: slow streets, old buildings, and a lot of standing around eating. And if you enjoy wandering historic merchant districts, it pairs naturally with Tokyo’s own Nihonbashi, which tells the same Edo-era merchant story from the capital’s side.

  • Mount Takao: Tokyo’s Easiest Mountain Day Trip

    Mount Takao: Tokyo’s Easiest Mountain Day Trip

    Photo by Timur Garifov on Unsplash

    At just 599 meters, Mount Takao (Takaosan) is the mountain Tokyo built a subway line to. It’s less than an hour from Shinjuku, has six marked trails ranging from paved sidewalk to real scrambling, and tops out with a Michelin three-star view and a temple full of tengu statues. You don’t need hiking boots, a car, or a whole weekend — just a transit card and a few hours. Here’s how to do it right, including the mistakes that trip up first-time visitors.

    Getting There: Trains, Fares, and Timing

    The fastest route is the Keio Line from Shinjuku Station directly to Takaosanguchi Station, the last stop. The ride takes about 45–55 minutes depending on the train, and a regular one-way fare runs roughly ¥390–¥430. On weekends and holidays (and seasonally on weekdays), the Keio Liner limited express runs straight through with reserved seating for a small surcharge of a few hundred yen — worth it if you want a guaranteed seat on the way home when everyone else is also tired and descending at once.

    You can also take the JR Chuo Line from Shinjuku or Tokyo Station to Takao Station, then transfer to a short Keio bus or train to Takaosanguchi. If you’re using a JR regional pass or want the cheapest possible local-train option, the Seishun 18 Ticket covers the JR Chuo Line leg to Takao Station during its sale windows, which can shave the cost down further if you’re already planning other local-train travel that day.

    Once you’re at Takaosanguchi, the trailheads and cable car station are a five-minute walk from the ticket gates — there’s no need for a taxi on arrival, though if you’re staying late for dinner near the station or missed the last train, taxi apps work fine in this area for the ride back to a nearby station.

    Choosing Your Trail

    Mount Takao has six numbered trails (plus a couple of side routes), and picking the right one matters more than people expect:

    • Trail 1 (Omotesando): The main route, fully paved, passing Yakuoin Temple. About 3.8 km one-way, roughly 90 minutes up at a relaxed pace. This is the one 80% of visitors take, which means it’s crowded on weekends but completely manageable in sneakers or even sandals.
    • Trail 6 (Biwa Waterfall Trail): Follows a stream through a shaded valley, more scenic and quieter, but can close temporarily after heavy rain — check signage at the trailhead.
    • Inariyama Trail: Ridge-line route with the best open views on the way up; a little more physically demanding with some stairs and uneven footing.
    • Trails 3, 4, and 5: Shorter connector loops good for extending the hike or avoiding backtracking on the descent.

    A common combo: go up via Trail 6 or Inariyama for scenery, come down via Trail 1 for an easy paved finish. Total round trip for most combinations is 3–4 hours including summit time.

    Cable Car, Chairlift, and the Summit

    If you’d rather skip the climb (or just the first third of it), the Takao Tozan cable car and an open-air chairlift both run from Kiyotaki Station near the base up to the mid-mountain Takaosan Station, cutting the hike roughly in half. Expect to pay around ¥600 one-way or ¥1,200 round-trip per person; the chairlift is slightly cheaper but slower and exposed to weather. Both stop running in the early evening — typically between 17:00 and 18:30 depending on the season — so check the posted last-departure time when you arrive if you’re planning to ride down rather than walk.

    From the cable car’s upper station it’s still a 20–40 minute walk to the actual summit, passing Yakuoin Temple, a Buddhist temple founded in 744 whose guardian deity is the tengu — you’ll see tengu statues and masks throughout the grounds. The summit itself has an open plaza, a few rest houses, vending machines, and on clear days (most common in winter), a surprisingly large view of Mt. Fuji to the southwest.

    Best Season and Time of Day

    Mount Takao is a year-round hike, but timing changes the experience:

    • Autumn (mid-November to early December): Peak momiji (maple leaf) season and by far the busiest time. Trail 1 and the cable car queues can back up for 30–60 minutes on weekends. If autumn colors are your priority, go on a weekday and arrive before 9:00am.
    • Winter (December–February): Cold but clear, with the best odds of seeing Mt. Fuji from the summit, and almost no crowds.
    • Summer (June–October): Hot and humid on the climb, but the summit area runs a seasonal beer garden (the “Takao Beer Mount”) with all-you-can-eat-and-drink courses around ¥4,000–¥5,000, reservation recommended.
    • Spring: Pleasant hiking weather, moderate crowds, some cherry blossoms lower on the mountain.

    Whatever season, start by late morning at the latest — the last cable car and the fading daylight both become real constraints if you linger too long at the summit.

    Budget, Mid-Range, and Splurge Options

    Budget: Hiking is free. Skip the cable car entirely and walk both ways; total cost for the day is just train fare (under ¥1,000 round-trip from Shinjuku) plus whatever you eat.

    Mid-range: Ride the cable car one way (around ¥600–¥1,200) and eat at one of the summit-area soba shops — tengu-themed tororo or zaru soba typically runs ¥900–¥1,300.

    Splurge: Finish at Keio Takaosan Onsen Gokurakuyu, a hot spring bathhouse literally attached to Takaosanguchi Station, for a post-hike soak (around ¥1,100–¥1,400 entry) before the train home — one of the few trailhead-to-bath setups this convenient anywhere near Tokyo.

    Common Mistakes to Avoid

    • Going on a weekend during peak autumn colors without a plan: Crowds can turn a 90-minute climb into a 3-hour shuffle. Weekday mornings are dramatically better.
    • Assuming Trail 1 means no effort: It’s paved, but it’s a steady uphill grade for nearly 4 km — regular walking shoes are fine, flip-flops are not.
    • Missing the last cable car down: If you rode up and plan to ride down, confirm the last departure time at the base station before you start hiking — it shifts by season and isn’t always what you’d assume.
    • Not bringing cash for the cable car and food stalls: Many small vendors on the mountain are cash-only or have unreliable card readers.
    • Underestimating how early it gets dark in winter: Trails have minimal lighting; aim to be off the mountain by dusk.

    If Takao leaves you wanting a longer, wilder hike, Japan has far more serious terrain within reach of a long weekend — the ancient beech forests of Shirakami-Sanchi are a good next step up. But for a half-day escape from Tokyo that needs zero planning and zero gear, Mount Takao is hard to beat.

  • Kamaboko: Japan’s Fish Cake Craft and Where to Buy Artisan Varieties

    Kamaboko: Japan’s Fish Cake Craft and Where to Buy Artisan Varieties

    Photo by Kelly Visel on Unsplash

    Walk past any Japanese supermarket’s refrigerated section and you’ll spot it: a smooth pink-and-white loaf, sometimes mounted on a thin wooden board, sometimes swirled into a pink pinwheel floating in a bowl of ramen. That’s kamaboko, Japan’s steamed fish cake, and while it often gets dismissed as a throwaway ramen topping, the artisan versions made in a handful of towns are genuinely crafted goods worth seeking out — some cut and shaped like origami, others aged in techniques that go back centuries. Here’s how to find the good stuff.

    What Is Kamaboko, Exactly?

    Kamaboko starts as surimi — white fish (traditionally shiro-guchi croaker, now often Alaska pollock or shark) pounded into a fine paste with salt, sugar, and starch, then steamed until it sets into a firm, springy cake. The classic shape is a half-cylinder loaf mounted on a small wooden board (ita), which is why old-school kamaboko is sometimes called ita-kamaboko. The pink skin you see on top isn’t rubber dye for fun — kōhaku (red-and-white) kamaboko is specifically made for New Year’s osechi trays and celebrations, since red and white together symbolize good fortune in Japan.

    Two relatives worth knowing so you don’t mix them up in a shop: chikuwa is the hollow, tube-shaped version grilled on a stick (not board-mounted), and narutomaki is the pink spiral swirl you find in ramen and oden, named after the whirlpools off Naruto in Tokushima. Both are technically kamaboko-family products but sold and eaten differently.

    Regional Styles Worth Seeking Out

    Kamaboko is a regional craft as much as a food category, and the differences are real:

    • Odawara (Kanagawa): Often considered the heartland of refined kamaboko, thanks to clean coastal water and a port that historically shipped premium white fish. Odawara kamaboko is prized for its tight, bouncy texture (the Japanese word is “ashi,” or springiness) and is sold in long-running shops dating back to the Edo period.
    • Sendai (Miyagi): Home to sasa-kamaboko, flat fan-shaped cakes grilled (not just steamed) so the surface browns slightly, resembling bamboo leaves. It’s a grab-and-eat snack as much as a formal gift, and stalls near Sendai Station sell it warm.
    • Kanazawa (Ishikawa): Known for kazari-kamaboko — decorative kamaboko sculpted into cranes, flowers, or crab shapes, traditionally made for weddings and celebrations. These are display pieces as much as food.
    • Shimonoseki and the Seto Inland Sea area: Leans on local fish varieties for a denser, more savory style, often sold in smaller artisan shops rather than department stores.

    Where to Buy Artisan Kamaboko

    If you’re in Tokyo, the easiest reliable source is a department store basement food hall (depachika), which routinely stocks regional kamaboko brands flown in from Odawara, Sendai, and Kanazawa. The food halls around Nihonbashi’s flagship department stores are a good bet precisely because this neighborhood has centuries of history as a merchant and provisions district — look for the gift-boxed sets, usually 1,000–3,000 yen for an assortment of 4–6 small cakes, which travel well if you’re bringing souvenirs home.

    In Osaka, the stalls of Kuromon Ichiba Market sell fresh kamaboko and chikuwa alongside the market’s famous seafood skewers — it’s a good spot to buy a small loaf (often 300–800 yen) to eat that day rather than a shelf-stable gift box.

    For the real pilgrimage, Odawara is an easy day trip from Tokyo — about 35 minutes by Tokaido Shinkansen from Tokyo Station, or roughly 70–80 minutes on the Odakyu Line from Shinjuku. Several historic kamaboko houses operate shops near Odawara Station and along the old Tokaido road, selling everything from everyday boards (around 500–900 yen) to elaborately shaped gift sets well over 3,000 yen.

    Watching (and Trying) the Craft Yourself

    The best-known hands-on stop is Suzuhiro Kamaboko no Sato, a combined shop, small museum, and workshop space a short walk or bus ride from Odawara Station. It’s generally open daily from around 9:00 to 18:00 (hours can shift seasonally, so confirm before you go), and offers a chikuwa- or kamaboko-making experience where you shape surimi paste by hand and grill or steam it yourself, typically for a fee in the 1,000–2,000 yen range per person. It’s a genuinely fun 20–30 minute activity for families or anyone curious how a flat fish paste becomes a springy, structured cake — and you eat what you make.

    Budget, Mid-Range, and Splurge Picks

    Thinking about what to buy at different price points:

    • Budget (300–800 yen): A single loaf or a few pieces of narutomaki or chikuwa from a market stall or supermarket — fine for snacking, not really gift material.
    • Mid-range (1,000–3,000 yen): Boxed assortments from an established house like those in Odawara or Sendai, usually vacuum-sealed or chilled, suitable as omiyage for colleagues or family. If you’re already building a shopping list of Japanese gift sweets and snacks, it’s worth comparing against the standards covered in our omiyage buyer’s guide — kamaboko makes a nice savory counterpoint to an all-sweets gift box.
    • Splurge (3,000–8,000+ yen): Hand-shaped kazari-kamaboko from Kanazawa artisans, often made to order for weddings or New Year, sculpted into cranes or flowers. These are closer to edible art and usually need advance ordering through specialty shops rather than walk-in purchase.

    Common Mistakes to Avoid

    The biggest one is buying kamaboko as a take-home souvenir without checking that it needs refrigeration — most artisan kamaboko is chilled, not shelf-stable, and will spoil within days, so it’s a poor choice if you have a long flight home with no cooler bag. Ask specifically for a vacuum-sealed or shelf-stable gift set if you need something to survive the trip; shops that cater to tourists usually have one. Another mistake is confusing cheap, highly processed kamaboko (often made mostly from starch and flavoring, sold cold-cut style for bento boxes) with the artisan product — texture and fish content vary enormously by price, and a 150-yen convenience store pack tells you nothing about what real ita-kamaboko tastes like.

    Best Time to Buy

    Kamaboko is sold year-round, but late December is peak season, since kōhaku (red-and-white) kamaboko is a required component of osechi ryori, the New Year’s meal, and shops sell out of their nicest shaped and gift-boxed versions in the final weeks of the year. If you want the full range of celebratory and decorative styles — including the elaborate Kanazawa shapes — visiting in mid-to-late December gives you the widest selection, though you’ll be competing with locals doing their own New Year shopping. Outside that window, kamaboko culture pairs naturally with other traditional Japanese food crafts worth building a trip around, like the fermented and pickled vegetables covered in our guide to tsukemono — both are everyday staples that have a surprisingly deep artisan tier once you know where to look.

  • Kuromon Ichiba Market: Osaka’s Kitchen Street Food Crawl

    Kuromon Ichiba Market: Osaka’s Kitchen Street Food Crawl

    Photo by Julien on Unsplash

    Known locally as “Osaka’s Kitchen,” Kuromon Ichiba Market is a 580-meter covered arcade in Nipponbashi packed with roughly 150 stalls selling everything from live seafood to wagyu skewers to seasonal fruit. Unlike many food markets in Japan where eating on the spot is frowned upon, Kuromon actively encourages it—most stalls grill, shuck, or torch their food right at the counter and hand it to you to eat standing a few feet away. Here’s how to plan a food crawl that actually works, with real prices and the mistakes that trip up first-time visitors.

    What Is Kuromon Ichiba Market?

    Kuromon Ichiba has operated as a wholesale-turned-retail food market since the late Edo period, originally supplying restaurants and sushi chefs across Osaka. Today it’s split roughly between old-school vendors selling raw fish, pickles, and produce to locals, and newer stalls built for tourists who want a quick skewer or a grilled scallop to eat on the move. Both halves are worth your time—the produce and dry-goods shops give you a sense of what Osaka actually cooks with, while the grab-and-go counters are where most visitors spend their money.

    The arcade is fully covered, so it’s a good rainy-day option, and it stays open regardless of weather or season. Pickle specialists here are a good stop if you want to understand Japan’s tsukemono tradition beyond the small packets sold at convenience stores—several stalls let you sample before buying.

    Getting There: Trains, Walking, and Taxis

    The market sits between Namba and Nipponbashi, making it an easy add-on to a Dotonbori or Shinsekai day.

    • Osaka Metro: Nippombashi Station (Sakaisuji Line or Sennichimae Line), Exit 10, is about a 1-minute walk directly into the market’s southern end.
    • Kintetsu/Hanshin Namba Line: Nihonbashi Station is similarly close, roughly 2 minutes on foot.
    • From Namba Station: It’s a 10–12 minute walk north through the Nipponbashi Den Den Town electronics district.
    • From Shin-Osaka Station: Take the subway (Midosuji Line to Namba, then transfer) for about 25 minutes total.

    If you’re coming from a hotel in a less subway-friendly area, or you’re loaded down with shopping bags afterward, a taxi is a reasonable option for this short a hop—see our guide to hailing a taxi in Japan for app-based ordering and fare etiquette.

    When to Go: Best Time to Beat the Crowds

    There’s no single posted opening hour for the market as a whole—it’s a public shopping street, not a gated facility—but individual stalls set their own schedules. Most open between 8:00 and 10:00 and pull their shutters by 18:00, though a handful of sushi and seafood counters stay open until 20:00 to catch dinner traffic. A few produce and dry-goods shops close entirely on no fixed day, so if there’s one specific stall you want, it’s worth checking it’s open before you go.

    Arrive before 10:00am for the best combination of fresh stock and thin crowds. Tour groups and cruise-ship day-trippers tend to flood the arcade between 11:00am and 3:00pm, especially on weekends, when the narrow lanes can get genuinely congested. Winter (November through February) is prime season for crab and oysters, while summer brings cheaper, plumper uni and the market’s famous grilled scallops at their sweetest. The market is covered, so humidity aside, there’s no bad season to visit.

    What to Eat: A Stall-by-Stall Crawl

    Budget street food runs 300–1,500 yen per item, which is the sweet spot for grazing your way down the arcade:

    • Grilled scallop on the half-shell — 500–800 yen, torched or grilled to order
    • Fresh oysters — 300–500 yen each, raw or lightly grilled
    • Tamagoyaki (rolled omelet) skewer — 300–500 yen, a good palate reset between seafood
    • Wagyu beef skewer — 800–1,500 yen, seared tableside
    • Takoyaki (6 pieces) — around 500–700 yen

    Mid-range options (1,500–3,000 yen) include small sushi sets, seafood rice bowls, and grilled fish plates meant to be eaten at a counter rather than walking. For a splurge, king crab legs run anywhere from 1,500 to 4,000+ yen depending on size and preparation, and premium uni bowls or whole grilled fugu courses can run 3,000–8,000 yen. These higher-end items are usually priced per gram or per piece and displayed clearly—always confirm the total before the vendor starts cutting, since a “per 100g” price can add up fast on a king crab leg.

    If you want to compare notes on grilled skewers more broadly—seasonings, cuts, and how to order like a regular—our guide to yakitori in Japan covers the etiquette that carries over to Kuromon’s beef and seafood skewer stalls too.

    Market Etiquette and Common Mistakes

    Eating while walking is one of the few places in Japan where this is normal, since Kuromon is built around it—but there are still unwritten rules. Eat your food near the stall you bought it from, not three shops down, and use the small trash bins each vendor provides rather than carrying wrappers out of the market. Don’t photograph vendors or their product up close without asking, and don’t pick up or touch seafood on display.

    The biggest mistake visitors make is assuming every stall takes cards. Many of the larger seafood and skewer counters now accept IC cards (Suica/Icoca) and credit cards, but plenty of the smaller, older stalls remain cash-only, and you’ll want small bills and coins rather than a 10,000 yen note for a 500 yen scallop. If a vendor hands you a receipt for a pricier item like crab or wagyu, hold onto it—it’s useful if you have any dispute about what you were charged, and our guide to receipts and returns in Japan explains what tourists should know before handing over cash at a market stall versus a retail shop.

    A second common mistake: buying the first grilled scallop or crab leg you see at the market’s entrance. Prices for the same item can vary by a few hundred yen between stalls, and the entrance-facing shops often charge a premium knowing it’s the first thing visitors encounter. Walk at least a third of the way down the arcade before committing to your first purchase.

    Budget Planning: What a Food Crawl Actually Costs

    For a satisfying grazing lunch of four or five small items—a scallop, an oyster, a skewer, a tamagoyaki, and a drink—budget 2,500–3,500 yen per person. Add a crab leg or premium uni bowl and you’re looking at 5,000–8,000 yen for a genuinely indulgent meal. Most people spend 45 minutes to 90 minutes working through the market at a grazing pace; if you want to sit down for a proper sushi set at one of the counter restaurants mid-arcade, add another 20–30 minutes and 2,000–3,000 yen to that.

    Nearby: Where to Go After Kuromon

    Dotonbori’s canal-side neon and restaurants are a 10-minute walk north, making it natural to pair a Kuromon lunch with an evening in Dotonbori. Shinsekai and the Tsutenkaku Tower area, known for kushikatsu, are about 20 minutes south on foot or a short subway ride. If you’re stocking up on souvenirs for home after your food crawl, it’s worth comparing what you find at Kuromon’s dry-goods stalls against the packaged sweets at department stores—see our buyer’s guide to Tokyo Banana and Japan’s iconic omiyage sweets for what travels well and what doesn’t.

  • Anmitsu & Mitsumame: Japan’s Retro Jelly Dessert and Where to Try It

    Anmitsu & Mitsumame: Japan’s Retro Jelly Dessert and Where to Try It

    Photo by Tracey Parish on Unsplash

    Long before soft-serve and fruit sandos took over Japanese dessert menus, there was anmitsu — a bowl of cubed agar jelly, sweet red bean paste, fruit, and a pour of dark syrup that’s been a fixture of Japanese sweets shops since the Meiji era. It’s not flashy, it’s not Instagram-engineered, and that’s exactly the appeal. If you want to taste a dessert that Japanese grandparents actually grew up eating, anmitsu and its simpler cousin mitsumame are worth seeking out, and they’re cheap enough to try more than once.

    What’s Actually in the Bowl

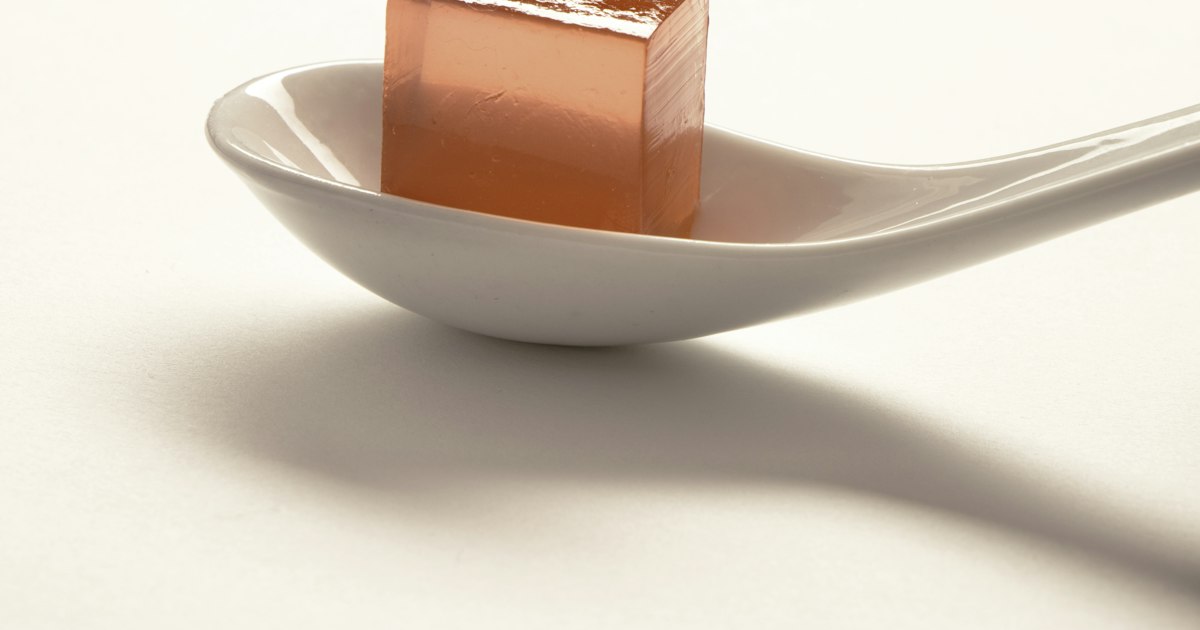
    Anmitsu starts with kanten — agar jelly made from seaweed, not gelatin, so it’s firm, barely sweet, and faintly grassy rather than bouncy like Western jello. The cubes sit in a bowl with:

    • Anko (sweet red bean paste) — usually a small scoop of smooth (koshian) or chunky (tsubuan) paste
    • Mitsu — a dark, molasses-like syrup called kuromitsu (black sugar syrup) poured over everything just before eating
    • Fruit — commonly mikan segments, cherries, and sometimes seasonal fruit like strawberries or persimmon
    • Shiratama dango — small chewy rice flour balls, in fancier versions
    • Ice cream or whipped cream — in modern variations, though traditional shops often skip this

    Mitsumame is the stripped-down version: just kanten cubes, a few beans (often sweetened red peas, not red bean paste), fruit, and kuromitsu — no anko. If a menu lists both, mitsumame is almost always the cheaper, lighter option and a good entry point if you’re not sure you like anko yet.

    How to Order and Eat It

    You’ll typically get kuromitsu served separately in a small pitcher or container — pour it yourself rather than having it pre-mixed, since the kanten can turn mushy if it sits in syrup too long. Mix everything together with your spoon before eating; it’s meant to be eaten as one bowl, not picked apart component by component. If you’re ordering in Japanese, “anmitsu” and “mitsumame” are both written clearly on menus in hiragana/kanji (あんみつ / みつまめ), and most shops that serve them will have a picture menu or plastic food models in the window, so pointing works fine.

    A common mistake first-timers make is assuming it’s a cold soup you drink — it’s eaten with a spoon, and the kanten cubes should be bitten through, not slurped. Another is skipping the matcha or hojicha tea that often comes alongside; the bitterness is there specifically to cut the sweetness of the kuromitsu, and the dessert tastes unbalanced without it.

    Where to Try It in Tokyo

    The best anmitsu comes from kanmidokoro (甘味処) — traditional sweets cafés — rather than general cafés or convenience stores, though you can find packaged versions in any supermarket for around 150–300 yen if you just want a quick taste.

    • Budget (300–600 yen): Convenience store and supermarket anmitsu cups are everywhere and surprisingly decent for the price — a good way to confirm you like the flavor before seeking out a sit-down shop.
    • Mid-range (700–1,200 yen): Kanmidokoro in old shopping districts like Asakusa, Yanaka, and Ningyocho serve made-to-order anmitsu in this range. Many of these neighborhoods are near other retro shopping areas — if you’re already exploring Nihonbashi’s historic merchant district, several long-running sweets shops are a short walk from the main department stores, making it an easy add-on to a shopping day.
    • Splurge (1,500–2,500 yen): Department store basement food halls and hotel tea lounges serve elevated versions with seasonal fruit, premium anko, and sometimes matcha ice cream added — common in Ginza and Nihonbashi department stores where high-end wagashi (traditional sweets) counters operate.

    Most kanmidokoro keep daytime hours, roughly 10:00 or 11:00 to 18:00 or 19:00, and close one day a week (often Monday or Wednesday) — it’s worth checking a shop’s hours before making a special trip, since these are small, independently run spots rather than chains with standardized schedules.

    Best Season and Timing

    Anmitsu is sold year-round, but it’s marketed and eaten primarily as a summer dessert — it’s cold, light, and common on menus from May through September when shops add seasonal fresh fruit versions. In winter, some kanmidokoro pivot their counter space toward hot dessert options like zenzai (sweet red bean soup) instead, so anmitsu availability can shrink in colder months, especially at smaller shops with limited seating. If you’re visiting in summer and want to beat the heat the way locals do, an afternoon anmitsu break between 14:00 and 16:00 — after lunch service ends and before dinner crowds — is when kanmidokoro tend to be least crowded and most relaxed.

    How to Get There

    Kanmidokoro cluster in Tokyo’s older downtown (shitamachi) neighborhoods — Asakusa, Yanaka, Ningyocho, and Nihonbashi — all reachable via the Tokyo Metro or Toei subway lines without needing a special transit pass. If you’re arriving from Narita Airport and heading straight into the city, deciding between the Narita Express and Keisei Skyliner is the first logistics question to sort out, since both connect to central Tokyo stations within a short transfer of these sweets districts.

    Buying Anmitsu-Style Treats as Souvenirs

    Fresh anmitsu doesn’t travel, but packaged kanten and mitsumame kits are sold in department store food halls and are easy to pack since kanten jelly is shelf-stable for weeks at room temperature. If you’re already building an omiyage shopping list alongside something like Tokyo Banana and other iconic Japanese sweets, a box of kuromitsu syrup or kanten jelly mix makes a good lightweight addition — just confirm the shop can give you a proper receipt if you’re using a tax-free purchase, something covered in our guide to returns, exchanges, and receipts in Japan.

    A Few Shops Worth Seeking Out

    While exact shop recommendations shift over time, look for kanmidokoro with a visible wagashi counter and a queue of local regulars rather than tourists — that’s usually the best sign of quality. Shops that have been operating for 50+ years (common in Yanaka and Asakusa) tend to make their own kanten and anko in-house daily, which means the jelly has better texture and the bean paste is less cloying than mass-produced versions. Expect simple, no-frills interiors — low tables, paper menus, maybe a single ceiling fan — this is a dessert built around consistency and tradition, not atmosphere.

    Anmitsu won’t win any dessert trend awards, but that’s precisely why it’s worth trying: it’s a direct line to how Japanese sweets shops operated a century ago, served in the same unfussy way, for a few hundred yen a bowl. Pair it with a slow afternoon in one of Tokyo’s old merchant districts and you’ll understand why it’s stuck around this long.

  • Tabi Boots & Socks: Japan’s Split-Toe Footwear Buying Guide

    Tabi Boots & Socks: Japan’s Split-Toe Footwear Buying Guide

    Photo by Ana Soares on Unsplash

    Long before European designers turned the split-toe silhouette into a runway statement, Japanese farmers, carpenters, and festival crews were wearing it to work. Tabi — the two-toed sock — and its rubber-soled cousin jika-tabi are some of the most functional, least understood pieces of Japanese clothing you can bring home. This guide breaks down what they actually are, where to buy real ones, and how to avoid the sizing mistakes that trip up almost every first-time buyer.

    What Exactly Are Tabi?

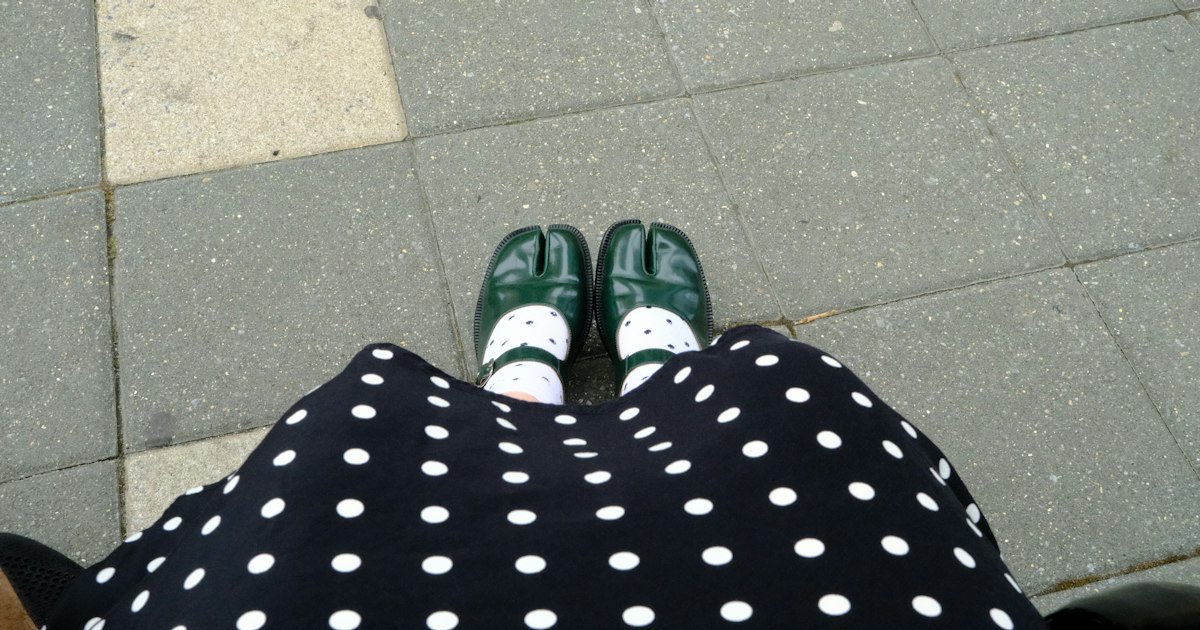
    Tabi are ankle-high socks with a separated big toe, designed to be worn with thonged footwear like zori and geta sandals, or under kimono. Traditional tabi fasten up the back with small metal hook-and-loop clasps called kohaze — usually four or five of them, with more clasps generally meaning a more formal, tighter-fitting sock. White cotton tabi are the standard for formal kimono wear; patterned or colored tabi (often indigo-dyed or printed with traditional motifs) are everyday or festival versions.

    Jika-tabi are a different animal entirely: heavier-duty boots with a rubber sole built directly onto a tabi-shaped upper, worn by construction workers, rice farmers, roofers, and the teams who carry mikoshi shrines during summer festivals. The split toe gives better grip and balance on uneven ground, ladders, and scaffolding — which is also why skateboarders and some outdoor brands have borrowed the shape in recent years.

    Jika-Tabi Work Boots: Function First

    If you want the real workwear item rather than a fashion reinterpretation, look at Japanese workwear chains rather than boutiques. Workman — a nationwide workwear retailer with stores near stations, highways, and suburban shopping centers — stocks jika-tabi from around ¥2,000 to ¥5,000, in both ankle-high and tall “tobi”-style versions popular with construction crews. Stores typically open 9:00am–8:00pm daily. Sizes are listed in centimeters and run true to Japanese foot measurements, which tend to be slightly narrower in the heel than Western lasts.

    Fun fact worth knowing before you shop: Bridgestone, now a global tire giant, began in Kurume, Fukuoka in the early 20th century as a rubber-soled jika-tabi manufacturer before pivoting to tires in 1931. The split-toe boot and the modern Japanese rubber industry share the same roots.

    Where to Find Fashion-Forward Tabi Footwear

    For a more wearable, street-ready take on the shape, Kyoto’s Sou-Sou is the name to know. Clustered around Nishiki-koji and the Teramachi covered arcade in central Kyoto — an easy walk from Kawaramachi or Shijo Station — Sou-Sou’s shops sell tabi-shaped sneakers with a thin rubber sole alongside patterned cotton tabi socks in collaboration prints. Expect ¥3,000–¥8,000 for sock-weight tabi items and ¥8,000–¥16,000 for the sneaker-soled versions. It’s a good contrast stop after browsing Kyoto’s weaving district — if you’re already visiting [[Nishijin-ori: Kyoto’s 1,200-Year-Old Silk Weaving District]](https://japantrove.com/nishijin-ori-kyotos-1200-year-old-silk-weaving-district/) wait, skip — see link list below.

    In Tokyo, Asakusa remains the best neighborhood for traditional tabi: the area’s kimono and festival-supply shops cater to locals who need tabi for shrine events and obon matsuri, so you’ll find a wider range of kohaze counts and seasonal patterns than in a general department store. For the designer-adjacent, streetwear side of the split-toe trend — including Japanese and international labels playing with the shape — boutique neighborhoods like Daikanyama are worth a browse, though stock of true tabi-last shoes rotates with the season.

    Tabi Socks for Everyday Wear

    If you’re not buying a full kimono outfit, plain cotton tabi socks are a cheap, genuinely useful souvenir — they’re comfortable in regular sneakers too, once you get used to the toe split. Basic white or navy cotton tabi run ¥600–¥1,500 a pair at department store kimono floors (Isetan, Takashimaya, and Mitsukoshi all carry them) or specialty tabi shops. Tabi socks for everyday use, as opposed to formal kimono tabi, usually have a stretch panel and fewer or no kohaze clasps, closer to a two-toe sock than a traditional garment.

    Fabric matters more than it looks: cotton tabi shrink noticeably after a hot wash, so size up slightly or wash in cold water if you plan to wear them long-term. Tabi made with a tabi-specific knit (common in brands sold at specialty shops rather than souvenir stores) hold shape better over repeated washes.

    Budget, Mid-Range, and Splurge Picks

    • Budget (¥600–¥2,000): Plain cotton tabi socks from a department store kimono floor, or basic jika-tabi from Workman.
    • Mid-range (¥3,000–¥8,000): Patterned Sou-Sou tabi socks, mikoshi-festival jika-tabi with reinforced soles, or locally made tabi from a dedicated Asakusa shop.
    • Splurge (¥8,000–¥20,000+): Sneaker-soled tabi shoes from Sou-Sou or similar specialty brands, and custom-fitted tabi made to your exact foot measurements by an artisan tabi maker — a service still offered by a handful of long-running shops in Tokyo and Kyoto, usually requiring an in-person fitting and a wait of one to several weeks.

    Common Mistakes to Avoid

    The single biggest error visitors make is sizing tabi like a regular sock — they should fit snugly, almost tight, since cotton tabi stretch slightly with wear and loosen over the day. Buying a size too large results in bunching at the toe seam, which is both uncomfortable and visibly wrong with kimono.

    Second: don’t confuse soft cotton tabi (for sandals and kimono) with jika-tabi (rubber-soled work boots) when shopping — staff at workwear stores may not carry the formal kimono version, and kimono shops rarely stock heavy-duty jika-tabi. Know which one you want before you go.

    Third, check return policy before buying, especially for sized items purchased in a hurry. Japanese retailers are generally stricter about returns than many Western shoppers expect, and worn footwear is almost never returnable for hygiene reasons — it’s worth reading Returns, Exchanges & Receipts in Japan before you commit to a pair, and keep your receipt until you’ve confirmed the fit at home.

    Best Time to Shop

    Tabi and jika-tabi are sold year-round, but stock and selection peak around two windows: early summer through August, when matsuri season drives demand for festival-grade jika-tabi and specialty shops restock patterned designs, and late December into early January, when kimono shops refresh their formal tabi ahead of New Year visits to shrines. If you want the widest selection of patterns and sizes, shop in those windows rather than the quieter off-season months of late autumn.

  • Shirakami-Sanchi: Hiking Japan’s Ancient Beech Forest UNESCO Site

    Shirakami-Sanchi: Hiking Japan’s Ancient Beech Forest UNESCO Site

    Photo by Robin Noguier on Unsplash

    Straddling the border of Aomori and Akita prefectures in northern Tohoku, Shirakami-Sanchi is the largest remaining virgin beech (buna) forest in East Asia and one of Japan’s first UNESCO World Heritage Sites, listed in 1993. Most visitors never make it this far north, which is exactly the appeal: you get ancient forest, a cobalt-blue pond that looks digitally altered, and almost none of the crowds you’d fight through in Nikko or Hakone. Here’s what you actually need to know before you go.

    What Makes Shirakami-Sanchi Special

    Shirakami-Sanchi isn’t a single trail or park — it’s a mountainous region roughly 1,300 square kilometers in size, with a strictly protected “core zone” at its heart where logging has never occurred and human access is tightly controlled. Almost everything tourists actually visit sits in the surrounding “buffer zone,” which is open and well-marked. The two famous entry points are Juniko (the “Twelve Lakes,” on the Aomori side) and Anmon Falls, also in Aomori near Tsugaru. The Akita side has fewer facilities but is where you’ll find the main visitor center for arranging deeper access.

    Getting There: Trains, Buses, and the Scenic Resort Shirakami

    The region is remote, so plan a full day. From Tokyo, take the Tohoku Shinkansen to Shin-Aomori or Hachinohe (around 3 hours), then transfer to local lines. The most enjoyable approach is the Resort Shirakami, a sightseeing train that runs along the Sea of Japan coast between Akita and Aomori/Hirosaki on the JR Gono Line, taking roughly 4 hours end to end. Seats are reserved-only, with a surcharge of around ¥520 on top of the base fare — book this well in advance if you’re traveling during autumn foliage season, since window seats facing the coast and Juniko sell out fast. Regular IC cards like Suica won’t cover the reserved-seat fee or work for through-ticketing on this route, so if you’re new to using one, it’s worth reading up on adding Suica or Pasmo to Apple Wallet before you leave Tokyo, and buy the Resort Shirakami ticket separately at a JR counter.

    From Hirosaki, it’s about 1.5–2 hours by train to Juniko Station. From there, a Konan Bus connects to the Oku-Juniko lake area in about 15 minutes, with a one-way fare in the ¥300–400 range. If you’re driving, rental cars from Aomori Airport give you the most flexibility and shave off waiting time for infrequent buses — figure 1.5–2 hours of driving to reach Juniko.

    The Blue Pond and Juniko: The Easiest Way to See Shirakami-Sanchi

    Juniko means “twelve lakes,” though there are actually around 33 ponds and lakes scattered through the beech forest — the name comes from how many are visible from a particular viewpoint. The star attraction is Aoike (Blue Pond), a small, perfectly clear pond with an intense cobalt color caused by light refraction through mineral-rich water. It’s an easy 10–15 minute walk from the Oku-Juniko parking area, so you don’t need serious hiking gear to see it.

    If you want more than a photo stop, the full walking course linking several of the ponds is about 2–3 hours round trip on flat, well-maintained paths — genuinely pleasant walking rather than hiking. Parking at Oku-Juniko costs around ¥500 per car. There are a few small food stalls and a rest house near the entrance, but nothing resembling a convenience store, so bring cash and snacks.

    Anmon Falls: A Quieter Alternative

    If Juniko sounds too popular for your taste, Anmon Falls (Anmon no Taki) is a three-tiered waterfall deeper in the forest, reached via a dedicated forest road from the Tsugaru area. The walk from the parking area to the falls takes 20–40 minutes each way depending on how many of the three tiers you want to see, with a full loop taking around 2 hours. The access road is only open roughly April through November — it’s gated and impassable once snow sets in, so check current conditions before planning a visit outside summer or early autumn.

    Best Time to Visit

    Late April through May brings shinryoku — the vivid fresh green of newly unfurled beech leaves — and is arguably the most beautiful and least crowded window. Summer (July–August) gives you full canopy shade and cooler temperatures than Tokyo, good for longer walks. Autumn, typically mid-October to early November, is peak season for foliage and the single busiest time to visit, which is also when Resort Shirakami seats and Juniko-area accommodation book out fastest. Winter brings heavy snow that closes most trails and the Anmon access road entirely; this is not the season for independent hiking here. For a sense of comparable Tohoku forest scenery if you have extra time in the region, Oirase Gorge is a streamside walk elsewhere in Aomori worth pairing with a Shirakami-Sanchi trip.

    Core Zone Hiking: Permits, Guides, and What to Know

    The strictly protected core zone, including the trek to the summit of Mt. Shirakami, is not something you can casually wander into. Access requires advance registration, and for most routes a licensed local guide is strongly recommended or required, both to protect the forest ecosystem and because the terrain is genuinely remote multi-day mountain hiking, not a day walk. The Shirakami-Sanchi Visitor Center in Fujisato on the Akita side (free admission, roughly 9:00–17:00, though hours and closures shift seasonally so confirm ahead) is the best place to arrange guided access and get current trail conditions. Asian black bears live throughout the forest, so even on the open buffer-zone trails, carrying a bear bell and making noise on quieter paths is standard practice, not paranoia.

    Common Mistakes and Budget Tips

    • Treating it as one attraction: Juniko’s Blue Pond is a tiny, easily accessible sliver of a vast mountain region — don’t expect a short walk there to count as “hiking Shirakami-Sanchi” in any deeper sense, and don’t expect to casually summit anything.
    • Skipping the reserved-seat booking: Resort Shirakami seats vanish weeks ahead during autumn foliage; book as soon as your dates are fixed.
    • Underestimating remoteness: cell signal is patchy in the forest, services are sparse, and the last buses back from Juniko run early evening — check return times before you start walking.
    • Budget option: self-guided day trip by train and bus from Hirosaki or Akita, roughly ¥3,000–5,000 round trip in transport, packing your own lunch.
    • Mid-range option: rental car (around ¥6,000–9,000/day) for flexibility, or a guided half-day nature walk around ¥5,000–8,000 per person.
    • Splurge option: a multi-day licensed-guide trek into the core zone with mountain lodge stays, which can run ¥20,000–40,000+ per day including guiding fees and lodging.

    Before heading home, the small shops near the visitor centers sell regional specialties worth a look — Aomori’s apple products and Akita’s mountain-vegetable pickles make good edible souvenirs, in the same spirit as Japan’s broader tsukemono pickling tradition. Shirakami-Sanchi rewards a bit of planning far more than it rewards spontaneity — get the logistics right and you’ll have one of the quietest, most striking natural sites in the country largely to yourself.

  • Kurokawa Onsen: Kumamoto’s Rotenburo-Hopping Hot Spring Village

    Kurokawa Onsen: Kumamoto’s Rotenburo-Hopping Hot Spring Village

    Photo by Tayawee Supan on Unsplash

    Tucked into a forested valley in the mountains of Aso-gun, Kurokawa Onsen is the hot spring town Japanese travelers quietly rank above the famous names. There’s no garish neon, no pachinko parlor, no vending machine on every corner — just steam rising over a cluster of wooden ryokan along a narrow river, and a simple wooden pass that lets you hop between their outdoor baths for the afternoon. If you’ve already done Hakone or Atami and want something that feels less like a resort town and more like a village that happens to sit on hot water, this is the trip to plan.

    What Makes Kurokawa Onsen Different

    Kurokawa is small by design. In the 1980s and 90s, local innkeepers — led by the owner of the Shinmeikan ryokan — agreed to a set of unwritten rules: no bright signage, no love hotels, no amusement arcades, and every ryokan should keep at least one rotenburo (open-air bath) that feels built into the landscape rather than bolted onto a building. That agreement is why the town today looks the way it does: about 30 ryokan connected by stone paths and little footbridges, cedar and bamboo screening the baths from the road, and a soundtrack of running water instead of traffic. It’s the kind of place where you walk the main lane in a rented yukata between baths and nobody looks twice.

    The Nyuto Tegata: How Rotenburo-Hopping Works

    The signature Kurokawa experience is the nyuto tegata (入湯手形), a small round wooden pass sold at the Kurokawa Onsen Tourist Information Center in the middle of the village. It costs around 1,300 yen for adults and about 700 yen for children, and it entitles you to enter three different ryokan baths of your choosing among roughly 20+ participating inns. Each time you use one, staff stamp or burn a mark onto the tag; once you’ve used all three you get to keep the pass as a souvenir. It’s valid for six months from purchase, so if you only manage two baths before dinner, you can finish the set the next morning before checking out.

    A few practical notes: not every ryokan’s bath is open to outside day-visitors at every hour, mixed-gender rotenburo exist at some inns (always marked clearly, and towels are provided for coverage), and a handful of the most photogenic baths — particularly ones with cave pools or river views — can have a line on weekends. If you don’t want to commit to the pass, most ryokan also sell single-visit day-bathing (higaeri onsen) directly for roughly 500–700 yen per bath, no tag required.

    Getting to Kurokawa Onsen

    This is the one part of the trip that takes real planning, since Kurokawa isn’t on a train line.

    • From Kumamoto: A direct highway bus (Kumamoto Kotsu) runs from Kumamoto Station/Kumamoto Airport to Kurokawa Onsen in roughly 70–90 minutes. Seats on the limited daily departures should be reserved in advance.
    • From Fukuoka/Hakata: A direct highway bus takes about 2.5–3 hours; reservations are required and schedules run only a few times a day, so book this before you build the rest of your itinerary around it.
    • From Beppu/Yufuin: The Kyushu Odan (“Kyushu Crossing”) highway bus connects Yufuin and Kurokawa Onsen in around 2 hours, continuing on to Kumamoto — a convenient way to combine Kyushu’s two biggest onsen regions in one loop, though it typically only operates seasonally, so check current schedules before relying on it.
    • By car: The easiest option if your Japan itinerary includes a rental car. It’s about an hour from Kumamoto Airport and roughly 2.5–3 hours from Fukuoka via expressway. Cars are left in a paid village lot (a few hundred yen) since the inn lanes themselves are pedestrian-scale.

    However you arrive, build in a full afternoon — the appeal of Kurokawa is slowing down, not rushing between buses.

    Best Time to Visit

    Kurokawa is genuinely a four-season destination, but two windows stand out. Late October through November brings fall foliage down the valley walls above the baths — one of the most photographed combinations in Kyushu. December through February is the other peak: snow on the cedar roofs and steam rising off the rotenburo makes for the classic “onsen in winter” scene, and several ryokan light up outdoor baths for evening snow-viewing. Summer is cooler here than in the cities below thanks to the elevation, which makes it a decent escape from Kumamoto or Fukuoka heat, though the baths themselves feel less dramatic without steam in the air. Whatever season, avoid Japanese holiday weekends (Golden Week in early May, Obon in mid-August, New Year) if you can — the village is small enough that even moderate crowds change the feel of the place.

    Where to Stay: Budget to Splurge

    Staying overnight — rather than visiting as a day trip — is worth prioritizing, since many of the best baths are reserved for guests after the day-bathing hours end (typically mid-afternoon).

    • Budget: Smaller family-run ryokan with shared bath access run roughly 15,000–20,000 yen per person with two meals included.
    • Mid-range: Inns with a private or semi-private rotenburo and a proper kaiseki dinner generally land around 25,000–35,000 yen per person.
    • Splurge: Well-known names like Yamamizuki or Shinmeikan — the latter famous for a bath set inside a natural cave — can run 40,000 yen and well beyond per person for a room with its own open-air bath and a multi-course dinner. These book out months ahead for foliage and snow season.

    If you’ve stayed somewhere like Noboribetsu Onsen in Hokkaido or made a quick trip to Atami from Tokyo, Kurokawa is a useful point of comparison — it trades Noboribetsu’s volcanic drama and Atami’s retro seaside-resort energy for something quieter and more rustic, closer in spirit to a mountain village than a hot spring resort.

    Common Mistakes to Avoid

    • Not reserving the long-distance bus. These routes run only a handful of times a day and fill up, especially around foliage season — book as soon as your dates are set.
    • Trying to pack in too many baths. Walking between ryokan, changing, and soaking properly takes longer than it sounds; three baths in an afternoon is a full, satisfying day, not a warm-up.
    • Forgetting tattoo policies vary by ryokan. Some baths welcome visitors with tattoos, others don’t, and a few offer cover-up stickers. If you have visible tattoos, it’s worth asking at the tourist information center which baths on your tegata are tattoo-friendly before you set out.
    • Assuming day-bathing is available any time. Many ryokan close their baths to outside visitors from mid-afternoon through the evening to prioritize overnight guests. Start your rotenburo-hopping by midday if you’re not staying the night.
    • Expecting convenience stores. Part of what preserves the atmosphere here is the deliberate absence of them — bring cash (many small ryokan don’t take cards) and don’t count on finding a conbini for forgotten toiletries.

    If a slow, forested soak isn’t quite enough on its own, the drop into the Aso caldera is less than an hour away by car, and travelers who enjoy a scenic streamside walk — in the way Oirase Gorge draws hikers up in Aomori — will find the short riverside path connecting Kurokawa’s ryokan has a similar, unhurried appeal, just on a much smaller scale. Either way, come with low expectations of “seeing” much and high expectations of actually relaxing — that’s the entire point of the place.

  • Tsukemono: Japan’s Pickled Vegetable Tradition and Where to Buy

    Tsukemono: Japan’s Pickled Vegetable Tradition and Where to Buy

    Photo by 5010 on Unsplash

    Walk through any Japanese supermarket basement, department store food hall, or morning market, and you’ll hit a wall of color before you hit the fish counter: crimson umeboshi, golden takuan, deep purple shibazuke, pale green cucumber in miso. This is tsukemono, Japan’s centuries-old tradition of pickled vegetables, and it’s one of the most overlooked souvenir and tasting categories for visitors. It’s cheap, it’s distinctly regional, and almost none of it is sold outside Japan in the form you’ll find it here. This guide covers what tsukemono actually is, the regional styles worth seeking out, where to buy it at every budget, and the mistakes that trip up first-time buyers.

    What Is Tsukemono, Exactly?

    Tsukemono (漬物, literally “pickled things”) is an umbrella term covering vegetables preserved in salt, rice bran, miso, soy sauce, vinegar, or fermented rice lees. Unlike Western pickles, which are almost always vinegar-based, Japanese pickling techniques developed to extend the storage life of vegetables through winter and to balance rich, starchy meals like rice and grilled fish. The result is a category with far more range than “pickle” implies — some tsukemono are crunchy and salty, some are funky and fermented, some are sweet and mellow. They function as a palate cleanser, a side dish, and in many cases a pantry souvenir that survives the flight home far better than fresh food, much like the fermented condiments covered in our Japanese condiment pantry guide.

    The Regional Styles Worth Knowing

    Tsukemono varies dramatically by region, and knowing a few names will help you shop with purpose rather than guessing from the label art.

    • Takuan — bright yellow daikon radish pickled in rice bran and salt, found nationwide. Crunchy and slightly sweet-salty; the everyday tsukemono most visitors encounter first, usually served alongside rice at breakfast.
    • Umeboshi — intensely sour, salty pickled ume plums, Wakayama Prefecture’s signature product (Nanko-ume is the premium cultivar). A small jar packs a serious punch; locals eat one with rice or tea to settle the stomach.
    • Shibazuke — Kyoto’s purple eggplant and cucumber pickle, colored and flavored with red shiso leaves. Tangy and slightly tart, sold all over Nishiki Market.
    • Nozawana-zuke — pickled leafy greens from Nagano, mild and slightly bitter, often fried with rice or chopped into onigiri.
    • Narazuke — vegetables (often cucumber or melon) pickled in sake lees for months or years in Nara; the flavor is deep, boozy, and an acquired taste worth trying at least once.
    • Misozuke — vegetables pickled in miso paste, common throughout the country, with a savory, almost caramelized depth.

    Where to Buy: Budget, Mid-Range, and Splurge

    Budget (¥150–¥500): Supermarket chains like Life, Seijo Ishii, and Ito-Yokado sell vacuum-packed takuan, shibazuke, and umeboshi in the refrigerated section near the tofu and natto. A standard 150–200g pack runs ¥150–¥350. Convenience stores also stock single-serving umeboshi onigiri for under ¥200 if you just want a taste.

    Mid-range (¥500–¥1,500): Department store basement food halls (depachika) — Isetan Shinjuku, Daimaru, Takashimaya — have dedicated tsukemono counters with staff who’ll let you sample before buying. Expect ¥600–¥1,200 for a well-packaged assortment box, which also makes a better gift than a supermarket bag. Nishiki Market in Kyoto is the classic tourist stop for shibazuke and pickled Kyoto vegetables (kyo-yasai), with shops offering small taster cups for free or a token ¥100.

    Splurge (¥2,000–¥6,000+): Specialty makers sell aged narazuke and premium umeboshi in gift boxes. In Nara, shops near Kintetsu Nara Station specializing in sake-lees pickles sell gift sets from ¥2,500 up to ¥6,000 for long-aged, dark narazuke. Wakayama’s top umeboshi producers sell large, flesh-heavy Nanko-ume in lacquered boxes for ¥3,000–¥8,000 — these are genuinely different from the cheap, bullet-sized variety and make a memorable high-end omiyage, comparable in gifting weight to the sweets covered in our omiyage sweets buyer’s guide.

    Best Places to Shop in Person

    Nishiki Market (Kyoto) remains the single best place to sample a wide range of regional tsukemono side by side; it’s open roughly 9:00 AM–6:00 PM, though individual shop hours vary, and most stalls close by early evening — go in the morning for the freshest selection before tour groups arrive. Kyoto has multiple dedicated chains here, including Nishiri and Murakamiya, both with English-friendly staff used to tourists.

    In Tokyo, Ameyoko Market in Ueno has several old-school tsukemono stalls with bulk bins and lower prices than department stores, while Tsukiji Outer Market has smaller stalls selling pickled vegetables alongside seafood snacks — good for grazing rather than gift shopping. If you’re staying near Shibuya or want a more curated, design-forward shopping stop afterward, Daikanyama’s boutiques (see our Daikanyama neighborhood guide) are a short train ride away, though tsukemono itself is better sourced at markets or depachika than boutique districts.

    Best Season and Timing to Buy

    Tsukemono is sold year-round, but timing affects both quality and price. Fresh-pickled vegetables (asazuke, “quick pickles”) are best in their harvest season — nozawana in late autumn/winter in Nagano, cucumber and eggplant shibazuke in summer in Kyoto. Winter (December–February) is traditionally when households make large batches of takuan and umeboshi for the year, so markets often have the widest fresh selection and seasonal gift sets in the lead-up to New Year, when pickles are part of osechi ryori (New Year’s food). If you’re traveling in early summer, that’s also when fresh ume plums appear before being salted, so some shops sell “this year’s” umeboshi batches as a selling point.

    Common Mistakes to Avoid

    • Buying refrigerated items without a cooler bag. Many fresh (non-vacuum-sealed) tsukemono need refrigeration and won’t survive a multi-day trip or flight. Stick to vacuum-packed, shelf-stable products if you’re buying for the flight home — ask the shop clearly, “Can this stay at room temperature?” (常温で大丈夫ですか, joon de daijoubu desu ka).
    • Assuming it’s low-sodium. Tsukemono is often very high in salt; it’s a condiment portion, not a vegetable serving, despite looking healthy.
    • Skipping the sample. Flavor intensity varies wildly between shops even for the same style (shibazuke can range from mild to aggressively sour). Always taste before buying a gift box — most market stalls expect this.
    • Not checking customs rules. Most commercially packaged, shelf-stable tsukemono is fine to bring into the US, EU, and most countries in personal luggage, but fresh/refrigerated items packed in liquid brine can raise questions at customs. When in doubt, buy the vacuum-sealed version.
    • Packing glass jars in checked luggage without padding. Narazuke and premium umeboshi are often sold in glass; wrap them in clothing or ask the shop for extra bubble wrap, which most will provide on request.

    Bringing It Home

    Vacuum-sealed tsukemono typically keeps for weeks to a few months unopened, making it one of the more forgiving pantry souvenirs — far less fragile than fresh produce and lighter than ceramics. If you’re flying out through Narita, note that depachika and airport shops sell similar gift-boxed sets, though selection is smaller and pricier than in-city shops, so buy en route if you’re taking the Narita Express or Skyliner rather than waiting until the terminal. Keep receipts in case you want to query a product at customs, and remember that tax-free shopping rules for food items require unopened packaging and your passport at checkout — the same rules covered in our general guide to returns, exchanges, and receipts in Japan.

  • Royce’ Chocolate and Hokkaido’s Nama Chocolate Craze

    Royce’ Chocolate and Hokkaido’s Nama Chocolate Craze

    Photo by Denny Ryanto on Unsplash

    If you ask a Japanese traveler what to bring back from Hokkaido, odds are good they’ll say “Royce’.” The Sapporo-based chocolate maker has turned a simple idea — ganache-like truffles dusted in cocoa powder, too soft to survive a hot pocket — into one of the most sought-after omiyage (souvenir gifts) in the country. Understanding what makes Nama Chocolate different, where to actually buy it, and how to transport it without ending up with a melted bag of regret will save you both money and disappointment.

    What Is Nama Chocolate, Exactly?

    “Nama” (生) means raw or fresh, and Nama Chocolate is essentially chocolate ganache cut into bite-sized cubes and coated in cocoa powder — closer to a soft truffle than a bar of chocolate. It has a much higher cream content than standard chocolate, which gives it that melt-in-your-mouth texture, but also means it’s genuinely perishable. Royce’ didn’t invent the category, but its version, launched in the 1980s, became the benchmark, and Royce’ is still the name most associated with it both inside Japan and among the inbound tourists who’ve caught on via social media.

    The original “Nama Chocolate Au Lait” comes in a signature insulated box with a small ice pack built into the packaging — a detail that matters more than it sounds, because it’s the reason this souvenir has strict handling rules most first-time buyers don’t anticipate.

    Where to Buy It in Hokkaido

    You don’t need to hunt for a hidden shop — Royce’ is sold almost everywhere in Hokkaido, but the experience and selection vary a lot by location:

    • New Chitose Airport: The Royce’ Chocolate World shop (near the domestic terminal, 2nd floor) is the single best stop for most travelers, open roughly 8:30am–8:00pm daily. It has a small factory viewing window and the widest seasonal selection, plus a dedicated duty-free counter for international departures.
    • Sapporo Factory outlet (Higashi-ku): Royce’s actual production facility has a shop and a free viewing corridor showing the chocolate-making line, open daily 9:00am–6:00pm. It’s about a 15-minute taxi ride from Sapporo Station, or reachable by local bus — worth it if you want the full “chocolate factory” experience rather than just a retail counter.
    • Department stores and Sapporo Station: Daimaru Sapporo (directly connected to JR Sapporo Station) and Odori underground shopping areas both carry the full lineup, useful if you’re buying on your way out of the city rather than at the airport.
    • Convenience stores and supermarkets: Some individually wrapped Royce’ items (not the delicate Nama line) turn up in Hokkaido supermarkets and are fine for casual snacking, though selection is limited.

    Outside Hokkaido, Royce’ has a handful of shops in Tokyo (Tokyo Station, Haneda Airport) and a few other major cities, but prices and selection are best on home turf, and part of the appeal for gift-giving is that it reads as an authentic Hokkaido souvenir rather than something picked up at a Tokyo airport on the way out.

    Prices and What to Buy

    Royce’ is mid-range as Japanese confectionery gifts go — not cheap, but far from a splurge item:

    • Nama Chocolate (Au Lait, Bitter, Champagne, Matcha and seasonal flavors): roughly ¥850–¥1,100 for a standard box of about 16–20 pieces.
    • Potechi (chocolate-coated potato chips): around ¥650–¥750 per bag — a genuinely addictive, less fragile alternative if you’re worried about melting.
    • Pierre de Royce / baked chocolate cookies: about ¥800–¥1,200, and far more travel-friendly since they’re shelf-stable.
    • Gift sets and larger boxes: can run ¥2,000–¥4,000+, often packaged specifically for omiyage-giving with individually wrapped pieces, which matters in Japan’s office gift-giving culture where recipients expect to take one piece each.

    Budget tip: a single ¥850 Nama Chocolate box split and shared is plenty for a small office; mid-range shoppers often grab 2–3 boxes in different flavors (matcha and champagne are popular picks that aren’t sold everywhere outside Hokkaido); splurge shoppers go for the large mixed gift sets or the seasonal strawberry/winter-limited editions that only appear roughly November through February.

    Best Season for Buying Nama Chocolate

    Timing matters more than with most souvenirs. Royce’ Nama Chocolate needs to stay cool, so the company itself recommends it mainly as a cold-weather purchase — think late autumn through early spring (roughly October to April). In peak summer, many shops reduce Nama Chocolate stock or push you toward the more heat-stable Potechi and cookie lines instead, precisely because the texture that makes it special also makes it collapse in a hot bag. If you’re visiting Hokkaido in July or August specifically to chase the cooler climate — similar in spirit to travelers escaping to Amami Oshima for a subtropical island break — plan to buy Nama Chocolate on your very last day, and ask the shop for a cold pack.

    Common Mistakes Tourists Make

    • Buying too early in the trip. The ice pack inside the box is rated for several hours, not several days. If you buy Nama Chocolate on day one of a two-week trip, it will likely be a soft, melted mess by the time you fly home — buy it at the airport right before departure, or on your last day in Hokkaido.
    • Checking it in baggage. Always carry it in your cabin bag. Hold luggage sits in non-climate-controlled parts of the aircraft and can get warm on the tarmac, and boxes have been known to arrive crushed as well as melted.
    • Forgetting it’s not shelf-stable at room temperature for long. Once opened, most Nama Chocolate should be eaten within a few days and kept refrigerated — it is not a “leave it in a drawer for a month” gift like rice crackers.
    • Assuming all Royce’ products need cold storage. Potechi and the baked cookie lines travel fine at room temperature, so if your itinerary has several more days of travel after Hokkaido, buy those instead and save the Nama line for last.
    • Not checking the receipt before leaving the shop. If you’re buying at the duty-free counter at New Chitose Airport, make sure your passport is scanned and the paperwork is correct on the spot — Japan’s rules around tax-free purchases and returns are stricter than many tourists expect, and sorting it out after you’ve left is difficult. The general guide on returns, exchanges and receipts in Japan is worth a skim before any big souvenir shopping day.

    Royce’ vs. Other Hokkaido Omiyage

    Royce’ isn’t the only sweet competing for suitcase space. Shiroi Koibito (white chocolate-filled langue de chat cookies) is Hokkaido’s other mega-famous confection, and it has the advantage of being completely shelf-stable — a safer bet if cold-chain logistics make you nervous. If you’re trying to decide what to bring home at all, it helps to think about Royce’ as part of the broader Japanese gift-giving landscape covered in our guide to Tokyo Banana and Japan’s iconic omiyage sweets: regional specialty, individually wrapped, modestly priced per piece, and instantly recognizable to anyone back home who knows Japanese sweets even a little.

    Many travelers combine a Hokkaido souvenir run with a soak at one of the region’s hot spring towns — if Nama Chocolate is on your list, consider pairing the shopping trip with a stop at Noboribetsu Onsen, about 90 minutes from Sapporo by train and bus, for a classic cold-weather Hokkaido itinerary that also happens to be the best season for buying chocolate that won’t melt in your bag.

    Quick Reference

    • Best buy location: New Chitose Airport Royce’ Chocolate World, 2nd floor domestic terminal
    • Typical price: ¥850–¥1,100 per box of Nama Chocolate
    • Best season: October–April
    • Golden rule: buy it last, carry it on, eat it within days