Japan Trove

Category: Uncategorized

  • Chawanmushi: Japan’s Savory Steamed Egg Custard and Where to Try It

    Chawanmushi: Japan’s Savory Steamed Egg Custard and Where to Try It

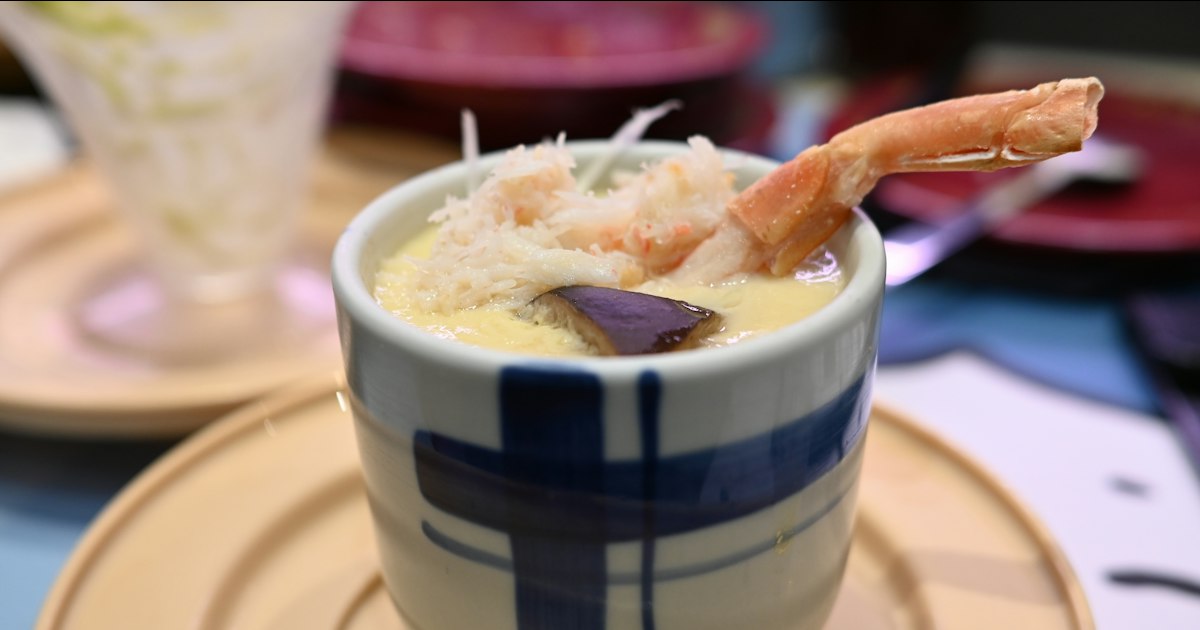
    Photo by Zhang Ziyu on Unsplash

    Chawanmushi doesn’t look like much when it arrives — a small lidded cup, often ceramic, sometimes with a wisp of steam escaping the seam. Lift the lid and you’ll find a pale, trembling custard with a few treasures buried inside: a shrimp, a sliver of chicken, a mushroom cap, maybe a single ginkgo nut. It’s one of the few Japanese dishes designed to be eaten slowly, with a spoon, in near silence. If you’ve only encountered it as an afterthought on a bento tray, it’s worth seeking out the real thing.

    What Is Chawanmushi, Exactly?

    The name breaks down literally: chawan means teacup or small bowl, and mushi means steamed. Chawanmushi is a savory egg custard made from beaten egg mixed with dashi (Japanese stock), a splash of soy sauce and mirin, then steamed gently over low heat in individual lidded cups until just set. The texture is the whole point — it should be smooth and barely firm, more like silken tofu than a Western quiche or flan, and it’s always savory rather than sweet.

    It’s typically served warm, not hot, as a small course rather than a main dish — think of it as sitting somewhere between a soup and a side dish. You eat it with a spoon straight from the cup, scooping down to find the fillings layered at the bottom.

    The Classic Ingredients Inside the Cup

    A traditional chawanmushi hides several small ingredients beneath the custard surface, chosen as much for color and contrast as for flavor:

    • Shrimp — usually one, peeled and deveined
    • Chicken — a small cube of thigh meat
    • Kamaboko — a slice of steamed fish cake, often pink-edged
    • Shiitake mushroom — for an earthy note
    • Mitsuba — a trefoil herb leaf, Japan’s answer to parsley, used mainly for color
    • Ginkgo nut (ginnan) — a pale, chewy nut that signals autumn on the menu

    Regional and seasonal versions swap things around: Kyoto-style kaiseki versions sometimes add a thin layer of thickened dashi sauce (ankake) poured over the top just before serving, while simpler izakaya versions might contain just chicken and mushroom. If you’re the type who enjoys tracking down other quietly comforting Japanese home dishes, chawanmushi sits in the same family as nikujaga and ochazuke — unglamorous dishes that Japanese households and small restaurants have quietly perfected for generations.

    Where to Try Chawanmushi in Japan

    You don’t need to hunt for a specialist shop — chawanmushi shows up across a wide range of price points:

    • Convenience stores and supermarkets (budget, roughly ¥150–¥280): 7-Eleven, Lawson, and FamilyMart all sell individual cups of chawanmushi in the chilled food section, ready to microwave. It’s a legitimate, tasty way to try the dish for the first time with zero commitment.
    • Soba and udon restaurants (¥400–¥800 as a side order): Old-fashioned Edo-style soba shops, particularly the long-established ones in Tokyo neighborhoods like Kanda and Asakusa, have served chawanmushi as a standard companion to a soba set for well over a century. Ordering it alongside cold soba and a small plate of tempura is a classic, filling, inexpensive lunch.
    • Unagi (eel) specialty restaurants (often ¥500–¥900, sometimes bundled with a set meal): Chawanmushi is one of the most common side dishes paired with grilled eel over rice, since the light custard balances the richness of the unagi sauce.
    • Izakayas (¥400–¥700): Many casual pubs include a simple chawanmushi on the menu as a warm, easy-to-share small plate between rounds of drinks and grilled skewers. If you’re exploring Tokyo’s izakaya culture, the alley restaurants at Yurakucho’s Gado-Shita near Ginza are a good place to order one alongside yakitori.
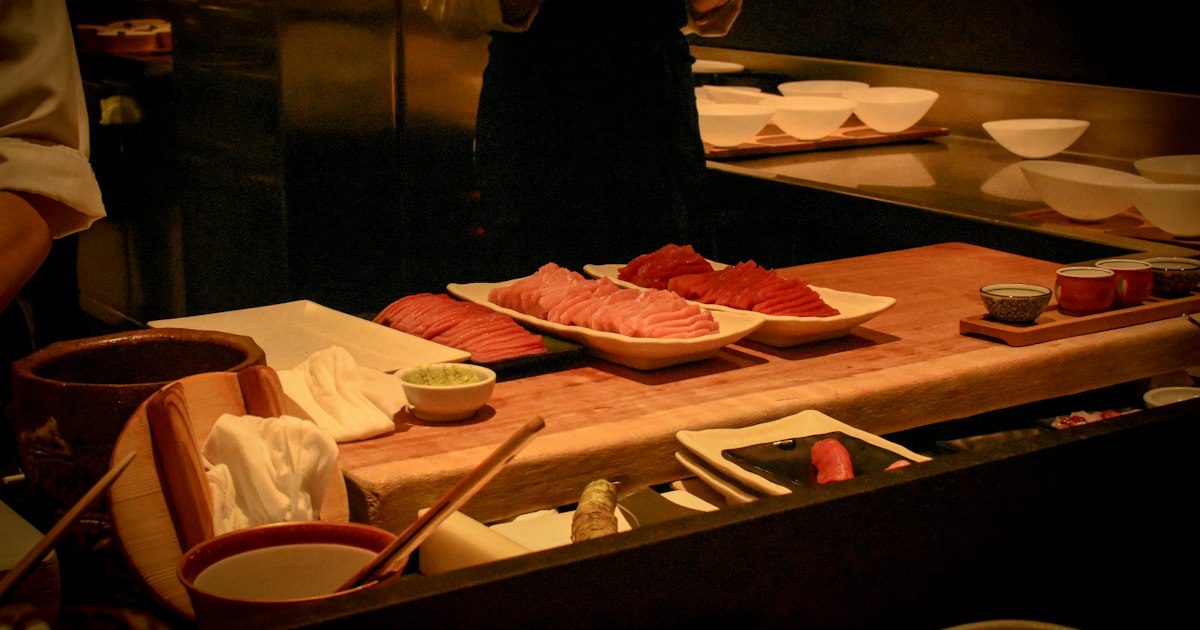
    • Sushi counters and omakase courses (included in courses from roughly ¥10,000 upward): Chawanmushi frequently appears as a warm interlude between cold fish courses, giving your palate a break.
    • Kaiseki restaurants (splurge, courses often ¥15,000–¥30,000+): Here it’s elevated furthest — truffle, uni, or seasonal matsutake mushroom might be worked into the custard or ladled on top as a garnish, with a delicate dashi sauce finishing the dish.

    Best Season and Timing to Order It

    Chawanmushi is served year-round, but autumn (September through November) is when it’s at its most interesting. That’s when ginkgo nuts and matsutake mushrooms come into season, and many kaiseki and sushi restaurants rotate them into the custard or as a garnish. In midsummer, some restaurants serve a chilled version — a cooled custard with a light, slightly tart dashi jelly on top — as a refreshing alternative to the standard warm cup. If you’re traveling specifically to chase seasonal Japanese food, autumn menus are worth planning around the same way you might time a trip to see Toyama’s winter yellowtail for a different seasonal specialty.

    How to Eat It Properly

    There’s a small bit of etiquette worth knowing so you don’t fumble it at a nicer restaurant:

    • Remove the lid and set it upside down next to the cup (or balanced on top at an angle) rather than placing it face-down on the table.
    • Eat directly from the cup with the small spoon provided — don’t transfer it to a plate.
    • Start from the top and work down; the fillings are usually layered toward the bottom, so the last few spoonfuls are the most rewarding.
    • It’s meant to be eaten warm, not hot. If it arrives still bubbling, let it sit for a minute — this also helps if the texture seems slightly rubbery, since it will settle as it cools.

    Common Mistakes Visitors Make

    The biggest mistake is stirring it like a soup — the custard is meant to stay intact as you spoon through distinct layers, not be mixed into a slurry. The second is sending it back (or assuming it’s undercooked) when you see small air holes or a slightly bubbly, pitted surface on a homemade version; that texture flaw is called su ga tatsu in Japanese and happens from steaming at too high a heat, but it’s a minor cosmetic issue, not a food safety one, in any dish a restaurant actually serves you. Finally, don’t assume chawanmushi is a dessert because of its custard-like appearance — it’s firmly savory, and ordering it expecting something sweet is the most common disappointment among first-timers.

    Budget to Splurge: A Quick Price Guide

    For a no-stakes first taste, grab a convenience store cup for under ¥300. For a proper restaurant version with better texture and fresher fillings, a soba shop, unagi restaurant, or izakaya will run ¥400–¥900 as a side order. For the full experience — matsutake, uni, or truffle worked into a silky custard with a refined dashi sauce — a kaiseki dinner or high-end sushi omakase is where chawanmushi becomes a genuine highlight of the meal rather than a quiet side dish. Whichever end of that range you choose, it’s a dish best eaten in the moment, warm, with no particular hurry.
  • Japanese Soufflé Cheesecake: Rikuro’s, Uncle Tetsu and the Wobble Worth Queuing For

    Japanese Soufflé Cheesecake: Rikuro’s, Uncle Tetsu and the Wobble Worth Queuing For

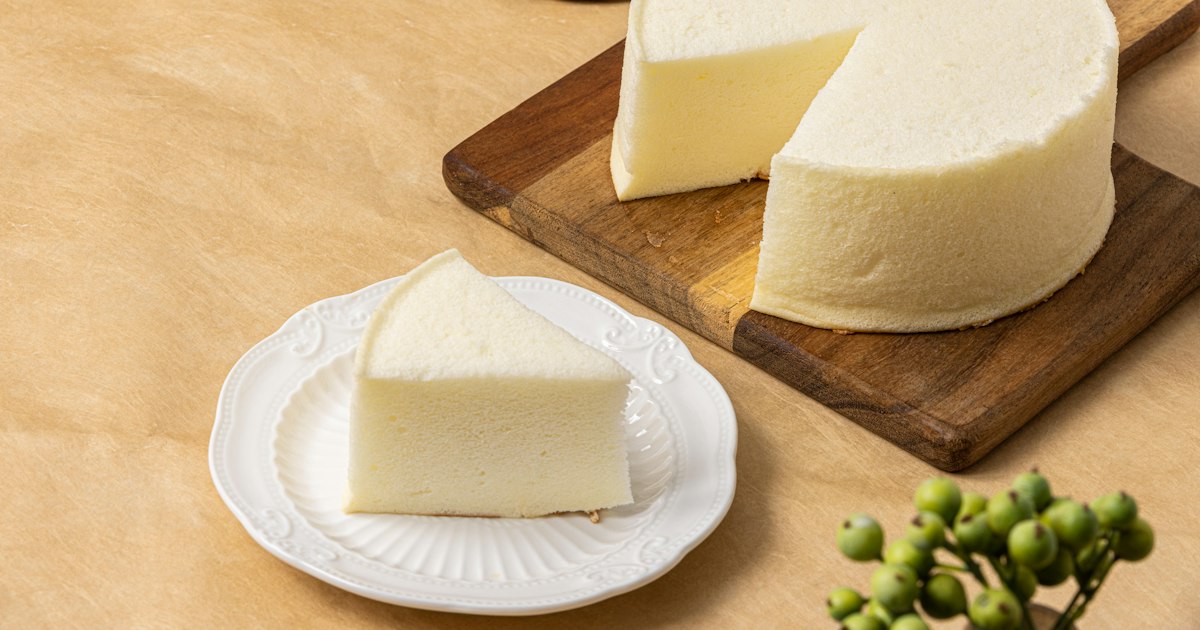
    Photo by Lee Milo on Unsplash

    If you’ve seen a video of a golden-brown cake jiggling like a waterbed on a store counter in Japan, there’s a good chance it was either Rikuro’s in Osaka or Uncle Tetsu’s in Fukuoka. Japanese soufflé cheesecake — lighter, eggier and far less dense than the New York-style block you might be picturing — has become one of the country’s most photographed desserts, and the two chains that popularized it still draw lines of visitors every single day. Here’s what the hype is actually about, what it costs, and how to get a slice without wasting half your trip standing in a queue.

    What Makes a Cheesecake “Soufflé” Style

    Japanese soufflé cheesecake gets its wobble from technique, not magic. Egg whites are whipped into a meringue and folded into a cream cheese batter, which is then baked slowly in a water bath (bain-marie). The steam keeps the cake from browning too fast or drying out, and the whipped egg whites give it a texture closer to a cloud than a cheesecake — somewhere between a sponge cake, a chiffon cake and the dense cheesecake you’d get in New York. It’s noticeably less sweet and less rich than Western cheesecake, which is part of why it’s easy to eat a whole slice in one sitting without feeling like you need a nap afterward.

    The “wobble” itself is a side effect of all that trapped air: a fresh-from-the-oven cake will visibly shake when the tray is set down or tapped, and both Rikuro’s and Uncle Tetsu lean into this as their signature selling point.

    Rikuro’s Osaka: The Face That Jiggles

    Rikuro’s Cheese Cake (りくろーおじさんの店) is an Osaka institution, with its most famous branch right by Namba Station, a few minutes from the Dotonbori canal. The cakes are printed with a smiling cartoon face on top — the “uncle” of the name — and part of the appeal is watching that face sink and wrinkle as the cake cools and settles over the following hour, like a time-lapse of a soufflé deflating.

    The Namba store bakes in small batches, and staff call out when a fresh tray comes out of the oven, which is the moment the queue surges forward — fresh, warm cakes jiggle far more dramatically than ones that have been sitting for a while. A plain cheesecake runs around ¥875 for the standard size (prices do creep up over time, so treat this as a ballpark rather than a guarantee), and you can usually buy a single cake to eat on the spot from a side counter without queuing for the full bakery line. Hours are roughly 10:00 am to 8:00 pm, though exact times vary by branch — Rikuro’s also has locations in Abeno, Shinsaibashi, and a few spots in Tokyo, so if the Namba queue looks brutal, a satellite store is often a faster bet.

    Uncle Tetsu: Fukuoka’s Plain and Fluffy Original

    Uncle Tetsu’s Cheesecake started in Hakata, Fukuoka, named after real-life baker Tetsushi Mizokami, whose cartoon likeness — round glasses, apron, mustache — appears on the packaging instead of being printed on the cake itself. Where Rikuro’s cheesecake includes a few raisins folded into the batter, Uncle Tetsu’s is kept deliberately plain: just cream cheese, egg, butter and a light dusting of flavor, baked in tall round tins that give the cake its characteristic domed top.

    The texture is arguably even airier than Rikuro’s — some visitors describe it as closer to a savory-leaning chiffon cake than a dessert. Expect to pay somewhere in the ¥900–¥1,000 range for a whole cake at the original Fukuoka store, with slices sometimes available at busier branches. Uncle Tetsu expanded aggressively overseas in the 2010s (Hawaii, Australia, Canada, Taiwan), so some visitors have actually tried it outside Japan before ever landing in Fukuoka — worth knowing if you’re wondering whether the trip-specific hype is deserved.

    Rikuro’s vs Uncle Tetsu: Which to Choose

    • Want the more photogenic option: Rikuro’s, for the sinking-face effect and the lively, almost theatrical queue culture at Namba.
    • Want the purer, more delicate cheesecake flavor: Uncle Tetsu, which skips the raisins and leans into plainness.
    • Only passing through Osaka, not Fukuoka: Rikuro’s wins by default — it’s far more widely available, with multiple Osaka and Tokyo locations.
    • Traveling with kids or picky eaters: Uncle Tetsu’s plain flavor is a safer bet than Rikuro’s raisin-studded version.

    Budget, Mid-Range and Splurge Options

    This is a rare Japanese food category where “budget” and “splurge” aren’t that far apart — a whole cake from either chain is already an affordable treat for two to four people to share.

    • Budget: A single slice bought at the counter, where available, usually costs a few hundred yen and is the easiest way to try it without committing to a whole cake you can’t finish before your train.
    • Mid-range: A whole plain cheesecake from either chain (¥875–¥1,000) — the standard way most locals buy it, often as a gift or to share at home.
    • Splurge: Seasonal or limited flavors (matcha, chocolate, or fruit-topped versions) that both chains occasionally run, typically priced a few hundred yen above the plain version. These rotate and aren’t always available, so don’t plan a visit around a specific flavor.

    When to Go and How to Avoid the Queue

    Queues build fastest in the late morning through early afternoon, especially on weekends, when tour groups and day-trippers converge on Namba. Arriving right at opening (around 10:00 am) or in the last hour before closing tends to mean a shorter wait, though you’ll trade off freshness slightly if you go late. If you specifically want to see a cake pulled hot from the oven, mid-afternoon on a weekday is usually your best window — batches come out every 15–20 minutes or so, and the line moves in bursts around each new tray.

    Because these stores are destination spots tucked into dense shopping districts, double-checking the exact storefront on a map before you set out is worth the thirty seconds — Japanese addresses don’t work block-by-block the way Western ones do, and understanding how Japanese addresses are structured will save you from wandering the wrong side of a busy intersection looking for a storefront.

    Common Mistakes to Avoid

    The single biggest mistake is assuming the cake travels well. Soufflé cheesecake is at its best within a few hours of baking and needs refrigeration — it is not a shelf-stable souvenir, and it will not survive a multi-day trip or an international flight home in good shape. If you’re hoping to bring a Japanese sweet back for someone, a cheesecake isn’t the one; baked cookies and chocolates travel far better, and it’s worth checking what you’re actually allowed to bring back through customs before you buy anything perishable in bulk. For a sweet that’s built to travel, something like Shiroi Koibito’s white chocolate cookies is a far safer pick for the suitcase.

    Another frequent misstep is buying a cake, then immediately hopping on a long train ride — the cake needs to be eaten same-day or kept cold, and a hot afternoon in a backpack is not kind to it. Eat it at a nearby bench or hotel room within a few hours if you can.

    Finally, don’t assume the queue photo you saw online reflects current conditions — Rikuro’s and Uncle Tetsu both have multiple branches, and a quieter satellite location can get you the same cake with a tenth of the wait. If you’re already deep into Japan’s dessert culture, it’s worth pairing a cheesecake stop with a look at the country’s other obsessive seasonal treats, like the chestnut-cream Mont Blanc or a box of traditional wagashi from Toraya — proof that Japan’s sweet shops reward patience whether the dessert wobbles or not.

  • Ochazuke: Japan’s Tea-Soaked Rice Comfort Food and How to Order It

    Ochazuke: Japan’s Tea-Soaked Rice Comfort Food and How to Order It

    Photo by Stefan Vladimirov on Unsplash

    Pour hot tea or dashi broth over a bowl of leftover rice, scatter on some salmon flakes or pickled plum, and you have ochazuke — one of the few Japanese dishes that locals eat purely for comfort rather than show. It’s the meal people make at 11pm after a long shift, the thing grandmothers serve at the tail end of a formal dinner, and the dish that quietly solves the “what do I do with this extra rice” problem in millions of Japanese kitchens. For visitors, it’s also one of the easiest, cheapest, and most genuinely local foods you can order — if you know what to ask for.

    What Ochazuke Actually Is

    Ochazuke (お茶漬け) literally means “tea-soaked,” and at its simplest that’s exactly what it is: cooked rice with hot green tea (sencha or hojicha) poured over it, topped with something salty or umami-rich to balance the mild tea flavor. Common toppings include shiozake (salted salmon flakes), umeboshi (pickled plum), nori (dried seaweed), tarako (cod roe), pickles, or sesame seeds. Many restaurants and packaged versions use hot dashi (fish or kelp broth) instead of tea, which gives a rounder, savory flavor — purists will tell you that’s technically a different dish, but on menus both get called ochazuke.

    In Kyoto, ochazuke has a second life as local slang. “Bubuzuke” is the old Kyoto-dialect word for it, and there’s a famous (half-joking) bit of local etiquette: if a Kyoto host asks “would you like some bubuzuke?” late in a visit, it’s a polite hint that it’s time to go home. You won’t run into this in practice as a tourist, but it’s a fun piece of trivia if you’re spending time in the city.

    Where to Order It — Budget to Splurge

    Budget (¥0–¥400): The cheapest route is DIY. Buy a box of Nagatanien-brand ochazuke packets at any supermarket or convenience store (around ¥250–¥350 for 6 packets, flavors like salmon, plum, wasabi, and nori) and make it yourself with rice and hot water from a hotel kettle or ryokan breakfast station. It’s genuinely how most Japanese households eat it.

    Mid-range (¥400–¥900): Izakaya (Japanese pubs) often list ochazuke as a “shime” — the small rice dish eaten at the very end of a drinking session to settle the stomach. Order it as your last dish rather than a starter; asking for it first can confuse staff, since it’s culturally understood as a closer. Some standing-sushi and kaiten-zushi (conveyor-belt sushi) chains also serve a dashi-based ochazuke, typically salmon or tuna, for roughly ¥400–¥600.

    Splurge (¥1,500+): At traditional kaiseki (multi-course) restaurants, particularly in Kyoto, a rice-in-broth or tea-rice course sometimes appears near the end of a tasting menu, dressed up with ingredients like unagi (eel), sea urchin, or seasonal vegetables. You won’t order this dish on its own here — it’s folded into the full course, which can run ¥10,000–¥30,000 depending on the restaurant and season. If you’re building a Kyoto food itinerary around traditional dining, it’s worth asking your ryokan concierge whether the evening’s kaiseki includes a rice course.

    How to Order It Without Fumbling

    At a restaurant, you’ll usually see it written as 茶漬け (chazuke) or お茶漬け (ochazuke), often with the topping listed first — 鮭茶漬け (sake chazuke, salmon) or 梅茶漬け (ume chazuke, plum). Just point at the menu item or say the name; no special phrasing needed. If a server asks “お茶でよろしいですか?” (ocha de yoroshii desu ka — “is tea okay?”), they’re confirming whether you want the tea version versus a dashi version, since some places offer a choice. Answering “hai” (yes) for tea or “dashi de” for broth is all you need.

    If you’re at an izakaya, the polite move is to order ochazuke near the end of the meal, not alongside your drinks and appetizers — staff will sometimes gently push back or ask “now?” if you order it too early, since it signals you’re winding down the meal, similar to how dessert signals the end of a Western dinner.

    Common Mistakes Visitors Make

    • Using fresh, hot rice.
    • Ochazuke was invented partly to repurpose slightly cooled or day-old rice — pouring hot liquid over piping-hot rice turns it mushy. If making it yourself, let the rice sit a few minutes, or use rice that’s already cooled slightly.

    • Drowning the bowl. The liquid should come about two-thirds up the rice, not fully submerge it — you’re moistening and flavoring, not making soup. Add gradually.
    • Skipping the topping balance. Plain tea over plain rice is bland; the dish depends on a salty or umami element (salmon, plum, nori, pickles) to carry the flavor. If you buy packets, use the full sachet — don’t go light on it thinking you’re being healthy.
    • Expecting it on every menu. Not all restaurants serve it, especially non-Japanese or very upscale Western-style places. It’s most reliably found at izakaya, teishoku (set-meal) diners, and conveyor-belt sushi chains.

    Best Time and Season to Eat It

    Ochazuke is eaten year-round, but it has two sweet spots. In summer, a cold version made with iced tea or chilled dashi is a popular way to eat something light in Japan’s humid heat — if you’re also exploring other no-fuss summer drinks, mugicha (roasted barley tea) is a common pairing at the same casual meals. In winter, the hot broth version is a go-to late-night warmer, especially after drinking — it shows up on izakaya menus from around October through March more prominently than in summer, when lighter cold versions take over.

    Bringing Ochazuke Home

    Packaged ochazuke is one of the easiest, lightest, most TSA-friendly Japanese food souvenirs you can pack: the foil packets weigh almost nothing and don’t need refrigeration. Nagatanien is the brand you’ll see everywhere, from convenience stores to Don Quijote to airport souvenir shelves, usually priced ¥250–¥500 per box depending on flavor count and whether it’s a gift-boxed assortment. If you’re stocking up on other packaged Japanese pantry souvenirs for the flight home, it’s worth checking Japan’s duty-free allowance coming home so you know what quantities of food items you can bring back without issue — ochazuke packets are low-risk, but it’s a good general reference if you’re also buying alcohol, tea, or seafood products.

    If ochazuke’s home-style, use-up-what-you-have spirit appeals to you, it pairs well with other everyday Japanese comfort dishes on a food itinerary — nikujaga comes from the same category of dishes Japanese people cook at home rather than order to impress anyone. And if you’re curious how rice dishes shift by region and season, ozoni, the New Year’s mochi soup, is a good next stop for understanding how much a “simple” rice-and-broth bowl can vary across Japan.

  • Nikujaga: Japan’s Home-Style Meat and Potato Stew and Where to Try It

    Nikujaga: Japan’s Home-Style Meat and Potato Stew and Where to Try It

    Photo by Yu Hosoi on Unsplash

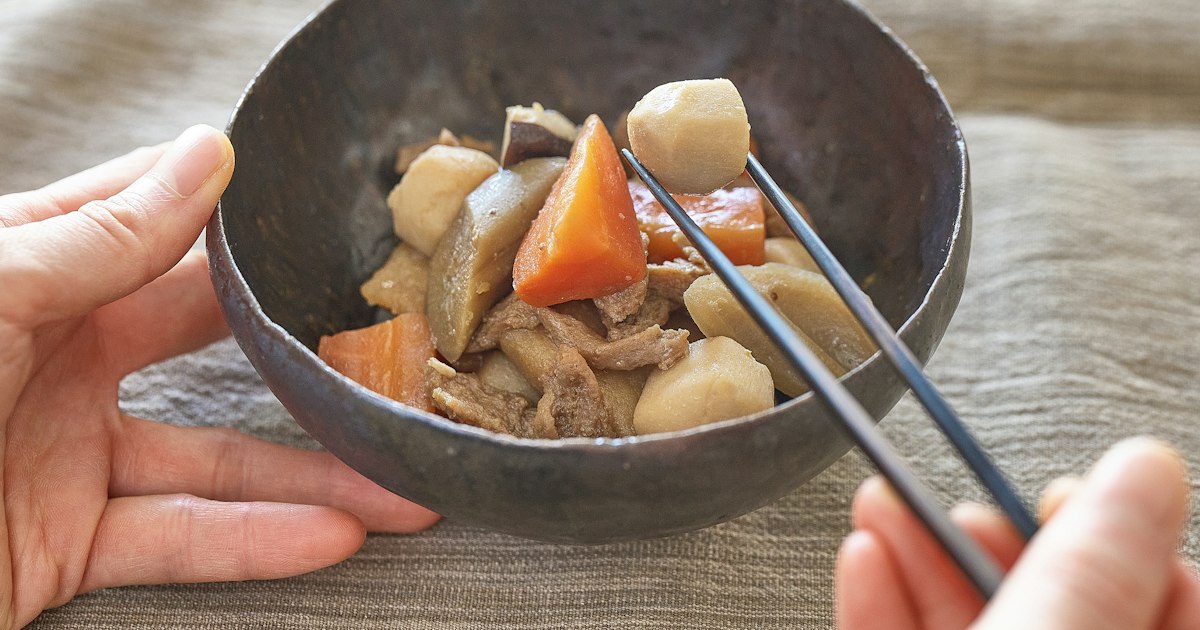
    If you ask a Japanese person what their mother’s cooking tastes like, there’s a good chance the answer involves nikujaga. This simmered dish of thinly sliced meat, potatoes, onions, and carrots in a sweet-savory soy broth is the definition of katei ryori, or home cooking — unglamorous, deeply comforting, and found on nearly every family dinner table at some point in the week. Travelers rarely seek it out on purpose, but once you taste it at an izakaya or a teishoku (set meal) counter, it tends to become a repeat order for the rest of the trip. Here’s what it is, why it’s cooked the way it is, and where you can actually sit down and eat it.

    What Nikujaga Actually Is

    Nikujaga literally means “meat [and] potato” (niku + jagaimo). The dish is potatoes, onion, and often carrot and shirataki noodles, simmered with thin slices of beef or pork in a dashi-based broth seasoned with soy sauce, mirin, and sugar. The result is closer to a dry braise than a soupy stew — most of the liquid cooks down and gets absorbed, so what’s left on the plate is tender, falling-apart potato chunks coated in a glossy brown glaze, plus meat that’s more of a flavoring element than the main event.

    There’s a real east-west divide in how it’s made. In the Kanto region (Tokyo and east), nikujaga is almost always made with thinly sliced pork, reflecting pork’s dominance in Tokyo home cooking. In Kansai (Osaka, Kyoto, and west), beef is the default, tied to the region’s historic beef culture and its overlap with sukiyaki. If a menu or a home cook specifies “gyu-niku” (beef) or “buta-niku” (pork) nikujaga, that regional lean is usually why.

    The “Curry Origin” Story — and Why It’s Disputed

    The most-repeated bit of nikujaga trivia is that it was invented by Admiral Heihachiro Togo of the Imperial Japanese Navy, who reportedly asked his cooks to recreate the beef stew he’d eaten in Britain while training there, but without the ingredients for a proper roux — so the cooks simmered beef and potatoes in soy and sugar instead, and curry became nikujaga. Both Maizuru (Kyoto Prefecture) and Kure (Hiroshima Prefecture), Togo’s former naval bases, claim the dish’s birthplace and run “nikujaga” tourism campaigns around it. Food historians are skeptical of the specifics — soy-and-sugar simmering was already a standard technique in Japanese cooking, so the dish likely evolved more gradually than the navy legend suggests. Still, it’s a fun bit of context if you end up in either city, and both have local restaurants that play up the connection.

    Where to Eat It: Budget to Splurge

    Budget (¥500–900): The easiest place to try nikujaga is a teishoku-ya or a casual set-meal chain. Yayoiken and Ootoya both rotate nikujaga as a side dish or a full teishoku (served with rice, miso soup, and pickles) for roughly ¥700–950, and both have English-friendly picture menus or touchscreen ordering in major cities. Department store basement food halls (depachika) also sell pre-made nikujaga by weight, around ¥400–600 for a single-portion container — a good option if you want to try it in a hotel room or on a train.

    Mid-range (¥900–2,000): Izakaya menus almost always list nikujaga as a shared side dish, typically ¥500–800 a plate, meant to be ordered alongside grilled skewers or sashimi rather than as a standalone meal. For a more composed sit-down version, old-fashioned “shokudo” diners near train stations often do a nikujaga teishoku for ¥1,000–1,500 that includes rice, soup, and a small side — this is where you’ll get the most traditional, slow-simmered rendition, since these places tend to be family-run and cook the way grandmothers do.

    Splurge: Nikujaga isn’t really a splurge dish by nature, but kaiseki (multi-course) restaurants occasionally include a refined, small-portion version as one course, using A5 wagyu instead of standard thin-sliced beef. If you’re already booked into a kaiseki dinner in Kyoto or Kanazawa and see “nikujaga” or “niku jagaimo” on the course list, it’s worth paying attention to — the texture is the same comforting dish, just built from much better beef.

    A Few Specific Spots Worth Knowing

    • Maizuru, Kyoto Prefecture — several restaurants near Maizuru’s naval port sell a “Maizuru nikujaga” plate, leaning into the Togo legend; look for shops around Maizuru Port and the Red Brick Park area.
    • Kure, Hiroshima Prefecture — the rival birthplace city has its own “Kure nikujaga” association with a dedicated logo you’ll spot on restaurant signs near Kure Station; it’s usually served with a thicker gravy-like sauce than the home-style version.
    • Tsukiji Outer Market, Tokyo — a few of the older sit-down shokudo tucked behind the main tourist strip serve nikujaga as a breakfast or lunch set; it’s easy to miss among the sushi stalls, so look for shokudo with a handwritten teishoku board out front.

    Opening hours for shokudo-style restaurants tend to run roughly 11:00–14:00 for lunch and 17:00–21:00 for dinner, with many closing entirely in the mid-afternoon — show up outside those windows and you may find the shutters down even if the restaurant isn’t officially closed for the day.

    Best Season and Timing

    Nikujaga is eaten year-round, but it’s at its best in late autumn through winter (roughly November to February), when new-crop potatoes and onions are in season and restaurants lean harder on simmered, warming dishes generally. It’s a natural pairing with other cold-weather regional specialties — if you’re traveling in Toyama in winter, for instance, you might see nikujaga alongside kanburi on the same seasonal set menu, since both peak at the same time of year. (If that link looks off, the correct kanburi guide is on japantrove.com under the Toyama yellowtail article.)

    Common Mistakes Visitors Make

    • Expecting a soup. Nikujaga is simmered until most of the liquid is absorbed — if you’re picturing a ladle-able stew with broth to spoon up, you’ll be surprised by how dry and glazed the final dish actually is.
    • Ordering it as a full meal at an izakaya. At most izakaya, nikujaga is a shared side portion meant to go with rice or drinks, not a main course — if you want it as a complete meal, look for a teishoku set instead.
    • Confusing it with niku udon or sukiyaki. The thin beef or pork slices and brown soy glaze look similar to sukiyaki at a glance, but nikujaga has no raw egg dip and is served as a finished, room-temperature-friendly side rather than cooked tableside.
    • Assuming beef is standard everywhere. If you specifically want the beef version, order in Kansai or ask for “gyu-niku no nikujaga” — in Tokyo and the east, pork is the default unless stated otherwise.

    Making It (or Shopping for It) at Home

    Nikujaga is simple enough that many visitors end up wanting to recreate it. The ingredients — soy sauce, mirin, and dashi powder — are all things you can legally bring home in reasonable quantities; if you’re unsure what’s allowed through customs, it’s worth checking Japan’s duty-free allowance coming home before you overpack your suitcase with condiments. Supermarkets also sell nikujaga seasoning packets (nikujaga no moto) for about ¥150–250, which let you recreate a decent version with just potatoes, onion, and sliced meat once you’re back home.

  • Mugicha: Japan’s Caffeine-Free Roasted Barley Tea and Where to Try It

    Mugicha: Japan’s Caffeine-Free Roasted Barley Tea and Where to Try It

    Photo by Katherine Sousa on Unsplash

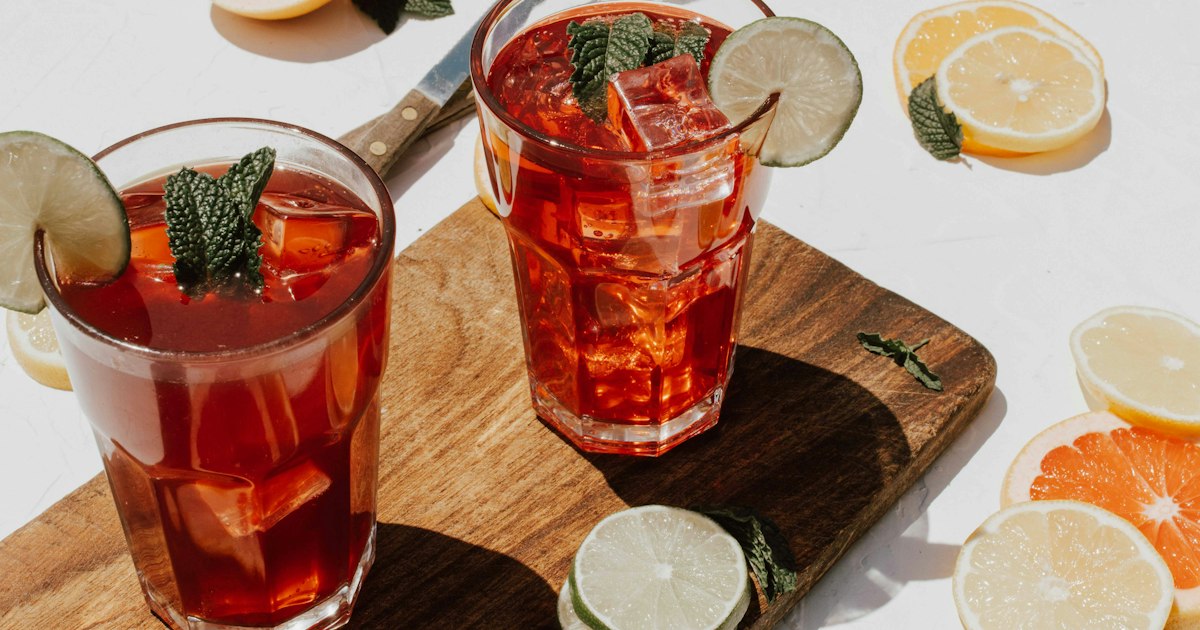
    If you’ve spent even one sweltering August afternoon in Japan, you’ve probably already had mugicha without knowing its name. It’s the amber-colored, slightly nutty, faintly smoky iced tea that appears on restaurant tables instead of water, chills in nearly every refrigerator in the country, and gets handed out free at school sports days. Unlike green tea or black tea, mugicha contains zero caffeine, which is exactly why it’s so deeply woven into daily Japanese life — it’s the one “tea” everyone from toddlers to grandparents can drink all day long.

    What Is Mugicha, Exactly?

    Mugicha (麦茶) means “barley tea,” and that’s a literal description: it’s made from roasted, unhulled barley grains steeped in hot or cold water. No tea leaves are involved at all, which is why it’s technically a tisane rather than a true tea. The roasting process gives it a toasted, almost coffee-adjacent aroma, but the flavor itself is mild, slightly sweet, and faintly bitter — closer to roasted grain or barley malt than to anything caffeinated. Because it has no caffeine and very little in the way of tannins, it doesn’t stain teeth or cause the jittery effect of iced coffee, and it’s considered gentle enough for babies (diluted) and the elderly alike.

    Why It’s Everywhere in Summer

    Mugicha is overwhelmingly a cold-weather-opposite drink — it belongs to Japanese summer (roughly June through September) the way hot cocoa belongs to winter elsewhere. Families brew a large pitcher every morning during the hot months and keep it in the fridge all day for rehydration, since it’s caffeine-free and won’t dehydrate you the way iced coffee or black tea can. It’s standard issue at school, handed out at sports clubs, packed into kids’ water bottles, and served automatically — often without you ordering it — at many traditional restaurants, soba shops, and izakaya as a complimentary starter drink, essentially replacing tap water. If you’re taking a soba-making class, don’t be surprised if mugicha shows up alongside your bowl at the end — it’s considered a natural palate-cleansing pairing with buckwheat noodles.

    Where to Try It While You’re in Japan

    You don’t need to seek out anywhere special — mugicha is one of the easiest things to find in the entire country:

    • Convenience stores (7-Eleven, Lawson, FamilyMart): Bottled mugicha in 600ml–660ml PET bottles runs about ¥120–160. Brands like Ito En’s “Mugicha” and Suntory’s “Suntory Mugicha” are on nearly every cold-drink shelf, usually right next to the unsweetened green teas.
    • Vending machines: Found on almost every city block and inside train stations, selling the same bottles for ¥130–160. Look for the brown-and-tan labeling — it stands out from the green tea bottles.
    • Restaurants and izakaya: Many casual and traditional restaurants (teishoku shops, soba and udon counters, some izakaya) serve mugicha free as the default table drink, particularly in summer. It’s rarely on the menu because it’s assumed, not ordered.
    • Supermarkets: Larger format bottles (1–2 liters) cost roughly ¥150–250 and are the cheapest per-serving option if you’re self-catering during your trip.

    There’s no single “best place” or pilgrimage site for mugicha the way there might be for a regional specialty — its whole identity is that it’s ordinary and everywhere, which is part of the appeal for visitors curious about everyday Japanese life rather than tourist-oriented food experiences.

    Budget, Mid-Range, and Splurge Ways to Experience It

    Budget (¥120–160): Grab a single bottle from any convenience store or vending machine — the simplest way to taste it exactly as most Japanese people drink it day to day.

    Mid-range (¥300–500): Buy a box of tea bags at a supermarket or drugstore (Hakubaku is the best-known brand, widely sold in boxes of 20–50 bags) and brew a pitcher yourself if your hotel or guesthouse has a kitchenette. This is also the better route if you want to compare a few brands side by side, since roast levels and grain blends vary noticeably.

    Splurge (¥800–1,500): Some specialty tea shops and department store food halls sell premium, deeply roasted mugicha blends — sometimes mixed with roasted corn or rice (mugicha blended with genmaicha-style roasted rice) — in nicer packaging, aimed at gift-giving. These make a more presentable souvenir than a convenience-store bottle, though the flavor difference over a mid-range box is subtle rather than dramatic.

    Brewing It Yourself

    If you buy tea bags to try at home, the process is simple: steep 1–2 bags in about 1 liter of boiling water for 5–10 minutes, then refrigerate. Most Japanese households brew it this way each morning rather than making it fresh per cup, since it’s meant to be drunk cold throughout the day. Unlike green tea, there’s no risk of over-steeping into bitterness — longer steeping just deepens the roasted flavor, so it’s a forgiving tea for first-timers.

    Common Mistakes Visitors Make

    • Assuming it has caffeine: Some visitors avoid it thinking all “tea” has caffeine, or conversely order it expecting a pick-me-up. It has neither caffeine nor stimulant effect — it’s purely a hydrating, flavored water substitute.
    • Mistaking it for genmaicha or hōjicha: These are both actual teas (green tea blended with roasted rice, and roasted green tea, respectively) and do contain some caffeine. Mugicha, made from barley with no tea leaf at all, is the only one of the three that’s completely caffeine-free.
    • Expecting it hot: While mugicha can technically be served hot in winter, it’s almost always encountered cold in restaurants and convenience stores. If you’re served a hot brown tea, it’s more likely hōjicha or genmaicha.
    • Buying sweetened versions without checking: Nearly all mainstream bottled mugicha is unsweetened, but a few novelty or kids’-branded versions add sugar. Check the label (無糖 means “no sugar”) if you want the traditional, unsweetened version.

    Bringing It Home

    Tea bags travel well and make a light, inexpensive souvenir — a box of 50 bags weighs very little and fits easily in a suitcase. Loose-leaf-style mugicha (roasted whole barley grains) is also sold in some specialty shops and keeps for months unopened. If you’re stocking up on several boxes along with other pantry souvenirs, it’s worth a quick check of what you can actually bring back under your home country’s customs allowance, since dried goods are usually fine but it’s worth confirming for your specific destination. For a more premium gift option to pair with tea back home, a box from Toraya makes a classic wagashi pairing — their subtly sweet confections are traditionally served alongside roasted teas like mugicha and hōjicha.

    Mugicha isn’t a dish you need to plan a special trip around, but it’s one of the most authentic tastes of ordinary Japanese life you’ll encounter — cheap, caffeine-free, and handed to you without asking at countless meals across the country. Keep a bottle in your bag during the summer months and you’ll understand immediately why it’s a national habit rather than a niche specialty drink.

  • Kanburi: Toyama’s Prized Winter Yellowtail and Where to Eat It

    Kanburi: Toyama’s Prized Winter Yellowtail and Where to Eat It

    Photo by blackieshoot on Unsplash

    Every December, as the Sea of Japan turns gray and choppy, Toyama Bay produces one of the country’s most sought-after fish: kanburi, the fat-laden winter yellowtail that chefs across Japan quietly rank above the summer version of the same species. If you’re planning a winter trip through the Hokuriku region, timing a stop in Toyama around this fish is one of the more rewarding, less touristy food detours you can make. Here’s what makes it special, when to go, and where to actually eat it.

    What Makes Kanburi Different From Regular Buri

    Buri (yellowtail, Seriola quinqueradiata) is sold year-round in Japan, but it’s a different fish in winter. As water temperatures drop, yellowtail migrating south along the Sea of Japan coast pack on fat to survive the cold — their fat content can roughly double compared to summer catches. “Kanburi” (寒鰾) literally means “cold-season buri,” and it specifically refers to fish caught in this fattened winter state, typically from December through February.

    Toyama Bay is unusually well-suited to producing good kanburi because of its geography: it’s one of the deepest bays in Japan, with depths plunging to over 1,000 meters just a few kilometers from shore. That steep drop-off means cold, nutrient-rich water sits close to the coast, and migrating yellowtail pass through it on their way south, getting caught in fixed nets before they’ve burned off their fat reserves swimming further.

    Himi Buri: The Brand Behind the Fish

    If you see “Himi Buri” (氷見ぶり) on a menu, it refers to a specific, trademarked catch: yellowtail landed at Himi fishing port in Toyama Prefecture, caught using teichiami (fixed-net) fishing rather than nets that are towed or cast. Because the fish essentially swim into a stationary trap and are hauled in quickly, they arrive at auction with minimal stress and bruising, which matters a lot for sashimi-grade texture. To carry the Himi Buri name, a fish generally needs to meet weight and fat-content standards set by the local fisheries cooperative — lighter or leaner fish are sold as ordinary buri instead.

    The most famous moment of the season is the “ichiban buri” (一番ぶり), the first major catch of a new winter run, which is auctioned at Himi port and regularly makes local news for fetching dramatically higher prices than later catches of the same size — sometimes tens of thousands of yen for a single exceptional fish. You won’t be bidding at that auction as a visitor, but the fish from those early-season landings do filter down to restaurants and markets within a day or two.

    Best Season and Timing

    Kanburi season runs roughly from late November to February, with most people agreeing the peak is mid-December through January, right around New Year’s — fittingly, buri has long been a traditional New Year’s fish in the Hokuriku region, much as other regions build their own New Year’s dishes like ozoni around regional specialties. By late February the migration tapers off and quality becomes inconsistent, so if you’re planning the trip specifically around this fish, book for December or January.

    Catches depend on weather and sea conditions, so no restaurant can promise kanburi on a specific date — rough seas can keep boats in for a day or two. If you’re traveling a long way specifically for this, build in a buffer day or ask your hotel to call ahead and confirm availability the morning of your visit.

    Where to Eat It

    Himi Banya Gai (氷見番屋街) is the easiest place to eat kanburi close to its source. This is a seafood market-and-dining complex right next to Himi fishing port, with a morning fish market, casual seafood-rice-bowl counters, and several sit-down restaurants serving fresh sashimi and grilled set meals. It’s a short walk or taxi ride from Himi Station. Expect a kaisen-don (seafood rice bowl) with kanburi sashimi for roughly ¥1,500–3,000, and a more substantial sashimi or shabu-shabu course for ¥4,000–8,000. Hours vary by shop (most run from around 9:00 or 10:00 to 17:00–18:00), and some close on weekdays rather than weekends, so check the specific restaurant’s hours before heading out.

    Toyama City, about 40 minutes from Himi by train, has a strong sushi culture built around Toyama Bay’s variety of fish — locals sometimes call the bay “the natural aquarium” because of how many species pass through it. Kaiten-zushi (conveyor-belt sushi) chains based in the prefecture serve kanburi nigiri in winter for roughly ¥150–500 per plate, which is an easy, budget-friendly way to try it without committing to a full sashimi course. Department store restaurant floors in central Toyama City also run seasonal kanburi menus in winter.

    For a splurge, look for a ryokan or kappo-style restaurant offering a kaiseki or omakase course built around the season’s catch — a multi-course winter dinner featuring kanburi sashimi, grilled kama (collar), and nabe can run ¥10,000–20,000 per person, but it’s the most complete way to taste the fish prepared several different ways in one sitting.

    Getting There

    From Tokyo, the Hokuriku Shinkansen runs directly to Toyama Station (about 2 hours 10 minutes) or Shin-Takaoka Station (about 2 hours 20 minutes). From either station, local JR lines connect to Himi: from Takaoka, take the JR Himi Line to Himi Station (about 30 minutes); it’s also an easy stop if you’re already visiting nearby Takaoka’s copper and bronze casting workshops, since both towns sit on the same short rail line. If you’re hunting for a specific restaurant’s address, note that Japanese addresses in smaller coastal towns like Himi often skip street names entirely in favor of block-and-lot numbers — it’s worth reading up on how Japanese addresses work before you rely on a paper map rather than GPS.

    Common Mistakes to Avoid

    • Ordering buri outside winter and expecting the same fish. Buri served in summer is a different, leaner fish — it’s not mislabeled, but it won’t have the fat marbling that makes kanburi famous. If the season is wrong, ask what’s fresh instead.
    • Confusing kanburi with hamachi. Hamachi, common on sushi menus year-round, is usually farmed young yellowtail. Kanburi is wild and caught specifically in winter — the flavor and price are both noticeably different.
    • Assuming any Toyama restaurant will have it that day. Fixed-net catches depend on the sea; a shop can sell out of kanburi by early afternoon on a good day, or have none at all if boats stayed in. Going early, or calling ahead, helps.
    • Skipping the grilled or simmered preparations. Sashimi gets the attention, but the collar (kama) grilled with salt, or a block simmered in soy and ginger (buri no arani), are where the fat really shines — don’t leave without trying at least one cooked version.

    Kanburi season is short, weather-dependent, and genuinely regional — you’re unlikely to find the real thing far from the Sea of Japan coast in winter. That’s exactly what makes a dedicated stop in Himi or Toyama City worth the extra train transfer.

  • Himeji Castle: Japan’s Most Famous White Heron Castle and How to Visit

    Himeji Castle: Japan’s Most Famous White Heron Castle and How to Visit

    Photo by Sue Winston on Unsplash

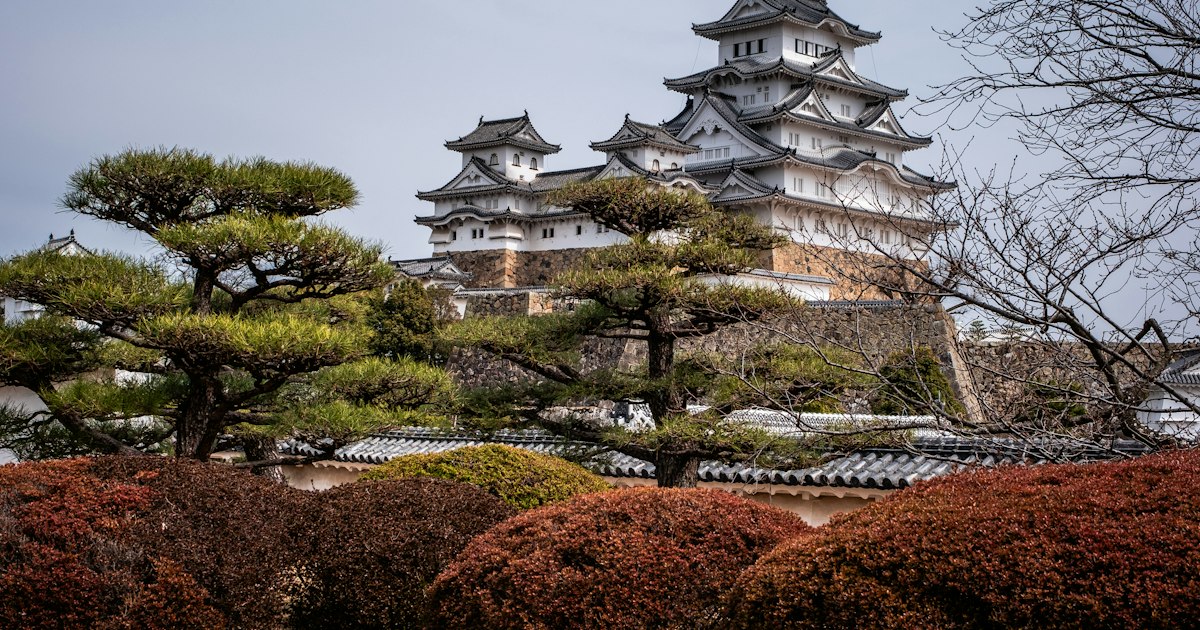
    Himeji Castle isn’t a reconstruction. While most of Japan’s “famous” castles are 20th-century concrete rebuilds of structures lost to fire, earthquake, or wartime bombing, Himeji’s six-story main keep has stood since 1609. That authenticity, combined with its brilliant white plaster walls, is why it’s nicknamed Shirasagi-jo — the White Heron Castle — and why it was one of the first two sites in Japan to be named a UNESCO World Heritage Site, back in 1993. If you only have time to see one Japanese castle in your life, most historians and architects would point you here.

    Why Himeji Castle Is Different From Japan’s Other Castles

    Of Japan’s roughly twelve surviving “original” castle keeps, Himeji is the largest and best preserved. Unlike Osaka Castle or Nagoya Castle, which are concrete museum buildings dressed up to look historic, Himeji’s interior is the real wooden structure: steep ladder-like staircases, centuries-old support pillars, and defensive features like gun ports, stone-dropping chutes, and a deliberately maze-like approach designed to confuse attacking samurai. The castle survived the World War II firebombing of Himeji city almost untouched — one incendiary bomb reportedly landed on the top floor and simply failed to detonate.

    Getting There: Trains, Timing, and the Walk from the Station

    Himeji Castle is one of the easiest major sights in Japan to reach without a car, which makes it an excellent day trip from several big cities. Himeji Station sits on the Sanyo Shinkansen line, so you can reach it by bullet train in about 40 minutes from Shin-Osaka, roughly 1 hour from Kyoto, and about 90 minutes from Hiroshima. If you’re not using a Shinkansen pass, local and rapid trains on the JR Kobe Line/Sanyo Line connect Himeji to Osaka and Kobe in 60-90 minutes for a fraction of the cost.

    From Himeji Station, skip the taxis and buses — the castle is a flat, scenic 15-20 minute walk straight up Otemon-dori, the wide boulevard directly in front of the station’s north exit. The castle keep is visible almost the entire way, so navigation is simple even if you’re still getting used to how addresses and streets are laid out in Japanese cities (our guide to how Japanese addresses work is worth a skim before this trip if you plan to explore side streets or find a specific shop). If you’d rather not walk, a loop bus runs from the station to the castle gate for about ¥100-300 per ride.

    Tickets, Hours, and What It Costs

    The castle grounds and keep are open daily from 9:00 to 17:00, with last entry at 16:00 (extended hours of 9:00-18:00, last entry 17:00, apply during the peak late-April-to-August season). The castle closes for maintenance on December 29 and 30 — check this if you’re visiting around New Year’s.

    Admission is ¥1,000 for adults and ¥300 for children (elementary through high school age); preschoolers enter free. A combined ticket covering both the castle and the neighboring Koko-en Garden costs ¥1,050 for adults — well worth the extra ¥50. Tickets can be bought at the gate, but during cherry blossom season and Japanese holidays, buying a timed-entry ticket online in advance through the official Himeji Castle website saves real queueing time, since entry into the keep itself is metered to control crowd flow on the narrow staircases.

    Inside the Castle: What to Expect

    Budget at least 1.5-2 hours for the castle keep alone, more if you’re visiting during busy periods. The stairs inside are original wooden staircases, steep (closer to 60 degrees in places) and narrow — there is no elevator, and this is not an easy visit for travelers with mobility issues, young children who need carrying, or large rolling suitcases (there’s no storage inside, though coin lockers are available near the station and main gate).

    You’ll need to remove your shoes at the entrance to the keep and carry them in a provided plastic bag for the rest of the visit — wearing socks without holes is a small but real courtesy here, and if you’re unsure about shoe sizing for any Japan-bound footwear purchases before your trip, our clothing and shoe size conversion guide can help. Inside, there’s minimal signage translation and no air conditioning, so summer visits can get uncomfortably hot and crowded near the top floors. Photography is allowed throughout, and the view from the top floor over Himeji city is the reward for the climb.

    Best Time to Visit

    Spring is the signature season: roughly 1,000 cherry trees bloom on the castle grounds in late March to early April, framing the white keep in pink. This is also, predictably, the most crowded time to visit, alongside Golden Week (late April-early May) and the August Obon holiday. If you can, aim for a weekday visit either right at the 9:00 opening or in the last two hours before closing — both the crowds and the heat (in summer) thin out considerably. Autumn (mid-November) offers good weather and smaller crowds with decent foliage in the surrounding gardens, and is generally the most comfortable time for the climb inside the keep.

    Common Mistakes to Avoid

    • Treating it as a quick stop. First-timers often budget 30-45 minutes based on photos from outside; the queue and climb inside alone can eat 90 minutes during busy periods.
    • Skipping the online ticket during peak season. On busy spring weekends, same-day entry into the keep can be delayed by an hour or more without a reserved slot.
    • Wearing shoes that are a hassle to remove and re-lace repeatedly. You’ll do this once at the keep entrance, but slip-ons make the whole visit smoother.
    • Visiting in the worst of summer without a plan. There’s no shade on the climb up the approach paths and no AC inside — bring water and a hat if you’re going in July or August.
    • Forgetting cash for the combined ticket or small souvenir stalls. Many vendors near the castle and in the old town still prefer cash or have lower card-payment limits.

    Beyond the Castle: Koko-en Garden and the Town

    Koko-en, a set of nine connected Edo-period-style gardens built on the former site of samurai residences, sits just a few minutes’ walk from the castle’s west gate and is included with the combined ticket. It’s a quieter, shadier contrast to the castle’s open stone paths and has a traditional teahouse serving matcha and sweets if you want to sit down after the climb. If castle towns and samurai history interest you more broadly, Himeji pairs well conceptually with our guide to Aizu-Wakamatsu, Fukushima’s samurai castle town, for a sense of how differently preserved castle towns can feel depending on the region and era they reflect.

    Before heading home, Himeji’s shopping arcade (Miyuki-dori), running parallel to the station approach, is a good spot for local snacks and crafts without the crowds of Osaka or Kyoto. If you’re stocking up on souvenirs across your trip, it’s worth checking our breakdown of Japan’s duty-free allowance for bringing goods home so you don’t get caught out at customs after a day of castle-town shopping.

  • Kushiro Shitsugen: Hokkaido’s Vast Wetland and Its Red-Crowned Cranes

    Kushiro Shitsugen: Hokkaido’s Vast Wetland and Its Red-Crowned Cranes

    Photo by Da-shika on Unsplash

    Kushiro Shitsugen is Japan’s largest wetland, a 183-square-kilometer sweep of reed marsh, peat bog, and winding river in eastern Hokkaido that feels closer to Siberia than to Tokyo. It’s also the year-round home of the tancho, Japan’s red-crowned crane, a bird so tied to national identity that it appears on the ¥1,000 note. For visitors willing to make the trip out to Kushiro, this is one of the few places on Earth where you can watch a wild crane population up close, in a landscape that looks almost unchanged since the Ainu named it centuries ago.

    A Wetland That Was Almost Drained

    Kushiro Shitsugen became Japan’s first Ramsar Convention wetland of international importance in 1980 and was designated a national park in 1987, largely to stop agricultural drainage projects that had already shrunk the marsh. The park sits just north of Kushiro city, straddling the Kushiro River as it meanders slowly toward the Pacific. Unlike a mountain or temple destination, there’s no single “site” to see — the appeal is the scale of it, the silence, and the wildlife that depends on it: Ezo deer, Blakiston’s fish owls, and roughly 1,800 red-crowned cranes that now live in eastern Hokkaido, almost all descended from this marsh.

    The Tancho’s Near-Extinction and Comeback

    Red-crowned cranes were hunted to the brink of extinction in Japan by the early 20th century and were believed completely gone until a small group of around 20 birds was found hiding in the Kushiro marshes in 1924. Winter feeding programs started in the 1950s, after a brutal winter nearly wiped out the remaining population, and that intervention is the reason the species survives in Japan today. The cranes are now protected as a Special Natural Monument, and the local feeding stations that saved them in the 1950s are the same places tourists visit today.

    When to Go: Winter Cranes vs. Summer Marsh

    Timing changes the entire experience. In winter (roughly late December through February), snow covers the marsh and natural food is scarce, so cranes concentrate at a handful of feeding stations where you can see 30, 50, even 100 birds at once, often performing their famous courtship dances. This is by far the best season for seeing cranes up close, but daytime highs sit around -5°C to -10°C and mornings can drop below -20°C, so come prepared with real winter layers, not just a city coat. If you need to pick up extra thermal gear or boots once you’re in Japan, it’s worth checking a size chart in advance — see this guide to Japanese clothing and shoe size conversion before you shop, since Hokkaido stores sell out of larger sizes fast in cold snaps.

    In summer (June–August), the cranes disperse into the marsh to nest and raise chicks, so sightings become scarce and distant — you might spot one or two from an observatory with binoculars, but the dramatic flocks are gone. Summer is instead the season for the wetland itself: lush green reeds, kayaking the Kushiro River, and the Norokko sightseeing train. Early autumn (late September–October) offers a middle ground, with some cranes still visible and cooler, comfortable hiking weather.

    Best Places to See the Cranes

    • Tsurumidai (Tsurui Village): A free, open-air feeding field where cranes gather most reliably in winter, typically with morning and midday feeding times. It’s the easiest spot for a quick, high-volume crane sighting.
    • Akan International Crane Center (GRUS), Akan-Kushiro: An indoor observation hall with glass walls facing an outdoor feeding ground, useful if you want warmth between photo sessions. There’s a modest entrance fee (around ¥480 for adults) and exhibits on crane conservation history.
    • Otowabashi Bridge, Tsurui: The iconic shot of cranes roosting on a steaming river at dawn is taken here. You need to arrive well before sunrise (often by 6am) in deep winter for a parking spot and a clear view — this is the spot every Hokkaido photography tour builds its itinerary around.
    • Kushiro Shitsugen Observatory and Hosooka Observatory: Year-round viewpoints over the marsh itself, with boardwalk trails. Don’t expect crowds of cranes here outside winter, but the panoramic view of the wetland is worth it in any season. The Kushiro Shitsugen Observatory charges a small entry fee (roughly ¥480); Onnenai Visitor Center’s boardwalk nearby is free.

    Getting There and Around

    Kushiro Airport has direct flights from Tokyo Haneda (around 1 hour 40 minutes, several times daily on ANA and JAL) and seasonal connections from other cities. From Sapporo, the JR limited express “Super Ozora” runs to Kushiro Station in about 4 hours. From the airport or station, Tsurui Village and the Akan crane sites are roughly 45–60 minutes further inland by car.

    A rental car is genuinely the best option for winter crane viewing, since the feeding stations and Otowabashi Bridge aren’t well served by public transport and you’ll want flexibility for a pre-dawn start. Studded or winter tires are mandatory and standard on Hokkaido rental fleets in this season — confirm it when booking. If you’d rather not drive on icy rural roads, winter day tours from Kushiro city covering Tsurumidai, Otowabashi, and the crane center typically run ¥8,000–¥15,000 per person including a guide and vehicle.

    The Norokko Train and Summer Kayaking

    The Kushiro Shitsugen Norokko-go is a slow sightseeing train with oversized windows and open-air viewing sections, running on the JR Senmo Line between Kushiro and Toro Station through the heart of the marsh. It operates seasonally (roughly mid-April through early October, with gaps — check current JR Hokkaido schedules before planning around it), and seats require a reserved-seat ticket on top of the base fare, so book a day or two ahead in peak season. Get off at Toro and walk up to Hosooka Observatory for one of the best wide views of the whole wetland.

    In the warmer months, guided canoe and kayak trips down the gentle Kushiro River are a highlight — half-day tours run roughly ¥6,000–¥9,000 per person through local outfitters based near Toro or Kushiro city, no experience needed since the current is slow and flat.

    Common Mistakes and Practical Tips

    The single biggest mistake is visiting in summer expecting the crane spectacle people see in photos — that’s a winter phenomenon. The second is underestimating the cold: locals wear insulated boots with real tread, not fashion sneakers, since ice forms on parking areas and boardwalks before dawn. Budget travelers can see cranes for free at Tsurumidai and the Onnenai boardwalk; mid-range visitors should add the Akan Crane Center and a Norokko train ride; a splurge option is a private winter photography tour timed for first light at Otowabashi, which small Kushiro-based operators run for roughly ¥20,000–¥30,000 for a few hours with a guide who knows exactly where the cranes will be standing.

    Before heading back to Kushiro city, it’s worth stopping at Washo Market for a build-your-own kaisendon seafood rice bowl — Kushiro is a major fishing port and the market is one of the best places in Hokkaido to try one. And if you’re stocking up on Hokkaido souvenirs before flying home, this region is where Shiroi Koibito cookies are sold everywhere from convenience stores to the airport, making them an easy last-minute gift. Just double check your duty-free allowance if you’re buying food items in bulk to take home.

  • Toraya: Inside Japan’s 500-Year-Old Wagashi Maker and What to Buy

    Toraya: Inside Japan’s 500-Year-Old Wagashi Maker and What to Buy

    Photo by Igal Ness on Unsplash

    Most souvenir sweets in Japan are made to be eaten within the week. Toraya’s are made to be understood as craft first, sweet second — the company has been making wagashi (traditional Japanese confectionery) since before Japan had a unified capital at Edo, and it still supplies sweets to the Imperial Household. If you only know wagashi as “the weird jelly thing next to the mochi,” a stop at Toraya is the fastest way to see what the fuss is about, and it’s also one of the few places where you can buy a genuinely old-world souvenir that survives the flight home.

    A 500-Year House: From Kyoto’s Imperial Court to Modern Tokyo

    Toraya traces its founding to Kyoto in the early 1500s, during the late Muromachi period, where it supplied wagashi to the Imperial court. When the capital and Imperial household moved to Tokyo in 1869, Toraya followed, opening what’s now its Tokyo headquarters store in Akasaka while keeping its original Kyoto shop running near the old Imperial Palace grounds. That dual identity — Kyoto roots, Tokyo headquarters — is still the core of the business today, eighteen generations and five centuries later. The company also quietly runs a shop in Paris, opened in 1980, which says something about how it has positioned itself: not as a nostalgia act, but as a living confectionery house that still trains new craftspeople in a very old method.

    What Makes Wagashi — and Toraya Specifically — Different

    Wagashi is built around anko (sweetened azuki bean paste), agar, rice flour, and sugar rather than butter, cream, or chocolate, and the best pieces are designed to represent a season, a poem, or a specific moment rather than just “chocolate cake, but Japanese.” Toraya’s signature product is yokan — a firm, sliceable block of sweetened bean paste set with agar — which it has been refining since the 17th century. Alongside yokan, Toraya makes nerikiri (soft, hand-shaped seasonal sweets meant to look like flowers, leaves, or seasonal motifs), dorayaki (two small pancakes sandwiching anko), and monaka (thin wafer sandwiches). If you’ve read about Japan’s obsession with Mont Blanc or tried warabimochi, Toraya sits at the more formal, old-school end of that same spectrum — this is the wagashi served at tea ceremonies, not the stuff sold from a festival stall.

    Where to Visit

    Toraya Akasaka (Tokyo headquarters store): 4-9-22 Akasaka, Minato-ku, Tokyo. It’s about a 5-7 minute walk from Akasaka Station (Chiyoda Line) or Akasaka-mitsuke Station (Ginza/Marunouchi Lines), tucked into a quiet, more residential stretch of Akasaka away from the nightlife strip. The shop sells the full product range and typically opens around 9:00 and closes by 18:00, though hours shift around New Year and can vary by season, so it’s worth confirming the day you plan to go. Attached to the store is the small, free Toraya Gallery, which rotates exhibits on wagashi history, tools, and Imperial-era documents — a 15-20 minute stop, not a full museum visit.

    Toraya Kyoto (Gosho honten): near the Kyoto Imperial Palace (Kyoto Gosho), on Karasuma-dori close to Ichijo. This is the shop closest to Toraya’s actual origins, and it’s a reasonable add-on if you’re already walking the palace grounds.

    TORAYA CAFE and AN STAND: Toraya also runs more casual, modern offshoots — TORAYA CAFE locations (such as in Tokyo Midtown and Omotesando) serve matcha-and-wagashi sets for roughly ¥1,200-1,500, while the AN STAND concept sells anko-based snacks like anko toast or anko soft-serve for about ¥500-800. These are a good lower-commitment way to try the flavor without buying a full box, especially if you’re not sure wagashi is for you yet.

    What to Buy, and What It Costs

    • Classic yokan bar (single serving): around ¥400-450. This is the easiest entry point and the best souvenir — more on why below.
    • Mini yokan assortment box (5 pieces): roughly ¥1,600-2,200. Good for sharing or for bringing home multiple flavors at once.
    • Gift boxes (mixed yokan, dorayaki, monaka): ¥3,000-10,000+ depending on size — this is the standard “bring something back for the office” tier.
    • Dorayaki: about ¥260-320 each, best eaten within a couple of days.
    • Seasonal nerikiri (fresh, hand-shaped sweets): roughly ¥500-600 each, sold individually or in small boxes. These are the most beautiful items in the shop and the most fragile — they’re a same-day or next-day treat, not a souvenir.
    • Splurge option: large formal gift sets in wooden presentation boxes, sometimes ¥10,000 and up, aimed at the Japanese tradition of omiyage for a boss or in-law, not casual self-buying.

    The single most useful thing to know before you buy: Toraya’s sealed, firm-set yokan (the kind sold in individually wrapped bars or wooden boxes, not the fresh nerikiri) is shelf-stable and doesn’t need refrigeration — some varieties keep for close to a year unopened. That makes it one of the rare Japanese sweets that genuinely survives a long flight and weeks in a suitcase, which is why it’s been a standard diplomatic and Imperial gift for centuries. Fresh nerikiri, by contrast, is meant to be eaten within a day or two and will not travel well at all.

    Best Season and Timing

    Toraya changes its nerikiri lineup roughly monthly to match the 24 micro-seasons of the traditional Japanese calendar — cherry blossom motifs in spring, cool water and ayu-fish shapes in summer, chestnut and maple leaves in autumn, plum blossoms in winter. If a specific seasonal design matters to you, check that it’s currently in rotation before building a trip around it, since last month’s shape won’t be sitting in the case. For the shelf-stable yokan and gift boxes, timing barely matters — they’re sold year-round. New Year’s week is worth avoiding for store visits generally, as hours shrink and lines for seasonal gift boxes build up domestically.

    Common Mistakes

    • Buying fresh nerikiri as a take-home souvenir. It looks like the showpiece item, but it’s a same-day food. Buy it to eat in Japan; buy sealed yokan to take home.
    • Confusing this Toraya with unrelated businesses of the same name. There are other shops and restaurants in Japan called “Toraya” (including at least one well-known ramen/gyoza chain) that have no connection to the wagashi maker — double-check you’re at 虎屋, the confectioner, if you’re navigating by name alone rather than address.
    • Assuming it’s duty-free or needs special customs handling. It doesn’t — it’s a normal packaged food souvenir. If you’re stocking up on several boxes along with other Japanese snacks and goods, it’s worth skimming what you can actually bring back under your home country’s duty-free allowance before you over-buy.
    • Treating the Akasaka store as a quick grab-and-go. It’s a quiet, formal shop, closer in feel to a jeweler than a convenience store — budget a little time to look at the gallery and ask staff about current seasonal flavors rather than rushing in and out.

    If you’re building out a broader list of traditional, well-made Japanese things to bring home rather than mass-produced souvenirs, Toraya’s yokan pairs naturally with other small-format collectibles like hashioki chopstick rests — both are inexpensive enough to buy several, both hold up in a suitcase, and both give a Japanese host or dinner-table gift a little more weight than a keychain.

  • Ozoni: Japan’s Regional New Year’s Mochi Soup and How It Differs by Region

    Ozoni: Japan’s Regional New Year’s Mochi Soup and How It Differs by Region

    Photo by Seiya Maeda on Unsplash

    If you’re in Japan over New Year’s and a host offers you a bowl of soup with a piece of mochi floating in it, you’ve just been handed ozoni (お雑煮) — the dish nearly every Japanese household eats on the morning of January 1st. What makes ozoni fascinating for visitors isn’t the dish itself but how differently it’s made depending on where you are: broth, mochi shape, and toppings can change completely within a few hundred kilometers. Here’s what to know if you want to try it, understand it, or even recreate it at home.

    What Ozoni Is and Why It’s Eaten at New Year’s

    Ozoni is a soup built around mochi (pounded rice cake), eaten as part of osechi ryori, the formal New Year’s meal. The custom dates back to the Muromachi period, when mochi offered to household and harvest gods during New Year’s rituals was later cooked into a soup and shared as a way of receiving that blessing for the coming year. Because the dish evolved independently in farming and fishing communities across the country, there was never a single “correct” recipe — just local ingredients and local dashi traditions layered onto the same basic idea of rice cake plus broth.

    Families typically eat ozoni on January 1st, and often continue through January 3rd (the sanganichi, the main three-day New Year’s holiday), sometimes up to January 7th in regions that observe matsu-no-uchi, the traditional end of New Year’s decorations.

    The Great Divide: Clear Broth vs. White Miso

    The most useful mental map for ozoni is the old Kanto/Kansai split:

    • Tokyo and eastern Japan (Kanto): a clear, soy-seasoned dashi broth called sumashijiru, made with katsuobushi (bonito) stock. The mochi is kiri mochi — cut into squares — and lightly grilled before going into the bowl, which gives it a faint char and keeps it from dissolving. Chicken, kamaboko fish cake, mitsuba (Japanese parsley), and spinach or komatsuna round it out.
    • Kyoto, Osaka, and much of western Japan (Kansai): a white miso (shiro miso) broth that’s noticeably sweeter and thicker than Kanto’s. The mochi here is round (marumochi) and simply boiled until soft rather than grilled. Daikon and taro (satoimo) are cut into rounds too — a deliberate pun on “roundness” meaning harmony for the year ahead.

    If you only remember one thing, remember this: clear and square in the east, white-miso and round in the west. Everything else is a regional variation on that theme.

    Six Regional Variations Worth Knowing

    Travel outside the two big metro areas and ozoni gets genuinely surprising:

    • Kagawa Prefecture (Shikoku): an anmochi version — mochi filled with sweet red bean paste — dropped into a white miso broth. The combination of sweet filling and savory miso is deliberately startling and is one of the most talked-about regional ozoni among Japanese people themselves.
    • Hiroshima: a clear broth ozoni with fresh oysters added, reflecting the region’s oyster farming industry in the Seto Inland Sea.
    • Niigata and parts of Tohoku: salmon and salmon roe (ikura) go into a soy-based clear broth — a nod to the salmon runs of the region’s rivers.
    • Tottori: a sweet azuki bean version closer to zenzai, with whole red beans simmered into the broth around the mochi rather than a savory stock.
    • Iwate: mochi is often served separately with kurumi-dare, a sweet walnut dipping sauce, alongside a lighter broth.
    • Nara: starts as a white miso ozoni, but diners are expected to lift the mochi out of the broth, dip it in kinako (roasted soybean flour) and sugar, and eat it that way — a two-stage dish rather than a straightforward soup.

    Several of these regional dishes sit alongside other distinctly local comfort foods worth seeking out on the same trip — if you’re curious about regional variation in everyday Japanese cooking more broadly, takikomi gohan follows a similar pattern of “same dish, different ingredients by prefecture.”

    When and Where Visitors Can Actually Try It

    Ozoni is a seasonal dish in the truest sense — outside the New Year’s window it essentially disappears from restaurant menus, so timing matters more than for almost any other dish covered on this site.

    • Ryokan and hotel New Year’s breakfasts: if you’re staying at a ryokan or traditional hotel on the night of December 31st into January 1st, ask whether a New Year’s breakfast (osechi or ozoni set) is offered. Many ryokan include it automatically for guests staying through ganjitsu (New Year’s Day); others offer it as an add-on for roughly ¥2,000–¥5,000 per person.
    • Department store food halls (depachika): from mid-to-late December, basement food floors at stores like Isetan Shinjuku, Daimaru, and Takashimaya sell takeout osechi boxes that include mochi and sometimes a ready-to-heat ozoni broth packet, typically ¥10,000–¥30,000 for a full osechi set depending on size and how many people it serves.
    • Supermarkets and convenience stores: in the days around New Year’s, chains sell individual kiri mochi packs (around ¥300–¥600 for a tray of 8–12 pieces) and instant ozoni broth sachets, which is the easiest way for a visitor with access to a kitchen to try making a bowl themselves.

    Year-round, your best bet for tasting a specific regional style is a restaurant specializing in that region’s home cooking (izakaya chains built around Kyoto, Shikoku, or Tohoku cuisine sometimes keep a version on the menu outside New Year’s), but don’t expect to find it on a generic restaurant menu in July.

    Buying Ozoni Ingredients to Bring Home

    If you want to recreate ozoni after your trip, the shopping list travels well: vacuum-sealed kiri mochi or marumochi (sold shelf-stable, no refrigeration needed until opened), a tub of white miso paste if you want the Kansai style, and a pack of katsuobushi or dashi powder. Nishiki Market in Kyoto and Kuromon Ichiba in Osaka both sell high-quality miso and dashi aimed at home cooks, often in smaller, suitcase-friendly packaging than supermarket versions. Before you buy in bulk, check what’s actually allowed through customs when you land — Japan’s duty-free allowance guide covers the practical limits on food items so you don’t lose anything at the airport.

    Common Mistakes Visitors Make

    • Confusing mochi textures. Ozoni’s mochi is dense, chewy pounded rice cake, not to be confused with warabimochi, the cold, jiggly bracken-starch sweet served with kinako and syrup — they look vaguely similar in translation but are completely different dishes and seasons.
    • Assuming one recipe is “the” recipe. Asking a Kyoto local why their ozoni “isn’t real ozoni” (because you tried the Tokyo version first) is a reliable way to start a good-natured but long conversation about regional pride.
    • Underestimating the mochi. Pounded mochi is notoriously sticky and has caused choking deaths in Japan, especially among the elderly, which is why NHK and city governments issue public reminders every New Year’s to cut mochi small and chew thoroughly. Take smaller bites than you think you need to.
    • Expecting it outside the season. Unlike other heritage dishes that have specialty restaurants open all year, ozoni’s availability is genuinely tied to the New Year’s calendar — plan your trip timing around late December through early January if trying it is a priority.

    Ozoni rewards curiosity more than most Japanese dishes precisely because there’s no “authentic” version to chase — the differences themselves are the point. If you’re traveling during New Year’s week, asking a ryokan host or homestay family how their family makes it is often the most direct way into a conversation about where they’re from.