Japan Trove

Category: Uncategorized

  • Mont Blanc (Monburan): Japan’s Chestnut Cream Dessert Obsession and Where to Try It

    Mont Blanc (Monburan): Japan’s Chestnut Cream Dessert Obsession and Where to Try It

    Photo by Aashray Dutta on Unsplash

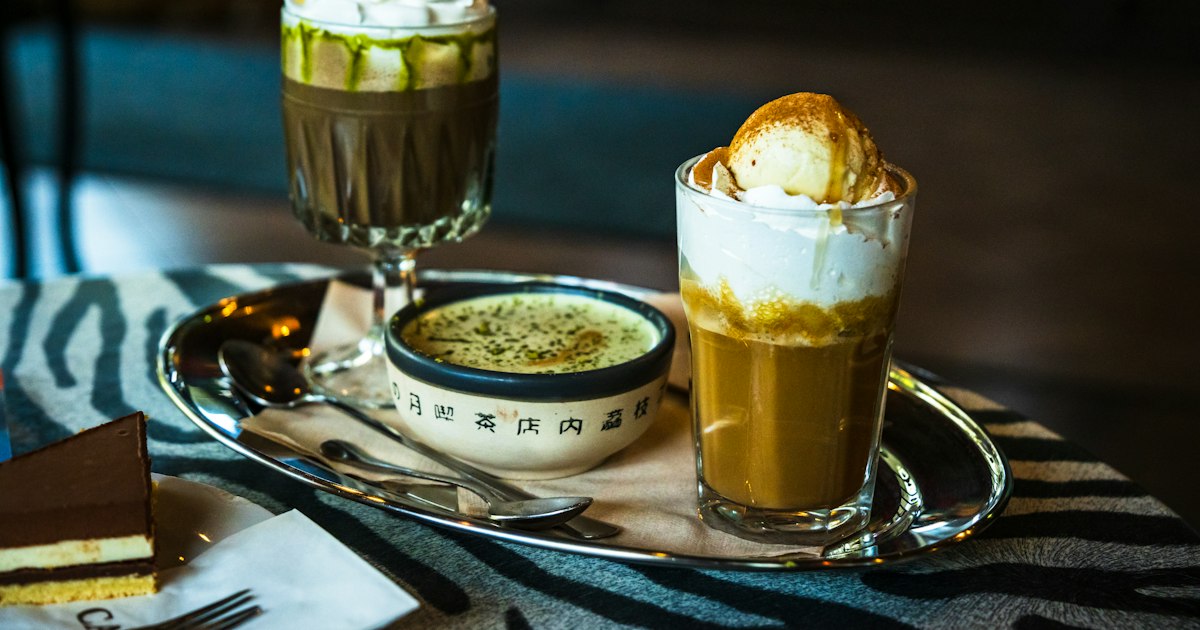
    Walk into almost any Tokyo café, convenience store, or department store basement between September and November, and you’ll see it: a swirl of pale golden or deep brown vermicelli-thin cream piled over a hidden dome of meringue and sponge, often crowned with a single glazed chestnut. This is monburan — Japan’s version of the Mont Blanc — and it’s less a dessert trend than a full-blown seasonal ritual. Here’s what it actually is, why Japan takes it so seriously, and where to eat the best versions without wasting a trip.

    What Exactly Is a Mont Blanc?

    The Mont Blanc dessert takes its name from the Alpine peak, and the classic French version — sweet chestnut purée (crème de marrons) piped over meringue and whipped cream — is usually a deep brown, meant to evoke the mountain’s rocky, snow-capped silhouette. Japan’s take diverges in one striking way: many of the country’s most famous versions use pale yellow chestnut cream instead of brown. That’s because Japanese confectioners historically worked with domestic chestnuts (kuri) rather than imported marrons, and the natural color of that cream, combined with less added cocoa or caramel, comes out golden rather than chocolate-brown. If you grew up expecting a brown dessert, the yellow Japanese original can be a genuine surprise — and it’s the whole reason this dessert deserves its own entry rather than being filed under “generic French pastry.”

    Why Japan Is Obsessed With Mont Blanc

    Japan has a deep cultural attachment to kuri as a seasonal autumn ingredient, on par with how it treats cherry blossoms in spring or fresh bonito in early summer. Chestnuts show up in rice dishes, in traditional sweets, and above all in Mont Blanc, which has become the unofficial flagship dessert of aki no aji (“the taste of autumn”). Convenience store chains, Starbucks Japan, hotel patisseries, and neighborhood kissaten all release limited-time Mont Blanc items the moment chestnut harvest begins, and social media amplifies it further: a genre of “squeeze-style” Mont Blanc, where chestnut cream is piped fresh onto your plate at the table in thin, noodle-like strands, has turned the dessert into a photogenic event rather than just a cake slice. If you like seasonal, limited-run Japanese food culture, this sits in the same category as autumn foliage viewing — timing really matters.

    Where It All Began: Jiyugaoka’s Original Montblanc

    Most food historians trace Japan’s Mont Blanc craze to a specific shop: Montblanc, a confectionery near Jiyugaoka Station in Tokyo that opened in 1933 and is widely credited with inventing the yellow chestnut-cream style that later spread nationwide. The shop sits a short walk from Jiyugaoka Station’s south exit, reachable in about 20 minutes from Shibuya on the Tokyu Toyoko Line (roughly ¥280 one-way) or via the Tokyu Oimachi Line. It still sells its signature cake — a dome of yellow chestnut vermicelli over meringue and sponge, topped with a whole glazed chestnut — as both a café-style slice and a takeaway box. A single slice typically runs in the ¥700–900 range, in line with most sit-down desserts at Tokyo kissaten. Expect a line on autumn weekends; this is as close to a pilgrimage site as a dessert shop gets in Japan.

    Best Season and Timing to Try It

    Fresh Japanese chestnuts are harvested from roughly early September through November, and that window is when the best, freshest-tasting Mont Blanc appears — many serious shops use fresh seasonal kuri paste only during these months, switching to frozen or canned chestnut purée the rest of the year. If your trip falls in that window, prioritize it the way you would prioritize peak autumn leaves; shops sell out of daily batches, and seasonal flavors (chestnut-matcha, chestnut-black sugar, whole roasted chestnut toppings) rotate weekly. If you’re visiting outside autumn, you can still find year-round Mont Blanc at specialty cafés and department stores, but don’t expect the same depth of flavor. Travelers combining a Mont Blanc stop with autumn leaf-viewing near Nagoya might pair it with a visit to Korankei Gorge, since both hit their peak in the same November window.

    Budget, Mid-Range, and Splurge Options

    • Budget (¥250–500): Seasonal Mont Blanc items at convenience stores (Lawson, 7-Eleven, FamilyMart all run autumn chestnut lineups) and Starbucks Japan’s autumn chestnut Frappuccino or slice. Quality is inconsistent but it’s an easy way to sample the flavor between sightseeing stops.
    • Mid-range (¥600–1,200): A café slice at a kissaten or patisserie, including the original Jiyugaoka Montblanc. This is where most visitors should aim — proper meringue-and-sponge construction, real chestnut cream, served with coffee or hojicha.
    • Splurge (¥900–1,800+): Table-side “squeeze-style” Mont Blanc, where a server presses warm chestnut paste through a mesh press directly onto your plate over ice cream or sponge. These shops cluster in areas like Jiyugaoka and Omotesando and often require a short wait even with a queue number system. Also in this tier: whole Mont Blanc cakes from department store food halls (depachika), typically ¥2,500–4,000 for a 12cm cake meant for sharing or gifting.

    If you want to go deeper into chestnut culture specifically, Obuse in Nagano Prefecture is Japan’s best-known chestnut town, with multiple long-established confectioners selling chestnut yokan and marron-based sweets — a worthwhile detour if you’re already heading toward Nagano in autumn.

    Common Mistakes to Avoid

    • Expecting brown cream everywhere. Both yellow (Japanese-style, kuri) and brown (French-style, marron) versions are common; they’re not interchangeable, and menus rarely explain the difference, so ask or look at the photo before ordering if you have a preference.
    • Visiting in summer expecting peak flavor. Many shops are running on frozen or canned chestnut paste outside the September–November window; the dessert is edible year-round but noticeably better in autumn.
    • Underestimating weekend crowds at famous shops. The Jiyugaoka original and well-known squeeze-style cafés can have real waits on autumn weekends — go on a weekday morning if you can.
    • Confusing search terms. Searching “Mont Blanc Japan” online turns up as many results for the pen brand and mountaineering tours as for the dessert — search “monburan” or “chestnut Mont Blanc dessert” for better results.

    Bringing the Flavor Home

    Fresh cream Mont Blanc cakes won’t survive a flight, but several shelf-stable chestnut products travel well as souvenirs: canned or jarred chestnut paste (kuri an or marron cream), chestnut yokan, and individually wrapped chestnut mochi or monaka are sold at depachika food halls and souvenir shops near major stations. If you’re stocking up on these alongside other Japanese sweets like warabimochi, check quantities and declaration rules before you pack your suitcase — the basics are covered in our guide to Japan’s duty-free allowance coming home, which also explains what counts toward your personal exemption at customs.
  • Tsukemen: Japan’s Dipping Ramen and Where to Try It

    Tsukemen: Japan’s Dipping Ramen and Where to Try It

    Photo by Mario Verduzco on Unsplash

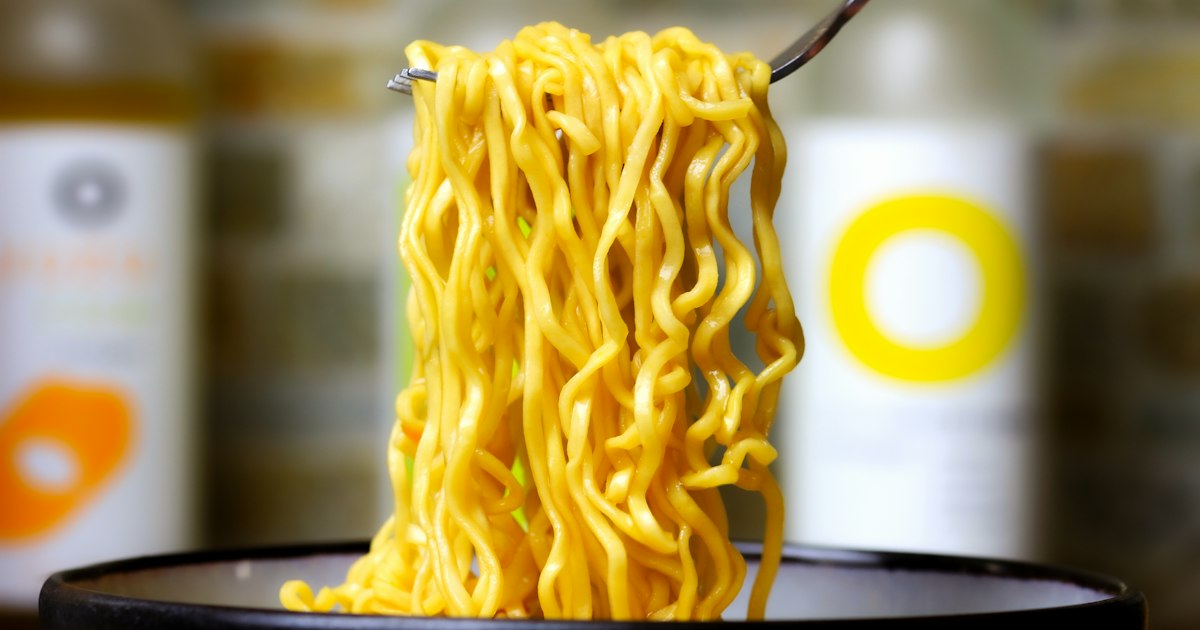
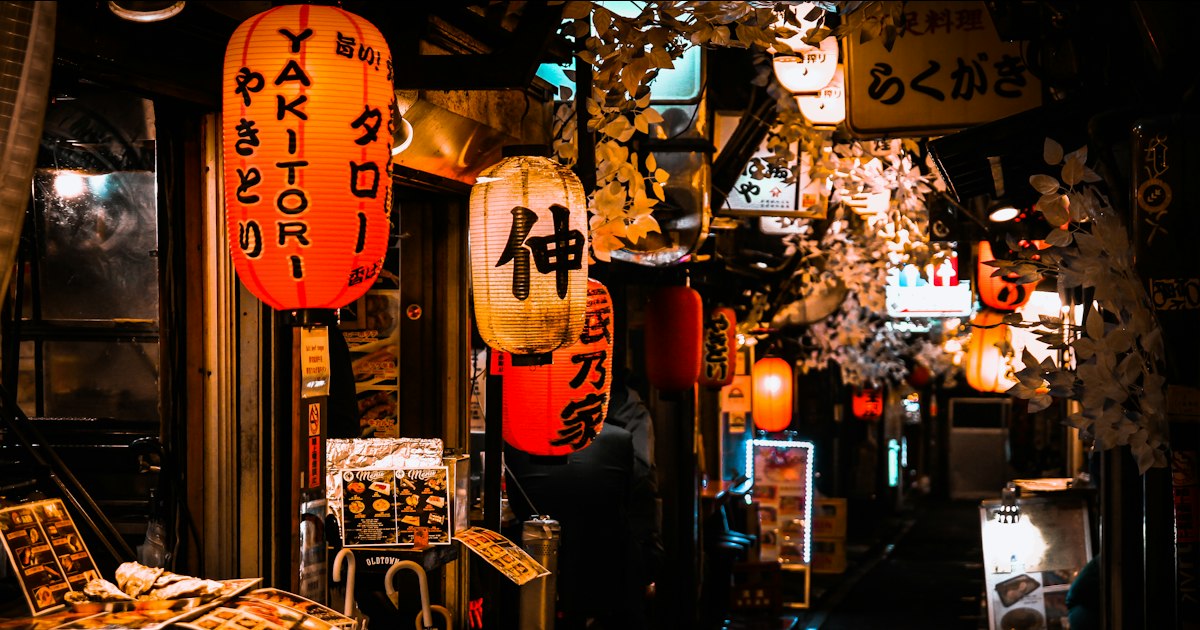
    Order ramen in Japan and you’ll get a steaming bowl of noodles swimming in broth. Order tsukemen (つけ麺) and you’ll get something stranger-looking: a plate of cold or room-temperature noodles next to a small, intensely concentrated bowl of dipping sauce. New arrivals often assume something’s gone wrong with the order. Nothing has — this is one of Tokyo’s most distinctive noodle inventions, and once you know how to eat it, it’s one of the most satisfying bowls in the country.

    What Tsukemen Actually Is

    Tsukemen separates the two components of ramen that are normally combined. The noodles — thick, chewy, and usually served chilled or at room temperature to keep their bite — sit on one plate. The broth sits in a separate bowl, reduced down until it’s thick, salty, and far more intense than a normal ramen soup, since it’s not meant to be drunk on its own. You pick up a clump of noodles with your chopsticks, dunk it into the dipping bowl, and eat it directly from there.

    The dish is credited to Kazuo Yamagishi, a cook at Taishoken in Higashi-Ikebukuro, Tokyo, who started serving noodles this way around 1961 and became known as the “god of tsukemen” before his death in 2015. His original shop closed in 2007, but several of his former apprentices still run Taishoken-lineage shops around Tokyo using close variations of his recipe, so the dish’s history is still very much tasteable today.

    How to Eat It Without Looking Lost

    There’s no elaborate ritual here, but a few habits separate a good bowl from a disappointing one:

    • Dip, don’t dunk and hold. Lower a small bundle of noodles into the sauce, swirl briefly, and eat. The sauce is concentrated to coat quickly — leaving noodles submerged makes them oversalted.
    • Eat at a steady pace. Because the noodles start at room temperature, they clump and lose texture faster than hot ramen noodles do. Tsukemen rewards eating briskly rather than lingering over conversation.
    • Ask for “wari soup” at the end. When you’ve finished the noodles, you’ll have a small pool of thick, almost paste-like broth left. Most shops will top this up with hot dashi or soup stock if you ask for “sūpu-wari” (スープ割り) — it dilutes the concentrate into a drinkable soup so nothing goes to waste. Some shops do this automatically; at others you need to ask the staff or press a button at the counter.
    • Toppings go in the dipping bowl, not the noodle plate, if you want them to pick up flavor — chashu pork, menma bamboo shoots, and ajitama (seasoned soft-boiled egg) are common.

    Where to Try It in Tokyo

    Tsukemen is a Tokyo specialty more than a nationwide one, and the city’s best-known shops cluster around a few neighborhoods.

    Budget / classic: Taishoken’s disciple shops, including the one in Higashi-Ikebukuro that carries on the original name, serve a straightforward pork-and-dashi tsukemen for roughly ¥900–1,100. Expect a short counter, cash or IC card payment, and a line that moves fast — these are quick, no-frills meals, not sit-down dining.

    Mid-range, destination-worthy: Rokurinsha, inside Tokyo Station’s “Ramen Street” basement arcade (Yaesu side, near the Tokyo subway exits), is the shop most visitors end up at simply because it’s inside the station and heavily thick-noodled with a rich pork-and-seafood dip. A regular bowl runs about ¥1,100–1,300. Fuunji in Shinjuku, a few minutes’ walk from the south exit of Shinjuku Station, is known for a niboshi (dried sardine) based dipping sauce with a sharper, more mineral flavor — expect to queue, especially at lunch, for a bowl around ¥1,000–1,200.

    Splurge: True high-end tsukemen is rare since the dish is built around casual, fast dining, but some shops offer premium versions with double-fish-stock broths, wagyu chashu, or truffle oil finishes in the ¥1,800–2,500 range. These are the exception rather than the rule — most of the best bowls in Tokyo still cost under ¥1,300.

    Both Tokyo Station and Shinjuku Station locations are easy to reach without a taxi: Tokyo Station is on the JR Yamanote, Chuo, and Shinkansen lines, and Rokurinsha is signposted inside the station’s underground mall. Fuunji is a five-minute walk from Shinjuku Station’s South Exit, which is served by JR, Odakyu, Keio, and several subway lines.

    Best Time to Go

    Tsukemen has no strict season, but it’s genuinely popular in summer — the noodles aren’t served scalding hot, and some shops offer a fully chilled “hiyashi tsukemen” version that’s more refreshing than a bowl of hot ramen on a humid Tokyo afternoon. For lines, the pattern is predictable at any time of year: arrive right at opening (many shops open around 11:00) or after 14:00 to avoid the worst of the lunch crowd, and again after 20:30 for dinner. Popular spots like Fuunji and Rokurinsha can have 20–30 minute waits during peak lunch hours (12:00–13:00) on weekdays and most of the afternoon on weekends.

    Common Mistakes Visitors Make

    • Trying to drink the dipping sauce straight. It’s deliberately oversalted and reduced — it’s meant to coat noodles, not be sipped on its own until it’s been diluted with wari-soup.
    • Letting the bowl sit while taking photos. Tsukemen looks great on camera, but the noodles start degrading in texture within a few minutes. Take your shot quickly.
    • Confusing the ordering style with Ramen Jiro’s. Tsukemen shops are generally relaxed about customization and don’t have the elaborate unwritten rules you’ll find at Ramen Jiro — you won’t be expected to call out toppings in a specific sequence, though some shops do use vending-machine ticket systems, so have coins or an IC card ready.
    • Assuming it’s interchangeable with regular ramen. If you’re hoping for a hot, sippable soup, order ramen instead — tsukemen is a different eating experience by design, not a variation on the same theme.

    If You Want to Go Deeper on Japanese Noodles

    Tsukemen sits at one end of Japan’s noodle spectrum — dense, wheat-based, and broth-forward. For contrast, Okinawa soba uses a completely different noodle and pork-based broth tradition from the southern islands, while travelers interested in how noodles are actually made by hand can look into soba-making classes offered in several cities, which give a hands-on feel for the techniques behind Japan’s noodle culture more broadly.

    Tsukemen rewards a little homework before you sit down, but none of it is complicated: know that the sauce is for dipping, eat before the noodles cool and clump, and ask for wari-soup at the end. Do that, and a ¥1,000 bowl in a Tokyo Station basement arcade or a Shinjuku side street becomes one of the most memorable meals of the trip.

  • Yahoo! Auctions Japan (Yahuoku): A Buyer’s Guide for Overseas Shoppers

    Yahoo! Auctions Japan (Yahuoku): A Buyer’s Guide for Overseas Shoppers

    Photo by Pema G. Lama on Unsplash

    Yahoo! Auctions Japan — known locally as Yahuoku — is the largest secondhand marketplace in the country, dwarfing anything comparable for sheer volume: vintage film cameras, retired anime cels, Showa-era pottery, deadstock streetwear, farm tools, kimono, and literally millions of other items pass through it every week. The catch is that Yahuoku was built for domestic use, requires a Japanese bank account and phone number to register, and most sellers won’t ship overseas even if you could bid directly. This guide explains how foreign shoppers actually use it, what it costs, and where the pitfalls are.

    What Is Yahoo! Auctions Japan, and Why You Need a Proxy Service

    Yahuoku works much like eBay did in its early days: timed auctions, some with a Buy It Now (即決, “sokketsu”) price, listed by individual sellers and small resale shops rather than large storefronts. Prices skew low because the buyer pool is almost entirely domestic — a mint-condition 1980s Nikon FM2 body that would fetch $300+ on a Western resale site might close for ¥15,000–¥25,000 here, simply because there’s less international competition.

    Because account verification requires a Japanese Yahoo! ID, a domestic credit card or bank account, and a local address for billing, overseas buyers go through a proxy bidding service instead. These companies hold a Japanese account on your behalf, bid or buy for you, receive the item at their warehouse, and then consolidate and forward it internationally. The three most established are Buyee, ZenMarket, and FromJapan.

    Setting Up: Buyee, ZenMarket, and FromJapan Compared

    All three operate on a similar model: you browse Yahuoku (Buyee even mirrors the listings in English on its own site), place a bid or request a purchase, they execute it in yen, and you pay them in your own currency plus fees. Rough fee structure to budget for:

    • Buyee — roughly 5% of the winning bid as a service fee (minimum around ¥300), plus a separate payment handling fee (around 600 yen or so) and warehouse storage that’s free for the first 14–30 days depending on the plan.
    • ZenMarket — similar commission structure, often around 300–500 yen flat per cheap item or a percentage on higher-value ones, with its own consolidation warehouse.
    • FromJapan — comparable fees, and historically a bit more flexible about negotiating with sellers on your behalf (useful for items listed with ambiguous shipping terms).

    None of these fees are trivial on a ¥1,000 item, so proxy buying works best when the item itself is worth at least ¥3,000–¥5,000 — otherwise the service fee and international shipping can exceed the purchase price.

    How Bidding Actually Works (Timing, Sniping, and Buy-It-Now)

    Most Yahuoku auctions run for a fixed window — commonly 1, 3, or 7 days — and almost all end at a specific minute set by the seller, frequently in the late evening (21:00–23:59 Japan Standard Time) since that’s when Japanese bidders are online. If you’re bidding from the US or Europe, this means your auction will often close in your early morning hours.

    Two practical strategies:

    • Use the proxy service’s automatic bidding tool. Buyee, ZenMarket, and FromJapan all let you set a maximum bid in advance; their system bids incrementally for you up to that ceiling, including in the final seconds, so you don’t need to be awake for the close.
    • Watch for 即決 (Buy It Now) prices. Many listings offer a fixed “instant win” price alongside the auction. If the item is uncommon or you don’t want to risk losing a bidding war at 2am your time, paying the sokketsu price is often worth the premium.

    Sniping — bidding in the last 10–20 seconds — is common practice among Japanese users too, so don’t assume a quiet auction will stay cheap; prices frequently jump in the closing minute.

    What’s Worth Buying on Yahuoku

    Yahuoku shines for categories where Japan has deep domestic secondhand supply but Western resale markets are thin: film and digital cameras, retro video games and consoles, kimono and obi, tea ceremony utensils, vintage watches, model trains, and band/idol merchandise. It’s also a genuinely good source for streetwear — if you’re already familiar with labels covered in our guide to BAPE, Neighborhood & Human Made, you’ll find discontinued collaborations and sizes that sold out in-store years ago, often at a fraction of resale-site prices.

    Clothing and footwear need extra care, though, since Japanese sizing runs differently from US/UK/EU standards and sellers list only the Japanese size on the tag — cross-check against our clothing and shoe size conversion guide before bidding, because proxy services generally won’t accept returns for sizing mistakes.

    Common Mistakes First-Time Buyers Make

    • Ignoring the condition grading. Japanese sellers use a fairly standardized shorthand (未使用 = unused, 中古 = used, ジャンク = junk/for-parts) — “ジャンク” items are sold explicitly as non-functional or untested, and beginners sometimes win these thinking “junk” just means “used.”
    • Missing the shipping terms in the listing. Some sellers specify they’ll only ship via a method with no tracking, or that the item is a local pickup-only (手渡し) listing — your proxy service can’t bid on those at all.
    • Underestimating total cost. Winning bid + proxy service fee + domestic shipping to the warehouse + international shipping + possible import duty can roughly double a cheap item’s price. Always check the estimated total before confirming.
    • Not reading seller feedback. Like eBay, sellers have a rating score and review history visible on the listing — a seller with very few completed transactions or several complaints about non-disclosed damage is a signal to skip.

    Shipping, Customs, and Final Costs

    Once your proxy service receives the item, you’ll choose a forwarding method — EMS (fastest, with tracking, pricier), FedEx/DHL, or cheaper surface/economy air options that can take 2–4 weeks. Large or fragile items (ceramics, framed art, furniture-sized pieces) cost significantly more to ship and may need extra packing fees — the same logistics challenge you’d face buying something bulky like a washlet toilet seat to ship home: always get a shipping quote for the specific box weight and dimensions before you commit to bidding on anything oversized.

    Consolidating multiple wins into a single shipment (most proxy services let you hold items in their warehouse for 2–4 weeks for free, then combine them) is the single best way to cut per-item shipping cost. Your home country’s import duty and tax thresholds still apply on arrival, so factor that into high-value purchases like watches or cameras.

    Budget, Mid-Range, and Splurge Strategies

    If you’re trying Yahuoku for the first time on a tight budget, start with small, light, non-fragile items — pin badges, stickers, small accessories — in the ¥500–¥2,000 range to learn the process before risking more. Mid-range shoppers do well hunting specific niches, like a particular camera lens or a size-run of sneakers, in the ¥5,000–¥20,000 bracket where Yahuoku’s pricing advantage over Western resale is largest. For a splurge, vintage kimono sets, high-end film cameras, or complete vintage toy collections can run ¥30,000+ but still often undercut equivalent Western auction prices by half or more — just budget extra for careful, insured shipping.

    If timed auctions and shipping logistics feel like more hassle than you want on a short trip, remember Japan’s physical secondhand markets are just as rewarding in person — Tokyo’s Setagaya Boro-Ichi antique and flea market is a great example of the same hunting-for-treasure experience without the proxy fees or the wait.

  • Shimamura: Japan’s Budget Family Clothing Chain and What to Buy

    Shimamura: Japan’s Budget Family Clothing Chain and What to Buy

    Photo by Kelvin Zyteng on Unsplash

    If Uniqlo is the brand foreign visitors already know, Shimamura (しまむら) is the one locals actually stretch their yen with. It’s a no-frills, suburban clothing chain with over 2,000 stores across Japan, and while it rarely shows up on tourist itineraries, it’s where a huge number of Japanese families buy everyday basics, kids’ clothes, and seasonal items at prices that undercut almost everything else in the mall. If you’re trying to stretch a travel budget or just want to see how ordinary Japanese households actually shop, Shimamura is worth an hour of your time.

    What Shimamura Actually Is

    Shimamura is a publicly listed Japanese apparel retailer founded in Saitama, selling its own private-label clothing alongside licensed character collaborations (Disney, Sanrio, San-X) and the occasional designer tie-up. Unlike Uniqlo, it doesn’t do minimalist basics as its main identity — think more “practical family wardrobe”: T-shirts, fleece, pajamas, socks, underwear, kids’ uniforms-adjacent items, work clothes, and a surprisingly deep home goods and bedding corner. Stores are almost always standalone roadside shops or part of suburban strip malls, not inside train station buildings, which is the main reason tourists miss them.

    Prices are the whole point. T-shirts commonly run ¥990–¥1,500, kids’ items start around ¥500–¥800, socks are often 2–3 pairs for ¥500, and outerwear like fleece jackets or light coats lands in the ¥1,500–¥3,000 range. Even their seasonal outerwear tops out well under ¥5,000 in most cases. Compare that to Uniqlo’s ¥2,990–¥6,990 range for similar categories, and you can see why Shimamura has a loyal following among budget-conscious families and retirees.

    What’s Actually Worth Buying

    Not everything at Shimamura is a great souvenir — a lot of it is generic basics you can get anywhere. But a few categories stand out for visitors:

    • Character collaboration items — Shimamura regularly runs limited collabs with Sanrio (Hello Kitty, Cinnamoroll), San-X (Sumikko Gurashi), and sometimes anime franchises. These show up as T-shirts, room wear, socks, and tote bags, usually ¥1,000–¥2,500, and sell out or rotate quickly, so they have a bit of collector appeal.
    • Room wear and pajamas — Fleece pajama sets and loungewear are genuinely well-made for the price (often ¥1,500–¥2,500 for a set) and make easy, packable gifts.
    • Kids’ clothing — If you’re traveling with children or shopping for family back home, this is Shimamura’s strongest category. Sizes run small and prices are low enough that it doesn’t hurt to buy items your kids will outgrow in a season.
    • Socks, tights, and base layers — Boring but useful. Heat-retention innerwear (similar in concept to Uniqlo’s HEATTECH) appears under Shimamura’s own private labels in winter and is noticeably cheaper.
    • Seasonal outerwear — Light rain jackets and windbreakers in spring, fleece and padded coats in winter, both well below department store prices.

    Skip the going-out fashion basics and trend items — quality and cut are inconsistent, and that’s not what the brand is optimized for.

    Sizing: The Biggest Catch for Visitors

    Shimamura runs small, even by Japanese standards, and sizing is almost entirely in Japanese labeling (S/M/L or numeric cm measurements) with little to no English signage or staff support. Unlike Uniqlo, Shimamura doesn’t do much business outside Japan and isn’t set up for international shoppers, so there’s no English app or size-matching tool to lean on. If you’re above an average Japanese L, try before you buy — fitting rooms exist in every store. It’s worth reading through our Japanese clothing and shoe size conversion guide before you go, since the gap between Japanese and US/EU/UK sizing catches a lot of visitors off guard, and Shimamura’s cut tends to run even slimmer than mainstream brands.

    Finding a Store and Getting There

    This is the main logistical hurdle: Shimamura stores are almost never in central tourist districts. They cluster in suburban retail areas, often near a supermarket or drugstore, and are built for car access with their own parking lots. The upside is that nearly every mid-size Japanese city and many suburban train stations have one within a short bus or taxi ride.

    Practical ways to find one:

    • Search “しまむら” (Shimamura) on Google Maps or Apple Maps near your hotel — the Japanese name returns far more accurate results than the English spelling.
    • Look in suburban shopping areas around regional train stations rather than downtown shopping streets.
    • If you’re relying on local transit to reach a suburban location, our guide to riding local buses in Japan explains flat-fare boarding, which is often the easiest way to reach a roadside Shimamura that isn’t walkable from the station.
    • In flatter suburban areas, a shared e-scooter can also work for short hops from the station — see our LUUP guide for how tourists can use it legally.

    Hours, Payment, and Shopping Logistics

    Most Shimamura locations open around 10:00 AM and close between 7:00 PM and 8:00 PM, with some suburban locations closing slightly earlier. There’s no 24-hour format like convenience stores, and hours can vary by location, so it’s worth checking Google Maps listings for the specific store before heading out, especially outside major cities.

    Shimamura accepts major credit cards and Japan’s common contactless/IC payment methods at most locations, though smaller or older stores may lean more cash-only than you’d expect from a big chain — carrying some cash is a safe backup. Tax-free shopping for tourists is not standard at Shimamura the way it is at big electronics or department stores, so don’t expect a tax-exemption counter; treat it as a cash-and-carry discount shop rather than a duty-free retailer.

    Best Time to Shop and Common Mistakes

    End-of-season clearance is where Shimamura gets genuinely cheap — late January to February for winter items and August for summer stock, with markdowns stacking on already-low prices. New seasonal and character-collab merchandise tends to land at the start of each season (early March, early June, early September, early December), so if you want first pick of a specific Sanrio or Disney collab, shop early in that window rather than waiting.

    The most common visitor mistakes: assuming it’s a tourist-friendly shop like Uniqlo or Don Quijote (it isn’t — expect no English signage and modest staff English), skipping the fitting room because “it’s just a T-shirt” (sizing runs unpredictably small across different in-house labels), and writing it off as low-quality fast fashion when the better buys are actually in home goods, sleepwear, and kids’ items rather than outerwear fashion. Treat it as a practical errand stop rather than a shopping destination, and it earns its place on a budget-conscious Japan itinerary.

  • Korankei Gorge: Aichi’s Autumn Leaves Valley Near Nagoya

    Korankei Gorge: Aichi’s Autumn Leaves Valley Near Nagoya

    Photo by Lucas Calloch on Unsplash

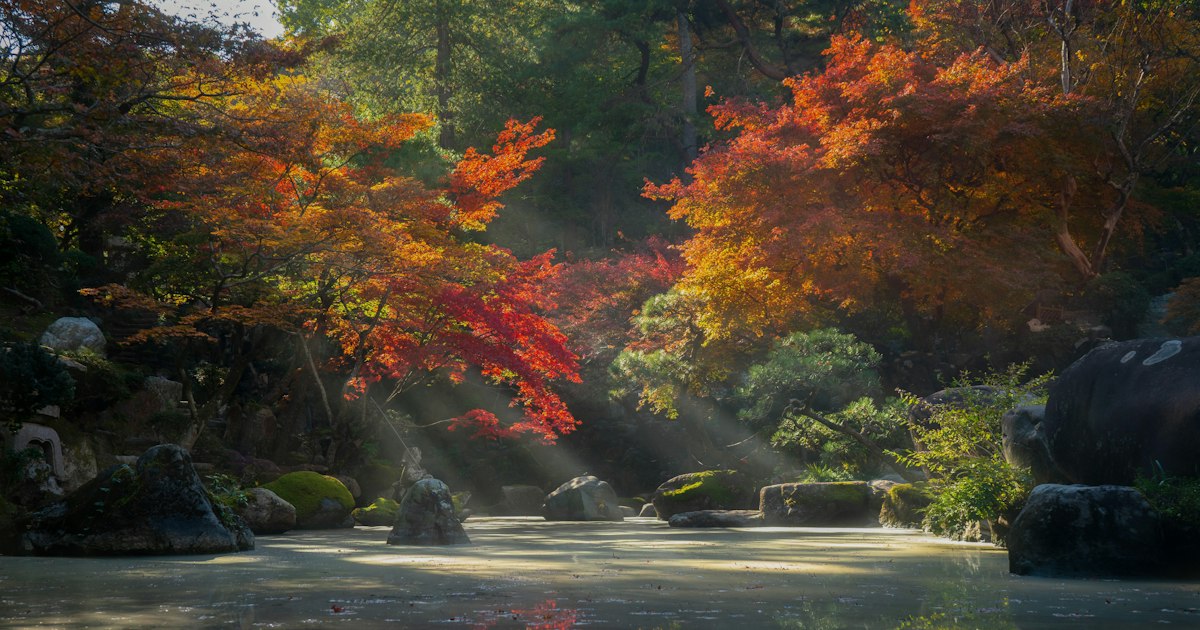
    About an hour from Nagoya Station, the Tomoe River cuts through a narrow wooded valley lined with roughly 4,000 maple trees that turn the whole gorge into a tunnel of red and gold every November. Korankei (香嵐渓) is one of the Chubu region’s best-known autumn leaf spots, yet it still flies well under the radar for foreign visitors who assume Nagoya is purely a business-and-ramen stopover between Tokyo and Kyoto. If you’re building a Japan itinerary around momiji season, this is a genuinely worthwhile detour — here’s how to time it, reach it, and not get stuck in the traffic jam that gives this valley its mixed reputation.

    Why Korankei Is Worth the Trip

    Korankei sits in the Nishi-Chibu area of Toyota City, Aichi Prefecture — yes, the same Toyota as the car company’s headquarters. The maples here were first planted in 1634 by a monk at the hillside temple Kojaku-ji, and nearly four centuries of plantings have built up a dense canopy along both banks of the Tomoe River. The signature photo is the arched Taigetsukyo bridge framed by maples, best shot from the riverbank just downstream. Behind the temple, a short climb up Mt. Iimoriyama gives you an elevated view over the whole valley if you want to escape the riverside crowds for twenty minutes.

    Unlike many famous foliage spots that charge admission, the gorge itself is free to walk at any time of day — there’s no gate, no ticket, no opening hours to work around outside of the festival period described below.

    When to Go: Peak Autumn Color Timing

    Peak color at Korankei typically falls between mid-November and the first week of December, with the absolute peak usually landing in the last ten days of November. This shifts by up to two weeks year to year depending on autumn temperatures, so don’t lock in dates more than two or three weeks out — check one of Japan’s seasonal foliage-forecast sites closer to your trip and adjust rather than trusting a date you read months in advance.

    During peak weeks, the Korankei Momiji Matsuri (Maple Festival) runs nightly illumination of the gorge, usually from around 5:30pm to 9:00pm. Seeing the maples lit up and reflected in the river is a different experience from the daytime version and worth staying for if your schedule allows — just confirm the last bus back before you commit, since return buses on festival nights can stop running earlier than you’d expect and taxis are scarce in this rural valley.

    How to Get There from Nagoya

    The standard route is: from Nagoya Station, take the Meitetsu Toyota Line to Toyotashi Station (roughly an hour, with a transfer depending on the train), then switch to a Meitetsu bus bound for Korankei (about 20–30 minutes, fare in the ¥500–600 range one-way). During the Momiji Matsuri weeks, extra direct seasonal buses sometimes run from central Nagoya — worth checking Meitetsu’s site for that year’s schedule if you’d rather skip the train transfer.

    If you’ve never ridden a Japanese local bus before, it’s worth knowing the mechanics ahead of time — boarding from the rear door, taking a ticket or tapping an IC card, and paying on exit is standard practice across the country, and our guide to riding local buses in Japan covers it in detail so you’re not fumbling at the farebox with a line of commuters behind you.

    Driving is an option outside peak weekends, but during the festival, the roads into the valley jam for hours and paid parking lots (roughly ¥1,000–1,500 per day) fill early. If you’re visiting on a Saturday or Sunday in late November, public transport is genuinely the faster option, not just the cheaper one.

    What to Do in the Gorge

    Korankei rewards a slow walk more than a checklist. Budget 2–3 hours for: crossing and photographing Taigetsukyo bridge, browsing the stalls along the main approach road, a stop at Kojaku-ji temple grounds, and the short hike up Iimoriyama if you want the overview shot. If you have a car or are willing to take a local bus onward, Obara — also within Toyota City — is known for shikizakura, a rare variety of cherry tree that blooms in autumn alongside the turning maple leaves, giving you pink blossoms and red foliage in the same frame. It’s a short add-on if you’re already out this way and have a half-day to spare.

    The adjacent town of Asuke is also worth a wander — its Edo-period merchant street (Asuke-juku) is free to explore and far quieter than the gorge itself, a good option if the main crowds feel like too much.

    Local Food: What to Eat on Site

    The food stalls lining the approach to the gorge are a big part of the visit. The local specialty is gohei mochi — grilled, slightly flattened rice cakes on a skewer, coated in a sweet-savory miso-and-walnut or sesame glaze. It’s a mountain-region snack specific to this part of Chubu, not something you’ll easily find in central Nagoya, so it’s worth trying here rather than waiting. Expect to pay roughly ¥300–400 per skewer, cash-first at most stalls. You’ll also find roasted chestnuts, grilled dango, and simple noodle stands serving kishimen (Nagoya’s flat wheat noodle) for a more substantial lunch around ¥800–1,200.

    Budget, Mid-Range, and Splurge Options

    • Budget: The gorge is free to enter at any time. Pack a snack, pay only train and bus fare (roughly ¥2,000–2,500 round trip from Nagoya), and skip the illumination to catch an earlier, less crowded bus home.
    • Mid-range: Add a gohei mochi or two, a noodle lunch, and a stroll through Asuke — figure ¥2,000–3,000 extra for food, plus parking if you’re driving outside peak weekends.
    • Splurge: Stay overnight near Sanage Onsen or another ryokan in the Toyota City area so you can see the evening illumination without racing for the last bus, then walk the gorge again the next morning before the day-trip crowds arrive. Expect ¥20,000–40,000+ per person for a ryokan stay with dinner included, but it’s the most relaxed way to experience both the night lights and a quiet morning view.

    Common Mistakes to Avoid

    • Driving in on a peak weekend. Traffic into the valley during the last two weekends of November is notoriously bad; trains and buses are far more reliable on those dates.
    • Trusting a foliage date set months in advance. Peak color shifts by up to two weeks year to year — check a current forecast within a few weeks of your trip rather than locking in a date from an old blog post.
    • Expecting English signage or card payment everywhere. This is a domestic-tourist destination at heart; food stalls especially are often cash-only, so carry yen.
    • Underestimating the round trip. Between trains, buses, and the walk through the gorge, this is realistically a half-day to full-day outing from Nagoya, not a quick stop between other sights.
    • Staying for illumination without checking the last bus. Festival-night bus schedules don’t always match the full illumination hours — confirm your return time before you settle in for the evening lights.

    If you’re building out a loop of lower-key day trips beyond the usual Tokyo–Kyoto–Osaka circuit, Korankei pairs well with other overlooked regional destinations — the canal-boat town of Yanagawa near Fukuoka or the castle town of Aizu-Wakamatsu in Fukushima follow the same formula: an hour or so outside a major hub, genuinely scenic, and far less crowded than the headline sights.

  • Aizu-Wakamatsu: Fukushima’s Samurai Castle Town and Lacquerware Shopping

    Aizu-Wakamatsu: Fukushima’s Samurai Castle Town and Lacquerware Shopping

    Photo by Rikako Matsuoka on Unsplash

    Most foreign visitors never make it to Aizu-Wakamatsu, and that’s exactly why it’s worth the detour. This inland city in western Fukushima Prefecture was the seat of the Aizu domain, one of the last strongholds of shogunate loyalists during the 1868 Boshin War, and it’s still one of the best places in Japan to see real samurai-era history without the crowds of Kyoto or Nikko. It’s also the center of Aizu-nuri, a 400-year-old lacquerware tradition that produces some of the most durable, functional lacquer goods made anywhere in the country. This guide covers how to get there, what to see, and how to shop for lacquerware without overpaying for souvenir-shelf junk.

    Getting There and When to Go

    From Tokyo, take the Tohoku Shinkansen to Koriyama (about 80 minutes), then transfer to the JR Ban-etsu West Line limited express or rapid service to Aizu-Wakamatsu Station (roughly 65-70 minutes). Door to door, budget around 2.5-3 hours and ¥9,000-10,000 one way with a reserved seat. There’s also a direct highway bus from Tokyo (Shinjuku, Tokyo Station area) that takes about 4.5-5 hours and costs roughly ¥4,000-5,500 — slower but noticeably cheaper, and a reasonable option if you’re not using a rail pass.

    Spring (early-to-mid April) brings cherry blossoms around Tsuruga Castle’s moat, one of Tohoku’s better-known hanami spots. Autumn (late October to early November) is arguably the best window — foliage on Iimoriyama and around the castle, mild temperatures, and none of the summer humidity. Winter is atmospheric but genuinely cold and snowy; Aizu sits in one of Tohoku’s heaviest snowfall basins, so pack for it if you visit between December and February.

    Tsuruga Castle and the Boshin War Story

    Tsuruga Castle (Tsurugajo) is the city’s anchor sight — a reconstructed five-story keep rebuilt in 1965 on the original stone foundations, instantly recognizable by its red roof tiles, a design choice unique among Japanese castles and meant to resist the region’s harsh winters. The current structure sits inside Tsurugajo Park and houses a museum on the castle’s history and the 1868 siege, when Aizu’s forces held out against imperial troops for about a month before surrendering.

    The keep is open daily, 8:30am-5:00pm (last entry 4:30pm), with no fixed closed days. Adult admission is ¥410; a combination ticket that adds entry to Rinkaku, the historic tea house on the castle grounds, runs about ¥520. Give yourself 45-60 minutes for the museum floors plus the view from the top.

    Iimoriyama and the Byakkotai

    A short bus or taxi ride from the station, Iimoriyama is a small hill where a unit of teenage samurai cadets, the Byakkotai (White Tiger Force), died during the castle’s siege rather than surrender — a story still taught to Japanese schoolchildren and central to the city’s identity. An escalator (slope conveyor) up the hillside costs around ¥250 each way if you’d rather skip the stairs.

    At the top, don’t skip Sazaedo, a bizarre and genuinely unique wooden structure built as a double-helix spiral so that pilgrims climbing up never cross paths with those descending — one of the strangest pieces of religious architecture in Japan. Entry is a small separate fee, around ¥400. The whole hill, including the Byakkotai memorial and a small museum, takes about an hour.

    Aizu Lacquerware: 400 Years of Craft

    Aizu-nuri traces back to the late 16th century, when the local lord Gamo Ujisato invited lacquer and woodworking craftsmen from Kyoto’s Omi region to set up shop here, taking advantage of the area’s abundant lacquer trees and humid climate, which is ideal for curing lacquer slowly and evenly. Unlike more decorative lacquerware traditions, Aizu-nuri built its reputation on everyday durability — bowls, trays, and boxes meant to be used daily for decades, finished with techniques like kinsai (gold powder decoration) and tetsusabi-nuri, an iron-rust-toned finish unique to the region.

    This is a useful distinction if you’re comparing it to other Japanese crafts you may have seen written up elsewhere — Aizu lacquerware sits closer to functional heirloom tableware than to display pieces, which also makes it one of the more practical souvenirs to actually use once you’re home.

    Where to Shop for Aizu-Nuri

    The old merchant street Nanukamachi-dori, a short walk from the station, is the main shopping area and still has several Edo- and Meiji-era storefronts.

    • Budget (¥1,000-3,000): Lacquered chopsticks, small sake cups, and coasters are the easiest entry point and pack well. Several shops on Nanukamachi-dori sell these without pressure to buy more.
    • Mid-range (¥3,000-15,000): Lacquered rice bowls (owan) and soup bowls are the classic practical buy — look for a solid wood core rather than a resin base, which shop staff will confirm if you ask. Suzuki Morihisa Shoten, a lacquerware specialist with roots going back generations on Nanukamachi-dori, is a reliable stop for this tier and can explain which pieces are dishwasher-tolerant (most traditional ones aren’t).
    • Splurge (¥20,000 and up): Multi-tiered jubako boxes and fine maki-e decorated pieces, often made to order or sold as limited runs, fall into this range. These are genuinely collectible and worth it if you want a piece that will outlast everything else in your luggage.

    If your dates line up, keep an eye out for the Aizu lacquerware market, a spring event (typically around late April to early May) where multiple workshops sell direct — prices tend to be fairer than in fixed retail shops, though exact dates shift year to year, so confirm locally or with your accommodation before planning around it.

    Getting Around and Common Mistakes

    The city runs two color-coded loop buses, Haikara-san (clockwise) and Akabe (counterclockwise), that connect the station, Tsuruga Castle, and Iimoriyama. A one-day pass costs around ¥600 and pays for itself after two or three rides; if you haven’t used a flat-fare loop bus in Japan before, our guide to riding local buses in Japan covers how boarding and fare payment actually works, which applies directly here.

    The most common mistake visitors make is trying to see Aizu-Wakamatsu as a rushed half-day stop between Tokyo and somewhere else — the Koriyama transfer alone eats real time, and rushing means you’ll likely miss Iimoriyama or the lacquerware district entirely. Plan for a full day minimum, or an overnight if you want to add the nearby thatched-roof post town of Ouchi-juku. The second mistake is buying lacquerware at station gift shops instead of Nanukamachi-dori — the selection is thinner and markups are higher than at the specialist shops a ten-minute walk away.

    If you’re building out a Japan itinerary around smaller, history-rich day trips rather than the major cities, Aizu-Wakamatsu pairs well conceptually with other overlooked destinations like Yanagawa’s canal-boat town in Fukuoka — different region, same idea of getting real local character without the crowds. And if lacquerware sparks a broader interest in Japanese handcraft shopping, our guides to temari thread balls and kumihimo braiding kits cover two more traditional crafts that travel well and make for genuinely distinctive souvenirs.

  • Amakusa: Kumamoto’s Dolphin-Watching Islands and Hidden Christian Villages

    Most visitors to Kyushu never make it past Kumamoto Castle, which is a shame, because an hour and a half southwest sits one of Japan’s most underrated regional trips: Amakusa. This cluster of islands, linked to the mainland by a string of bridges, pairs wild dolphin-watching cruises with a cluster of quiet villages where Japan’s “Hidden Christians” worshipped in secret for over two centuries. It’s an easy overnight or ambitious day trip from Kumamoto City, and almost nobody outside Japan has heard of it — which makes it feel like a genuine discovery rather than a checklist stop.

    Where Is Amakusa and How Do You Get There

    Amakusa is a group of islands off the southwest coast of Kumamoto Prefecture, connected to the mainland at Misumi by the Amakusa Five Bridges (天草五橋), a scenic toll road that hops island to island. The practical hub for visitors is Hondo, the largest town, roughly 1.5–2 hours by car from Kumamoto City or about 1 hour from Kumamoto Airport.

    • By car: The easiest option by far. Rent a car in Kumamoto City or at the airport — public transport on the islands themselves is thin, with buses running infrequently between villages.
    • By bus: Direct highway buses run from Kumamoto’s Sakura-machi Bus Terminal to Hondo Bus Center, taking around 2 hours. If you’re relying on buses once you arrive, it’s worth knowing how flat-fare and rear-door boarding actually works, since rural Kyushu routes follow the same system as everywhere else.
    • By ferry from Nagasaki: If you’re coming from the Shimabara Peninsula or Nagasaki side, a ferry connects Oniike (in Amakusa) with Kuchinotsu in about 30 minutes — a handy backdoor route if you’re combining this trip with Unzen or the Shimabara area rather than backtracking through Kumamoto.

    Dolphin Watching: What to Expect, Prices, and Best Season

    The southern part of Amakusa, around the port town of Ushibuka, is home to a resident population of roughly 200 wild bottlenose dolphins that live in the strait year-round — they aren’t migratory, so this isn’t a seasonal gamble like whale watching elsewhere. Several small operators run cruises out of Ushibuka and nearby harbors, typically charging around ¥3,000–3,500 for adults and about half that for children, for roughly 60–90 minutes on the water. Operators commonly advertise sighting rates above 90%, and in practice most boats do find pods, since the dolphins stay in a fairly contained feeding area.

    A few practical notes: boats generally run multiple times a day but on a semi-flexible schedule tied to tides and group size, so book ahead by phone or through your hotel rather than just showing up. Cruises are suspended in rough weather and are less pleasant (and sometimes cancelled) during the June rainy season. Spring through autumn, especially clear mornings, tends to give the calmest seas and best visibility. Bring a light jacket even in summer — it’s breezy on open water — and motion-sickness medication if you’re prone to it, as the boats can bob around while circling pods.

    Sakitsu Village: A UNESCO World Heritage Hidden Christian Village

    Amakusa’s other claim to fame is Sakitsu, a small fishing village whose church, Sakitsu Church, sits almost at the water’s edge. After Christianity was banned in Japan in the early 1600s, communities here practiced in secret for over 200 years, disguising prayer as folk ritual. Sakitsu was recognized in 2018 as one of the component sites of the UNESCO World Heritage listing “Hidden Christian Sites in the Nagasaki Region,” alongside sites across the border in Nagasaki Prefecture.

    The current church building dates to 1934 and is a striking mix of Gothic exterior and tatami-mat flooring inside — a detail worth seeing in person. It’s a working church, so dress and behave respectfully, and photography inside is generally not permitted. Because the village is small and residential, cars can’t park right at the church during busy periods; use the Sakitsu Village Guidance Center (崎津集落ガイダンスセンター) nearby, which has parking (a small fee, around ¥200) and exhibits on the village’s history before you walk down to the church itself. Weekday mornings are noticeably quieter than weekend afternoons.

    Oe Church and the Amakusa Rosary Museum

    A short drive from Sakitsu, Oe Church is a white Gothic building perched on a hill, built in 1933 and funded partly by a French missionary. It’s free to visit, less crowded than Sakitsu, and the hilltop view back over the village is worth the stop on its own. Next door, the Amakusa Rosary Museum (天草ロザリオ館) displays artifacts from the hidden Christian era — hidden crucifixes, Buddhist-disguised icons, and relics from the 1637–38 Shimabara-Amakusa Rebellion, which was centered partly in this region. Entry runs a few hundred yen and the museum is compact enough to see in 30–40 minutes.

    Food and Other Amakusa Highlights

    Amakusa sits on some of Kyushu’s best fishing grounds, and seafood is the reason locals eat out here. Look for set lunches built around fresh-caught sashimi and seafood rice bowls — if you haven’t tried one yet, it’s worth knowing how to order a proper kaisendon before you sit down, since menus can be a wall of unfamiliar fish names. Amakusa is also known for cultured pearls — smaller operations than the famous Mikimoto brand, but shops around Hondo sell loose pearls and jewelry at a fraction of mainland prices.

    Common Mistakes and Planning Tips

    • Treating it as a single day trip from Tokyo or Osaka: it isn’t. Amakusa only makes sense as part of a Kyushu itinerary already anchored in Kumamoto, Nagasaki, or Fukuoka.
    • Skipping a rental car: the islands are spread out, and without one you’ll burn most of a day waiting on infrequent buses between Ushibuka and the Christian villages.
    • Booking the dolphin cruise same-day: operators are small and boats fill up or get cancelled for weather, so call or book a day or two ahead, especially on weekends.
    • Rushing Sakitsu: it’s a lived-in village, not a theme park — go early, stay quiet near the church, and don’t expect cafes or facilities beyond the guidance center.

    Suggested Plan and Budget

    A realistic one-night trip: drive in from Kumamoto in the morning, do a dolphin cruise early afternoon in Ushibuka (allow a buffer in case of a reschedule), then head north to Sakitsu and Oe Church before sunset, staying in or near Hondo. Rough per-person budget: dolphin cruise ¥3,000–3,500, museum/parking fees under ¥1,000, lunch ¥1,500–2,500, plus car rental and fuel. Mid-range travelers can stay at a seaside ryokan in Hondo (often ¥10,000–18,000/night with dinner); budget travelers will find business hotels closer to ¥6,000–8,000. If you’re stretching a Kyushu loop further south afterward, Amakusa pairs well with a detour to Ibusuki’s sand baths in Kagoshima, or if you’re coming from the Fukuoka side, consider combining it with Yanagawa’s canal-boat town for a full slow-travel swing through rural Kyushu that most first-time visitors never see.

  • Takikomi Gohan: Japan’s Savory Mixed Rice Dish and Where to Try It

    Takikomi Gohan: Japan’s Savory Mixed Rice Dish and Where to Try It

    Photo by Mehmet Keskin on Unsplash

    If you’ve only ever had Japanese rice as a plain side dish or under a bowl of seafood, takikomi gohan (炊き込みご飯) will reset your expectations. The rice itself is the dish: short-grain rice simmered in dashi, soy sauce, mirin and sake alongside mushrooms, carrot, burdock root, chicken or seafood, so every grain picks up flavor as it cooks. It’s homestyle food in most households, but it also shows up in ekiben (station bento), ryokan dinners, and specialist restaurants — and tracking down the good versions is one of the more rewarding, low-key food missions you can run on a Japan trip.

    What Takikomi Gohan Actually Is

    The name breaks down simply: takikomi means “cooked in,” and gohan is rice. Unlike a donburi, where toppings sit on top of plain rice, takikomi gohan cooks everything together in one pot, so the seasoning is absorbed from the inside out rather than poured on at the end. The base flavor is almost always dashi plus soy sauce and a little sake or mirin for sweetness — mild, savory, and not spicy at all, which surprises some first-timers expecting something closer to fried rice or jambalaya. A close cousin is gomoku gohan (“five-item rice”), which is essentially the same idea under a different name, usually with a fixed lineup of carrot, shiitake, konnyaku, fried tofu, and chicken or pork.

    Seasonal Versions Worth Planning a Trip Around

    Because the dish is built around whatever’s in season, timing your visit matters more than with most Japanese food.

    • Matsutake gohan (松茸ご飯): late September through October. Matsutake mushrooms are prized and expensive — domestic ones can run several thousand yen for a handful — so this version turns up as a seasonal splurge item at kaiseki restaurants and ryokan, often priced per course rather than à la carte.
    • Kuri gohan (栗ご飯), chestnut rice: September to November. Kyoto’s Arashiyama district and Obuse in Nagano (a town famous for chestnuts) are the two places most associated with it; expect lightly sweet chestnut chunks folded through savory rice.
    • Takenoko gohan (筍ご飯), bamboo shoot rice: April and May, when fresh bamboo shoots are briefly in season and noticeably less fibrous than the canned version used the rest of the year.

    Outside these windows, mushroom-and-chicken or seafood versions are available year-round, so you’re never completely out of luck — but hitting Japan in autumn is genuinely the best time to chase this dish specifically.

    Kamameshi: The Clay-Pot Version You Can Take With You

    Kamameshi (釜飯) is takikomi gohan’s famous cousin, cooked and served in an individual clay or iron pot rather than a shared rice cooker. The best-known examples are ekiben sold at train stations: Oginoya’s Toge no Kamameshi, originally sold at Yokokawa Station and now found at Karuizawa Station and Oginoya’s own roadside restaurants along the old Usui Pass route, has been served in a small Mashiko-ware ceramic pot since the late 1950s — many travelers wash it out and keep it as a souvenir. Expect to pay roughly ¥1,300–1,500. Further north, Tawaraya’s Kiso no Kamameshi has been sold at Kiso-Fukushima Station on the JR Chuo Line since 1966, for around ¥1,200–1,400. Both are sold at station kiosks during regular daytime hours and can sell out on busy days, so don’t leave it until the last train.

    If a restaurant kamameshi is cooked to order rather than pre-made, budget 20–30 minutes of wait time — it’s worth asking when you order so you’re not caught off guard mid-trip.

    Where to Eat It While Traveling

    You don’t need to seek out a specialist restaurant to try takikomi gohan, though it helps to know where to look at every budget level.

    • Budget (under ¥1,000): Convenience stores — 7-Eleven, Lawson, FamilyMart — sell takikomi gohan onigiri seasonally, especially kinoko (mushroom) and matsutake-flavored versions in autumn, typically ¥150–250. Depachika food halls (department store basement food floors, like Isetan Shinjuku or Daimaru) sell takikomi gohan bento boxes for roughly ¥500–900, good for a train ride or a park picnic.
    • Mid-range (¥1,500–3,000): Most teishoku (set meal) restaurants and izakaya offer a takikomi or kamameshi option as a side or a small-pot add-on. In Kyoto, Torigin, near Shijo-Kawaramachi and the Pontocho entrance, has specialized in chicken-based tori kamameshi since the 1930s and is a reliable sit-down option if you want the “specialist restaurant” experience without a splurge price tag.
    • Splurge (¥5,000 and up): Autumn kaiseki courses built around matsutake gohan, or a ryokan dinner that finishes with a seasonal takikomi gohan course cooked tableside — this is where the dish gets genuinely luxurious, since the mushroom itself drives the cost.

    Okinawa’s Own Take: Jūshī

    Okinawa has a regional cousin worth knowing about if your itinerary includes the islands: jūshī (ジューシー), rice simmered with pork, kombu, and sometimes carrot or peanuts, seasoned closer to Okinawan cooking than mainland dashi. It’s often served as a side alongside a bowl of Okinawa soba, and some versions use pork cooked the same slow, soy-sweetened way as rafute. If you’re comparing Japan’s rice-bowl culture more broadly, it’s also worth lining jūshī and takikomi gohan up against a completely different style of rice dish, like the raw-seafood-topped kaisendon, to see how differently rice gets used across regions.

    Common Mistakes First-Timers Make

    • Expecting a topping, not a mix-in. If you order takikomi gohan expecting something like a donburi, the lack of a visible “topping” can feel underwhelming — remember the flavor is cooked through, not piled on.
    • Assuming it’s spicy or oily. It’s a soy-dashi-seasoned, simmered dish, closer to a savory pilaf than fried rice. There’s no chili and very little oil involved.
    • Visiting in the wrong season for the variant you want. Matsutake and chestnut versions are genuinely only around for a few autumn weeks; don’t assume a menu photo means it’s available year-round.
    • Skipping the bottom of the pot. With kamameshi especially, the rice touching the hot clay or iron forms a lightly crisp layer called okoge. It’s considered a treat, not a mistake to scrape past.
    • Not budgeting cook time. If a restaurant cooks kamameshi fresh per order, it can take half an hour. Ask when ordering, especially if you’re on a tight schedule between sights.

    Getting There

    If you’re chasing a specific ekiben like Kiso no Kamameshi or Toge no Kamameshi, both stations sit on regional lines rather than the main shinkansen trunk routes, so you’ll likely connect via local train and possibly a short local bus leg from the nearest city. If that’s new territory, it’s worth knowing how flat-fare, rear-door boarding works on Japan’s local buses before you go, since rural routes rarely have English signage. And if you want a classic side dish to go with your rice once you’re seated, a small dish of umeboshi is the traditional palate-cleanser pairing, and it’s just as easy to find in a souvenir shop afterward if you want to bring the flavor home.

  • Ramen Jiro: Tokyo’s Cult Mountain-Size Ramen Chain and Its Unwritten Ordering Rules

    Ramen Jiro: Tokyo’s Cult Mountain-Size Ramen Chain and Its Unwritten Ordering Rules

    Photo by Susann Schuster on Unsplash

    There is a species of ramen shop in Tokyo where the bowls look less like a meal and more like a geological event: a mountain of bean sprouts and cabbage buried in noodles, with pork slabs the size of place mats wedged into the sides. That’s Ramen Jiro. It has no English menu, no photos on the wall, and a counter staff that will ask you a question in rapid-fire Japanese the moment your bowl is almost ready — and you’re expected to answer in about three seconds. Get it right and you join a decades-old Tokyo subculture. Get it wrong and you’ll still eat well, just a little red-faced. Here’s how the system actually works.

    What Is Ramen Jiro, and Why Does It Have a Cult Following?

    Ramen Jiro traces back to a single shop that opened in 1968 near Keio University’s Mita campus in Tokyo — the “Mita Honten,” still considered the mothership. Over the decades, cooks who trained under founder Takumi Yamada branched out and opened their own shops under the Jiro name, and that’s the key thing to understand: Jiro isn’t a uniform chain like a convenience store. Each branch is run by an independently trained chef, so the broth’s fattiness, the garlic quantity, and even the noodle thickness shift noticeably from shop to shop. Fans (“Jiro-ian” or “Jiro-kei” otaku) argue endlessly over which branch is the “real” Jiro experience — part of the appeal is that no two visits are identical.

    What unites every branch is the format: enormous portions, a short and loud ordering ritual, cash payment, elbow-to-elbow bench seating, and a house style built around raw garlic, pork back fat, and vegetables piled so high they spill over the rim.

    Reading the Menu: Size, Toppings, and What It Actually Costs

    Most Jiro shops sell essentially one dish — ramen — in two sizes, ordered at a ticket vending machine by the entrance. As of 2025, a small (“shou”) bowl typically runs about ¥800–900, which already includes roughly 400g of noodles — more than double what you’d get at a standard ramen shop. Oddly, at most branches “small” and “big” (ogata/dai) cost the same, since the price difference comes from noodle volume rather than toppings. That doesn’t mean you should order big: staff will sometimes quietly discourage first-timers from it if they doubt you’ll finish, because leaving food is taken seriously here.

    Extras are cheap and bought as separate tickets: extra pork slices (butamore, roughly ¥150–250 for 2-3 extra pieces) and sometimes a double-noodle ticket (dabu, around ¥100–150) for noodle fiends. Toppings like extra vegetables, garlic, and fat don’t cost anything extra — they’re controlled entirely by what you say at the counter, which brings us to the part everyone gets nervous about.

    The Topping “Call”: Jiro’s Famous Three-Second Ritual

    After buying your ticket and handing it to staff, you sit and wait. Just before your bowl is finished, a cook will look at you and ask something like “Call?” or simply point at you expectantly. This is your one chance to specify toppings, and you’re expected to answer immediately and clearly — hesitating holds up the entire line behind you.

    • Yasai (vegetables) — bean sprouts and cabbage, already piled high by default
    • Ninniku (garlic) — raw, minced, and pungent
    • Abura (back fat) — soft pork fat scattered over the top
    • Karame (extra sauce) — a saltier, more intense flavor

    You combine these with amount words: sukoshi (a little), mashi (more), or mashimashi (double more, the famous “more more”). A typical first-timer’s call is simply “Yasai!” — standard vegetables, nothing else — which is a completely normal and respected answer. If you want to push further, “Yasai mashi, ninniku” (extra vegetables, add garlic) is a common step up. There’s no shame in keeping it simple; regulars do it too.

    Where to Go in Tokyo

    The Mita Honten (the original shop, a short walk from Tamachi and Mita stations) is the pilgrimage site and draws the longest, most tourist-heavy lines, especially on weekends. Many Jiro otaku actually prefer other branches for a more consistent bowl — Nishi-Waseda, near Waseda University, is frequently cited as one of the best for balance between broth, fat, and noodle texture, while Ikebukuro and Kanda have their own loyal regulars. If a line looks unmanageable at one branch, it’s often worth checking a nearby one rather than waiting it out — Jiro branches are scattered across central Tokyo, with a few more in Kanagawa, Saitama, and Chiba.

    Best Time to Go (and When You’ll Be Turned Away)

    Jiro shops run split hours — typically lunch from around 11:00 to 14:00 and dinner from roughly 17:00 to 20:00, with the shop closed in between and often closed entirely one or two days a week (varies by branch, so check signage or recent reviews before heading over). Critically, Jiro shops close the moment they run out of noodles for the session, sometimes well before the posted closing time — a popular branch can sell out by 13:00 on a busy Saturday. Arriving right at opening on a weekday morning is your best shot at a short wait; weekend lunch lines can stretch past an hour. Winter is slightly more forgivable for queueing outdoors than the brutal heat of a Tokyo August, so factor season into your plan if you’re queue-averse.

    Counter Etiquette and Common First-Timer Mistakes

    A few habits will mark you as a rookie — or worse, slow down a shop that runs on speed:

    • Treating “small” as actually small. It’s a full, calorie-dense meal (often 1,500–2,000+ kcal); don’t order a side dish expecting room.
    • Freezing up at the call. Decide your answer while you wait, not when you’re asked.
    • Asking for menu customizations. There’s no broth substitution, no spice level, no noodle swap — only the four call options.
    • Lingering after finishing. Seats are scarce and shared; eat, pay (cash is standard — cards are rare), and clear out.
    • Leaving food unfinished. It’s considered disrespectful at Jiro specifically, more so than at an ordinary restaurant — size up honestly before you order.
    • Bringing big luggage. Counters are narrow with no storage; this isn’t a shop to visit straight from the airport with rolling suitcases in tow.

    If Jiro Isn’t Quite Your Speed

    If the queue culture and shouting match isn’t appealing but you still want Tokyo’s line-worthy food experiences, the pork bun counter at 551 Horai runs on a similarly intense but far gentler system, and Japan’s other cult food-chain obsession, Mister Donut, needs zero bravado to order from. For noodle soup without the mountain of garlic and fat, Okinawa soba is a completely different, far more relaxed bowl worth seeking out if you make it south. But if you do brave Jiro, go in with a plan, a clear call ready on your tongue, and an appetite that means business — it’s one of the few meals in Tokyo that doubles as a small act of courage.

  • Okinawa Soba: The Pork Noodle Soup That Isn’t Really Soba, and Where to Try It

    Okinawa Soba: The Pork Noodle Soup That Isn’t Really Soba, and Where to Try It

    Photo by Zion C on Unsplash

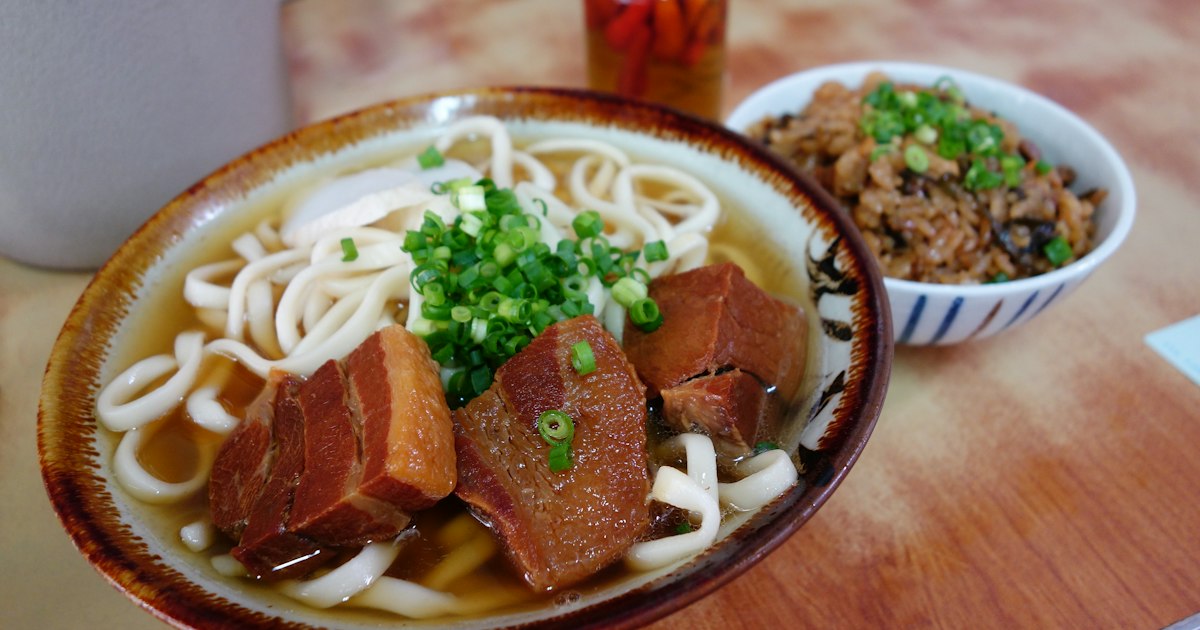
    Order “soba” anywhere else in Japan and you’ll get thin, grayish-brown buckwheat noodles in a soy-dashi broth. Order soba in Okinawa and you’ll get something completely different: thick, pale, chewy wheat noodles floating in a cloudy pork-and-bonito broth, topped with a slab of stewed pork belly, a slice of fish cake, and a tangle of green onion. It looks nothing like soba because, technically, it isn’t. There’s no buckwheat in it at all. Here’s why that’s allowed, what to order, and which shops are worth planning a meal around.

    Why It’s Called Soba When There’s No Buckwheat in It

    In mainland Japan, the word “soba” is legally tied to buckwheat content — a product needs actual soba flour to use the name. Okinawa’s noodle, made purely from wheat flour and kansui (an alkaline mineral water that gives the noodles their yellow tint and springy bite), should technically not qualify. But the dish predates that mainland rule by decades and is deeply embedded in Okinawan food culture, dating back to Chinese-influenced court cuisine of the former Ryukyu Kingdom.

    When the issue came to a head in the 1970s, the Japan Fair Trade Commission ruled in Okinawa’s favor in 1978, allowing “Okinawa soba” to keep its name as a regional exception. The ruling came down on October 17, which is why that date is now celebrated across the prefecture as Okinawa Soba Day, with special deals at soba shops island-wide. If you happen to be visiting in mid-October, it’s worth timing a bowl around it.

    The Three Bowls You’ll Actually See on Menus

    Okinawa soba isn’t one fixed dish — the broth and noodles stay the same, but the pork topping changes. Knowing these three names will save you from pointing randomly at a menu:

    • Soki soba — topped with soki, pork spare ribs braised on the bone until the meat pulls away easily. This is the most popular version and the safest default order.
    • Sanmainiku soba — topped with sanmainiku, a flat slice of boneless pork belly, closer in style to the braised pork belly used in rafute, Okinawa’s other famous pork dish.
    • Nakami soba — topped with nakami, simmered pork intestine. It’s milder in flavor than it sounds, having been boiled and rinsed repeatedly to remove any gaminess, but it’s the one to skip if offal isn’t your thing.

    Most bowls also come scattered with kamaboko (fish cake), scallions, and a small pile of beni shoga (red pickled ginger) — stir it in partway through rather than all at once, since it’s sharp and will dominate the broth if dumped in early.

    Where to Eat It: Budget, Mid-Range, and the Pilgrimage-Worthy Splurge

    Budget (500–800 yen): Local shokudo (diners) and the stalls inside Makishi Public Market in Naha serve no-frills bowls for well under 800 yen. These places aren’t fancy — think plastic stools and a handwritten menu — but the noodles are made fresh daily and the broth is honest. This is also the easiest category to find near Kokusai-dori, Naha’s main tourist strip, for a quick lunch between shopping stops.

    Mid-range (800–1,200 yen): Sit-down soba specialists in central Naha fall here, often adding a side of jūshī (Okinawan seasoned rice) or a small plate of rafute for a combo set. This is the sweet spot for most visitors — enough polish to feel like a proper meal without tourist-trap pricing.

    Splurge / pilgrimage (1,200–1,800 yen, plus a wait): Kishimoto Shokudo in Motobu, near Nago in the north of the main island, is widely regarded as the oldest Okinawa soba shop still operating, founded in 1905. It still makes its noodles using the traditional ash-water method rather than modern kansui, giving them a slightly different texture and aroma that soba purists travel across the island for. Expect a line before opening and a menu that’s barely changed in generations — it’s usually closed once the day’s noodles sell out, sometimes by early afternoon, so arriving right at opening is the only reliable strategy.

    How to Get There and When to Go

    Naha’s soba shops are walkable from the monorail (Yui Rail) stations along Kokusai-dori and around Makishi Public Market, making them an easy stop whether you’re coming from shopping or sightseeing. Kishimoto Shokudo in Motobu is a different story — it’s about an hour to 90 minutes by car or bus from central Naha, usually combined with a visit to Churaumi Aquarium or the Nago/Motobu area, since it isn’t realistic as a standalone trip. If you’re renting a car for the north, build lunch there into the route rather than trying to detour back for it.

    Lunchtime (11:30 am–1:30 pm) is when soba shops are busiest, and popular ones genuinely do run out of noodles and close early, especially on weekends. Going right at opening, or later in the afternoon around 2–3 pm, avoids both the crowd and the risk of a sold-out sign. Summer (June–September) is peak tourist season in Okinawa generally, so even casual shokudo can have a short wait; shoulder months like April–May or October–November are calmer for food-focused stops like this.

    Common Mistakes Visitors Make

    • Assuming it’s gluten-free because “soba” sounds like buckwheat. It’s the opposite — Okinawa soba is 100% wheat, so it’s actually fine for people with buckwheat allergies but unsuitable for anyone avoiding gluten.
    • Ordering without specifying soki vs. sanmainiku vs. nakami and being surprised by what shows up. If a menu just says “soba,” ask which pork topping it defaults to.
    • Dumping all the beni shoga and kōrēgūsu (Okinawan chili-infused awamori) in at once. Both are meant to be added gradually to taste, not mixed in like a condiment from the start.
    • Treating it as a light meal. The broth and pork topping make this heartier than mainland soba or ramen — it’s a full lunch, not a snack.

    A Few Pairing Ideas

    If you’re building out an Okinawan food itinerary, soba pairs naturally with a side of rafute (the two often appear together on set menus), and the pork theme carries through much of Okinawan cuisine generally — worth keeping in mind if you’re also curious about other regional pork specialties found elsewhere in Japan, like Osaka’s 551 Horai steamed pork buns. For a lighter contrast on the same trip, Okinawa’s seafood-forward dishes make a good counterpoint to all that pork broth — similar in spirit to a mainland kaisendon if you want something fresher between heavier meals.

    Okinawa soba won’t satisfy anyone looking for the nutty, delicate flavor of real buckwheat soba — and it isn’t trying to. It’s a regional dish with its own name, its own 1978 legal backstory, and its own devoted local following, which is exactly what makes it worth seeking out rather than skipping because the name seems misleading.