Japan Trove

Category: Uncategorized

  • Izu Peninsula: Hot Springs, Coastline & Easy Day Trips from Tokyo

    Izu Peninsula: Hot Springs, Coastline & Easy Day Trips from Tokyo

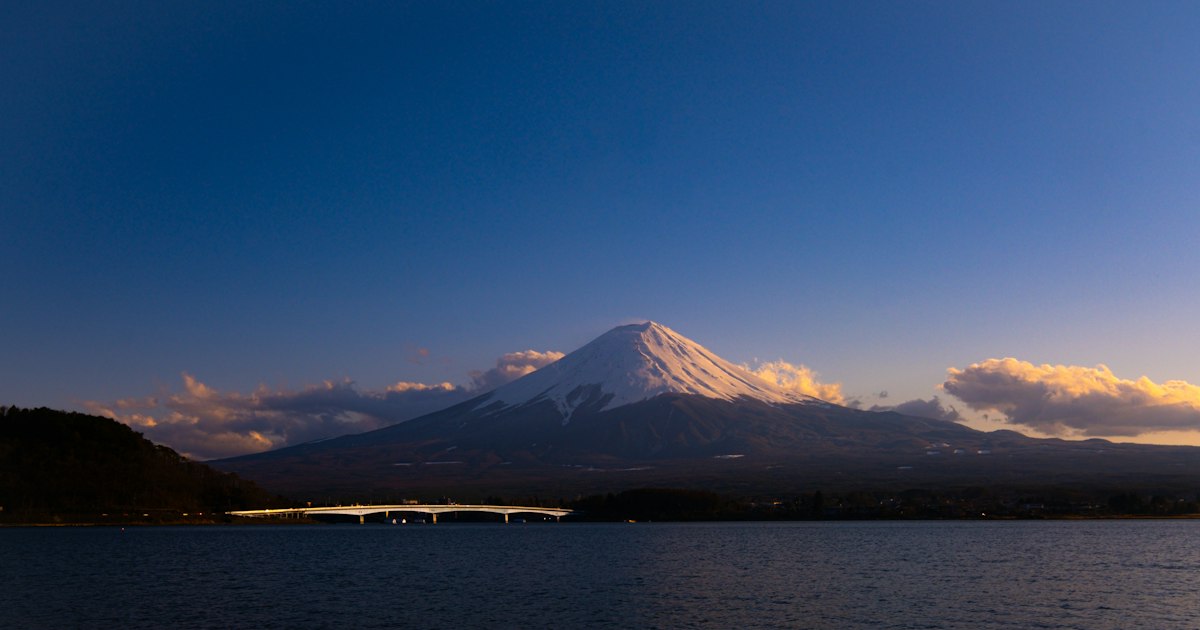
    Photo by Greg Jurgajtis on Unsplash

    Less than an hour from Tokyo by train, the Izu Peninsula packs hot spring towns, rugged coastline, and mild winters into a shape that juts into the Pacific like a thumb off Shizuoka Prefecture. It’s an easy add-on for travelers who’ve already done Hakone and want more coastline, fewer crowds, and ryokan dinners built around just-caught seafood. You can do it as a long day trip from Tokyo or stretch it into two or three days with an onsen stay in the middle.

    Getting There: Trains, Cars, and Timing

    The two gateway stations are Atami and Mishima, both on the Tokaido Shinkansen. A Kodama shinkansen from Tokyo Station to Atami takes about 40-50 minutes and costs roughly ¥4,000-4,500 one way unreserved; the faster Hikari gets you to Mishima in a similar time. Both are covered by the Japan Rail Pass.

    For a one-seat ride deeper into the peninsula, JR’s Odoriko limited express runs from Tokyo Station down to Izukyu-Shimoda in about 2.5-3 hours (around ¥7,000 one way). Seats are reserved, so book ahead on weekends and during cherry blossom season — the train fills up. One catch: Odoriko continues past Atami onto Izukyu Corporation tracks, which the JR Pass does not cover, so pass holders need to pay a supplementary fare for the Atami-to-Shimoda stretch or simply ride JR as far as Atami and transfer.

    To reach Shuzenji, change at Mishima for the private Izuhakone Railway Sunzu Line (about 35 minutes, not JR Pass eligible). If you’re renting a car to cover the coastal roads at your own pace, our guide to ETC cards and expressway tolls is worth reading before you pick up the keys, since the Izu Skyline and coastal routes involve several toll sections.

    Atami and Ito: Onsen Towns Closest to Tokyo

    Atami is the most convenient base, with a retro seafront, a famous fireworks schedule in summer, and dozens of ryokan built into the hillside above the bay. If you don’t want to stay overnight, several hotels sell higaeri (day-use) onsen access for roughly ¥1,000-2,500, letting you soak for a few hours without a room. Atami’s Sun Beach and the Atami Baien plum garden (blooms January-February) are both walkable from the station.

    Ito, 20-25 minutes further by local train, has a quieter, more residential onsen-town feel and is the jumping-off point for the Jogasaki Coast. Budget travelers can find simple guesthouses from around ¥5,000-7,000 a night; mid-range ryokan with kaiseki dinner and private or shared onsen run ¥15,000-25,000 per person; splurge properties with ocean-view rooms and private baths start around ¥40,000 and climb well past that for peak-season weekends.

    Shuzenji: The Historic Spa Town Inland

    Shuzenji, in the center of the peninsula, is one of Izu’s oldest hot spring towns, built around a small river lined with bamboo groves. The Chikurin no Komichi bamboo path and the free foot bath (ashiyu) in the middle of the river are both free and take maybe 30-40 minutes to see properly. It’s a good half-day stop if you’re routing between Mishima and the coast rather than a full destination on its own — most visitors pair it with lunch and a short walk rather than a full day.

    The Jogasaki Coast and Shimoda: Cliffs, Beaches, and Black Ships History

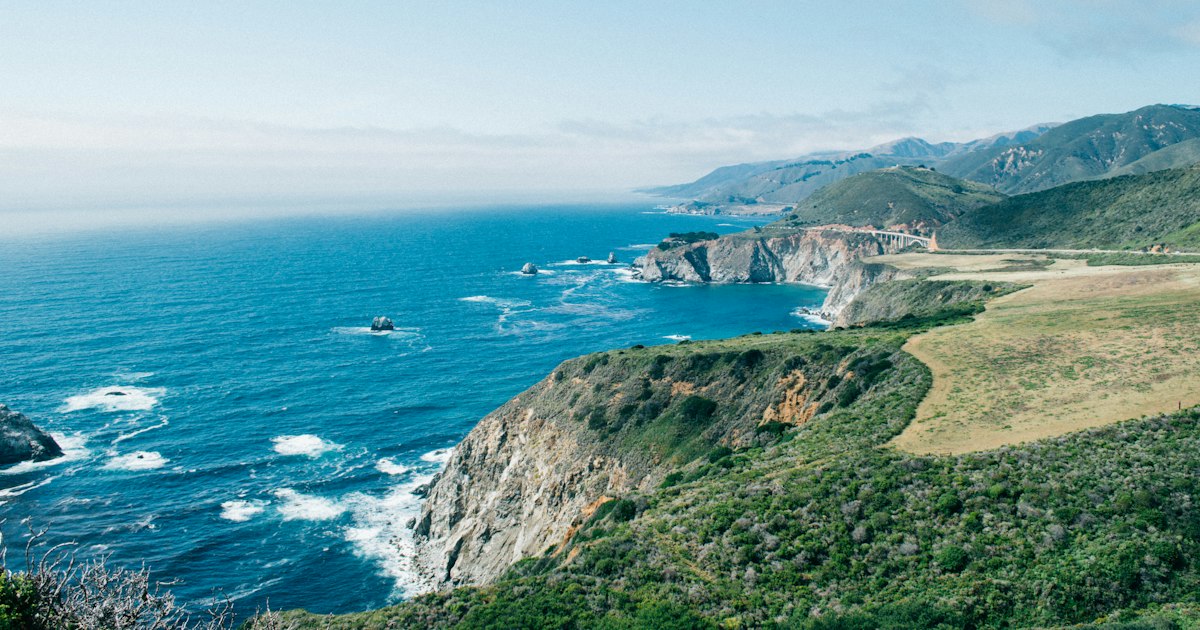
    The Jogasaki Coast, south of Ito, is Izu’s best stretch of scenery: black volcanic cliffs formed by old lava flows, a 9 km coastal hiking trail, and the Kadowaki Suspension Bridge swaying 23 meters above the surf. It’s free to walk and reachable via Jogasaki-Kaigan Station on the Izukyu Line. The cliffs and wide ocean views make it a popular spot for photography — if you’re flying a drone for shots of the coastline, check our rundown of drone laws and photography permits in Japan first, since parts of the coast fall under flight restrictions near residential areas and parks.

    Further south, Shimoda is where Commodore Perry’s “Black Ships” landed in 1854, and the compact old town still has a Black Ships Festival each May along with Perry Road, a short canal-side lane of preserved buildings. Shimoda’s beaches (Shirahama in particular) are some of the clearest-water swimming spots within day-trip range of Tokyo, busy with families June through August. On the west coast, Dogashima is known for sightseeing boats that loop past wave-eroded rock formations — a worthwhile detour if you have a car.

    Best Time to Visit

    Late January through early March is prime time for Kawazu-zakura, an early-blooming pink cherry variety that flowers weeks before Tokyo’s. The Kawazu Cherry Blossom Festival lines the Kawazu River with thousands of trees and illuminates them at night. Early June brings hydrangeas to Shimoda Park. Summer (July-August) is peak beach season with higher hotel prices and crowded trains; autumn (November) brings foliage without the summer crowds. Winter is mild for a hot-spring trip — daytime temperatures often stay in the low teens Celsius, which makes an outdoor rotenburo bath genuinely pleasant rather than just bearable.

    Common Mistakes and Budget Tips

    • Underestimating distances within Izu. The peninsula is bigger than it looks on a Tokyo-area map — Atami to Shimoda by local train can take over 1.5 hours with transfers. Don’t plan to see Atami, Shuzenji, and Shimoda all in one day.
    • Skipping reservations for Odoriko. It’s an all-reserved-seat train on weekends and holidays; showing up without a reservation can mean standing in the aisle or waiting for the next departure.
    • Booking ryokan dinner times too late. Traditional ryokan often serve kaiseki dinner at a fixed early time (around 18:00) — confirm this when booking if you’re arriving late from Tokyo.
    • Forgetting that ryokan trash sorting has its own rules. Guesthouses and self-catering stays expect guests to sort waste correctly; our guide to trash and recycling in Japan covers the basics so you’re not guessing at the bins.
    • Not budgeting for station snacks. Atami and Ito stations both have good souvenir counters — local senbei makers sell wasabi- and seafood-flavored crackers that make better gifts than generic Tokyo omiyage; see our senbei buying guide if you want to know what you’re choosing between.

    For a tight budget trip, a day return from Tokyo to Atami (shinkansen both ways, a higaeri onsen, and lunch) can be done for around ¥10,000-12,000 per person. Stretch that to an overnight ryokan stay with two meals and you’re looking at ¥20,000-35,000 per person total — reasonable for the combination of coastline, hot springs, and genuinely good seafood you get in return.
  • Kurobe Gorge Railway: Toyama’s Open-Air Trolley Train Through Unazuki Onsen

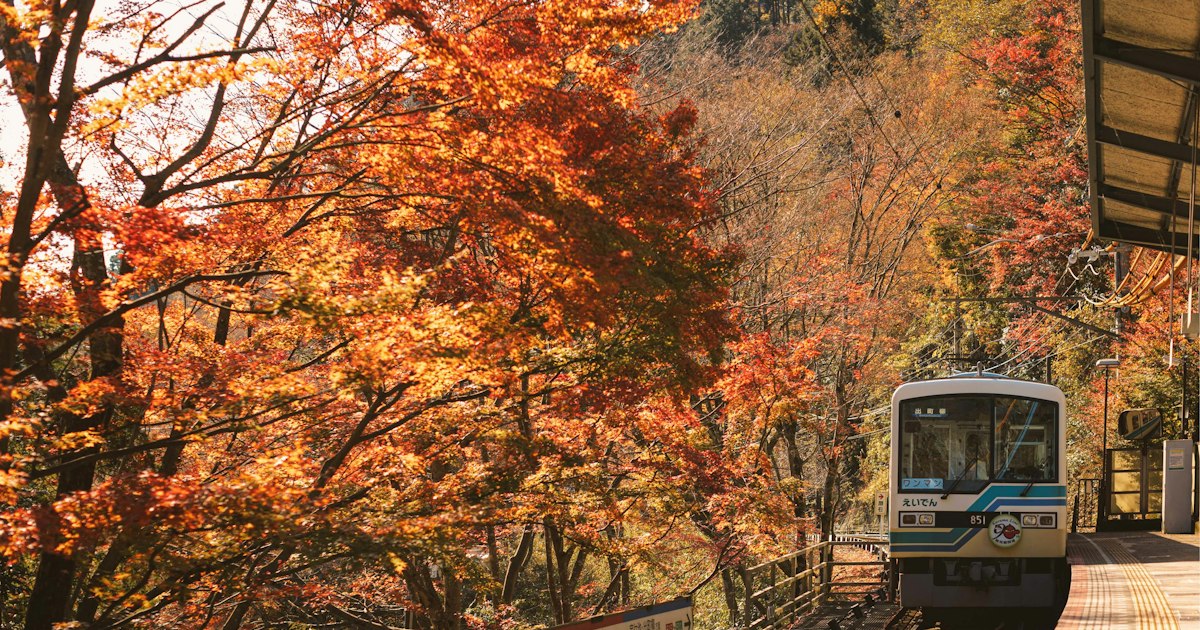
    Kurobe Gorge Railway: Toyama’s Open-Air Trolley Train Through Unazuki Onsen

    Photo by Bbb xzh on Unsplash

    Tucked into the mountains behind Toyama Bay, the Kurobe Gorge Railway (黒部峡谷鉄道) is one of Japan’s most memorable short train rides: a narrow-gauge trolley line built nearly a century ago to haul workers and dam materials into a sheer granite gorge, now carrying sightseers instead. The open-air cars creak across bridges strung high above jade-green water, duck through unlit tunnels, and stop at a hot spring you can only reach by rail. It’s slow, a little cold, and completely unlike anything on a standard Tokyo-Kyoto itinerary.

    What the Kurobe Gorge Railway Actually Is

    The line runs 20.1 km from Unazuki Station to the end-of-the-line Keyakidaira Station, climbing through the Kurobe Gorge along a route originally cut for hydroelectric dam construction in the 1920s-30s. A one-way trip takes about 80 minutes at a walking-pace crawl, with the train winding past tunnels, 41 bridges, and viewpoints where the gorge drops away on both sides. Most cars are genuinely open-air, meaning no windows on the sides — you feel the temperature drop as you enter the mountains, and in tunnels you’ll get a faint mist on your face. This isn’t a polished theme-park ride; it’s a working mountain railway that happens to be scenic enough to attract tourists, and that rough-edged quality is a big part of its appeal.

    Getting There from Toyama

    Start at Toyama Station, reachable via the Hokuriku Shinkansen (about 2 hours from Tokyo, roughly 25 minutes from Kanazawa). From there, take the Toyama Chihou Railway local line to Unazuki Onsen Station — about 1 hour 20 minutes, with limousine-style express trains cutting that down somewhat. Here’s the detail that trips people up: Unazuki Onsen Station (the Chihou Railway stop) and Unazuki Station (the Kurobe Gorge Railway’s starting point) are two separate stations about a 5-minute walk apart, connected by a signed path along the river. Budget extra time for this transfer, especially with luggage.

    If you’re driving, there’s paid parking near Unazuki Station, and the drive from Toyama city takes roughly an hour on local roads. Anyone combining this with a rental car elsewhere in the region should check our guide to ETC cards and expressway tolls before setting off, since several approach routes use toll roads.

    Tickets, Fares, and Which Car to Choose

    There are two main car types. The standard open-air car (ippan-kyaku) is unreserved, first-come first-served, and the one-way adult fare for the full run from Unazuki to Keyakidaira is around ¥1,980 (children roughly half price). The “Relax” car is glass-enclosed with proper windows and padded seats, reservable in advance for a surcharge of around ¥530 on top of the base fare — worth it if you’re visiting during peak autumn weekends when standard cars fill up fast, or if you’d rather not sit exposed to the wind for 80 minutes each way.

    You don’t have to ride the whole line. Shorter fares exist to intermediate stops like Kuronagi and Kanetsuri, which can be a good option if you’re short on time or traveling with young kids who won’t sit still for a 2.5-hour round trip. Buy tickets at the Unazuki Station window on the day, or reserve Relax car seats in advance through the railway’s official booking channels, especially for November weekends.

    Stops Worth Getting Off For

    Kuronagi Station is the most popular midway stop, home to Kuronagi Onsen — a riverside hot spring reachable via a short walk and a tunnel from the platform, with an open-air bath you can soak in for a fee even as a day visitor. Kanetsuri Station has a free footbath (ashiyu) right by the platform, a nice quick stop if you don’t want the full detour to Kuronagi. At the end of the line, Keyakidaira has walking trails to the Sarutobi Gorge viewpoint and the Okukane suspension bridge, plus its own footbath and a small restaurant — plan for at least 30-40 minutes here before the return train, since the turnaround schedule isn’t generous.

    Best Season and Timing

    The line is seasonal, typically running from mid-to-late April through the end of November, closing entirely in winter because snow and avalanche risk make the gorge impassable. Early-to-mid June brings fresh green foliage and is noticeably less crowded than autumn. Late October into early November is peak season for fall colors and also the busiest and most expensive time to find a room in Unazuki — expect sold-out Relax cars and long lines for standard cars if you arrive without a plan. Midsummer is pleasant precisely because the gorge stays cool, often 10°C or more below the valley floor, which is refreshing in August but means you’ll want a jacket no matter when you visit. Services occasionally suspend for heavy rain or rockfall checks, so build slack into your schedule rather than treating this as a tightly timed connection.

    Common Mistakes to Avoid

    • Underdressing: the open-air cars and tunnels are cold even in summer — bring a light jacket regardless of season.
    • Confusing the two Unazuki stations: Unazuki Onsen Station (Chihou Railway) and Unazuki Station (Kurobe Gorge Railway) are separate buildings a short walk apart.
    • Assuming it runs year-round: the line closes for winter; check the operating calendar before building an itinerary around it.
    • Skipping advance booking in autumn: Relax car seats and even standard-car capacity get tight on November weekends.
    • Treating it as a quick side trip: round trip plus transfers from Toyama easily eats half a day — don’t schedule a tight connection afterward.

    If you’re planning to photograph the gorge with a drone, note that flight restrictions apply around many of Japan’s dam and forest areas — our guide to drone laws and photography permits in Japan is worth checking before you pack one.

    Where to Stay and Budget Options

    Unazuki Onsen itself is a proper hot spring town, not just a train depot, with ryokan ranging from simple guesthouses to riverside inns with gorge views. Budget travelers can do the trolley as a day trip from Toyama city and skip lodging entirely — the standard car plus a short stop at Kanetsuri’s footbath makes for a satisfying half-day for well under ¥5,000 per person including transit. Mid-range visitors might add a Relax car reservation and a soak at a public bathhouse in Unazuki before heading back. For a splurge, stay overnight at a ryokan with its own onsen bath and kaiseki dinner, then combine the trip with the nearby Tateyama Kurobe Alpine Route for a multi-day Toyama mountain itinerary — the two routes sit in the same region but offer completely different experiences, one a riverside gorge railway, the other a high-altitude crossing by cable car and bus.

  • Oden: Japan’s Winter Hot Pot Snack and Where to Find It at Convenience Stores

    Oden: Japan’s Winter Hot Pot Snack and Where to Find It at Convenience Stores

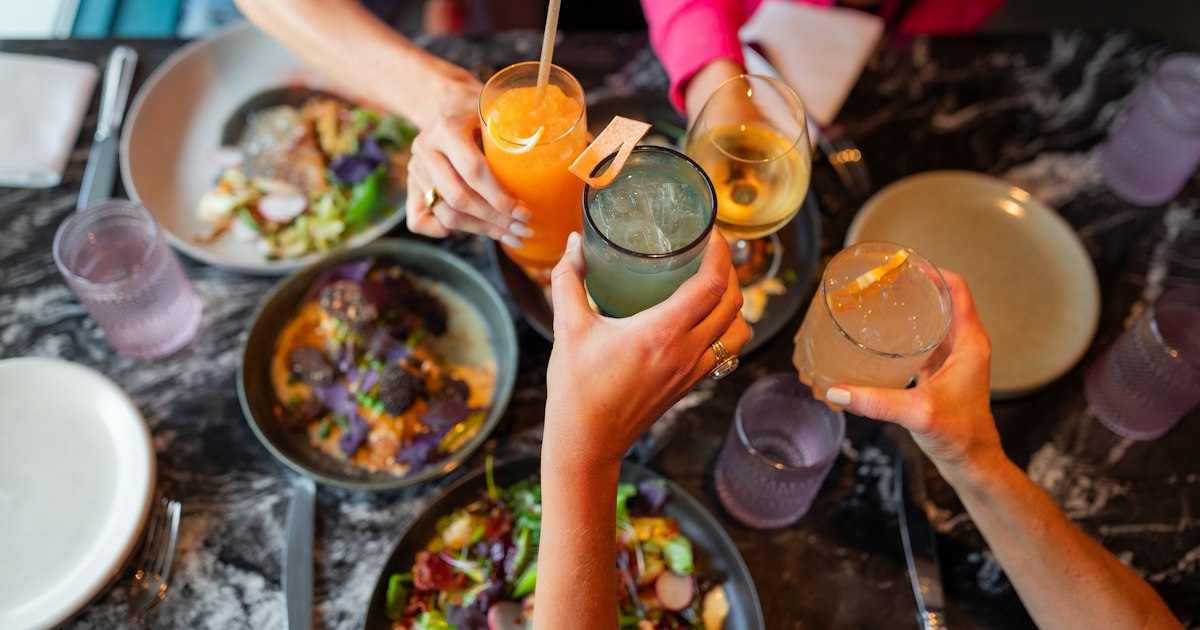
    Photo by Julien on Unsplash

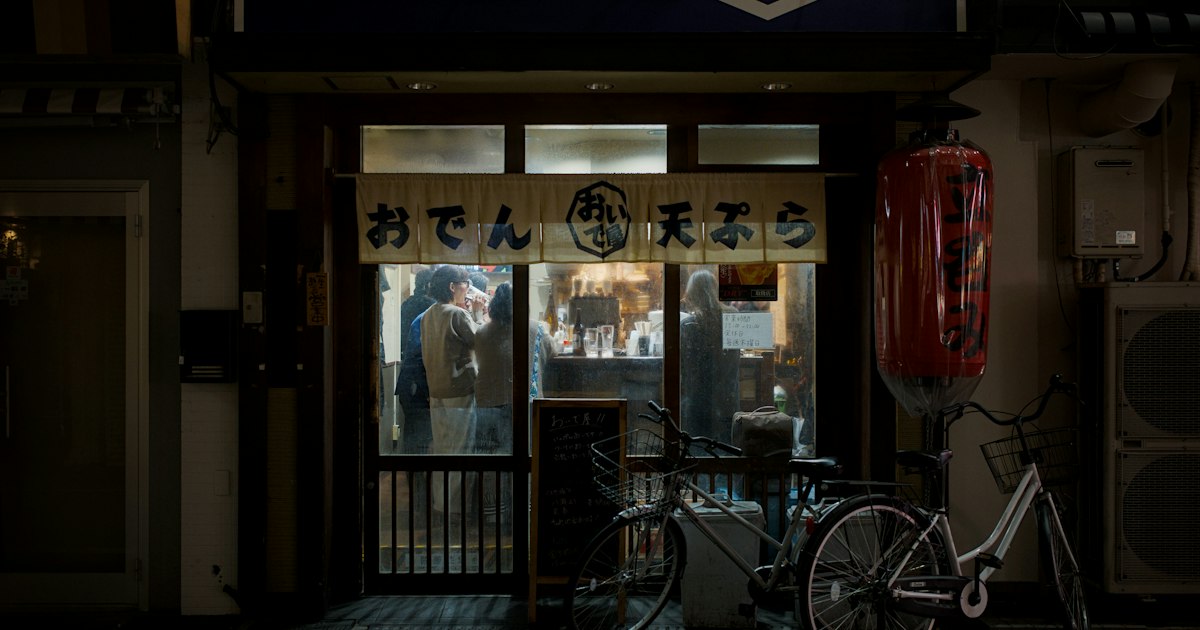
    Walk into a Japanese convenience store on a cold evening between November and March and you’ll smell it before you see it: a steaming metal pot near the register, divided into compartments, each one holding something simmering in dark, savory broth. That’s oden, and it’s one of the best cheap, quick meals you can get in Japan without ever sitting down at a restaurant. Here’s how to order it, what to pick, and what it should cost you.

    What Is Oden, Exactly?

    Oden is a one-pot dish of various ingredients—daikon radish, boiled eggs, fish cakes, tofu, konjac—slow-simmered together in a light dashi broth seasoned with soy sauce and mirin. Everything sits in the same broth for hours, so the flavors blend: the daikon turns nearly translucent and soaks up the broth, the eggs turn a pale amber, and the fish cakes become soft and savory. It’s less a dish you cook than one you tend, which is exactly why convenience stores are so good at it—the pot simmers all day, and staff top it up as items sell.

    Regional variations exist (Kansai broth tends to be lighter and saltier, Nagoya has a miso-based version called miso oden), but the convenience store version you’ll encounter nationwide is the standard Kanto-style soy-dashi broth, and it’s remarkably consistent whether you’re in Sapporo or Fukuoka.

    Why Convenience Stores Are the Best Way to Try It

    You could seek out a dedicated oden restaurant (oden-ya), and it’s worth doing once for the atmosphere—but a sit-down oden dinner with drinks easily runs ¥3,000–6,000 per person. The convenience store version costs a fraction of that, requires no reservation or Japanese ability, and is available at nearly every 7-Eleven, Lawson, and FamilyMart in the country. For a traveler trying to eat well on a tight schedule between sightseeing stops, it’s hard to beat: you can grab a cup of oden, eat it standing at the store’s window counter if there is one, and be back on your way in five minutes.

    It also pairs naturally with other convenience store staples worth trying on the same trip—karaage (Japan’s fried chicken) is sold at the same hot case and makes a good non-broth companion if you want something to go alongside your oden cup.

    How to Order Oden at a Konbini, Step by Step

    The pot sits near the checkout counter, usually with a laminated sign showing photos and prices of each item. The process varies slightly by store policy (some are self-service with tongs, others have staff serve you for hygiene reasons), so watch what other customers are doing or simply ask the staff—pointing works fine.

    • Grab a cup: You’ll get a paper or plastic container, sometimes with a lid.
    • Choose your items: Point at what you want, or tell the staff the names if you know them. Staff will transfer each piece into your cup with tongs.
    • Get your broth: The cup is topped up with hot dashi broth before the lid goes on.
    • Ask for mustard: Karashi (hot Japanese mustard) usually comes in a small free packet—ask for “karashi” if it isn’t automatically included, and dab a little onto your eggs or daikon for a sharp kick that cuts the broth’s sweetness.
    • Pay at the register: Oden is priced and rung up per item, not as a set meal, so the cashier will total it up based on what’s in your cup.

    What to Pick: A Beginner’s Guide to the Pot

    If you’ve never seen an oden pot before, the compartments can be confusing. Here are the staples you’ll find at almost every store:

    • Daikon (radish): The most popular item by far—soft, broth-soaked, and mild. A safe first pick.
    • Tamago (boiled egg): Simmered for hours until the yolk firms up and takes on the broth’s color and flavor.
    • Konnyaku: A firm, chewy jelly made from konjac yam—low in flavor on its own but great at absorbing broth.
    • Chikuwa: A tube-shaped fish cake with a mild, slightly sweet taste.
    • Hanpen: A soft, spongy fish cake, almost like a savory marshmallow in texture.
    • Atsuage: Thick fried tofu, meaty and filling.
    • Chikuwabu: A wheat-gluten tube found mainly in Kanto-style oden—chewy, mild, and divisive among first-timers.
    • Gyusuji (beef tendon) skewers: A pricier, richer option for those who want more substance.

    A good first cup for someone trying oden for the first time: daikon, a boiled egg, and one fish cake (chikuwa or hanpen). That gives you the core textures and flavors without overcommitting.

    Price Guide: Budget, Mid-Range, and Splurge

    Budget (convenience store): Most individual items run roughly ¥90–150, with a few pricier items like beef tendon skewers reaching ¥200–250. A satisfying cup of four to six pieces typically costs ¥500–800 total—genuinely one of the cheapest hot meals available in Japan.

    Mid-range (supermarket depachika counters): Department store basement food halls often sell pre-packaged oden sets to take home, priced by weight or as a family-size tray, generally landing in the ¥1,000–2,500 range for enough to share.

    Splurge (dedicated oden-ya): A proper sit-down oden restaurant, often with counter seating and sake pairings, will run ¥3,000–6,000 per person for a full meal, and is a nice way to spend a cold evening if you have time for it, particularly in Tokyo neighborhoods with old-school izakaya culture.

    When to Go: Oden Season and Timing

    Oden is a cold-weather food, and convenience store pots generally appear around October and disappear by late March or April, with peak availability from December through February. Some stores quietly suspend their hot food pots during the hottest summer months or occasionally for hygiene/staffing reasons, so don’t count on finding it in July. If oden is a priority for your trip, plan your visit for winter—it also pairs well with other cold-season activities, so if you’re heading somewhere snowy like the Tateyama Kurobe Alpine Route, a konbini oden stop on the way is a natural fit.

    Common Mistakes to Avoid

    • Assuming it’s self-serve everywhere: Policies vary by store and even by time of day. Always glance at what other customers do, or just ask—don’t assume you can use the tongs yourself.
    • Double-dipping your own chopsticks into shared sauces or mustard packets: Japan takes shared-condiment hygiene seriously—the same etiquette you’ll find with Osaka’s kushikatsu skewers and their no-double-dipping rule applies broadly here.
    • Not asking for extra broth: If your cup looks dry, you can usually ask for a bit more dashi before the lid goes on—it’s typically free.
    • Ordering too much at once: Items are priced individually and add up fast. Start with three or four pieces rather than filling the cup.
    • Eating it ice-cold: Oden is meant to be eaten hot, soon after purchase. If you’re taking it back to a hotel, ask for it to be reheated or eat it within a few minutes of leaving the store.

    Oden won’t win any beauty contests in photos, but it’s one of the most genuinely local, unpretentious foods you can eat in Japan—standing at a convenience store counter on a freezing night, cup in hand, is a small travel memory that sticks. If you’re building out a broader list of Japanese comfort foods to try, pairing an oden stop with something like Sanuki Udon in Kagawa or a bowl of Zaru Soba rounds out a solid culinary itinerary beyond the big-city restaurant scene.

  • Bic Camera vs Yodobashi Camera: Points Cards, Tax-Free & Which to Choose

    Bic Camera vs Yodobashi Camera: Points Cards, Tax-Free & Which to Choose

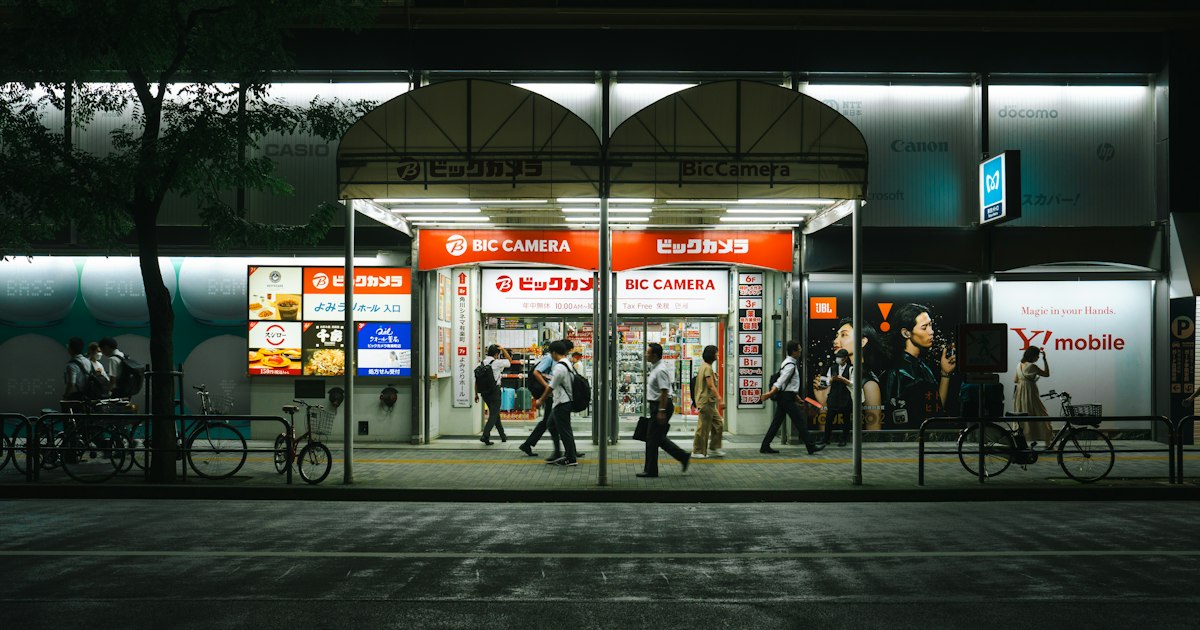
    Photo by taro ohtani on Unsplash

    If you’re buying a camera, rice cooker, or the latest gaming handheld in Japan, you’ll almost certainly end up choosing between Bic Camera and Yodobashi Camera. Both are nationwide electronics megastores with duty-free counters, English-speaking staff, and towers of merchandise that can overwhelm even confident shoppers. The two chains look similar from the outside, but their points systems and store layouts work differently enough that picking the wrong one — or using it the wrong way — can cost you real money. Here’s what actually matters.

    Bic Camera vs Yodobashi Camera: What’s the Difference?

    Both chains sell the same core categories: cameras, laptops, phones, home appliances, watches, toys, and increasingly cosmetics and souvenirs on their tax-free floors. The practical differences come down to store footprint and location:

    • Yodobashi Camera tends to build a small number of enormous flagship stores — Yodobashi Akiba next to Akihabara Station is the chain’s largest, spanning multiple buildings with electronics, a golf range, and a rooftop baseball field for demos.
    • Bic Camera runs more, slightly smaller branches spread across major stations, including a flagship in Yurakucho (walking distance from Ginza and Tokyo Station), a huge Shinjuku location split across east and west exits, and branches in Ikebukuro, Namba, and Umeda.

    In practice, both carry near-identical stock from the same Japanese brands (Panasonic, Sony, Zojirushi, Tiger, Nintendo), so for a single-item purchase, proximity to your hotel or train route usually matters more than brand loyalty.

    How Tax-Free Shopping Works at Both Chains

    Both Bic Camera and Yodobashi have dedicated tax-free counters (look for “Tax-Free” signage, usually on an upper floor). The rules are set by Japanese customs, not the store, so they’re identical at both chains:

    • You must be a foreign tourist (short-term visa status) and show your passport at checkout or the tax-free counter.
    • Minimum spend is ¥5,000 (before tax) in a single day at a single store to qualify for the 10% consumption tax exemption.
    • Electronics, appliances, and general goods no longer need to be sealed in special bags — only consumable items like food, drinks, and cosmetics still get sealed and must leave Japan unopened within 30 days.
    • Your passport gets an electronic record attached at purchase; customs may check this on departure, so keep tax-free receipts accessible until you’ve left the country.

    Both stores accept major foreign credit cards, Alipay, WeChat Pay, and increasingly cash-free payment for tax-free purchases, so there’s no real advantage either way on the mechanics of tax exemption itself.

    Points Cards: Bic Point vs Yodobashi Gold Point

    This is where things diverge and where most visitors lose value without realizing it. Both chains run loyalty programs — Bic Point and Yodobashi Gold Point — that return somewhere around 8–10% of your purchase as store credit usable on a future visit to the same chain.

    The catch: when you use the tax-free exemption, the points rate on that purchase is typically cut roughly in half (often down to around 5%, though the exact figure varies by product category and is posted at the register). The store effectively can’t give you both the full tax break and the full points rate on the same transaction.

    For most tourists this doesn’t matter much, since points only redeem at that same chain’s Japanese stores and expire within a year or two — not very useful if you’re flying home in a week. But it matters if:

    • You’re making multiple purchases on the same trip and could redeem points at a second visit before you leave.
    • You’re a frequent visitor to Japan who might come back within the points’ validity window.
    • You’re buying a big-ticket item (a camera body, a laptop) where even a 3–5 percentage point difference is thousands of yen.

    In that case, do the math: sometimes skipping the tax exemption and taking the full points rate is actually worse than taking tax-free and the reduced points, since the 10% tax saving is immediate and guaranteed while points require a return visit. For a one-time tourist purchase, always take the tax exemption.

    Both point cards can be issued on the spot to tourists with just a passport — no Japanese address or phone number required — but there’s little reason to sign up unless you’re buying enough to make the points meaningful before you leave.

    Flagship Stores and How to Get There

    Yodobashi Akiba sits directly connected to Akihabara Station (JR Yamanote/Chuo-Sobu lines, Hibiya and Tsukuba Express lines nearby), making it an easy add-on if you’re already exploring Akihabara’s electronics and anime shops. It’s open roughly 9:30 AM–10:00 PM daily and is large enough to need a floor map — electronics are on lower floors, with restaurants and a sports/outdoor section upstairs.

    Bic Camera Yurakucho is a 1–2 minute walk from Yurakucho Station (JR Yamanote/Keihin-Tohoku lines) or Ginza Station, and sits right at the edge of the Ginza shopping district, so it pairs naturally with a day of upscale window shopping. Hours are typically 10:00 AM–9:00 PM. Bic Camera’s Shinjuku East branch (the “Bicqlo” building, which shares space with a Uniqlo) is another strong option if you’re based around Shinjuku.

    Both chains also have large branches in Osaka (Yodobashi Umeda near Osaka Station; Bic Camera Namba near Namba Station), so travelers doing a Tokyo–Osaka itinerary don’t need to front-load all their electronics shopping in one city.

    Common Mistakes to Avoid

    • Not comparing prices between floors. Both stores sometimes have the same item at slightly different prices between a “new release” display and the regular shelf — scan the barcode with a price-comparison app if you’re unsure.
    • Forgetting your passport. No passport, no tax exemption — staff cannot apply it retroactively once you’ve left the counter.
    • Assuming voltage and plugs match home. Japan runs on 100V, and some appliances (rice cookers, hair tools) are built for Japanese electrical standards only — ask staff for an “overseas use” (kaigai taiô) model if you plan to use it outside Japan.
    • Buying the first thing you see. Both chains will often price-match a competitor’s listed price if you ask politely at the register, especially on cameras and laptops — it’s worth a try before you commit.

    Which Should You Choose?

    For most visitors, the honest answer is: whichever is closer to where you’re already going. If you’re spending a day in Akihabara, Yodobashi Akiba’s scale and the surrounding electronics district make it the obvious stop. If you’re based near Ginza, Tokyo Station, or Shinjuku, Bic Camera’s flagship branches are just as well-stocked and save you a detour. Big spenders on a single large purchase should take the tax exemption every time and treat points as a minor bonus rather than a deciding factor. And if electronics shopping isn’t scratching your itch for only-in-Japan retail, it’s worth pairing your trip with something quirkier — Village Vanguard’s chaotic variety-store shelves or Koenji’s vintage clothing racks make a good contrast to a sterile electronics floor.

  • Zunda Mochi: Sendai’s Sweet Edamame Paste and Other Tohoku Snacks

    Zunda Mochi: Sendai’s Sweet Edamame Paste and Other Tohoku Snacks

    Photo by Negley Stockman on Unsplash

    Mention “zunda” to most Japanese people and they’ll immediately picture Sendai — the largest city in the Tohoku region and the undisputed home of this bright green, slightly sweet edamame paste. Zunda mochi is soft pounded rice cake coated in mashed young soybeans, sugar, and a pinch of salt, and it’s become the edible calling card of Miyagi Prefecture, showing up on everything from mochi to soft-serve ice cream. If you’re routing a Tohoku trip around food, here’s what’s actually worth your time and money.

    What Is Zunda Mochi, Exactly?

    Zunda is made by boiling edamame, popping the beans out of their pods, and grinding them into a coarse, slightly grainy paste with sugar and a touch of salt. Unlike red bean (anko), which is deep reddish-brown and earthy, zunda is pale green and tastes fresher and lighter — closer to a sweet edamame hummus than a traditional Japanese sweet. The paste is then spread over or mixed with soft mochi to make zunda mochi, the classic format, though you’ll also see it as zunda daifuku (mochi stuffed with a bean filling), zunda shake (a thick, cold blended drink), and zunda-flavored soft-serve.

    The dish has roots going back centuries in the farming communities of Miyagi, where edamame was a summer staple, but it was popularized as a tourist souvenir starting in the 1980s–90s, particularly through the shop chain Zunda Saryo (ずんだ茶寮), which now has a near-monopoly presence at Sendai Station.

    Where to Try It in Sendai

    Sendai Station is genuinely the easiest place to do this — no taxi or bus required. On the station’s 3rd floor, the “Sen-eki” food and souvenir area has multiple zunda specialists clustered within a few minutes’ walk of each other:

    • Zunda Saryo — the best-known chain, with a sit-down cafe and a takeaway counter in the station. A plate of zunda mochi (a few small pieces) runs roughly ¥600–800; the zunda shake, a cold whipped drink that’s part milkshake, part smoothie, is around ¥500–600.
    • Zunda-ya — a similarly long-running competitor with its own takeaway boxes of individually wrapped zunda mochi, useful as omiyage (souvenir gifts) since they’re vacuum-sealed and travel well for a day or two.
    • Convenience stores and station kiosks — during spring and summer, Sendai-area 7-Eleven and Lawson branches often stock zunda-flavored snacks (bread, daifuku, even KitKat-style bars) for a fraction of the cafe price, if you just want a taste without sitting down.

    If you have more time, Sendai’s covered shopping arcades near the station (Clis Road and the Ichibancho arcade) have additional wagashi (traditional sweets) shops selling fresh zunda mochi made same-day, which has a noticeably better texture than the shelf-stable souvenir boxes.

    Best Season and Timing

    Zunda mochi is sold year-round because most shops use frozen edamame, but the freshest, most vividly flavored versions appear from July through September, when Miyagi’s edamame harvest is in season. If you’re visiting in midsummer, look for shops advertising “生ずんだ” (nama zunda, or fresh zunda) — the color is greener and the taste less sugar-forward than the frozen version used the rest of the year. Shops in the station food court typically open around 9:00–10:00 and close by 20:00–21:00, syncing with train traffic rather than separate hours, so there’s no need to plan a special visit window — it fits naturally around a shinkansen connection.

    Getting to Sendai

    Sendai is about 90 minutes from Tokyo Station on the Tohoku Shinkansen (Hayabusa or Yamabiko trains), and it’s fully covered by the Japan Rail Pass, so there’s no extra cost if you already have one. It also works well as a base for exploring the rest of Tohoku — Yamagata, Akita, and Aomori are all further up the same shinkansen line. If you’re planning to rent a car to reach more rural parts of Miyagi or neighboring prefectures, it’s worth reading up on ETC cards and expressway tolls beforehand, since Tohoku’s expressway network is the practical way to reach smaller towns that trains don’t serve well.

    Beyond Zunda: Other Tohoku Snacks Worth Packing

    Zunda is the headline act, but Tohoku’s other prefectures each have their own snack specialties that rarely make it onto standard Tokyo souvenir shelves:

    • Sasa kamaboko (Miyagi) — a steamed or grilled fish cake shaped like a bamboo leaf, mildly sweet and savory rather than a dessert. Sold at shops like Abe Kamaboko near Sendai Station, individually priced around ¥150–250 per piece.
    • Hagi no Tsuki (Miyagi) — Sendai’s other signature confection: a soft castella-style sponge shell wrapped around fresh whipped cream. Boxes of 6–8 pieces typically run ¥1,000–1,500 and are one of the most popular omiyage bought at Sendai Station, so buy early in the day if you want a full selection.
    • Kiritanpo (Akita) — mashed rice formed onto cedar skewers and grilled, usually eaten in a hot pot (kiritanpo nabe) rather than as a snack, but skewer versions are sold plain with sweet miso at festivals and rest stops.
    • Wanko soba (Iwate) — not a snack so much as an event: small bowls of soba served continuously in Morioka restaurants until you cap your bowl to signal you’re full. Worth doing once if your itinerary stretches north to Morioka.

    If seasonal regional food is part of what draws you to a trip like this, it’s worth comparing notes with Firefly Squid Season in Toyama — a similarly tight seasonal window built around one regional specialty, on the opposite coast.

    Common Mistakes to Avoid

    The biggest one is assuming zunda mochi travels indefinitely — the fresh cafe versions with real whipped cream or fresh mochi typically need to be eaten the same day, while only the individually wrapped, vacuum-sealed souvenir boxes (usually labeled with a shelf life of several days to a couple of weeks) are suited for checked luggage or gifting back home. Ask the shop staff directly (“Kore wa nan-nichi motte imasu ka?” — “how many days will this keep?”) if you’re unsure, since the two product lines often sit on the same shelf. Second, don’t assume zunda tastes like matcha because of the green color — it’s a legume-based paste, not a tea flavor, and the sweetness profile is quite different, which occasionally surprises first-time tasters expecting a green tea dessert.

    Budget, Mid-Range, and Splurge

    For a quick taste, a convenience-store zunda snack costs ¥150–300. A proper sit-down plate of zunda mochi or a zunda shake at Zunda Saryo or Zunda-ya runs ¥500–800 and is the standard mid-range experience most visitors go for. For a splurge, some of the wagashi shops in Sendai’s Ichibancho arcade sell same-day fresh zunda mochi gift sets made with premium Miyagi-grown edamame, priced from around ¥2,000–3,000 for a boxed set — a reasonable gift if you’re visiting someone’s home in Japan or want the best possible version rather than the station souvenir.

    If you end up staying overnight in the Miyagi or Yamagata countryside rather than just passing through, it’s also worth looking at kominka farmhouse stays, several of which serve home-style versions of regional dishes like zunda and kiritanpo that don’t appear on restaurant menus at all. And if edible souvenirs with a strong regional identity are your thing, Miyajima’s momiji manju makes a good point of comparison — a very different sweet, but the same idea of a single confection becoming a whole prefecture’s culinary calling card.

  • Shinsekai: Osaka’s Retro Tower District and Its Kushikatsu Alleys

    Shinsekai: Osaka’s Retro Tower District and Its Kushikatsu Alleys

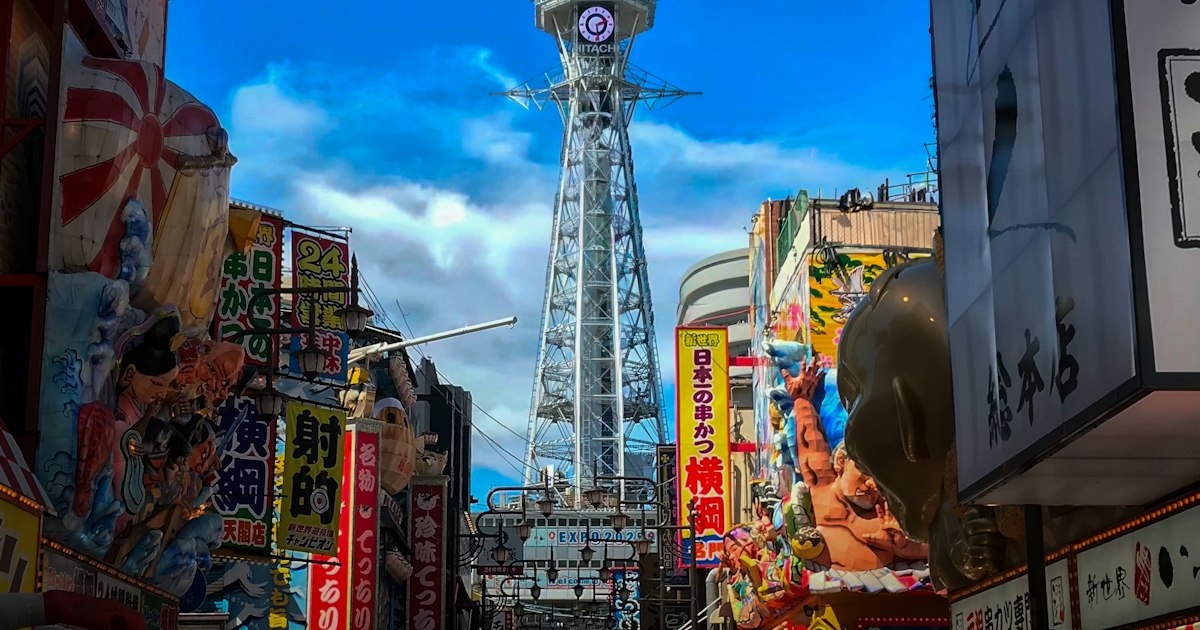
    Photo by Dynamic Hong Kong on Unsplash

    Shinsekai means “New World,” and when it opened in 1912 that’s exactly what it was meant to be — a slice of Paris and Coney Island grafted onto southern Osaka, complete with its own Eiffel Tower knockoff. More than a century later, the utopian theme-park ambitions are long gone, replaced by something stranger and more likeable: a compact grid of neon-lit alleys, deep-fried skewer shops, retro arcades, and a tower that still glows over it all. It’s touristy, a little scruffy around the edges, and one of the most photogenic few blocks in the city.

    What Shinsekai Actually Is

    Shinsekai sits at the southern edge of central Osaka, wedged between Tennoji Park and the older working-class neighborhoods south of it. The district’s layout still follows its original 1912 plan: streets radiate out from Tsutenkaku Tower like spokes, a design borrowed from Paris’s Champs-Élysées, while the tower itself was inspired by the Eiffel Tower. The current tower isn’t the original — that one was dismantled for scrap metal during World War II — but the 1956 rebuild has become one of Osaka’s most recognizable landmarks anyway, especially at night when its LED sides flash and its beacon changes color to forecast the next day’s weather (blue for clear, orange for cloudy, and so on).

    The neighborhood’s reputation swung from glamorous to rough through the 20th century — it bordered Kamagasaki, a day-laborer district — before reinventing itself again in the 1990s and 2000s as a nostalgia destination. Today it’s safe and heavily visited, though it still feels grittier and more lived-in than Dotonbori a few kilometers north.

    Getting There

    The easiest approach is Dobutsuen-mae Station, served by the Midosuji Line, Sakaisuji Line, and Sennichimae Line — it’s a two-minute walk to the base of the tower. Ebisucho Station on the Sakaisuji Line is equally close and also connects to the Hankai Tramway, Osaka’s last surviving streetcar line, which is worth riding for its own retro charm if you have time. Shinsekai is also an easy 10-minute walk from JR Tennoji Station or Shin-Imamiya Station, both of which are on the JR Loop Line and connected to Kansai Airport via the Haruka limited express, so it works well as a first or last stop on a Kansai itinerary.

    Tsutenkaku Tower

    The tower’s observation deck runs roughly 10am to 8pm (last entry around 30 minutes before close), with adult admission around ¥900–¥1,000; tickets are sold at the base and lines build up on weekend afternoons. Inside, the main draw is Billiken, a squat, grinning good-luck statue enshrined on one of the observation floors — tradition says you rub the soles of his feet (not his head) to make a wish come true, and most visitors do. The view itself isn’t Tokyo Skytree-scale, but that’s the point: you’re looking down at Shinsekai’s own rooftop signage and pachinko lights rather than a generic skyline, which makes it one of the more atmospheric tower views in Japan.

    Kushikatsu Alleys: Eating Your Way Through

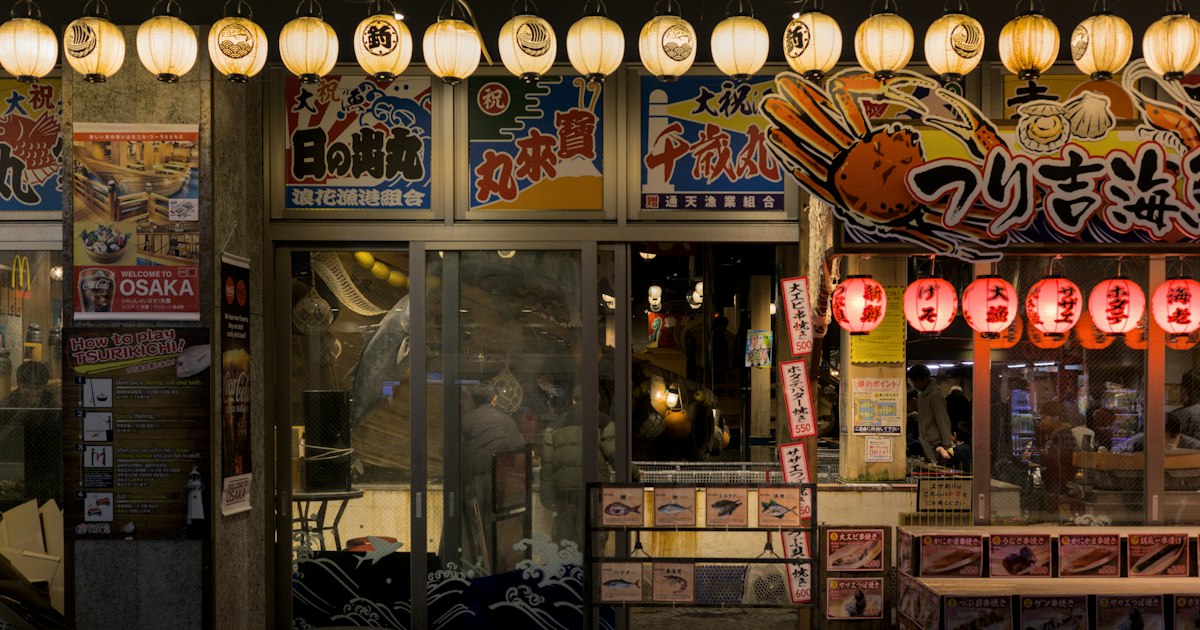
    Shinsekai is the spiritual home of kushikatsu — bite-sized meat, seafood, and vegetables skewered and deep-fried in a light batter — and the streets fanning out from the tower are lined with shops competing for your attention with hanging lanterns and life-size chef mascots. Daruma, founded here in 1929 and instantly recognizable by its scowling mascot logo, is the most famous chain and has several branches within a few blocks; expect skewers from around ¥100–¥250 each and a wait at peak dinner hours. For the full etiquette rundown — including the famous “no double-dipping” rule, where the communal sauce pot is off-limits to a skewer that’s already been bitten — see our dedicated guide to kushikatsu in Osaka. It’s genuinely enforced here, not just a tourist myth, and breaking it is the single most common mistake first-time visitors make — use the shredded cabbage provided at the table to scoop extra sauce instead of re-dipping.

    Most kushikatsu shops open for lunch around 11am and stay open until 11pm or later, and many don’t take reservations, so arriving right at opening or well before 6pm avoids the worst queues.

    Jan-Jan Yokocho and the Standing Bars

    Just south of the main tower strip, the covered arcade of Jan-Jan Yokocho is the district’s older, quieter half — a narrow lane of shogi and go parlors, cheap noodle counters, and standing bars that hasn’t changed much in decades. It’s a good place to see the neighborhood’s working-class roots up close, away from the souvenir shops. Several tachinomi (standing bars) here serve small plates and cheap draft beer to a mostly local, older crowd standing at counters rather than sitting; if the format is new to you, our guide to tachinomi culture and ordering etiquette covers the basics — pay as you go, keep your visit relatively short, and don’t expect an English menu.

    Best Time to Visit and Common Mistakes

    Shinsekai is genuinely a nighttime district — the neon signage and tower lighting are the main event, so aim to arrive around sunset and stay through dinner rather than treating it as a daytime stop. Weekday evenings are noticeably calmer than Friday and Saturday nights, when the main strip gets shoulder-to-shoulder. Any season works, since most of the experience is indoors or under the arcade roof, though summer evenings are muggy and a light jacket helps in winter since you’ll be walking between shops.

    • Mistake: double-dipping the sauce. It’s the one rule everyone enforces here — dip once before your first bite.
    • Mistake: eating at the first shop you see. The shops directly facing the tower tend to charge more for the same skewers as places one block over.
    • Mistake: skipping Jan-Jan Yokocho. Most visitors only see the tower-facing strip and miss the more atmospheric older arcade a minute away.
    • Mistake: assuming credit cards work everywhere. Many of the smaller stalls and standing bars are cash-only; bring yen.

    Budget, Mid-Range, and Splurge

    On a tight budget, you can eat well for under ¥1,500 by picking five or six skewers at a counter-style kushikatsu shop and pairing them with a ¥400 draft beer at a standing bar in Jan-Jan Yokocho. A mid-range dinner at a sit-down branch of Daruma or a similar established chain, with a full course of skewers, rice, and miso soup, runs closer to ¥3,000–¥4,000 per person. For a splurge, some of the larger kushikatsu restaurants near the tower offer premium courses with wagyu beef, whole prawns, and seasonal vegetables for ¥6,000–¥8,000, plus private tatami seating — worth it if you want the full experience without standing at a counter. Whichever tier you choose, pair it with the ¥900 trip up Tsutenkaku beforehand; watching the neon switch on from above makes the alleys below far more fun to wander afterward.

  • Tateyama Kurobe Alpine Route: Toyama’s Snow Corridor and Mountain Crossing

    Tateyama Kurobe Alpine Route: Toyama’s Snow Corridor and Mountain Crossing

    Photo by Dana Andreea Gheorghe on Unsplash

    The Tateyama Kurobe Alpine Route is one of the few places in Japan where you cross an entire mountain range without a car, a hiking permit, or a full day of climbing. Over about six hours you switch between a cable car, a highland bus, an underground trolleybus, a “cable-less” ropeway, and another cable car, threading through the Northern Japan Alps between Toyama Prefecture and Nagano Prefecture. In late April and May, the highlight is the Yuki-no-Otani snow corridor—a road cut through walls of snow that can reach 20 meters. The rest of the year, it’s simply one of the most dramatic mountain crossings you can do without technical gear.

    What the Alpine Route Actually Is

    This isn’t a single train or cable car—it’s a chain of seven different vehicles covering roughly 37 km and climbing to 2,450 meters at Murodo, the route’s highest point. Most travelers go one-way, entering on one side of the Alps and exiting on the other, rather than doing a round trip. The Toyama side starts at Tateyama Station; the Nagano side starts at Ogizawa. In between you’ll transfer at Bijodaira, Murodo, Daikanbo, and Kurobedaira, with a walk across the top of Kurobe Dam—Japan’s tallest dam at 186 meters—built into the middle of the journey.

    Because it’s a one-way crossing for most visitors, plan your onward transport in advance: you’ll end up on the opposite side of the Alps from where you started, which usually means either looping back by train or continuing on to Matsumoto or Nagano.

    The Yuki-no-Otani Snow Corridor

    The snow corridor is a walking path cut through accumulated snow near Murodo Station, and it’s the reason most people time their visit for spring. The walls are tallest right when the route opens for the season—typically mid-April—and they gradually melt down through late June, when the walking section usually closes for the year. If you want the classic photo of walls towering well above head height (12–20 m), aim for the opening weeks in late April; by early June the walls are usually down to a few meters.

    Dress like you’re going skiing, not sightseeing. Murodo sits at 2,450 m and stays near or below freezing through May even on sunny days—a warm jacket, gloves, and sturdy shoes are non-negotiable, and the path can be icy underfoot.

    How to Get There and Through

    From the Toyama side: Take the Toyama Chihō Railway from Dentetsu-Toyama Station (a short walk from JR Toyama Station) to Tateyama Station, about 1 hour. From there it’s cable car to Bijodaira, then highland bus up to Murodo.

    From the Nagano side: Take the JR Oito Line from Matsumoto to Shinano-Omachi (about 1 hour), then a local bus to Ogizawa (around 40 minutes). From Ogizawa, the Kanden Tunnel trolleybus takes you into the mountain to start the crossing in reverse.

    If you’re driving to either gateway station, note that private cars can’t enter the Alpine Route itself—you park at Tateyama or Ogizawa and switch to the route’s own vehicles. If you’re renting a car for the wider Toyama/Nagano leg of your trip, our guide to ETC cards and expressway tolls is worth reading before you set off, since the drive in involves toll roads on both sides.

    Tickets, Prices, and Luggage

    You can buy individual tickets for each leg at each station, or a through ticket covering the whole crossing in one direction. The full one-way through ticket (Tateyama to Ogizawa, or the reverse) generally runs in the ¥12,000–13,000 range per adult; children pay roughly half. Fares are adjusted periodically, so check the official Alpine Route website for the current breakdown before you go rather than relying on last year’s numbers.

    Because you’re changing vehicles seven times, hauling luggage the whole way is miserable. Both Tateyama and Ogizawa offer a same-day baggage forwarding service (around ¥2,000–3,000 per piece) that sends your bags ahead to a hotel or station on the other side, usually arriving the same evening. If you’re staying in Toyama city before or after, this is worth arranging the day before you cross.

    Best Time to Go

    The route opens mid-April and closes around November 30 each year. Broadly:

    • Late April–early May: tallest snow walls, but also Golden Week (April 29–May 5), when buses and cable cars run at capacity and queues at Bijodaira and Murodo can stretch for over an hour.
    • June–July: the snow corridor walking path is gone, but Murodo’s marshland trails (Mikurigaike pond, Midagahara) open up for easy alpine walks, and wildflowers start blooming.
    • Late June–mid-October: Kurobe Dam performs its scheduled water release (houshui), a genuinely impressive sight if your timing lines up—check the dam’s release schedule in advance.
    • October: autumn colors around Murodo and Bijodaira, with far shorter lines than spring.

    For fewer crowds, aim for weekday travel in June or October, and take the first bus/cable car of the morning—departures fill up fast after 9 a.m. in peak season.

    Common Mistakes

    The most common misstep is treating this as a half-day trip. Budget a full day for the one-way crossing once you add transfers on both ends, and don’t schedule a tight onward train right after you arrive at Ogizawa or Tateyama—delays from weather or bus queues are routine. Second, underdressing: even in August, wind at Murodo and Daikanbo can make it feel 15–20°C colder than at your hotel that morning. Third, assuming you can buy a through ticket for any departure time you want in Golden Week—during the busiest weeks, same-day tickets can sell out by mid-morning, so buy in advance or start early. Finally, don’t forget cash or IC card top-ups for local buses on the Nagano side; not every rural connecting bus takes credit cards.

    Budget, Mid-Range, and Splurge

    On a budget, do the crossing as a long day trip: take an early train from Toyama, cross to Ogizawa, and continue to Matsumoto or Nagano the same evening, skipping a mountain hotel stay entirely. Mid-range travelers often overnight in Toyama city the night before—handy if you’re also timing a visit around Toyama’s firefly squid season, which runs roughly March through May and overlaps neatly with the snow corridor’s best weeks. For a splurge, book a night at one of the mountain lodges near Murodo or Kurobedaira, which lets you catch sunrise over the Alps before the day-trip crowds arrive on the first bus up from Bijodaira.

    If you’re bringing a camera or drone for the scenery, check the rules first—flying over the dam area and other parts of the route falls under restrictions covered in our guide to drone laws and photography permits in Japan, since much of the Alpine Route sits inside a national park where drone use is tightly limited or banned outright.

  • Sanuki Udon: Kagawa’s Chewy Noodle Pilgrimage and How to Order

    Sanuki Udon: Kagawa’s Chewy Noodle Pilgrimage and How to Order

    Photo by Jinomono Media on Unsplash

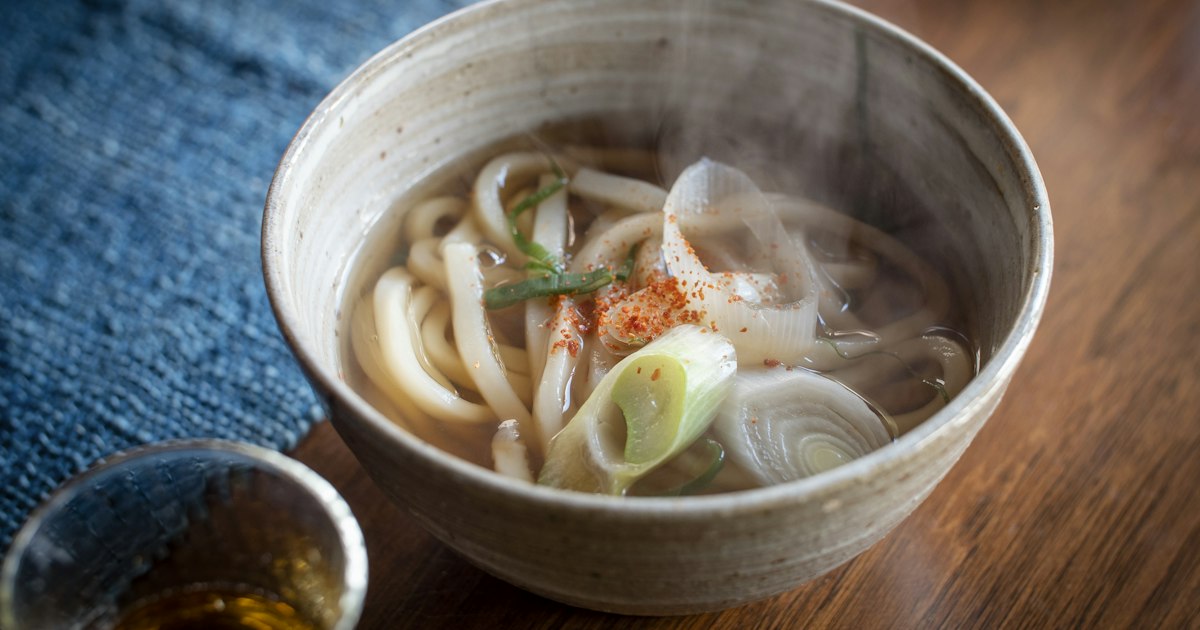
    Kagawa Prefecture is the smallest prefecture in Japan, but it eats more udon per person than anywhere else in the country. Locals call it “Udon-ken” — Udon Prefecture — only half-jokingly, and the noodle culture here is different from what you’ll find in a Tokyo udon shop. Shops are cheap, self-service, and often run by families who’ve been boiling the same recipe for decades out of a converted garage or farmhouse. Visiting a handful of them in one day, known informally as an udon pilgrimage, is one of the most rewarding low-cost food experiences in Japan. Here’s how to actually do it.

    Why Kagawa Is Japan’s “Udon Prefecture”

    Kagawa’s old name was Sanuki Province, which is why the noodles are called Sanuki udon. The region’s flat, dry Setouchi climate is good for growing wheat, and the local water and salt levels happen to suit noodle-making, so udon became a daily staple rather than an occasional treat. Today there are several hundred udon shops packed into a prefecture you can drive across in under two hours, and the noodle chain Marugame Seimen — now found across Japan and internationally — takes its name from the Kagawa city where it started.

    Kake, Bukkake, or Zaru? A Quick Order Guide

    Menus are short but the terminology trips up first-timers. The main styles are:

    • Kake udon — noodles in hot dashi broth, the plainest and cheapest option.
    • Bukkake udon — noodles topped with a small amount of concentrated, undiluted sauce (not swimming in broth), served hot or cold. This is Kagawa’s signature style.
    • Kamatama udon — hot noodles straight from the pot mixed with a raw egg and soy sauce, silky and rich.
    • Zaru / hiyashi udon — cold noodles for dipping, popular in summer.

    If you’ve already read our guide to zaru soba etiquette, the slurping and dipping mechanics carry over directly to zaru and bukkake udon — loud slurping is normal and helps cool the noodles as you eat.

    How Self-Service Udon Shops Actually Work

    Most everyday shops in Kagawa are “self” (セルフ) style, and the system is the same reason locals eat here almost daily — it’s fast and cheap. The general sequence:

    • Tell the staff your noodle order and size (small/regular/large, or 小/並/大) — they boil it fresh in front of you.
    • Take your bowl and walk down a counter of self-serve tempura, inari sushi, and croquettes; add whatever you want to your tray.
    • If it’s a kake-style bowl, ladle hot dashi broth from a communal pot yourself and cut your own scallions from a bin.
    • Pay at the register at the end — everything on your tray gets totaled together.

    Budget for this: a small kake or bukkake udon typically runs about ¥250–450, and a couple of tempura pieces add ¥100–150 each, so a full, satisfying meal usually costs ¥400–700. It’s genuinely one of the best-value hot meals in Japan.

    Where to Eat, by Budget

    Budget: Rural self-service shops are the heart of the pilgrimage — many are open only a few hours a day (often roughly 8:30am–2pm, or until the noodles sell out) and some barely look like restaurants from outside. Expect to pay under ¥500 for a full bowl.

    Mid-range: Sit-down udon restaurants in Takamatsu, Marugame, and Kotohira serve set meals with tempura, rice, and pickles for around �¥800–1,300, with table service and English-friendly menus more common near stations and tourist sites.

    Splurge / experience: Book a session at Nakano Udon School in Kotohira, where you knead and stretch your own noodles (including the traditional step of stepping on the dough) under a teacher’s guidance, then eat what you made. Sessions run roughly ¥1,600–1,800 per person and take about 40–50 minutes — a fun rainy-day activity that pairs naturally with a visit to nearby Kotohira-gu shrine, famous for its long stone staircase.

    Getting to Kagawa and Getting Around

    Takamatsu is the prefecture’s transport hub. From Okayama, the JR Marine Liner crosses the Seto-Ohashi Bridge to Takamatsu Station in about an hour, making it an easy add-on from a Kansai or Hiroshima itinerary via the Sanyo Shinkansen. Takamatsu Airport also has direct flights from Tokyo Haneda (roughly 80 minutes). If you’re arriving from Tokyo and enjoy overnight trains, the Sunrise Seto sleeper train runs directly from Tokyo Station to Takamatsu, arriving early morning — a scenic, novel way to start an udon-focused trip.

    Once in Kagawa, the local Kotoden railway connects Takamatsu with Kotohira, but many of the best-known rural shops are only reachable by car, since they’re tucked into farmland with no station nearby. Renting a car is the most efficient way to hit several shops in a day; if you’re driving between towns on the expressway, our guide to ETC cards and expressway tolls covers how to set up the toll card most rental counters will offer you. If you’d rather not drive, “udon taxi” services are available in the region — a driver who knows the back-road shops takes you on a set multi-stop course, typically charged by the hour and split among passengers.

    Best Season and Common Mistakes

    Udon is eaten year-round in Kagawa — hot kake and kamatama in winter, cold bukkake and zaru in the humid summer — so there’s no wrong season to visit. The main scheduling issue is hours, not weather: the most famous rural shops sell out and close early, sometimes by early afternoon, and are busiest on weekends and holidays. Visiting on a weekday morning is the easiest way to avoid a queue.

    The most common mistakes first-timers make: assuming a self-service shop has table service and waiting to be seated; not realizing the tempura and rice balls on the counter are self-serve and get added to your bill at checkout; and trying to cram too many shops into one day. Two or three shops, eaten in small portions, is plenty — the noodles are heavier than they look, and part of the fun is picking a variety of toppings rather than filling up at the first stop.

    If you have extra time on Shikoku, Kagawa pairs well with a side trip to neighboring Tokushima, especially in summer around the Awa Odori dance festival, or with the art islands of the Seto Inland Sea reachable from Takamatsu’s port.

  • Kushikatsu in Osaka: Deep-Fried Skewers and Shinsekai’s No-Double-Dipping Rule

    Kushikatsu in Osaka: Deep-Fried Skewers and Shinsekai’s No-Double-Dipping Rule

    Photo by Julien on Unsplash

    In Osaka, deep-fried skewers on a stick are less a snack than a small ritual — one with a rule that trips up nearly every first-time visitor. Kushikatsu (also spelled kushiage) are bite-sized pieces of meat, seafood, and vegetables, breaded and fried, then dunked into a shared pot of thin, savory-sweet sauce. That shared pot is exactly where the trouble starts. Here’s how to eat kushikatsu the right way, where to find the best of it, and what it actually costs.

    What Kushikatsu Actually Is

    Kushikatsu started as working-class food in Osaka’s Shinsekai and Nishinari districts in the early 20th century, built for factory workers who needed cheap, fast calories between shifts. A skewer holds one or two pieces of a single ingredient — pork, beef, quail egg, lotus root, cheese, shrimp, shiitake, asparagus — coated in a light panko breading and deep-fried to order. Unlike tempura, the batter is drier and crunchier, and unlike yakitori, nothing is grilled; everything goes into hot oil. Each skewer typically runs ¥120–¥350 depending on the ingredient and the shop, and a satisfying meal of 8–10 skewers plus a drink lands around ¥2,000–¥3,500 per person at a casual counter.

    The No-Double-Dipping Rule (Sōsu Nido-zuke Kinshi)

    Every kushikatsu counter shares one communal vat of dark, Worcestershire-style dipping sauce. Because dozens of diners use the same pot, the rule is absolute: you dip once, take a bite, and never re-dip a skewer you’ve already put your mouth on. Signs reading “ソース二度づけ禁止” (no double-dipping) are posted at nearly every shop in Shinsekai, sometimes in English too. If you want more sauce for a second bite, use the cabbage instead — free, unlimited raw cabbage is provided at most counters specifically as a sauce-scooping tool. Cup a cabbage leaf, ladle sauce onto your skewer or the leaf itself, and eat that way. Staff will politely (or not so politely, at old-school shops) call out anyone who dips twice, so this is genuinely the one etiquette point worth memorizing before you sit down.

    Where to Eat It in Shinsekai

    Shinsekai, the retro neighborhood clustered around Tsutenkaku Tower, is the spiritual home of kushikatsu and the easiest place to try several shops in one outing.

    • Daruma — the most famous chain, founded in 1929. The original Shinsekai branch (near Tsutenkaku) is often crowded with a line out front; skewers run roughly ¥150–¥400 each. Open daily, typically 11:00–22:30.
    • Yaekatsu — a Shinsekai institution since 1954, known for a thicker, more old-fashioned batter and a lively, no-frills dining room. Budget ¥2,500–¥3,500 for a full meal with drinks.
    • Kushikatsu Daruma vs. smaller family-run counters — for a cheaper, more local experience, wander the side streets off Jan Jan Yokocho, a covered arcade in Shinsekai lined with tiny standing counters where skewers can be as low as ¥100–¥150 each and beer is ¥400–¥500. It’s a similar atmosphere to the standing-bar culture described in our guide to tachinomi, Japan’s standing bar culture — order at the counter, eat quickly, and don’t linger over a single beer if the shop is packed.

    Getting there: Shinsekai is a 5-minute walk from Dobutsuen-mae Station (Midosuji, Sakaisuji, and Sennichimae subway lines) or Shin-Imamiya Station (JR Osaka Loop Line and Nankai lines). From Namba it’s about 10 minutes by subway.

    Budget, Mid-Range, and Splurge Options

    Kushikatsu scales well across budgets:

    • Budget (¥1,500–¥2,500): Standing-only counters in Jan Jan Yokocho or Shinsekai back streets. Order 6–8 skewers and a highball; no reservation needed, expect to eat standing or on a stool at a shared counter.
    • Mid-range (¥2,500–¥4,000): Sit-down chains like Daruma or Yaekatsu, or Dotonbori branches that stay open late (many until 23:00 or midnight) for post-dinner grazing.
    • Splurge (¥6,000–¥12,000+): Omakase-style kushiage counters, common in Kyoto and upscale Osaka neighborhoods like Kitashinchi, where a chef fries a fixed course of 12–20 skewers using premium ingredients (wagyu, seasonal fish, foie gras) and pairs each with a specific sauce or salt rather than the communal dip. These require reservations and run more like a tasting menu than a casual meal.

    Best Time to Go

    Kushikatsu is eaten year-round and isn’t seasonal food, but timing your visit still matters practically. Lunch (11:00–14:00) is quietest and some shops offer set lunch skewer plates for ¥1,000–¥1,500. Dinner from 17:00 onward gets busy fast, especially on weekends, and popular Shinsekai shops can have 30–45 minute waits by 19:00. Arriving right at opening or after 21:00 avoids most of the queue. Shinsekai is also at its liveliest and most atmospheric after dark, when Tsutenkaku Tower is lit up — so if you can tolerate a short wait, evening is worth it for the scenery alone.

    Common Mistakes to Avoid

    • Double-dipping — covered above, but worth repeating: it’s the single fastest way to get an awkward correction from staff.
    • Skipping the cabbage — it’s not a garnish, it’s your sauce-delivery tool and a free palate cleanser between fried bites. Eat it throughout the meal.
    • Over-ordering at once — skewers are fried to order and best eaten immediately; order in small rounds of 3–4 rather than a giant batch that goes cold and limp.
    • Assuming it’s the same as tempura or yakitori — the breading, technique, and sauce culture are distinct; don’t expect tempura’s light tenpura sauce or yakitori’s tare glaze.
    • Not checking cash-only policies — many old-school Shinsekai counters are still cash-only or have low card minimums; carry ¥5,000–¥10,000 in cash for an evening out.

    Kushikatsu pairs naturally with a broader crawl through Osaka’s fried and street-food scene — if you’re building out a food-focused itinerary, it’s worth comparing notes with other regional specialties like karaage, Japan’s fried chicken, or the open-air stall culture at Fukuoka’s yatai food stalls, which shares the same communal, order-as-you-go energy. But for a single evening in Osaka, a few rounds of hot skewers, a cold beer, and careful cabbage-dipping in Shinsekai is hard to beat.

  • Momiji Manju: Miyajima’s Maple-Leaf Cake and Where to Buy It

    Momiji Manju: Miyajima’s Maple-Leaf Cake and Where to Buy It

    Photo by Elevate on Unsplash

    Shaped like a maple leaf and sold from bakery windows all along Miyajima’s main street, momiji manju is one of the few souvenir snacks in Japan that’s genuinely worth eating on the spot rather than saving for later. It’s a small sponge cake, usually filled with sweet red bean paste, baked in individual maple-leaf molds — and on an island famous for its autumn foliage and the floating torii gate of Itsukushima Shrine, the shape isn’t a gimmick, it’s the point. Here’s what it actually is, which shops are worth your time, and how to work a stop into a Miyajima day trip without wasting your visit standing in the wrong line.

    What Momiji Manju Actually Is

    Momiji manju (紅葉饅頭) is a castella-style sponge cake baked in a hinged iron mold shaped like a maple leaf, similar in spirit to Japan’s taiyaki (fish-shaped cake) but denser and cakier rather than waffle-crisp. The classic filling is tsubuan or koshian (chunky or smooth red bean paste), but nearly every shop on the island now sells custard, chocolate, cheese, matcha, and seasonal fruit versions too. The cake was reportedly created in the Meiji era by a Miyajima confectioner and popularized further when it appeared in a well-known manzai comedy sketch decades later, which is part of why it’s now considered Hiroshima Prefecture’s signature omiyage (souvenir food) alongside oysters.

    Individual pieces cost roughly ¥120–180 depending on filling and shop. Gift boxes of 5 pieces run about ¥700–900, and boxes of 10–12 run ¥1,400–1,900 — useful math if you’re buying for coworkers back home, since most shops box mixed-flavor assortments on request.

    Fresh vs. Fried: The Age-Momiji Question

    The single most useful thing to know before you go is that there are two very different ways to eat momiji manju on Miyajima, and they are not interchangeable. Regular momiji manju is a soft, cool cake meant for slow eating or gifting — it keeps for several days to a week unrefrigerated depending on the shop, which makes it a real souvenir option. Agemomiji (揚げもみじ), or fried momiji manju, is dipped in a light tempura-style batter and deep-fried to order, served hot in a paper sleeve. It has a crisp shell and a molten, almost custardy interior even with red bean filling, and it does not travel — eat it within minutes, standing on the street. Treat it as a snack, not a souvenir.

    If you only have time for one version, fried is the better on-island experience; boxed fresh manju is the better gift. Doing both in one visit is easy since most fried stands are steps from the boxed-cake shops.

    Where to Buy It on Miyajima

    Momiji manju shops cluster along Omotesando shopping street, the covered arcade running from the ferry terminal toward Itsukushima Shrine, so you’ll pass a dozen options without trying. A few worth singling out:

    • Yamadaya (やまだ屋) — the largest chain, with a main shop near the ferry pier that has a glass-walled kitchen where you can watch the molds being filled and flipped. Reliable quality, widest flavor range, and the easiest to find with tired kids or limited time.
    • Nishiki-do (紅葉堂) — widely credited as the originator of the fried version; their agemomiji stand usually has the longest line on Omotesando, but it moves fast. Worth the wait if you’re only trying fried manju once.
    • Fujiiya (藤い屋) — an older, smaller-batch maker with a slightly firmer cake and less-sweet anko; good if the other shops feel too sugary.
    • Momiji Doujou — lets you press and bake your own momiji manju by hand for a small fee (roughly ¥500–700), a fun activity stop if you’re traveling with kids or just want a souvenir with a story.

    Most shops open around 9:00–9:30 and close between 17:30–18:00, tracking the last ferries off the island rather than a fixed schedule — hours shift seasonally, so don’t plan a last-minute purchase after 18:00.

    Getting There and Timing Your Visit

    Miyajima is a short ferry ride from Miyajimaguchi Station, reachable by JR San’yo Line (about a 25-minute local train from Hiroshima Station) or the Hiroshima Electric Railway tram (slower, around 70 minutes, but scenic and covered by some transit passes). From Miyajimaguchi Pier, both the JR West ferry and the Miyajima Matsudai Kisen ferry cross to the island in about 10 minutes for roughly ¥200–360 one way; the JR ferry is covered by the Japan Rail Pass if you’re using one. Boats run frequently, generally every 15–20 minutes during the day.

    For food shopping specifically, arrive before midday if you can — Omotesando gets very crowded by early afternoon, especially on weekends and during the November foliage peak, and the fried-manju stands develop their longest lines between 11:00 and 14:00. Early morning or late afternoon (after 15:30) gives you a much easier walk and shorter waits. If you’re visiting for the maple colors that inspired the cake’s shape, mid-to-late November is peak season island-wide, which is also peak crowding — budget extra time for everything, including buying manju.

    Since you’ll likely pass Itsukushima Shrine on the same visit, it’s worth knowing what the shrine’s amulets actually mean before you buy one as a companion souvenir — see our guide to omamori and what they mean.

    Common Mistakes to Avoid

    • Buying boxed manju too early in the trip. Fresh cake softens and can go slightly stale within a few days; if Miyajima is early in your itinerary, buy on your way home instead, or ask the shop about shelf life for the specific filling (custard and cream versions spoil faster than red bean).
    • Trying to eat agemomiji later. It’s genuinely bad reheated or cold — the batter turns soggy. Only buy fried versions when you’re ready to eat immediately.
    • Assuming all shops taste the same. Sweetness, cake density, and bean-paste texture vary noticeably between Yamadaya, Nishiki-do, and Fujiiya. If you have time, buy single pieces from two or three shops before committing to a gift box.
    • Skipping the checked-baggage problem. If you’re flying home the same day or soon after, boxed manju is not vacuum-sealed and can crush in a suitcase — carry it in your day bag or a rigid tote, and know that most fillings are not freezer-stable for long-haul travel.

    Budget, Mid-Range, and Splurge Options

    For a quick taste without commitment, a single fresh manju at any Omotesando shop (¥120–150) or one fried agemomiji (¥150–200) covers the budget end. Mid-range is a small gift box of 5–6 mixed flavors (¥700–1,000), enough for a couple of coworkers or to sample the range yourself. For a splurge or proper omiyage haul, Yamadaya’s large boxes (10–20 pieces, roughly ¥1,900–3,500) include premium seasonal fillings like matcha or chestnut and come in presentation packaging appropriate for formal gift-giving back home. None of this is expensive by Japanese souvenir standards, which is part of why momiji manju remains the default gift choice for anyone visiting the Hiroshima area — it’s cheap enough to buy in bulk and distinctive enough that recipients recognize it as a real regional specialty rather than a generic sweet.

    If you’re building out a broader list of regional foods worth seeking out on this trip, momiji manju pairs naturally with other single-region specialties like Nagoya’s hitsumabushi or regional karaage styles — each tied tightly enough to one place that eating it there, rather than a Tokyo department-store version, is genuinely part of the experience.