Japan Trove

Category: Culture & Seasons

Etiquette, onsen, ryokan, seasons and cultural experiences to enjoy Japan like a local.

  • Onsen Etiquette: How to Use a Japanese Hot Spring

    Onsen Etiquette: How to Use a Japanese Hot Spring

    Soaking in an onsen (hot spring) is a quintessential Japanese experience — but the etiquette can feel daunting the first time. Here’s a simple, step-by-step guide so you can relax with confidence.

    The golden rule: wash before you soak

    The bath is for soaking, not washing. You clean yourself thoroughly at the shower stations before entering the communal bath. The bath water stays clean for everyone.

    Step by step

    1. Undress fully in the changing room — no swimsuits. Put clothes in a basket or locker.
    2. Bring the small towel to the bathing area (a modesty towel).
    3. Wash and rinse completely at a shower station — sit on the stool, rinse off all soap.
    4. Enter the bath slowly — it’s hot. Keep the small towel out of the water (rest it on your head or the side).
    5. Soak and relax. Rinse off after if you like, then dry with the small towel before returning to the changing room.

    Do’s and don’ts

    • Do tie up long hair so it doesn’t touch the water.
    • Don’t put your towel or head under the water, swim, or splash.
    • Don’t take photos — privacy is essential.
    • Keep voices low — it’s a place to unwind. More in our etiquette guide.

    Tattoos?

    Many onsen still restrict tattoos, but there are workarounds (cover patches, private baths, tattoo-friendly spots) — see our tattoo & onsen guide.

    Where to soak

    Try an onsen town for the full experience — see our best onsen towns and Hakone guide. A ryokan with a private open-air bath is the stress-free way to start.

    What onsen bathing typically costs

    • Public bathhouses (sento, not fed by natural hot spring but similar etiquette) cost as little as JPY 400-600; standalone onsen day-use facilities usually run JPY 700-2,000 depending on the region and facilities.
    • A ryokan stay with a private in-room open-air bath (kashikiri or private bath rooms) typically adds JPY 5,000-20,000 per couple over a standard room, but removes any tattoo or etiquette concerns entirely since you’re bathing alone.
    • Rental towels and yukata are usually included at ryokan; day-use facilities sometimes charge JPY 200-500 extra if you don’t bring your own small towel.

    Common first-timer mistakes

    • Rinsing only briefly before entering the bath — a thorough wash (shampoo, soap, full rinse) is expected, not optional; locals notice and it affects water cleanliness for everyone.
    • Wearing a swimsuit into a mixed public bath thinking it’s more modest — most onsen explicitly prohibit swimwear in the communal bath itself, though some newer mixed-gender or family facilities do allow suits, so check specific rules.
    • Rushing the soak — most visitors find 10-15 minutes at a time comfortable before needing to cool off outside the water, then returning for a second soak; treat it as a slow, repeated ritual rather than one long sit.

    Choosing your first onsen experience

    A private-bath ryokan room removes nearly every source of first-timer anxiety (nudity, tattoos, unfamiliar etiquette in front of strangers) and is worth the extra cost for a first try if budget allows. If you’d rather dive into the full communal experience, a well-reviewed onsen town like those in our best onsen towns guide will have staff used to first-time foreign visitors and often posted English instructions.

    Onsen for families and groups

    Traveling with kids or a mixed group of friends who’d rather not split up? Family baths (kazoku-buro) at many onsen towns can be reserved by the hour for private, mixed-gender bathing — a practical option that sidesteps the gender-separated communal baths without requiring a full private-bath ryokan stay. Ask at check-in or the local tourist office, since availability and pricing vary widely by town.
  • Japanese Gardens: The Most Beautiful to Visit & How to Enjoy Them

    Japanese Gardens: The Most Beautiful to Visit & How to Enjoy Them

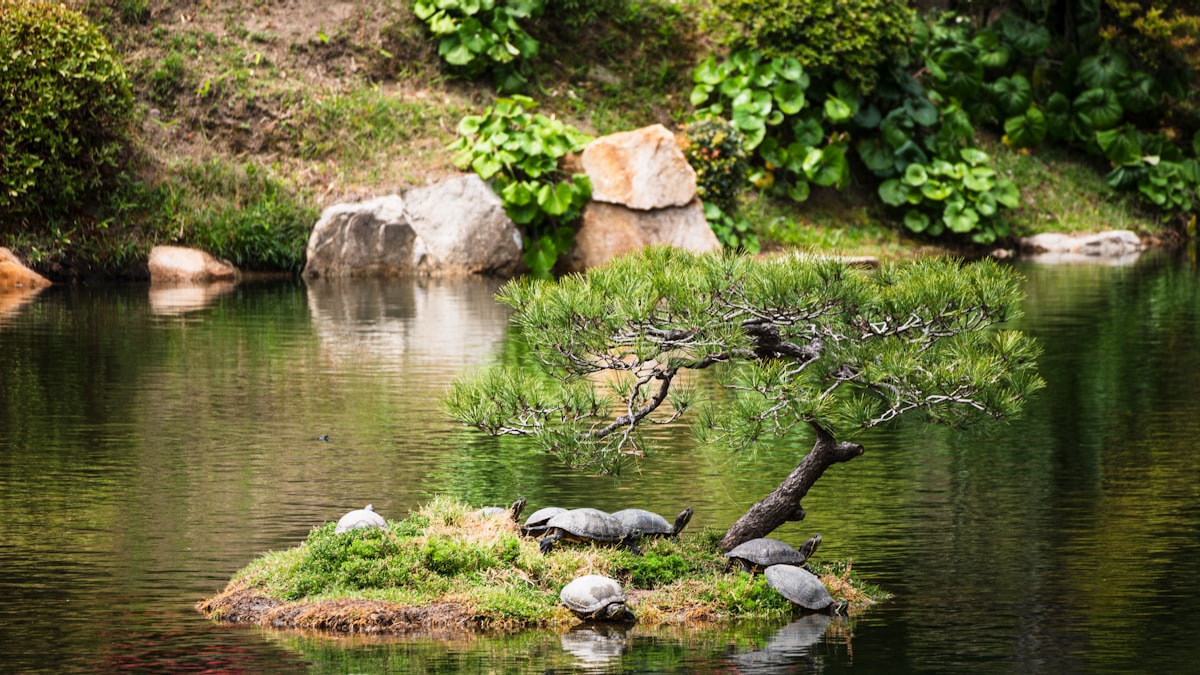
    Japanese gardens are among the country’s most serene pleasures — carefully composed landscapes of moss, stone, water, and seasonal color. Here’s how to enjoy them and which are the most beautiful to visit.

    Types of Japanese garden

    • Strolling gardens (kaiyu-shiki) — large gardens designed to be walked, with a central pond.
    • Zen rock gardens (karesansui) — raked gravel and stone, meant for quiet contemplation.
    • Tea gardens (roji) — the mossy path leading to a tea house.

    The most beautiful to visit

    • Kenrokuen (Kanazawa) — one of Japan’s “three great gardens”; see our Kanazawa guide.
    • Ryoan-ji & Saiho-ji (Kyoto) — the famous Zen rock garden and moss temple; more in our Kyoto guide.
    • Korakuen (Okayama) and Kairakuen (Mito) — the other two great gardens.
    • Adachi Museum & Ritsurin (Takamatsu) — stunning, less-crowded masterpieces.
    • Shinjuku Gyoen (Tokyo) — a gorgeous city escape; see our Shinjuku guide.

    How to enjoy them

    • Go early for stillness and soft light; gardens reward a slow pace.
    • Every season shines — cherry blossoms, summer green, autumn maples, and snow.
    • Sit and take it in — many gardens have a tea house for matcha (see our green tea guide).
    • Stay on paths and keep quiet — see our etiquette guide.

    Tips

    • Some famous gardens require timed entry or advance reservation (e.g. Saiho-ji).
    • Combine garden visits with nearby temples and shrines.

    Typical costs & hours

    • Most famous gardens charge JPY 300-700 entry; Kenrokuen is JPY 320, the Adachi Museum garden (paired with its art collection) is JPY 2,500, and many smaller temple gardens are free or included in temple admission.
    • Saiho-ji (the famous moss garden) requires advance postal or online reservation and a suggested donation of around JPY 4,000, which includes a short sutra-copying session before you’re allowed into the garden — budget extra planning time for this one specifically.
    • Standard hours run 8:30am/9am to 5pm-ish, with seasonal night illuminations (often an extra ticket) during cherry blossom and autumn leaf season at gardens like Kenrokuen and some Kyoto temples.

    Common mistakes to avoid

    • Rushing through in 15-20 minutes — Japanese gardens are designed to be walked slowly, with views composed to unfold as you move; treat 45-90 minutes as a realistic minimum for a proper visit to a major garden.
    • Visiting Ryoan-ji’s rock garden at midday in peak season — the small viewing platform gets crowded fast; early morning gives a genuinely different, quiet experience of the same 15 stones.
    • Skipping the tea house — many gardens have a seated matcha service for a small additional fee, and pausing there is often the most memorable part of the visit, not an afterthought.

    Best season for each garden

    Kenrokuen is famous for its yukizuri (rope supports protecting pine branches from snow) in winter, a sight unique to that season; Ritsurin in Takamatsu peaks with autumn maples reflected in its ponds; and Shinjuku Gyoen offers a rare mix of Japanese, French, and English garden styles that make it worth a return visit across different seasons if you’re staying in Tokyo a while.

    Combining gardens with a wider day

    Many great gardens sit right beside temples or castles, so pairing them costs little extra planning — Kenrokuen sits next to Kanazawa Castle, and several Kyoto temple gardens are part of the same admission as the main hall. Building a garden into an existing temple or castle stop, rather than treating it as a separate destination, is usually the most efficient way to fit several into one trip.

  • Shrines vs Temples in Japan: The Difference & Etiquette

    Shrines vs Temples in Japan: The Difference & Etiquette

    You’ll visit a lot of shrines and temples in Japan — but what’s the difference? Knowing helps you appreciate them and behave respectfully. Here’s a simple guide.

    The basic difference

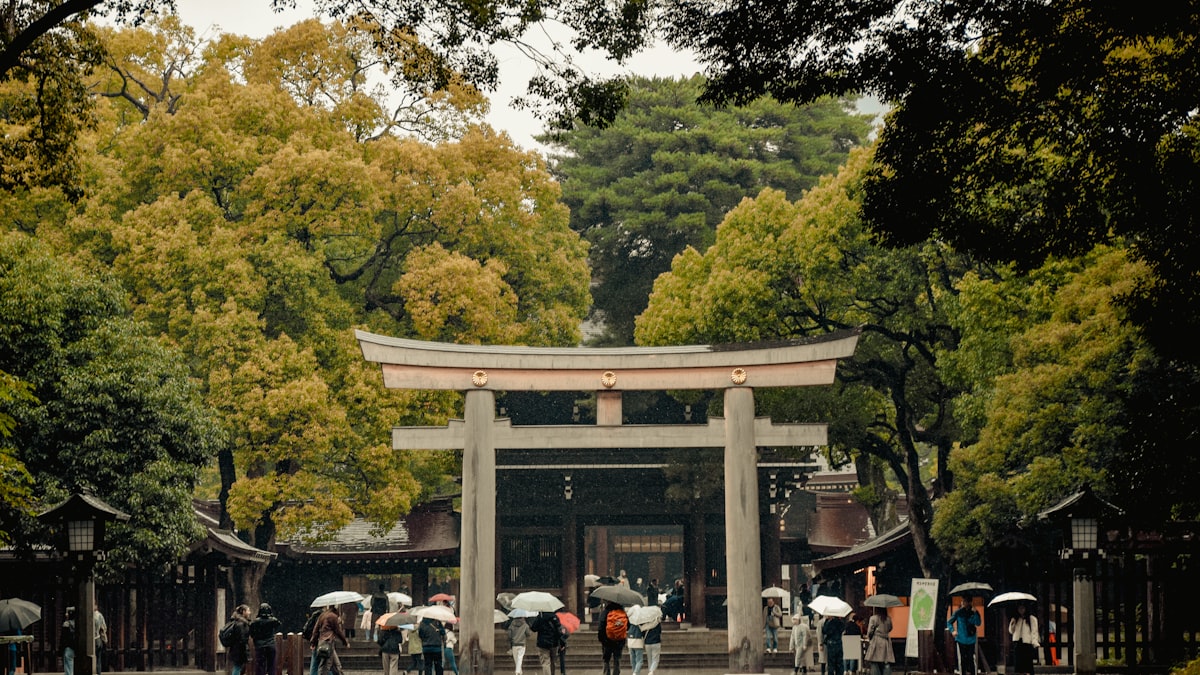
    • Shrines (jinja) are Shinto — Japan’s indigenous religion of kami (spirits/gods). Look for a torii gate at the entrance.
    • Temples (o-tera) are Buddhist. Look for a large gate with guardian statues, an incense burner, and often a pagoda.

    Many sites blend both, and most Japanese people take part in each — Shinto for life events and New Year, Buddhism for funerals.

    How to visit a shrine

    1. Bow slightly at the torii; walk to the side, not the center (reserved for the kami).
    2. Purify at the water basin (temizuya): rinse left hand, right hand, then mouth.
    3. At the hall: toss a coin, bow twice, clap twice, pray, bow once.

    How to visit a temple

    1. Bow at the gate.
    2. Optionally waft incense smoke over yourself for good health.
    3. At the hall: toss a coin, bow, pray quietly (no clapping), bow.

    Good to know

    • Omamori (charms) and goshuin (stamp-book seals) make meaningful souvenirs.
    • Photography is often fine outside but restricted inside halls — check signs.
    • Dress and behave modestly. More in our etiquette guide.

    See famous examples in Kyoto, Asakusa, and Nikko.

    Costs & practical details

    • Most shrines are free to enter; the majority of Buddhist temples charge a modest JPY 300-600 entry fee for the main garden or hall, though the grounds themselves are often free to walk.
    • A goshuin stamp costs JPY 300-500 at either type of site and is collected in a dedicated book (goshuincho, JPY 1,500-3,000) rather than a passport or notebook — buy the book at your first stop.
    • Omamori charms run JPY 500-1,500 depending on their purpose (health, travel safety, love, exam success) and are meant to be renewed yearly rather than kept forever, traditionally returned to any shrine or temple for a ritual burning.

    Common mistakes to avoid

    • Clapping at a Buddhist temple — the clap-twice ritual belongs to Shinto shrines only; at a temple, pray silently with palms together after your coin offering, no clapping.
    • Walking straight up the center of a shrine’s approach path — the center is traditionally reserved for the resident kami, not visitors, so walk slightly to one side as a small but appreciated courtesy.
    • Skipping the purification basin because the process seems unclear — rinse your left hand, then right hand, then cup a little water in your left hand to rinse your mouth (don’t drink from the ladle directly), then rinse the ladle handle itself before setting it down.

    Sites that combine both in one visit

    Several famous complexes blend Shinto and Buddhist elements on the same grounds, a good way to see both traditions side by side in a single stop — Nikko’s Toshogu area mixes shrines and temples across one hillside complex, and many Kyoto neighborhoods have a shrine and temple within a few minutes’ walk of each other, making it easy to compare the etiquette in practice rather than just in theory.

  • Japanese Festivals (Matsuri): A Season-by-Season Guide

    Japanese Festivals (Matsuri): A Season-by-Season Guide

    Japan’s festivals (matsuri) are among the best reasons to time a trip — fireworks, portable shrines, lantern-lit nights, and food stalls galore. Here’s a guide to the big ones and how to enjoy them.

    Famous festivals by season

    • Spring: cherry-blossom hanami parties everywhere — see our cherry blossom guide; Takayama Spring Festival.
    • Summer: the big season — Gion Matsuri (Kyoto), Tenjin Matsuri (Osaka), Nebuta (Aomori), and countless fireworks (hanabi) festivals.
    • Autumn: Takayama Autumn Festival and harvest matsuri amid the fall foliage.
    • Winter: the Sapporo Snow Festival and atmospheric New Year shrine visits (hatsumode).

    What to expect

    • Mikoshi — portable shrines carried through the streets by chanting crowds.
    • Yatai food stalls — takoyaki, yakisoba, candied apples, shaved ice.
    • Yukata — locals dress up; you can too (see our yukata guide).

    Tips for enjoying matsuri

    • Arrive early for fireworks — the best spots and trains fill fast.
    • Carry cash for stalls; expect big crowds and limited transport after.
    • Check exact dates each year — many are fixed to specific days, not weekends.
    • Mind your manners in the crush — see our etiquette guide.

    Time a festival into your itinerary and check the best time to visit.

    Costs & how festivals actually work

    • Most matsuri are free to attend — you’re paying only for food stalls (JPY 300-700 per item) and, for major hanabi festivals, sometimes a reserved seating area (JPY 2,000-5,000) if you want to skip the free general viewing spots.
    • Big-name festivals like Gion Matsuri and Nebuta draw huge crowds and can fully book nearby hotels months ahead — if a specific festival is your trip’s anchor, book lodging before anything else.
    • Fireworks festivals in particular can pack local trains afterward for over an hour; budget extra time or plan to linger for food after the show ends rather than rushing for the last train with everyone else.

    Common mistakes to avoid

    • Assuming a festival happens on a fixed weekend — many matsuri are pinned to specific calendar dates regardless of weekday, so always check the current year’s exact schedule rather than relying on “usually happens in July.”
    • Skipping the daytime portion of a festival to save for the evening highlights — daytime processions, mikoshi parades, and smaller stalls are often just as memorable and much less crowded.
    • Wearing a rented yukata with sandals unsuited to a long day of standing and walking — comfortable footwear matters more than perfect styling for an all-day festival visit.

    Building a festival around your trip dates

    Rather than picking a destination first, some of the best matsuri trips work backward from the calendar — check which festivals overlap with your travel window using an updated yearly matsuri calendar, then route your itinerary to catch one or two rather than trying to force a fit. See our best time to visit guide for how festival season interacts with weather and crowds more broadly.

    Festival food worth trying beyond the basics

    Beyond takoyaki and yakisoba, look for festival-specific treats like ringo-ame (candied apples in a hard red shell), choco-banana on a stick, and regional specialties tied to that particular matsuri — Gion Matsuri stalls in Kyoto, for instance, sell items you won’t find at a typical Tokyo summer festival, so treat the food as part of the region’s character, not a generic festival menu.

  • Japanese Toilets Explained: Washlets, Buttons & Squat

    Japanese Toilets Explained: Washlets, Buttons & Squat

    Japanese toilets are a genuine travel highlight — heated seats, bidets, and buttons galore. But they can baffle first-timers. Here’s your friendly guide to Japan’s famous washlets (and the occasional squat toilet).

    The high-tech washlet

    Many toilets are washlets with a control panel of buttons. The essentials:

    • Flush — look for 大 (big/large) and 小 (small) for full or light flush. It may be a lever, a wall panel, or a sensor — not always on the seat panel.
    • Bidet buttons — おしり (rear wash) and ビデ (front wash); often with pressure/position controls.
    • Stop — 止 (stop) ends the spray. This is the button you’ll want to find first.
    • Heated seat, dryer, and deodorizer on fancier models.

    The “privacy sound” button

    A button labeled 音 (sound) or a musical note plays a flushing sound to mask any noise — a beloved feature (especially in women’s restrooms, sometimes as an automatic sensor called Otohime).

    Squat toilets (still around)

    Older stations, parks, and rural spots may have squat toilets. Face the hood/flush end, feet either side, and squat. Carry tissues — some don’t have paper.

    Good to know

    • Carry a small pack of tissues (often handed out free on the street) and a hand towel — some restrooms lack paper towels.
    • Public toilets are widespread, clean, and free — konbini, stations, and department stores are reliable.
    • Don’t flush anything but paper; sanitary bins are provided.
    • Toilet slippers exist in homes and ryokan — swap into them and back out. See our etiquette guide.

    Want one at home?

    Washlet seats are a popular souvenir/purchase — check voltage compatibility first; see our electronics buying guide. First trip? Read first-timer tips.

    Reading the buttons like a local

    • Most washlet panels group flush controls separately from bidet controls — the flush is often a small lever or separate wall-mounted button, not on the seat panel itself, which confuses many first-time users searching only the seat-side panel.
    • Pressure and nozzle position dials (if present) let you fine-tune the bidet spray — start on the lowest setting, since default factory settings can be stronger than expected.
    • A dryer function (if available) is usually a separate button from the bidet controls, often marked with a wind or fan icon.

    Common mistakes to avoid

    • Panicking and pressing random buttons — nearly every washlet has a clearly marked stop button (止 or a red icon); learning to spot it first removes most of the anxiety around trying the other functions.
    • Forgetting toilet slippers exist at ryokan and some homes — these are separate from the house slippers you wear elsewhere and should be swapped back out immediately after leaving the bathroom, a common etiquette slip for first-timers.
    • Assuming every public restroom has hand dryers or paper towels — many don’t, which is why locals carry a small hand towel; picking one up early in your trip (sold everywhere, including 100-yen shops) solves this permanently.

    Where to find reliably good public toilets

    Train stations, department stores, and konbini restrooms are consistently clean, free, and equipped with modern facilities, making them a reliable fallback anywhere in a city — unlike some countries, there’s no need to buy something or ask permission to use a station or konbini restroom while out sightseeing.

    Buying a washlet to take home

    If a trip converts you into a washlet believer, note that most models sold in Japan are built for Japan’s toilet bowl shapes and 100V electrical standard — check compatibility with your home country’s plumbing and voltage carefully before buying one as a souvenir, since not every model ships or installs easily overseas.

  • Japan in Winter: Snow, Onsen, Skiing & What to Pack

    Japan in Winter: Snow, Onsen, Skiing & What to Pack

    Some links below are affiliate links. If you book through them, Japan Trove may earn a small commission at no extra cost to you.

    Winter is one of Japan’s most magical (and underrated) seasons — world-class powder snow, steaming hot springs, illuminations, and far fewer crowds. Here’s what to do and know.

    Why visit in winter

    • Powder skiing — some of the best snow on earth.
    • Onsen in the snow — soaking outdoors while it snows is unforgettable; see best onsen towns.
    • Winter illuminations light up cities from November through February.
    • Fewer crowds & clear Fuji views — see how to see Mt. Fuji.

    Where to go

    • Hokkaido — Niseko’s powder, the Sapporo Snow Festival, and seafood; see things to do in Hokkaido.
    • Nagano & the Japan Alps — skiing plus the famous snow monkeys.
    • Shirakawa-go — thatched farmhouses under snow; see Takayama & Shirakawa-go.
    • Tokyo & Kyoto — cold but usually snow-light, great for illuminations and quiet temples.

    Skiing basics

    • Season runs roughly December to March/April; January–February is peak powder.
    • Resorts rent gear and offer English lessons — easy for beginners.
    • Book snow-season accommodation early — compare on Booking.com .

    What to pack

    Good to know

    • New Year (Dec 29–Jan 3) brings closures and busy travel — plan around it.
    • Northern regions get serious snow; check transport in bad weather.
    • Use luggage forwarding to send ski gear or bags ahead.

    What a winter trip typically costs

    • Ski resort lift passes run JPY 5,000-8,000/day at major Niseko and Nagano resorts, with multi-day passes offering a modest per-day discount; equipment rental adds another JPY 4,000-7,000/day for a full set.
    • Winter illuminations in cities are free to view, though some, like Tokyo’s larger displays, have a designated ticketed section for premium viewing at JPY 500-1,500.
    • Onsen ryokan rates in ski towns often run higher in peak January-February powder season than in the shoulder months either side, so booking December or March can mean meaningfully better rates for a similar snow experience.

    Common mistakes to avoid

    • Assuming Tokyo and Kyoto get heavy snow — both cities get cold but see relatively little snowfall most winters; travelers picturing snowy temple photos should look to Kanazawa, Takayama, or Tohoku instead.
    • Underpacking for indoor heat contrast — Japanese buildings and trains run warm indoor heating, so a system of easily removable layers matters more than one very heavy coat.
    • Not checking New Year closures — many restaurants, shops, and some attractions close for several days around January 1st; a New Year’s trip needs different research than a normal winter visit.

    Combining snow and city in one trip

    A popular winter structure pairs 2-3 nights in Hokkaido or Nagano for snow and onsen with the remainder of the trip in Tokyo or Kyoto for illuminations, museums, and indoor culture — giving you both the postcard powder shots and comfortable, less weather-dependent city days.

    Beginner skiing and snowboarding notes

    Major resorts like Niseko and those around Nagano run English-language lesson programs specifically built for the large number of foreign beginners who visit each winter — a half-day group lesson (roughly JPY 6,000-10,000) is a practical, safe way to try the sport for the first time rather than heading straight to a lift alone.

  • Autumn Leaves in Japan: When & Where to See Koyo

    Autumn Leaves in Japan: When & Where to See Koyo

    Japan’s autumn foliage (koyo) rivals its cherry blossoms — fiery maples, golden ginkgo, and temples framed in red. Here’s when and where to catch the colors.

    When does it happen?

    • Hokkaido: from mid/late September.
    • Tokyo, Kyoto & central Japan: mid-November to early December (peak).
    • Southern Japan: late November into December.

    Colors move north-to-south and high-to-low elevation. Follow the annual koyo forecast as your trip nears — timing shifts each year with the weather. See best time to visit.

    Best places for autumn colors

    • Kyoto — temples like Tofuku-ji, Eikan-do, and Arashiyama are stunning; see Kyoto guide.
    • Nikko — mountains, waterfalls, and shrines north of Tokyo.
    • Hakone & Mt. Fuji area — colors with Fuji views.
    • Kamikochi & the Japan Alps — alpine autumn near Takayama.
    • Tokyo — Rikugien and the Meiji Jingu Gaien ginkgo avenue.

    Don’t-miss experiences

    • Evening light-ups at Kyoto temples — magical after dark.
    • Momiji-gari (maple viewing) walks and mountain ropeways.
    • Seasonal sweets and chestnut (kuri) treats.

    Planning tips

    • Autumn is peak season — book hotels and a ryokan early.
    • Weekends at famous temples get crowded; go early morning.
    • Bring layers — mountain mornings are cold. Check the packing list.

    Prefer pink? Compare with our cherry blossom guide, and slot autumn into the 7-day itinerary.

    What things cost

    • Most autumn foliage viewing is free — temple grounds and public parks rarely charge extra for the season, though a handful of famous Kyoto temples add a modest JPY 300-600 fee for special evening illumination events.
    • Ropeway and cable car rides to elevated viewpoints (like those near Hakone or in the Japan Alps) run JPY 1,500-3,000 round-trip and are often the easiest way to see a wide swath of color without a long hike.
    • Autumn is peak-season pricing for hotels and ryokan in famous foliage areas, often on par with or exceeding cherry blossom season rates — booking 2-3 months ahead for well-known spots is standard practice, not overcautious.

    Common mistakes to avoid

    • Planning a trip around a fixed date without checking the yearly koyo forecast — peak color shifts by 1-3 weeks year to year depending on temperature patterns; if your dates are flexible at all, checking forecasts 2-3 weeks out before finalizing your itinerary improves your odds significantly.
    • Only planning for Kyoto — while famous, Kyoto’s temple gardens get extremely crowded in peak color weeks; Nikko, the Japan Alps, and Tokyo’s own parks (Rikugien, Meiji Jingu Gaien) offer excellent color with meaningfully smaller crowds.
    • Underestimating temperature swings — mountain and highland viewing spots can be 10-15°C colder than nearby cities at the same time of year; pack real layers, not just a light jacket.

    Chasing color across the country

    Because color moves from north to south and high to low elevation over about two months, a longer trip can genuinely chase peak foliage across multiple regions — starting in Hokkaido or the Japan Alps in late September/October and finishing in Kyoto or southern Japan in early December, turning a single season into a much longer travel window than cherry blossom season allows.

    Pairing foliage with seasonal food

    Autumn in Japan is also a major food season — chestnuts, sweet potato, matsutake mushrooms, and Japan’s famous fruit season (grapes, pears, early mandarins) all peak alongside the leaves, so building in a food-focused stop (a depachika food hall or a rural farm stand) rounds out a foliage-focused trip nicely.

  • Ryokan Guide: Staying at a Traditional Japanese Inn

    Ryokan Guide: Staying at a Traditional Japanese Inn

    Some links below are affiliate links. If you book through them, Japan Trove may earn a small commission at no extra cost to you.

    Staying at a ryokan — a traditional Japanese inn — is one of the most memorable things you can do in Japan. Here’s what to expect and how to choose one.

    What is a ryokan?

    A ryokan is a traditional inn with tatami-mat rooms, futon bedding, communal or private hot-spring baths, and often exquisite multi-course meals. It’s less a hotel than a full cultural experience — hospitality (omotenashi) is the whole point.

    What’s usually included

    • Kaiseki dinner — a seasonal multi-course feast, often served in your room or a private dining space.
    • Breakfast — a traditional Japanese spread (grilled fish, rice, miso, pickles).
    • Onsen access — public baths and sometimes private ones. Tattooed? See our tattoo & onsen guide.
    • Yukata — a cotton robe to wear around the inn.

    Ryokan etiquette

    • Remove shoes at the entrance; wear the provided slippers (and separate toilet slippers).
    • Wash thoroughly before entering the shared bath; no swimsuits.
    • Meals and baths often run on a schedule — check times at check-in.
    • More in our etiquette guide.

    How much does it cost?

    Ryokan are typically priced per person, including dinner and breakfast — often 15,000–40,000+ yen per person. Luxury ryokan go far higher; simpler ones and minshuku (family-run) are cheaper. See our Japan budget guide.

    Where to stay in one

    • Onsen towns like Hakone, Kinosaki, and Beppu — see best onsen towns.
    • Kyoto for machiya-style inns; Takayama and Kanazawa for tradition.
    • Book early — good ryokan fill up. Compare on Booking.com and Agoda .

    Tips for first-timers

    • Book at least one ryokan night — it’s a highlight of any trip.
    • Arrive by mid-afternoon to enjoy the bath before dinner.
    • Pack light; use luggage forwarding to send big bags ahead.

    Weave a ryokan night into our 7-day itinerary.

    What drives the price range

    • Simpler ryokan and minshuku (family-run inns) start around JPY 10,000-15,000 per person with two meals, while mid-range properties with a nice onsen run JPY 20,000-35,000, and luxury ryokan with private baths and elaborate kaiseki can exceed JPY 60,000-100,000+ per person.
    • Weekends and peak seasons (cherry blossom, autumn leaves, Golden Week) typically add a real premium over weekday rates — booking a weekday stay can mean a noticeably better ryokan for the same budget.
    • Rooms with a private open-air bath (rotenburo) cost more than standard rooms but remove any concern about shared-bath etiquette or tattoo policies, which many first-timers find worth the extra cost for peace of mind alone.

    Common mistakes to avoid

    • Arriving late in the evening — ryokan hospitality is built around an afternoon arrival, bath before dinner, and an early dinner service; arriving at 8-9pm can mean missing the bath window or a rushed, less enjoyable meal.
    • Skipping the yukata provided in your room — wearing it around the inn (and even to a nearby evening stroll in an onsen town) is completely normal and part of the experience, not just loungewear.
    • Booking a ryokan without checking meal plan options — some let you skip dinner for a lower rate if you’d rather eat elsewhere, which can be a smart choice on a food-focused trip through a city with better dining options nearby.

    Choosing your first ryokan experience

    For a first stay, a mid-range property in an established onsen town (Hakone, Kinosaki, or Yudanaka) tends to offer the most reliably good experience for foreign visitors, since staff are used to explaining the customs, timing, and bath etiquette that can otherwise feel unfamiliar on a first visit.

    What kaiseki dinner actually involves

    A typical kaiseki course runs 8-12 small dishes served in sequence, each showcasing a different cooking technique and seasonal ingredient rather than one large plate — pacing yourself across the full meal (which can run 90 minutes to two hours) is part of the experience, not something to rush through.

  • Tattoos and Onsen: How to Enjoy Japan’s Hot Springs

    Tattoos and Onsen: How to Enjoy Japan’s Hot Springs

    Onsen (hot springs) are one of Japan’s great pleasures — but if you have tattoos, you’ve probably heard they can be a problem. Here’s the honest, up-to-date guide to soaking with ink.

    Why tattoos and onsen clash

    Historically, tattoos in Japan were associated with the yakuza (organized crime), so many bathhouses banned them to keep a family-friendly atmosphere. The rule is about appearances, not you personally — but it’s still widely enforced, especially at traditional public baths.

    Your options with tattoos

    • Tattoo-friendly onsen. A growing number welcome ink, especially in tourist areas. Look for “tattoo OK” / “tattoo friendly” listings before you go.
    • Cover-up patches. Small tattoos can be hidden with waterproof skin-tone stickers (sold online and at some pharmacies). Many baths allow entry if the tattoo is fully covered.
    • Private baths (kashikiri / family bath). The stress-free choice — rent a private bath by the hour, common at ryokan and onsen towns.
    • In-room onsen. Some ryokan rooms have a private open-air bath (rotenburo) — no rules, total privacy.

    Where it’s easiest

    Big resort areas like Hakone, Kinosaki, and Beppu have more tattoo-friendly and private options. See our guide to the best onsen towns in Japan to plan around private baths.

    Onsen etiquette (for everyone)

    • Wash and rinse thoroughly at the shower stations before entering the bath.
    • No swimsuits — you bathe nude. The small towel doesn’t go in the water.
    • Tie up long hair; keep voices low; no photos.

    New to Japanese customs? Pair this with our etiquette guide.

    Bottom line

    Tattoos don’t have to mean no onsen. Book a ryokan with a private bath, use a cover patch for small designs, or seek out tattoo-friendly spots — and you’ll still get that unforgettable soak. Make it part of a wider trip with our 7-day itinerary.

    What tattoo-friendly options cost

    • Cover-up patches run JPY 500-1,500 for a pack, sized to cover small-to-medium tattoos — worth buying a couple of sizes before your trip since availability in Japanese pharmacies can be inconsistent outside major cities.
    • Private family baths (kashikiri) at onsen towns run JPY 2,000-5,000 for a 45-60 minute rental, separate from the main communal bath admission, and typically need to be booked at the front desk on arrival since slots are limited.
    • A ryokan room with a private in-room open-air bath adds JPY 5,000-20,000 over a standard room, but completely removes any tattoo policy question for the length of your stay.

    Common mistakes to avoid

    • Assuming a “tattoo-friendly” label means a large tattoo is fine everywhere — some tattoo-friendly onsen still have size or placement limits (no face/neck ink, for example); check the specific policy for your tattoo’s size rather than assuming a blanket welcome.
    • Not calling ahead to confirm a private bath is available — especially at smaller, popular onsen towns, private baths can be fully booked on weekends; a quick call or online booking before you arrive avoids disappointment.
    • Using a cover patch that isn’t genuinely waterproof for extended soaking — test any patch at home in a bath first, since some cheaper covers lift after 10-15 minutes in hot water.

    Researching before you travel

    Several English-language apps and websites specifically list tattoo-friendly onsen and ryokan across Japan, updated by other tattooed travelers — checking one of these before finalizing your itinerary saves the stress of discovering a policy problem after you’ve already booked a non-tattoo-friendly property.

    Traveling as a group with mixed tattoo status

    If your travel group includes both tattooed and non-tattooed members, a private family bath or a ryokan with in-room bathing lets everyone soak together without singling anyone out or splitting up the group — often a smoother solution than each person separately navigating different individual policies at a shared communal bath.

  • Solo Travel in Japan: Why It’s So Good & How to Do It

    Solo Travel in Japan: Why It’s So Good & How to Do It

    Some links below are affiliate links. If you book through them, Japan Trove may earn a small commission at no extra cost to you.

    Japan might be the best country in the world for solo travel: extremely safe, easy to navigate, and full of experiences that are just as good — sometimes better — on your own. Here’s how to make the most of a solo trip.

    Why Japan is perfect for solo travelers

    • Safety. Low crime and easy to walk around late; solo travelers, including women, generally feel very comfortable.
    • Solo-friendly by design. Counter seats at ramen and sushi bars, single hotel rooms, and vending machines everywhere.
    • Easy logistics. Great signage, reliable trains, and translation apps mean you rarely feel stuck.

    Where to stay solo

    • Business hotels — cheap, clean single rooms; ideal bases. Book via Booking.com .
    • Capsule hotels — a fun, budget-friendly only-in-Japan experience.
    • Hostels — great for meeting people if you want company.

    Eating alone (no problem here)

    Solo dining is completely normal. Look for counter seats, ticket-machine restaurants (buy a meal ticket, hand it over — no awkward ordering), ramen shops, and standing bars. Konbini and depachika food halls are your friends too.

    Things that shine solo

    • Quiet temple mornings in Kyoto.
    • Wandering neighborhoods at your own pace in Tokyo.
    • A reflective soak at an onsen town.

    Practical solo tips

    • Get an eSIM and an IC card so you’re self-sufficient.
    • Share your itinerary with someone at home and keep some cash on hand.
    • Learn a few Japanese phrases — locals appreciate the effort.

    New to the country? Combine this with our first-timer tips and 7-day itinerary.

    What solo travel typically costs

    • Single business hotel rooms run JPY 6,000-12,000/night in most mid-size cities, not much more than a shared twin room split two ways once you account for the space and privacy difference.
    • Solo dining rarely carries a premium in Japan — ramen counters, kaiten-zushi, and set-meal shops are priced per person regardless of party size, unlike some countries where solo diners face minimum spend requirements or awkward seating.
    • A realistic solo daily budget for a comfortable mid-range trip runs JPY 12,000-18,000 including lodging, food, and local transport, similar to per-person costs for a couple since Japan doesn’t heavily incentivize group travel the way some destinations do.

    Common mistakes to avoid

    • Over-scheduling every single day — solo trips are the easiest to burn out on since there’s no travel companion suggesting a slower pace; building in at least one unplanned afternoon per week noticeably improves overall trip satisfaction.
    • Avoiding counter dining out of unfamiliarity — ramen shops, sushi counters, and standing bars are specifically designed around solo and quick dining; hesitating to sit alone at a counter means missing some of the best, most efficient food in the country.
    • Not researching capsule hotel gender policies before booking — most are single-gender by floor or property; check before assuming any capsule hotel works for solo bookings of any gender.

    Meeting other travelers if you want company

    Hostels with common areas, guided food or walking tours, and izakaya with shared counter seating are all easy, low-pressure ways to have social moments during an otherwise independent trip — solo travel in Japan doesn’t have to mean total isolation unless that’s specifically what you’re looking for.

    Solo-friendly cities beyond the capital

    Compact regional cities like Kanazawa, Takayama, and Nara are especially rewarding for solo travelers — easy to navigate without much planning, safe to explore after dark, and set up with good single-traveler accommodation options away from Tokyo’s larger scale and pace.