Japan Trove

Category: Plan Your Trip

Itineraries, budgets, rail passes, when to go, and everything you need to plan a Japan trip.

  • Japan Honeymoon: Romantic Ryokan, Onsen & Itinerary

    Japan Honeymoon: Romantic Ryokan, Onsen & Itinerary

    Some links below are affiliate links. If you book through them, Japan Trove may earn a small commission at no extra cost to you.

    Japan is a dream honeymoon destination — romantic ryokan, private onsen, incredible food, and a beautiful mix of city and nature. Here’s how to plan a memorable, romantic trip.

    Romantic experiences

    • A luxury ryokan with a private open-air bath — the ultimate couple’s experience; see our ryokan guide.
    • Onsen towns for a relaxing soak together; see best onsen towns.
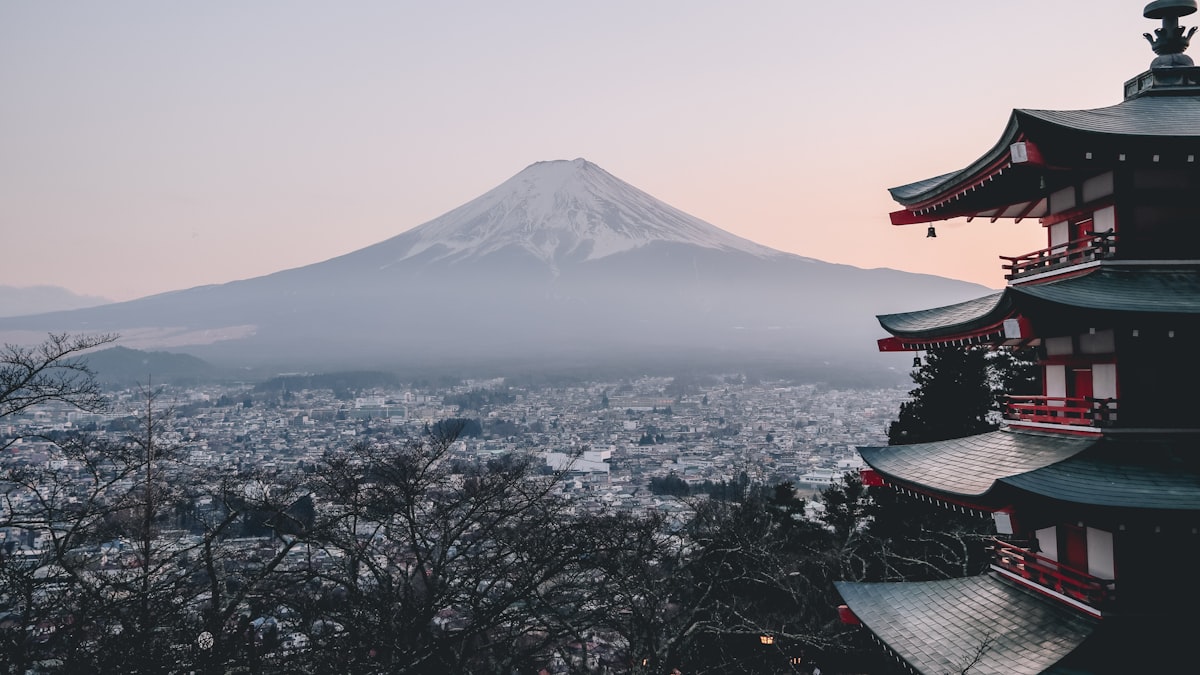
    • Mt. Fuji views from a lakeside stay; see our Kawaguchiko guide.
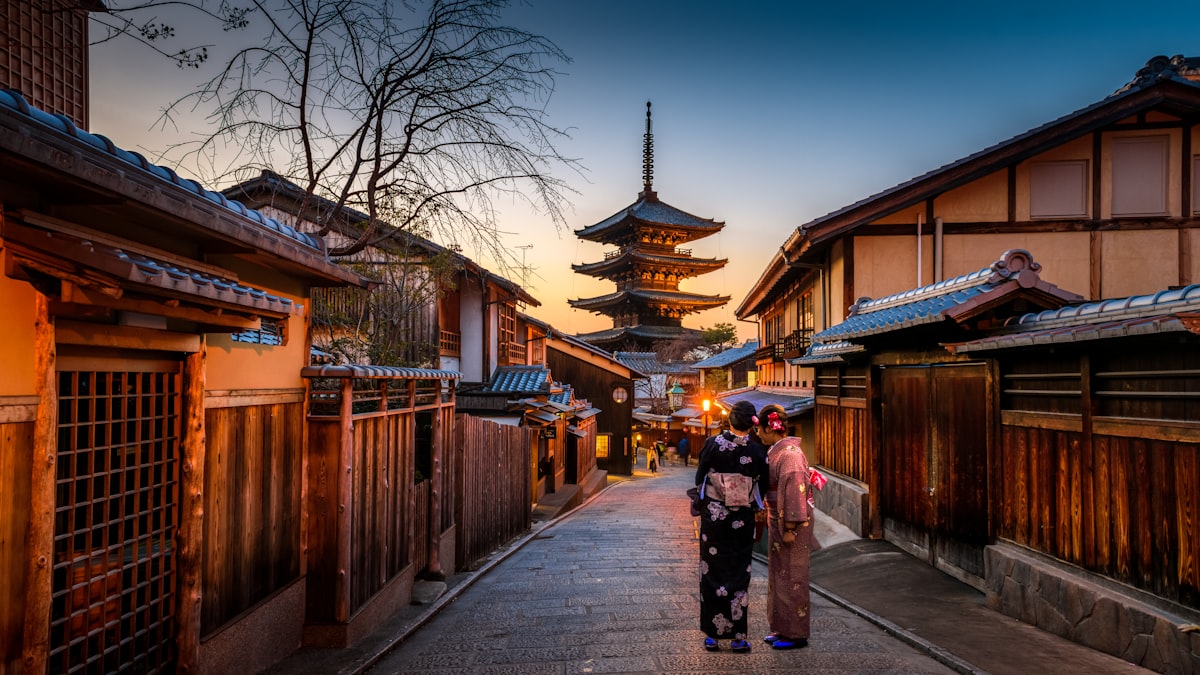
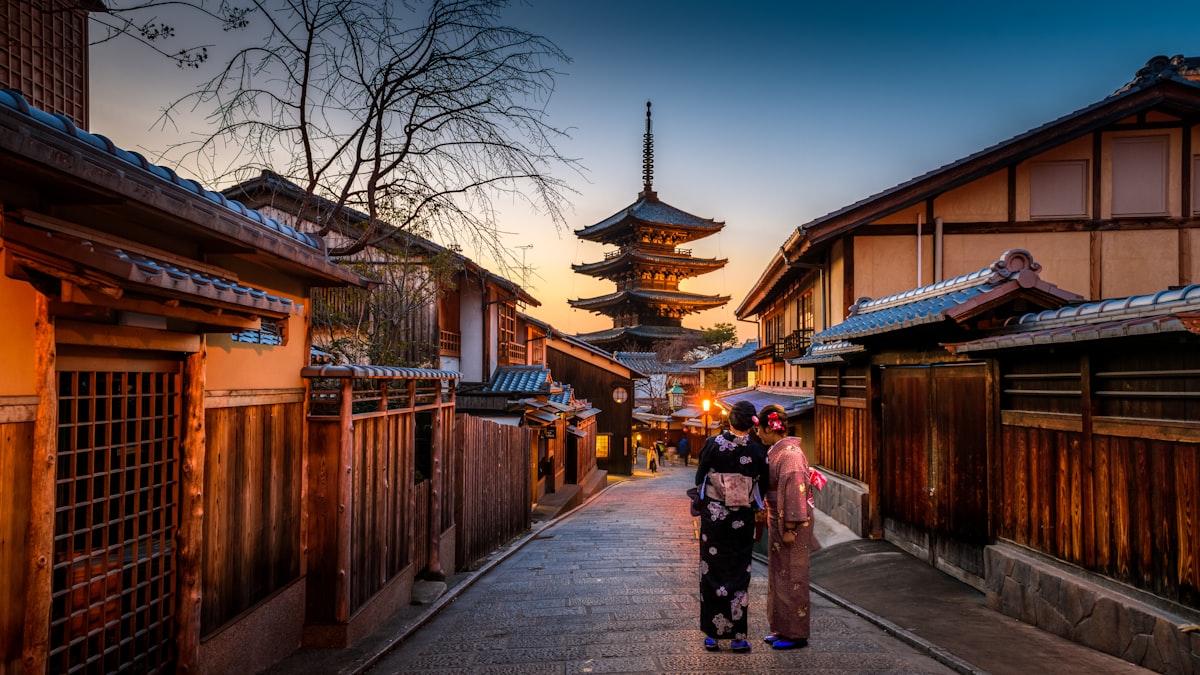
    • Kyoto’s temples and gardens at golden hour, plus a kimono stroll.

    A sample romantic route

    • Tokyo for city buzz and fine dining.
    • Hakone or Kawaguchiko for an onsen ryokan and Fuji views (Hakone guide).
    • Kyoto for timeless romance and day trips.
    • See our 7-day or 10-day itineraries for a framework.

    Where to stay

    • Splurge on one or two special ryokan or view rooms — compare on Booking.com and Agoda .
    • Private-bath rooms are ideal if either of you has tattoos.

    Tips

    • Book standout dinners and ryokan early — the best fill up.
    • Best seasons: cherry blossoms and autumn leaves (also the busiest).
    • Balance city and nature, and leave downtime to simply enjoy each other. Start with our first-timer tips.

    Budgeting for a honeymoon trip

    • Mid-range: a comfortable 7-10 night honeymoon (nice hotels, one splurge ryokan night, good dinners) typically runs JPY 350,000-550,000 per person excluding flights.
    • Splurge: adding 2-3 nights at top-tier ryokan with private open-air baths and kaiseki dinners can add JPY 80,000-150,000 per night per couple on top of a mid-range base.
    • Budget-conscious couples can still get the romantic highlights by choosing one splurge night (rather than a whole trip of them) and staying at well-reviewed business hotels or standard ryokan the rest of the time.

    Common planning mistakes

    • Booking the whole trip around cherry blossoms or autumn leaves without a flexible date — both seasons shift year to year by 1-2 weeks; if your dates are fixed for a honeymoon, treat foliage as a bonus, not the plan’s foundation.
    • Packing the itinerary too tightly — honeymoons are one of the few trip types where we would recommend fewer cities and more unstructured time, especially around a ryokan stay meant for slowing down.
    • Not confirming twin vs. double bedding when booking — some traditional ryokan rooms are set up with two futons by default; specify a double/Western bed request if that matters to you.

    A few special-occasion touches

    Many ryokan and hotels will arrange a small in-room celebration (flowers, cake, or a sake set) for honeymooners if you mention the occasion when booking — it rarely costs extra and is a nice way to mark the trip. A sunset dinner cruise in Tokyo Bay or a private tea ceremony in Kyoto are also easy ways to add one memorable, low-effort splurge to an otherwise budget-conscious trip.

    Sample honeymoon budget breakdown (7 nights, per couple)

    • Budget-conscious: roughly JPY 400,000-550,000 total — comfortable hotels, one splurge ryokan night, mostly mid-range dining.
    • Mid-range: roughly JPY 700,000-1,000,000 — better rooms throughout, two ryokan nights with kaiseki dinners, a couple of special experiences.
    • Full splurge: JPY 1,500,000+ — top-tier ryokan for most of the trip, private guided days, and fine-dining reservations.

    Choosing between city and countryside nights

    A good honeymoon rhythm alternates energy levels: a couple of nights in Tokyo for restaurants and nightlife, a slower two or three nights in an onsen town or Kyoto for quiet mornings and long baths, then a final city night before flying home. Trying to do all of Japan’s regions in one honeymoon usually backfires — fewer stops with more time in each tends to feel far more romantic than a rushed multi-city sprint.
  • Japan’s Rainy Season (Tsuyu): What to Know

    Japan’s Rainy Season (Tsuyu): What to Know

    Japan’s rainy season (tsuyu) puts many travelers off — but it has real upsides and is very manageable with a little planning. Here’s what to expect and how to make the most of it.

    When is the rainy season?

    Tsuyu typically runs from early June to mid/late July across most of Japan (Okinawa earlier; Hokkaido largely skips it). Expect humid days with periods of rain rather than constant downpours.

    The upsides

    • Fewer crowds and lower prices at big sights and hotels.
    • Lush greenery — gardens and moss temples look their best; see our gardens guide.
    • Hydrangeas (ajisai) bloom beautifully at temples and parks.

    How to plan around the rain

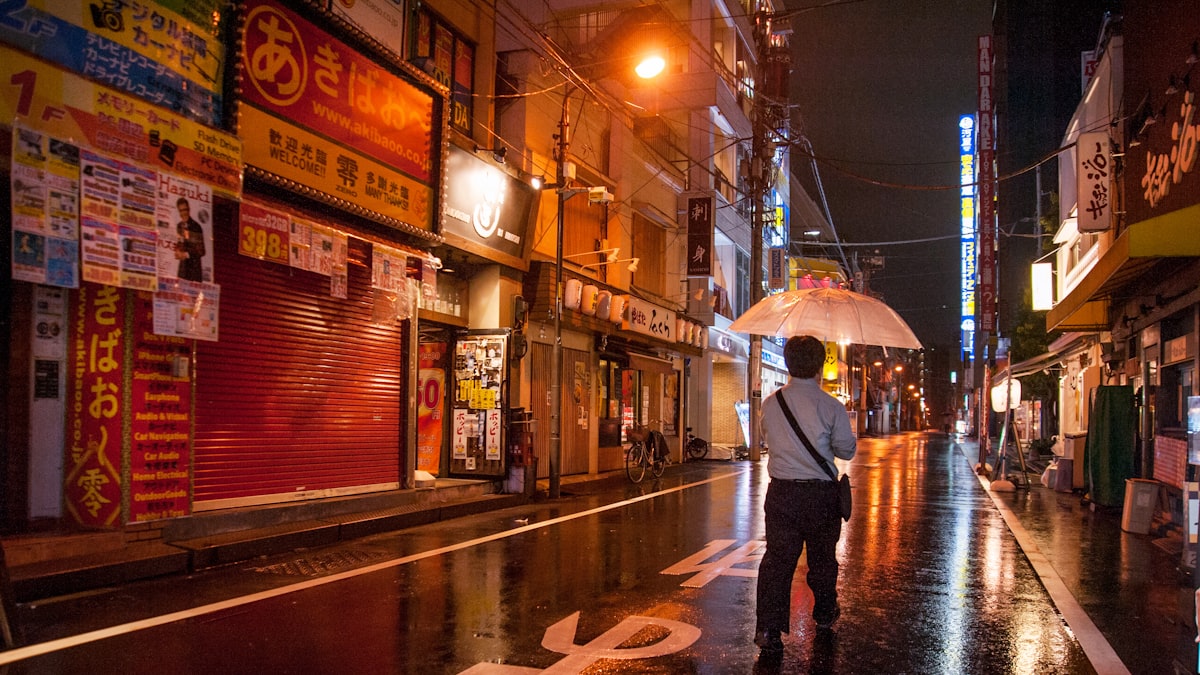
    • Mix indoor and outdoor plans — museums, aquariums, teamLab, shopping, and food halls are perfect rain backups.
    • Carry a compact umbrella (cheap at any konbini) and quick-dry clothes; see what to wear.
    • Check forecasts daily and stay flexible — with an eSIM you can adjust on the go.

    What to know

    • It’s humid — pack breathable clothing and a hand towel.
    • Rain rarely ruins a trip here; trains and indoor life carry on as normal.
    • Onsen towns are lovely in the rain — see our onsen towns guide.

    Bottom line

    If you don’t mind some rain, tsuyu offers value and beauty with fewer crowds. Compare with our best time to visit guide, and plan with a flexible itinerary.

    What tsuyu means for your budget

    • Hotel rates in June and early July often sit 15-25% below the cherry blossom and summer peaks, and popular ryokan that book out months ahead in April are frequently available with a week or two of notice.
    • Flights into Japan during this window are also typically cheaper than the surrounding shoulder seasons, since it falls between the two big domestic travel peaks of Golden Week and Obon.
    • An umbrella from a konbini costs about JPY 500-700 and is disposable enough that buying one on arrival, rather than packing one, is a normal local habit during this season.

    Common mistakes during rainy season

    • Cancelling outdoor plans entirely — most days bring a few hours of rain, not a full washout; checking an hourly forecast rather than the daily one often reveals a dry window to work with.
    • Packing only cotton clothing — it stays damp in the humidity; the same quick-dry fabrics recommended for summer help here too.
    • Skipping Hokkaido on the assumption all of Japan is rainy in June — Hokkaido largely misses tsuyu and can be a smart regional pivot if the forecast further south looks grim.

    Regional timing differences

    Okinawa’s rainy season starts and ends earlier (roughly May to mid-June), so a trip timed for late June often finds Okinawa already clear while the mainland is still damp. If flexibility allows, watch the Japan Meteorological Agency’s tsuyu-akemi (rainy season end) announcements, since the season can run shorter or longer than the average by two or three weeks in either direction.

    What to pack for rainy season

    A packable rain shell beats an umbrella on breezy days, and quick-dry socks and shoes make a real difference if you’re walking outdoor sights in steady rain. See our packing list for a full season-by-season rundown, and pair a rainy-season trip with a flexible itinerary that can shuffle outdoor and indoor days as the forecast changes.

  • Kyoto Itinerary: 2 Days of Temples & Old Streets

    Kyoto Itinerary: 2 Days of Temples & Old Streets

    Two days in Kyoto lets you see the essential temples, shrines, and old streets without rushing. Here’s a well-planned 2-day Kyoto itinerary that groups sights by area to save time.

    Day 1: East Kyoto (Higashiyama)

    • Kiyomizu-dera — the famous hillside temple; go early.
    • Sannenzaka & Ninenzaka — preserved sloping lanes of shops and tea houses.
    • Yasaka Shrine & Gion — end in the geisha district at dusk; see our Gion & geisha guide.
    • Optional: Fushimi Inari (the red torii gates) — magical early morning or evening.

    Day 2: Arashiyama & the north/west

    • Arashiyama Bamboo Grove and Tenryu-ji temple; go at opening for calm.
    • Kinkaku-ji (the Golden Pavilion) — dazzling on a clear day.
    • Ryoan-ji — the famous Zen rock garden; see our gardens guide.

    Make it smooth

    • Group by area — Kyoto’s sights are spread out; buses and trains fill the gaps. Grab an IC card.
    • Start early — the top temples get crowded by mid-morning.
    • Rent a kimono for Higashiyama photos.

    Nearby & next

    Add a half-day to Nara or Osaka. See our full Kyoto guide, where to stay, and fit it into a 7-day itinerary.

    Budgeting for two days in Kyoto

    • Temple entry fees across both days typically total JPY 2,000-3,000 per person if you visit 4-5 paid sites; Fushimi Inari and much of Arashiyama’s grounds are free.
    • A kimono rental for a Higashiyama photo walk runs JPY 4,000-8,000 for a basic set, more for higher-end fabrics or hair styling add-ons.
    • Bus and train fares across two days of area-hopping run about JPY 1,000-1,500 per person on an IC card; a one-day bus pass (around JPY 700) can pay off if you’re doing several short hops rather than a few longer train rides.

    Common mistakes on a 2-day Kyoto trip

    • Underestimating Higashiyama’s crowds by mid-morning — Kiyomizu-dera and the lanes below it are genuinely packed by 10am; starting at opening is the difference between a calm and a crowded visit.
    • Trying to fit Fushimi Inari into Day 1 on top of a full Higashiyama itinerary — it deserves its own slot, ideally early morning or evening on either day.
    • Skipping lunch planning — Nishiki Market and the streets around Gion have good options, but the most famous spots near Kiyomizu-dera can have long waits at peak lunch hours.

    Where to eat each day

    Day 1 in Higashiyama pairs naturally with a stop at Nishiki Market for a grazing lunch on the way to or from the eastern temples. Day 2 in Arashiyama has good tofu-focused restaurants near Tenryu-ji — a fitting, quiet lunch after the bamboo grove, before the afternoon crowds arrive from tour buses.

    Extending to three days

    If you can stretch to a third day, Uji’s tea houses and the Byodo-in Phoenix Hall make an easy, low-key add-on that doesn’t require re-planning the rest of the trip — it’s a short hop from central Kyoto and pairs naturally with the green tea theme already present in the city’s cafes.

  • Tokyo Itinerary: 3 Days for First-Timers

    Tokyo Itinerary: 3 Days for First-Timers

    Three days in Tokyo is enough to hit the highlights and get a real feel for the city. Here’s a well-paced 3-day Tokyo itinerary that balances old and new, plus food and downtime.

    Day 1: Old Tokyo & the east

    • Asakusa — Senso-ji temple and Nakamise street; see our Asakusa guide.
    • Tokyo Skytree or a Sumida River cruise.
    • Evening in Akihabara for neon and geek culture — see our Akihabara guide.

    Day 2: West-side energy

    • Meiji Shrine & Harajuku — calm forest then youth fashion (Harajuku guide).
    • Shibuya — the scramble crossing and Shibuya Sky (Shibuya guide).
    • Evening in Shinjuku — Omoide Yokocho and city views (Shinjuku guide).

    Day 3: Your pick

    Practical tips

    Budgeting for three days in Tokyo

    • Entry fees for the optional attractions vary widely — Tokyo Skytree runs JPY 2,100-3,500 depending on the deck, teamLab is JPY 3,800-4,800, and the Ghibli Museum is a flat JPY 1,000 but needs advance booking.
    • Food across three days for a mid-range traveler runs roughly JPY 3,000-5,000/day if you mix konbini breakfasts, ramen or teishoku lunches, and one nicer dinner.
    • Local transport across three days on an IC card typically totals JPY 2,500-3,500 per person, assuming a few train hops each day rather than a day pass.

    Common mistakes on a 3-day Tokyo trip

    • Booking Ghibli Museum or teamLab tickets too late — both release timed tickets in advance and sell out, especially around weekends and holidays; lock these in before finalizing the rest of the itinerary.
    • Spreading day trips too thin — Kamakura, Nikko, and Yokohama are each worth a dedicated half-to-full day; squeezing more than one into Day 3 usually means rushing all of them.
    • Not grouping Asakusa and Akihabara together despite being on the same day — they’re a short ride apart and pair naturally into one east-Tokyo day.

    Where to eat on each day

    Day 1 in Asakusa has excellent tempura and unagi (eel) restaurants near Nakamise; Day 2 in Harajuku and Shibuya is best for casual crepe stands and trendy cafes between sights; Day 3, if you choose the Tsukiji morning option, is the day to have a proper sushi breakfast before your afternoon activity.

    If it rains

    Tokyo has enough indoor backup options that rain rarely derails a day: teamLab’s digital art is arguably better experienced on a rainy afternoon, and the underground shopping arcades beneath Tokyo, Shinjuku, and Ginza stations let you cover real ground between sights without stepping outside.

  • Accessible Japan: Tips for Wheelchair Users & Limited Mobility

    Accessible Japan: Tips for Wheelchair Users & Limited Mobility

    Japan is more accessible than many travelers expect — but it has quirks worth planning around. Here’s a practical guide for wheelchair users and anyone with limited mobility.

    The good news

    • Trains & stations are largely step-free, with elevators, tactile paving, and staff who will set up ramps for boarding (ask at the gate — they’ll radio ahead).
    • The shinkansen has wheelchair-accessible seating — reserve it in advance.
    • Modern buildings, malls, and attractions generally have elevators and accessible toilets (look for the “multipurpose” restroom).

    Things to plan around

    • Older temples & shrines can have steps, gravel, and slopes — check ahead.
    • Some small stations and older streets are less step-free; big hubs are best.
    • Ryokan & onsen vary — ask about accessible rooms and private baths (see our ryokan guide).

    Practical tips

    • Ask station staff for help boarding — it’s a smooth, well-practiced system; allow a few extra minutes.
    • Reserve accessible shinkansen seats and hotel rooms early.
    • Rent equipment — wheelchair and mobility rentals are available in major cities.
    • Use an eSIM and maps to check step-free routes and elevator exits.

    Where to stay

    Choose accessible rooms in newer hotels near major stations for the easiest logistics — see where to stay in Tokyo. Plan gentle days and build in rest.

    Bottom line

    With some advance planning, Japan is a rewarding, largely barrier-free destination. Pair this with our first-timer tips and a realistic itinerary.

    Typical costs for accessible travel

    • Wheelchair and mobility scooter rentals in major cities run roughly JPY 1,000-3,000/day through specialist rental services, often with delivery to your hotel — worth arranging before arrival rather than trying to source one last-minute.
    • Accessible taxi services (with wheelchair-accessible vans) exist in major cities but are limited in number and should be booked in advance, typically at standard taxi rates plus a modest dispatch fee.
    • Most major museums and attractions don’t charge extra for accessible facilities, though a companion/carer ticket discount is common at larger sights — ask at the ticket counter, since it’s not always advertised in English.

    Common mistakes to avoid

    • Assuming all train stations are equally accessible — large hub stations are excellent, but some smaller rural or older stations still require stairs; check a station’s accessibility on Japan’s rail operator apps before building it into a tight itinerary.
    • Not calling ahead for ryokan with tatami rooms — traditional low furniture and steps between rooms can be a real obstacle even at otherwise well-reviewed properties; ask specifically about barrier-free rooms.
    • Underestimating walking distances between train exits and attractions — Japanese stations and city blocks can involve longer covered walks than expected; build extra time into each day’s plan.

    Requesting station assistance in practice

    Station staff assistance is a well-practiced, genuinely reliable system — tell any staff member your destination station and roughly when you’d like to travel, and they’ll radio ahead so a colleague meets you with a ramp at your arrival platform. Arriving 10-15 minutes before your planned departure gives staff enough time to set this up smoothly, especially at busy hub stations during peak hours.

    Onsen and ryokan accessibility notes

    Larger modern ryokan chains and hotel-style onsen resorts increasingly offer barrier-free rooms and step-free bath access, while small family-run traditional ryokan often cannot accommodate wheelchairs due to their historic layout — always call or email ahead rather than relying on a booking site’s general description, since accessibility details are frequently missing from listings entirely.

  • Japan Itinerary: 10 Days for First-Timers

    Japan Itinerary: 10 Days for First-Timers

    Some links below are affiliate links. If you book through them, Japan Trove may earn a small commission at no extra cost to you.

    Ten days is a fantastic length for a first trip to Japan — enough to pair the classic cities with a couple of deeper stops without rushing. Here’s a balanced 10-day itinerary.

    At a glance

    • Days 1–3: Tokyo
    • Day 4: Hakone or Nikko (nature/onsen)
    • Days 5–7: Kyoto (+ Nara)
    • Day 8: Osaka
    • Day 9: Hiroshima & Miyajima
    • Day 10: Back to Tokyo / departure

    Tokyo (Days 1–3)

    Ease in with Asakusa, Shibuya, Shinjuku, and a day trip. See our Tokyo guide; grab a Suica/Pasmo and an eSIM.

    Nature break (Day 4)

    Add hot springs and Mt. Fuji views in Hakone, or shrines and waterfalls in Nikko.

    Kyoto, Nara & Osaka (Days 5–8)

    Ride the shinkansen to Kyoto for temples and geisha districts, day-trip to Nara, then eat your way through Osaka.

    Hiroshima & Miyajima (Day 9)

    The Peace Park and the floating torii — see our Hiroshima & Miyajima guide.

    Tips

    Budgeting for 10 days

    • A mid-range 10-day trip covering Tokyo, Hakone/Nikko, Kyoto, Nara, Osaka, and Hiroshima typically runs JPY 250,000-400,000 per person excluding flights, factoring hotels, food, local transport, and a few paid attractions.
    • Long-distance transport is the biggest lever here — with a Hiroshima leg added, price out the 7 or 14-day JR Pass carefully, since this itinerary’s distance profile is exactly the kind that can make the nationwide pass worthwhile.
    • Luggage forwarding between each multi-night base runs roughly JPY 2,000-3,000 per bag per hop and is worth the cost on a trip with this many city changes.

    Common mistakes on a 10-day itinerary

    • Under-allocating time to Hiroshima and Miyajima — treating it as a single rushed day from Kyoto often means missing the low-tide floating torii walk or the Peace Museum’s full impact; if possible, an overnight makes this leg far less rushed.
    • Packing Days 5-7 in Kyoto too tightly around Nara — Kyoto alone has enough for 2-3 full days; treat the Nara add-on as a half-day, not a full day carved from Kyoto time.
    • Not confirming the JR Pass exchange process before travel — passes now require online purchase and a specific pickup process at designated stations; leave time on Day 1 to sort this out if you’re using one.

    Adjusting the pace to your travel style

    This 10-day structure assumes a first-timer wanting breadth across regions; if you’d rather go deeper into fewer places, swap the Hiroshima day for an extra Kyoto day or a detour to Kanazawa, which is closer to the standard Tokyo-Kyoto corridor and easier to fit without adding a long return leg.

    What to eat along the way

    A 10-day route touching this many regions is also a great food tour if you eat locally at each stop: Tokyo’s sushi and ramen, a kaiseki dinner at your Hakone or Nikko ryokan, Kyoto’s tofu and kaiseki cuisine, Osaka’s street food, and Hiroshima’s distinct layered okonomiyaki style each give a genuinely different regional flavor rather than repeating the same dishes city to city.

  • Capsule Hotels in Japan: What to Expect & How to Book

    Capsule Hotels in Japan: What to Expect & How to Book

    Some links below are affiliate links. If you book through them, Japan Trove may earn a small commission at no extra cost to you.

    Staying in a capsule hotel is a fun, only-in-Japan experience — and a great budget option. If you’ve never slept in a pod, here’s exactly what to expect and how to do it right.

    What is a capsule hotel?

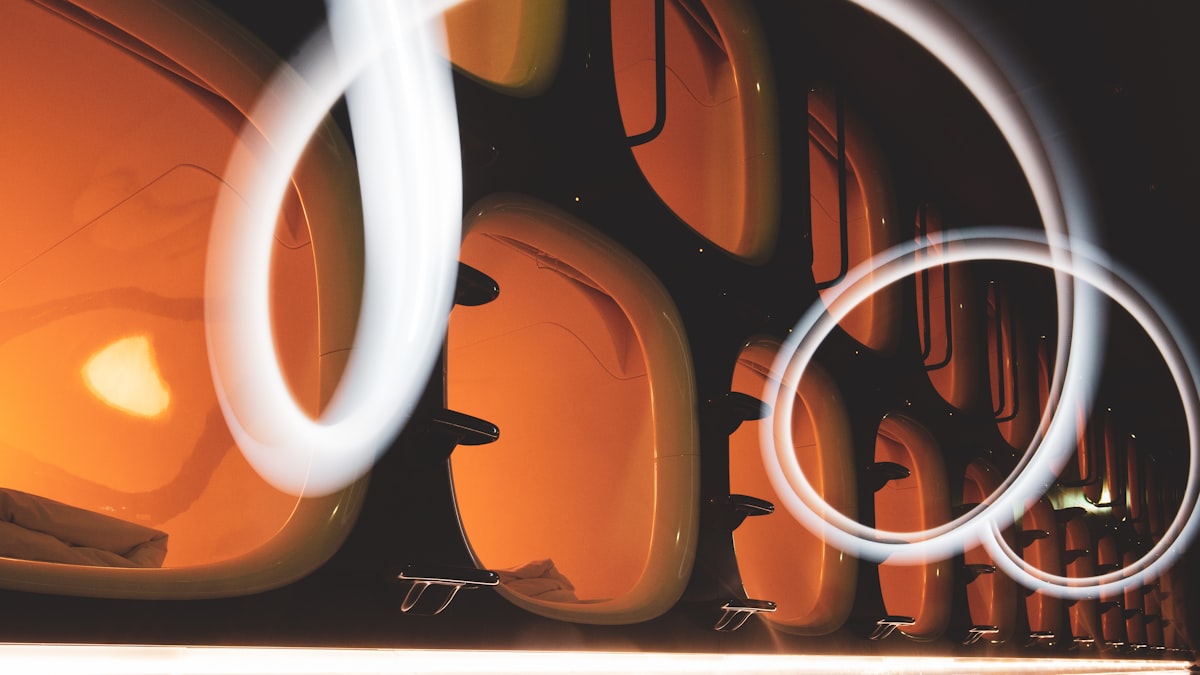
    A capsule hotel gives you a compact sleeping pod (bed, light, outlet, often a small screen) stacked in rows, with shared bathrooms, lockers, and lounges. Modern ones are clean, secure, and surprisingly comfortable — a world away from the old image.

    What to expect

    • Your pod: enough room to sit up and sleep; a curtain or blind for privacy (not a locking door).
    • Shared facilities: lockers for luggage, communal baths/showers, and a lounge. Many have a large public bath (sento-style).
    • Amenities: pajamas, towels, and toiletries are often provided.
    • Often gender-separated floors.

    Etiquette & tips

    • Keep quiet — noise carries between pods. No phone calls in the pod area.
    • Store bags in your locker; pods are for sleeping, not luggage.
    • Follow bath rules if there’s a communal bath — see our onsen etiquette guide.
    • Great for solo travelers — see solo travel in Japan.

    When they’re perfect

    • Budget nights, solo trips, or an early flight (many are near stations/airports).
    • A fun experience to try once even if you usually book hotels.
    • Traveling light helps — use luggage forwarding for big bags.

    How to book

    Reserve ahead in busy seasons; compare capsule and business hotels on Booking.com . For more options, see where to stay in Tokyo and our budget guide.

    What a capsule hotel typically costs

    • Budget capsule hotels run JPY 2,500-4,500/night, often cheaper than a hostel dorm bed in the same neighborhood while offering more privacy.
    • Upscale “designer” capsule hotels (with saunas, quality bedding, and stylish lounges) run JPY 5,000-9,000/night and have become genuinely popular with design-conscious travelers, not just budget backpackers.
    • Most include access to a public bath or sauna at no extra charge, which is worth factoring in as part of the value compared to a plain business hotel room.

    Common mistakes to avoid

    • Booking without checking gender policy — most capsule hotels are single-gender per floor or fully single-gender properties; a small but growing number accept mixed groups, so confirm before assuming your travel companions can stay in adjacent pods.
    • Bringing a large suitcase expecting in-pod storage — luggage goes in a separate locker, not the sleeping pod itself; oversized bags sometimes need to be checked at the front desk if lockers are too small.
    • Expecting a locking door — pods use a curtain or roll-down screen for privacy, not a lock; valuables should stay in your locker, not the pod.

    Who capsule hotels suit best

    They’re an excellent fit for a single night near an airport before an early flight, a solo traveler on a budget, or anyone curious to try the experience once — less ideal for a multi-night stay with heavy luggage or anyone who values a private bathroom, in which case a compact business hotel room is a closer, only slightly pricier alternative.

    A first-timer’s checklist

    Bring earplugs (noise carries between pods more than you’d expect), a phone charger since outlets are sometimes positioned awkwardly inside the pod, and flip-flops or the provided sandals for moving between your pod and the shared bath — most of the mild culture shock first-timers report comes from not knowing these small details in advance, not from the pod itself.

  • What to Wear in Japan: A Season-by-Season Packing Guide

    What to Wear in Japan: A Season-by-Season Packing Guide

    Wondering what to pack and wear in Japan? The country spans seasons and situations — from temple visits to fancy dinners to lots of walking. Here’s a practical, season-by-season guide.

    By season

    • Spring (Mar–May): layers — mild days, cool mornings. A light jacket and a compact umbrella. Perfect for cherry blossom season.
    • Summer (Jun–Aug): hot and very humid. Breathable clothes, a hat, and a hand towel; a light layer for strong air-con.
    • Autumn (Sep–Nov): gorgeous and mild — layers again, great for fall foliage.
    • Winter (Dec–Feb): cold, especially up north — a warm coat, gloves, and heat packs; see Japan in winter.

    Comfortable, respectful, practical

    • Shoes you can slip off easily — you’ll remove them at temples, ryokan, and some restaurants. Nice socks help!
    • Walk-friendly footwear — you’ll walk a lot; broken-in sneakers win.
    • Modest options for temples and shrines; shoulders/knees covered is polite. See our etiquette guide.

    Dressing up (and down)

    • Japan skews neat and put-together; smart-casual covers most situations.
    • High-end restaurants may expect tidy attire (no gym wear/flip-flops).
    • Renting a kimono or yukata for a day is a fun experience.

    Handy extras

    • A compact umbrella, a foldable bag, and layers you can peel off.
    • Tattoos? Some onsen have rules — see our tattoo & onsen guide.
    • Full checklist in our packing list.

    What clothing actually costs to buy locally

    • Uniqlo’s AIRism and Heattech lines (JPY 990-2,990 per piece) are widely available and a smart way to pack light — many travelers buy a few pieces on arrival rather than checking a full seasonal wardrobe from home.
    • A basic folding umbrella from a konbini runs JPY 500-700; a compact travel umbrella from a department store runs JPY 2,000-3,500 and holds up better to wind.
    • Heat packs (kairo) for winter cost about JPY 500-800 for a pack of 10 and are sold at every drugstore and convenience store from October through March.

    Common packing mistakes

    • Packing only for the season you’re used to at home — Japan’s humidity in summer and damp cold in winter both feel more intense than similar temperatures elsewhere; err toward more breathable fabric in summer and warmer layers in winter than your home climate would suggest.
    • Forgetting temple-appropriate footwear — shoes that are quick to remove and put back on save real time and hassle across a day with multiple temple or restaurant stops requiring shoes off.
    • Overpacking formal wear — smart-casual covers the overwhelming majority of restaurants and situations; very few places outside high-end kaiseki restaurants enforce a strict dress code.

    Shopping for weather gear once you arrive

    Rather than over-packing for uncertain weather, most travelers find it easier to buy what they need once in Japan — Uniqlo, drugstores, and 100-yen shops are everywhere and inexpensive, and this approach also frees up luggage space for souvenirs on the way home. See our full packing list for exactly what’s worth bringing versus buying locally.

    Dressing for specific situations

    A kaiseki dinner at a nice ryokan, a rooftop bar in Ginza, or a temple visit in the rain each call for slightly different choices — a versatile smart-casual outfit with layering options handles all three, while a single pair of easy slip-on shoes covers everything from a shrine visit to a fine-dining reservation without needing a separate formal shoe.

  • Japan Itinerary: 5 Days for First-Timers (Tokyo & Kyoto)

    Japan Itinerary: 5 Days for First-Timers (Tokyo & Kyoto)

    Some links below are affiliate links. If you book through them, Japan Trove may earn a small commission at no extra cost to you.

    Only have five days in Japan? You can still see the highlights of Tokyo and Kyoto without rushing. Here’s a tight but comfortable 5-day first-timer itinerary.

    At a glance

    • Days 1–2: Tokyo
    • Day 3: Day trip (Hakone or Nikko) or more Tokyo
    • Days 4–5: Kyoto (with a Nara or Osaka half-day)

    Days 1–2: Tokyo

    Asakusa, Shibuya, Shinjuku, and a neighborhood or two — see our Tokyo guide. Get a Suica/Pasmo and an eSIM on arrival.

    Day 3: A taste of nature

    Add an onsen-and-Fuji day in Hakone or shrines and waterfalls in Nikko — or simply go deeper into Tokyo.

    Days 4–5: Kyoto (+ Nara/Osaka)

    Take the shinkansen to Kyoto for temples, bamboo groves, and geisha districts (Kyoto guide), with an easy half-day to Nara or Osaka.

    Tips to make 5 days work

    • Base in just two cities to minimize transit; a 7-day pass usually isn’t worth it — see JR Pass.
    • Use luggage forwarding between Tokyo and Kyoto to travel light.
    • Book hotels early — compare on Booking.com .
    • Have more time? See our 7-day and 14-day itineraries.

    Budgeting for 5 days

    • A mid-range 5-day Tokyo-Kyoto trip typically runs JPY 150,000-230,000 per person excluding flights, covering hotels, food, local transport, and a handful of paid attractions.
    • The one-way Tokyo-Kyoto shinkansen fare runs about JPY 14,000 in an unreserved seat — with only one long-distance leg each way, single tickets almost always beat any rail pass on a trip this short.
    • Luggage forwarding between Tokyo and Kyoto (JPY 2,000-3,000 per bag) is worth it on a tight 5-day trip since it removes a full transfer day’s worth of hassle.

    Common mistakes on a 5-day trip

    • Trying to add a third base city — 5 days is genuinely tight for even two cities; adding Osaka as a full third base (rather than a Kyoto day trip) usually means arriving exhausted rather than well-traveled.
    • Scheduling the Hakone or Nikko day trip on your last full day — if it runs long or the weather turns, you have no buffer before departure; slot nature days in the middle of the trip instead.
    • Skipping jet lag adjustment time — most travelers land in Tokyo groggy; treating Day 1 as a lighter orientation day (rather than a packed sightseeing day) usually pays off across the rest of the trip.

    Making 5 days feel unrushed

    The trick with a short trip is choosing depth over breadth — rather than trying to see everything in our Tokyo and Kyoto guides, pick 2-3 priority sights per city and leave real gaps for food, wandering, and rest. A 5-day trip that covers less but moves at a comfortable pace consistently gets better reviews from first-timers than one that tries to match a 10-day itinerary’s checklist.

    If you land with jet lag

    Most international flights arrive in the afternoon or evening local time, which is a natural moment to keep Day 1 light — a nearby neighborhood walk and an early dinner beat forcing yourself through a packed sightseeing schedule on almost no sleep. The extra rest usually pays for itself in how much more you enjoy Days 2 through 5.

  • Japan Travel Mistakes: What to Avoid on Your First Trip

    Japan Travel Mistakes: What to Avoid on Your First Trip

    Japan is easy and rewarding to travel — but first-timers make the same avoidable mistakes. Here are the big ones and how to sidestep them for a smoother trip.

    Planning mistakes

    • Cramming too much in. Distances and transfers eat time. Fewer places, more depth. See our 7-day itinerary.
    • Buying the JR Pass by default. It’s not always worth it now — do the math first: is the JR Pass worth it?
    • Traveling during peak weeks. Avoid Golden Week, Obon, and New Year if you can.

    Money & tech mistakes

    • Assuming cards work everywhere. Carry cash; many small places are cash-only. See money in Japan.
    • Renting pocket wifi when an eSIM is cheaper and simpler.
    • Not getting an IC card — it makes trains and konbini effortless.

    Etiquette mistakes

    On-the-ground mistakes

    • Over-packing. Hotel rooms are small; use luggage forwarding and our packing list.
    • Underestimating station complexity — note your exit name, not just the line.
    • Ignoring regional food — each area has specialties worth seeking out.

    The fix

    Slow down, carry cash, get an eSIM and IC card, mind a few manners, and pack light. Start with our first-timer tips.

    Costly mistakes worth avoiding

    • Buying the nationwide JR Pass without doing the math — since the 2023 price increase, it only pays off on itineraries with several long-distance legs; see our JR Pass guide before assuming it’s automatic value.
    • Booking hotels during Golden Week, Obon, or New Year without realizing rates can double or triple compared to a normal week — if your dates are flexible at all, shifting by even a week can mean dramatically better prices and availability.
    • Exchanging large amounts of cash at the airport at poor rates — Japan is increasingly card- and IC-card friendly, so exchanging a smaller amount and topping up as needed (or using a fee-free travel card at ATMs) usually beats one big airport exchange.

    Mistakes that cost time, not money

    • Not noting station exit names, only line names — big stations like Shinjuku and Tokyo have dozens of exits, and the wrong one can add a 10-15 minute walk aboveground.
    • Scheduling a tight connection through a transfer station during rush hour — crowds and walking distances between platforms can eat more time than a map suggests.
    • Assuming all restaurants take reservations or walk-ins equally well — some popular spots are reservation-only weeks ahead, while others are strictly first-come; a quick check avoids a wasted trip.

    The single biggest fix

    Most of these mistakes share one root cause: treating Japan like a country where local norms don’t need research, when in fact a little upfront reading (this guide, plus our first-timer tips) resolves nearly all of them before they become a problem on the ground.

    A mistake specific to food

    Sticking only to famous, heavily reviewed restaurants in guidebooks can mean missing genuinely better, less-touristed spots nearby — a queue of local office workers at lunchtime is often a more reliable quality signal than a five-star online rating aimed at tourists.