Japan Trove

Category: Plan Your Trip

Itineraries, budgets, rail passes, when to go, and everything you need to plan a Japan trip.

  • Mailing Postcards & Stamps from Japan: A Traveler’s Guide

    Mailing Postcards & Stamps from Japan: A Traveler’s Guide

    Photo by Magic Mary on Unsplash

    Sending a postcard home is one of the cheapest, most satisfying souvenirs you can bring back from Japan — except you don’t keep it, someone else gets the joy of finding it in their mailbox weeks later. The process is simple once you know where to buy stamps, where the mailboxes are, and how long it actually takes. Here’s everything you need to pull it off without a wasted trip to the post office.

    Where to Buy Stamps (Kitte)

    Japanese postage stamps (切手, kitte) are sold at every post office counter, but you don’t need to track one down specifically for this — stamps are also sold at convenience stores (Lawson, FamilyMart, 7-Eleven) if you ask at the register, though stock is often limited to the most common denominations. Post offices themselves are the most reliable source and often sell postcard-friendly novelty stamp sheets featuring seasonal designs, anime characters, or regional motifs, which make nice souvenirs even unused.

    As of 2024, a standard postcard mailed internationally from Japan costs 85 yen. Domestic postcards cost 63 yen. Always confirm current rates at the counter, since postal rates do shift periodically — the clerk will weigh and check your postcard if you’re unsure which stamp denomination to use, which is the safest way to avoid an underpaid card getting held up overseas.

    Finding a Mailbox

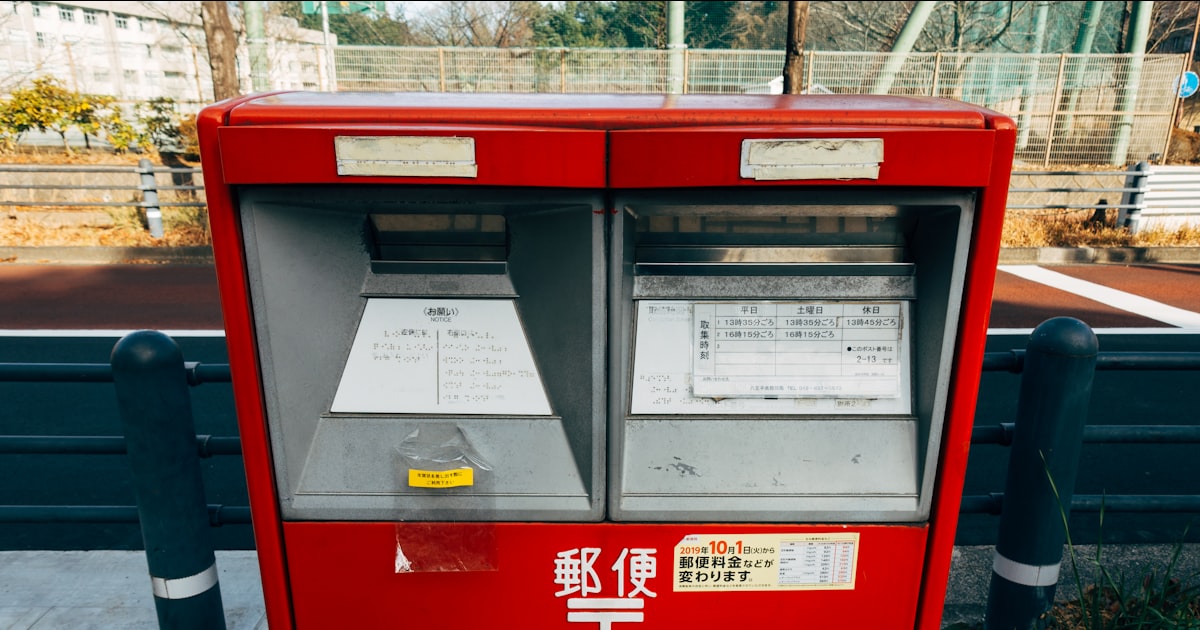
    Japan’s post boxes are bright red, cylindrical or box-shaped, and genuinely everywhere — outside post offices, near train stations, by convenience stores, and along shopping streets. Each box has two slots: one for regular mail (普通) and one for larger or non-standard items (大型・その他). Postcards always go in the regular slot. If a box looks locked or unusually quiet, don’t worry — these are just emptied on a set schedule printed on a small sign on the box itself, often once or twice daily.

    If you’d rather hand your postcard directly to a person, any post office counter will take it, stamp it, and send it off the same day, which is reassuring if you’re nervous about a card sitting in a random street box.

    Post Office Hours and Logistics

    Regular post offices (郵便局) are typically open 9:00 AM–5:00 PM on weekdays and closed on weekends and public holidays — a schedule that catches a lot of travelers off guard since so much else in Japan runs late and seven days a week. Larger central post offices in big cities, however, often have extended hours, and some — like Tokyo Central Post Office near Tokyo Station — stay open into the evening or even operate a 24-hour counter for mail and parcels. If you’re arriving via Narita, note that post office hours are a different beast entirely from the efficient airport transfers covered in our Narita Express vs. Keisei Skyliner guide — don’t assume postal services will be as convenient as the trains.

    Budget tip: if you’re buying stamps for a handful of postcards, convenience stores are fastest and open 24 hours, but for anything requiring weighing, customs forms, or unusual destinations, go to a proper post office.

    Best Time to Mail Postcards

    There’s no bad season to send a postcard, but timing matters if you want it to arrive before you’re home. International postcards from Japan typically take 1–2 weeks to North America, Europe, and Australia via standard airmail — occasionally longer during the New Year period (late December–early January) when Japan’s domestic mail volume spikes with nengajo (New Year’s cards) and processing slows everywhere. If you’re traveling during Golden Week (late April–early May) or Obon (mid-August), post offices will have reduced hours or closures, so mail postcards before or after those windows if timing matters to you.

    A nice trick: buy and write your postcards early in the trip, while you’re still near post offices in Tokyo or Kyoto, rather than scrambling on your last day when you might be somewhere rural with no post office in sight.

    Common Mistakes to Avoid

    • Underpaying postage. Oversized or thick novelty postcards sometimes exceed standard postcard weight/size limits and need extra postage — have the counter clerk check if your card feels unusually heavy or textured.
    • Assuming weekend post office access. Regular post offices are closed Saturday and Sunday; plan around this rather than discovering it on a Sunday afternoon.
    • Writing the address in the wrong format. For international mail, write the destination country name clearly in English/Roman letters, and write the address in the normal format for that country (not Japanese order) so it’s legible to the receiving postal service.
    • Forgetting customs forms for anything beyond a postcard. If you’re mailing a small gift alongside your postcard — say, a little omiyage sweet from our Tokyo Banana and Japan’s Iconic Omiyage Sweets guide — that becomes a parcel, not a postcard, and needs a customs declaration at the counter.

    Where to Find Beautiful Postcards to Send

    Souvenir shops near major shrines and stations sell standard tourist postcards, but for something more distinctive, look in neighborhoods known for craft and design. Daikanyama’s boutique shops often stock beautifully designed stationery and postcard sets from independent Japanese illustrators, a step up from generic rack postcards. If you’re drawn to traditional crafts, postcards featuring textile and washi paper motifs pair nicely with a stop at Nishijin-ori in Kyoto, where you can see the silk-weaving tradition that inspires a lot of that imagery firsthand.

    Budget option: 100-yen shops and train station kiosks sell perfectly decent postcards for 100–200 yen each. Mid-range: boutique stationery shops run 300–600 yen for higher-quality card stock and original art. Splurge: limited-edition museum or temple postcard sets, sometimes boxed, can run 1,000–2,000 yen but make excellent gifts in their own right.

    Final Tip: Send One to Yourself

    A postcard mailed to your own address is a small, inexpensive time capsule — it’ll arrive after you’re home, stamped and dated, as a tangible memory of the trip. Combine it with a quick post office stop near your hotel on day one or two, before the itinerary gets busy, and you’ll have one less thing to worry about later.

  • Taking Your Shoes Off in Japan: Indoor Etiquette for Homes, Ryokan & Temples

    Taking Your Shoes Off in Japan: Indoor Etiquette for Homes, Ryokan & Temples

    Photo by Felix Rostig on Unsplash

    Nothing marks a first-time visitor to Japan faster than fumbling at a doorway, shoes half-on, while everyone else glides past in socked feet. Taking shoes off indoors isn’t a quaint custom reserved for shrines — it’s a daily, practical system that governs homes, ryokan, some restaurants, and dozens of temples and castles you’ll likely visit. Get the basics down before you go and it becomes second nature within a day or two. Here’s exactly where, when, and how it works.

    Why Shoes Come Off: The Logic Behind the Rule

    The custom isn’t really about cleanliness alone — it’s about separating “outside” dirt from the raised, often tatami-matted floor that Japanese households (and many traditional buildings) are built around. Floors are where people sit, kneel, and sometimes sleep, so they’re treated more like a bed than a walkway. Once you see it that way, the rule stops feeling arbitrary and starts feeling obvious: you wouldn’t walk on your bed in street shoes either.

    At the Genkan: The Step-by-Step Choreography

    Every Japanese home, and most ryokan and traditional restaurants, has a genkan — a sunken or lowered entry area just inside the door where shoes come off. The etiquette is simple once you know it:

    • Step out of your shoes while still standing in the genkan (the lower level), never on the raised floor behind you.
    • Turn your shoes around afterward so the toes point back toward the door — this is a small courtesy that locals do automatically, often with a quick foot-pivot rather than bending down.
    • Line your shoes neatly to one side, not in the middle of the entryway where others will trip over them.
    • Wear socks or bring a clean pair — bare feet in someone’s home or a ryokan is considered a little too casual. Slip-on shoes save time and dignity, since you’ll be doing this constantly.

    If you’re invited to someone’s home, it’s worth reading up on omiyage gift-giving etiquette too — arriving with a small, nicely wrapped gift and clean socks will make a strong first impression at the genkan before you’ve said a word.

    Ryokan Etiquette: Slippers, Tatami, and the Bathroom Switch

    Traditional inns layer the system further, and it trips up almost every first-timer:

    • Entrance: remove your outdoor shoes at the genkan and change into the ryokan’s indoor slippers, usually lined up in cubbies or offered by staff.
    • Your room: slippers come off again before stepping onto the tatami floor — leave them just outside the sliding door. Tatami is walked on in socks or bare feet only.
    • The toilet: almost every ryokan has a separate pair of “toilet slippers” waiting just inside the bathroom door. Swap into these, and — this is the mistake nearly everyone makes at least once — remember to swap back out before walking back through the hallway. Wandering the corridor in toilet slippers is a classic rookie error.
    • Outdoor areas: if your ryokan has a garden path or outdoor onsen building, you’ll typically find geta (wooden sandals) by the door for that short outdoor stretch.

    If you’re planning an onsen weekend, the Izu Peninsula is a popular, easy-access area from Tokyo with ryokan ranging from simple family-run inns (around ¥12,000–18,000 per person with two meals) to elaborate kaiseki retreats well over ¥40,000 — all running the same shoes-slippers-tatami system described above.

    Visiting a Japanese Home

    Private homes follow the genkan rules above, with a couple of added layers. If your host hands you house slippers, wear them through the hallways — but take them off before entering any tatami room, and definitely before stepping onto a dining area with a low table and cushions. Bathroom slippers work exactly like the ryokan version. If you’re visiting around New Year, when many families host relatives at home, it’s worth knowing the broader customs around that season — see our guide to Oshogatsu traditions, osechi ryori, and hatsumode — since shoe etiquette is just one piece of a bigger set of expectations around visiting someone’s home at that time of year.

    Temples, Shrines, and Castles: Where Shoes Actually Come Off

    Not every temple requires bare feet — outdoor shrine grounds and stone approach paths are fine in shoes. The rule kicks in once you step up onto a wooden veranda, tatami room, or interior hall. A few concrete, reliable examples:

    • Sanjusangendo (Kyoto): the famous 120-meter hall of 1,001 Kannon statues is walked entirely in socks; shoes go into plastic bags or shelves at the entrance. Open roughly 8:00–17:00 (shorter in winter), admission around ¥600.
    • Nijo Castle’s Ninomaru Palace (Kyoto): shoes off to walk the palace’s famous “nightingale floors,” which chirp underfoot by design as a security feature. Open 8:45–16:00 (last entry), closed some Tuesdays in Jan/Jul/Aug/Dec; castle grounds admission around ¥800–1,300 depending on what’s included.
    • Nikko Toshogu’s inner halls, including the Honji-do “crying dragon” room: shoes off, socks recommended since you’re on bare wood or tatami.

    Carry a lightweight tote bag for your shoes at busy sites — most provide plastic bags or wooden shelf lockers, but queues move faster if you’re not hunting for a spare bag. Autumn (November) and spring (late March–April) are the busiest seasons at these sights, so arriving at opening time means less crowding around the shoe-storage area itself, which gets surprisingly congested.

    Common Mistakes Foreign Visitors Make

    • Walking into the raised area with shoes still on to “just drop off a bag” — even a few seconds counts.
    • Forgetting socks entirely — bare feet are workable at home with close friends but feel too informal at a ryokan, temple, or someone else’s house. Convenience stores and 100-yen shops sell basic socks for ¥300–500 if you’re caught out.
    • Leaving toilet slippers on past the bathroom door — the single most common slip-up, even among seasoned travelers.
    • Not squaring up shoes at the door — small, but noticed.
    • Assuming all restaurants require it — izakaya and casual chains generally don’t; it’s mainly tatami-seating restaurants, traditional ryokan dining rooms, and temple/shrine interiors.

    It’s part of a broader pattern of small, systemized etiquette you’ll notice throughout Japan — the same instinct for order shows up in how households sort and dispose of trash, another area where a little advance knowledge saves visitors some awkward moments.

    Quick Packing Tips

    Pack slip-on or easily removable shoes, bring at least one clean pair of socks per day if you’ll be ryokan-hopping or temple-heavy on your itinerary, and consider a small drawstring bag for shoe storage at crowded sights. It’s a minor adjustment, but once the genkan choreography clicks, it becomes one of the more charming, low-cost rituals of traveling in Japan rather than a source of stress.

  • Trash & Recycling in Japan: How Travelers Should Sort Waste

    Trash & Recycling in Japan: How Travelers Should Sort Waste

    Photo by Mylène Larnaud on Unsplash

    You finish a can of coffee or a convenience store onigiri, turn around, and realize there isn’t a trash can anywhere in sight. This is one of the first things that throws visitors off in Japan — a country famous for cleanliness has remarkably few public bins. It’s not an oversight; it’s the result of a very specific system, and once you understand it, carrying your own trash for a few hours stops feeling strange and starts feeling normal. Here’s how sorting and disposal actually work, and how to avoid the mistakes most tourists make.

    Why Japan Has So Few Public Trash Cans

    Many public bins were removed from train stations and streets after the 1995 Tokyo subway sarin gas attack, when bins were seen as a security risk for hiding dangerous items. That policy mostly stuck, and it combined with a cultural expectation that you take your trash home (or back to where you bought the item) rather than leave it for someone else to manage. The result is a country where streets are spotless precisely because there’s nowhere to litter — people simply hold onto their rubbish until they find an appropriate bin.

    The Basic Sorting Categories You’ll Encounter

    Japanese municipalities split waste into categories, and the exact names and rules vary slightly by city, but as a traveler you’ll mainly run into:

    • Moeru gomi (燃えるごみ) — burnable waste: food scraps, tissues, most packaging.
    • Moenai gomi (燃えないごみ) — non-burnable: metal, ceramics, small electronics.
    • PET bottles (ペットボトル) — plastic drink bottles only, usually rinsed, with caps and labels removed and binned separately.
    • Cans and bottles (缶・びん) — aluminum/steel cans and glass bottles.
    • Plastics (プラスチック) — snack wrappers, trays, and other soft plastic packaging, kept separate from PET bottles in many areas.

    Bins are almost always labeled with small pictures even when the text is in Japanese, so you can usually match the shape of your item (bottle, can, wrapper) to the icon without reading a word of Japanese.

    Where You Can Actually Throw Away Trash

    As a visitor, your realistic disposal points are:

    • Convenience stores (7-Eleven, Lawson, FamilyMart) — nearly all have a small bin bank near the entrance, open whenever the store is (most are 24 hours). These are intended for items you bought there, so it’s good etiquette to use them after a konbini purchase rather than dumping a bag of loose travel trash.
    • Vending machines — almost every vending machine has a recycling bin attached, but it’s for cans, bottles, and sometimes cartons only.
    • Train station platforms — bins reappeared in many stations in recent years, usually past the ticket gates, sorted into burnable/PET/cans.
    • Food stalls and festival areas — at matsuri and street-food alleys, vendors typically set out sorted bins near their stalls. This is especially true at big events like Awa Odori, where food stands line the dance route, or in skewer-and-beer alleys like Shinsekai’s kushikatsu strip — look for the bin cluster near where you bought the food rather than carrying it elsewhere.
    • Your hotel room — standard hotels empty room bins daily as part of housekeeping, so you don’t need to sort anything there.

    Vending Machines and Convenience Store Bins: The Fine Print

    This is where most travelers slip up. Vending machine recycling bins are for the can or bottle you just bought at that machine — not a general trash can. Shoving in a tissue, a food wrapper, or an umbrella bag will sometimes jam the chute, and locals notice. Likewise, convenience store bins are meant for purchases made in that store; walking in just to dump a bag of trash from elsewhere is considered poor form, even though staff rarely say anything. If you buy a drink, finish it before you leave the area near the vending machine or store — that’s the easiest way to stay within the unwritten rules.

    If You’re Staying in a Vacation Rental or Kominka

    This is the one situation where sorting mistakes actually have consequences. Hotels handle your trash for you, but if you book an Airbnb, machiya, or a traditional kominka farmhouse stay, you become responsible for sorting your own waste according to the local municipal calendar. Collection happens on fixed days — burnable waste might be picked up twice a week, PET bottles and cans once a week, non-burnables only once or twice a month — and putting bags out on the wrong day means they simply get left behind. Many municipalities also require designated garbage bags sold at local supermarkets or convenience stores, printed with the ward or city’s logo; these typically cost around ¥20–50 per bag depending on size and region, and generic bags may be rejected. Good hosts leave a printed sorting guide and calendar in the house; if yours doesn’t, ask before your first collection day rather than guessing.

    Common Mistakes Travelers Make

    • Carrying trash into a shrine, temple, or scenic viewpoint bin that doesn’t exist — these areas are almost always bin-free to keep them pristine.
    • Mixing PET bottles with cans in combo bins without checking the icon, even though many stations and stores do separate them.
    • Leaving large items on the street, like a broken umbrella or a cheap suitcase bought for souvenirs — oversized item disposal (sodai gomi) requires a paid sticker, usually ¥200–2,000 depending on the item and city, arranged in advance through the local ward office. It’s not something a short-term visitor can realistically do, so it’s better to leave bulky purchases behind in your home country, pack light, or ship items home instead.
    • Assuming every bin accepts food waste — some station and convenience store bins are “bottles and cans only,” with nowhere for leftover food, so finish meals before disposing of containers.

    A Simple System for Your Trip

    The easiest habit is to carry a small resealable bag or a spare konbini bag in your daypack. Use it to hold wrappers, tissues, and empty containers between bin sightings, then sort everything in one go at the next convenience store or train station. Finish drinks near the vending machine you bought them from rather than carrying open containers around. If you’re hopping between regions — say, combining a street-food crawl in Shinsekai with a few evenings at a standing bar through Japan’s tachinomi culture — you’ll generate a lot of small cans and skewer sticks over a single night, and knowing that the bin by the register is fair game (because you bought the food there) makes the whole system much less stressful. Within a day or two, scanning for the bin icons becomes second nature, and the lack of public trash cans stops being a puzzle and starts making sense as part of why Japan’s streets stay so clean.

  • Getting a Haircut in Japan: How to Book a Salon and What to Expect

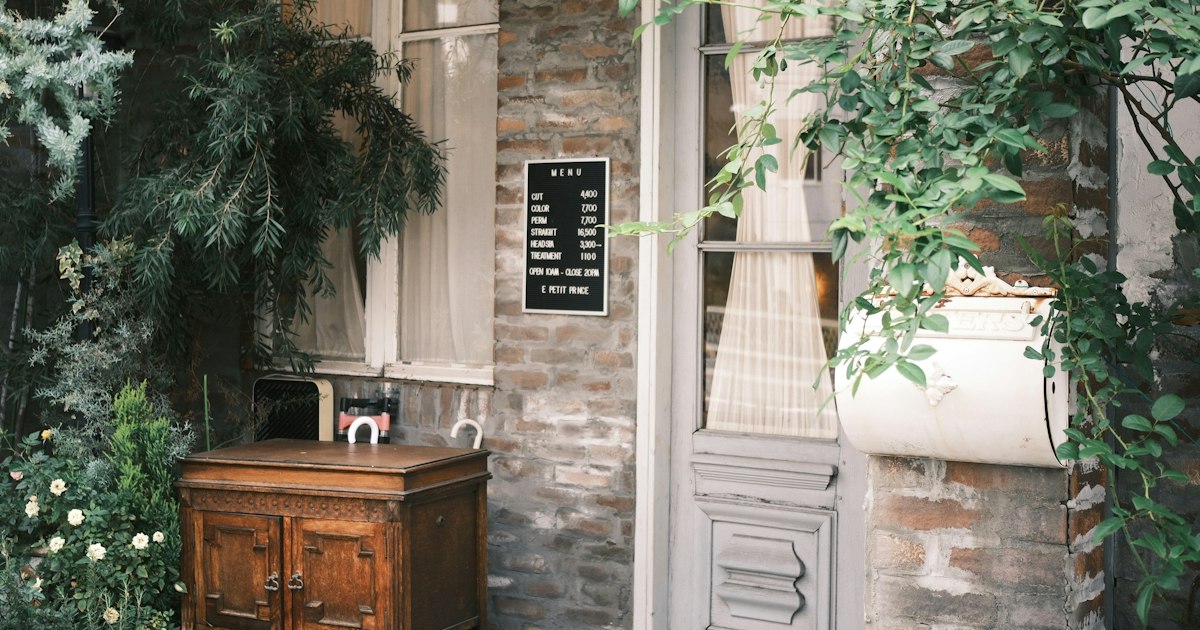
    Getting a Haircut in Japan: How to Book a Salon and What to Expect

    Photo by Hongwei FAN on Unsplash

    Running out of road before your flight home and realizing you need a trim is one of the more underrated travel stresses in Japan. The good news: Japanese salons range from ten-minute, no-frills cuts to elaborate two-hour experiences with a head massage thrown in, and most of the system is navigable even if you don’t speak Japanese. Here’s how to figure out which kind of haircut you actually want, how to book it, and what happens once you sit down in the chair.

    The Three Tiers of Haircuts in Japan

    Japan’s hair industry splits roughly into three categories, and picking the right one matters more than picking the right salon.

    • Quick-cut chains (budget): QB House is the best known, with branches inside train stations across Tokyo, Osaka, and other major cities. Cuts run about ¥1,200–¥1,500, take roughly 10 minutes, use an air-suction system instead of a wash, and are walk-in only—no reservation possible or needed. There’s no shampoo, no styling, and usually no English, but the process (sit, point at a length guide, done) is simple enough to manage with gestures.
    • Neighborhood salons (mid-range): A standard unisex salon (biyoin) or traditional barbershop (tokoya) charges around ¥3,500–¥6,000 for a men’s cut and ¥6,000–¥9,000 for a women’s cut, including shampoo and blow-dry. These are the most common salons in any residential area and are where most long-term residents go.
    • Designer salons (splurge): Concentrated in Harajuku, Omotesando, and Shibuya, these salons charge ¥8,000–¥20,000+ for a cut with a senior stylist, often more if you add color or a perm. Many have at least one English-speaking stylist and cater specifically to foreign clients.

    How to Book: Hot Pepper Beauty and Walk-Ins

    The dominant booking platform is Hot Pepper Beauty (Hotpepper Beauty), a website and app used by the vast majority of Japanese salons. You can browse by neighborhood, see stylist portfolios and prices, and book specific time slots—though the interface is mostly in Japanese, so a translation app or your phone’s built-in page translation helps. Some larger salons in tourist-heavy areas also take bookings directly via Instagram DM or a simple English booking form on their own website.

    Walk-ins work at QB House-style chains and many traditional tokoya barbershops, but trendy salons in Harajuku or Omotesando generally require a reservation, especially on weekends—showing up without one often means being turned away or told to come back in several hours. If you want a specific well-reviewed stylist, book 3–5 days ahead; for weekend slots at popular salons, a week out is safer.

    What a Typical Salon Visit Looks Like

    Budget more time than you would at home. A full-service cut at a mid-range or designer salon typically includes a consultation, shampoo (often with a scalp massage), the cut itself, and a blow-dry styling—the whole thing commonly takes 60–90 minutes, sometimes longer for women’s cuts with styling. Many salons also offer an optional head spa add-on (a deeper scalp massage and conditioning treatment) for an extra ¥1,000–¥3,000, which is worth trying at least once even if you’re not usually a spa person.

    Staff will usually hand you a tablet or paper form asking about allergies and hair concerns, and the stylist will do a consultation before touching scissors—this is the moment to communicate clearly, since cutting too much is hard to undo.

    Bridging the Language Gap

    Bring 2–3 reference photos on your phone showing the length and style you want, ideally from multiple angles. Japanese stylists are generally precise and will try to match a photo closely, which makes this far more reliable than verbal description alone. Useful phrases to have ready or typed into a translation app: “sukoshi” (a little), “mijikaku” (shorter), “onaji gurai” (about the same length), and “maegami” (bangs/fringe). If a salon’s listing on Hot Pepper Beauty or its own site explicitly says “English OK” or lists an English-speaking stylist, it’s worth paying slightly more for the peace of mind, particularly for a first visit or anything beyond a simple trim.

    Timing, Hours, and Common Mistakes

    Most salons open around 10:00 and close between 19:00 and 20:00, and nearly all close one weekday—commonly Monday or Tuesday—so don’t assume every salon is open daily. Avoid the turn-of-year period (roughly December 28 to January 3), when many salons close entirely and the rest are booked solid with people getting a fresh look before New Year visits to family or shrines. Weekday afternoons are the easiest slots to get on short notice; Saturdays fill up fastest.

    The most common mistakes travelers make: assuming any salon takes walk-ins (many don’t), underestimating how long a full-service visit takes and scheduling it too close to a train or flight, and not bringing a photo, which can lead to miscommunication on length or layering. It’s also worth knowing that tipping is not expected or practiced at any tier of salon in Japan—the listed price is the full price, though color, perm, or extra-long hair often carry a surcharge that’s usually disclosed on the booking page.

    Beyond the Cut: Traditional Hair Culture

    If you’re interested in Japanese hair care beyond a modern salon visit, it’s worth seeking out traditional tools and styling culture rather than just the haircut itself. Kyoto is the best place to see this up close—see our guide to Tsuge Kushi: Kyoto’s Boxwood Combs and Traditional Hair Accessories for where to find hand-carved boxwood combs still used by geiko and maiko today. For a more alternative, street-style take on Japanese hair and fashion, Tokyo’s Koenji vintage and punk rock neighborhood has salons that lean into bold color and cuts rather than the polished Omotesando look. And if you’re based near Tokyo’s old geisha quarter, the atmospheric streets of Kagurazaka are a pleasant place to wander while you wait for a nearby appointment.

    Which Option to Pick

    For a simple maintenance trim with no language ability and no time to spare, QB House or a similar quick-cut chain is hard to beat. For a proper cut with wash and style at a fair price, any neighborhood biyoin booked through Hot Pepper Beauty will do the job well. And if you want the full experience—head spa, a stylist who speaks English, and a result worth photographing—book a designer salon in Harajuku or Omotesando several days ahead and treat it as part of the trip rather than an errand.

  • Drone Laws & Photography Permits in Japan: What Travelers Need to Know

    Drone Laws & Photography Permits in Japan: What Travelers Need to Know

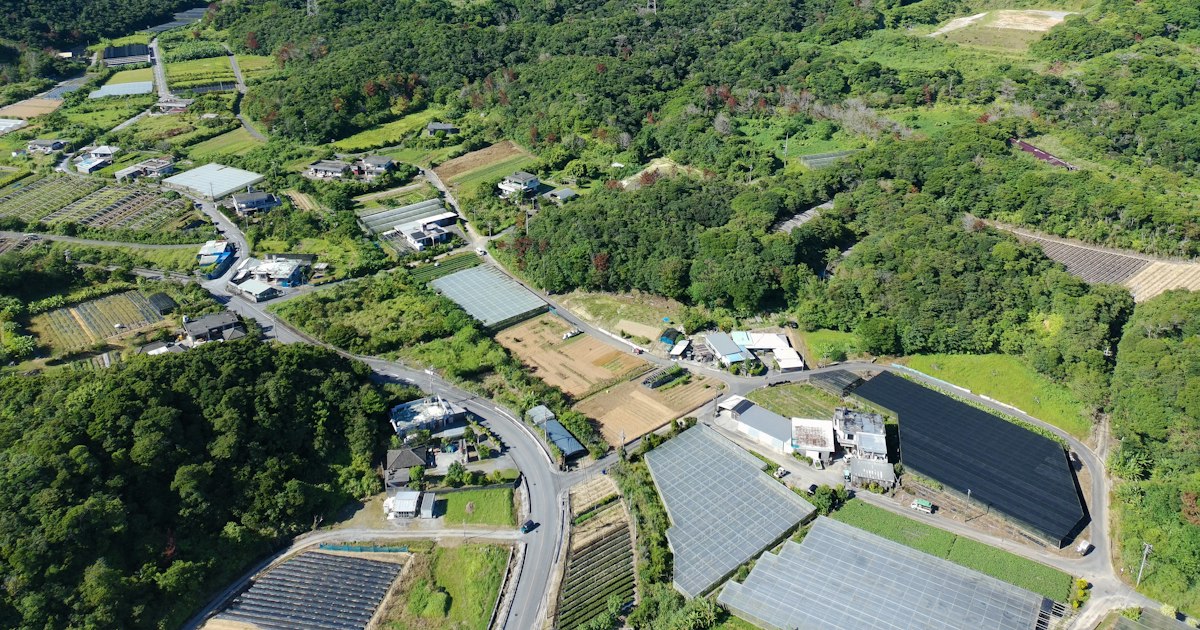
    Photo by Erik Groh on Unsplash

    Japan looks made for drone photography — terraced rice fields, volcanic coastlines, snow-dusted castle towns — but it’s also one of the more tightly regulated countries in Asia for flying one. The rules changed significantly in 2022 with a new national registration system, and most visitors don’t discover the details until their drone is confiscated at customs or a park ranger flags them down mid-flight. Here’s what actually applies to a traveler bringing a drone into Japan, not just the headline law.

    The 100-gram threshold that decides everything

    Japan’s Civil Aeronautics Act regulates any drone weighing 100 grams or more (including battery), which covers almost every consumer model — even the DJI Mini series sits well above that line. Drones under 100g are exempt from national registration and most Aviation Act flight restrictions, though they’re still subject to local park rules, the Small Unmanned Aircraft Flight Prohibition Act around sensitive sites, and Radio Law rules on frequency use. If your drone is 100g or heavier, assume the full rulebook below applies to you.

    Registering your drone before you fly

    Any drone 100g+ must be registered with Japan’s Ministry of Land, Infrastructure, Transport and Tourism (MLIT) through the online DIPS2.0 system before its first flight in Japan — this applies to foreign visitors, not just residents. You’ll need a passport, a credit card, and the drone’s serial number; registration for overseas addresses is permitted. Fees run roughly ¥900–2,400 per drone depending on the method, and you’ll receive a registration number that must be displayed on the aircraft (a sticker or engraving works). Processing has historically taken anywhere from a few days to a couple of weeks, so apply well before your trip — do not plan to register at the airport. Flying an unregistered drone can carry a fine of up to ¥500,000.

    Unlike some countries, Japan does not require a pilot license (the national Level 1/2 qualification introduced in December 2022) for ordinary recreational flying. That license only matters for advanced operations like flying beyond visual line of sight over people — well outside what a typical traveler attempts.

    No-fly zones that catch almost every tourist

    Even with a registered drone, you need prior approval from MLIT (also filed through DIPS2.0, ideally submitted at least 10 business days ahead) to fly:

    • Inside a Densely Inhabited District (DID) — which covers the vast majority of central Tokyo, Kyoto, Osaka, and every other major city
    • Above 150 meters altitude
    • At night
    • Beyond your visual line of sight
    • Within 30 meters of people, vehicles, or buildings not involved in the flight
    • Over crowds or events

    Separately, the Small Unmanned Aircraft Flight Prohibition Act bans flying near the Imperial Palace, the Diet building, ministries, nuclear facilities, US and Self-Defense Force bases, and airports, regardless of DID status — no permit process gets you around this one. Violations here can mean fines up to ¥500,000 and, in serious cases, criminal penalties. Practically speaking, this means the postcard shots of Kinkaku-ji, Shibuya Crossing, or Fushimi Inari’s torii tunnels are off-limits by drone without a hard-to-obtain permit — and many of these sites also have their own outright bans on private property, so permission from MLIT wouldn’t help anyway.

    Where you can actually fly legally

    The good news: rural and less-populated Japan is wide open. Farmland, coastline, and mountain areas outside DID zones generally don’t require the special permission described above, only registration. Hokkaido is the classic choice — the rolling lavender fields and patchwork hills around Furano & Biei are largely outside dense urban districts and reward aerial shots of the color-block terrain, especially in July when the lavender peaks. Further north, the remote flower islands of Rebun & Rishiri off Wakkanai offer coastal cliffs and near-total quiet, though check conditions carefully since strong sea winds are common even in summer.

    Smaller castle towns can also work well if you check local ordinances first — somewhere like Tsuwano in the San’in region has far less air traffic and foot traffic than Kyoto, making it easier to plan a compliant flight, though you should still confirm you’re outside any DID boundary using MLIT’s public map viewer on the DIPS2.0 site before taking off.

    One important caveat: national parks are a separate layer of regulation. Many, including parts of Fuji-Hakone-Izu, the Japan Alps, and Shiretoko, restrict or ban drones in their special protection zones under Ministry of Environment rules, independent of the Aviation Act. Always check with the specific park office, not just the aviation map, before flying in protected nature areas.

    If you’re driving to a remote shooting location

    Many of the best legal drone spots — coastal cliffs, farmland ridges, mountain passes — are only practical to reach by rental car, since trains won’t get you to the exact vantage point. If that’s your plan, budget for expressway tolls, which add up fast on long rural routes; renting an ETC card at the counter saves you from fumbling cash at toll gates and often unlocks discounted rates. Our guide to ETC cards and expressway tolls covers what it costs and how to set it up.

    Beyond drones: general photography permit rules

    Drones aren’t the only thing that needs clearance. Tripods and monopods are banned or restricted at many shrines, temples, museums, and train stations, both for safety and to keep pathways clear during busy hours. Commercial or professional shoots (anything involving a crew, models, or clear commercial intent) at public gardens and parks — Shinjuku Gyoen and the Tokyo Metropolitan Gardens among them — require a separate advance application and fee, even without a drone involved. If you’re shooting content for work rather than personal memories, check the specific venue’s website before you show up with gear.

    Common mistakes that get travelers fined or stopped

    • Assuming a “toy” drone is exempt. Most beginner and mid-range consumer drones exceed 100g once the battery is in.
    • Registering after arrival. DIPS2.0 processing isn’t instant — start it from home.
    • Trusting Google Maps instead of the official DID map. City boundaries don’t match DID boundaries; use MLIT’s map tool to check your exact launch point.
    • Flying near a shrine or temple “because it’s outside the city.” Religious sites frequently have their own private bans regardless of aviation law.
    • Skipping travel insurance with liability coverage. It’s not legally required for basic flights, but damage to a parked car or a stranger’s property comes out of your pocket otherwise.

    None of this makes drone photography in Japan impossible — it just rewards planning. Register before you leave home, stick to areas clearly outside DID zones and national park restrictions, and treat rural Hokkaido and quieter regional towns as your friendliest legal options.

  • Manga Kissa: Japan’s Internet Cafes as a Budget Overnight Stay

    Manga Kissa: Japan’s Internet Cafes as a Budget Overnight Stay

    Photo by Leongsan on Unsplash

    Miss the last train, land on a red-eye flight with nowhere booked yet, or just want to stretch a shoestring budget across a few more nights in Tokyo? The manga kissa (漫画喫茶, “comic cafe”) is one of Japan’s most useful budget-travel secrets. For the price of a mid-range restaurant meal, you get a private reclining booth, unlimited soft drinks, a shower, and free Wi-Fi — open 24 hours, no reservation required. It’s not a hotel, but for one night it doesn’t need to be.

    What Is a Manga Kissa, Exactly?

    Manga kissa started as comic-book reading lounges — walls of manga volumes, individual booths with a TV or PC, and pay-by-the-hour pricing. Today most chains have expanded into full “complex cafes” (kanzen kanshitsu, or “internet cafe”) with private lie-flat or semi-flat booths, showers, drink bars, and sometimes laundry machines. You’ll find them clustered near major train stations — Shinjuku, Shibuya, Ikebukuro, Osaka’s Namba, and Fukuoka’s Tenjin all have dense clusters open around the clock.

    Crucially, they’re licensed as “internet cafes,” not lodging, so there’s no front-desk check-in the way a hotel requires — you pick a plan at a ticket machine or counter, get assigned a booth number, and that’s it.

    How Much Does It Cost?

    Pricing is almost always tiered by time block, and the overnight “night pack” (yoru pack, ヨルパック) is the one budget travelers want:

    • First-time membership card: 300–500 yen, one-time, required by most chains (bring your passport)
    • 3-hour pack: roughly 1,300–1,900 yen
    • Night pack (around 9pm/10pm–morning, 6–9 hours): roughly 1,900–2,900 yen
    • Drink bar (soft drinks, tea, coffee): usually included in the pack price, sometimes a flat 200–300 yen add-on
    • Shower: 300–500 yen extra, towel usually included or rented for ~100 yen

    All told, a night at a manga kissa typically runs 2,000–3,500 yen — well under even a capsule hotel (4,000–6,000 yen) and far below a business hotel room. Payment is by cash or IC card (Suica/Pasmo) at most locations; some now take credit cards too, but don’t count on it everywhere.

    What You Actually Get (Amenities)

    Booth types vary by chain and location, so check the seat map at booking:

    • Flat mat booths (フラットシート): the closest thing to a bed — a reclining seat that folds fully flat, curtained off, roughly 1×2 meters
    • Reclining chair booths: a large massage-chair-style seat, fine for a nap but not great for a full night’s sleep
    • Pair/box seats: larger enclosed rooms for two people, sometimes with a small sofa

    Every booth has a PC with internet access, and most chains offer free manga and magazines to read. Showers, sinks with toiletries for sale, vending machines, and sometimes simple food (curry rice, instant ramen) round things out. What you generally don’t get: a proper bed, silence (thin partitions, not soundproof walls), or daylight — many booths are windowless. Bring earplugs and an eye mask if you’re a light sleeper.

    Best Chains and Where to Find Them

    A few nationwide chains are reliable for foreign visitors because they’re large, well-signed, and used to non-Japanese-speaking guests:

    • Kaikatsu Club (快活CLUB): Japan’s largest chain, strong on flat-mat booths, found in almost every major city
    • Manboo (まんぼう): similar footprint, popular in Tokyo and Osaka entertainment districts
    • Bagus (バグース): common in Kansai, often has darts/karaoke combos
    • Media Cafe Popeye: frequent choice near Shinjuku and Shin-Osaka stations
    • Jiyu Kukan (自遊空間): good density around Tokyo’s Yamanote line stations

    Look for locations inside or right outside major stations — they’re the most convenient for an early departure, and useful if you’re trying to time a first Shinkansen out or, say, an early-morning outing like the sumo stable morning practice tours in Tokyo, which often start before 7am.

    When a Manga Kissa Makes Sense (and When It Doesn’t)

    It’s the right call when you’ve missed the last train (Tokyo’s subway and JR lines stop around midnight–1am) and a taxi back to your hotel would cost more than the night itself; when you land on a cheap red-eye and need a few hours before check-in opens; or when you’re stretching a trip during a sold-out period, like around a big hanabi taikai fireworks festival, when every hotel and capsule bed nearby is booked solid.

    It’s the wrong call if you need real sleep before a demanding travel day — the lighting, noise, and short seats add up over multiple nights. If you’re chasing overnight travel with a proper bed and moving distance at the same time, Japan’s sleeper trains like the Sunrise Izumo and Sunrise Seto are the better splurge, and for a long daytime journey in real comfort, the Green Car or Gran Class seats are worth the upgrade instead.

    Booking, Checking In, and Etiquette

    Most locations don’t take advance reservations for casual overnight stays — you simply walk in, and during peak periods (weekend nights, festival season, New Year) popular locations near stations can fill up by 11pm–midnight. If you’re relying on one as a backup plan, scope out two or three options near your station in advance using Google Maps, and have a backup neighborhood in mind.

    At check-in, staff will ask for ID (your passport works) to issue the membership card, then assign your booth. Basic house rules apply everywhere: no loud calls or video without headphones, no bringing in outside food in some locations (drinks from the bar are fine), and keep noise down after a certain hour since most guests are sleeping. Smoking booths and floors are usually separated from non-smoking — double-check if it matters to you, as older locations can still be smoky near entrances.

    Common Mistakes to Avoid

    • Assuming English support: ticket machines increasingly have an English toggle, but staff may not speak much English — a translation app helps for questions about shower timing or extending your stay
    • Forgetting the membership fee: that 300–500 yen card fee is separate from your time pack and is charged the first visit to each chain (each chain’s card is separate — a Kaikatsu Club card won’t work at Manboo)
    • Not checking the extension cutoff: night packs have a fixed end time; overstaying gets billed at the hourly rate, which adds up fast
    • Leaving valuables unsecured: booths have curtains, not locking doors — use the small lockers most locations provide for bags and electronics
    • Booking the wrong seat type: reclining chairs are fine for a two-hour nap but rough for six-plus hours; pay the small difference for a flat-mat booth if you actually need to sleep

    Used well, a manga kissa isn’t a downgrade so much as a different kind of Japan experience — cheap, always open, and oddly comfortable once you’ve found your chain of choice. Keep one in your back pocket for the nights your itinerary doesn’t quite line up with the trains.

  • Bringing Medicine Into and Out of Japan: Customs Rules for Travelers

    Bringing Medicine Into and Out of Japan: Customs Rules for Travelers

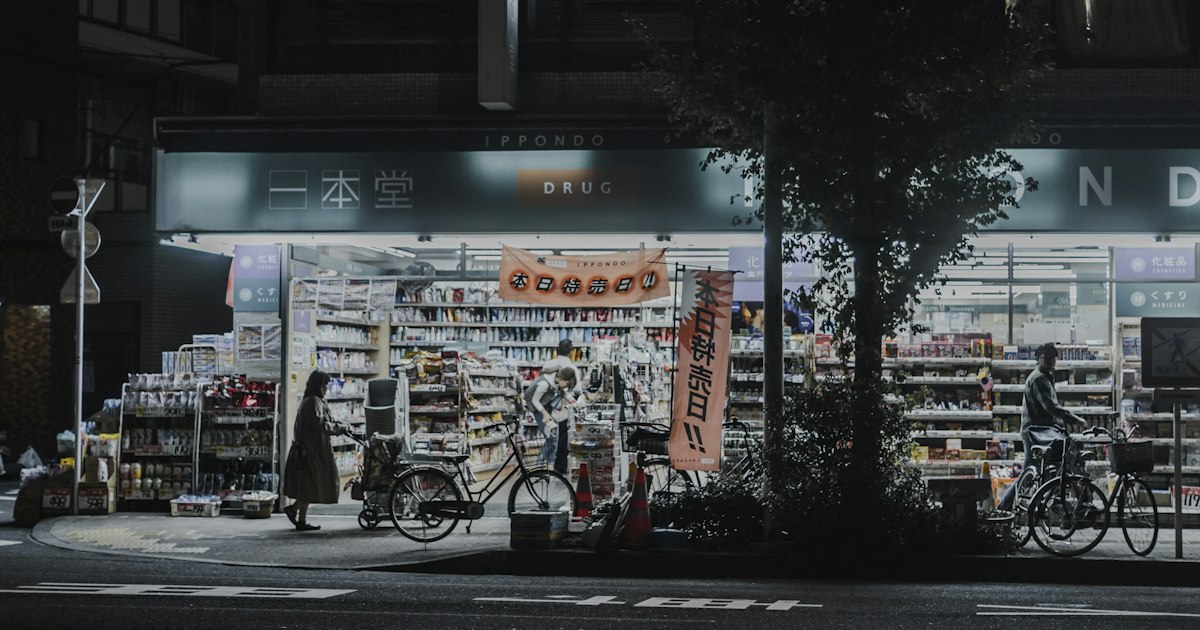
    Photo by Redd Francisco on Unsplash

    Japan has some of the strictest medicine import rules of any major travel destination, and they catch out well-meaning travelers every year — sometimes with a common cold medicine or ADHD prescription confiscated right at the airport. The good news is that the rules are clear and well-documented once you know where to look. Here’s exactly what you can bring in, what requires paperwork, what’s simply banned, and how to stock up on Japanese pharmacy favorites to take home.

    Medications That Are Banned or Tightly Restricted

    Japan’s Stimulants Control Law (覚醒剤取締法) is far broader than most travelers expect. It covers not just illegal drugs but many common prescription and over-the-counter medications sold freely elsewhere:

    • Adderall, Vyvanse, and other amphetamine-based ADHD medications — illegal to bring into Japan, even with a valid prescription and even in small quantities. Travelers who need ongoing stimulant treatment typically switch to a non-stimulant alternative like atomoxetine (Strattera) before their trip, in consultation with their doctor.
    • Pseudoephedrine-containing decongestants — this includes Sudafed, Actifed, and Vicks inhalers. Vicks inhalers in particular are a frequent confiscation because travelers assume an inhaler for stuffy noses is harmless.
    • Codeine in high concentrations and other narcotic painkillers — allowed only within strict limits and often only with prior permission (see below).
    • CBD products — legal CBD in your home country may still contain trace THC, which is illegal in Japan regardless of concentration. Bring only products with documentation confirming zero THC content, and even then, expect scrutiny.

    When in doubt, check the Japanese Ministry of Health, Labour and Welfare’s official “Import of Medications for Personal Use” page before you pack, or contact the nearest Japanese embassy or consulate. Don’t rely on forum posts or guesses — the penalties for bringing in banned substances range from confiscation to prosecution.

    The One-Month Rule for Everyday Medications

    For medications that aren’t banned, Japan allows travelers to bring in a personal supply without any special certificate, as long as it fits within these limits:

    • Up to a one-month (30-day) supply of prescription medication
    • Up to a two-month supply of non-prescription (over-the-counter) medication and vitamins
    • Up to 24 units of items like contact lenses per type

    This covers the vast majority of leisure travelers — blood pressure pills, antihistamines, birth control, antidepressants, and similar daily medications for a two-week trip are almost never a problem. Keep medication in its original packaging with your name matching your passport, and carry a copy of the prescription or a doctor’s letter (ideally in English, listing the generic/active ingredient name, not just the brand) in case customs asks.

    Getting a Yakkan Shoumei for Larger Quantities

    If you’re staying longer than a month, need more than a two-month OTC supply, or are carrying injectable medications (like EpiPens or insulin pens) beyond a small personal set, you’ll need a Yakkan Shoumei — an import certificate issued by Japan’s regional Bureau of Health and Welfare (地方厚生局).

    Key points on applying:

    • Apply through the regional bureau covering your port of entry (Tokyo and Osaka bureaus handle most applications by mail or online submission).
    • Processing officially takes about one to two weeks once documents are complete, but agencies and the bureaus themselves recommend applying one to two months ahead to allow for corrections and mailing time.
    • You’ll need the medication’s generic name, dosage, and quantity, plus a doctor’s prescription or letter.
    • The certificate is free to obtain directly from the bureau, though private agencies charge a service fee (typically ¥5,000–¥15,000) to prepare and submit it for you.
    • Print the certificate and carry it with your medication when you enter Japan — you may be asked to show it at customs.

    This is the single most common paperwork travelers overlook, especially digital nomads, long-stay visitors, and anyone managing a chronic condition with a multi-month supply.

    Narcotic and Psychotropic Medications Need a Separate Process

    Medications classified as narcotics under Japanese law — certain strong opioid painkillers, some sleep medications, and select psychiatric drugs — fall outside the standard Yakkan Shoumei system entirely. These require permission from Japan’s Narcotics Control Department (麻薬取締部) rather than the Bureau of Health and Welfare, and the process is stricter and slower. If your prescription includes anything in this category, start the inquiry well before booking flights, since approval isn’t guaranteed and typically requires more lead time than a standard Yakkan Shoumei.

    Buying Medicine in Japan to Bring Home

    Japanese drugstores are a shopping destination in their own right, and many travelers stock up on OTC staples that aren’t available (or are far pricier) back home. Chains like Matsumoto Kiyoshi, Sundrug, and Don Quijote are everywhere near train stations and tourist areas, generally open from around 9:00 or 10:00am until 9:00pm–midnight depending on location. If you’re browsing a bargain shopping street, the Osu Shopping Arcade in Nagoya has several drugstores mixed in among its otaku and vintage shops, worth a stop if you’re in the area.

    Popular budget picks and rough prices:

    • Loxonin S (loxoprofen painkiller, 12 tablets) — around ¥900
    • Eve Quick (headache tablets, 40 count) — around ¥700–900
    • Salonpas pain-relief patches (40 count) — around ¥600
    • Sante FX or similar cooling eye drops — around ¥600–1,000

    When you’re heading home, remember the rules run both ways: check your destination country’s import limits, since some Japanese OTC formulations contain ingredients restricted elsewhere. Most countries allow a reasonable personal-use quantity in original packaging without issue, but if you’re unsure, declare it.

    Common Mistakes to Avoid

    • Packing decongestant inhalers or cold medicine without checking ingredients — pseudoephedrine hides in many familiar brand names.
    • Assuming a prescription automatically makes a drug legal — it doesn’t for banned substances like amphetamine-based ADHD medication.
    • Leaving Yakkan Shoumei applications until the week before departure — processing plus mailing time can easily exceed two weeks.
    • Packing medication loose or relabeled — always keep it in original, labeled packaging.
    • Not carrying English documentation — a prescription in your home language alone may slow things down at customs.

    Quick Pre-Departure Checklist

    • Confirm none of your medications are on Japan’s banned list (check the MHLW site directly)
    • Calculate whether your supply exceeds the one-month (prescription) or two-month (OTC) threshold
    • Apply for a Yakkan Shoumei at least a month ahead if you’re over the limit or carrying injectables
    • Check separately for narcotic-classified medications, which need Narcotics Control Department approval
    • Pack a doctor’s letter or prescription copy in English, plus original packaging

    With a little advance planning, medication is one of the easier parts of a Japan trip to get right — and one of the worst to get wrong at the airport. If you’re also sorting out how to pack everything for train travel around the country, the guide to Shinkansen oversized luggage rules is worth a read before you finalize your itinerary.

  • Shipping Souvenirs Home from Japan: Post Office vs Courier Guide

    Shipping Souvenirs Home from Japan: Post Office vs Courier Guide

    Photo by Markus Winkler on Unsplash

    You’ve filled your suitcase with Kutani ware, a set of chopsticks, maybe a pair of Akoya pearl earrings — and now it won’t close. Shipping souvenirs home is often cheaper and safer than checking an overstuffed bag, but Japan gives you two very different systems to choose from: Japan Post’s international mail and private couriers like DHL, FedEx, and UPS. Here’s how to pick the right one, what it actually costs, and how to avoid the packing mistakes that ruin fragile gifts in transit.

    Why Ship Instead of Carry?

    Airlines charge steep excess-baggage fees (often ¥15,000–¥30,000 or more per extra bag depending on route and carrier), and fragile items like ceramics or glass wind chimes rarely survive being crammed into checked luggage. Shipping also frees up suitcase space mid-trip — useful if you’re buying bulky items early, like Kutani ware in Kanazawa (see our Kutani Ware buying guide) or a full haul of sealed Pokémon booster boxes (see our Pokémon cards in Japan guide) with weeks of travel still ahead of you.

    Japan Post: EMS, Airmail, and Surface Mail Explained

    Japan Post (Yu-Bin) is the budget-friendly default and has three international speed tiers:

    • EMS (Express Mail Service) — the fastest and most reliable option, with tracking and up to ¥6 million of automatic compensation coverage on request. Delivery typically takes 2–5 business days to the US, Europe, or Australia. As a rough guide from recent rate tables, a 5kg box runs about ¥11,000–13,000 to North America and ¥13,000–15,000 to Europe — always confirm current rates with the clerk or Japan Post’s online EMS calculator, since they’re revised periodically.
    • Airmail (small packet or parcel) — cheaper than EMS, no tracking guarantee on the cheapest tier, and delivery takes roughly 1–2 weeks. Good for lightweight, low-value items like postcards or textiles.
    • Surface mail — the cheapest option by far but painfully slow (6–12 weeks) and not offered to every country; ask the counter clerk whether it’s currently available on your route.

    Post offices sell their own EMS-branded cardboard boxes in several sizes for roughly ¥260–¥600, which is worth doing since the box dimensions are pre-approved for shipping and save you guesswork.

    International Couriers: DHL, FedEx, and UPS

    Private couriers cost more but offer real advantages: door-to-door pickup (from your hotel in some cases), better real-time tracking, English-language customer service, and stronger insurance options for high-value items. Expect a similarly sized 5kg box to run ¥15,000–¥25,000+ for express service, depending on destination and speed tier. This is the better choice for genuinely valuable purchases — a Mikimoto pearl necklace (see our Mikimoto & Akoya pearls guide) or graded trading cards — where you want full insured value and a guaranteed delivery window rather than the cheapest possible rate. Drop-off locations exist in most major cities, though pickup requests usually need to be booked a day ahead via each courier’s website or phone line.

    Packing Fragile and High-Value Souvenirs

    This is where most shipments go wrong. A few concrete rules:

    • Ceramics and glassware (Kutani ware, Arita porcelain, glass furin wind chimes) need double-boxing: wrap each piece individually in bubble wrap, nest it in a smaller box with padding on all six sides, then place that box inside a larger one with more cushioning around it. A single layer of newspaper is not enough — Japan Post and couriers both explicitly limit liability for inadequately packed fragile goods.
    • Flat items like ukiyo-e woodblock prints should go in a rigid mailer tube or flat cardboard mailer, never folded.
    • Sealed collectibles like Pokémon booster boxes should be padded on all sides to prevent corner crushing, and always declare the actual purchase value — undervaluing to dodge duty can void insurance claims if the box is damaged or lost.
    • Ask the post office or courier counter for extra packing tape and filler material on the spot; most keep some behind the counter even if it’s not openly displayed.

    Customs Forms, Duty, and Restricted Items

    Every international parcel needs a customs declaration (form CN22 for lower-value items, CN23 for higher-value or heavier ones). List contents specifically (“ceramic tableware,” “trading cards,” “pearl jewelry”) and the real purchase price — vague descriptions like “gift” or “souvenir” can trigger customs holds. Check your home country’s duty-free personal import allowance before shipping, since exceeding it means you may owe duty on arrival. Alcohol (sake, whisky) and certain foods have their own restrictions both for export from Japan and import into your home country, so verify before buying in bulk.

    Where and When to Ship

    Neighborhood post offices generally keep counter hours of 9:00–17:00 on weekdays only, but larger central post offices in big cities (Tokyo Central Post Office near Tokyo Station, for example) stay open later on weekdays and often open Saturdays too — worth seeking out if you’re shipping on a tight schedule. Avoid shipping right around New Year’s (late December–early January) and Golden Week (late April–early May), when Japan Post processing slows significantly due to national holidays. If you’re picking up regional souvenirs on a longer rail itinerary — say, ceramics in Kanazawa or lacquerware along the Nakasendo route through Tsumago and Magome — it’s often easier to ship each purchase home in stages rather than carrying everything to a single shipping point at the end of your trip.

    Post Office vs Courier: Which Should You Choose?

    Budget: Japan Post airmail or surface mail for lightweight, low-value items you’re not in a hurry to receive. Mid-range: Japan Post EMS — the sweet spot for most travelers, balancing speed, tracking, and cost for a standard box of souvenirs. Splurge: DHL, FedEx, or UPS for high-value, fragile, or time-sensitive shipments where guaranteed insurance and door-to-door pickup are worth the premium. Whichever you choose, weigh and measure your box before you go to the counter, bring your passport for the customs form, and keep the tracking receipt until the package arrives — it’s your only proof if something goes missing.

  • Doing Laundry in Japan: Coin Laundries, Hotels & What You’ll Need

    Doing Laundry in Japan: Coin Laundries, Hotels & What You’ll Need

    Photo by Jakub Stekla on Unsplash

    Pack light, wash as you go — it’s the single best strategy for a trip longer than a week in Japan, and the country makes it easy once you know the system. Coin laundries are everywhere, hotel options range from free washer-dryers to full valet service, and everything you need to do a load is sold at the nearest drugstore. Here’s exactly how it works, what it costs, and the mistakes that trip up first-timers.

    Coin Laundries (Koin Randorī): How They Work

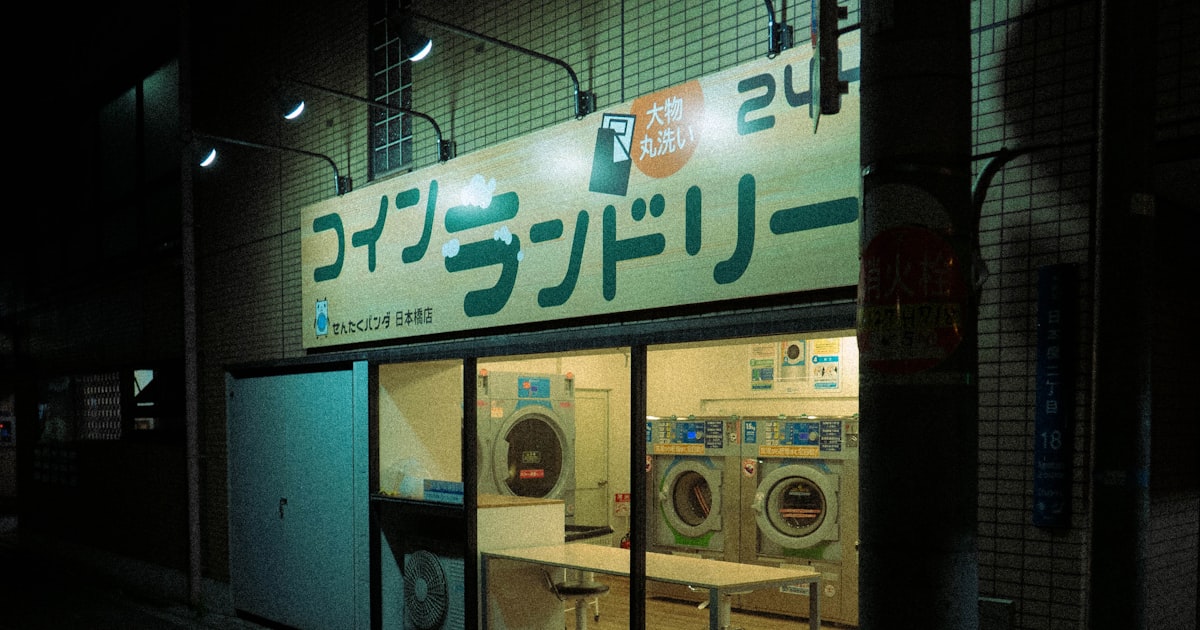
    A コインランドリー (koin randorī) is a self-service laundromat, and you’ll find one within a few blocks of almost any train station or residential neighborhood, even in small towns. They’re unstaffed, open 24 hours in most cases, and machines take coins (¥100 pieces are essential) or, increasingly, IC transit cards and PayPay.

    Typical pricing: a standard washer (7–8 kg) runs ¥300–500 per load, and larger washers (10–12 kg, useful for futon or several days’ worth of clothes) run ¥600–800. Dryers are coin-fed in blocks of time rather than one flat fee — expect ¥100 per 10–12 minutes, and Japanese dryers run cooler than American ones, so a full load of cotton clothing often needs 40–60 minutes (¥400–600) to get properly dry. Bring a stack of ¥100 coins; break larger bills at a convenience store first, since most machines don’t give change for anything bigger.

    Some coin laundries are stand-alone buildings; others are attached to a super sento bathhouse, so you can toss in a load, soak for 45 minutes, and come back to dry clothes — a genuinely efficient combo if you’re near one of the facilities in our guide to super sento. To find one, search “コインランドリー” or “laundromat” on Google Maps near your accommodation; the app’s Japanese-language listings are far more complete than English ones.

    Hotel and Ryokan Laundry Options

    Business hotel chains (Toyoko Inn, APA, Super Hotel, Route Inn) are the most laundry-friendly accommodation in Japan. Most have a small coin laundry room on one of the upper floors, priced the same as a standalone laundromat (¥200–300 wash, ¥100/10 min dry) and reserved for guests only, which means no wait and no lugging a bag down the street. It’s worth checking this when booking if laundry is a priority — it’s usually listed under hotel facilities.

    Mid-range and upscale hotels typically don’t have self-service machines but offer a send-out laundry service instead: you fill out a slip, bag your clothes, and get them back same-day or next-day, professionally washed and folded. This is priced per item, not per load — a T-shirt might be ¥300–500, a pair of trousers ¥500–800, and a jacket considerably more — so a full bag can easily run ¥3,000–5,000. It’s convenient but not a budget option; use it for a few key items rather than your whole wardrobe.

    Ryokan, including those in onsen towns like the ones covered in our Kinosaki Onsen guide, almost never have guest laundry machines, since stays are typically one or two nights and the whole point is not doing chores. If you’re settling into a ryokan town for several nights of onsen-hopping, do a load at a coin laundry before you arrive rather than trying to find one there.

    What to Buy (and What to Pack)

    Don’t bother bringing large bottles of detergent — it adds weight and you can buy everything you need cheaply once you land. Drugstores like Matsumoto Kiyoshi, Sundrug, and Daikoku, plus most supermarkets, sell single-use detergent pods (a box of 10–20 runs ¥300–500), travel-size bottles of liquid detergent, and mesh laundry bags (¥100–300) for delicates. Convenience stores (7-Eleven, Lawson, FamilyMart) carry a more limited selection but usually stock at least one small detergent option in a pinch.

    Two things worth packing from home: a small tube or capsule-style stain remover pen, since Japanese drugstores mostly stock spray-on stain treatments in Japanese-only packaging that’s hard to read on the fly, and a couple of flat rubber sink stoppers if you plan to hand-wash in your hotel sink — Japanese sinks don’t always have stoppers built in. A collapsible travel clothesline with suction hooks is genuinely useful, since drying space in hotel rooms is limited.

    Drying: The Part That Actually Trips People Up

    The biggest laundry mistake in Japan isn’t washing — it’s underestimating drying time. Japanese home and coin-laundry dryers are gentler and cooler than what many visitors are used to, so a load that would take 30 minutes elsewhere can take an hour. Budget the coins accordingly, or plan to dry heavier items (jeans, hoodies) overnight on a hotel towel rack or clothesline instead of paying for extra dryer cycles.

    Season matters a lot here. During Japan’s rainy season (tsuyu, roughly early June to mid-July) and the humid peak of summer — see our guide to Japan in summer — air-drying indoors barely works at all; humidity sits above 70% for weeks, and clothes hung in a room can take two days to dry and start to smell musty. In this window, pay for the full dryer cycle rather than trying to save a few hundred yen air-drying. In autumn and winter, indoor air is dry enough that hang-drying overnight works fine, and it’s the cheaper choice.

    Common Mistakes to Avoid

    Skipping detergent measurements: Japanese washers are usually smaller-capacity than what you’re used to, so a home-country “one scoop” habit can oversud a small drum. Follow the line markings on the machine or the pod instructions.

    Not carrying coins: many laundromats, especially older ones, only take ¥100 coins and don’t make change. Get a stack of ten to twenty coins in cash before you go, ideally from a convenience store register when you buy something small.

    Assuming ryokan or capsule hotels have machines: they usually don’t. If you’re island-hopping or doing a multi-day itinerary through somewhere remote like Yakushima or the Shikoku pilgrimage route, plan your laundry stop for the last city hotel before you head somewhere rural, not after.

    Budget vs. Splurge Summary

    Budget: self-service coin laundry, wash and dry yourself, roughly ¥700–1,200 total per load including coins and a pod of detergent. Mid-range: business hotel coin laundry room, similar pricing but with the convenience of doing it in-house overnight, useful if you’re arriving late after an overnight bus and want clean clothes waiting the next morning. Splurge: hotel valet service for a handful of items you want professionally pressed, at ¥300–800 per piece — reasonable for a business shirt before a meeting, expensive if you try to do your whole suitcase that way.

  • Earthquake & Disaster Prep in Japan: What Travelers Should Know

    Earthquake & Disaster Prep in Japan: What Travelers Should Know

    Japan sits on the Pacific Ring of Fire, and small earthquakes are a genuine, routine part of life there — most are too minor to notice, but the country’s history includes major ones, and typhoons hit with predictable seasonal regularity. None of this should scare you out of a trip; Japan is arguably the best-prepared country on Earth for natural disasters. But a little know-how turns a confusing situation into a manageable one.

    Earthquakes: what actually happens

    Japan records thousands of earthquakes a year, and the overwhelming majority are small tremors that locals barely register. Buildings are built to extremely strict seismic codes — modern high-rises are engineered to sway and absorb energy rather than collapse — so the biggest real risk to a tourist is falling objects, not structural collapse, in all but the most severe events.

    • If you feel a quake indoors — get under a sturdy table if one’s nearby, or move away from windows, glass, and tall furniture; in a hotel room, protect your head and stay low until the shaking stops.
    • If you’re outside — move away from building facades, vending machines, and power lines, which can topple or drop debris.
    • Elevators — most modern elevators in Japan automatically stop at the nearest floor and open during a quake; avoid using elevators until you’ve confirmed things are safe.
    • Aftershocks — expect them after any noticeable quake; they’re usually weaker than the initial shock but can continue for days.

    The Safety Tips app

    Download the free “Safety tips” app (published by the Japan Tourism Agency) before you arrive — it’s available in multiple languages and pushes real-time alerts for earthquakes, tsunami warnings, extreme weather, and volcanic activity, along with basic phrasebook and evacuation information. It also has an offline mode, which matters if a disaster knocks out mobile networks temporarily. This is genuinely the single most useful thing a traveler can do to prepare, and it takes five minutes to set up.

    Typhoons

    Typhoon season runs roughly from June through October, peaking in August and September. Unlike earthquakes, typhoons are forecast days in advance, so preparation is mostly about flexibility:

    • Trains and flights are often suspended pre-emptively, sometimes a day ahead of a major typhoon’s arrival, to get staff and passengers home safely — check JR and airline websites directly rather than assuming your booked train will run.
    • Build slack into itineraries during typhoon season; avoid scheduling a can’t-miss event (a flight home, a non-refundable tour) on a day when a typhoon is forecast to make landfall nearby.
    • Convenience stores and supermarkets sell out fast right before a major typhoon, as locals stock up — if a warning is issued, buy water and snacks early rather than waiting.

    Tsunami basics

    If you’re near the coast and feel a strong or prolonged earthquake, move to higher ground immediately rather than waiting for an official tsunami warning — the shaking itself is the warning in a genuinely dangerous scenario. Coastal towns have blue-and-white tsunami evacuation signs pointing toward higher ground or designated shelters (marked 津波避難場所); it’s worth knowing this sign exists before you’re looking for it under stress. Hotels in coastal areas typically post evacuation routes in guest rooms — take thirty seconds to check them on arrival, the same way you’d note fire exits.

    What to actually pack

    • A portable phone charger/power bank — useful for daily travel anyway, and essential if you need the Safety Tips app or maps during a power outage.
    • A basic paper map or offline map download of your area, in case data networks are overloaded after a major event.
    • A few days’ worth of any essential prescription medication in carry-on luggage, not checked bags.
    • Copies (photo or paper) of your passport and travel insurance details stored separately from the originals.

    Hotel and ryokan preparedness

    Japanese hotels and ryokan are required to post evacuation maps and flashlight locations in every room, and staff run regular safety drills. If an alert sounds or staff give evacuation instructions, follow them immediately and calmly — Japanese emergency response protocols are methodical and well-rehearsed, even if the announcements are only in Japanese. Front desk staff at any mid-range or larger hotel can usually communicate basic safety instructions in English, or will use the Safety Tips app’s translated alerts as backup.

    Keeping perspective

    Millions of tourists visit Japan every year without ever experiencing anything beyond a barely-felt tremor. The country’s disaster infrastructure — early warning systems, seismic building codes, and public drilling — exists precisely because earthquakes are common, which is also why the systems are so mature and effective. Preparation here isn’t about anxiety; it’s the same five minutes of setup you’d spend checking a fire exit at home, and then you can get back to planning your itinerary and your packing list without giving it another thought.